01 Why the smoke generated during the cutting process cannot be discharged smoothly by the purifier?
Check whether the purifier is successfully connected to the host; re-insert the airhead and make sure the LED indicator is green...
Check the connection status of the exhaust pipe, whether there is bending, extension, and other phenomena; rearrange the exhaust pipe status...
Check whether the dust accumulation in the air outlet is too high, resulting in poor smoke exhaust...
No cartridge work too long, resulting in the fan blade being blocked by dust, the speed being low, will not report errors, and the residue will be stuck on the fan blade...
Check whether the cartridge is installed backward; reposition the cartridge...
Whether the cartridge is dirty; replace the cartridge
Remove the cartridge to test if there is an improvement; remove the cartridge for temporary use. In the school area, it is not recommended to remove the cartridge for use
If the LED of the purifier lights up red, you need to connect the laser cartridge to read the error code of the machine and then analyze it accordingly.
If the LED of the purifier does not light up, you need to connect the laser box and extract the log information for analysis.
02 Troubleshoot no laser beam scenario
Shut down the machine, loosen the 8 screws of the laser tube protective cover (as shown in the figure below), remove the laser tube cover (move the cover to the left or right), and observe whether the appearance of the laser tube is obviously damaged(click here to check the video for reference, which shows how the water inside can flow freely after the laser tube is damaged).
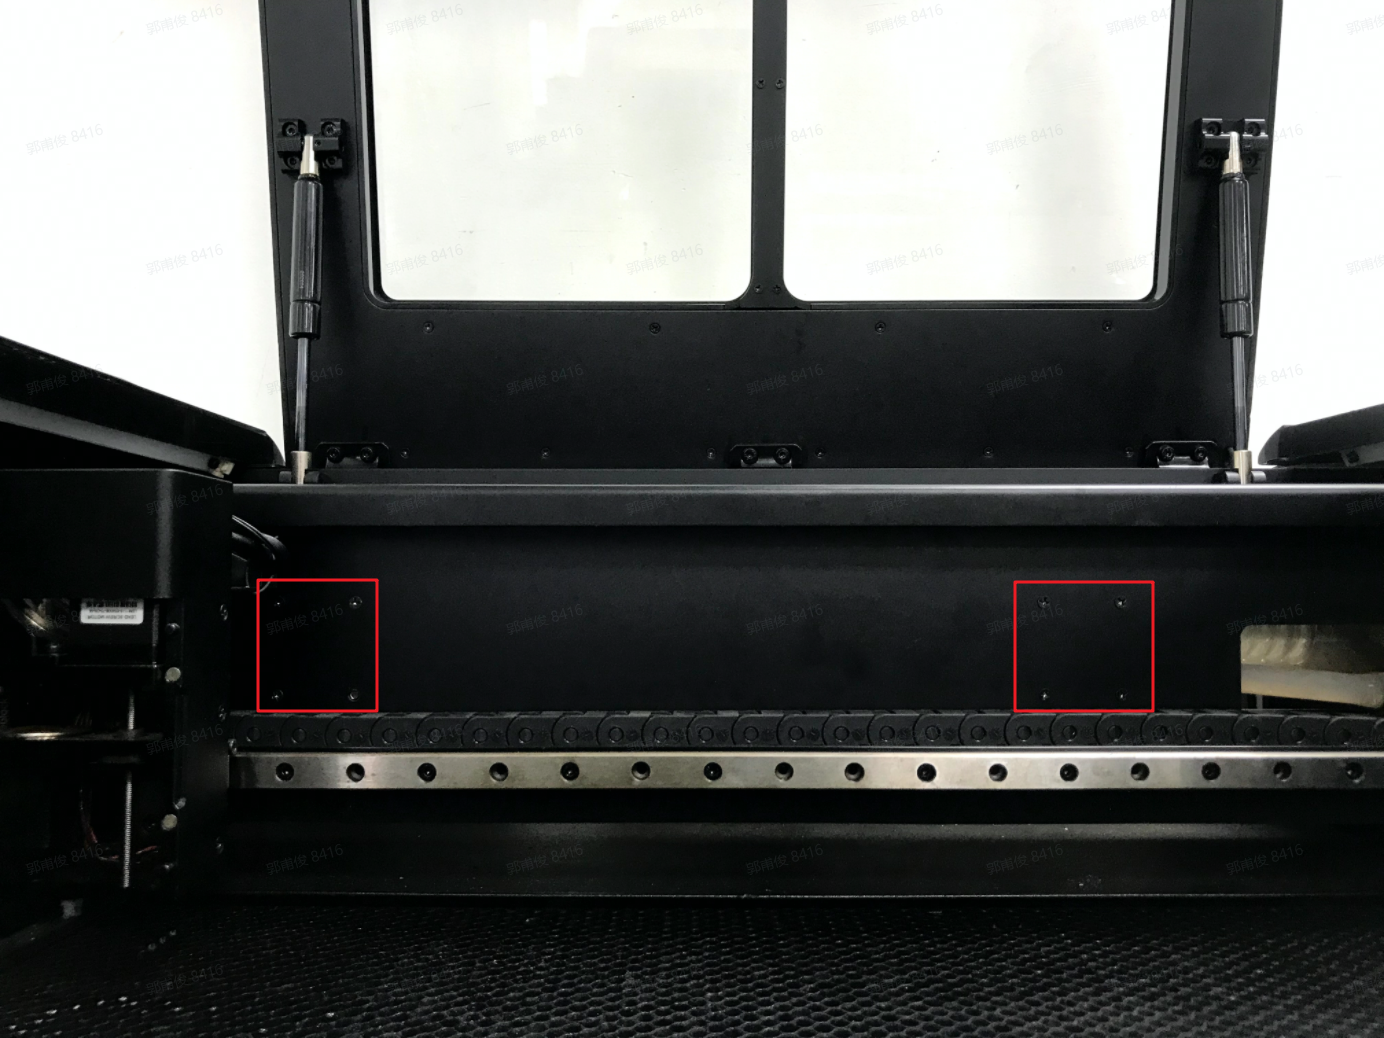
- If the laser tube is visibly damaged (leakage or broken inner tube), replace the laser tube.
- If not, please refer to the following steps for troubleshooting.
- Make sure that the software and firmware are the latest version(click here for reference), you can refer to the video below to check.
- Turn on the machine and connect it to the Laserbox software.
- Put in the consumables and set the processing parameters (power 100%, speed 1mm/s).
- Refer to the video(click here) to observe whether the laser tube emits light normally(The brightness of the laser tube in the normal working state is completely different from the brightness in the fault state.)
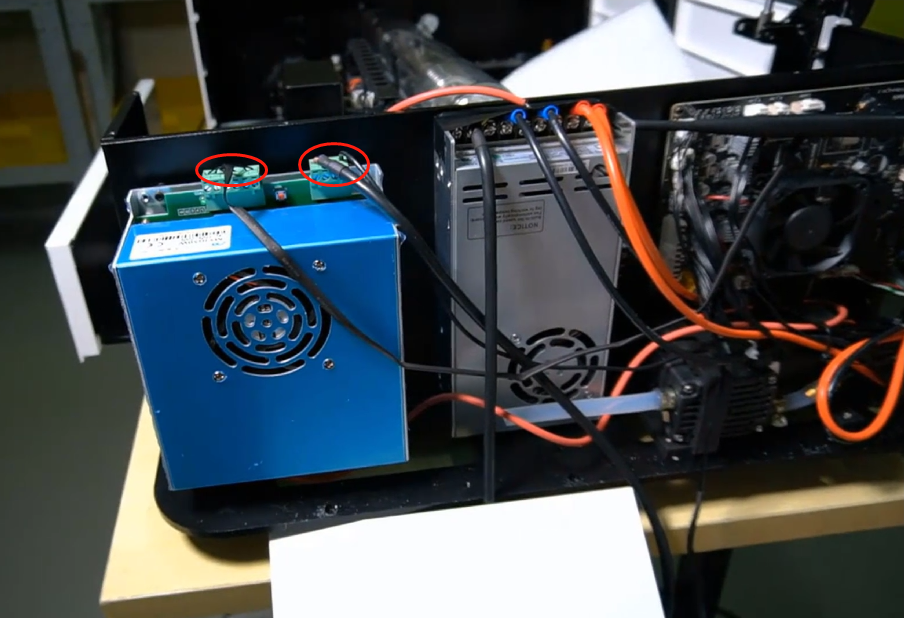
- If the light cannot be emitted normally, you can refer to the video(click here) to check whether the laser power control wire is loose(try to replug them). If there is no obvious looseness, replace the laser tube/laser power supply one by one.
- If the light can be emitted normally, refer to the video(click here) to check whether the optical path is shifted, and whether the reflector/focusing mirror is installed backwards/falls off(click here to learn more about the mirrors).
You may refer to this documentation(click here) to replace parts for your Laserbox.
03 Failed to cut through official materials, why?
- Video
- Troubleshooting graphic guide
- If it is a non-official consumable, try to change the parameters (increase the power and slow down the speed) to verify whether it is due to power decay.
- Make sure the consumables are flat,,, and there are no other foreign objects on the honeycomb board.
- Recommend cleaning the lens.
- Confirm whether the machine has been maintained, whether the focusing mirror is installed backward, the correct is convex side up, concave side down installation.
- If the official supplies, the above can not solve the problem, please refer to the following link to check whether the optical path offset and adjust the optical path
https://support.xtool.com/hc/en-us/articles/1500011537042-Light-Path-Calibration-Tool...
04 The computer shows "the device is being reset, please try again later..."
- restart the machine (when the machine just cut the purifier has not stopped, and send a new command, there will be a prompt, wait for the reset to stop and then start a new command can be)
- Download the latest software from the official website and connect the machine to update the firmware first; no, proceed to the next step
- equipment settings to extract logs, to the after-sales staff to determine which axis is not reset
- Then you can refer to the XYZ axis is not reset to solve the problem
05 Why can't the computer connect to the laser box via USB?
Possible Causes
#1 The Machine isn't Fully Started
Connect the machine to the computer with the USB cable, then power on the machine and wait for the white light next to the round button to change from blinking to always on, then select the USB connection in the software.
#2 Affected by VPN Software
Please close any VPN on your computer and restart the Laserbox software to connect again.
#3 Driver isn't Installed Properly
Some computer systems may intercept the installation of the driver. Please download the corresponding driver file and install it manually.
Windows
macOS
#4 Faulty USB Port or Cable
You can verify that your computer's USB port is working properly by plugging a USB flash drive or other USB storage device into the computer and seeing if it can be read properly.
After ensuring that the computer's USB port is working properly, use the original USB cable of the machine to connect it to the computer. At this time, you can observe whether the computer system detects the machine normally in the following ways, if it still does not detect, please replace the USB cable and test again.
Windows
macOS
06 Why can't the Windows driver install?
USB driver for 64-bit system
Caution.
Why can't the Windows driver install?
- Use administrator privileges to install laserbox software and driver
- Check if you have opened the wall software and anti-virus software
- Check whether the computer brand and main chip architecture belongs to surface computer and ARM architecture computer; the existing driver for ARM architecture computer support is not enough, we are pushing the driver manufacturers to improve, but the cycle maybe longer
- Recommend customers to use Ethernet for connection or WIFI configuration for connection
32-bit system: you can try the network cable connection
- Recommend customers to use Ethernet for connection or WIFI configuration for connection
32-bit system: you can try the network cable connection
07 WIFI can not connect to the laserbox
- whether the use of USB or network cable configured WIFI
- whether the WIFI name and password contains Chinese, Japanese, and other languages; and other special symbols,,, only English names and numbers are recommended are recommended.
- whether the network is similar to the mall requires verification. Such will also not be connected
- currently does not support 5GHZ signal, only supports 2.4GHZ signal.
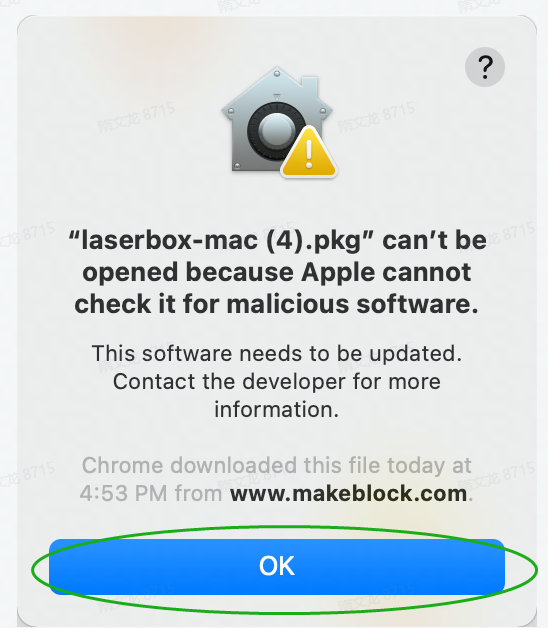
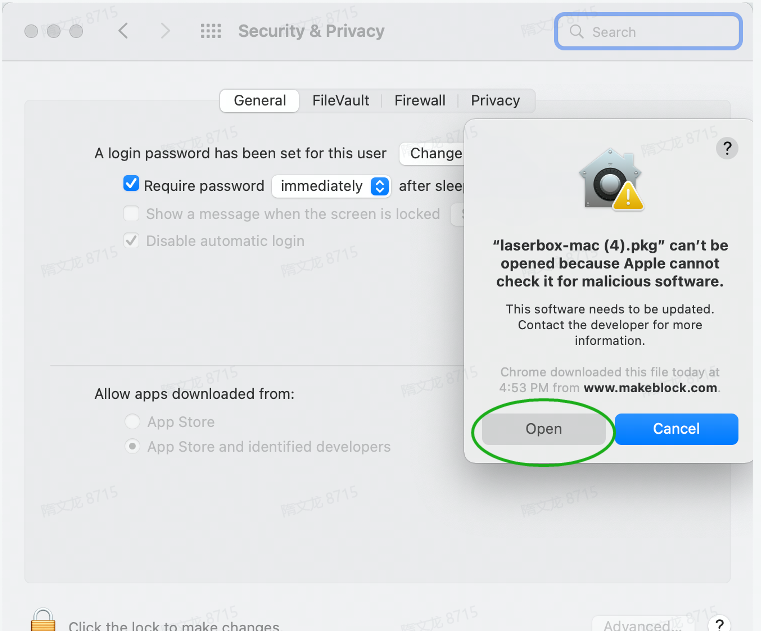
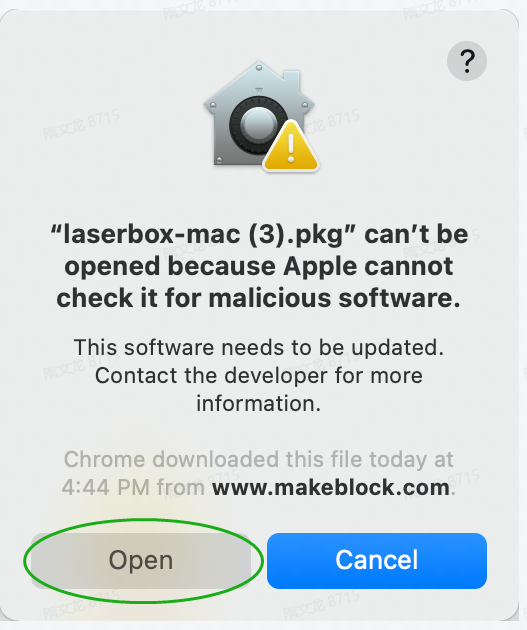
08 Why does the Apple computer download or install Laserbox software that will prompt malware blocking (the following picture)?
At present, it should be caused by the incompatibility between the Apple system and our software (some software from unknown developers not on the apple store is very likely to be blocked by the system), so we suggest the following solutions.
- Download the Laserbox MacOS installation package from the official website.
- If there is still a failure prompt when installing, close the interception as follows.
Method 1
1, Click "OK."
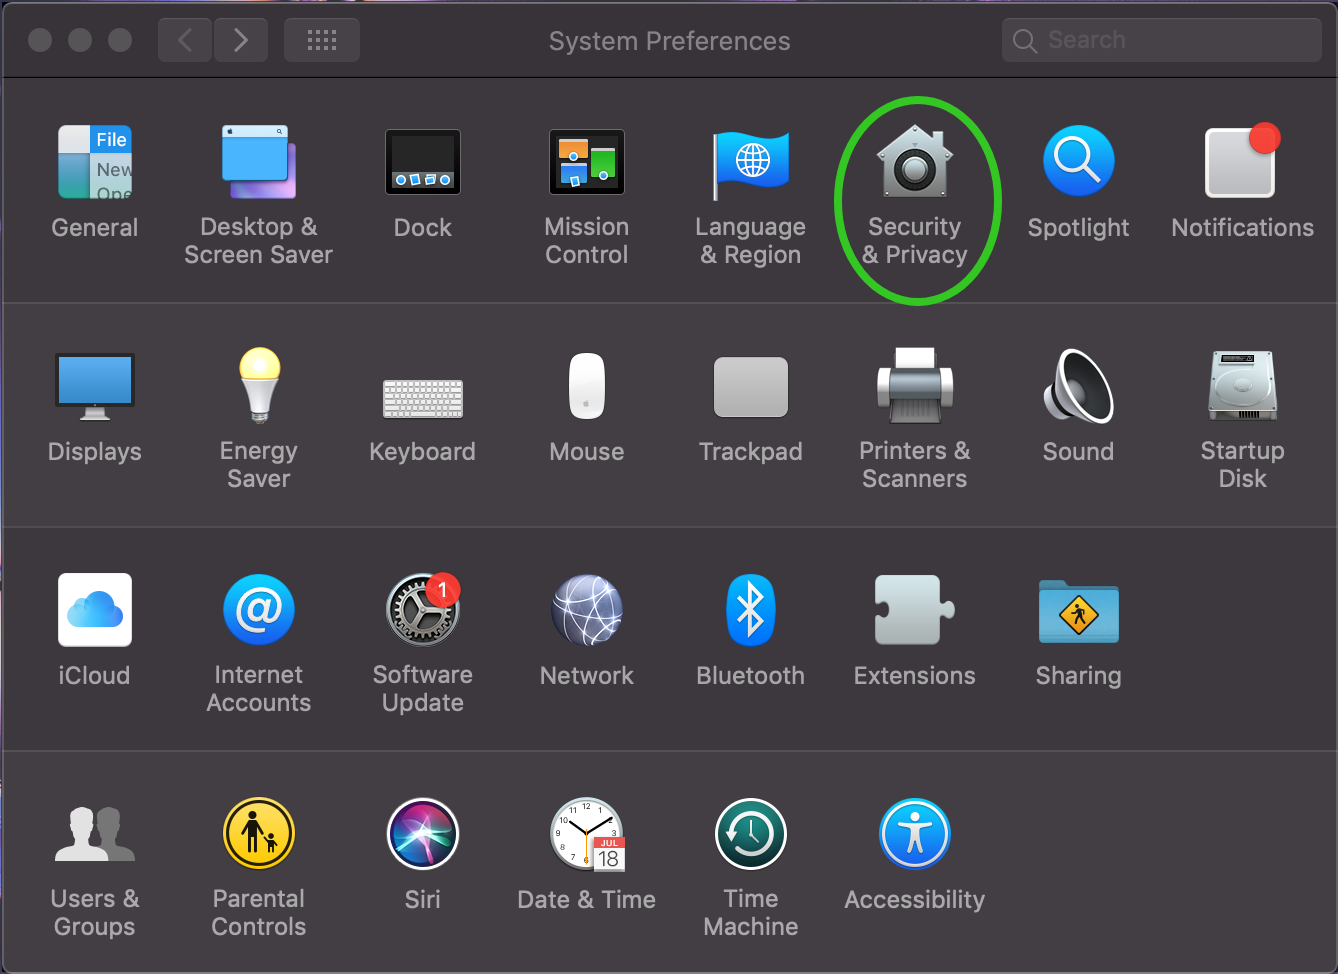
2, Open "System Preferences" > "Security and Privacy".
3, Click "Open Anyway"

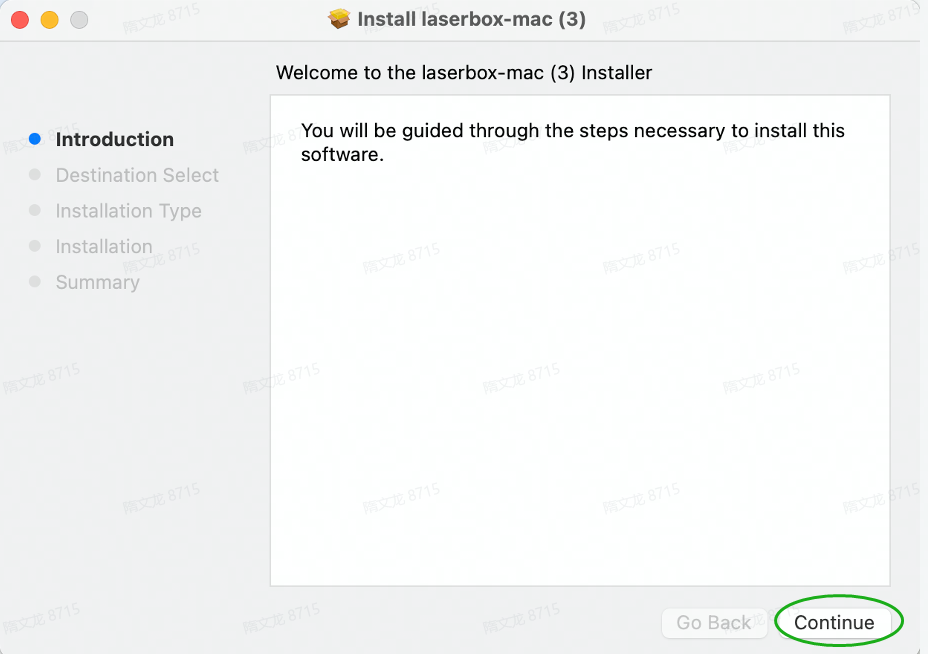
4 Click Open.
5, Keep clicking Continue.
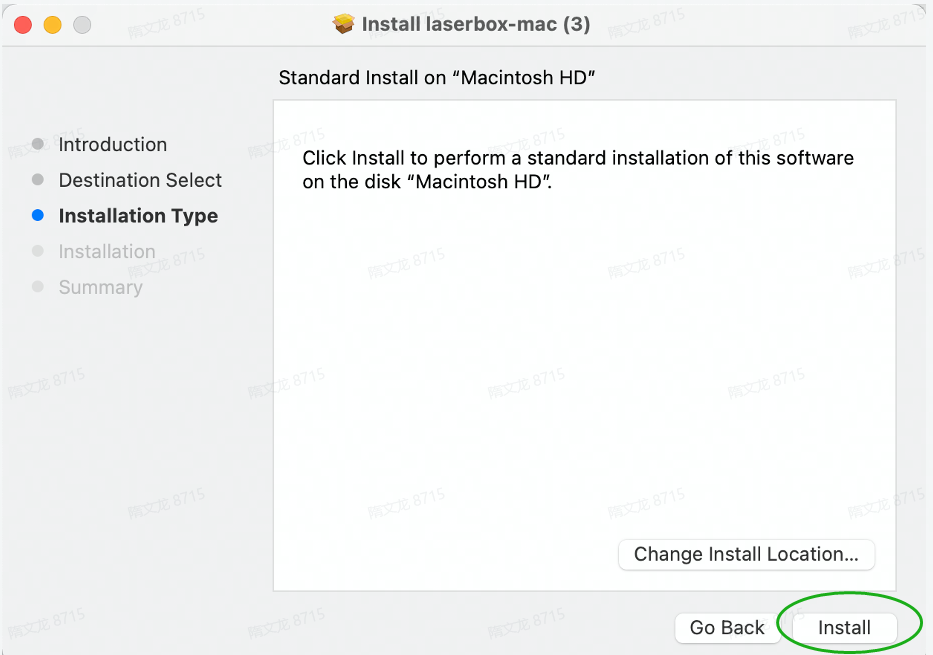
6, Click Install.
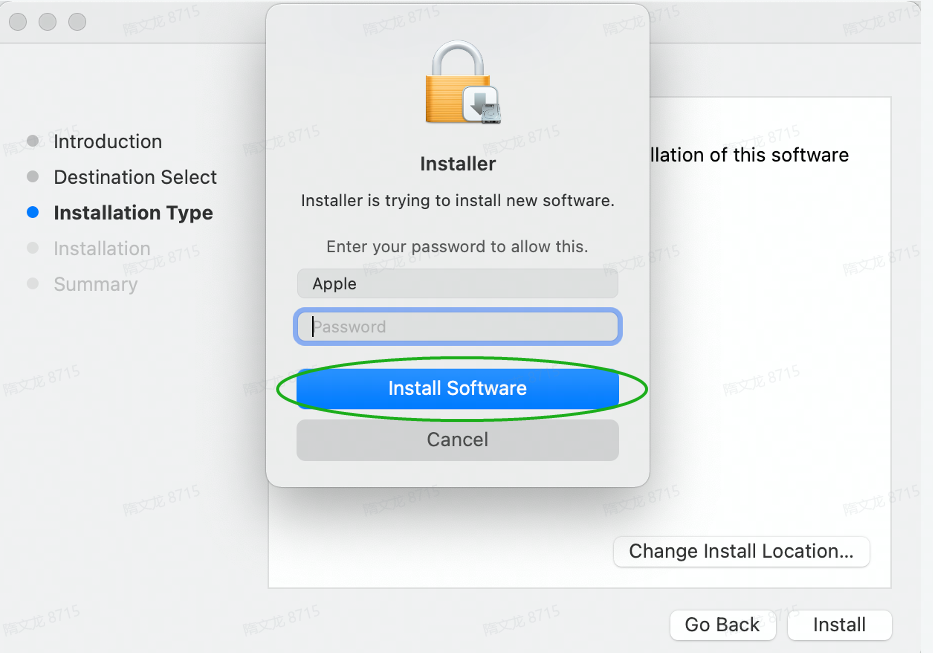
7, Enter the user name and password, and click Install Software.
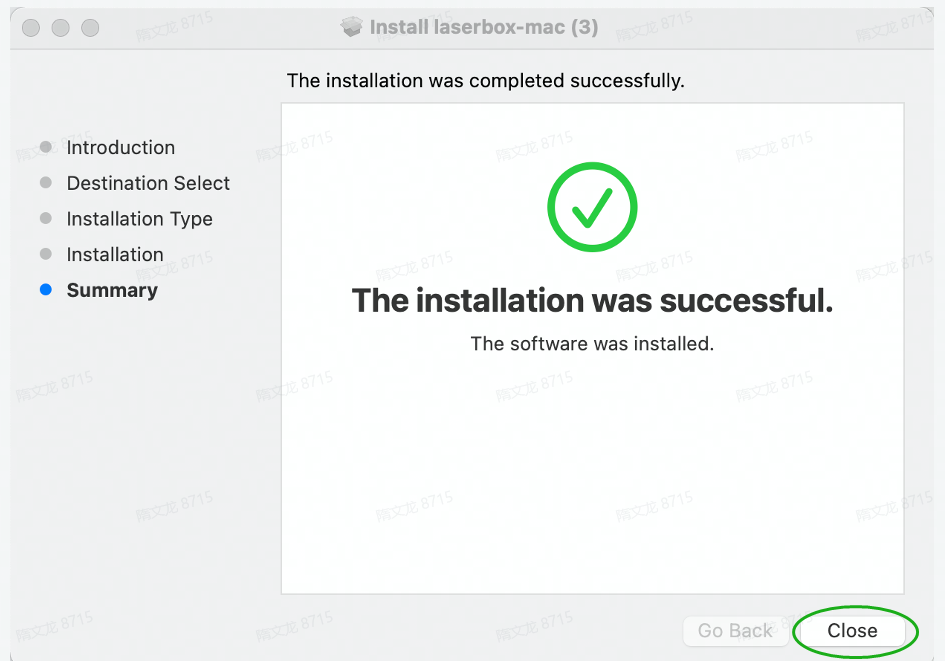
8, Wait till the installation is complete and click Close
Method 2
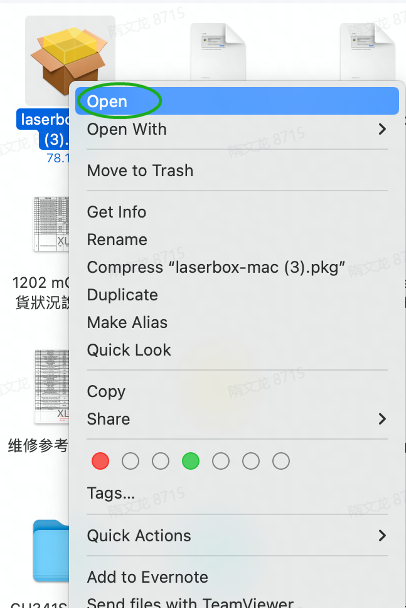
1, right-click the installation package, select "Open"
2, Click Open.
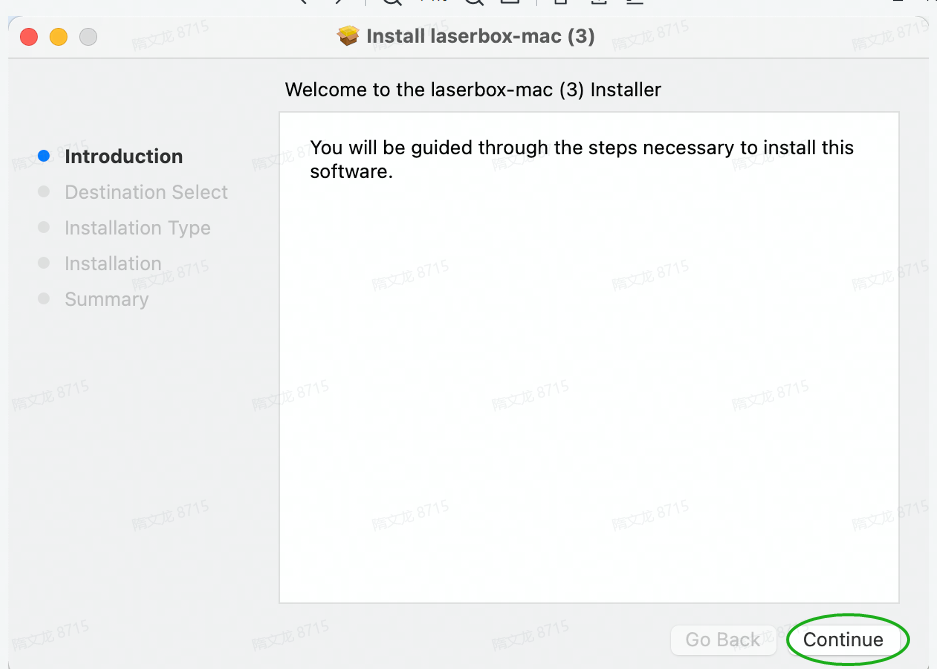
3, Keep clicking Continue.
4, Click Install.

5, Enter the user name and password, and click Install Software.
6, Wait till the installation is complete and click Close
09 System prompt: Laser Box is now too high temperature, temporarily unable to use?
- Check whether the machine water circulation is normal; Ctrl+F1 or Ctrl+fn+f1 to enter the debugging interface; test whether the pump is working normally, emitting the humming sound of the air pump and the sound of water flow (water flow can be seen inside the laser tube)
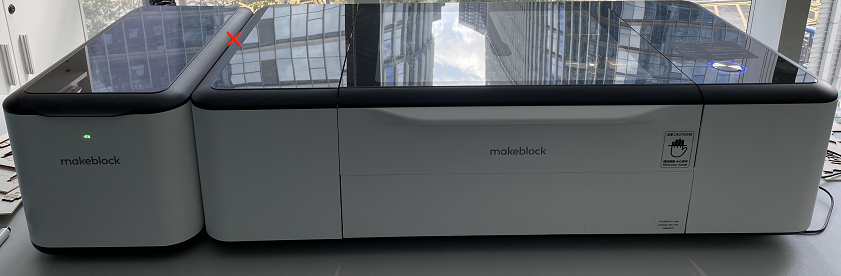
- Check whether the machine and the purifier are close to each other, the wrong placement of the following figure, completely blocking the exhaust fan heat dissipation; so prompt high-temperature alarm...
10 Why does the laser box window deformation connected to the upper computer secondary calibration always a prompt failure?
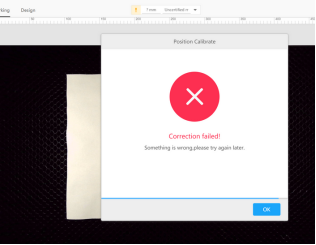
Reason: The primary calibration data is not well calibrated
Solution countermeasures.
- Check the firmware version of the laser box first. If it is not the latest version, upgrade to the latest firmware version, and check and upgrade the upper computer to the latest version...
- Please refer to the following link for primary calibration if you still can't calibrate the second time.
11 Why can't the machine turn on normally?
Phenomenon 1: After power on, the power button indicator does not light up
Phenomenon 2: After power on, the power indicator lights up, the left and the right light band does not light up
Solution: Remove the right side of the machine components, check whether the power management board wiring is loose
12 Why a certain axis of the motor suddenly can not work properly?
Phenomenon 1: when the machine is just turned on, can not reset a certain axis normally.
Solution.
1: First,,, update the software firmware.
2: Power on and use the card placed at the light-sensitive power-off switch of the limiter to see if it will light up red. If not, you need to replace the limit switch or change the limit control line.
3: Replace the motherboard
Phenomenon 2: In the processing stage, an axis suddenly does not work
Solution.
1: First,,, update the software firmware.
2: Check whether the limit switch control line is loose
3: Check the limit switch
2: Replace the motor
3: Replace the motherboard
Phenomenon 3: After processing is completed, can not reset the machine normally
Solution.
1: Update the software firmware first.
2: Replace the motherboard
13 Why when the laserbox cut half, the system shows that there is still time, the laser head suddenly did not move?
Causes.
- Maybe caused by the camera overheating
- The camera cable connection is unstable,,, leading to failure in the middle of printing...
Steps.
Turn off the machine to cool down for a few minutes, use Laserbox to connect the machine, open the device information to check the status of the machine; if it shows QX17, refer to QX17 troubleshooting guide to re-plug the camera https://support.xtool.com/hc/en-us/articles/1500013112801- Hardware-Abnormal-Error-Code-Troubleshooting-
14 Why are the lines cut out particularly thick or wavy?
- Confirm the material and whether the difference between the cutting pattern is too large...
- Check whether the lens is installed backward, the air nozzle at the airflow is sufficient, or open the debugging interface to open the air pump.
- Check whether the air nozzle & laser head is dirty; clean the air nozzle and laser head; refer to the video https://youtu.be/CWAm4YDf5nA..
- Check whether the lens is loose or dirty; clean the lens and paste the lens; refer to the video https://youtu.be/ew6kkeMAyIM..
- Wavy needs to check whether there is a relationship with calibration. You can put in the plate with thickness to observe whether the window is deformed.
- Check whether the camera fixed plate is off
15 Why does the processed graphics appear deformed (graphics are not closed or the ratio is not right)?
Phenomenon 1: drawing a circle or rectangle is not closed, deformation
Solution: the motor lost a step, belt elasticity is not correct, re-adjust the belt elasticity (refer to the video)
The light is too strong will also have an impact on the cutting jump step. Drag the axis after turning on the machine to see if the axis is locked
16 Why is there an offset in the processed graphics compared to the actual placement?
You may refer to the document to make a position calibration: https://support.xtool.com/hc/en-us/articles/1500010631422-What-should-I-do-if-the-camera-window-is-distorted-.
17 The total width and length of the work remains unchanged, and the shape boundary size remains the same, but the lines become wavy
Solution: It means there is no lost step, usually caused by loose lenses. Check the focus lens.
18 Why can't I open the DXF file? The line segments become thicker, and the lines curved?
- DXF original data is not standardized. You need to open with cad and click Save As to save.
19 Why can not adjust the DXF file in the laserbox software inside the single line?
- Dxf with color merge, which has been the traditional laser settings, want different engraving and cutting effects, set different colors.
20 Why can the pictures imported into Laserbox software only engrave but not cut?
The exception is as follows.
The file format causes (bitmap without path), can identify the contour for cutting by the contour extraction function, and the interface after the contour extraction.
21 Why does the machine fail to identify the thickness of the material automatically, or is it inaccurate?
Possible causes and solutions.
1, the table is not flat - the machine is placed on a rigid table or ground
2, infrared lamp crystallization of a lot of soot resulting in infrared lamp brightness is not enough - regular cleaning of the infrared lamp tube appearance
3, honeycomb board supplies residual scrap - machine cutting finished in time to clean up the table scrap
4, with a 3mm steel plate for calibration, and then identify to try
22 Why does the laser what you draw function not work properly?
- Use a red and black marker with at least 2mm wide handwriting
- Connect the machine to the software and check the corresponding settings
- It is recommended to use official consumables, do not use reflective materials
- Draw graphics as far away from the edge of the supplies as possible, and the supplies are best near the camera
- Do not use the function under the sunlight or in the case of strong light
- camera connected to the motherboard wire may have problems. You can repeat the switch cover several times to see if the image is the same
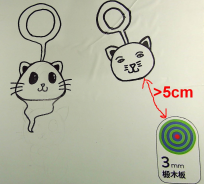
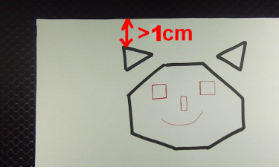
23 Why outer circle print failure when processing laser what you draw?
Possible causes and solutions.
1: graphics too close to the ring code, close to the ring code drawing may be rejected as noise - graphics from the ring code of not less than 5CM
2: The graphic is too close to the edge of the canvas. The material boundary extends inward 1cm range is the basis for automatic recognition of the drawing board - please ensure that the graphic is not less than 1CM away from the edge of the canvas
For more information, please refer to the Laserbox offline processing function instruction document
https://support.xtool.com/hc/en-us/articles/1500008809661-Must-see-tips-for-offline-processing
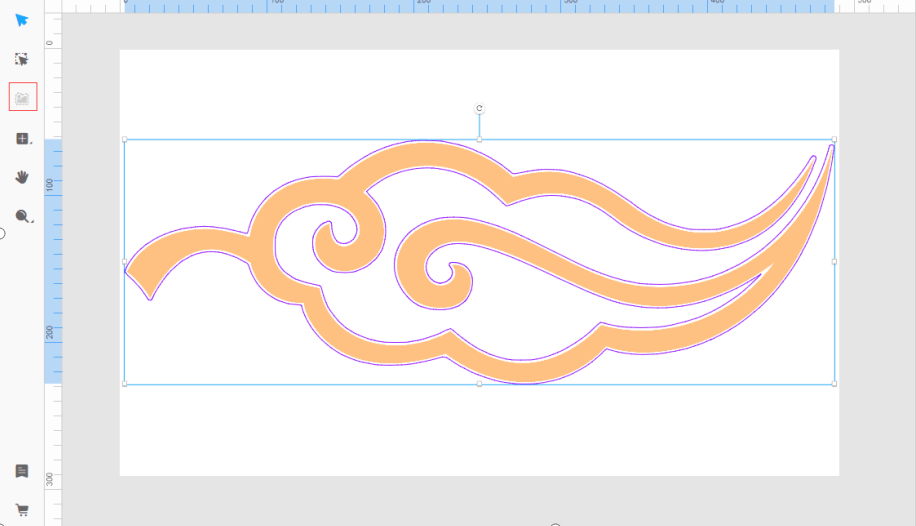
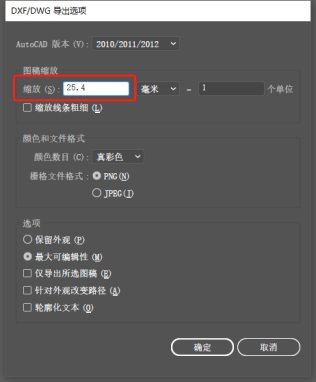
24 Why does the size of graphics exported from AI change in Laserbox?
DXF graphics import
AI software has a problem with DXF support, for example, drawing a 100*100mm rectangle in CAD software and saving it as a DXF file. After importing this DXF file into AI, the size will change. So there is a problem with AI's support for DXF. When exporting DXF using AI, it is recommended that in the scaling option, change the scaling value from 1 to 25.4 so that the size of the saved DXF file in Laserbox is consistent with AI.
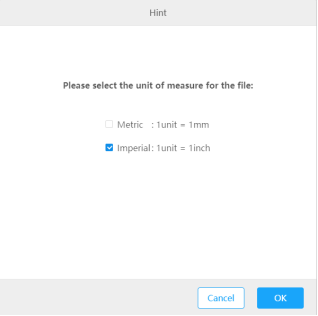
After opening Laserbox, select Import, select the imported DXF file. A pop-up window will appear asking you to select the unit of measure for the file, select imperial units and click Confirm.
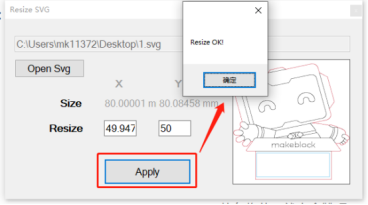
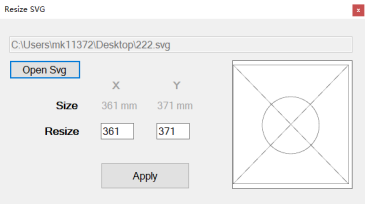
Pattern import before you need to confirm the required SVG pattern size and use ResizeSvg software to open the graphics to set the required size, and then import the graphics into Laserbox can be. Operation steps refer to: https://support.xtool.com/hc/en-us/articles/1500010631702-How-to-resize-the-SVG-file...
25 Why does the replacing SVG pattern of laser what you draw failed?
p.s.:This operation will replace the official SVG file if you need to restore it to find the R & D to the original document
- SVG file size and format, graphics size should be less than A4 format: 210mm x 297mm.
- Whether the file naming format is correct, can only contain the number 1 ~ 6, such as 4.SVG, the name can not contain Chinese
- Whether the file distinguishes the cutting and engraving area with different colors as required
The red line will be cut.
Black lines will be engraved.
Blue rectangles in the middle will be engraved with signatures; (can omit this step)
- whether the SVG file contains CSS (as shown below), the current software database does not support it, please delete the CSS manually after the user can use it

SVG can be used to determine the method: use the following software to open the SVG file, such as the pattern can display the color, that can use the file normally, and vice versa is not available.
Usable cases.
Unusable case (no color distinction between lines).
26 Why does Laserbox cut and engrave white paper under laser what you draw, only the outer circle can be cut, and the inner pattern is not engraved?
The default setting of the software cutting white paper only cuts the external outline. The internal does not carve.
27 Why will the machine not start after turning on the switch?
Step 1, Please confirm if the power cable has any epidemic damage, If no, Please perform the next step...
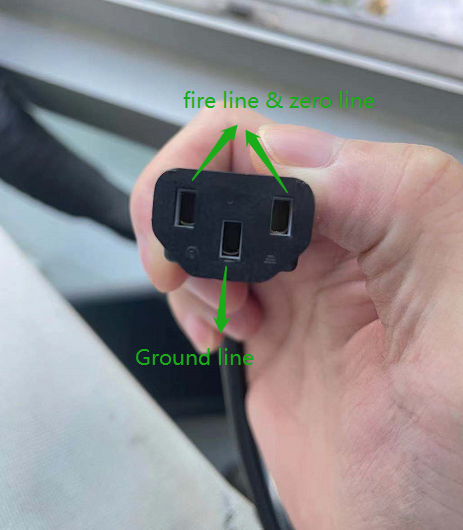
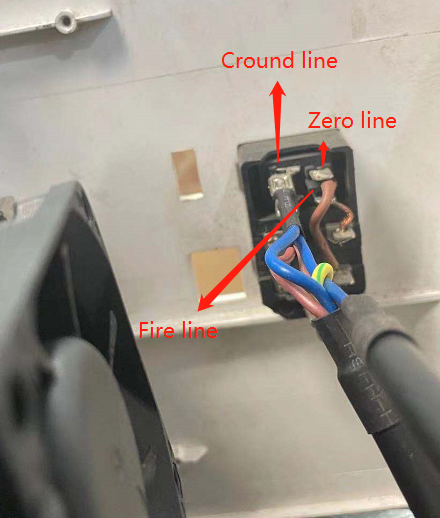
Step 2, Use the beep gear of the multimeter to check if the ground and fire line zero line short-circuited. If not short-circuited, please perform the next step...
Step 3. Please switch on the machine and observe if the switch is lighted on?
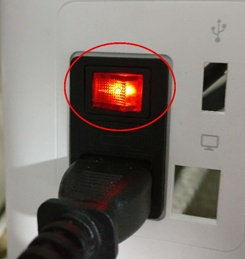
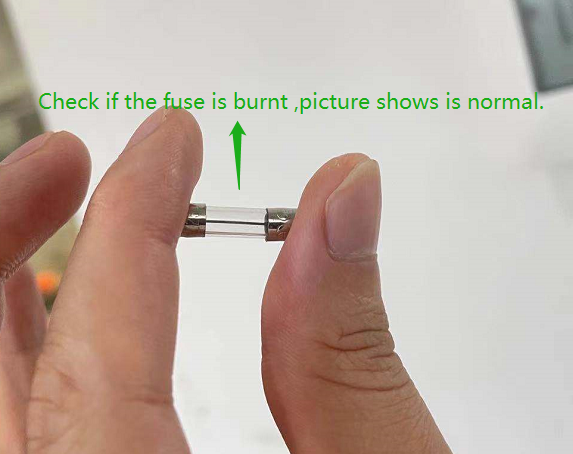
Step 4. If the switch is no light, Maybe the fuse is burnt,,, or there is a poor connection.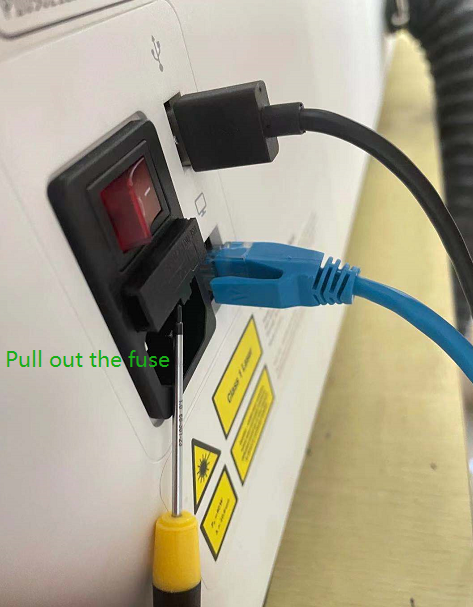
Step 5. If the switch is on, but the machine does not start, there may be a problem with the laser power supply. Need to check the cable connection from the switch to the laser power supply.
Step 6. If the cable connection is normal, there may be a problem with the laser power supply. Please refer to the following video to replace the laser power supply.
https://support.xtool.com/hc/en-us/articles/1500010790441-How-to-replace-the-laser-power-supply
28 Troubleshoot "Failed to get picture"
Services & Help
Learn & Community
Contact Us

Copyright © 2025 xTool All Rights Reserved.