xTool Studio is an all-in-one software for graphic designing and editing, laser process setting, and device controlling.
Minimum and recommended PC requirements
Item | Minimum configuration | Recommended configuration |
|---|---|---|
Processor | Intel Core i5-6200U | Intel Core i5-11600 |
Operating system | Win 10 (64 bit) macOS 11 or later | |
RAM | 8 GB | 16 GB or more |
Display resolution | 1280 × 720 (pixels) | 1920 × 1080 (pixels) or higher |
Hard drive | 8 GB | 12 GB or more |
- With the minimum configurations, all the functions of xTool Studio can be used properly. When you import a complex image, such as an image larger than 50,000,000 pixels or an SVG image larger than 1 MB, however, xTool Studio may fail to run smoothly.
- With the recommended configurations, xTool Studio can run more smoothly when you import and edit a complex image; the software delay may be shorter, and the performance is better.
Download and install xTool Studio
(1) Download xTool Studio from xtool.com/pages/software.
(2) Double-click the software you've downloaded to install it.
(3) Open xTool Studio. In the top-right corner, click the icon > Settings, and set the language on the General tab page.
Connect the device to xTool Studio
USB connection
(1) Use the USB cable to connect xTool MetalFab to your computer. And turn on the device.
(2) Open xTool Studio on your computer. In the top-right corner of the software, click + New Project.
(3) On the right side of the page, click Select device.
Note: If you have connected an xTool device in xTool Studio before, click the icon next to the device.

(4) On the pop-up window, click the name of your device to connect to it.
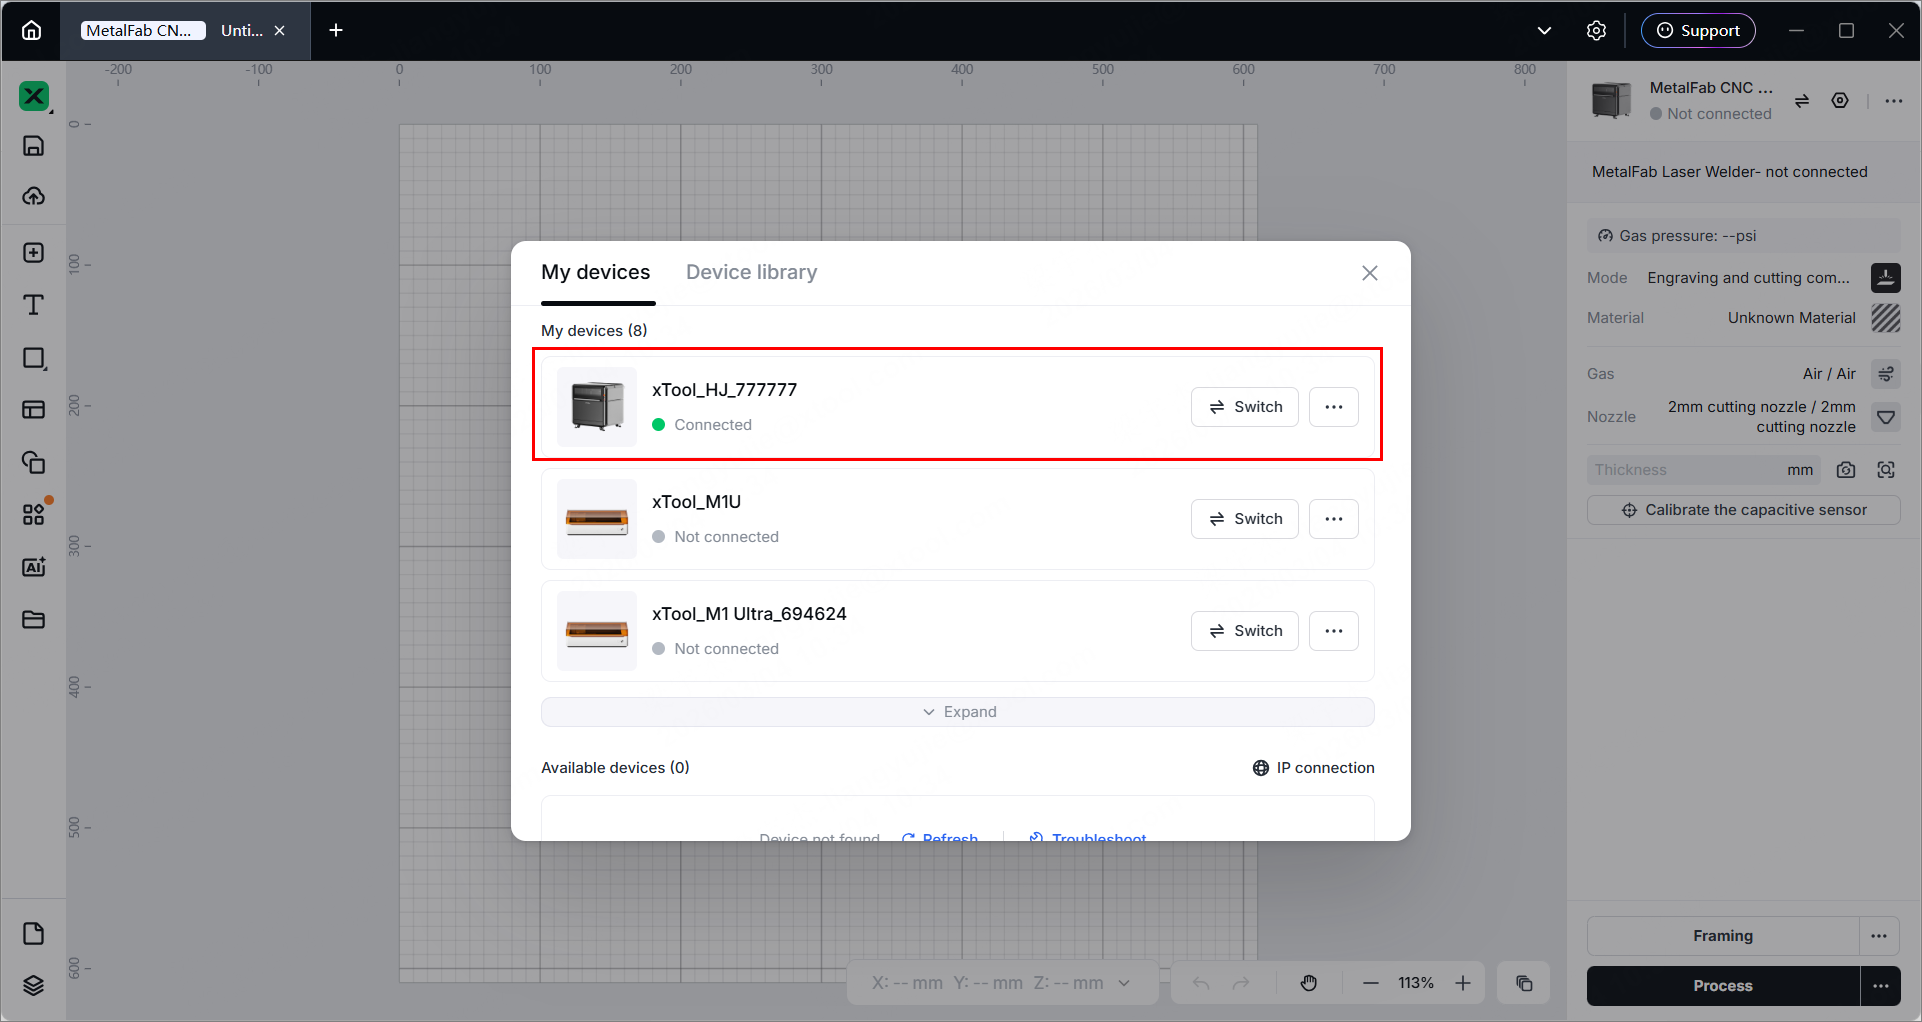
Note: After the device is connected, you can configure Wi-Fi for it so that you can connect it to xTool Studio through Wi-Fi next time.
Wi-Fi connection
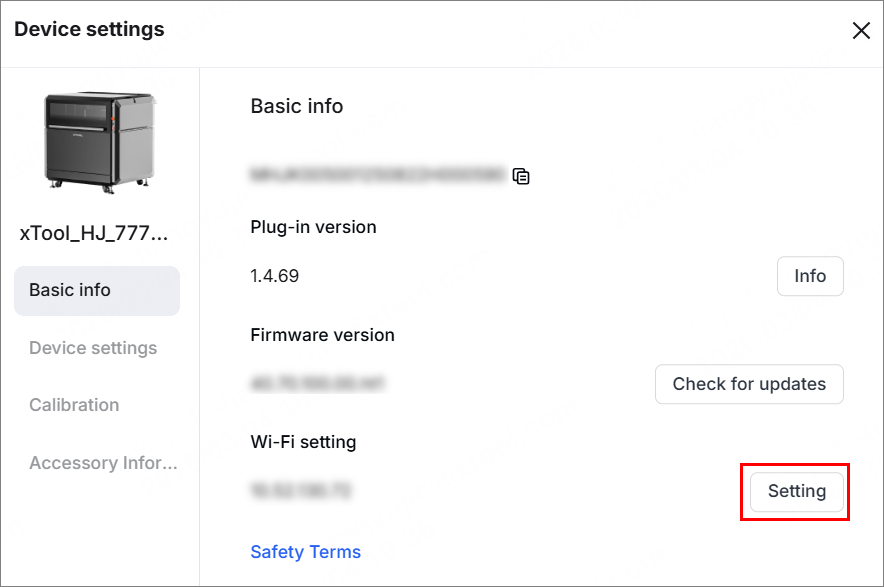
(1) In the top-right corner of the software, click  to enter the device settings page.

(2) On the Basic info tab page, click Setting for Wi-Fi setting.
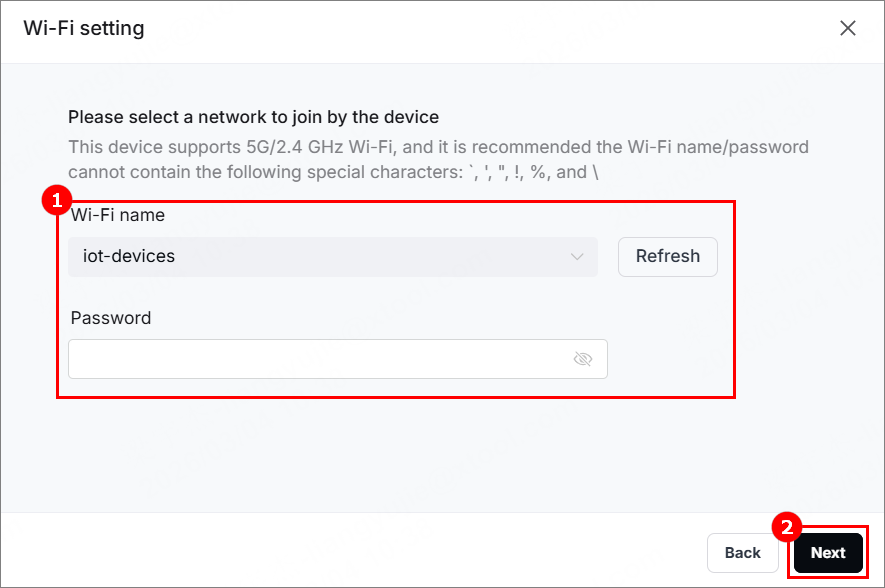
(3) In the Wi-Fi setting dialog box, select a Wi-Fi, enter the password, and click Next.
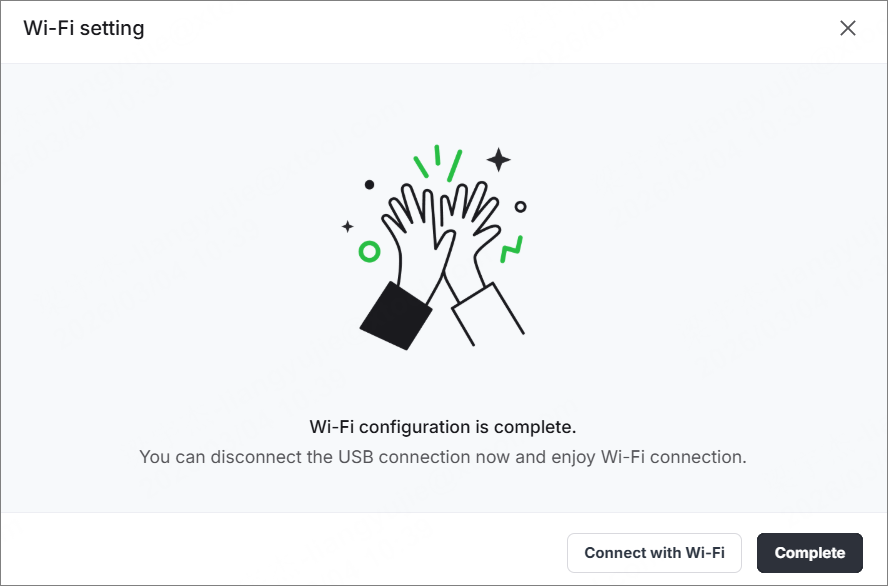
(4) Click Connect with Wi-Fi. If you do not want to connect your device and the computer through Wi-Fi now, click Complete to close the dialog box.
Note: Ensure that your computer and xTool MetalFab are connected to the same network.
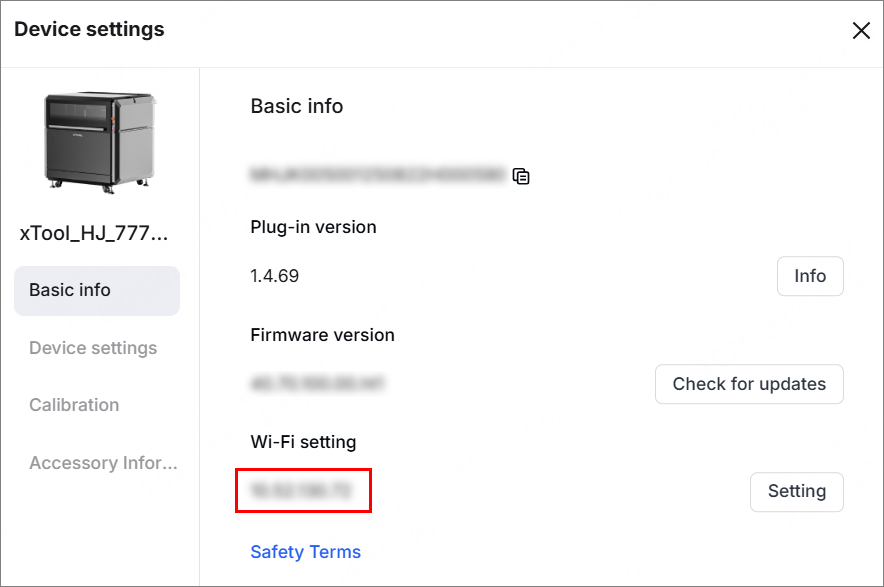
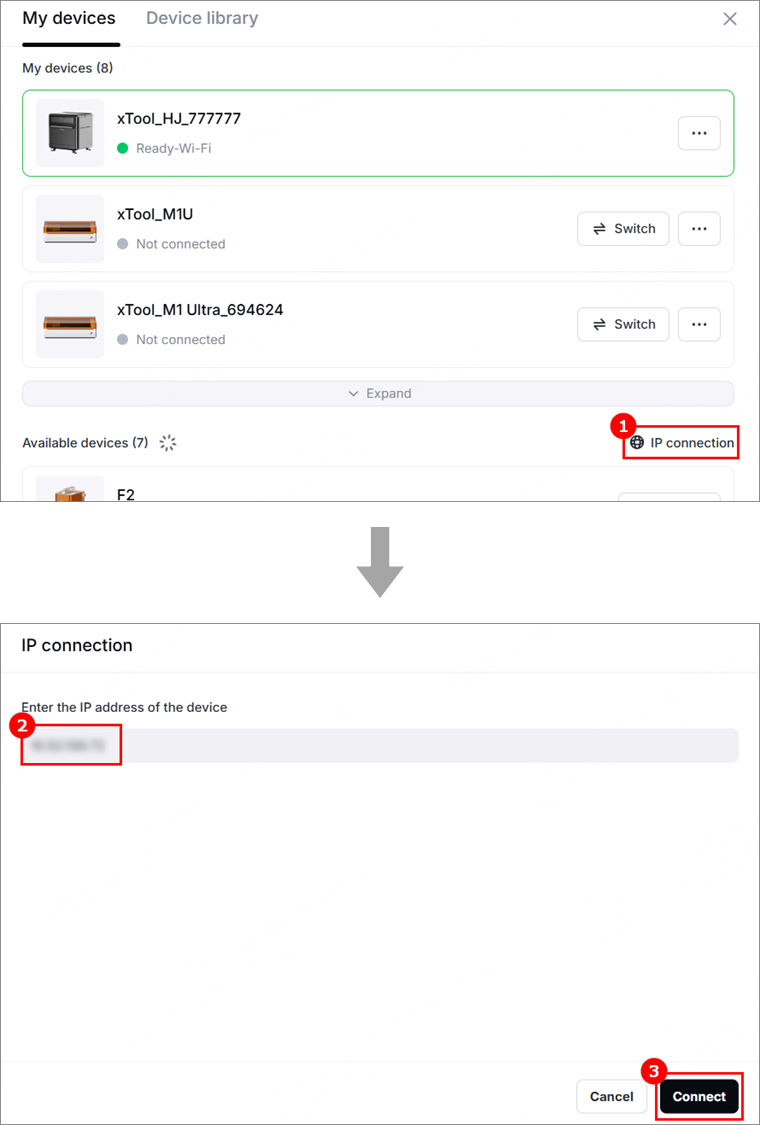
IP address connection
After you complete the Wi-Fi settings for xTool MetalFab, an IP address is displayed under Wi-Fi setting on the device settings page. You can use the IP address to connect xTool MetalFab to the computer.
(1) In the top-right corner of the software, click to enter the device settings page.
(2) Note down the IP address and return to the canvas page.
(3) On the canvas page, click .
(4) In the My device dialog box, click IP connection, enter the IP address noted down in step (2), and click Connect.
Set up xTool MetalFab in xTool Studio
(1) In the top-right corner of the software, click to enter the device settings page.
(2) In the Basic info tab page, you can view the basic information of xTool MetalFab and modify the following information.
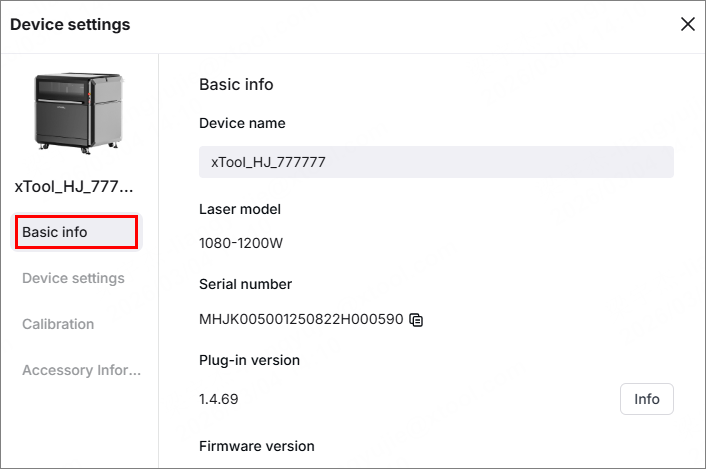
- Device name: Changes the device name in the textbox.
- Laser model: See your device's power
- Serial number: The only identity for your device.
- Plug-in version: Used for updating functions of xTool Studio.
- Firmware version: Checks for updates and updates the firmware if a new version is available.
- Wi-Fi setting: Connects the device to a Wi-Fi network.
- Safety Terms: LSO Training for xTool MetalFab CNC Cutter
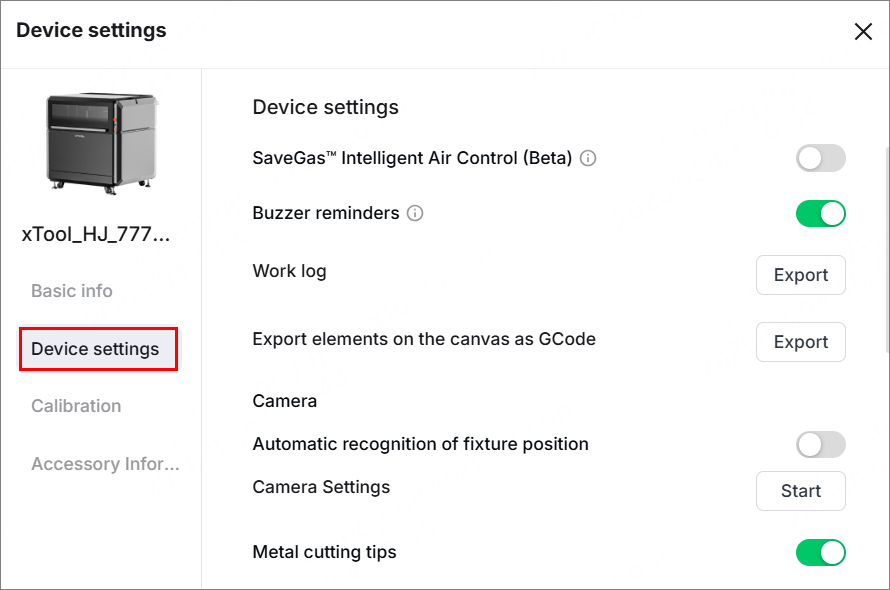
(3) In the Device settings tab page, you can set up the device and export files and logs as needed.
(4) In the Calibration tab page, calibrate the cameras, focus position, welding gun light position, and more.
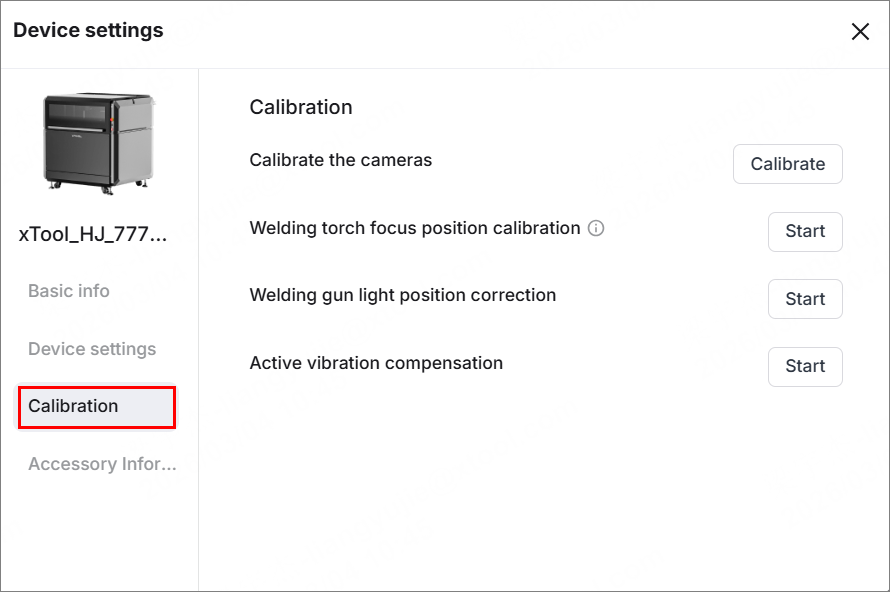
- Calibrate the camera
- Calibrate the welding torch focus position
- Calibrate the welding gun light position
- Active vibration compensation
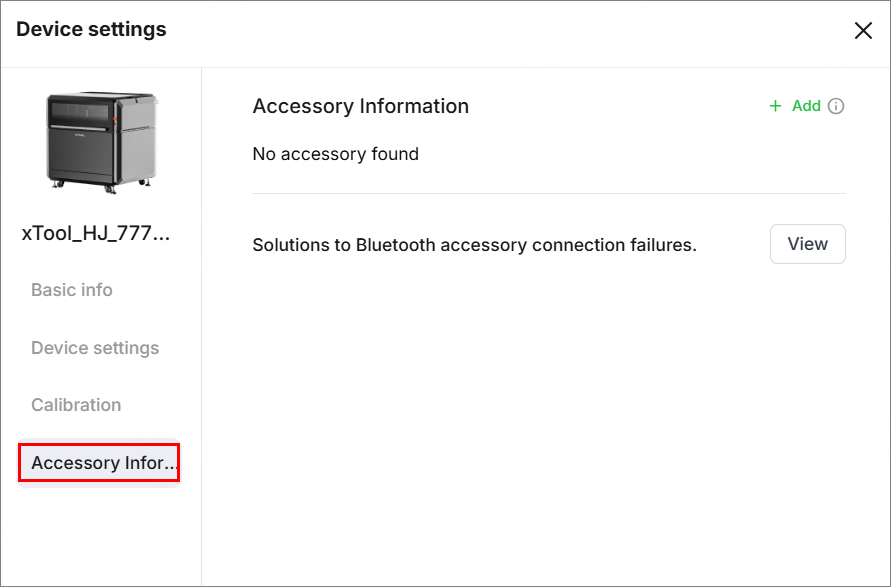
(5) In the Accessory Information tab page, you can see the information about accessories connected to xTool MetalFab and set parameters.
Processing modes
xTool Studio supports three processing modes for xTool MetalFab.
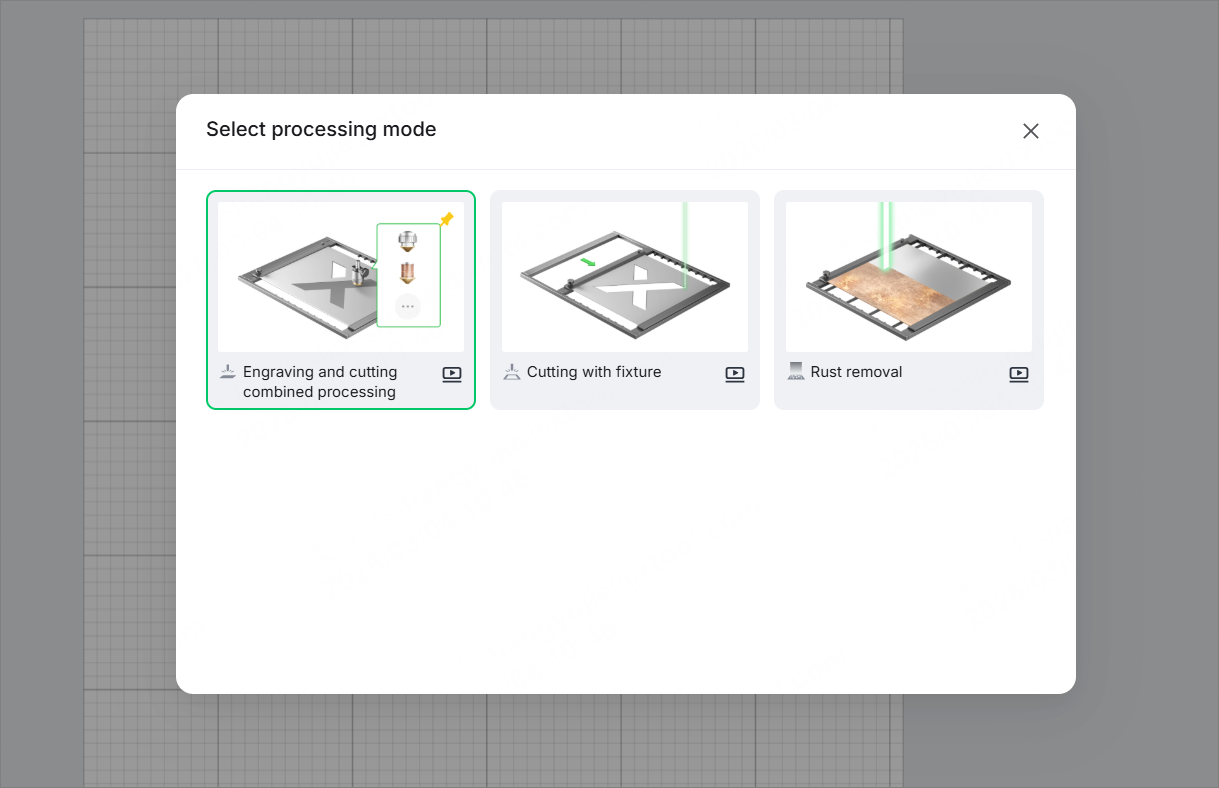
- Engraving and cutting combined processing: Perform both engraving and cutting in a single workflow by switching between tasks to streamline production.
Processing material size | 610 mm * 610 mm |
Maximum cutting thickness | 5mm Stainless Steel, 4mm Aluminum, 3mm Brass, 10mm Carbon Steel & Galvanized Sheet |
Supported processing modes | Cut, Engrave |
Supported image types | Vector |
- Cutting with fixture: processes flat materials by using laser beams. With this function, you can cut common flat metals, such as stainless steel, carbon steel, and more.
Processing material size | 610 mm * 610 mm |
Maximum cutting thickness | 5mm Stainless Steel, 4mm Aluminum, 3mm Brass, 10mm Carbon Steel & Galvanized Sheet |
Supported processing modes | Cut, Engrave |
Supported image types | Vector |
- Rust Removal: Clean the rust or paint on the metal surface with laser beams.
Processing material size | 610 mm * 610 mm |
Maximum processing height | Clean rust or paint on the metal of max. thickness of 80mm with slats |
Supported processing modes | Clean |
Supported image types | Vector |
To cut flat metals with xTool MetalFab CNC cutter, go to>>How to Cut Metals with xTool MetalFab CNC Cutter?
To clean rust/paint with xTool MetalFab CNC cutter, go to>>How to Remove Rust/Paint with xTool MetalFab CNC Cleaning Nozzle
Services & Help
Learn & Education

Copyright © 2025 xTool All Rights Reserved.