How to Calibrate the Welding Gun Light Position of xTool MetalFab on CNC Cutter
Updated Jun 17,2025
Updated Jun 17,2025
Why Do I Need Calibrate the Welding Gun Light Position?
Calibrating the welding gun light position is essential for ensuring consistent and best cutting results. Please refer to the video and software instructions for calibration (this tutorial is applicable only for CNC cutting; if the CNC platform is not connected and only calibrating the welding gun's red light for handheld welding or cutting, refer to link:Calibrate the red spot position for the welding head)
How to Calibrate the Welding Gun Light Position?
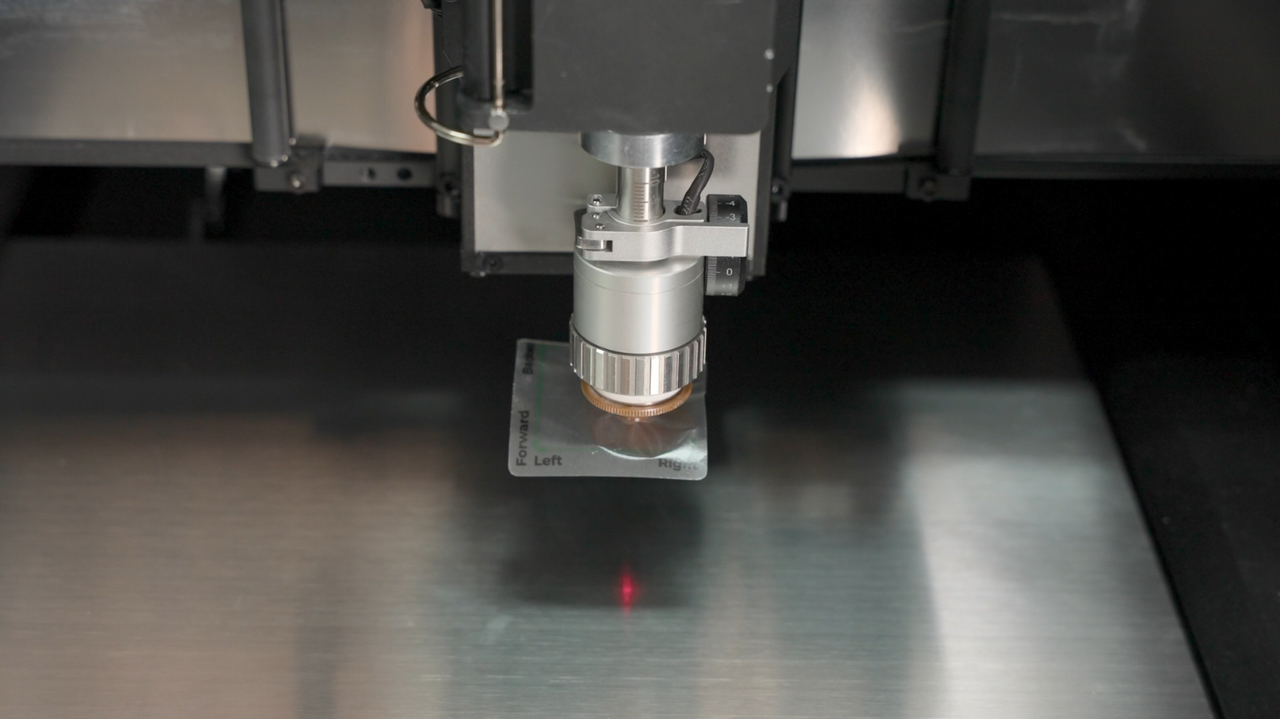
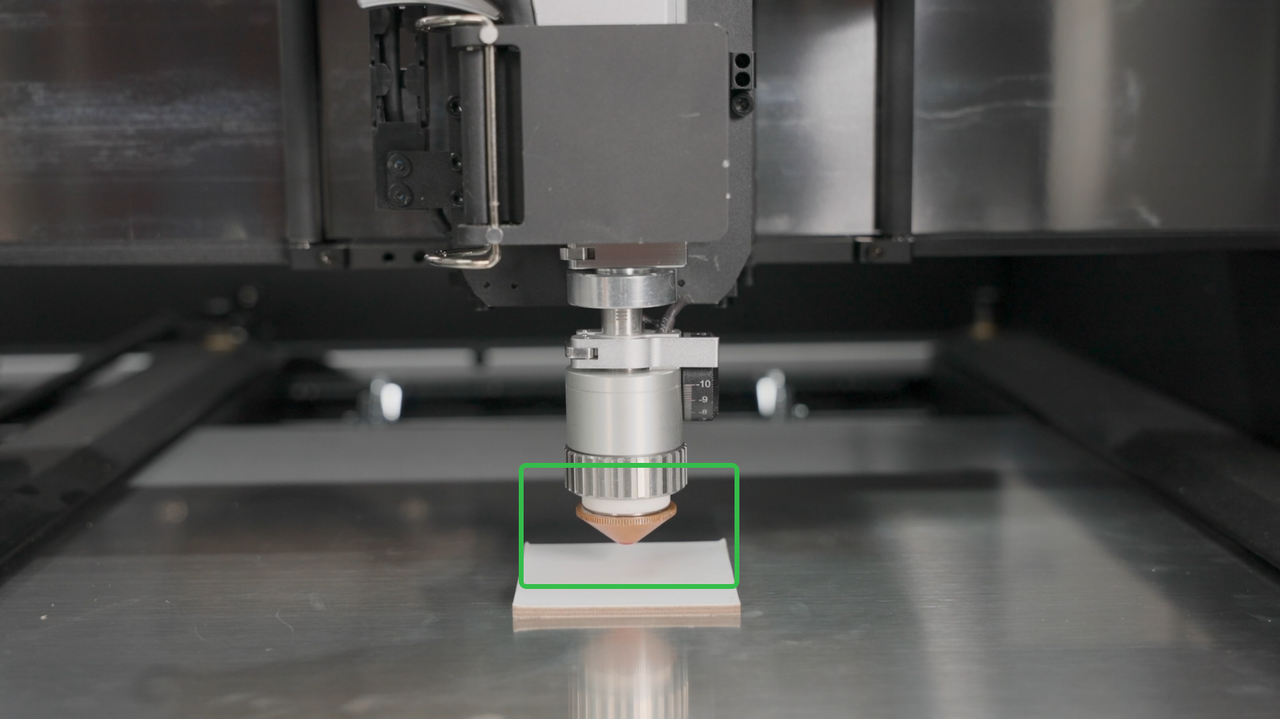
Take out the included 1mm stainless steel plate from the packaging, place it inside the machine, and secure it with the slats. (Ensure that an ordinary cutting nozzle is installed)
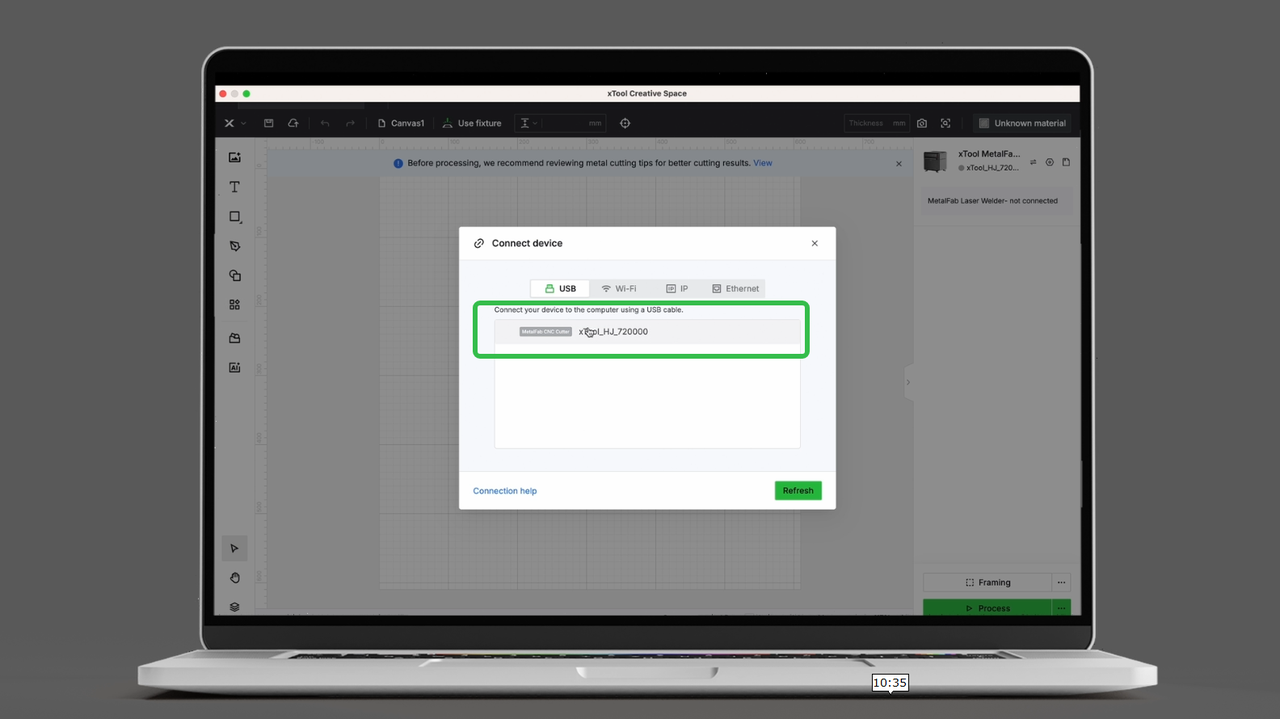
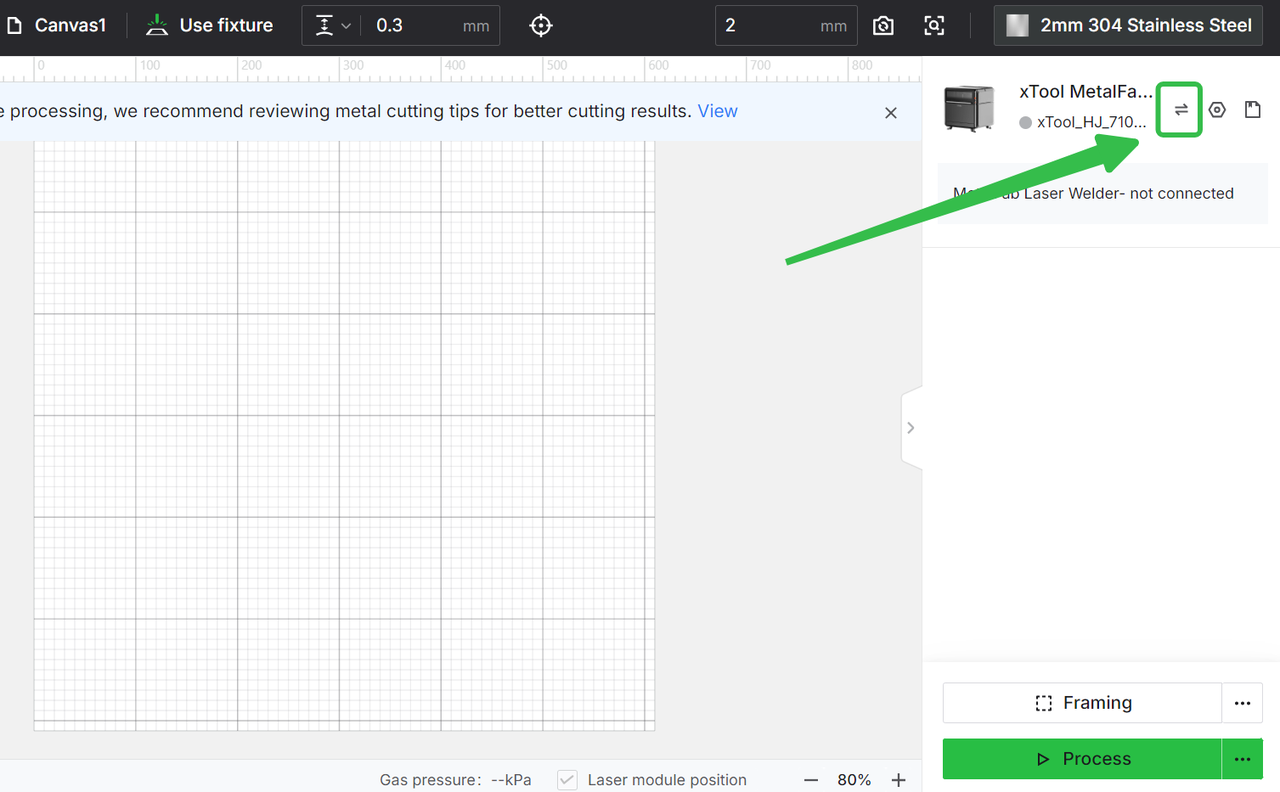
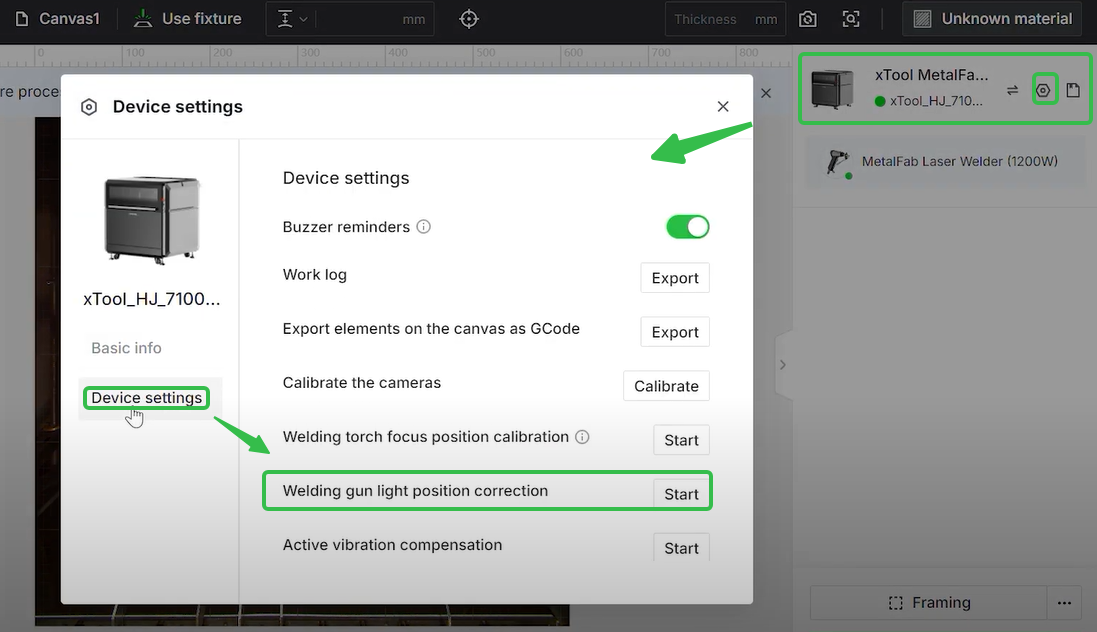
Power on the machine, connect it to XCS, click on "Device Settings", select "Calibrate Red Light," and click start.
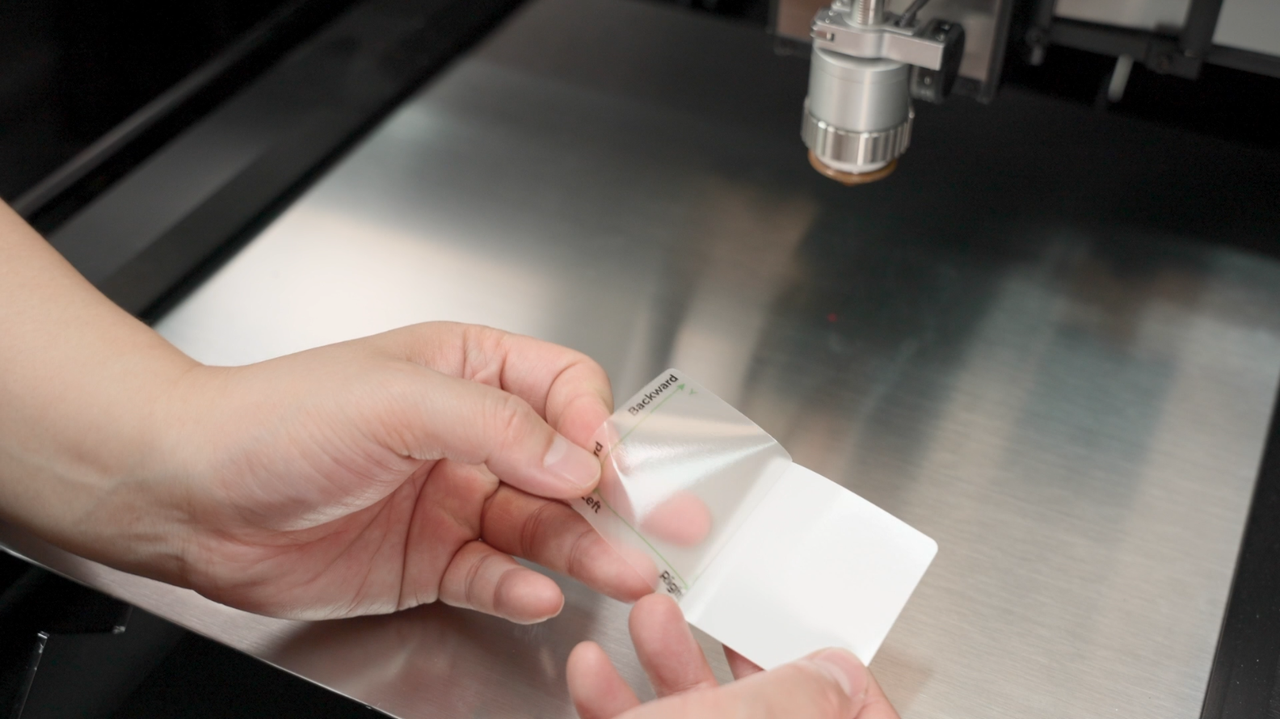
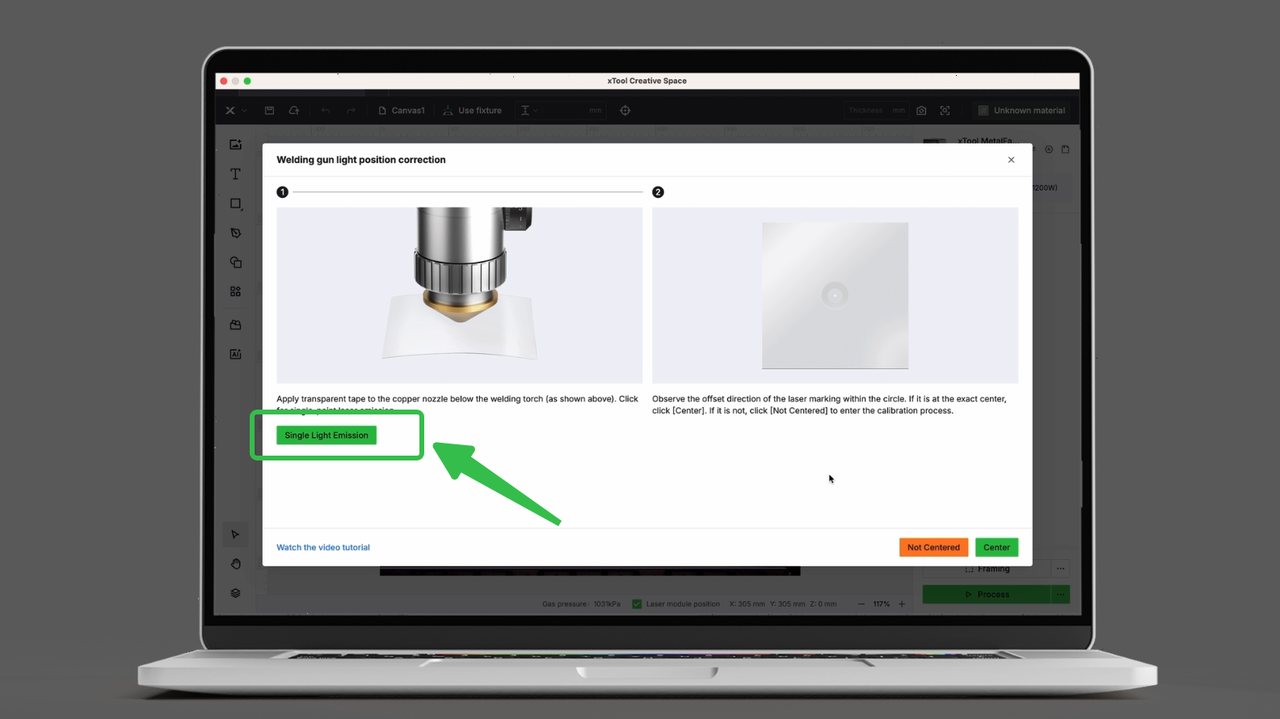
Place the included sticker or one piece of clear tape under the cutting nozzle, close the cover, and click "Single Point Emission."
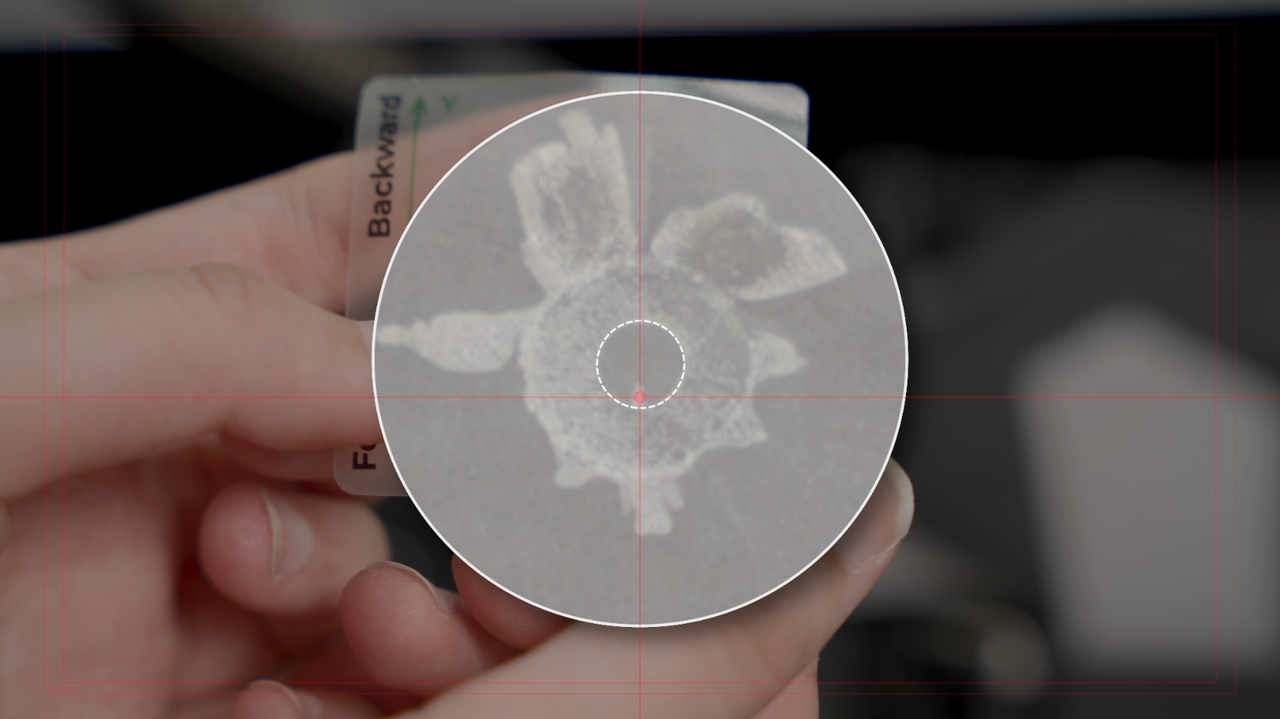
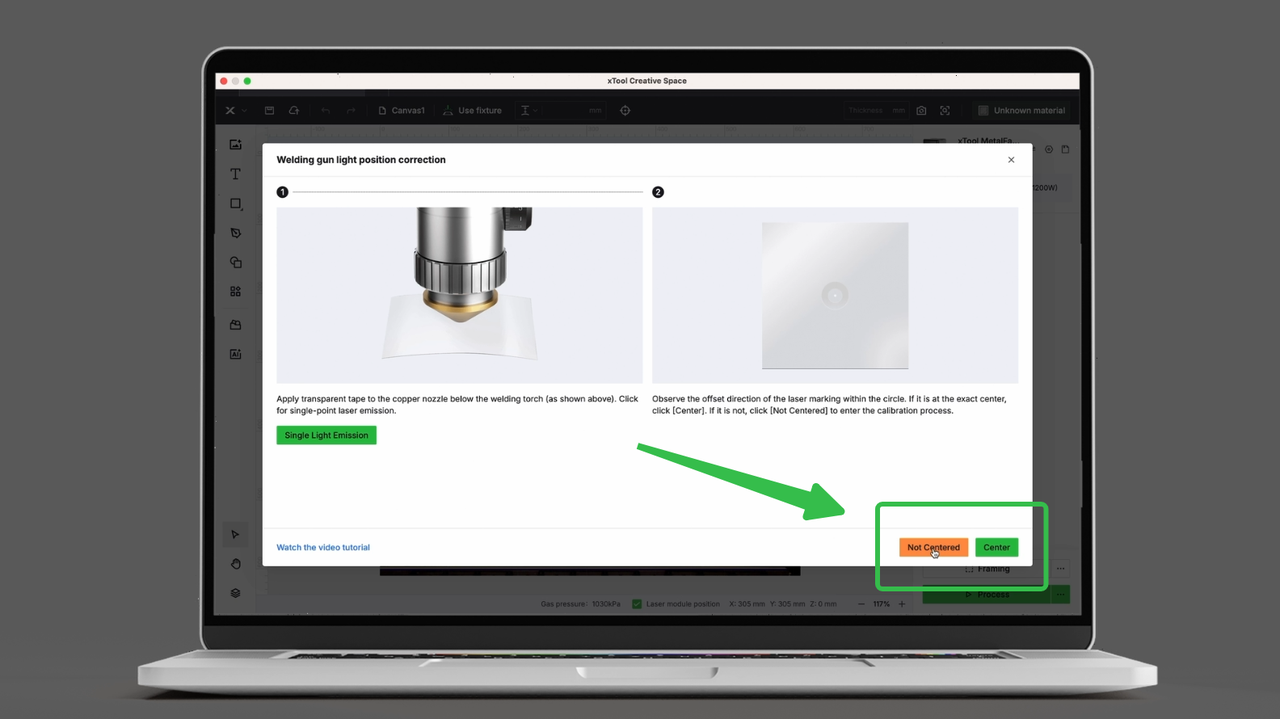
After emission, observe the red light deviation; if it is not centered, click "Not Centered" in the software to proceed to the next step.
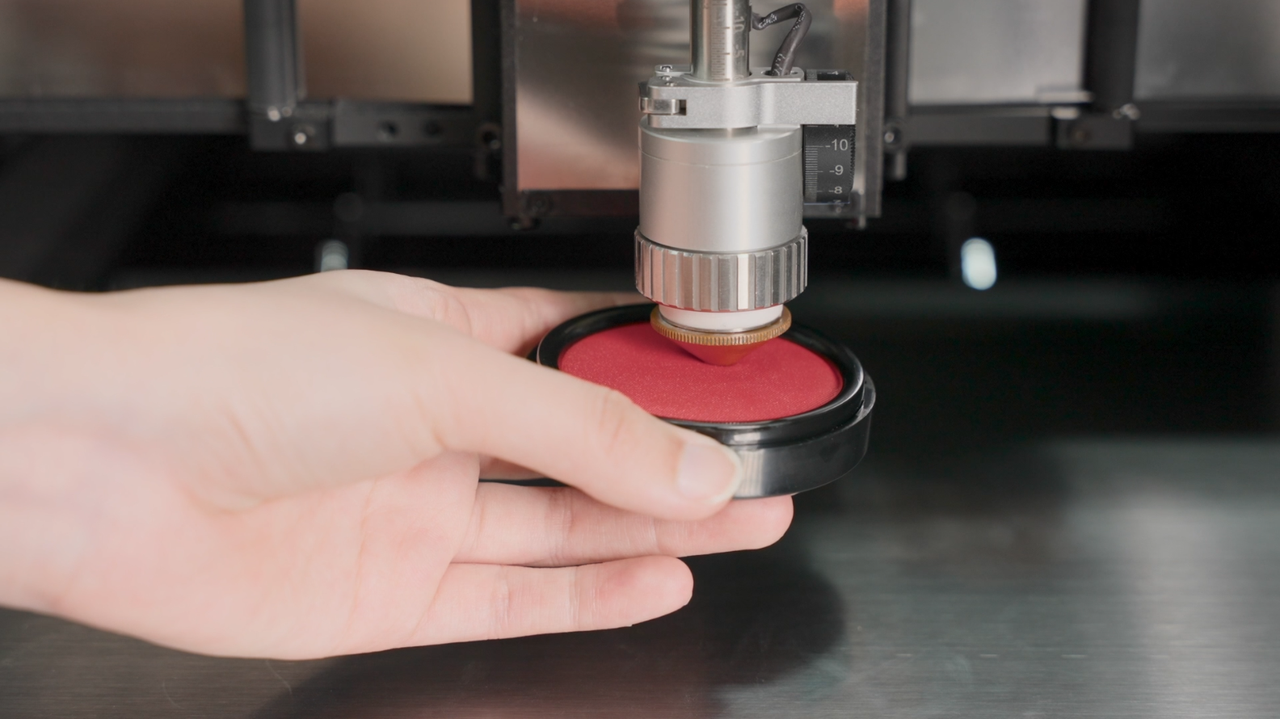
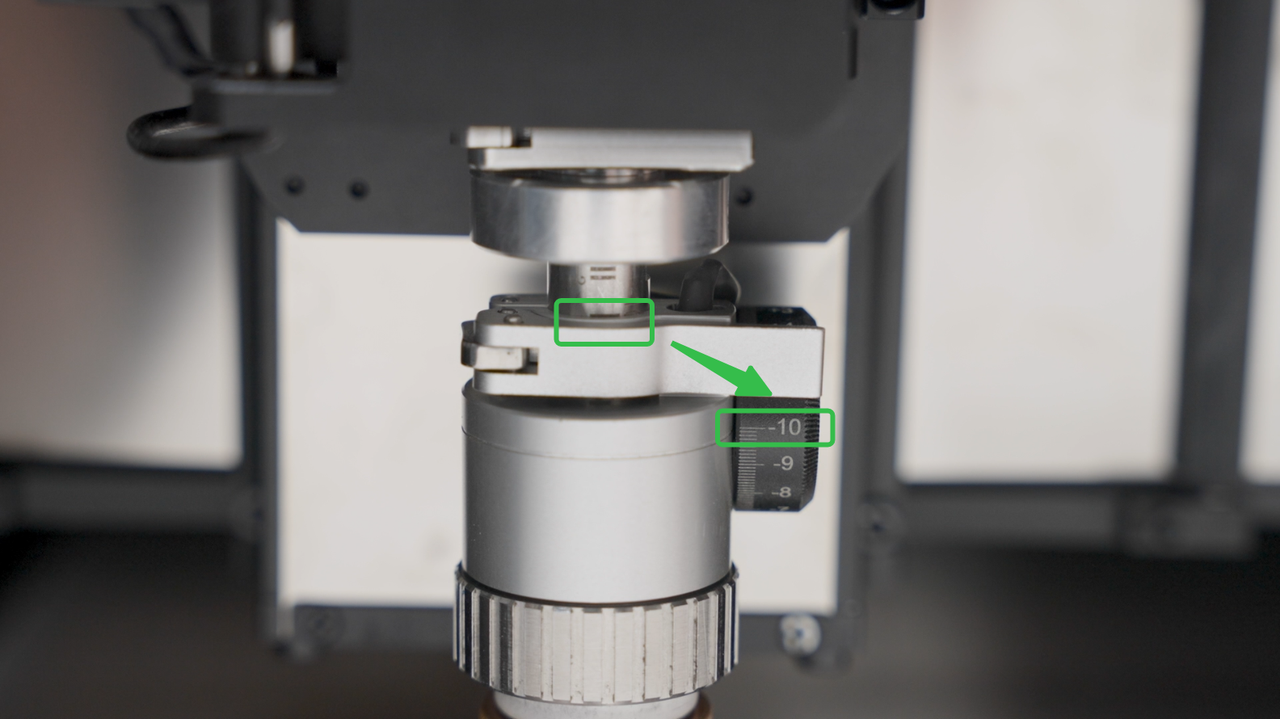
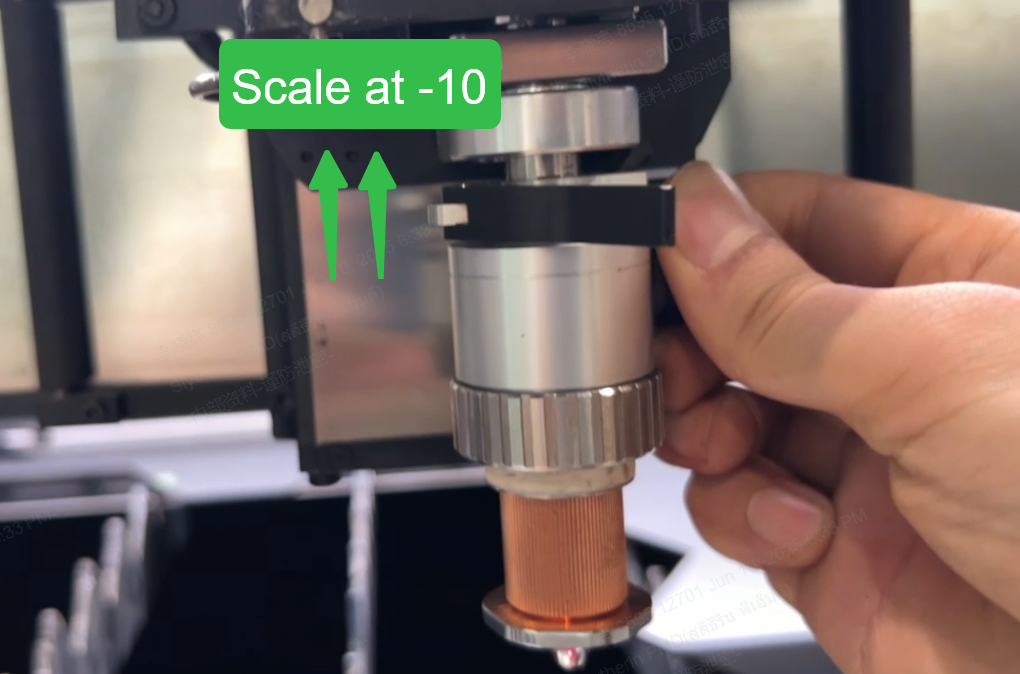
Adjust the focus position to -10 and apply red ink to the cutting nozzle.
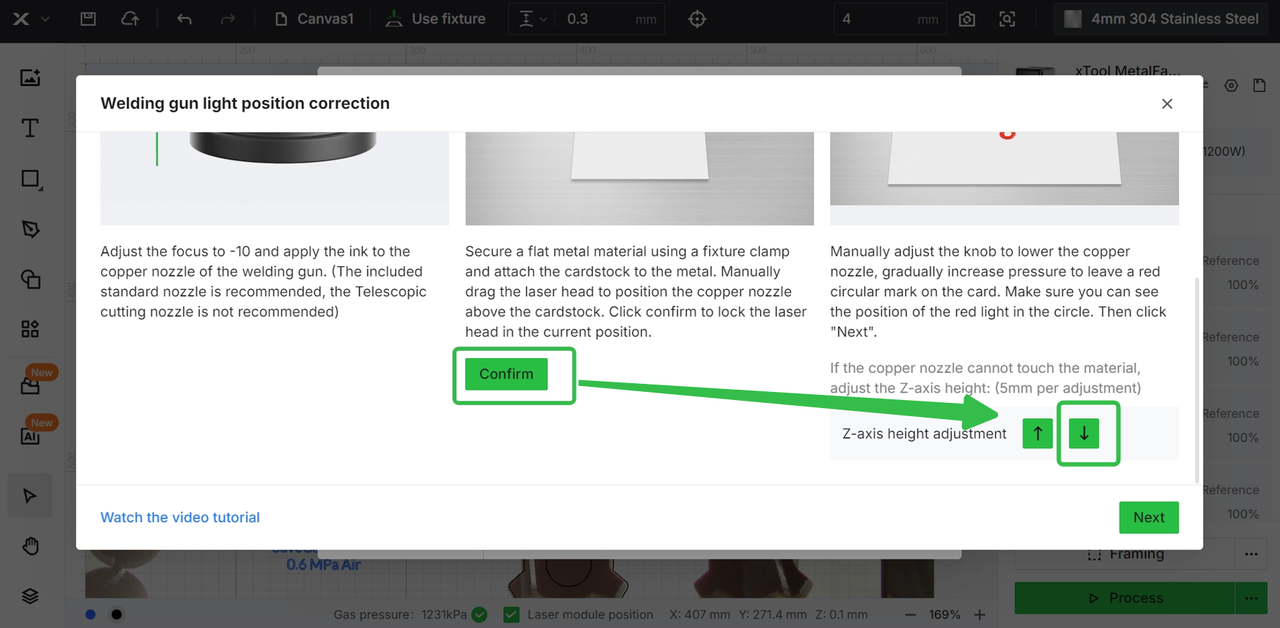
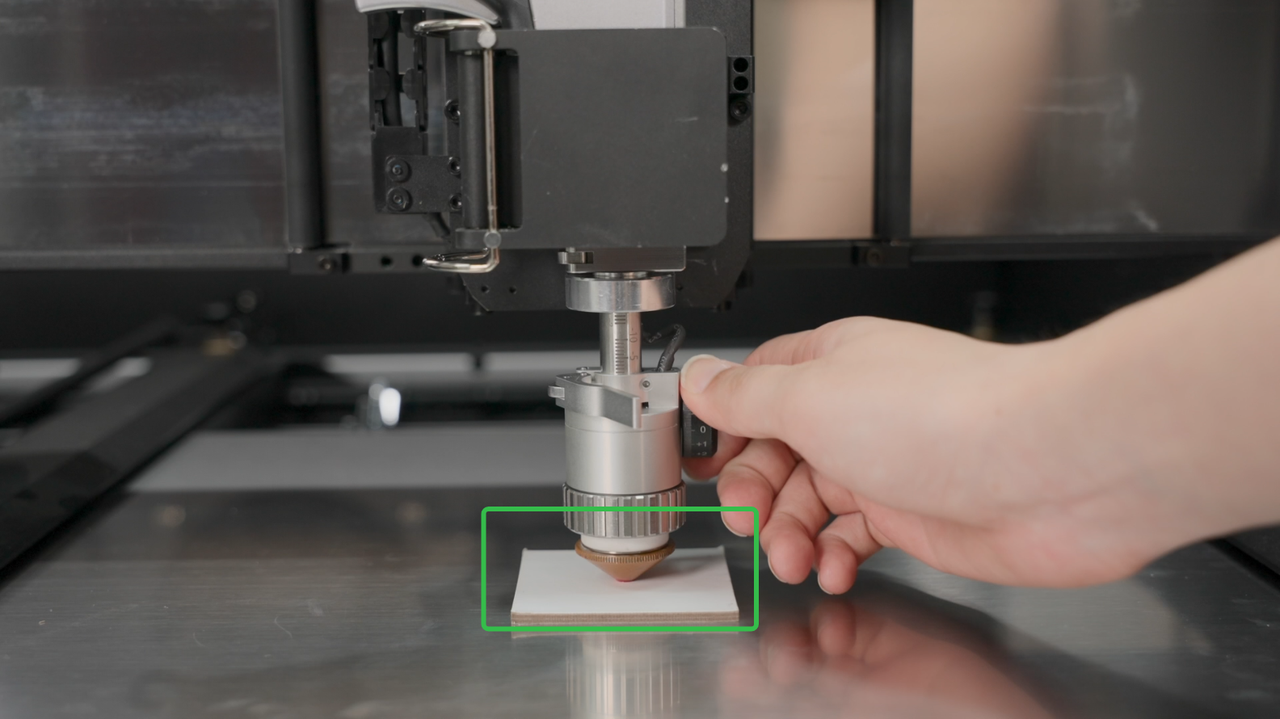
Clamp a flat metal material using a fixture and attach the paper jam to the metal. Manually move the laser head to position the copper nozzle above the paper jam. click "Confirm", and then click the lower array to adjust the z-axis height.
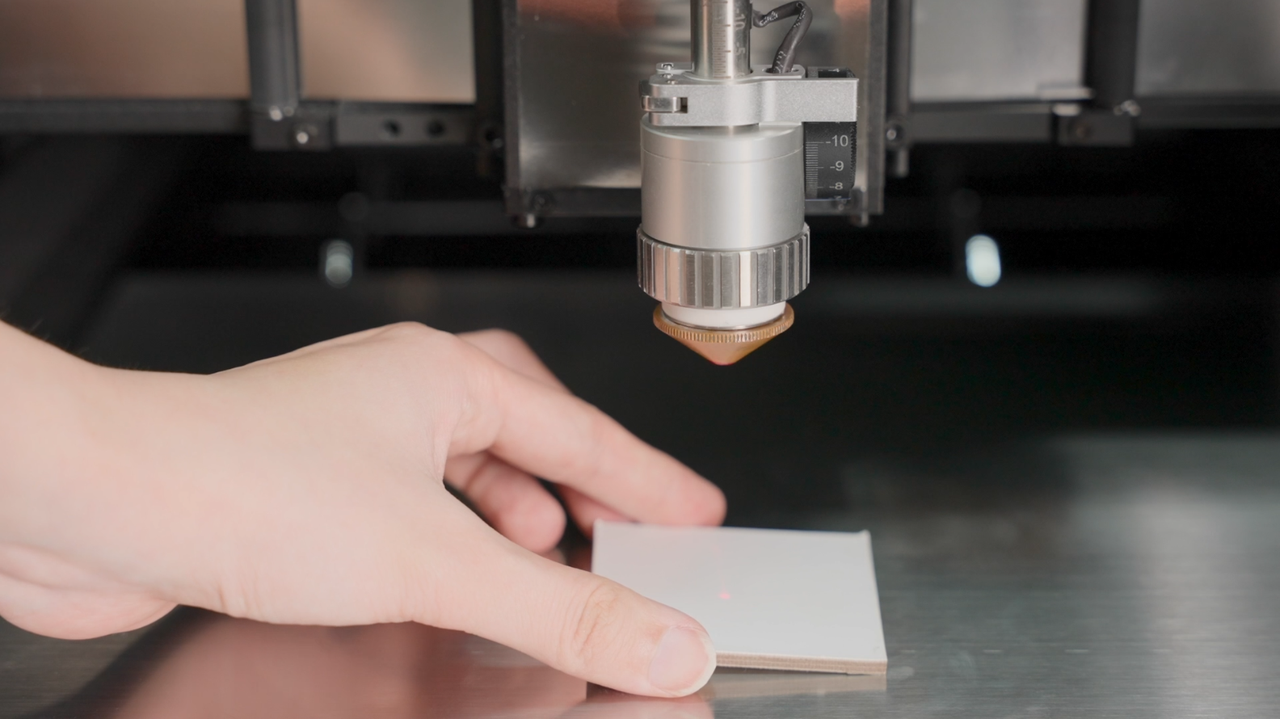
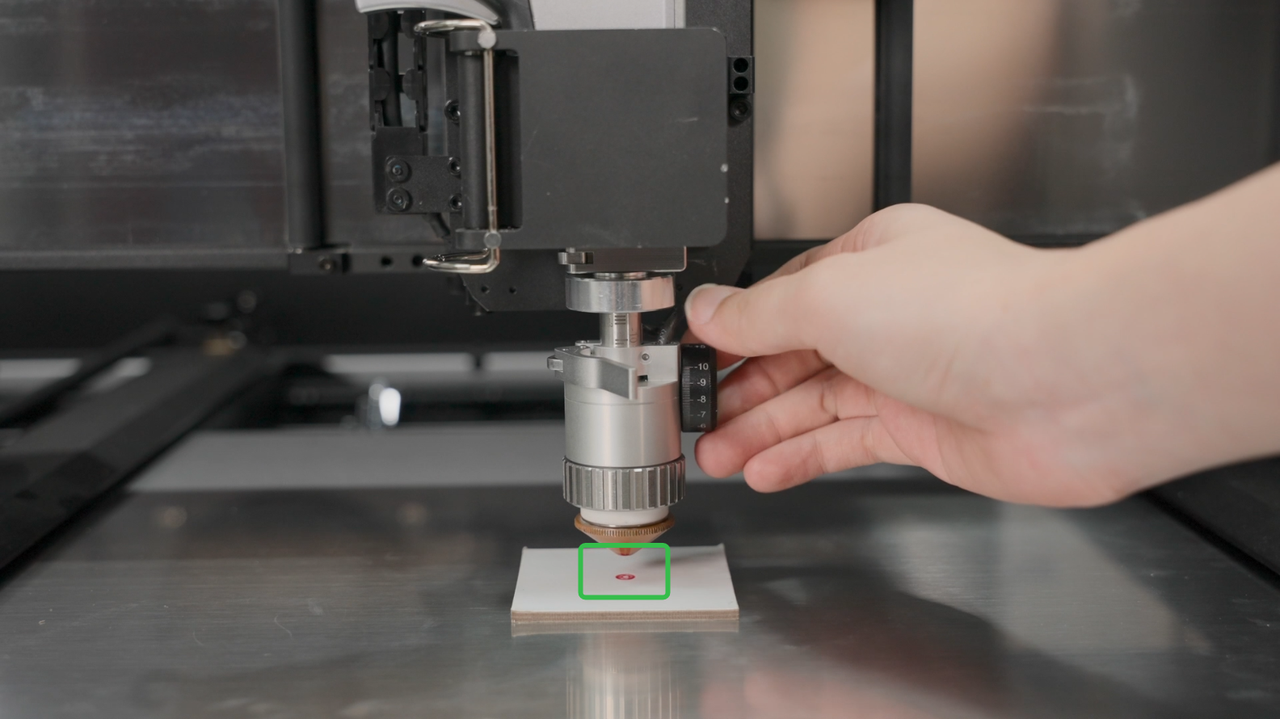
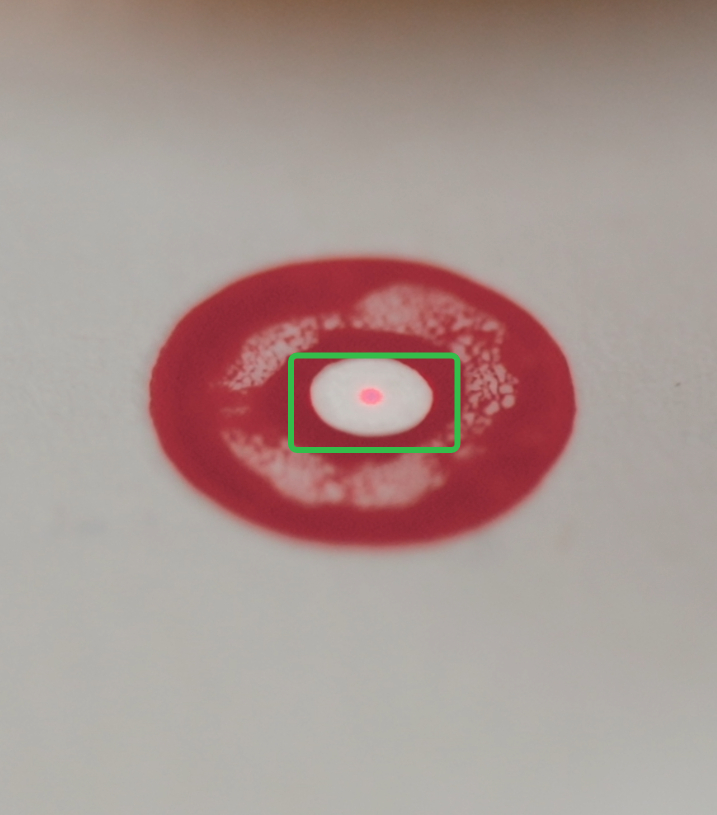
Manually adjust the knob so the cutting nozzle touches the paper and leaves a clear red mark, then raise the Z-axis until the red light is visible on the red circular mark.
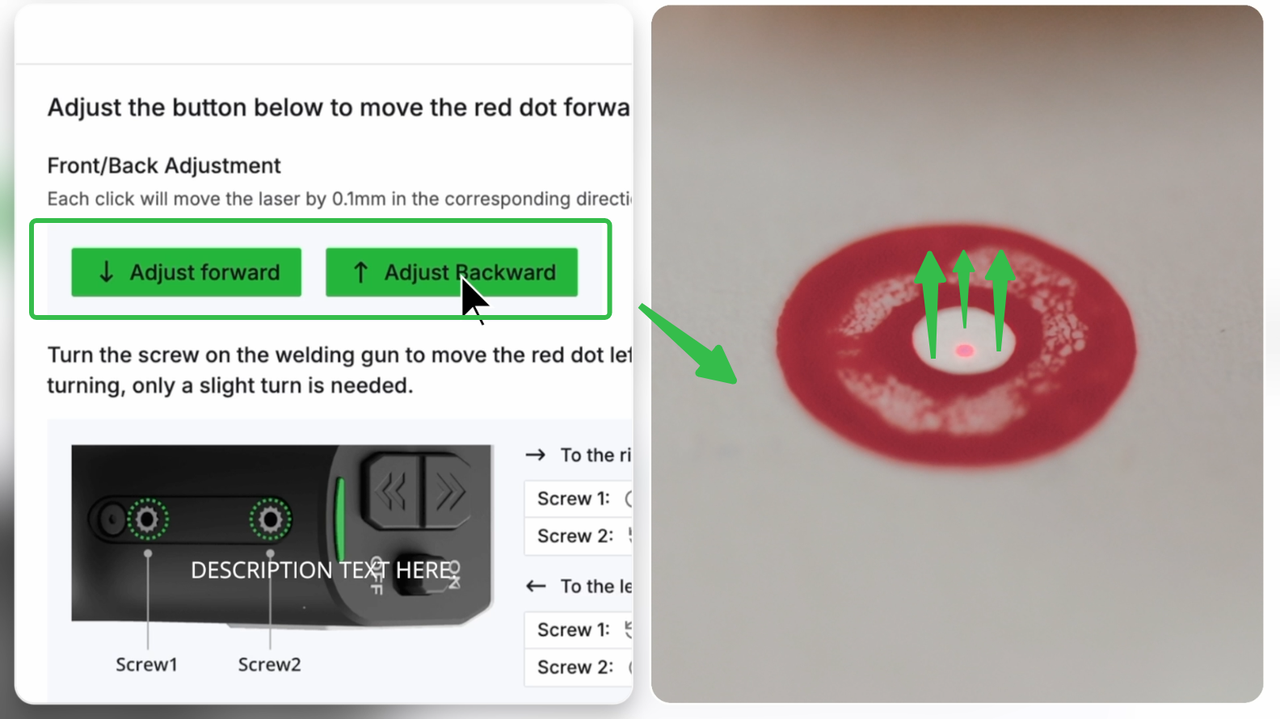
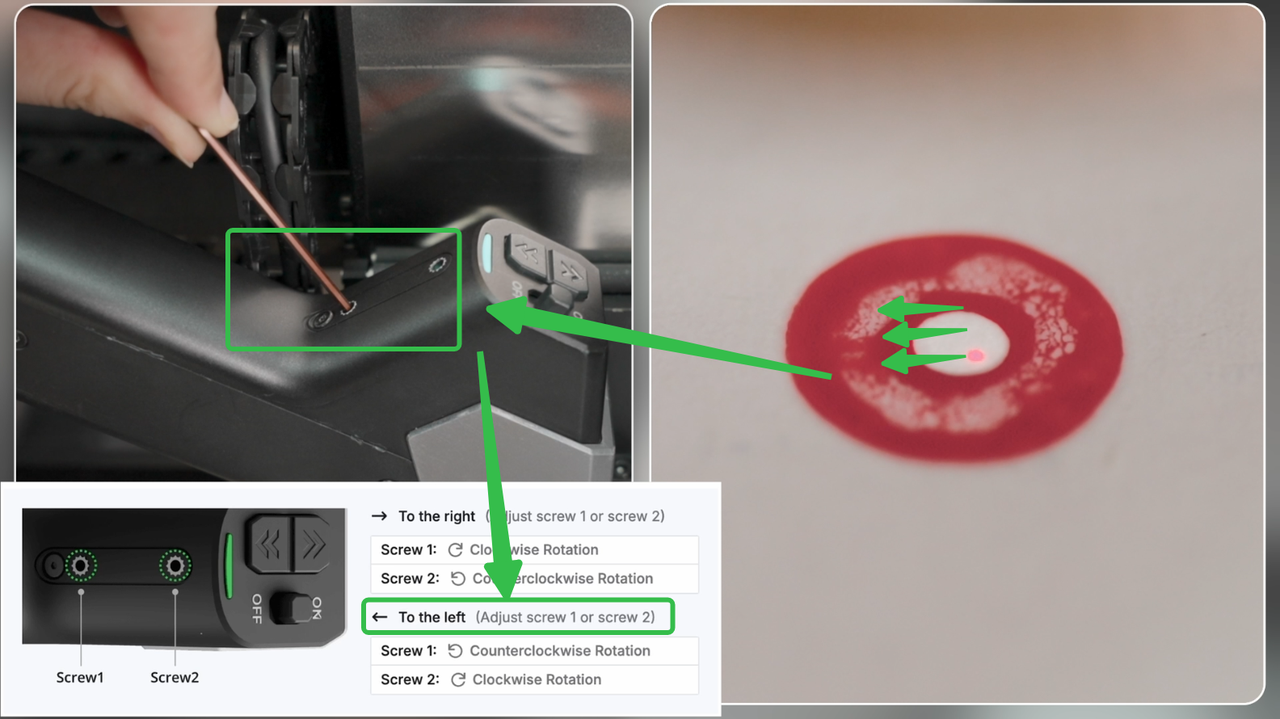
Observe the red light position: adjust the vertical position in the software to center it up and down; if there is horizontal deviation, use a 2mm hex key to adjust the screws on the welding gun until the red light moves to the center of the mark.
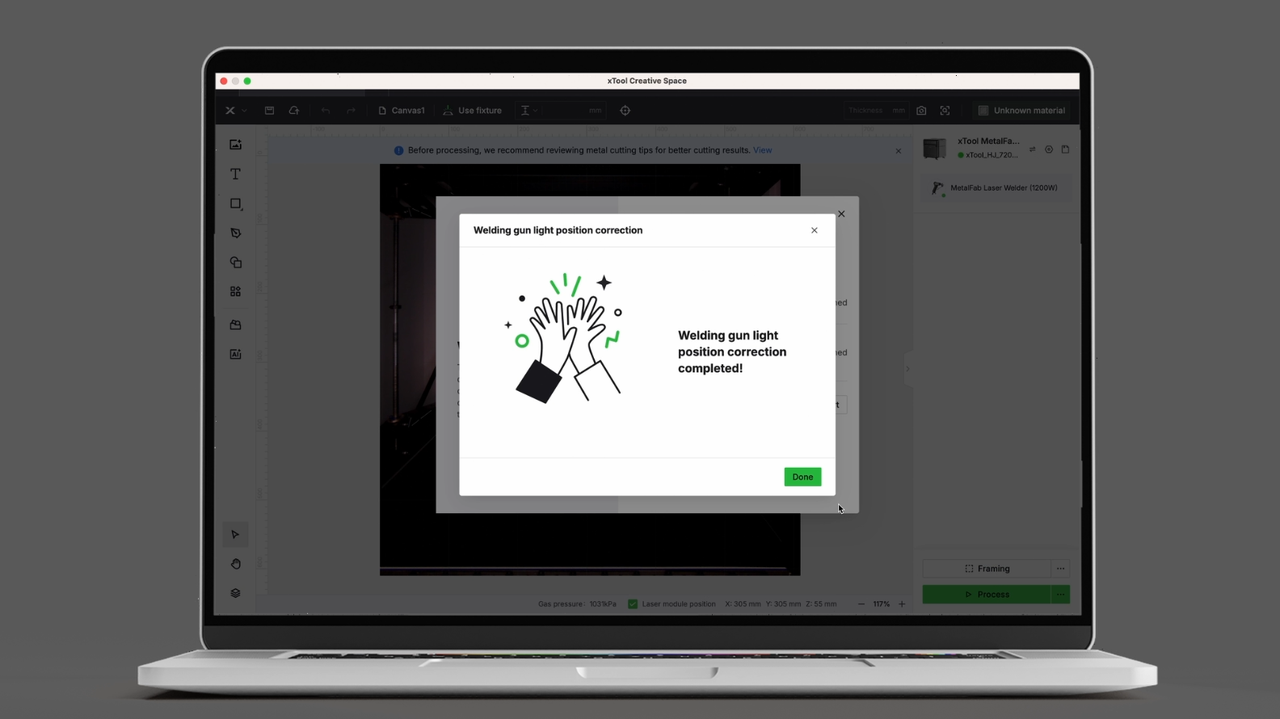
Click "Complete" and recheck using a transparent sticker; if there are issues, repeat the above steps.
Notes for Dual-Layer Nozzle Welding Gun Light Position Calibration
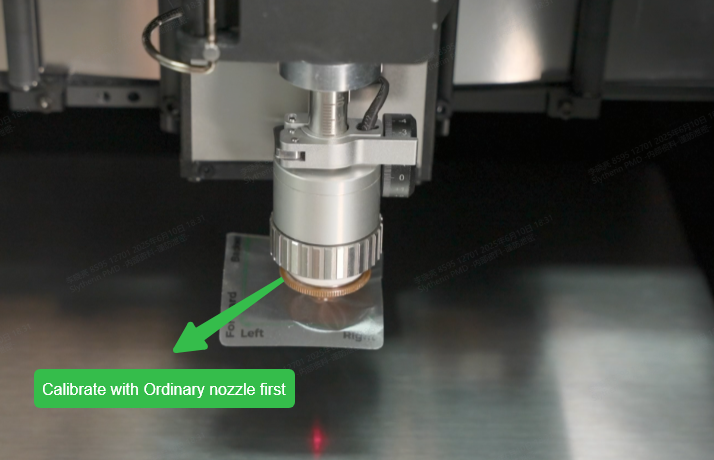
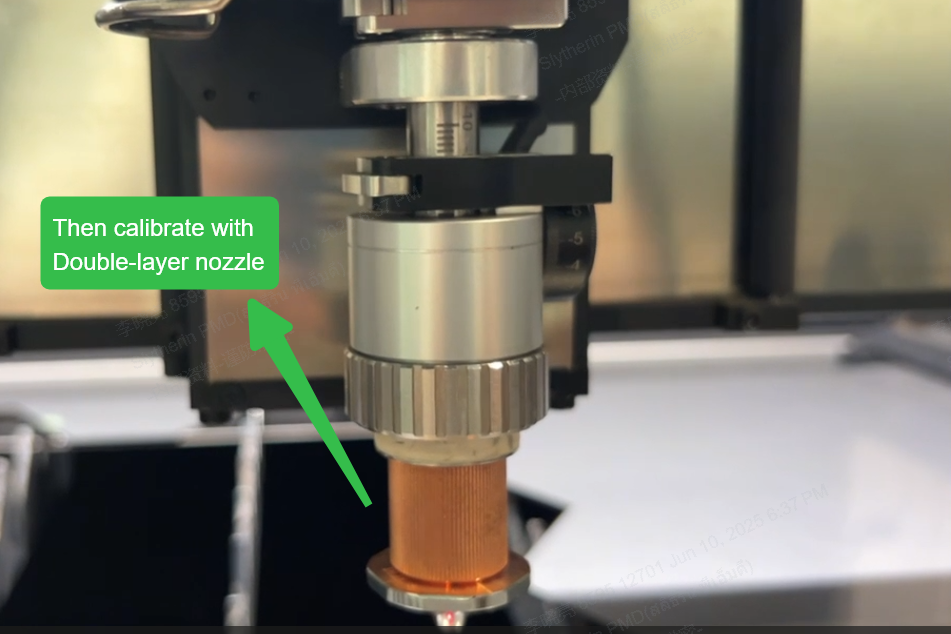
1. Calibrate with Ordinary Nozzle First
When calibrating the welding gun light position center with a dual-layer nozzle + extension tube, the excessive length of the extension tube and the small diameter of the copper nozzle may cause the laser spot to be unobservable. Therefore, it is recommended to first calibrate with a ordinary nozzle until centered before switching to the dual-layer nozzle for secondary calibration.
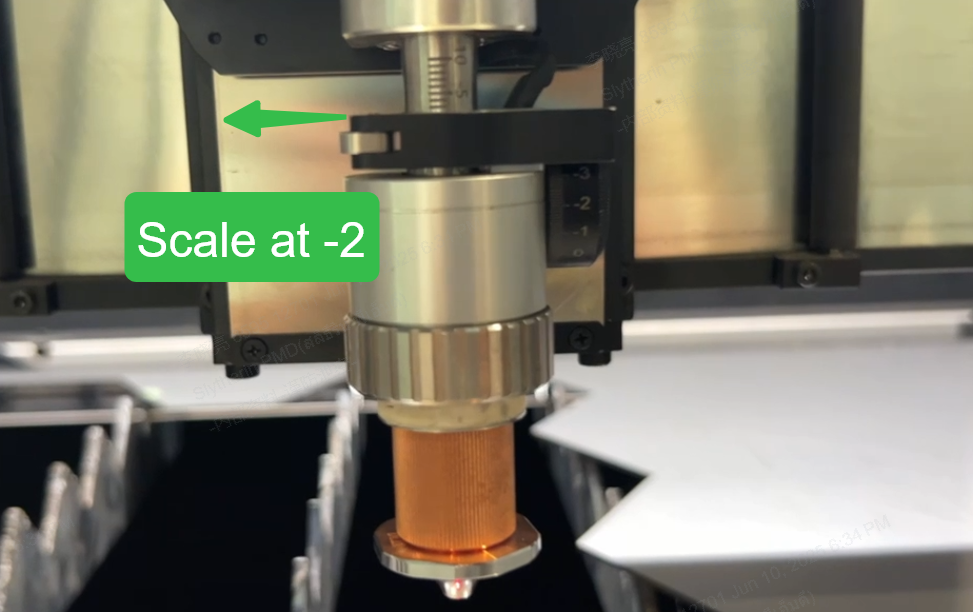
2. Calibrate at Lower Focus Position First
Different focus positions can also affect the centering of the welding gun light, especially for dual-layer nozzles: when cutting 5mm carbon steel, a +18 focus length is needed. It is advisable to adjust the focus position to -5 or lower (-10) during calibration to ensure the laser spot is not too large and easy to observe; after centering in a low focus position, then adjusting it to the specified value (-2 for 5mm carbon steel with 20mm extension tube).
When I Need Calibrate the Welding Gun Light Position?
1. Bad cutting effects
If cutting results are abnormal, with one side showing slag, it indicates the welding gun light is not centered and needs calibration.
2. Overheating
If the capacitor head or cutting nozzle overheats during cutting, it may mean the welding gun light is misaligned, requiring calibration.
3. Switch from welding to CNC cutting
When switching from welding mode to CNC cutting mode, because the capacitor head has been disassembled and the red light adjusted during welding, it is advisable to calibrate the red light center before cutting.
4. Switch from larger-diameter nozzle to smaller nozzle
When switching from a 4.0mm SaveGas nozzle (Telescopic nozzle) or 2.0mm ordinary cutting nozzle to a 1.0/1.2mm dual-layer nozzle for carbon steel cutting, the smaller aperture may cause the red light to shift even if was previously calibrated with the ordinary nozzle. It is recommended to recalibrate. Conversely, when switching from a smaller diameter cutting nozzle to a larger diameter cutting nozzle, recalibration is generally not required.
Preview
Was this page helpful?
8 out of 8 found this helpful
Help Ticket
Use this help ticket to submit your issue. We will respond within 1 business day