Things to check before starting:
Unpacked and installed the xTool machine:
Unpacked and installed the SafetyPro™ AP2 smoke purifier:
Unpacked and installed the kiosk(s):
Confirm the status of the store network: Network Configuration Checklist
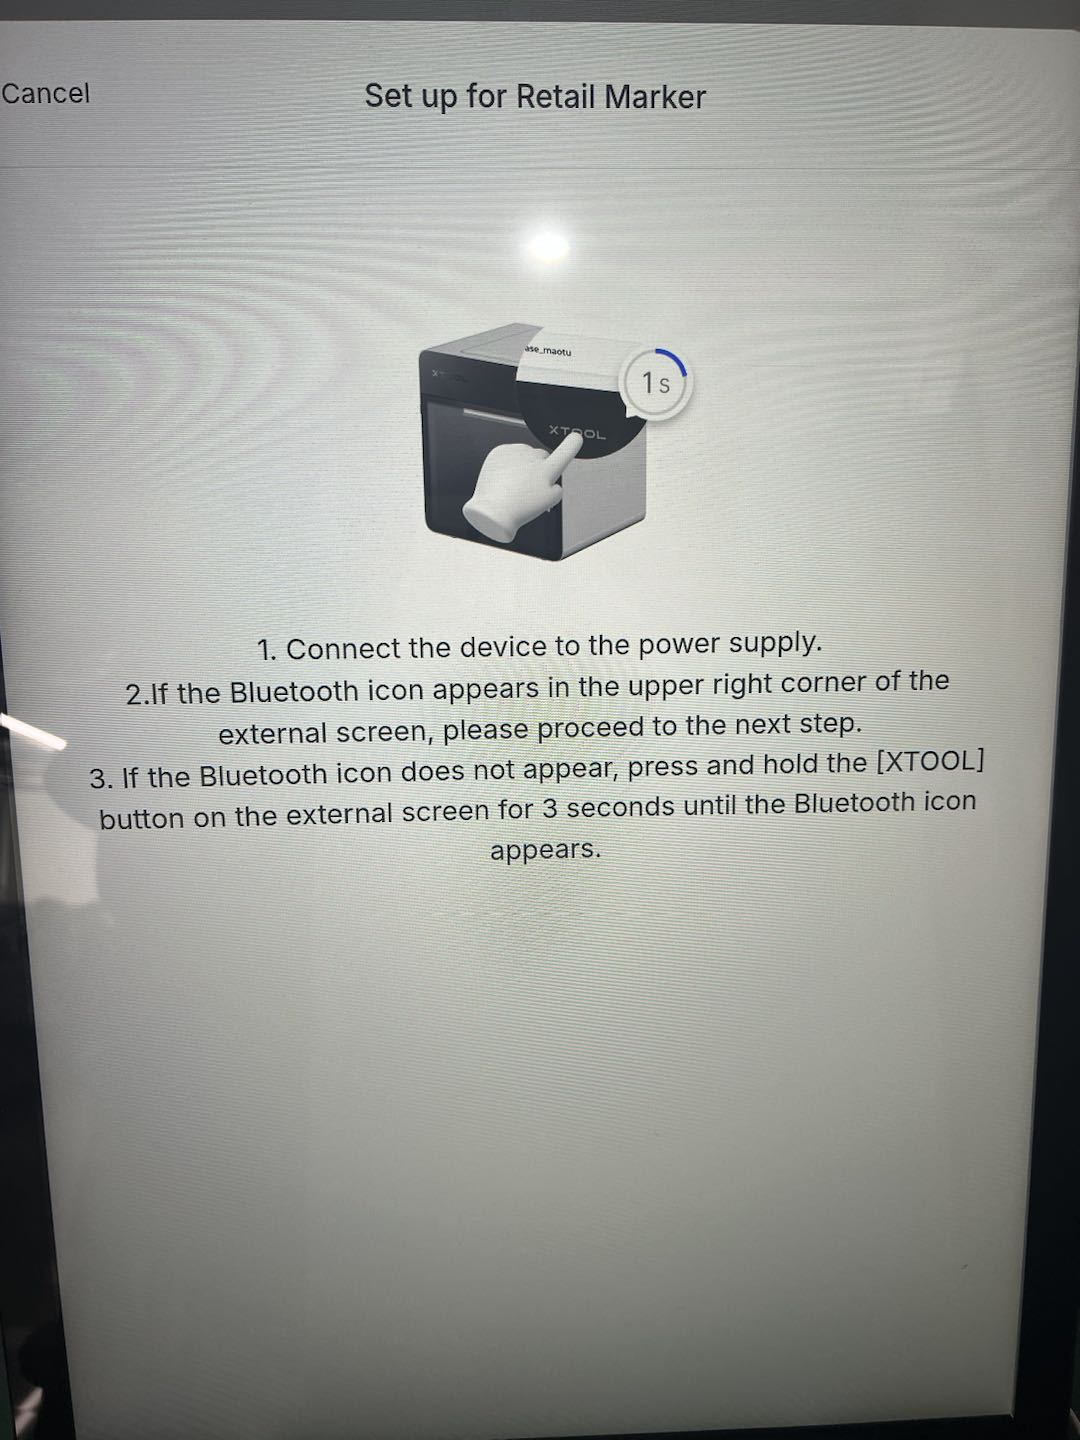
Safety Guide: Retail Marker Safety Instructions
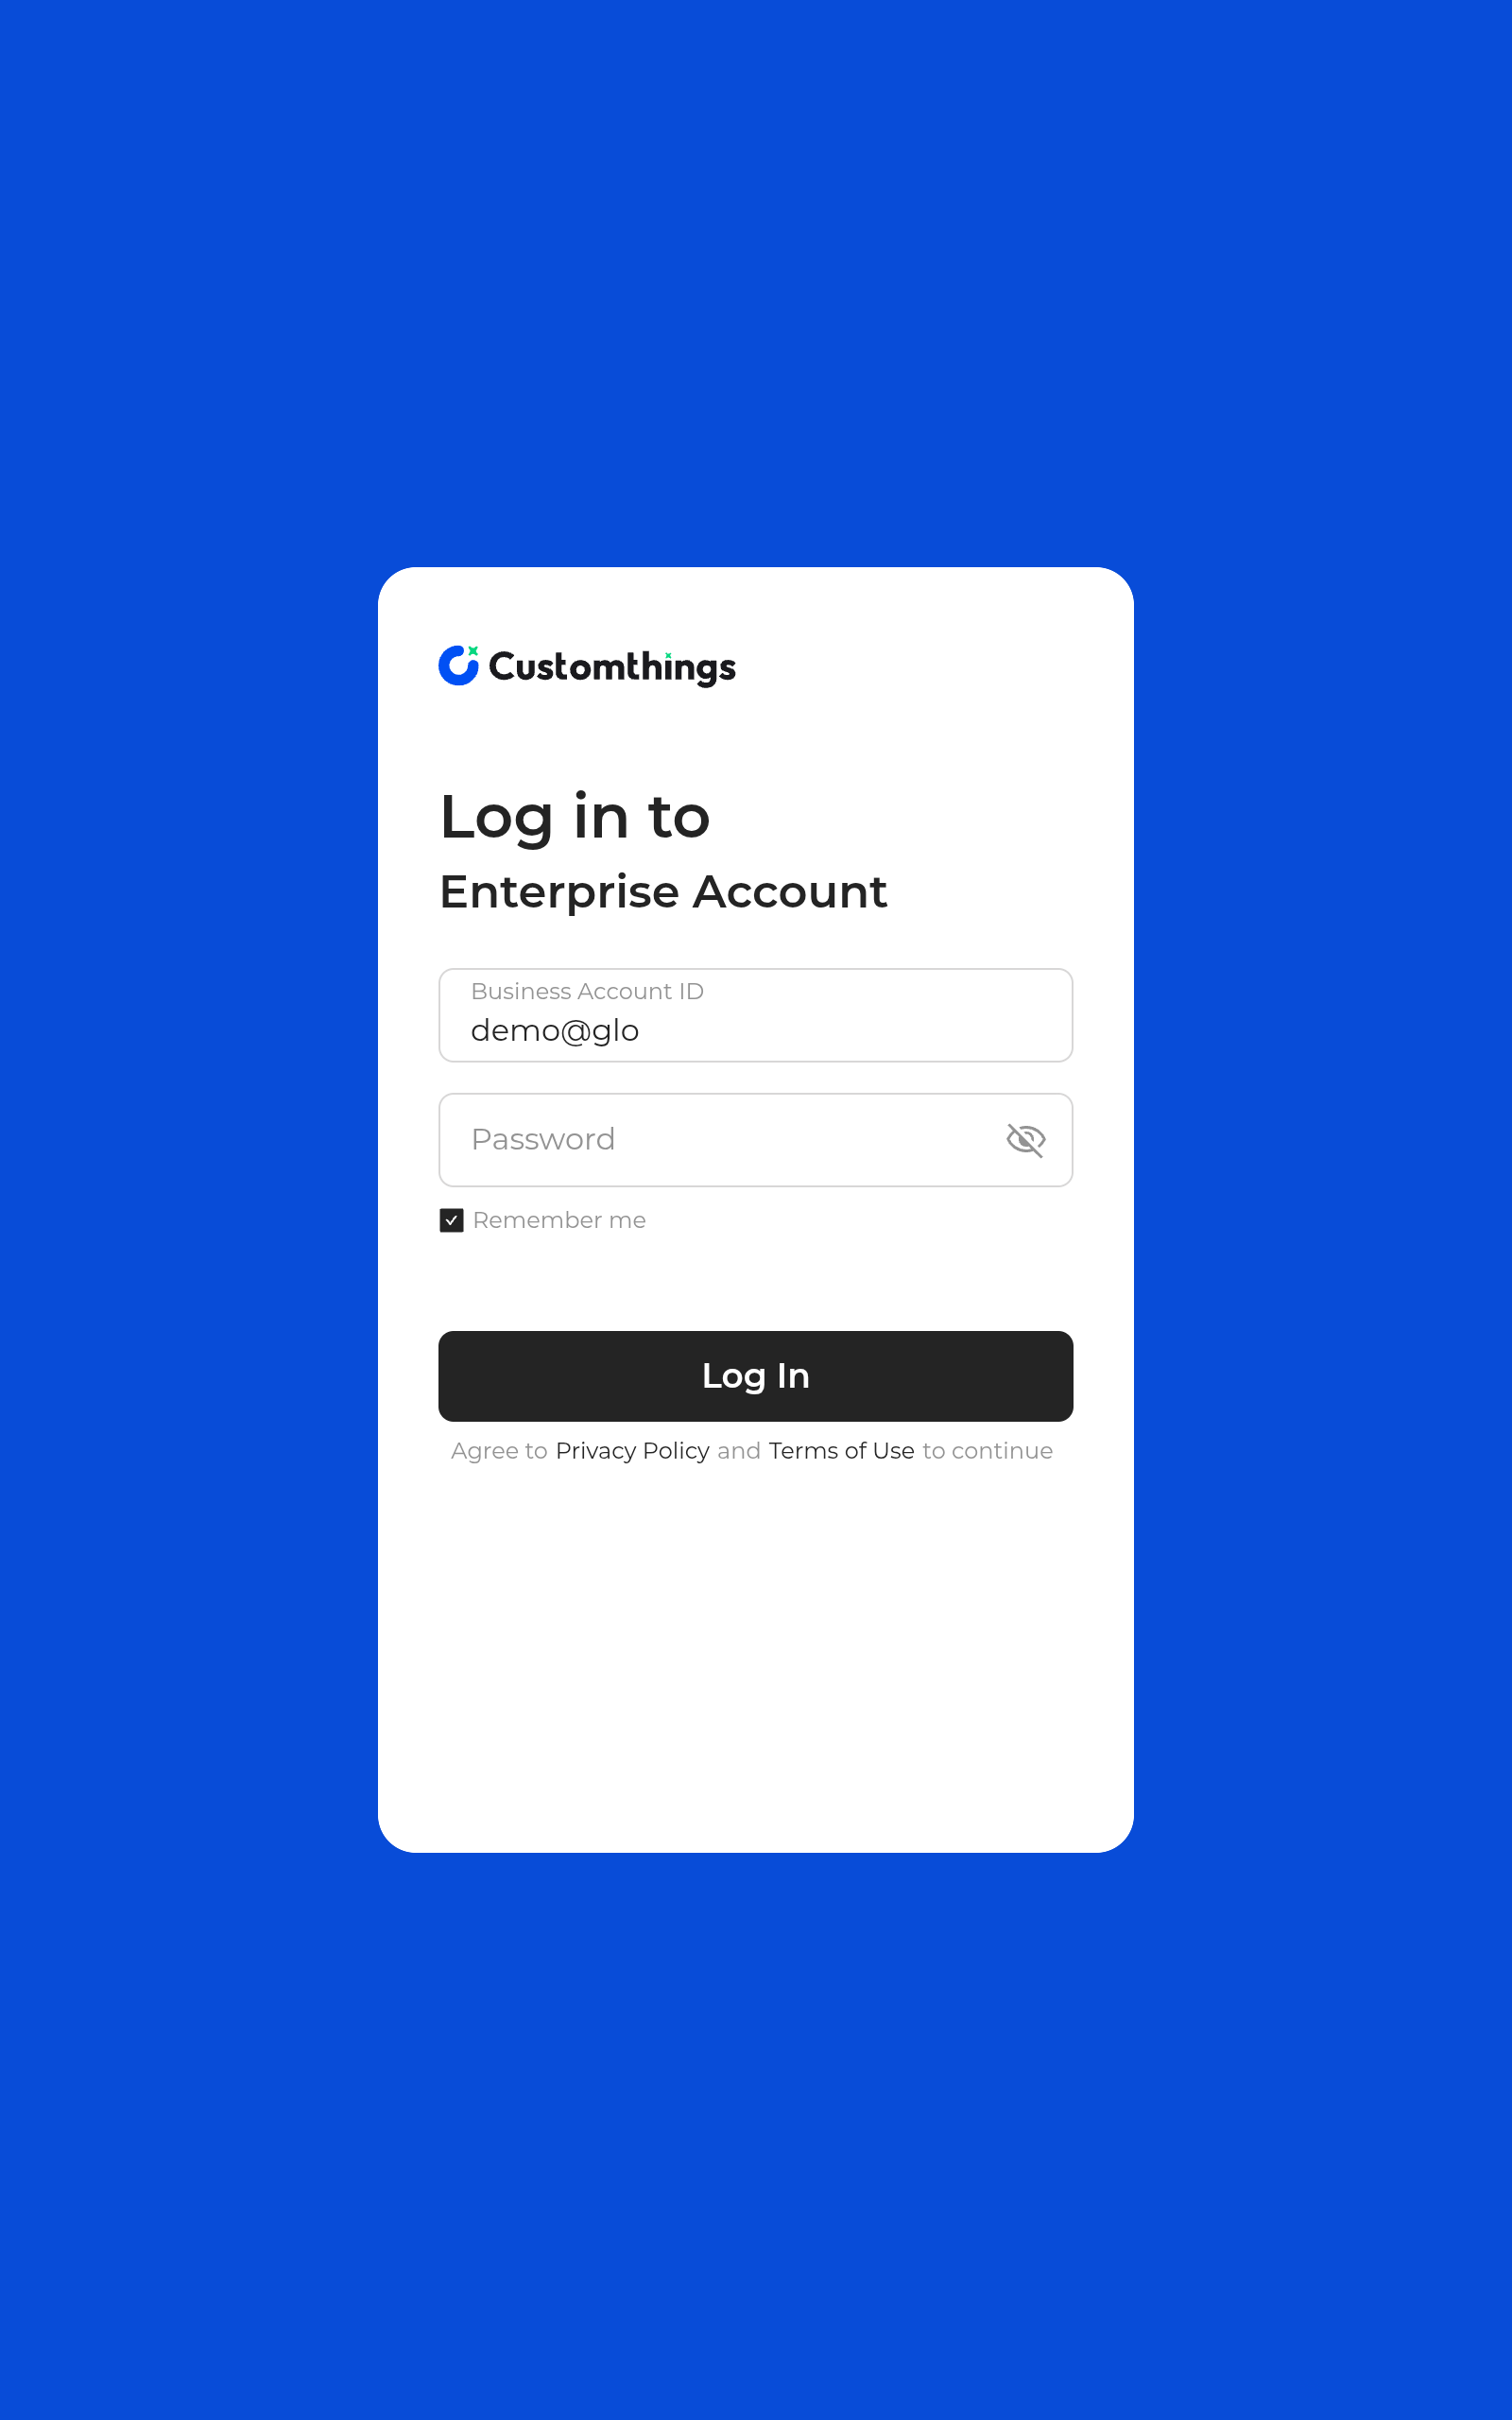
1. Log in with account
Login Account: Each store has a unique account.
Send credentials privately through a trusted channel such as email.
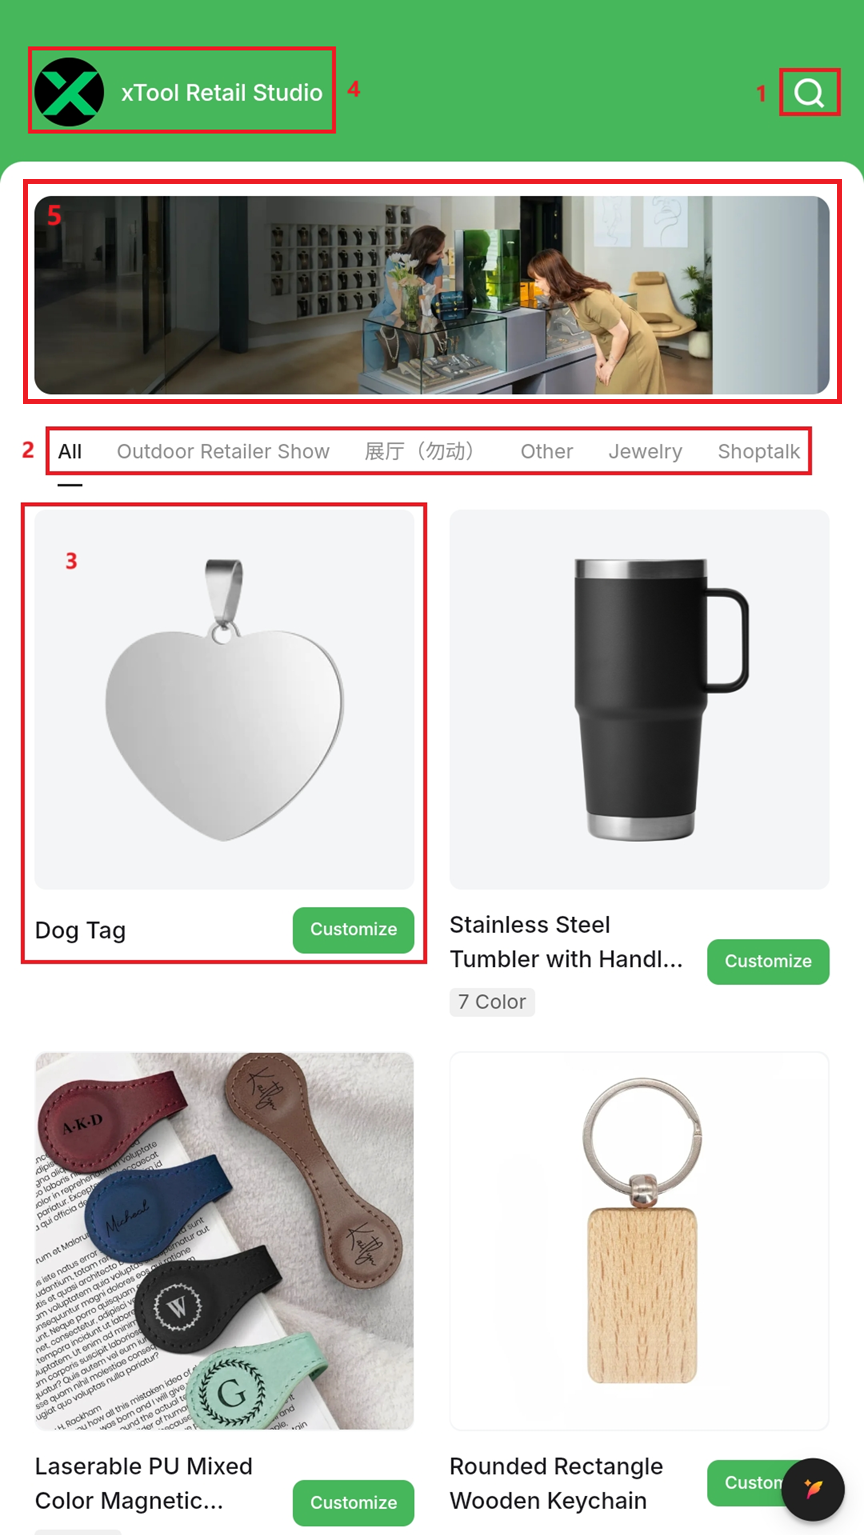
2. Customer mode
Customer mode is the in-store interface where shoppers design their own patterns.
It contains all the features required for customer customisation.
Features in customer mode:
- Quick search
- Product category list
- Product display
- Switch merchant mode
- Home page banner, used for brand display. It can be configured through the backend.
Note: When customers use a self-service kiosk, we recommend enabling Customer Mode. |
2.1 Quick search
Tap Quick Search, enter a product name, and instantly locate matching items.
.png)
.png)
.png)
2.2 Product category list
The home page organises items by category.
Tap a category to filter products; swipe left or right for additional categories.
.png)
.png)
2.3 Product displaying
Swipe up or down to view every product that can be customised in-store.
Tap Customize to open the design screen.
.png)
.png)
.png)
2.4 Switch to Merchant mode
Tap the brand icon (top-left) to display the mode-switch button.
Caution: Merchant Mode is for store operators only. Do not let customers use this mode. |
Do not allow customers to access it, as this prevents data leaks or accidental machine damage.
.png)
.png)
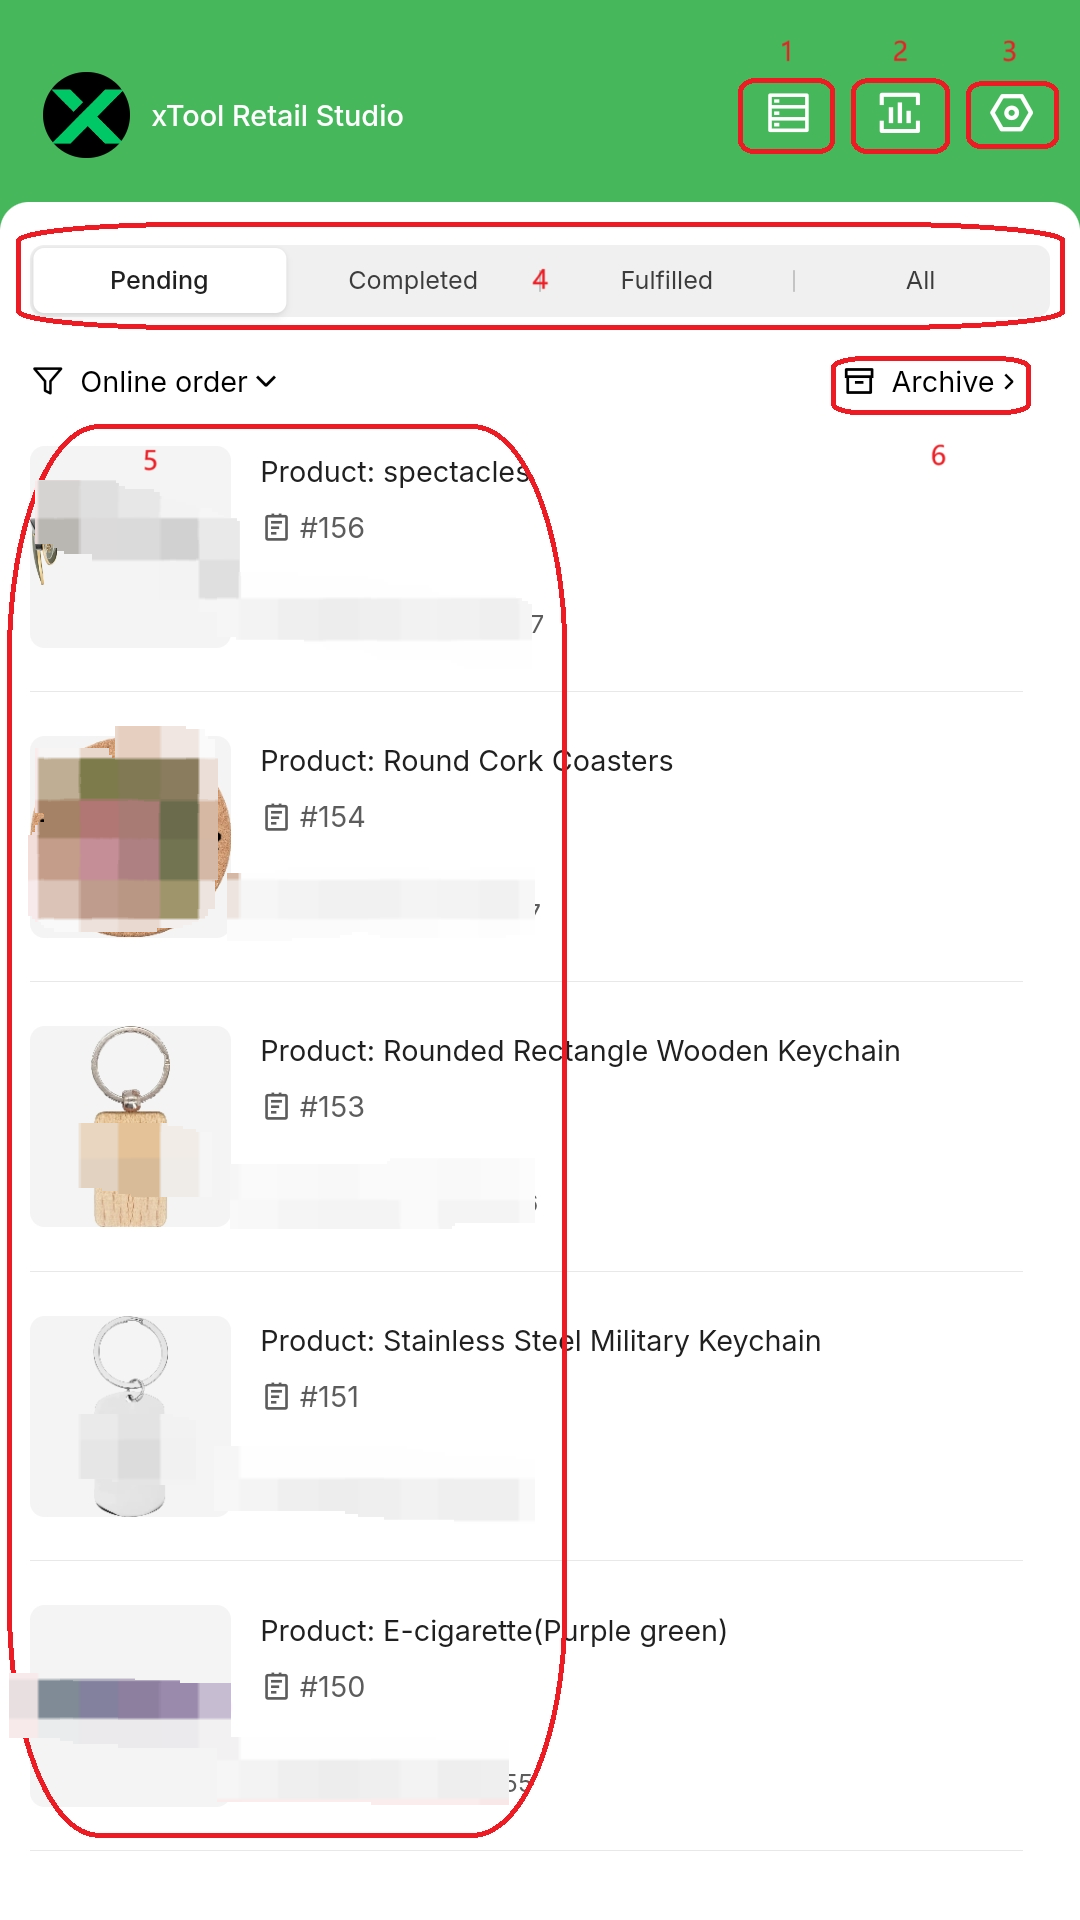
3. Merchant mode
Merchant Mode is the admin interface for equipment management and order control.
Features in merchant mode:
- Equipment List: Shows all xTool devices linked to this store account.
- Processing Data Analysis: Displays order metrics.
- Self-Service Kiosk Configuration: Settings for the kiosk.
- Order Classification: Filter historical orders by status:
- Pending: undelivered
- Completed – engraved
- Fulfilled – delivered
- All – every order
- Order History: Full order archive.
- Order Archive: Excludes test orders from analytics.
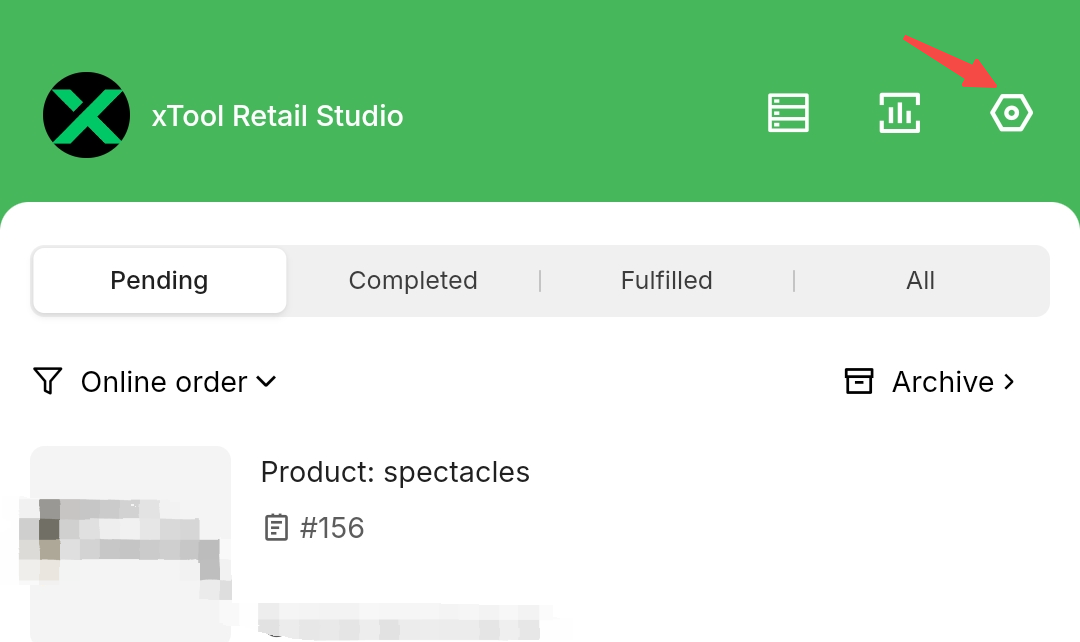
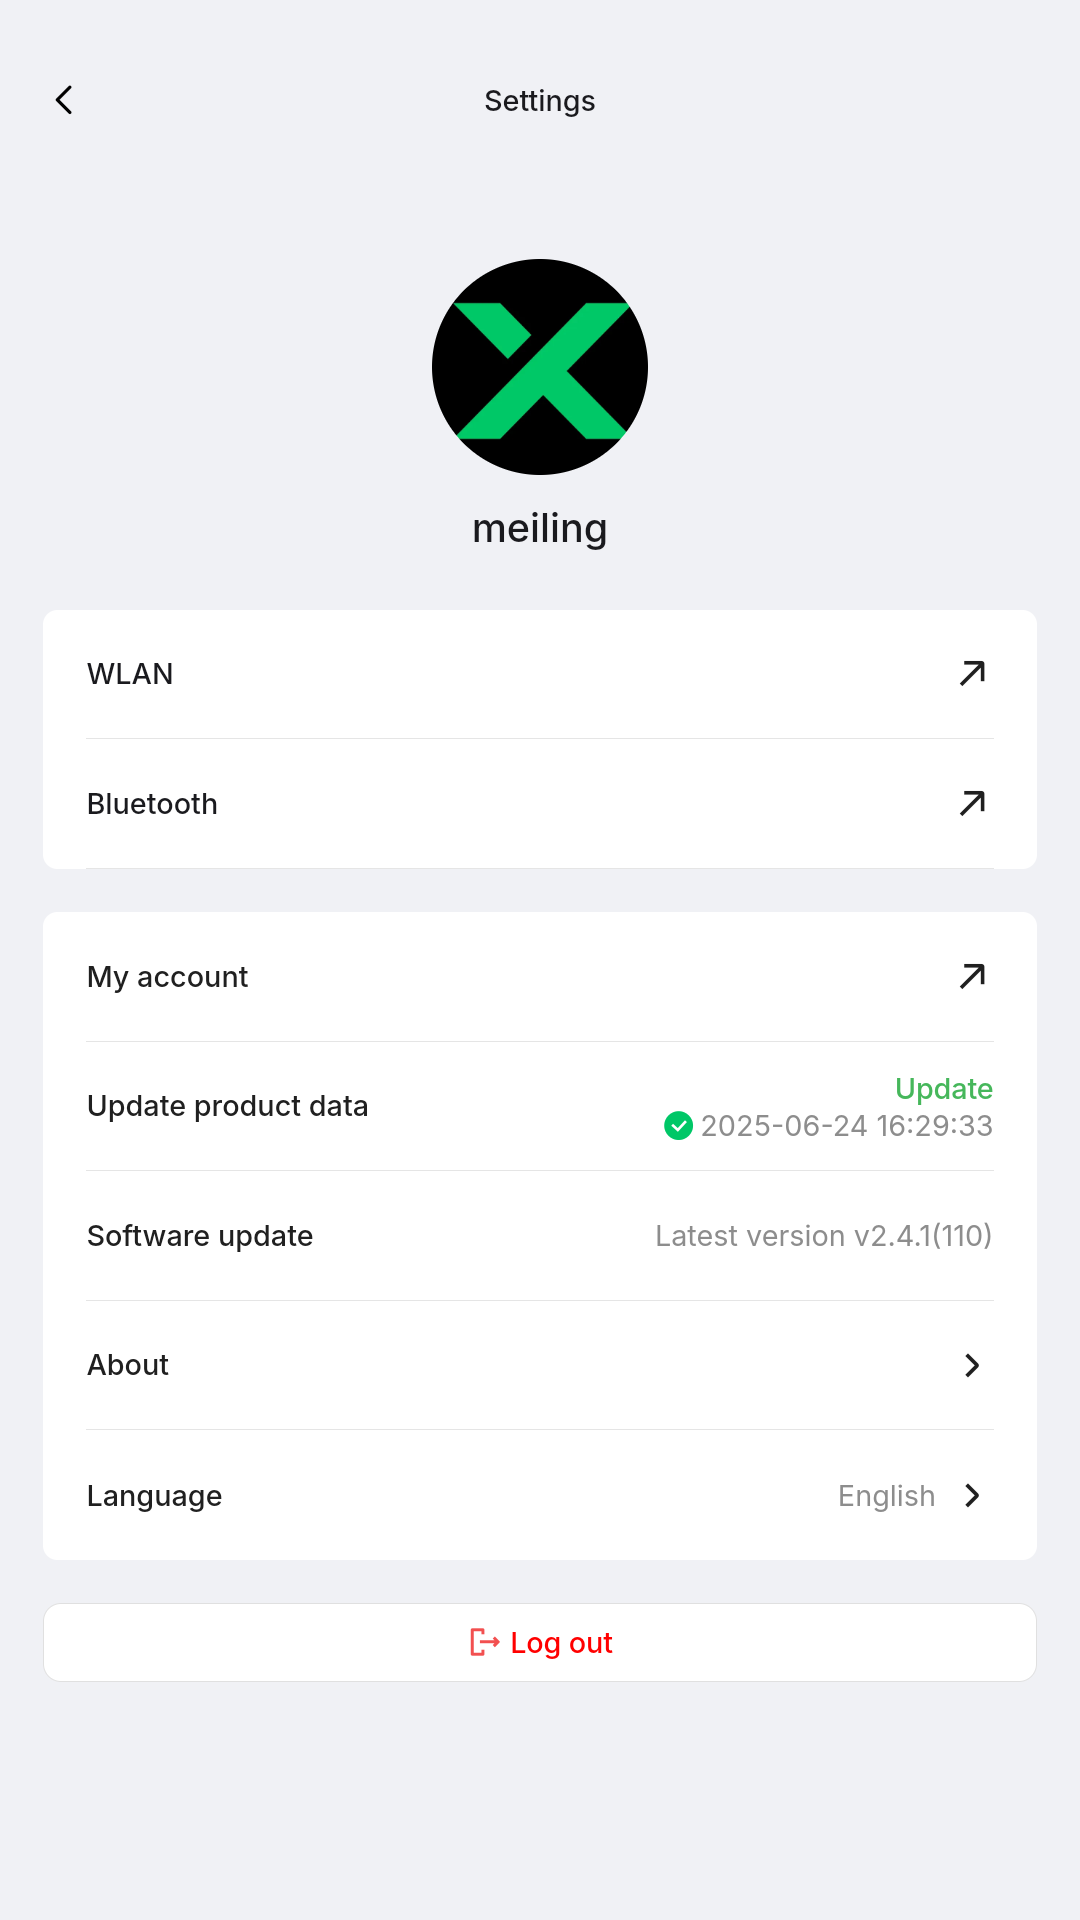
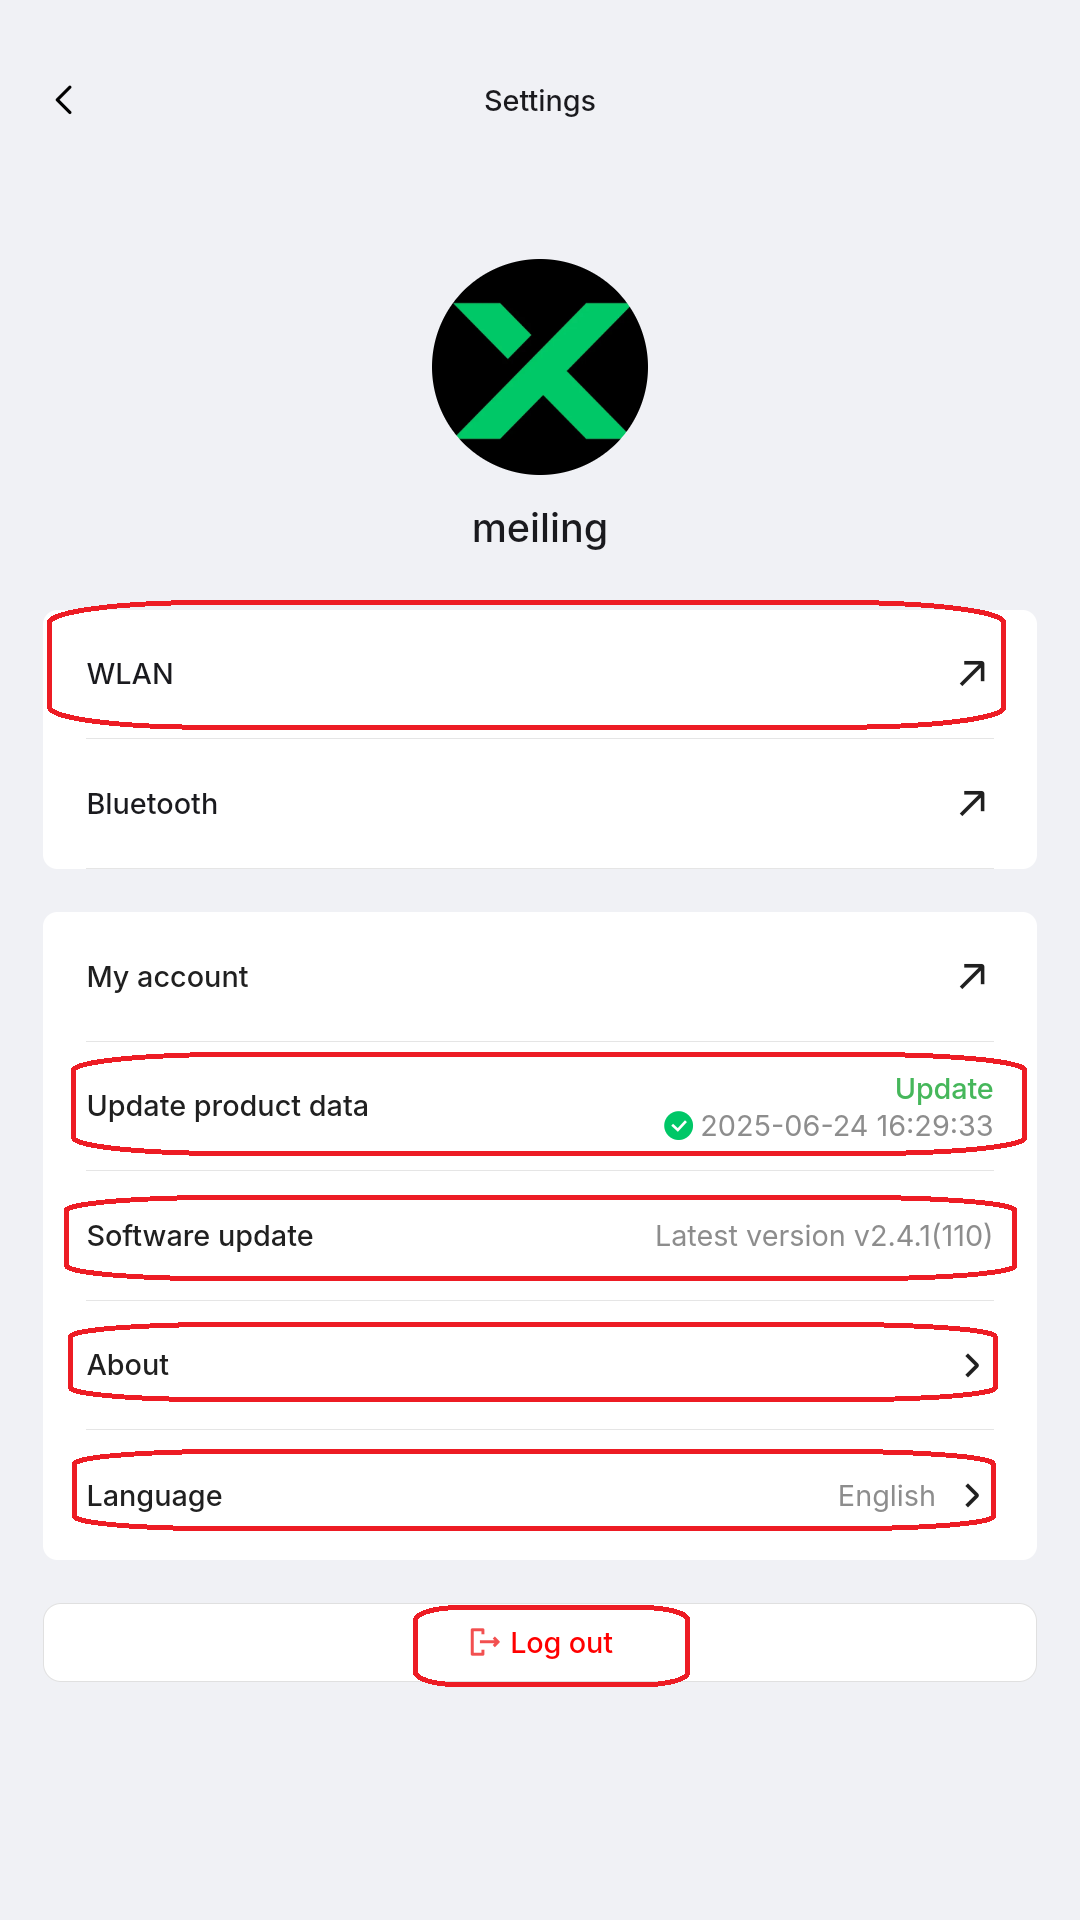
3.1 Settings
Open Settings on the xTool Self-Service Kiosk to configure:
- WLAN: Connect the kiosk to Wi-Fi
- Update product data: Download new product info
- Software update: Install the latest kiosk firmware
- About: View software version and privacy details
- Language: Change the app language
- Logout: Sign out of the current store account
3.1.1 Set up Wi-Fi
Select a 2.4 GHz network and enter the password.
.png)
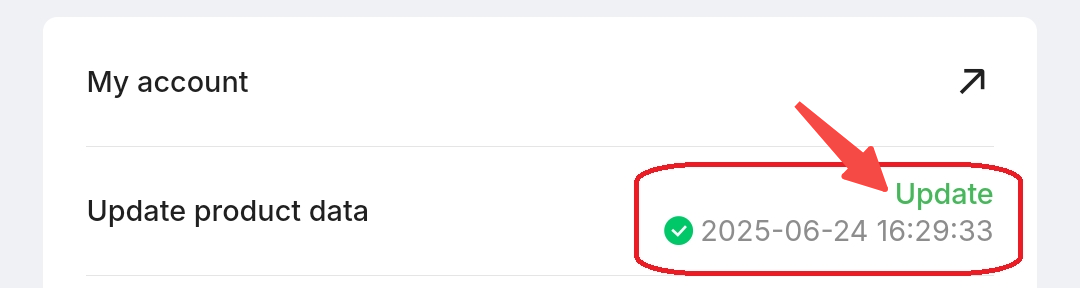
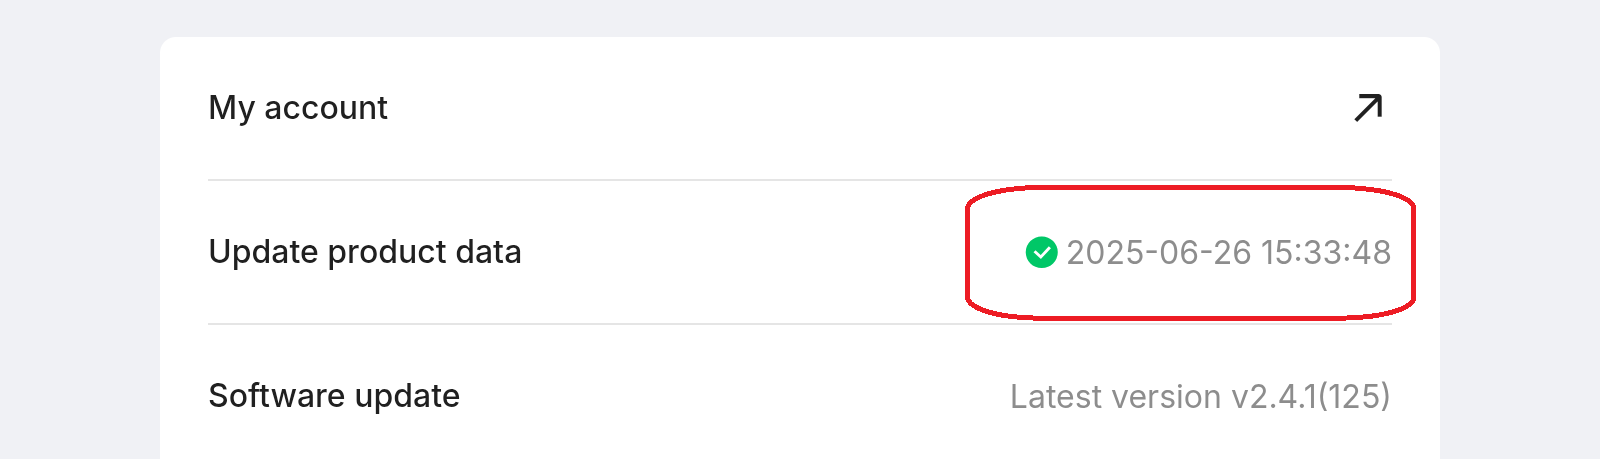
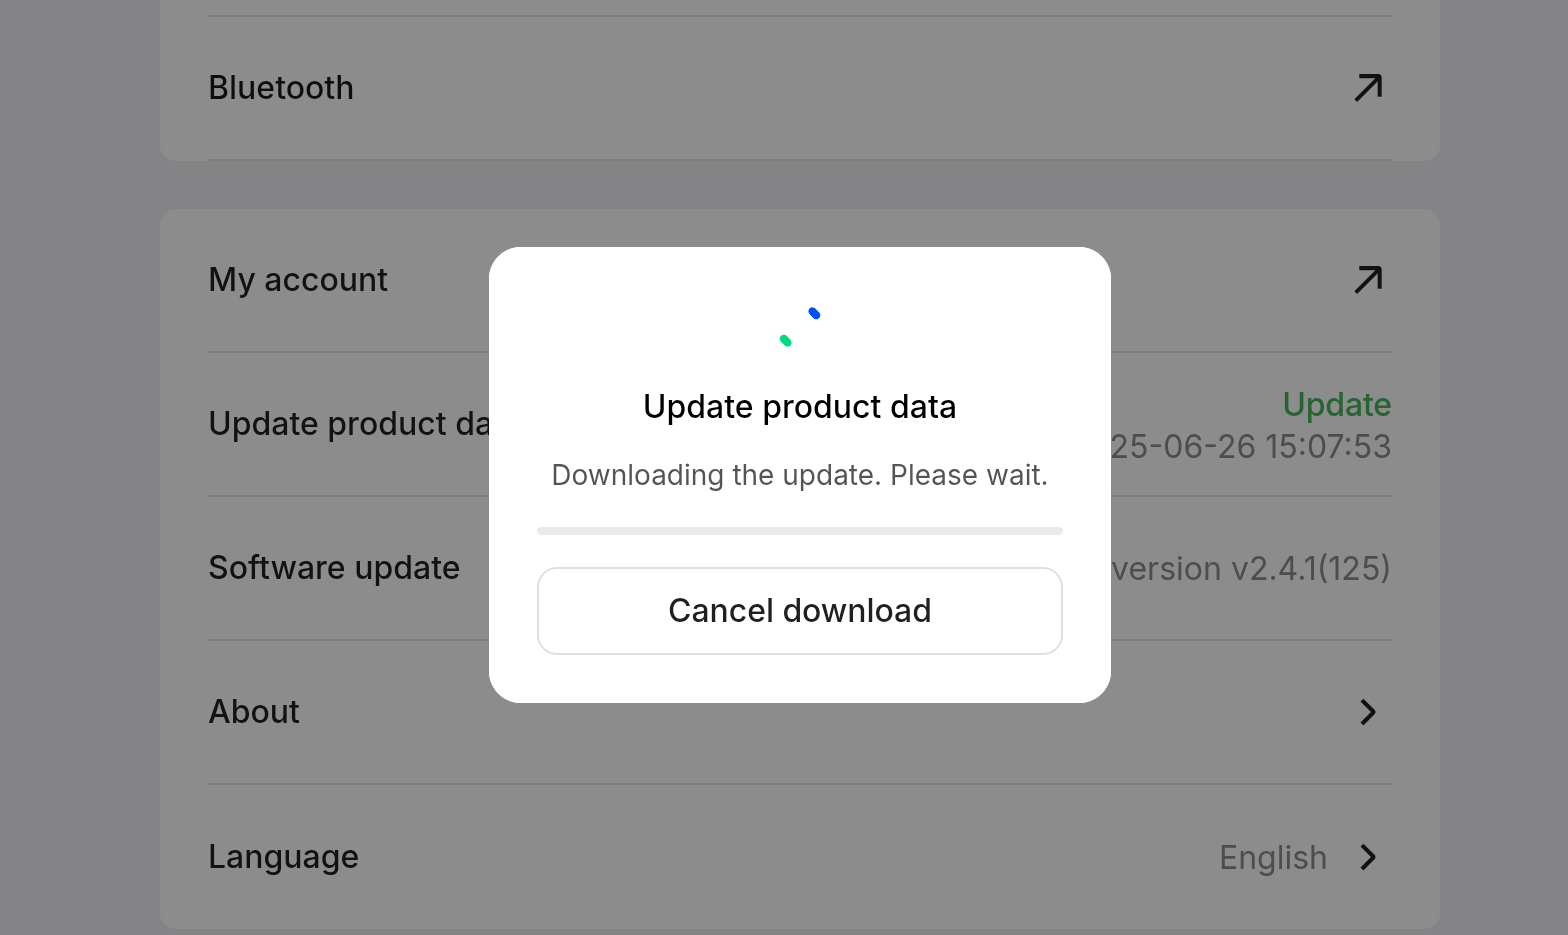
3.1.2 Update product data
The Settings page shows the last update time.
If the Update appears, tap it; the process takes a few minutes.
3.2 Device list
The device list page lists every xTool device bound to this store account, along with status and settings.
If no devices are bound—or you need another device—follow the Machine Registration Guide below.
.png)
.png)
Tap a device to open its Device Detail Page, which includes settings, calibration, and accessory info (e.g., Smoke Purifier).
|
|
.png)
.png)
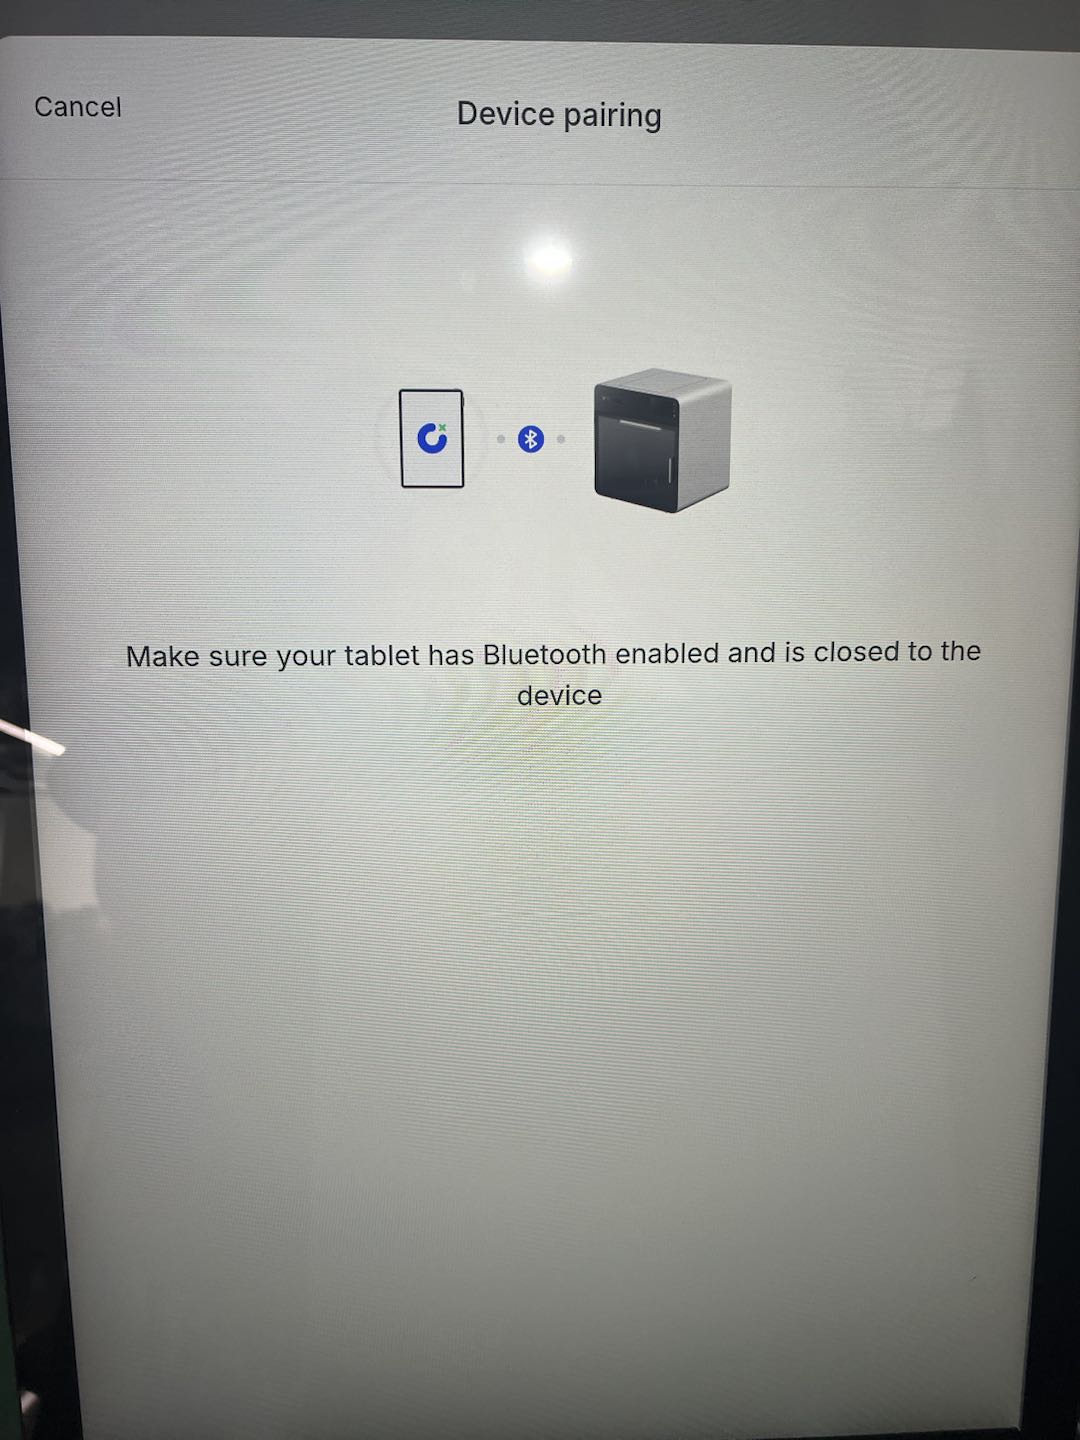
3.2.1 Bind / Register a machine
Step 1: Tap the ➕ (top-right) to add a device.
%20-%20copy.png)
Step 2: Ensure the machine’s screen controller is in Bluetooth mode (not AP mode).
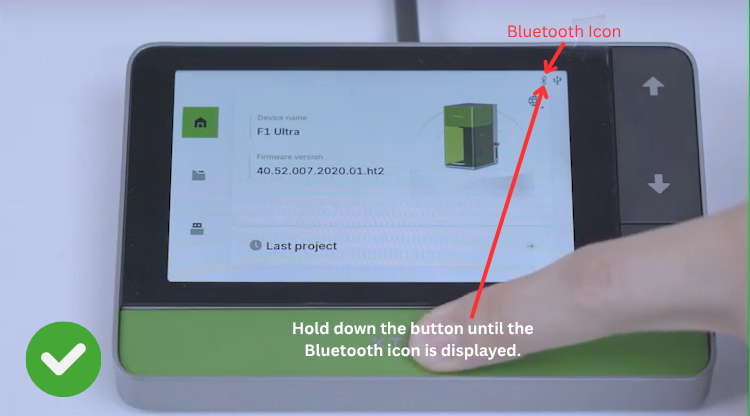
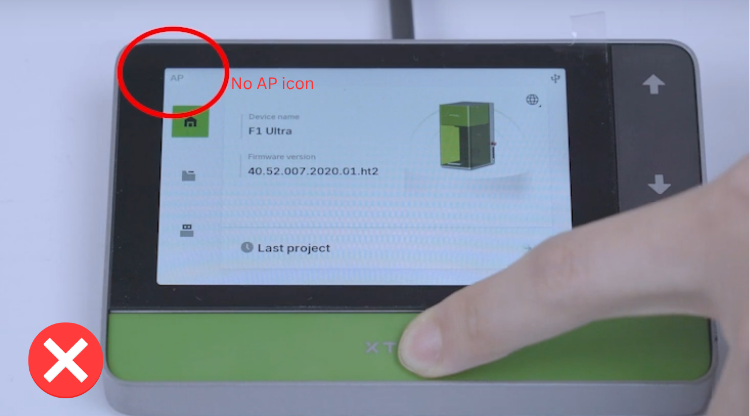
Step 3: The kiosk displays Waiting / Pairing, then scans for Wi-Fi.
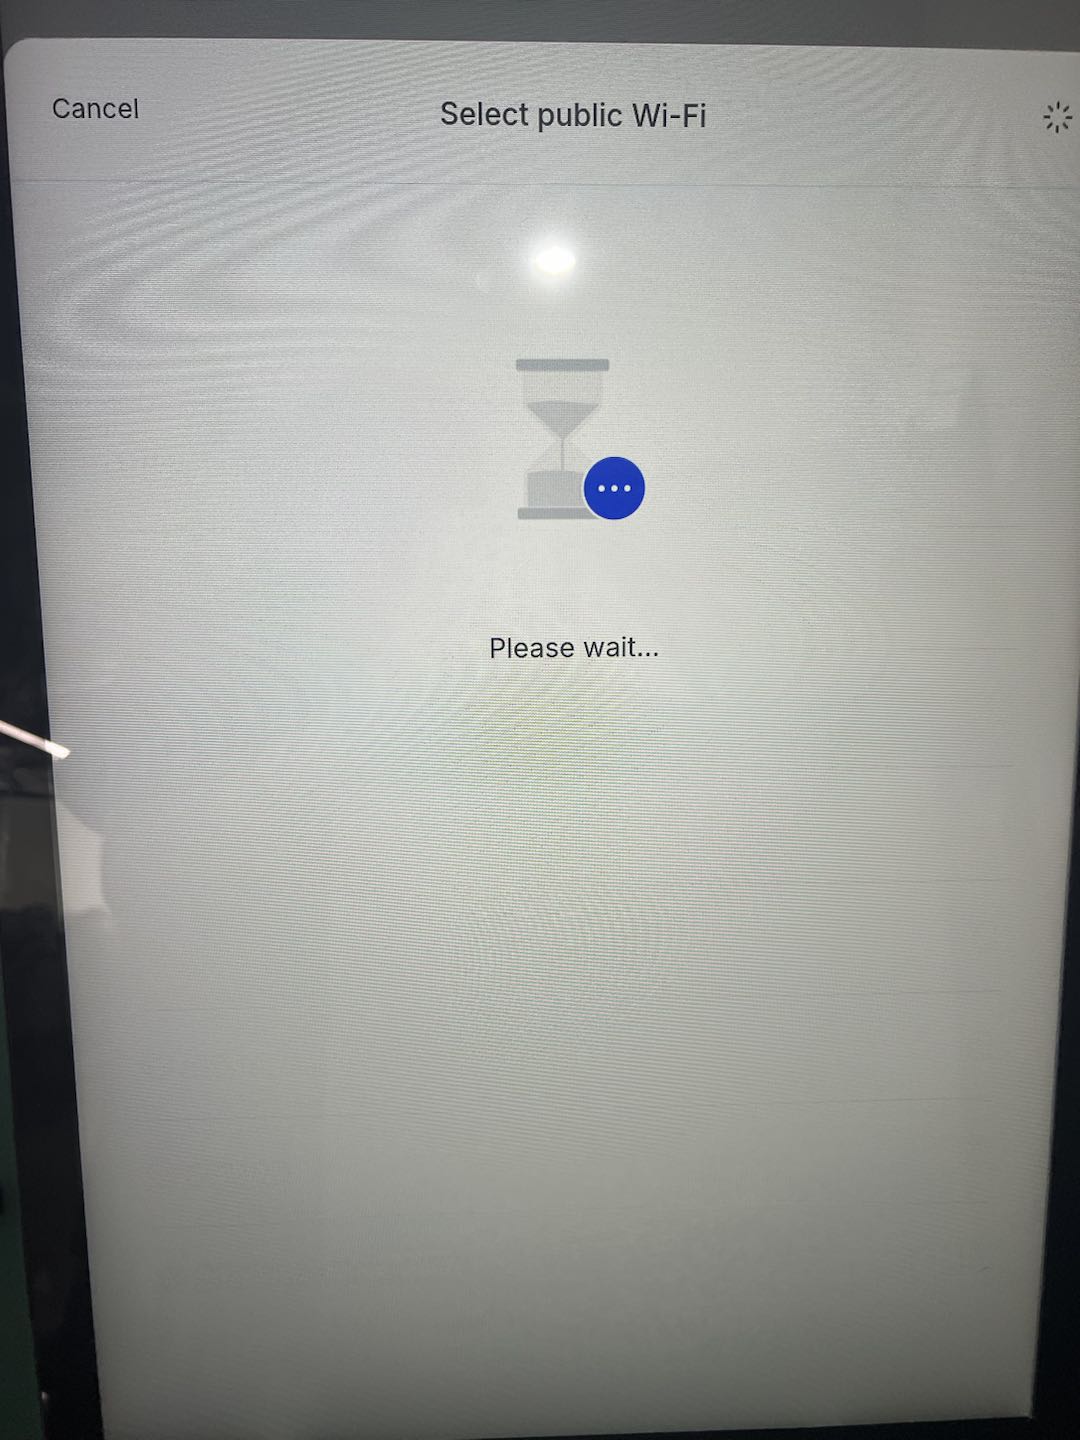
Step 4: Choose a 2.4 GHz Wi-Fi network and enter the password.
.png)
Step 5: Send Wi-Fi details and wait for connection confirmation.
.png)
3.2.2 Basic info
Displays device name, laser model, serial number, firmware version (Check for updates), and Wi-Fi IP address.
- Device Name: Editable.
- Laser Model: Model type.
- Serial Number: Unique ID.
- Firmware Version: Tap Check for updates to upgrade.
- Wi-Fi: Shows the device IP when connected.
.png)
3.2.3 Device settings (Technician use)
Device settings display the machine's settings and are primarily intended for use by technicians for troubleshooting purposes.
- Flame Alarm: Detects flame and sounds an alert.
- Stop when Moved: Halts engraving if the machine shifts.
- Stop when Enclosure Opened: Pauses if the cover is opened.
- Buzzer Alerts: Toggle the alert sound on/off.
- Fill-Light Brightness: Adjust LED brightness.
- Exhaust Time after Processing: Set AP2 run-on time.
- Z-Axis Homing: Force the laser head to the home position.
.png)
3.2.4 Parameter settings
Fiber IR and Blue-Light laser calibration
Note: If red/blue spots overlap but thickness readings are off, first perform Z-Axis Homing, then run this calibration.
3.2.5 Accessory information
Shows smoke purifier (SafetyPro™ AP2) data when connected via Bluetooth.
- Serial Number
- Firmware Version
- Air-flow Level (Auto recommended)
- Default Auto Level
- Filter Life (layers 1 – 5) – replace when below 5%
Note: The Accessory Information page is visible only when the Bluetooth dongle is connected. If there is no information, check the connection of the Bluetooth dongle.
.png)
3.2.6 Unbind device
Unbind device removes the machine from the store account; it must be registered again before use.
Note: Once unbound, the device disappears from the list until it is registered again. |
.png)
3.3 Processing data analysis
Shows order metrics for the current store. Filter by time range or product as needed.
.png)
.png)
3.4 Order history
Orders are grouped by status. Tap any entry to open its detail page..png)
Order detail fields:
- Thumbnail of the customer’s design
- Processing parameters
- Order ID and timestamp
- Action buttons – change status or start engraving
Note: See the “Order Processing” chapter before starting a task. |
.png)
4. Customer design (customer mode only)
Enables shoppers to create their own artwork.
4.1 Select products
Select the desired item and tap Customize.
If the product has multiple variants, customers must pick the correct colour and model before designing.
Note: Incorrect choices may load mismatched laser parameters, causing engraving failure. |
.png)

.png)
4.2 Design
Toolbar functions:
- Home
- Submit
- Full-screen preview
- Previous / Next
.png)
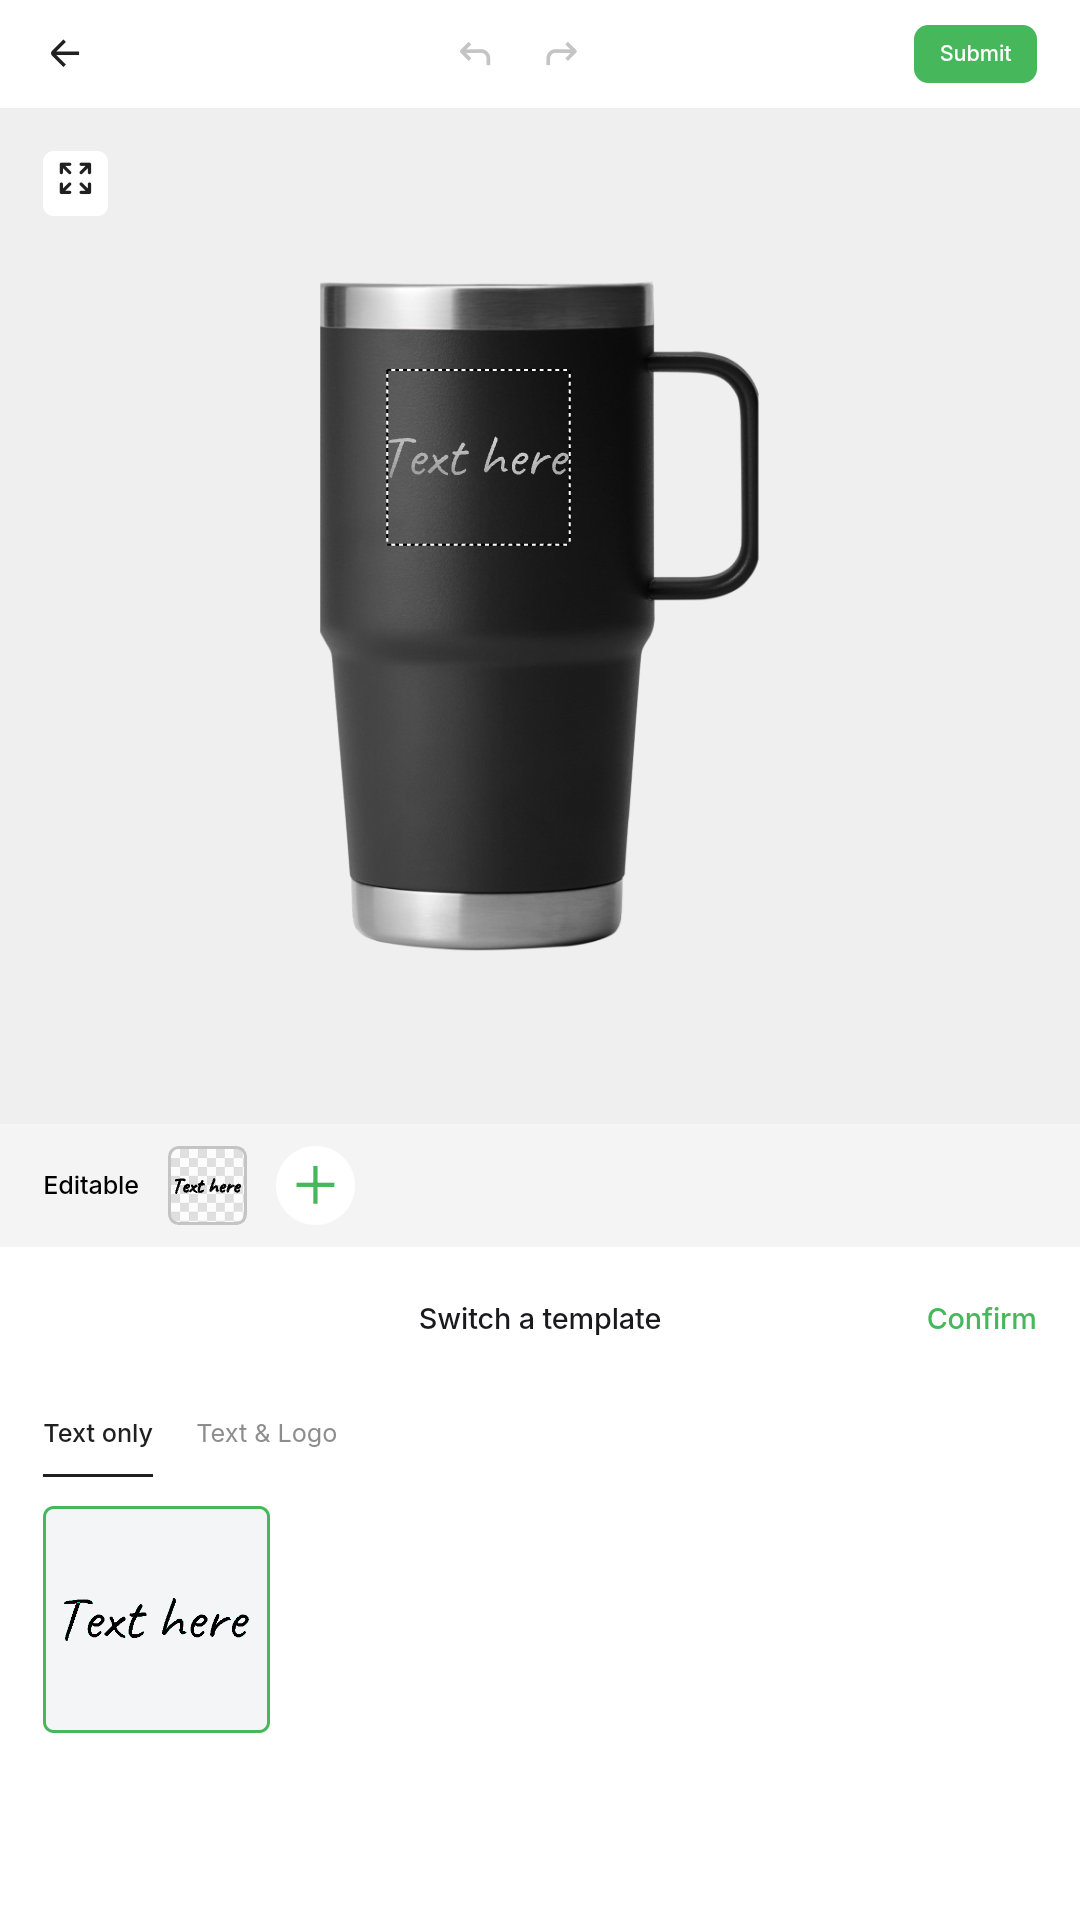
4.2.1 Select a template
(1) Templates are predefined layouts created in the brand's account from the Customthings business portal. Customers can choose a template and adjust elements.
.png)
Text template
.png)
Text & Logo template
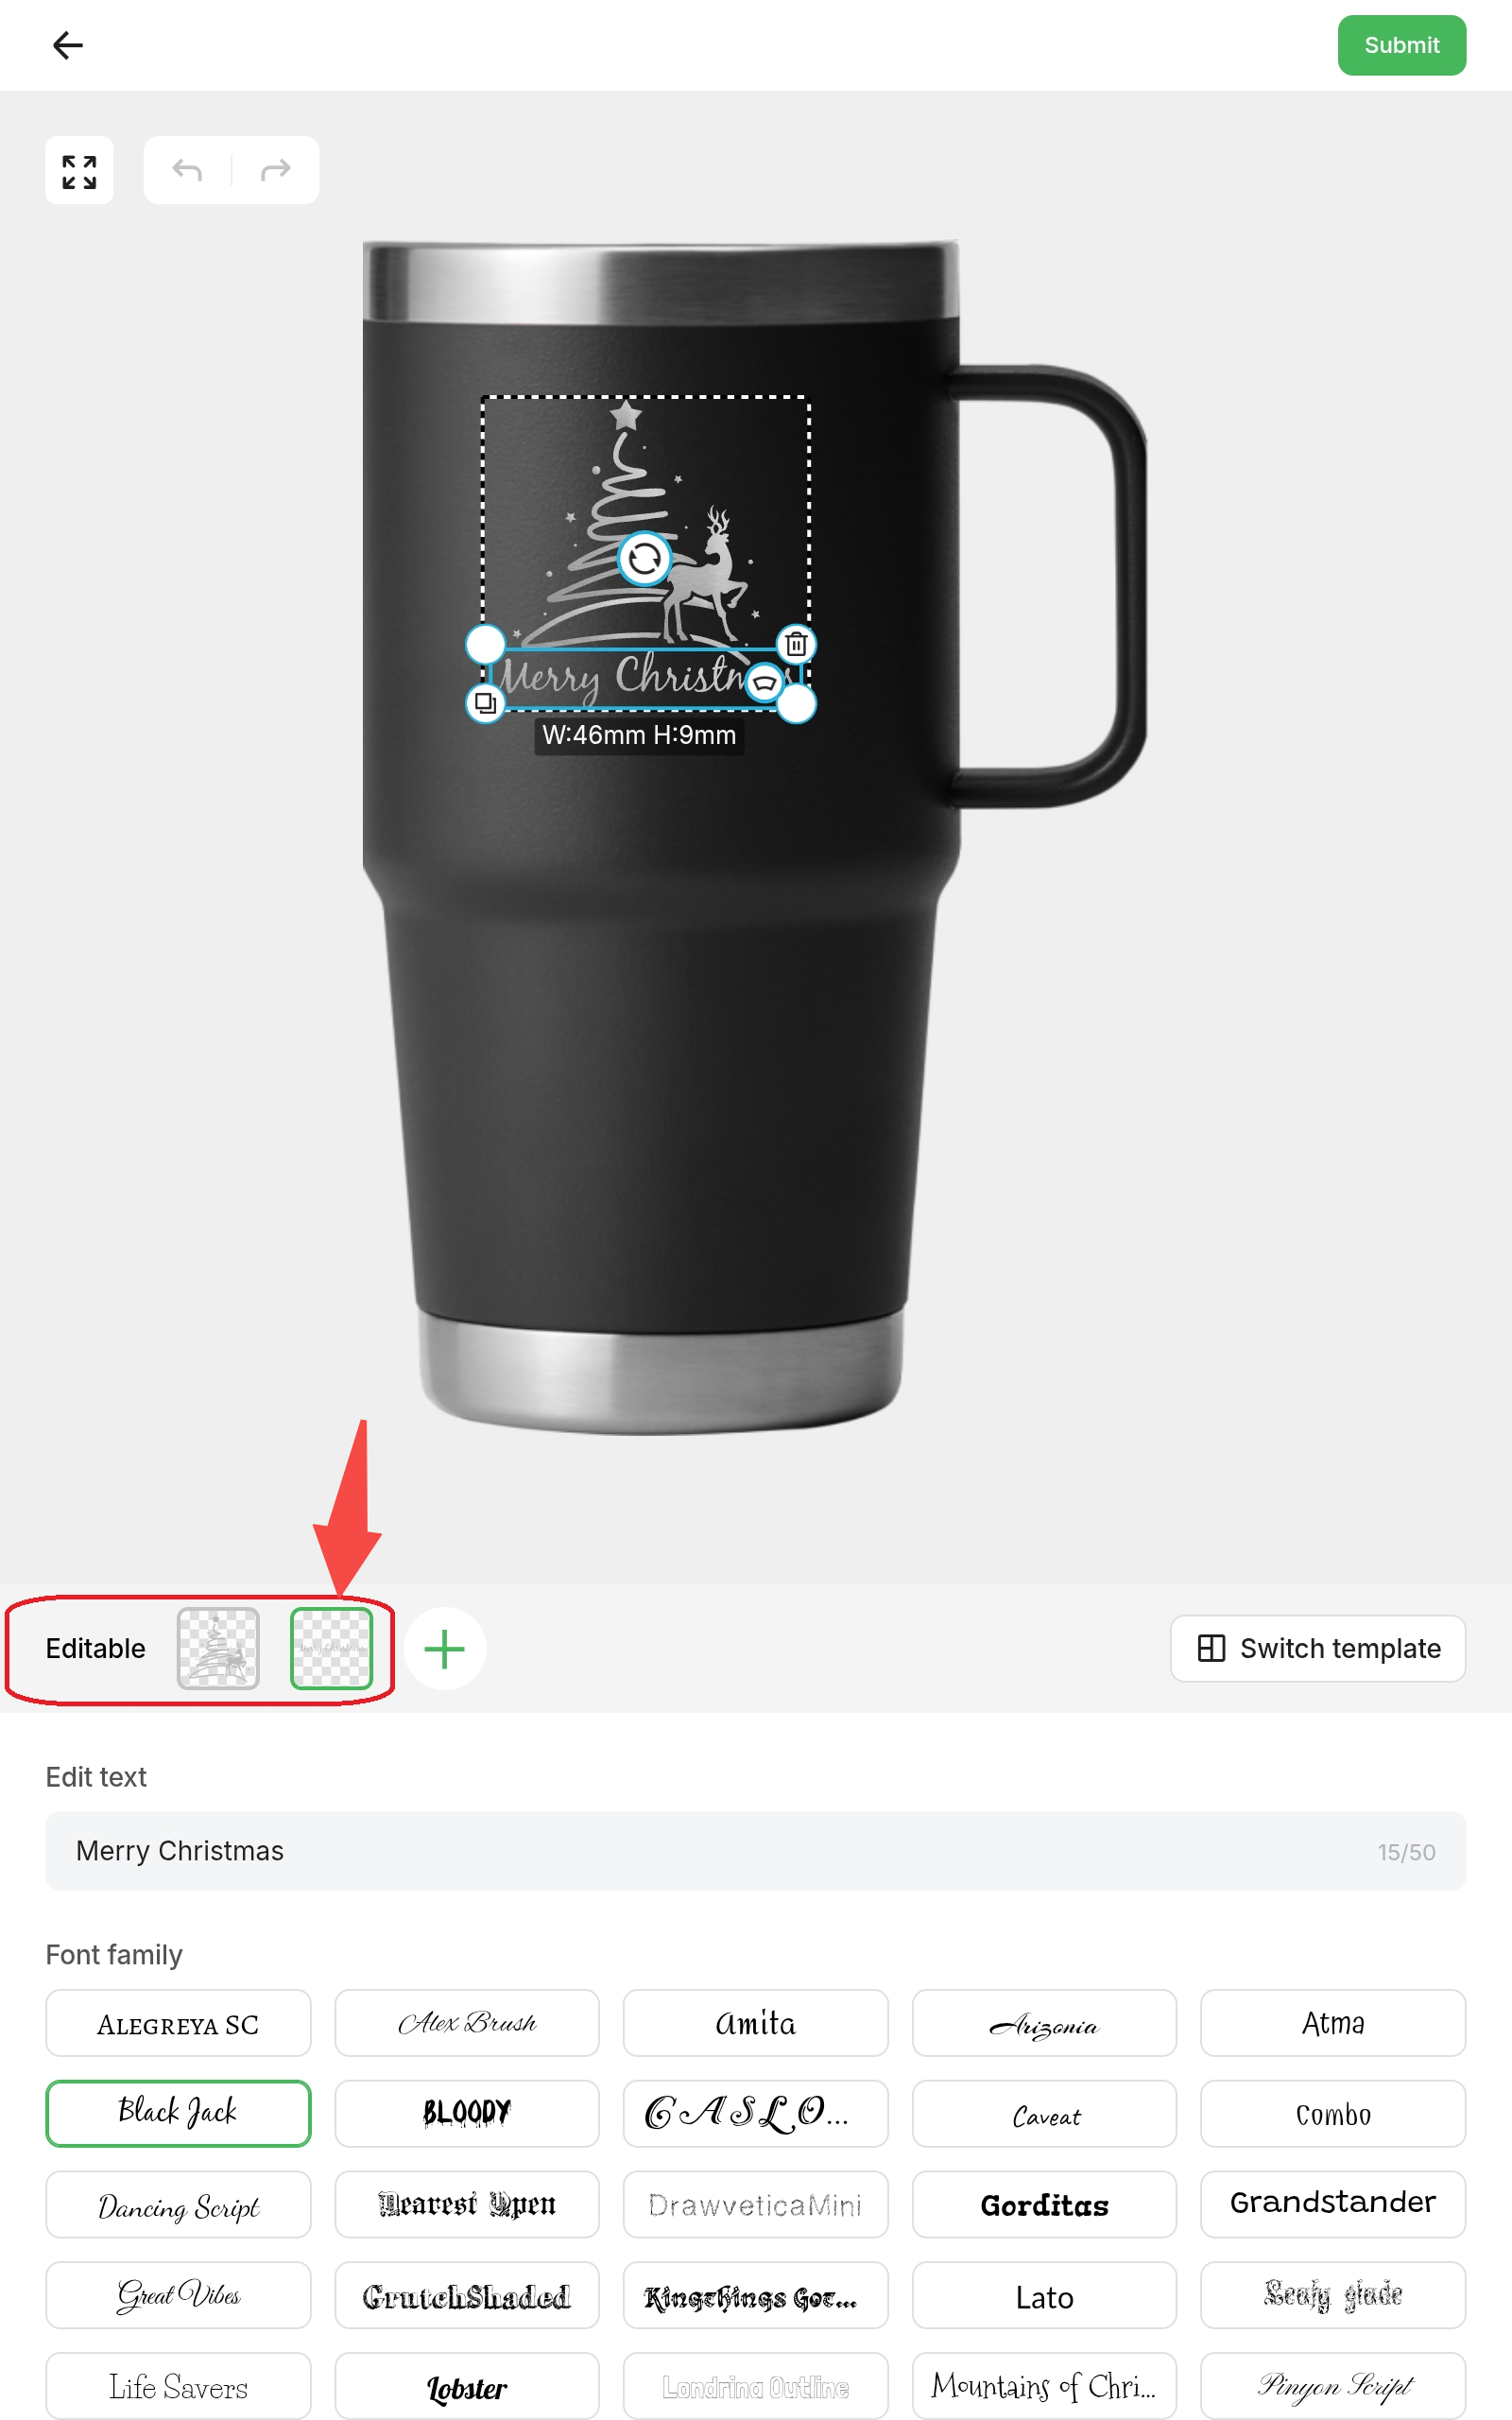
(2) Tap a template, then Confirm to enter edit mode.
.png)
(3) Tap Switch template to return to the selection screen.
.png)
(4) Editable Panel shows element types and quantities that can be changed. Click icons to swap images, text, or other assets supplied by the brand.
Editable image asset that's configured in the band's account in the Customthings Business Portal.
.png)
Editable text asset and font family that's configured in the band's account in the Customthings Business Portal.
(5) Click "+" to add a new customizable element.
.png)
(6) Customizable elements support Text, Image, or Handwriting (available options depend on the brand's account configuration.)
.png)
(7) Upload a personal image
- Tap Scan to Upload.
- The customer scans the code with a phone and uploads an image for engraving.
|
|
.png)
.png)
4.2.2 Multiple engraving locations
If the brand's account has defined multiple sides for this product, customers can design on each side.
Example: A tumbler can be engraved on both the front and back.
.png)
.png)
4.2.3 Submit the design and confirm the order
(1) After finishing the artwork, tap Submit.
.png)
(2) If the product has designs on multiple sides, tap the side tabs (e.g., Front, Back) to preview each one.
.png)
(3) The customer then enters the required order details, such as Pick-Up Name or Email Address, as specified in the backend brand's account.
.png)
(4) Order details appear after submission. At this point, hand the kiosk back to the store operator to process the order.
.png)
5. Processing
A workflow of the processing steps is shown as below.

Step1 Place the product
Position the product at the required spot inside the laser machine.
Note: Use a fixture to position the product. If no fixture is available, place the item in the centre of the work area. |
Step2 Preview the work
(1) Tap Start Processing.
.png)
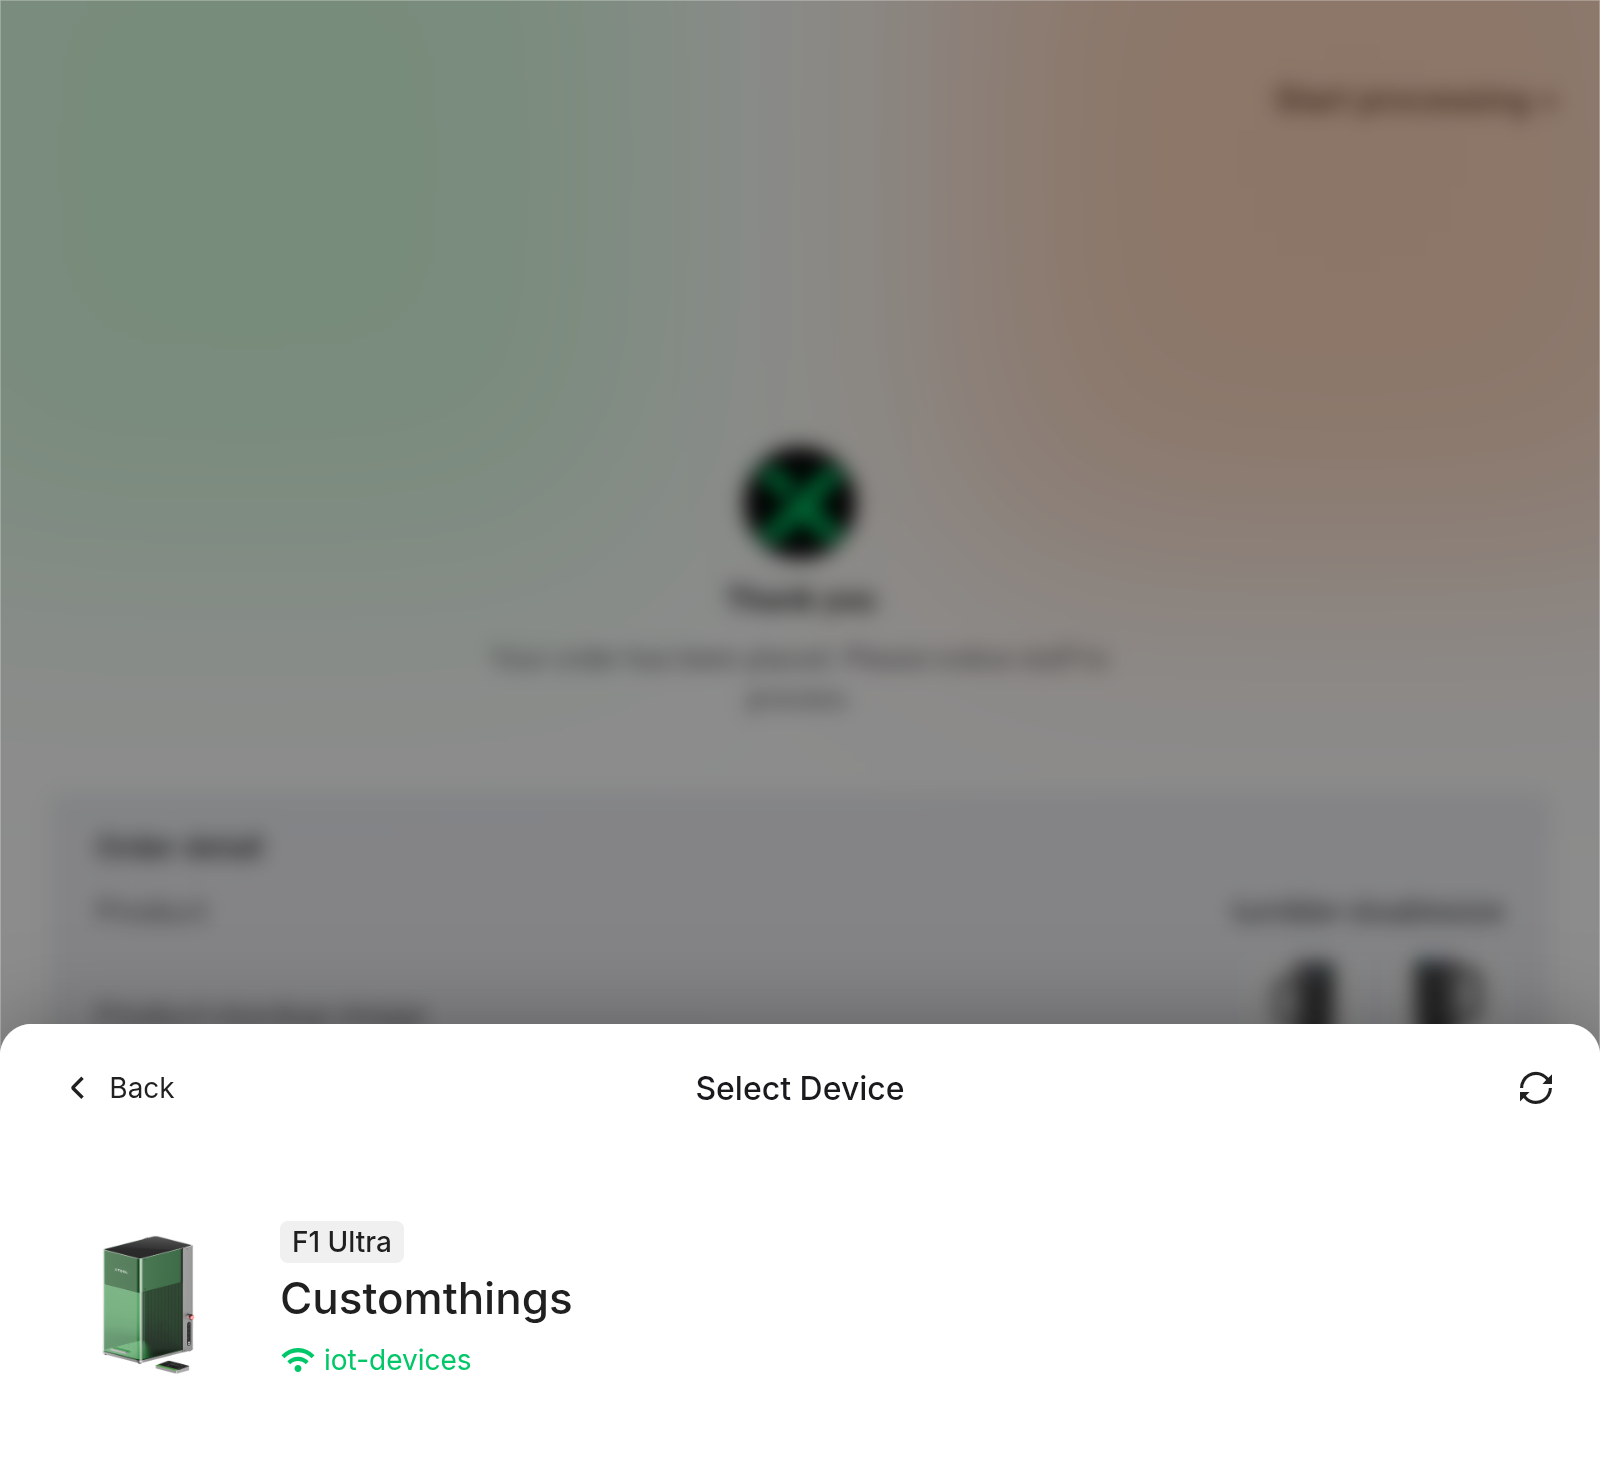
(2) Select an idle device to receive the job.
(3) The machine auto-focuses and moves to the preset location, then captures a preview photo.
(4) The customer’s design will then appear in the preview window.
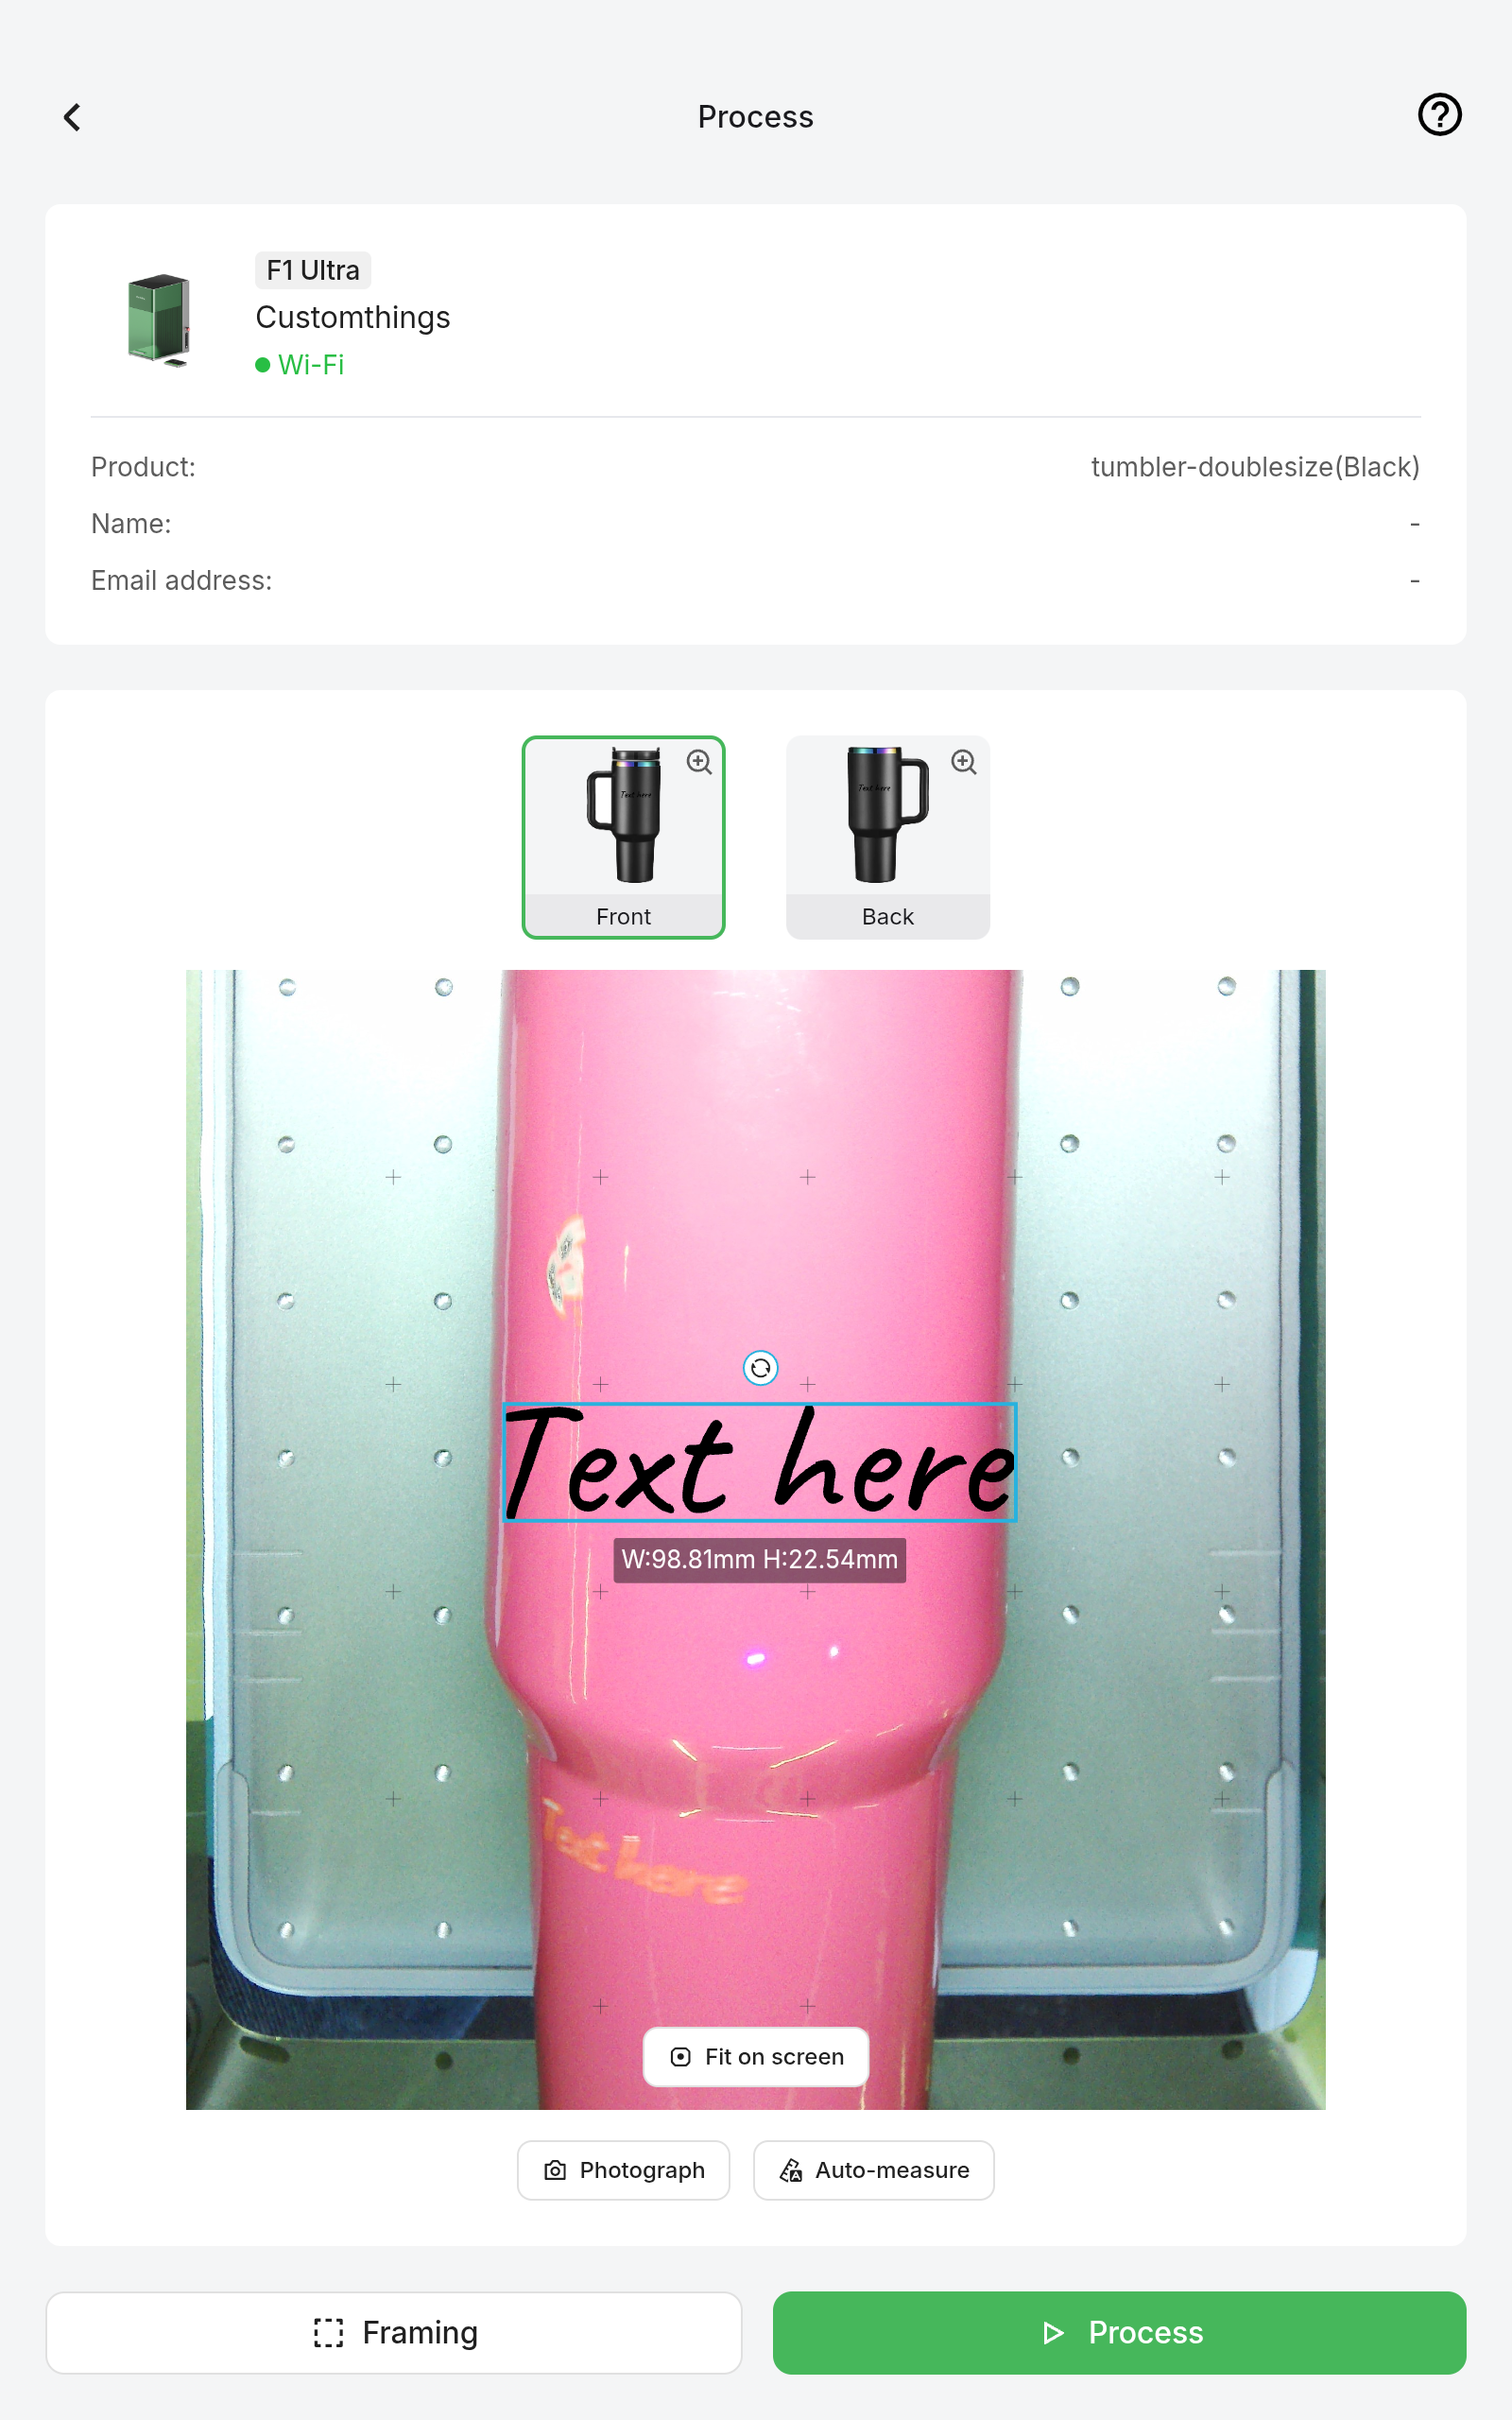
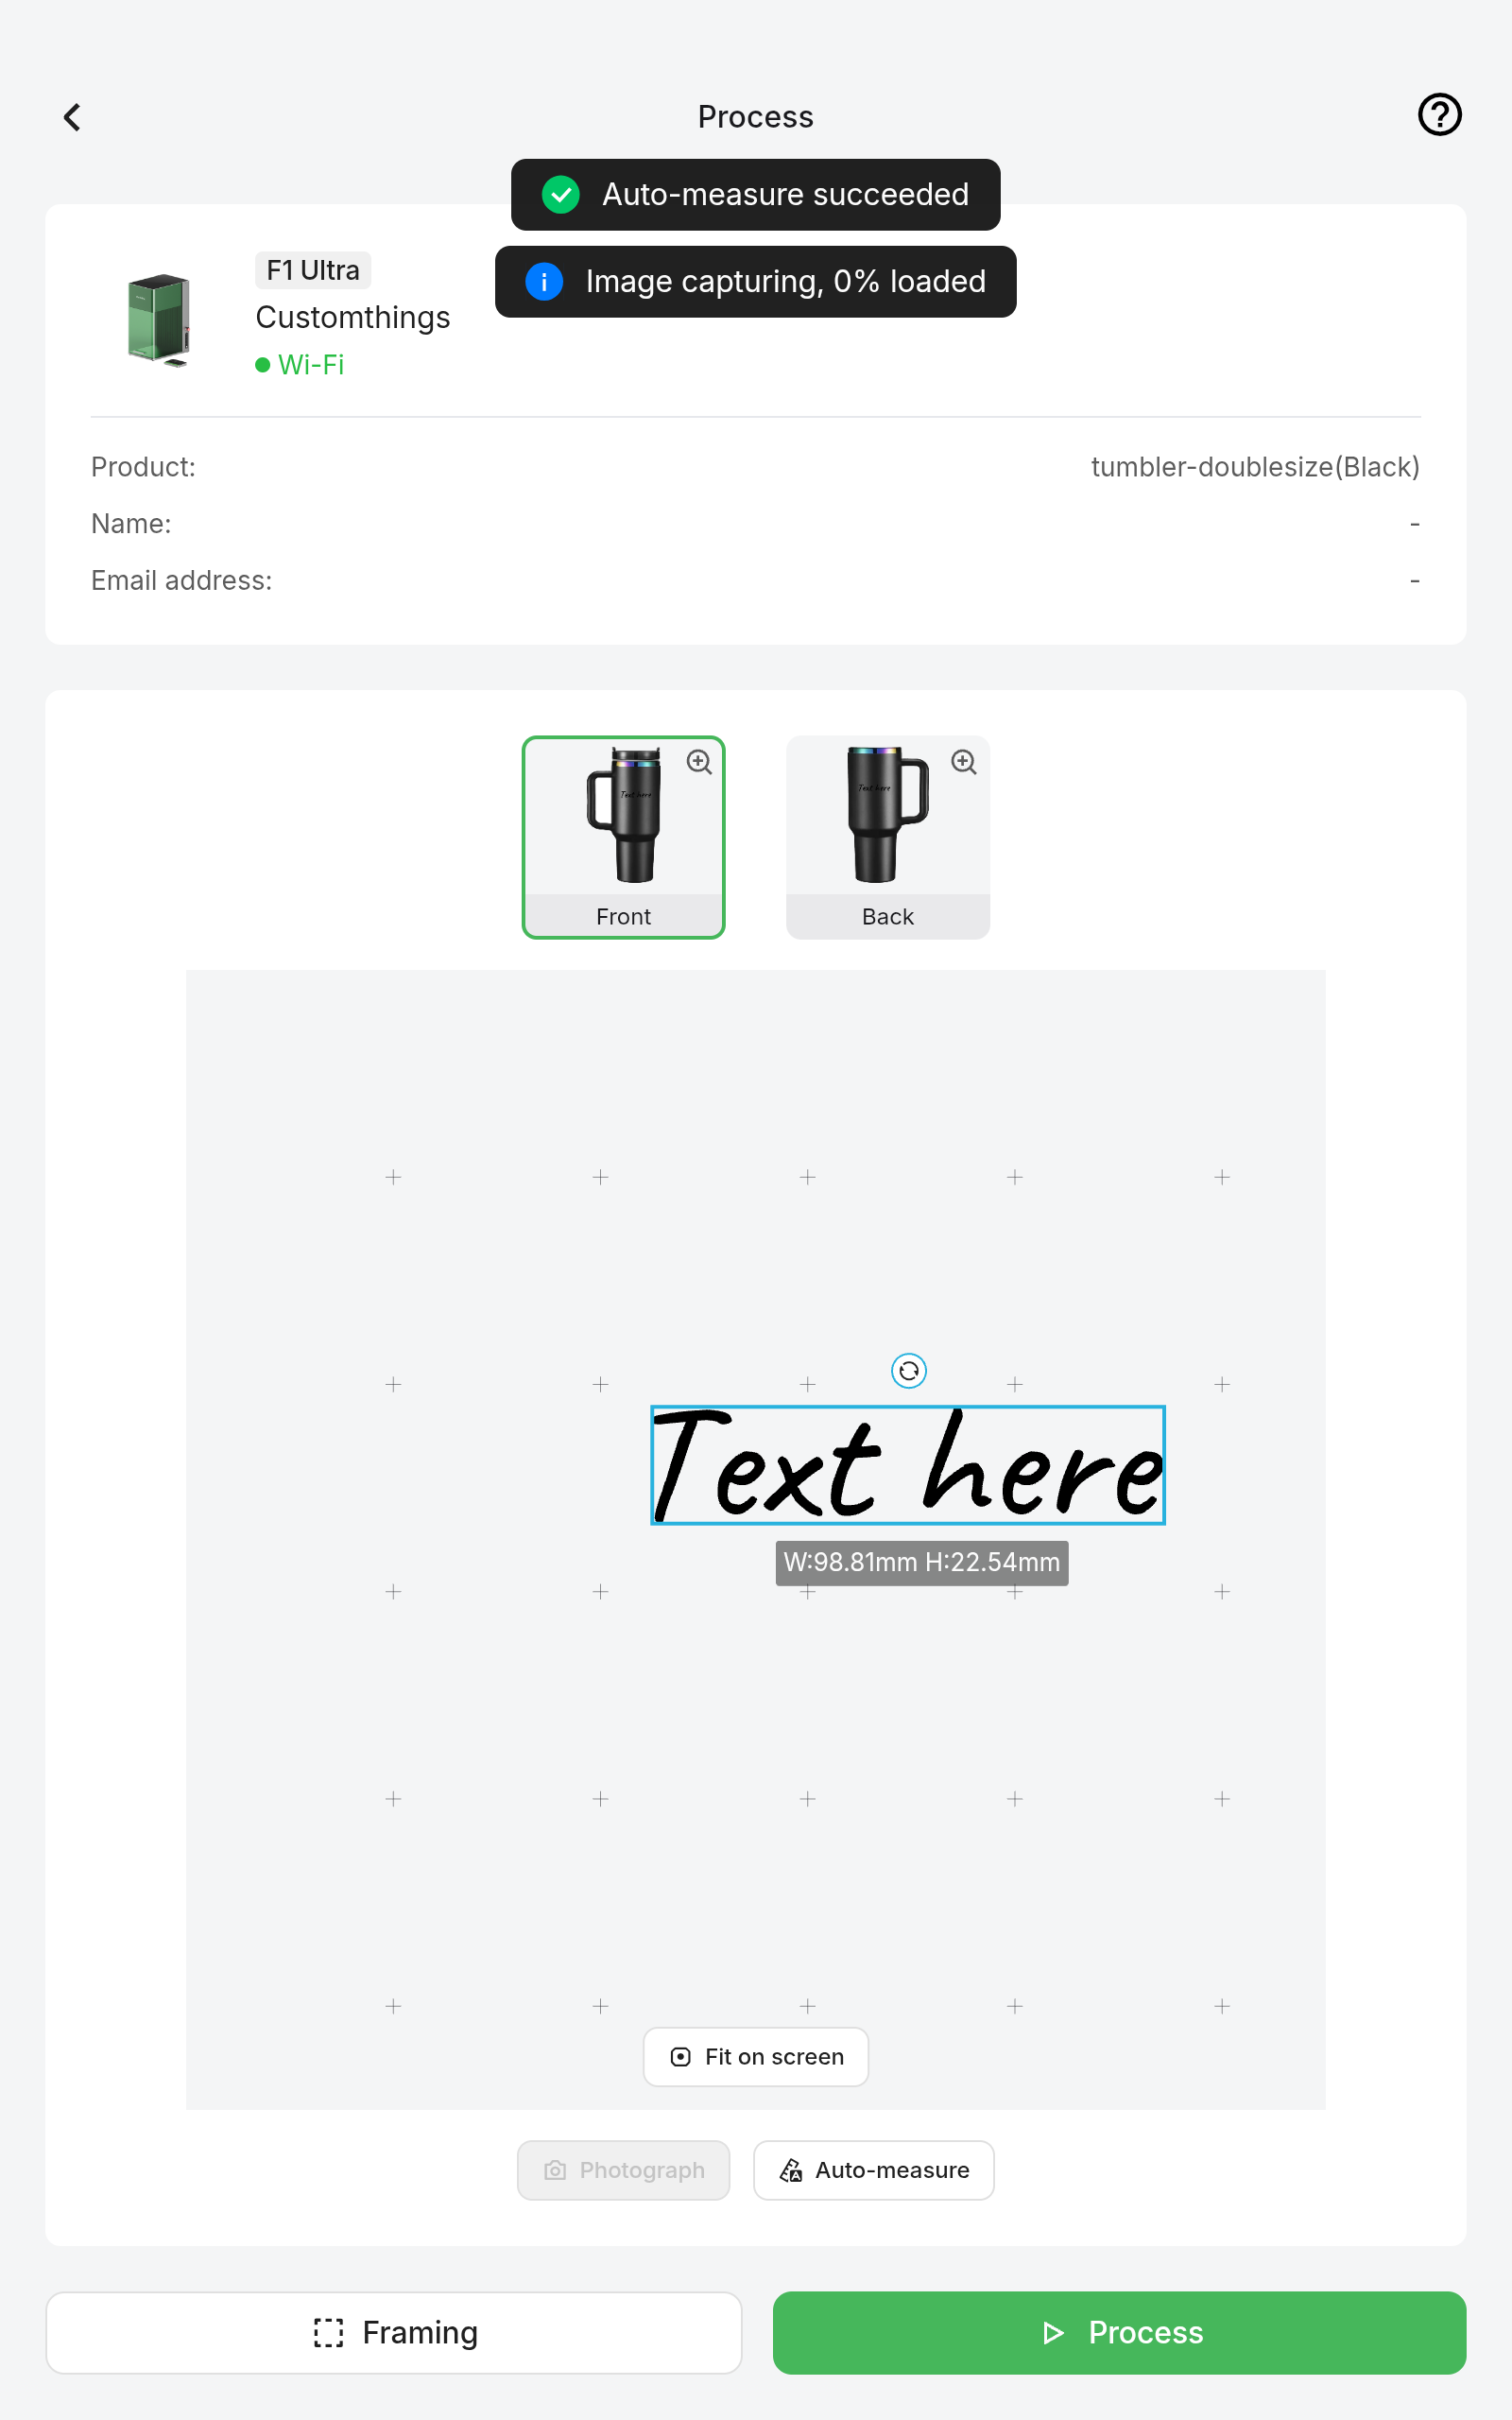
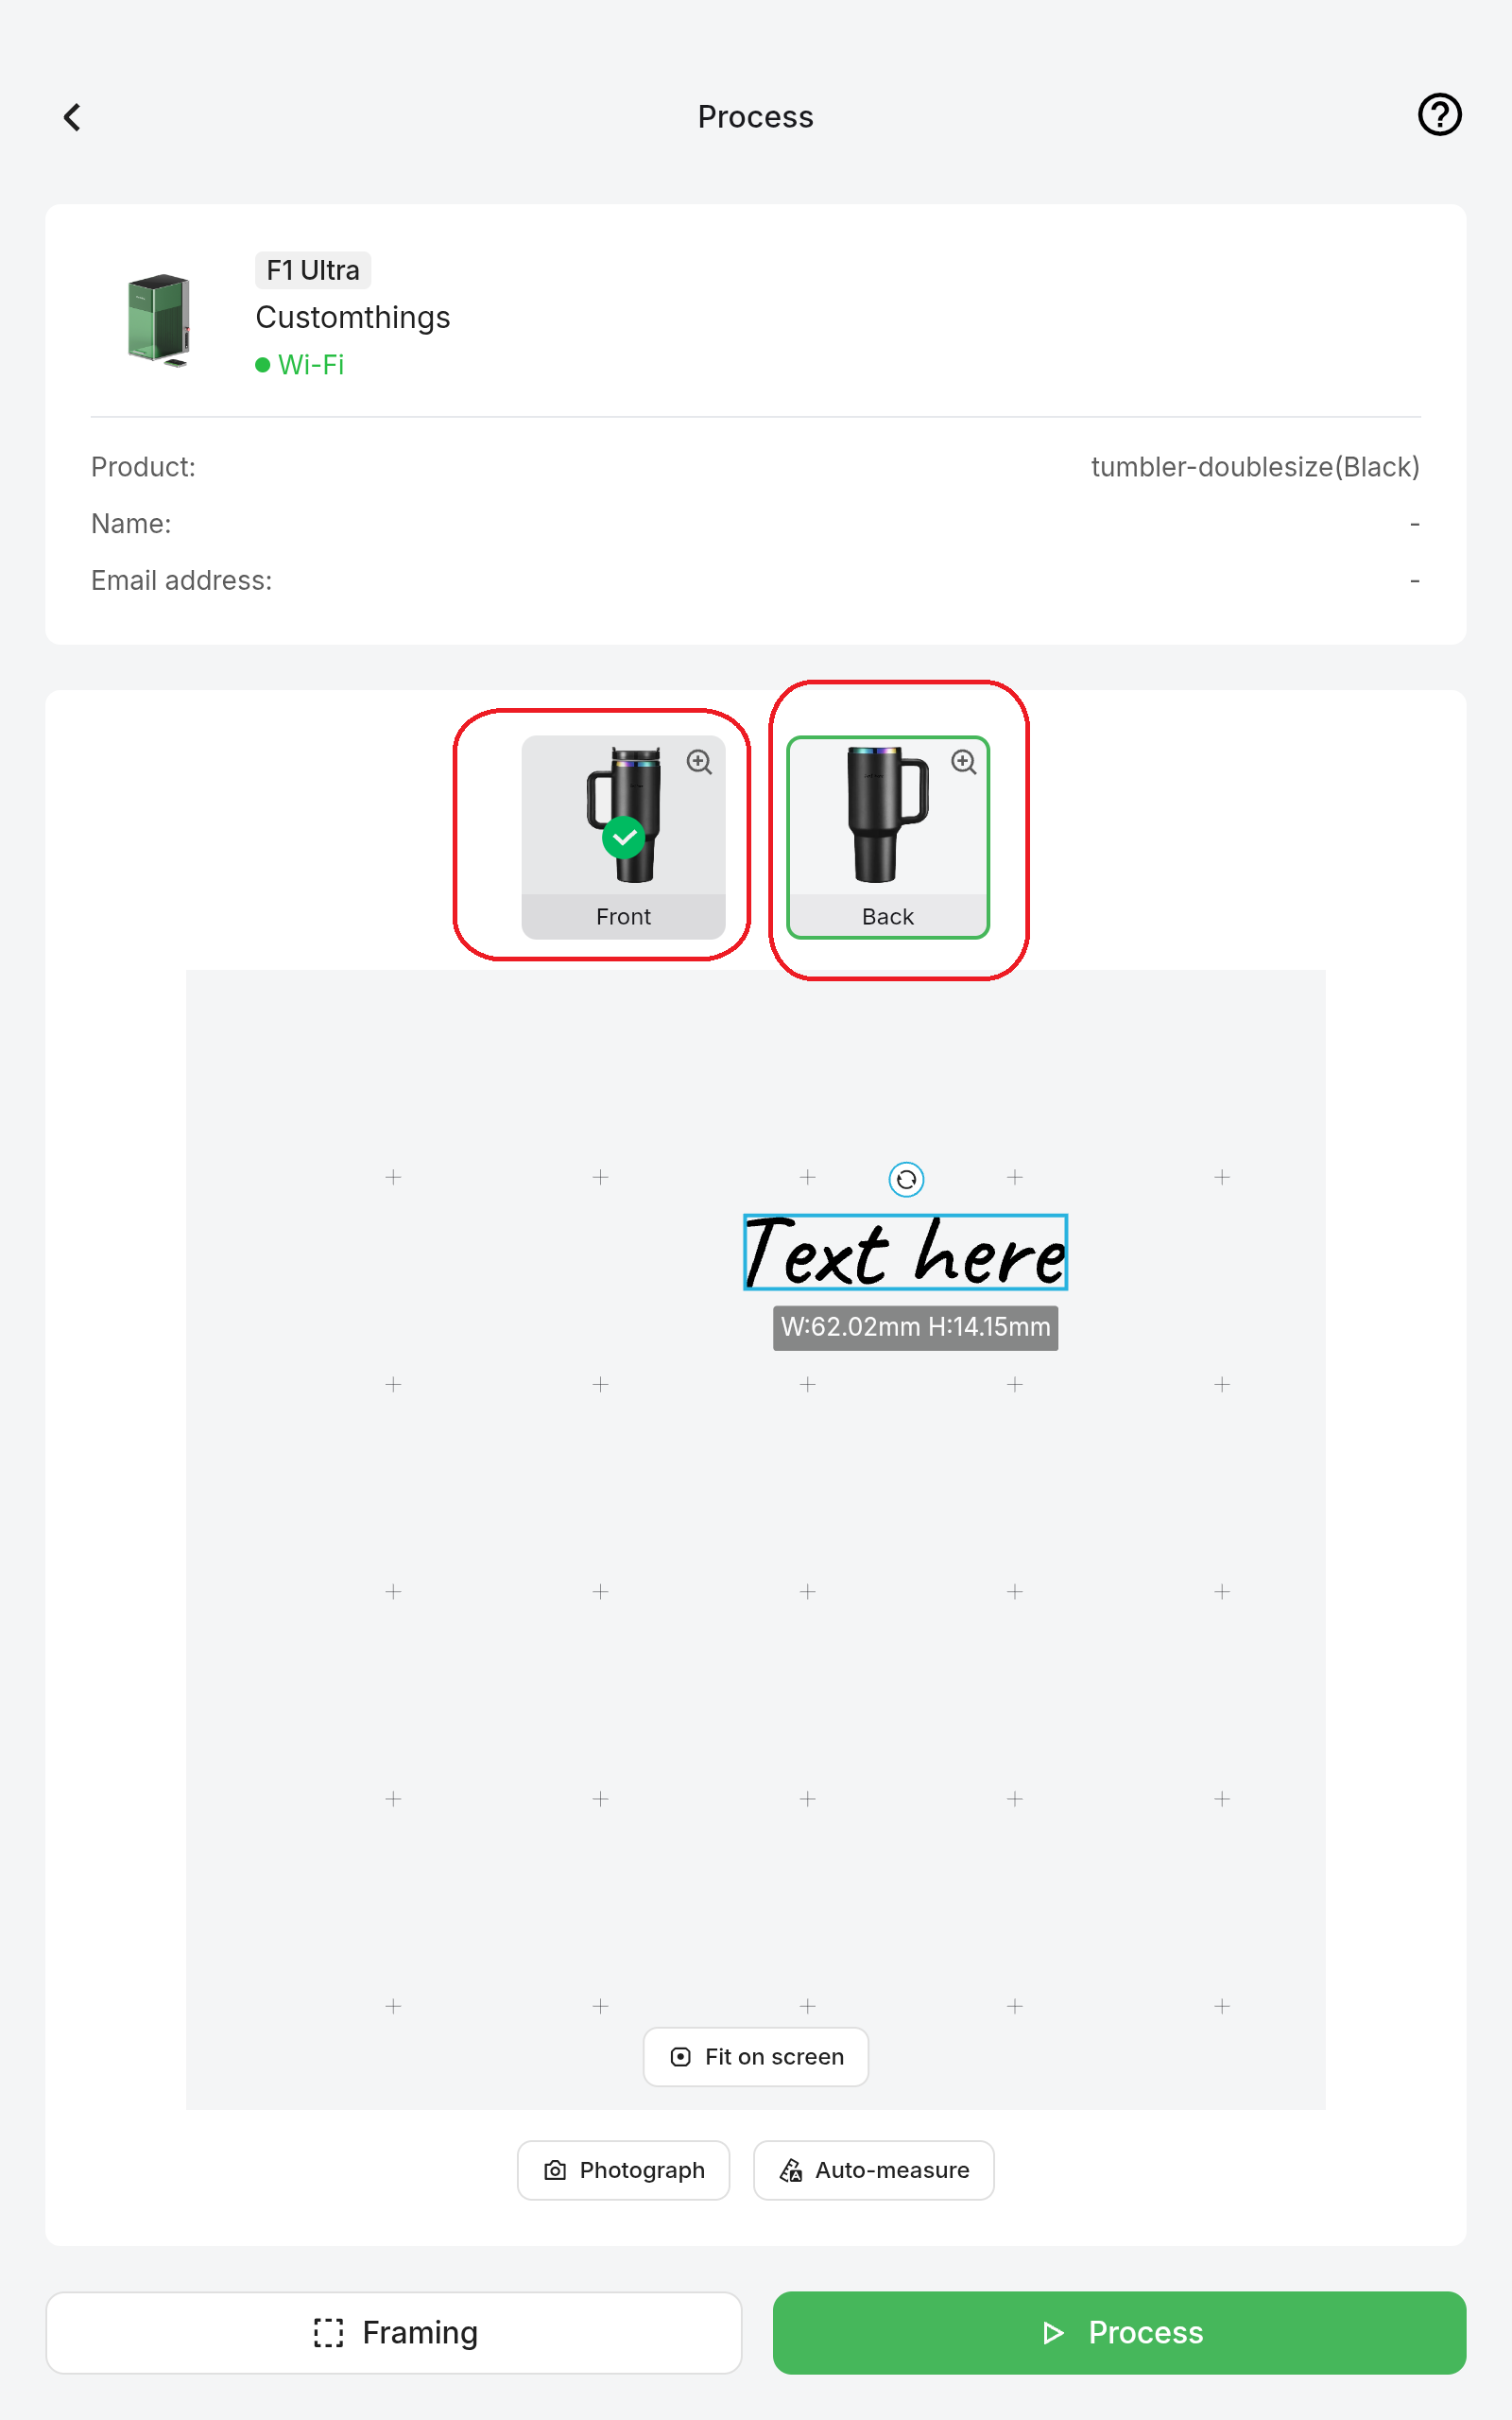
Step3 Framing and Engraving
(1) Tap Framing – the projector outlines the engraving area; verify placement.
.png)
(2) Tap Process – the command is sent to the laser. Wait until the status shows Ready.
.png)
(3) Close the safety enclosure and press the button on the controller to start engraving.
The enclosure must be closed before engraving.
|
|
.png)
.png)
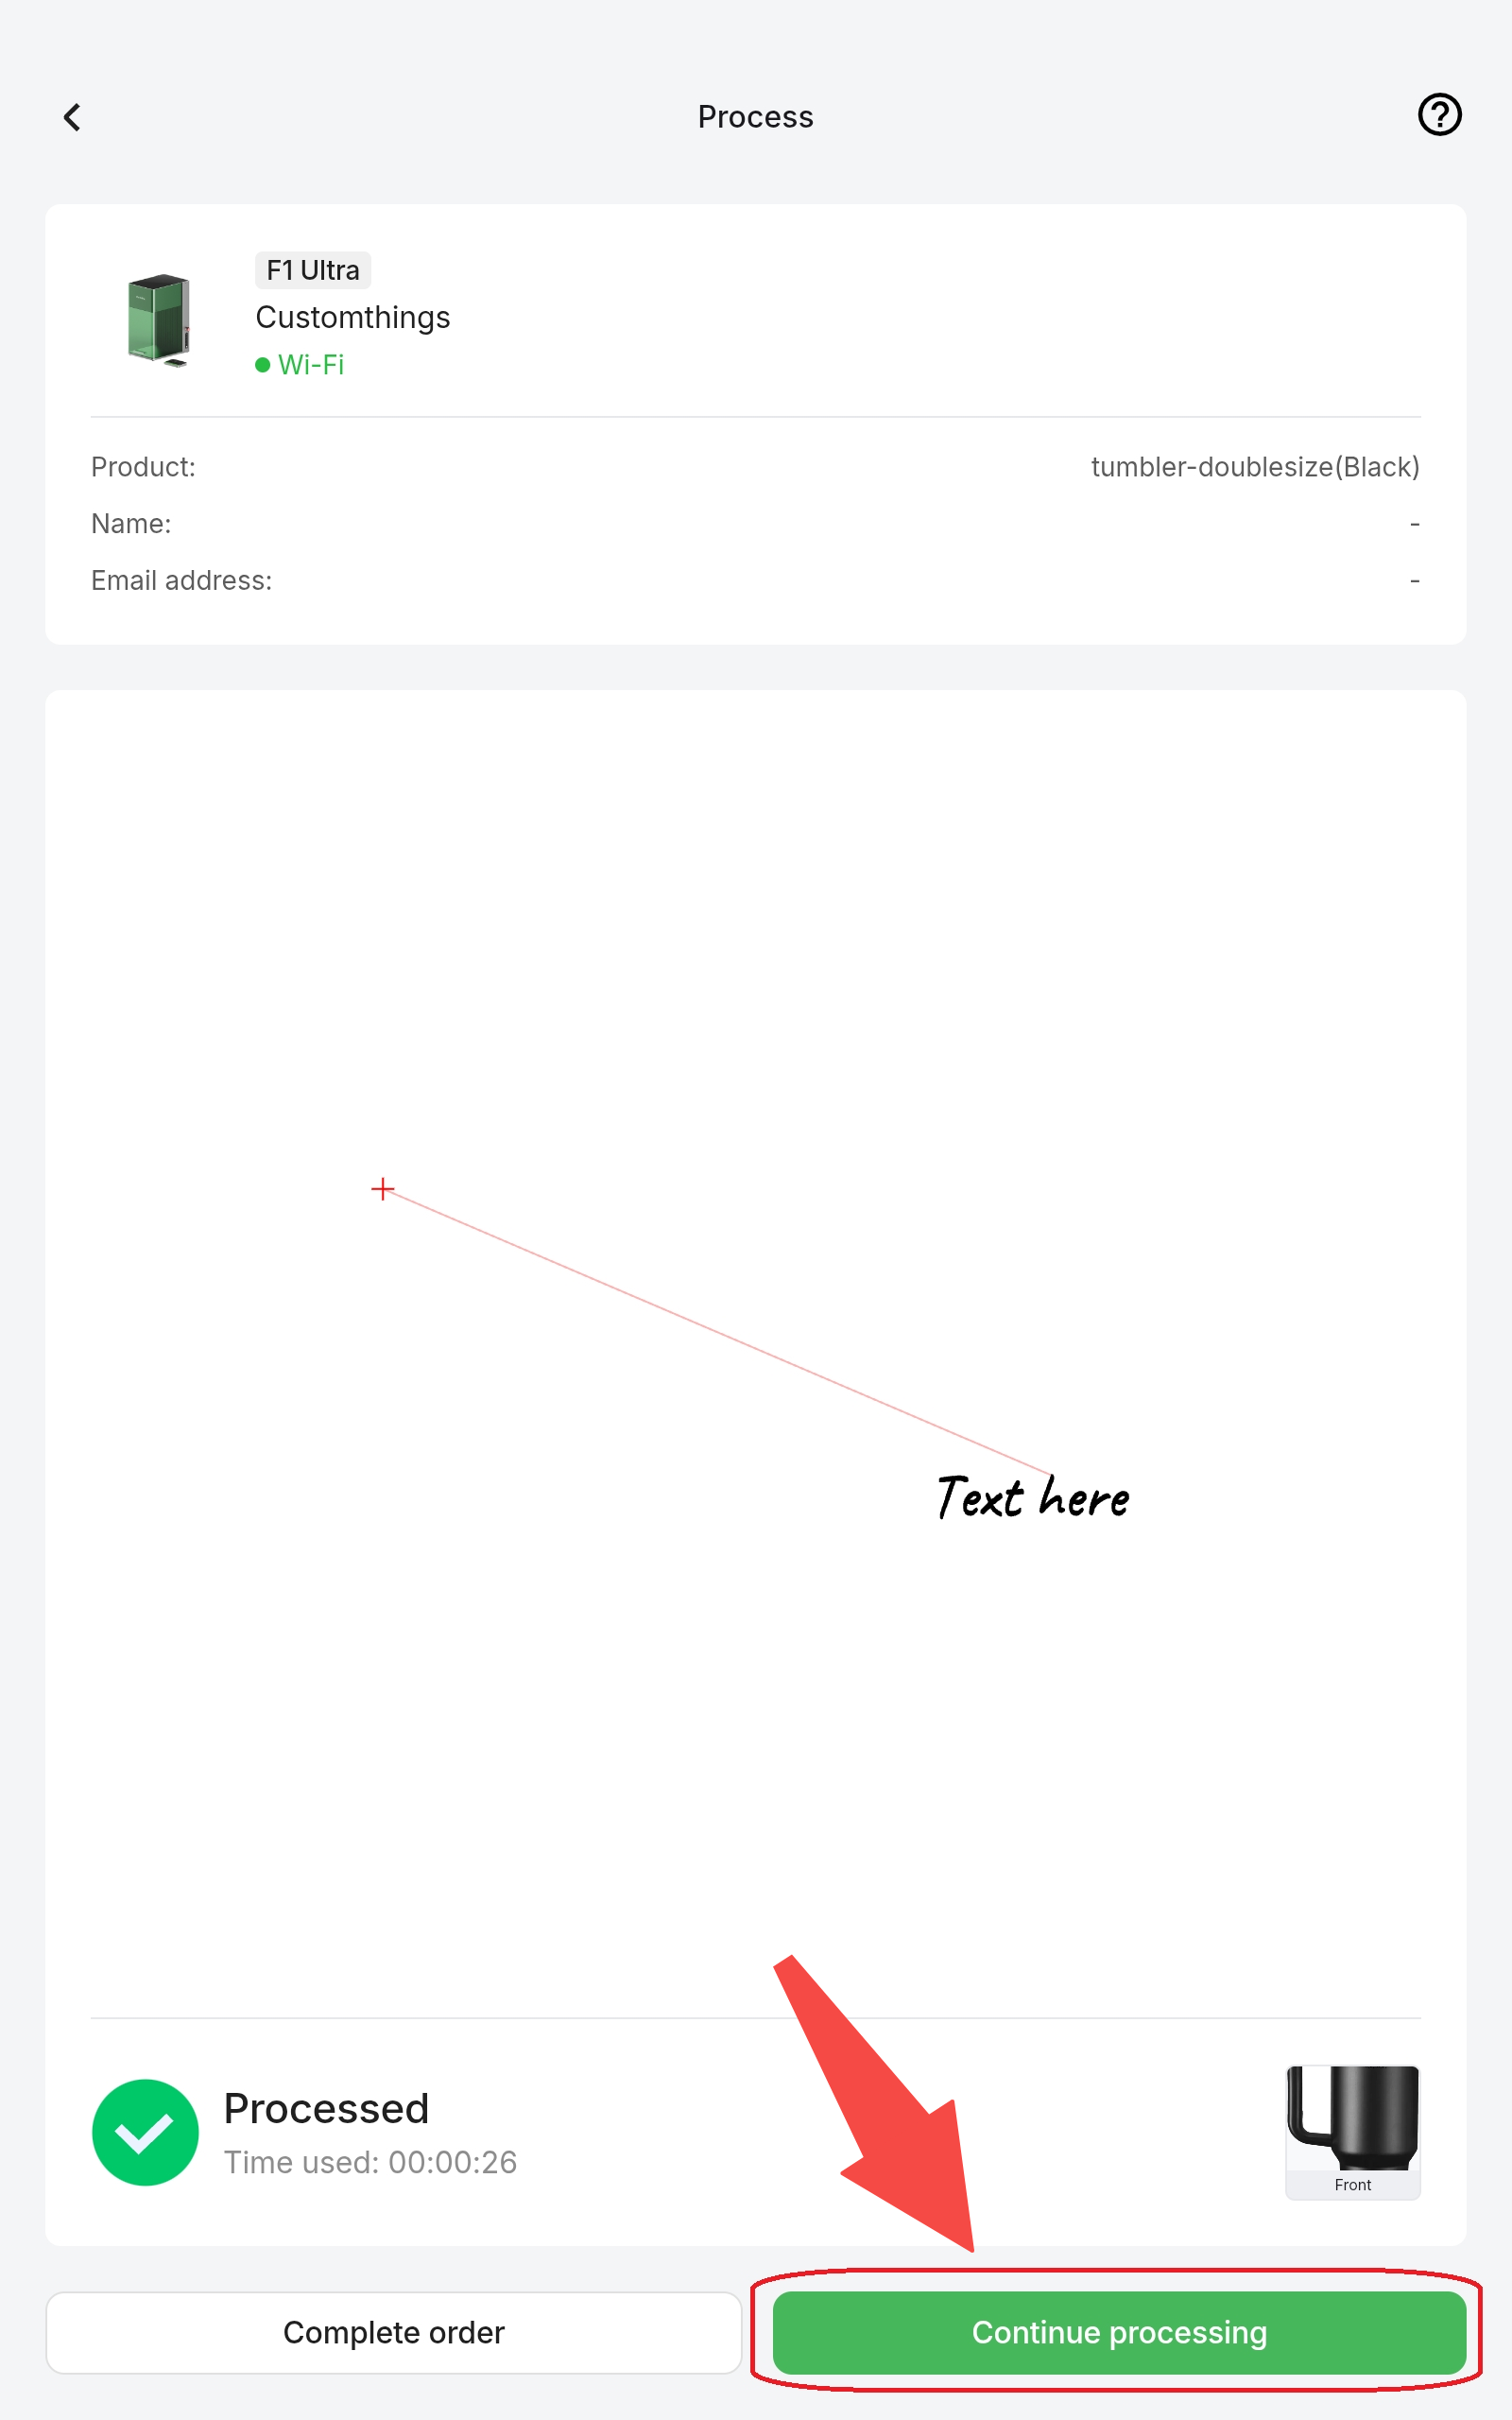
Step4 Engrave on the second side
If more sides need engraving, tap Continue Processing.
Completed positions are marked; select the next side and repeat.
Confirm the correct side and click "Process" to start engraving another location, until all designed locations are finished.
5.4 Finish engraving
Tap Complete Order to end the job, then tap Fulfilled to mark the order as delivered..png)
.png) Remove the product and check the engraving quality. Clean and package it for the customer.
Remove the product and check the engraving quality. Clean and package it for the customer.
If issues arise:
Too shallow: Notify the brand’s admin to review laser parameters in the Customthings Business Portal.
Failed engraving: Contact xTool Technical Support and keep photos/video as evidence.
Related Content
Services & Help
Learn & Education

Copyright © 2025 xTool All Rights Reserved.