Download PDF files (multi-language)


List of items
|
|
|
|
Self-service kiosk | Monitor stand | Power cable | Antenna |
|
|
|
|
Stylus pen | Thumb screw | Quick start guide | Safety instructions |


Note: The power cable varies according to the region in which the product is delivered. |
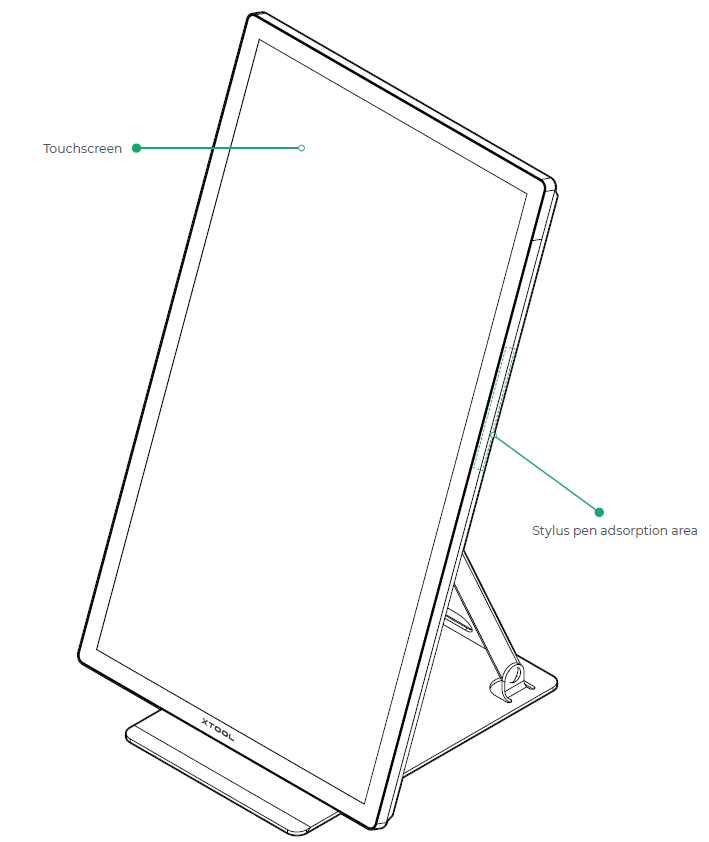
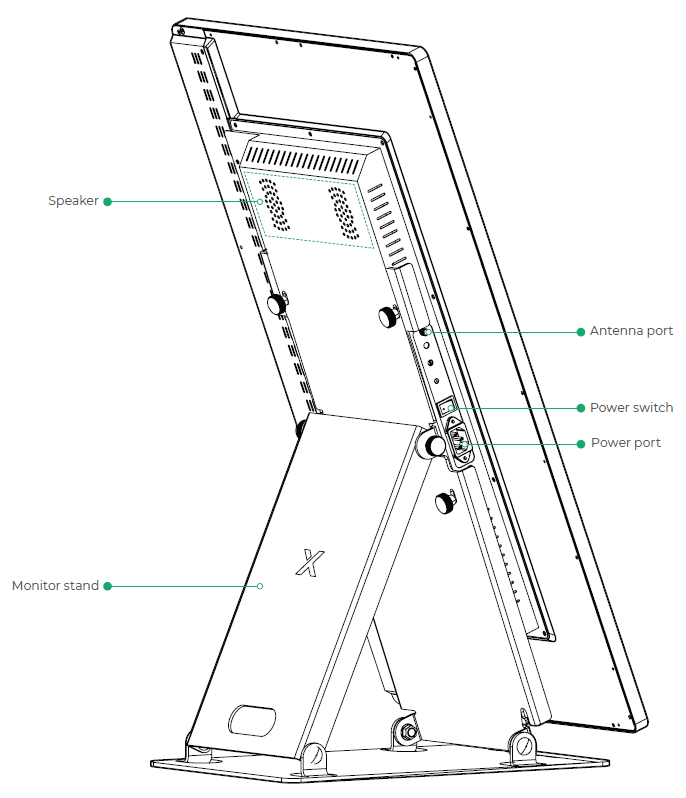
Meet xTool Self-Service Kiosk Desktop Standing
|
|
Install xTool Self-Service Kiosk Desktop Standing
1. Install the monitor stand


Note: To avoid scratching or damaging the screen, ensure that the desktop is flat and free of foreign objects. |
2. Install the antenna

3. Complete the installation

Use xTool Self-Service Kiosk Desktop Standing
Note: xTool self-service kiosk desktop standing can be used with xTool F1 Ultra and xTool Retail Marker and the procudure is similar for both. This article uses xTool Retail Marker as an example. |
1. Connect to the power
(1) Connect the power supply to xTool Retail Marker and turn on the power switch.
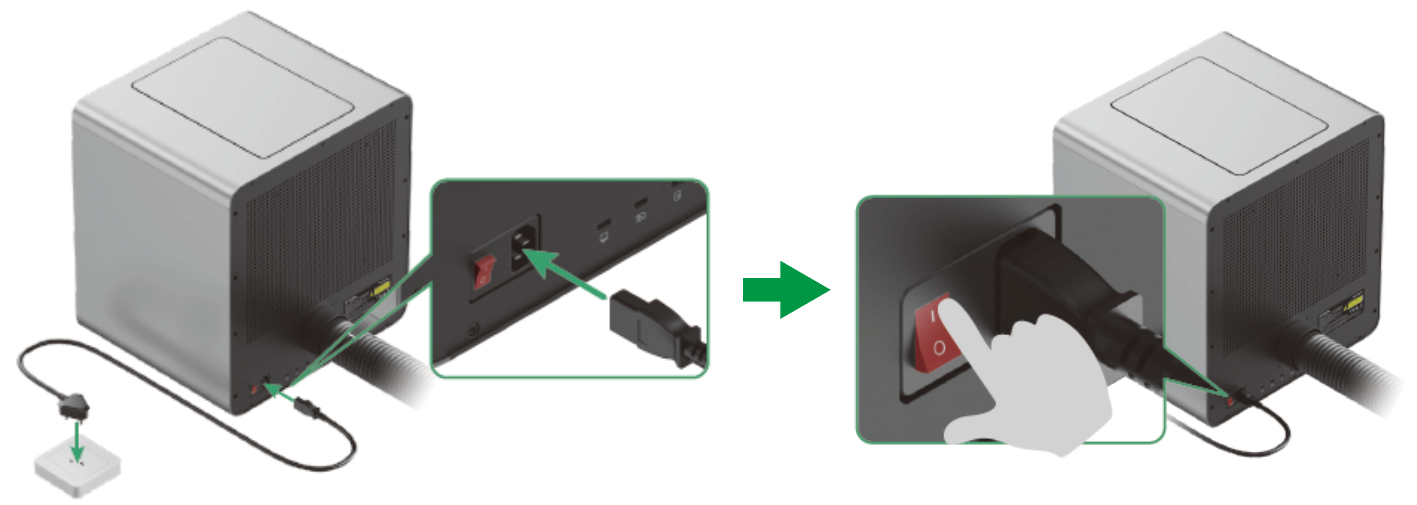
(2) Connect the power supply to xTool self-service kiosk and turn on the power switch.

2. Log in to Customthings
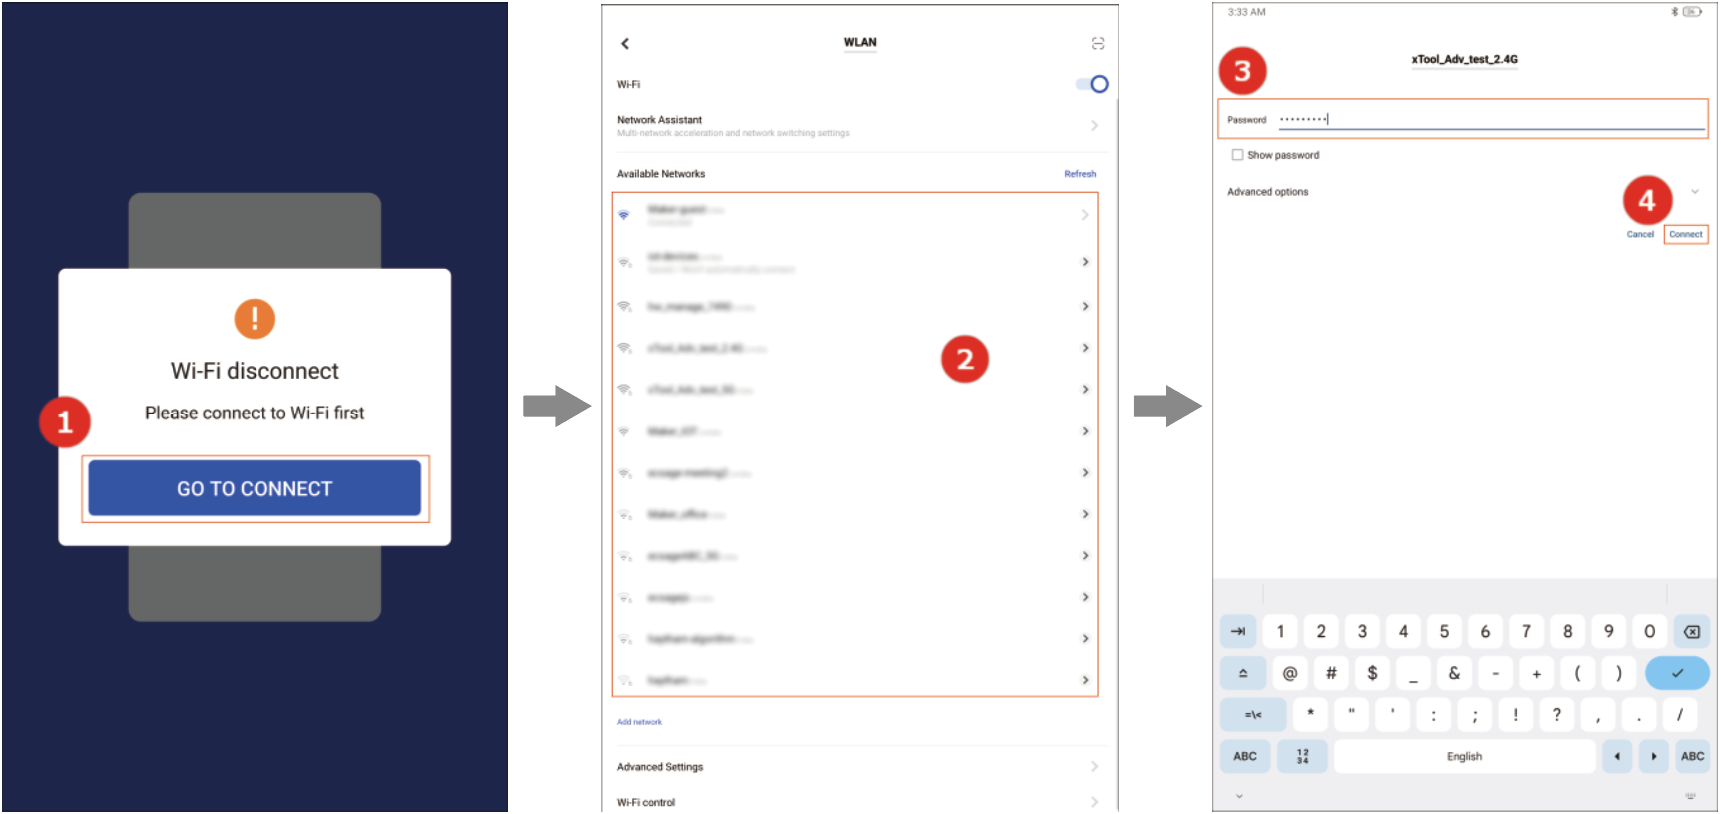
(1) On the self-service kiosk, tap GO TO CONNECT > select a Wi-Fi > enter the password > tap Connect. After connecting the network, return to the login page.
(2) Enter the username and password and tap Log In.
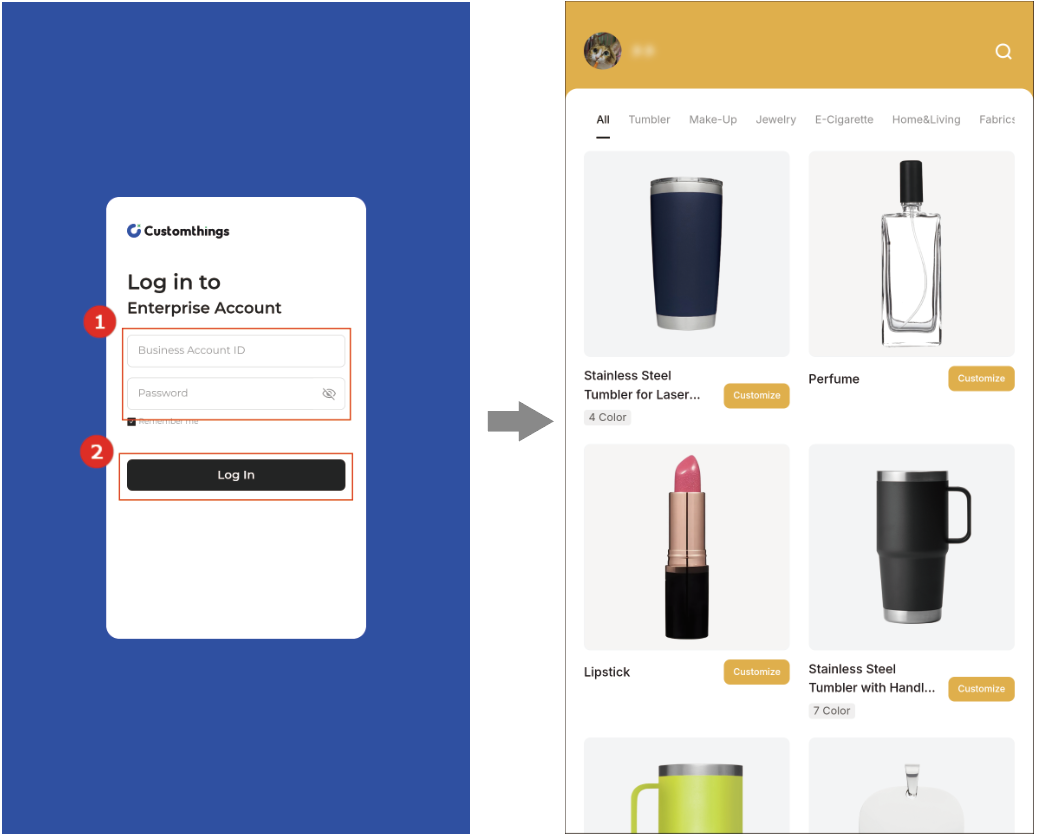
Note: The username and password are provided by the delivery manager. If you do not receive it, please contact the delivery manager. |
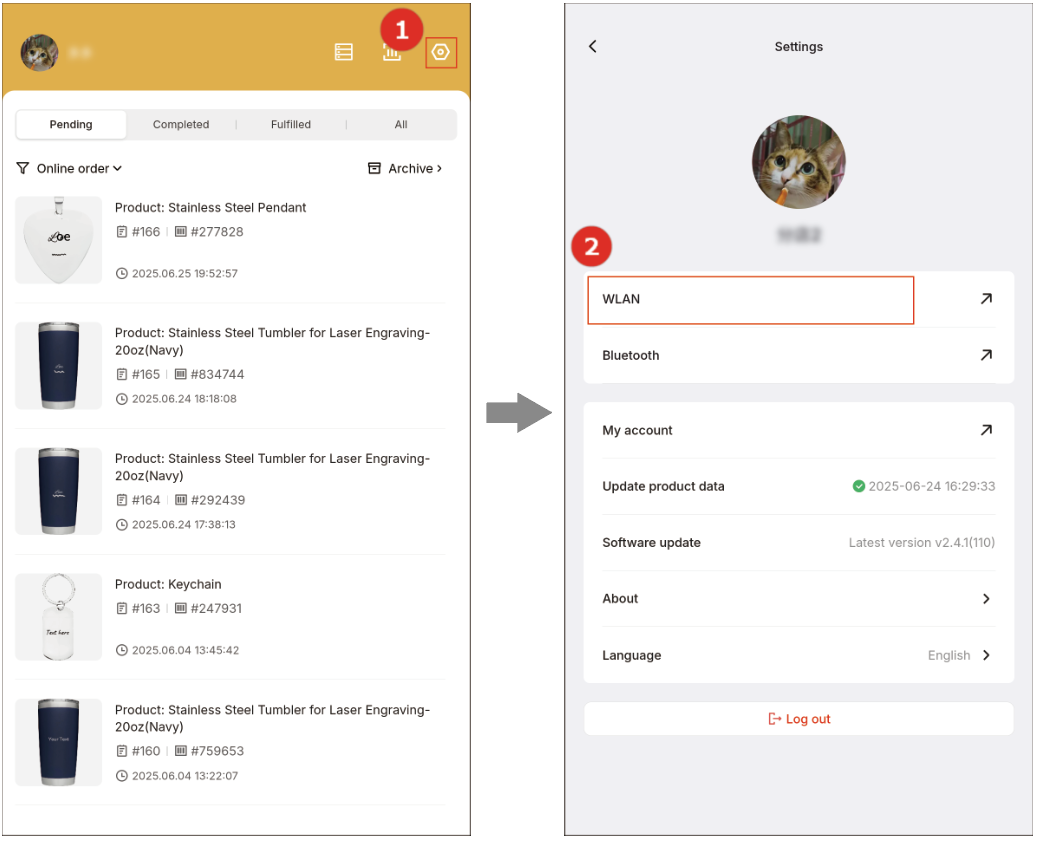
3. (Optional) Switch the Wi-Fi network
(1) On the homepage of Customthings, tap the profile in the upper-left corner and select Merchant mode.

(2) Tap ![]() in the upper-right corner and then tap WLAN.
in the upper-right corner and then tap WLAN.
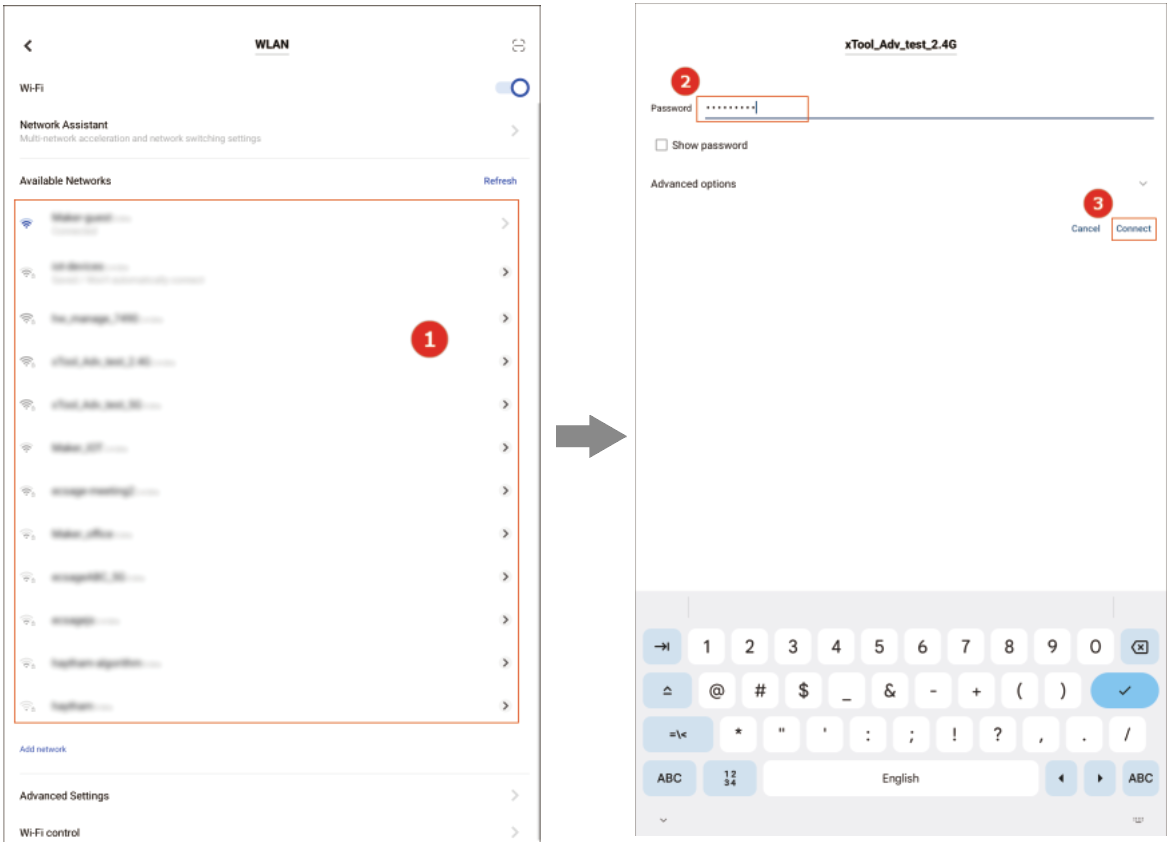
(3) Select a Wi-Fi name, enter the password, and tap Connect. Then, go back to the homepage of Customthings.
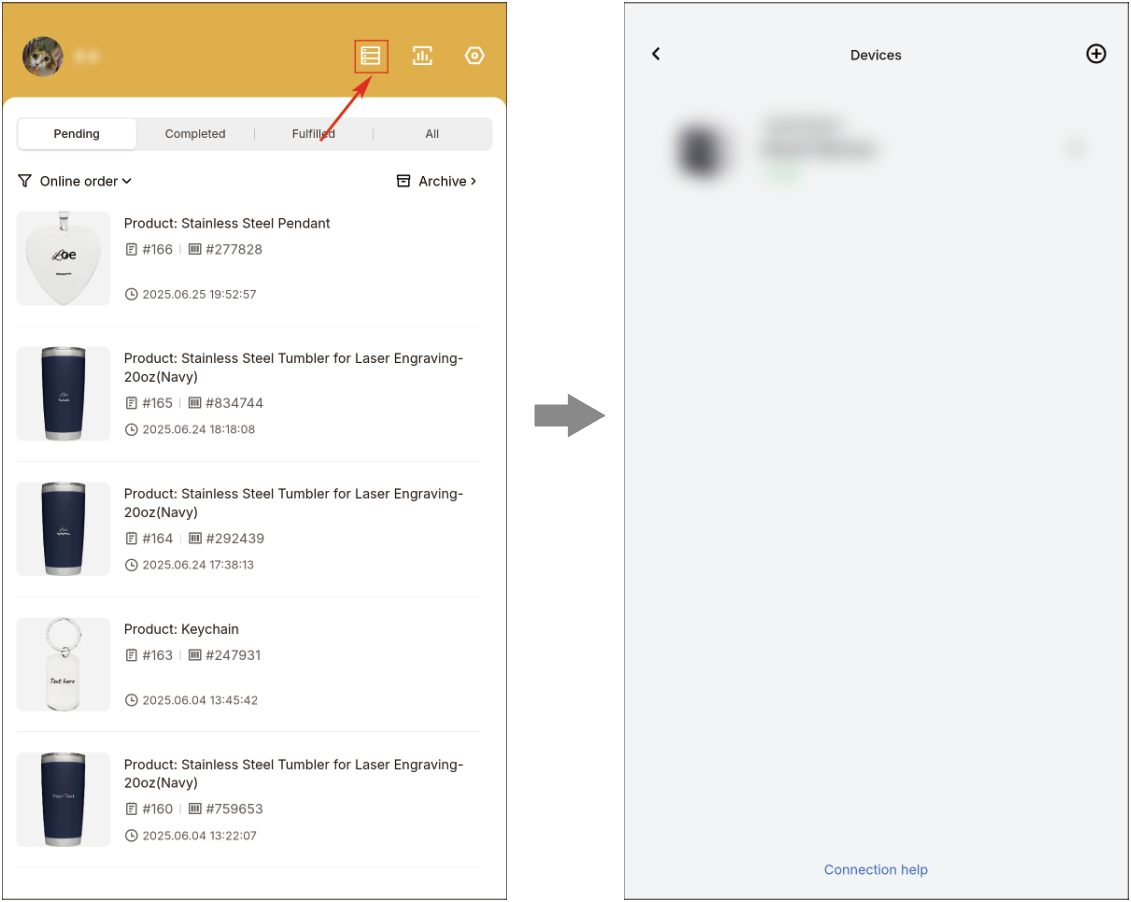
4. Add a device
(1) On the homepage of Customthings, tap  .
.
(2) Tap  in the upper-right corner. In the Add new device dialog box, select Retail Marker.
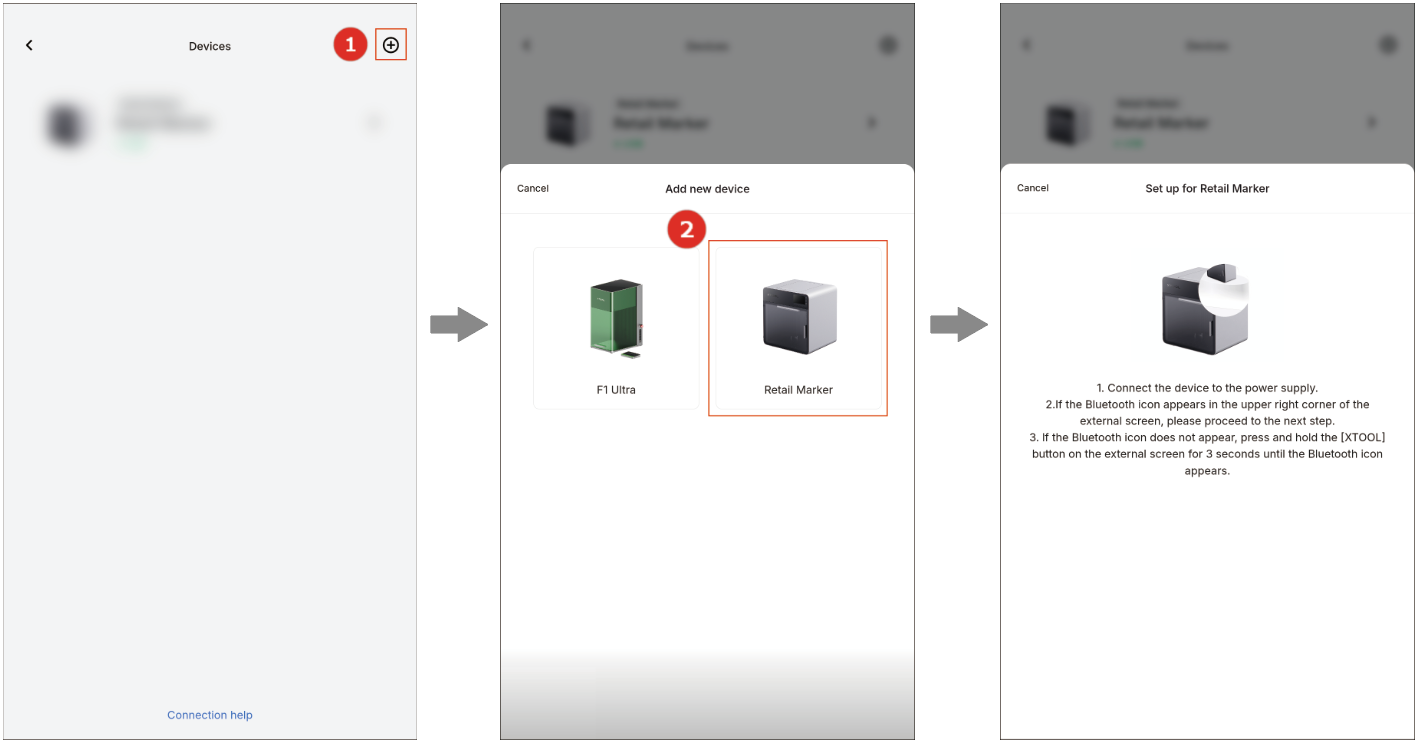
Note: During the connection, ensure that xTool Retail Marker is in Bluetooth mode only. If not, press and hold the start/stop button on the touchscreen controller to switch modes until the Bluetooth mark appears on the touchscreen controller and there is no AP mark. |
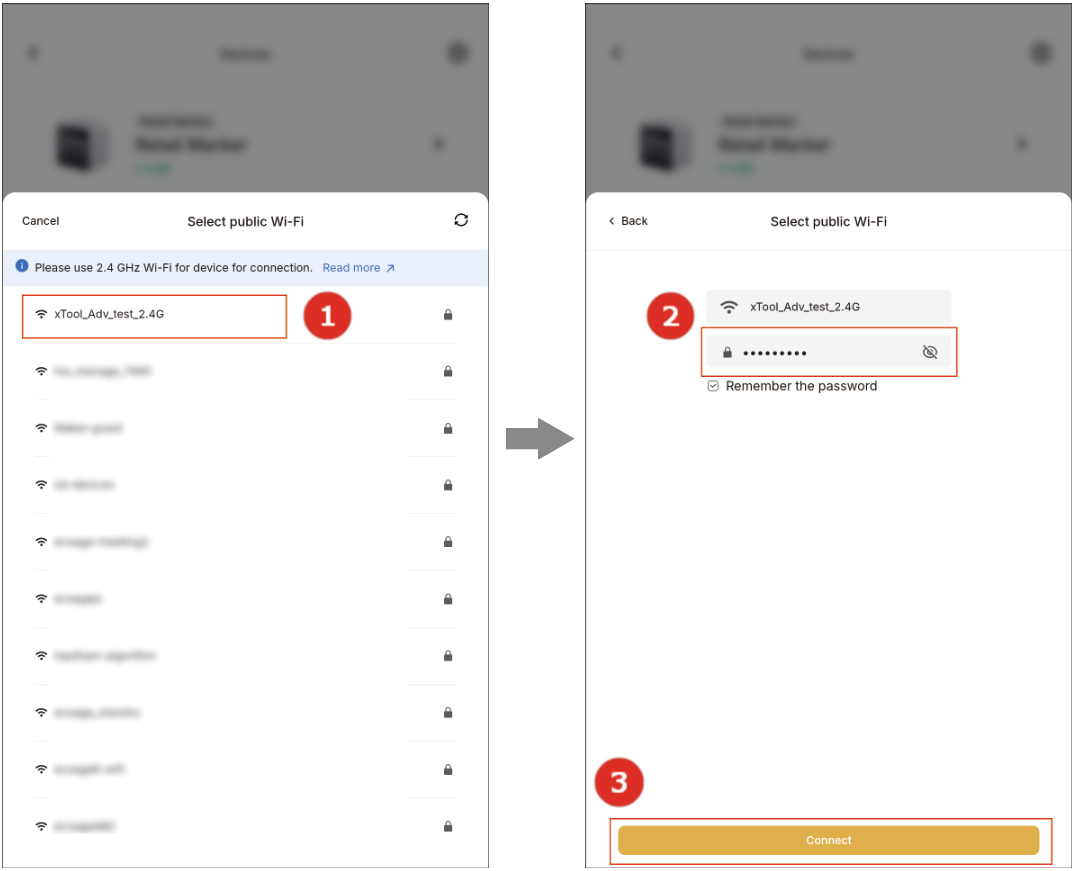
(3) In the Select public Wi-Fi dialog box, select the desired Wi-Fi, enter the password, and tap Connect.
Note:
|


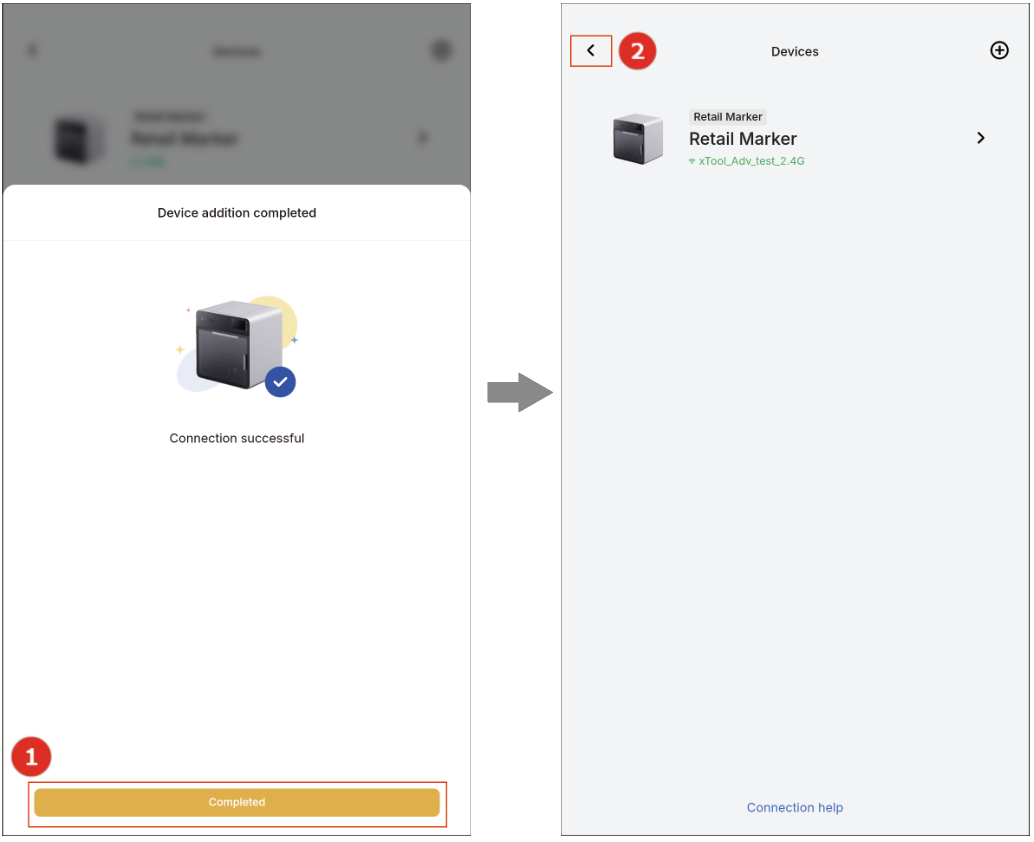
(4) Tap Completed. The device connected is displayed on the Devices page. Tap to return to the homepage.
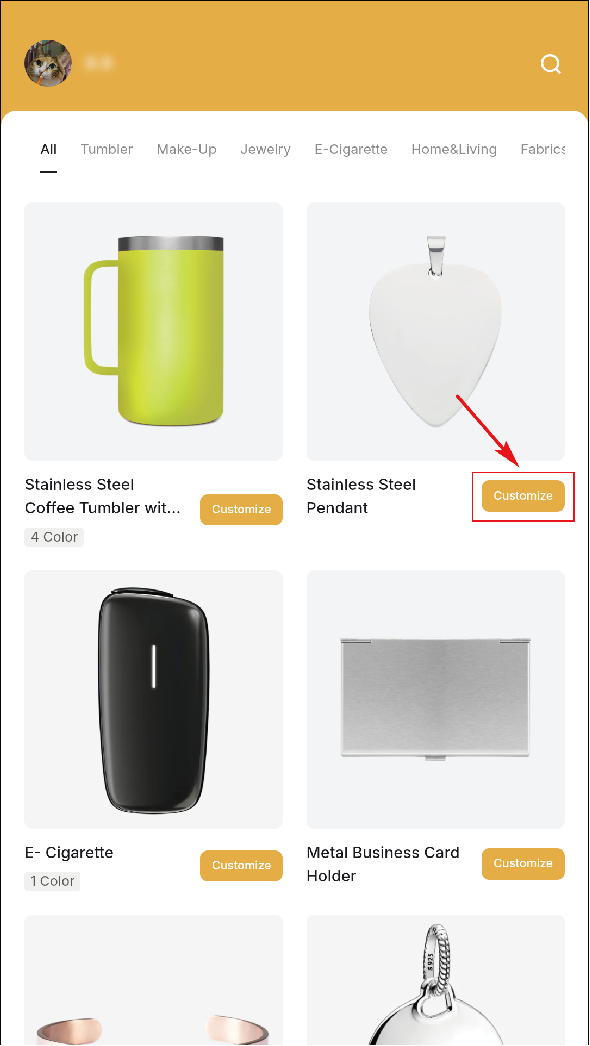
5. Used with xTool Retail Marker for processing
(1) On the homepage, tap the profile and select Customer mode.

(2) Tap Customize under the target product type.
(3) Add customized elements.
Note: Customized elements vary from different product types. |
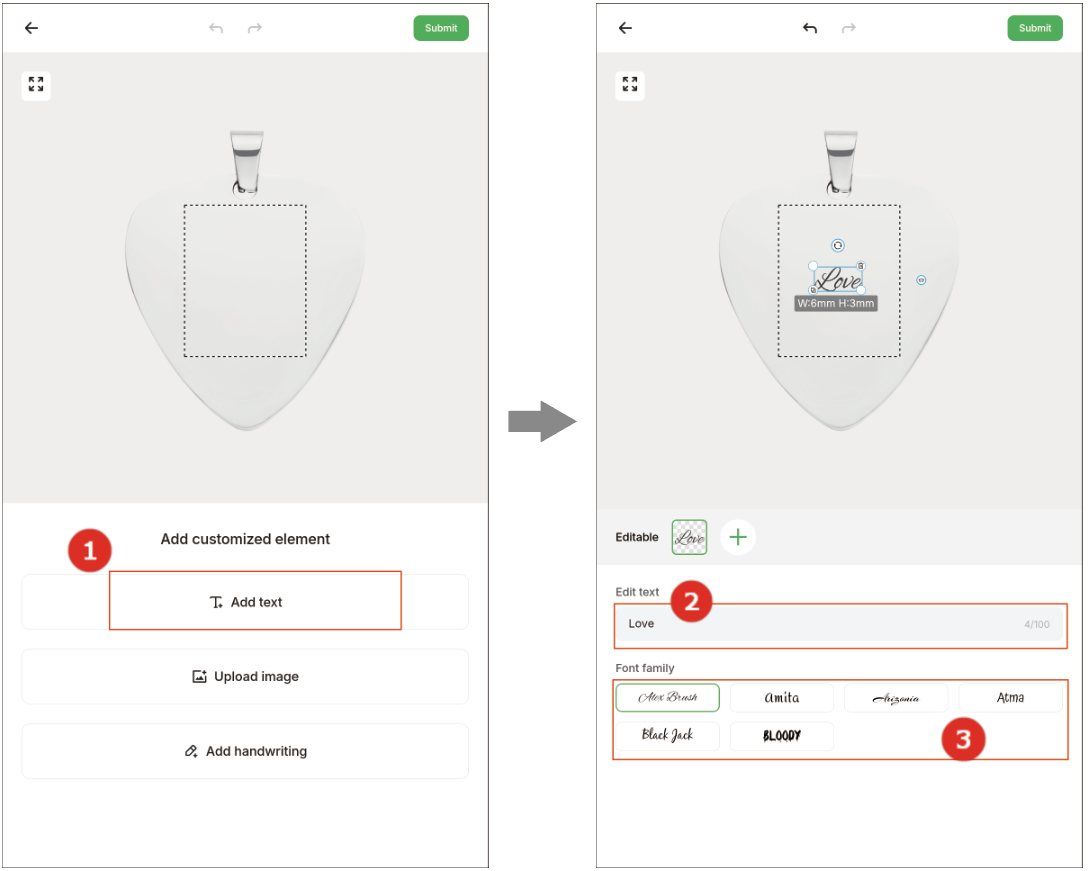
- Add text
Tap Add text, enter text in the text box, and select a font.
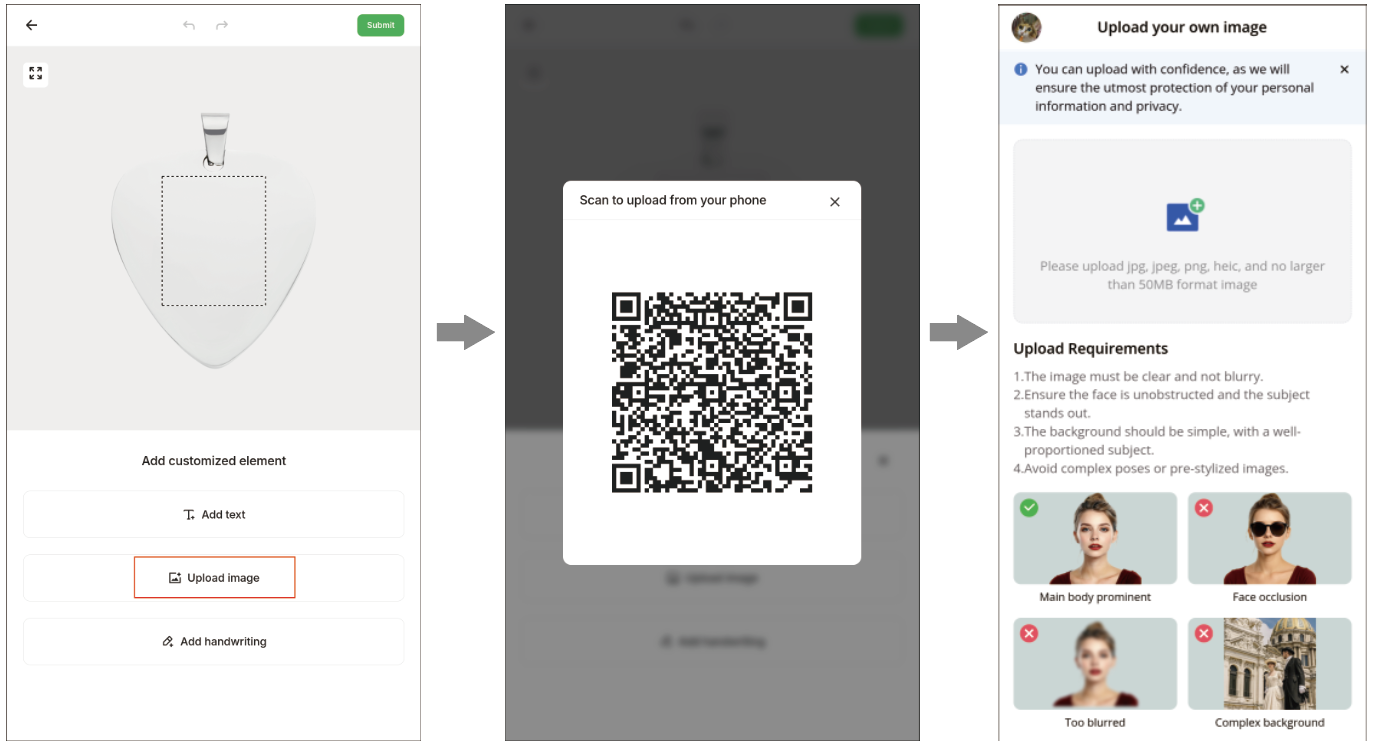
- Add image
Tap Upload image, scan the QR code displayed in the screen, and upload an image.
- Add graffiti
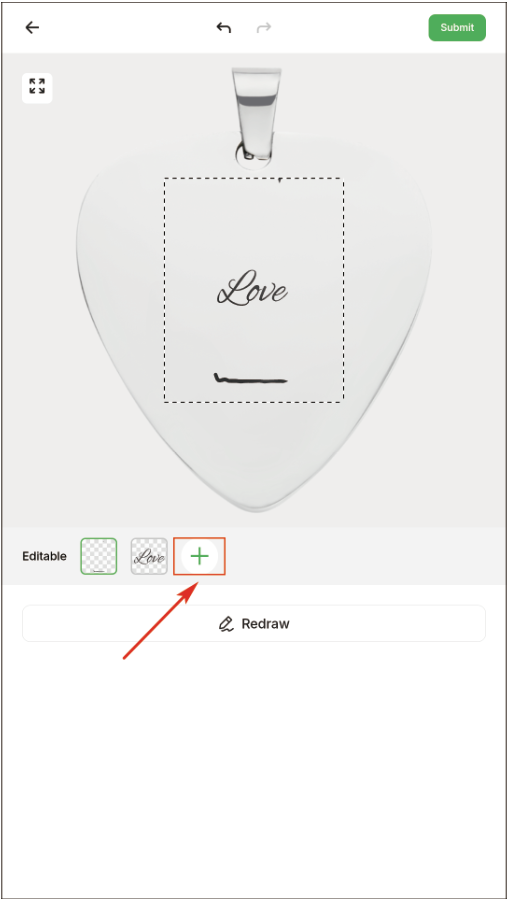
Tap Add handwriting and use the stylus pen to draw on the screen. After finishing the drawing, tap Save.
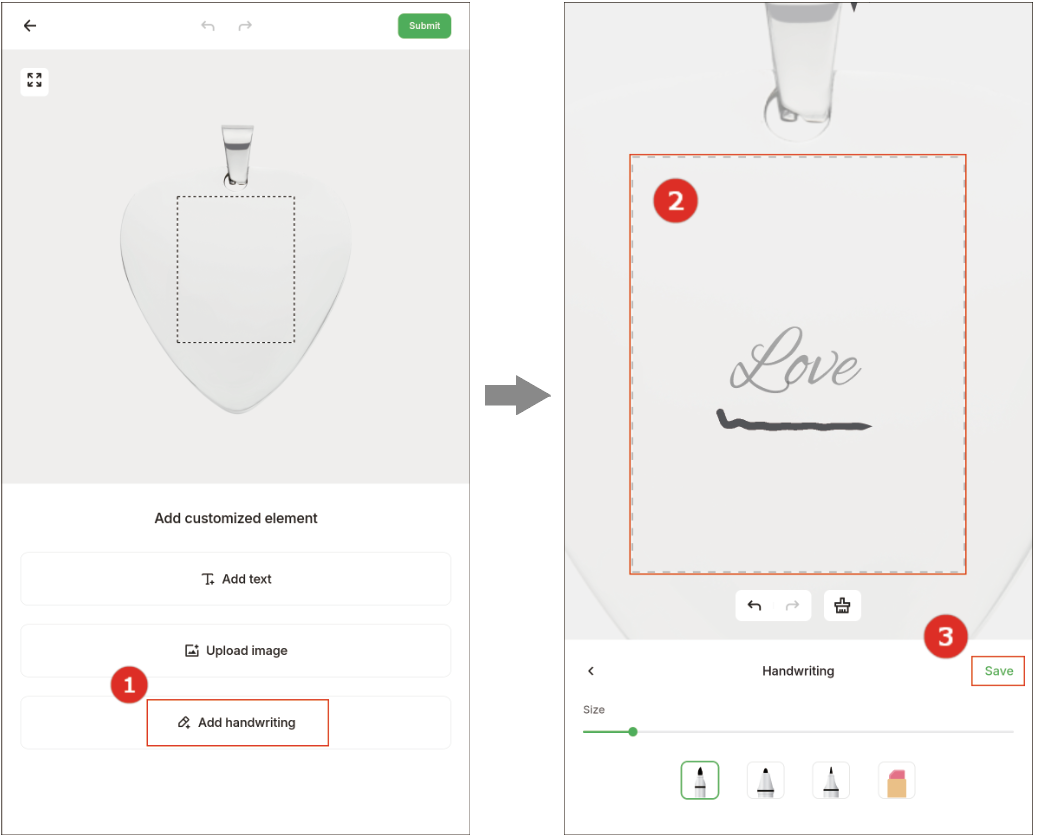
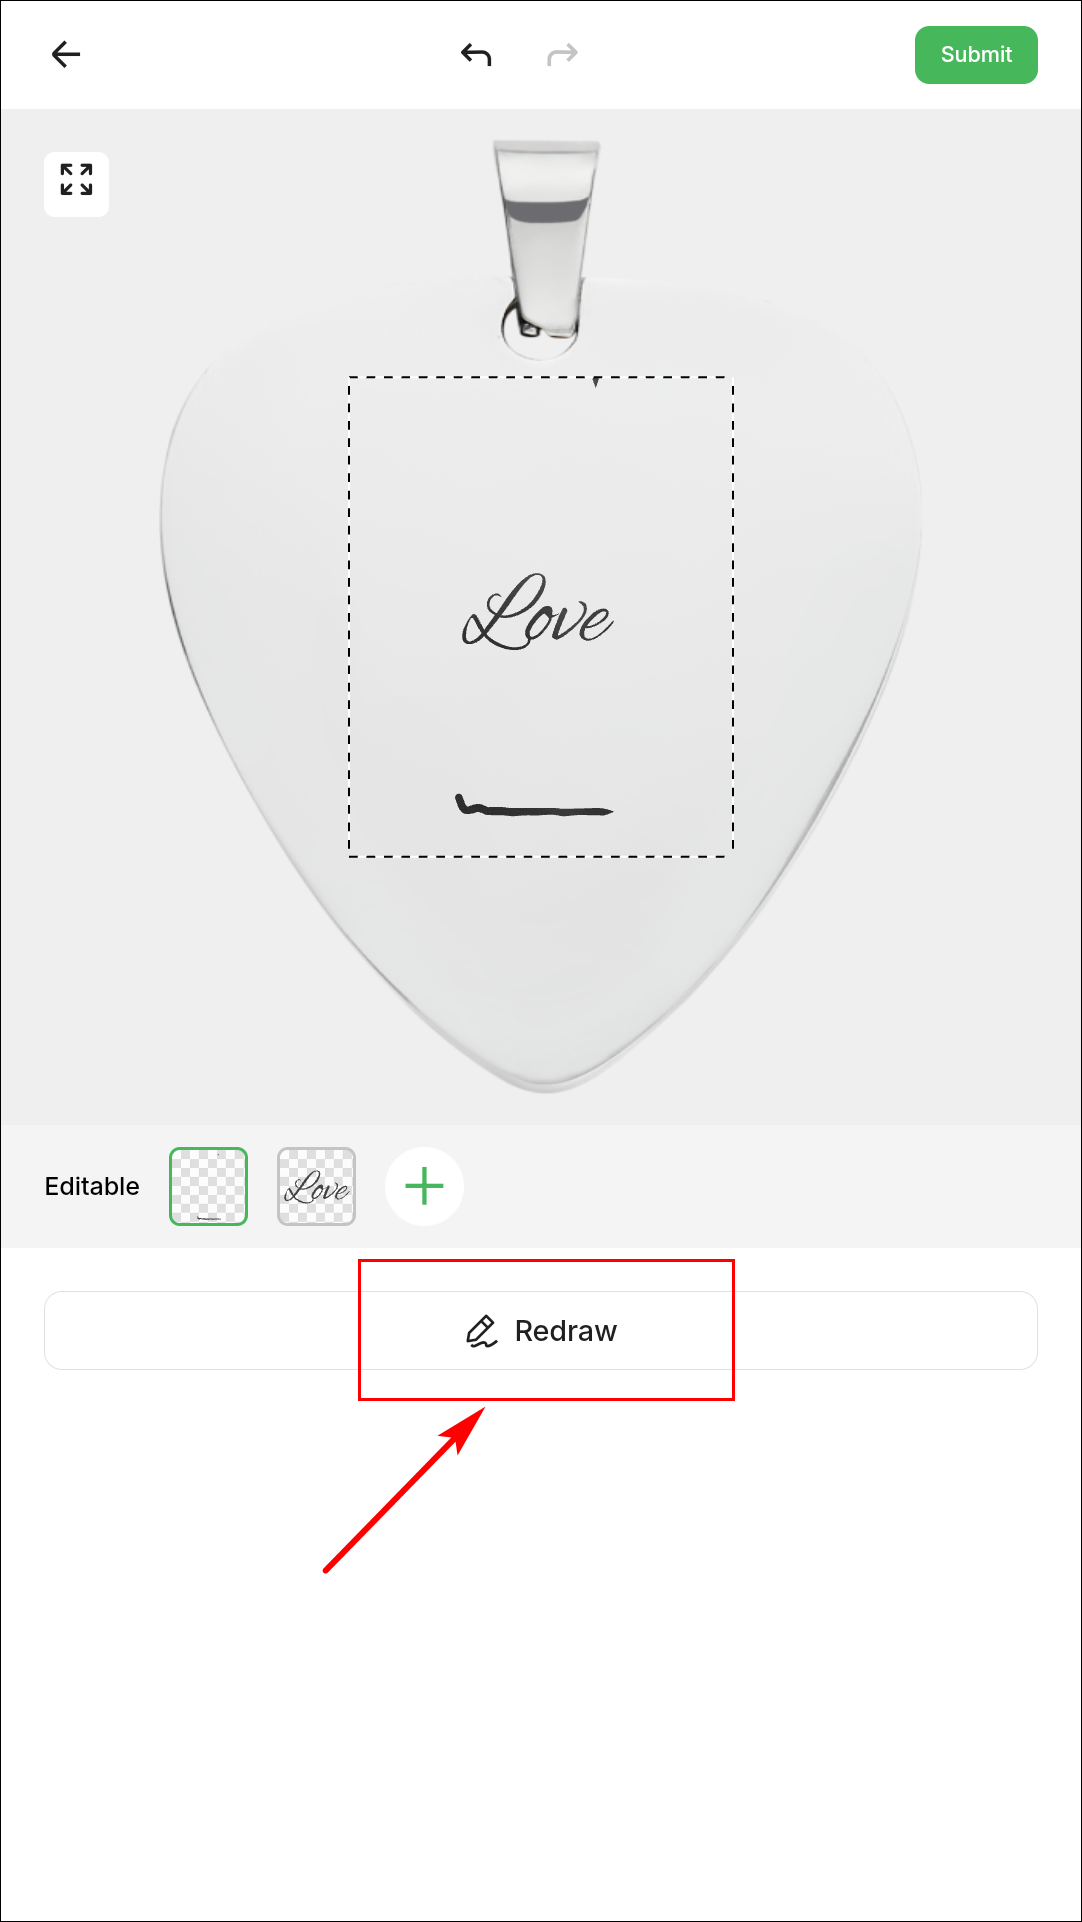
Note: If you are unsatisfied with the drawing, you can tap Redraw to redraw it.
|
(4) (Optional) Tap![]() to add more customized elements.
to add more customized elements.
(5) Tap Submit in the upper-right corner. In the Confirm order dialog box, tap Confirm.
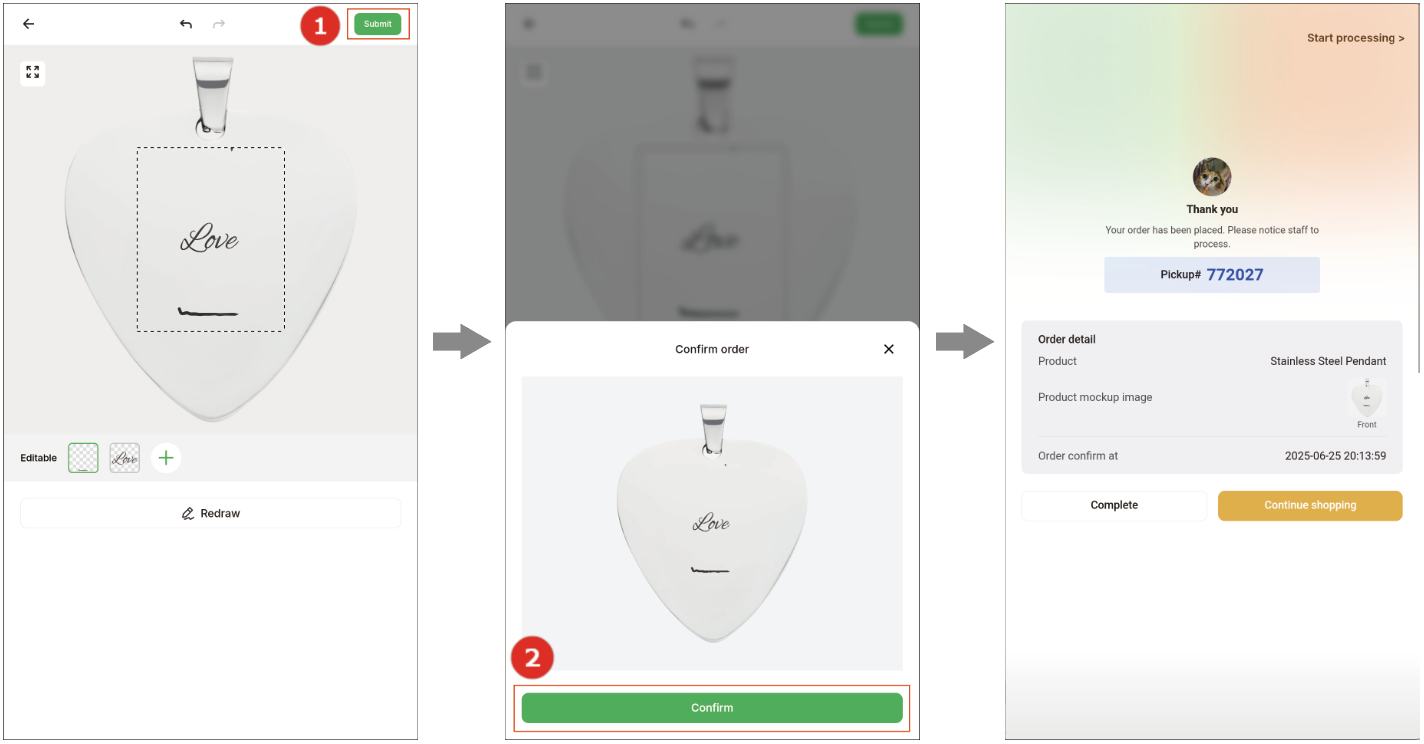
Note: If you want to customize a new product, tap Continue shopping.
|

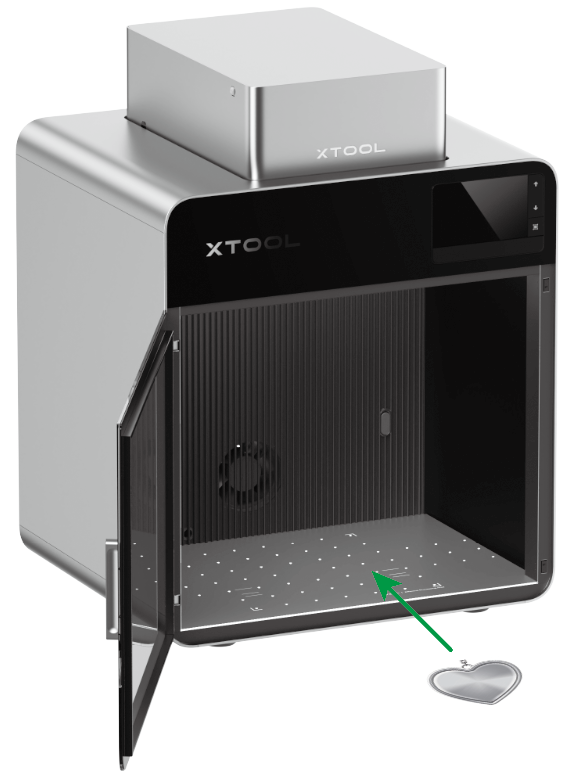
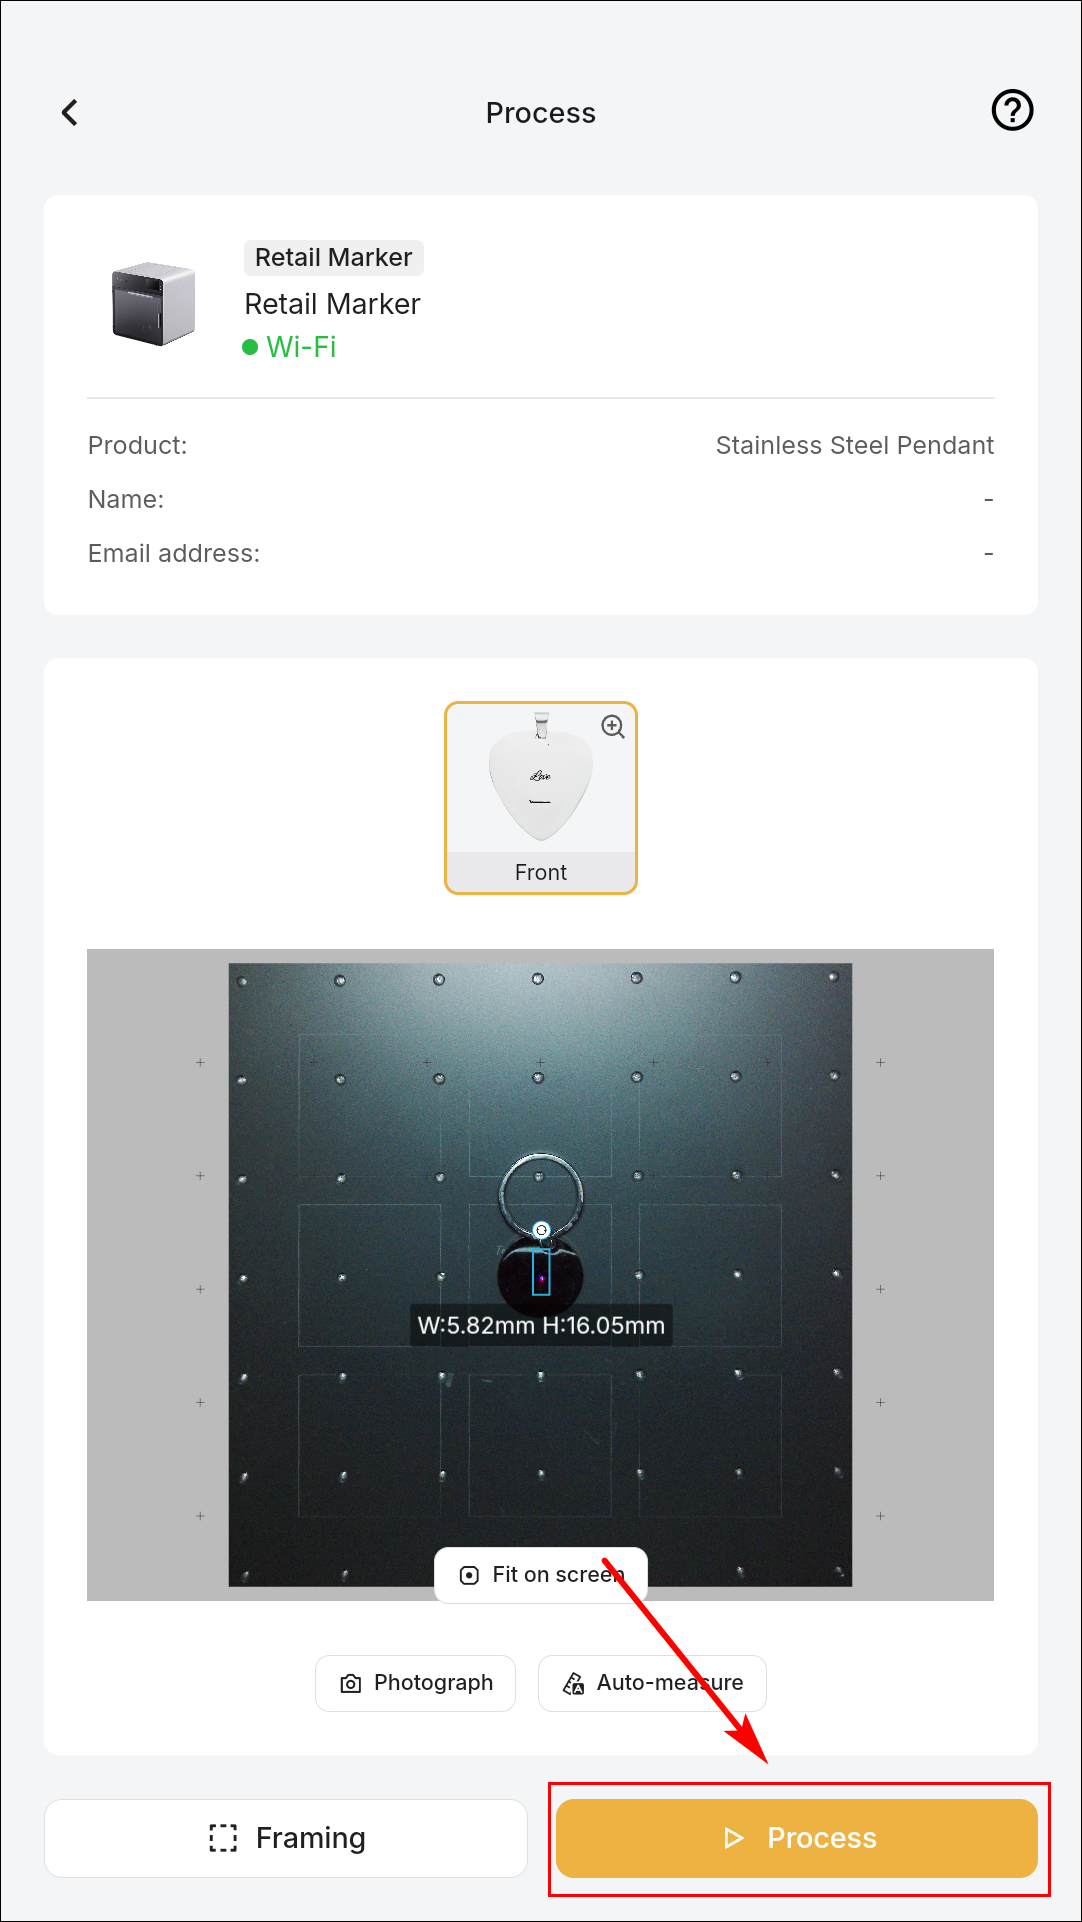
(6) Place the material to be processed into xTool Retail Marker.
(7) Tap Start processing and select the device. The device automatically captures the background and performs focus.
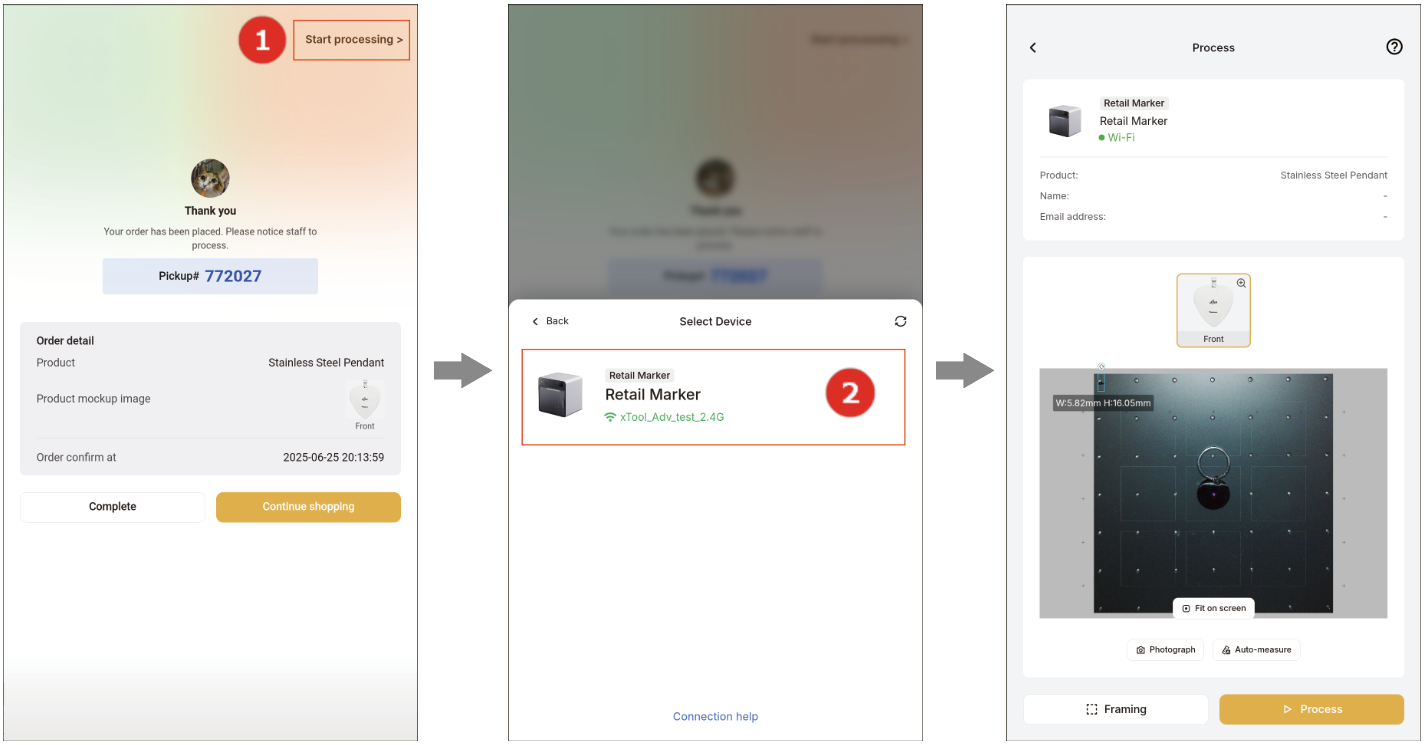
Note: If the device fails to capture the background or perform focus automatically, tap Photography or Auto-measure to capture the background or complete focus.
|

(8) Manually drag the elements to the desired position of the material to be processed.
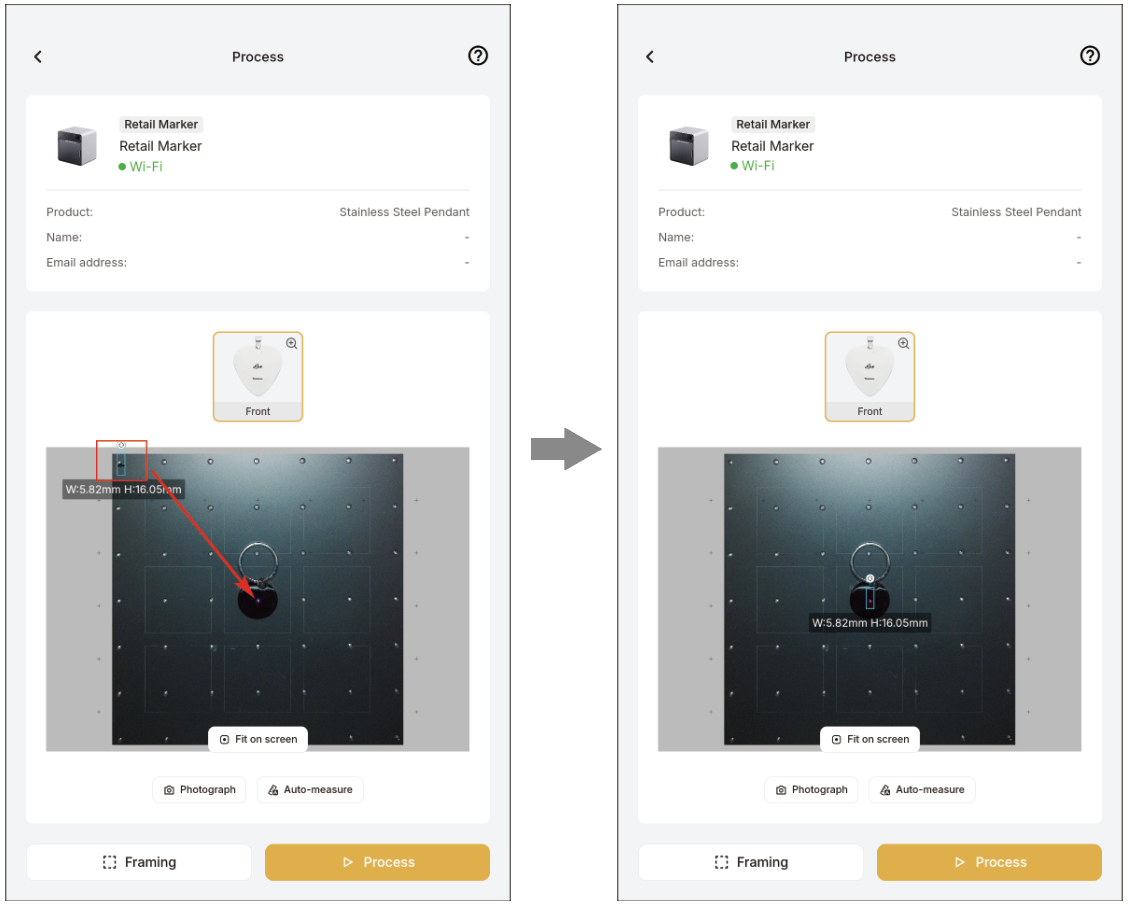
(9) Tap Process and the file is automatically delivered to xTool Retail Marker.
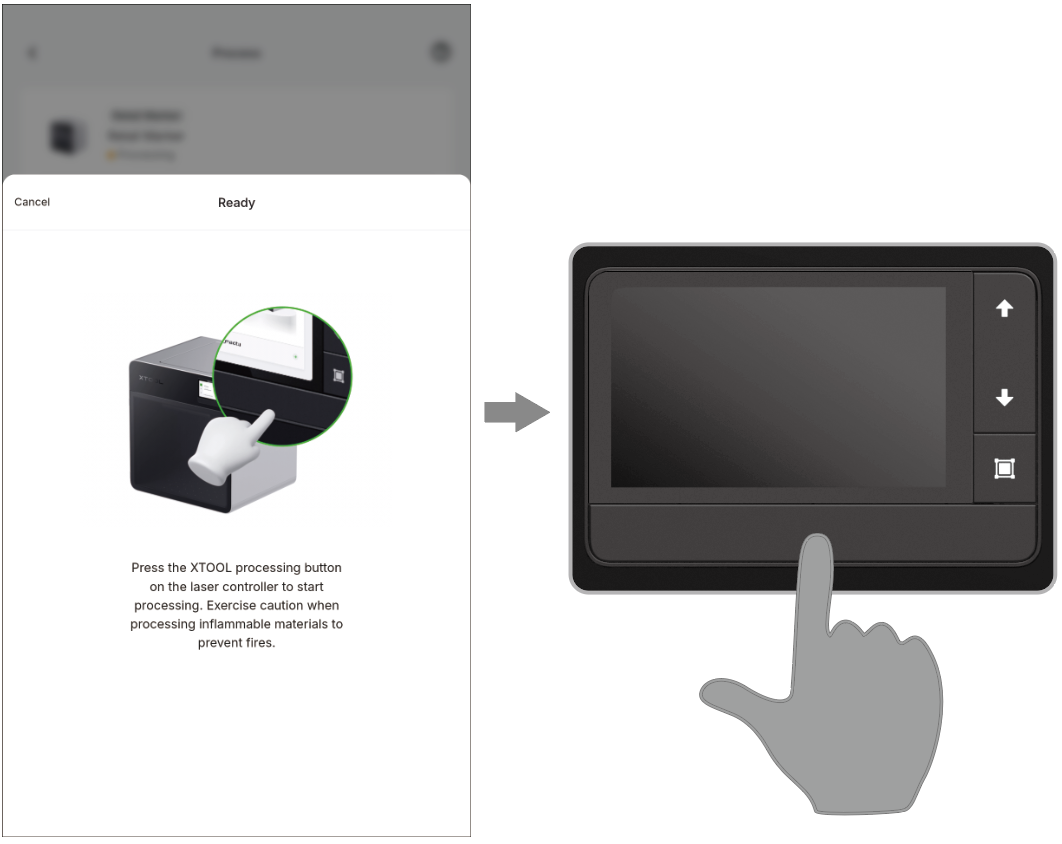
(10) After the Ready dialog box is displayed, press the start/stop button on the touchscreen controller to start processing.
(11) Wait for processing to be completed.
Services & Help
Learn & Education

Copyright © 2025 xTool All Rights Reserved.