Note:
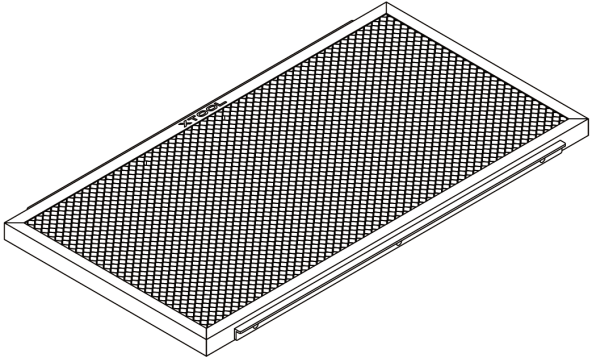
- Handle the honeycomb panel with care. Dropping or crashing the honeycomb panel may deform it and affect its function as a working panel.
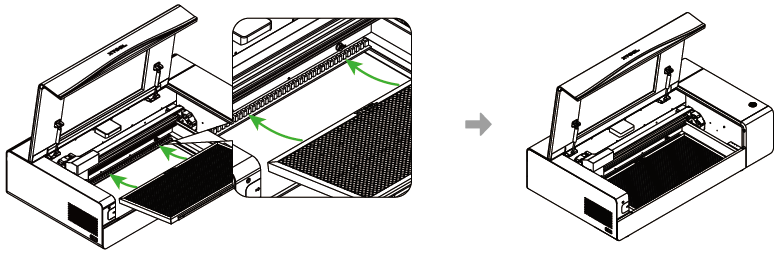
- Residues may remain in the honeycomb panel after material processing. It is recommended to take it out and clean it after each processing. To help you remove and clean the honeycomb panel easily, the area of the honeycomb panel is designed to be smaller than the working area. Hand clasping positions are provided on the two sides after you place it into xTool P2/P2S.
- As time goes, some parts of the honeycomb panel may sink. To prevent the problem where the top surface of a material placed on the honeycomb panel is lower than the slats plane in Process on slats processing mode, which causes the failure of auto-measure, the honeycomb panel is equipped with thick non-slip foot pads that raise it 1.5 mm higher than the slats plane after it is placed into xTool P2/P2S.
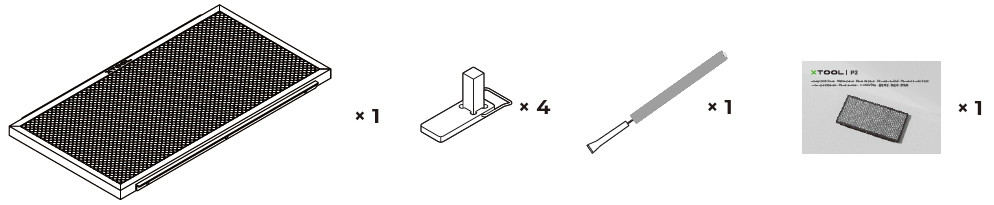
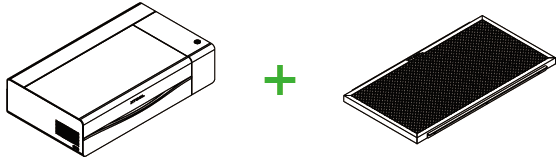
List of items
Use the honeycomb panel
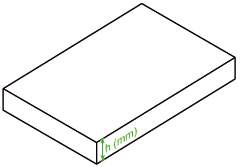
Thickness of materials supported
|
If you use the honeycomb panel with only xTool P2/P2S, you can process a material with a thickness h, where 0 < h ≤ 22. |
If you use the honeycomb panel with xTool P2/P2S and the rise base, you can process a material with a thickness h, where 22 < h ≤ 176. |

Place the honeycomb panel
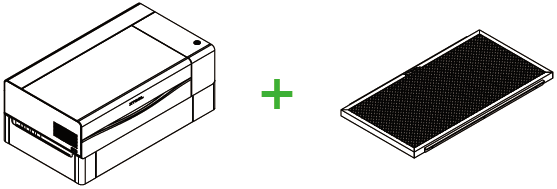
Use the honeycomb panel with only xTool P2/P2S
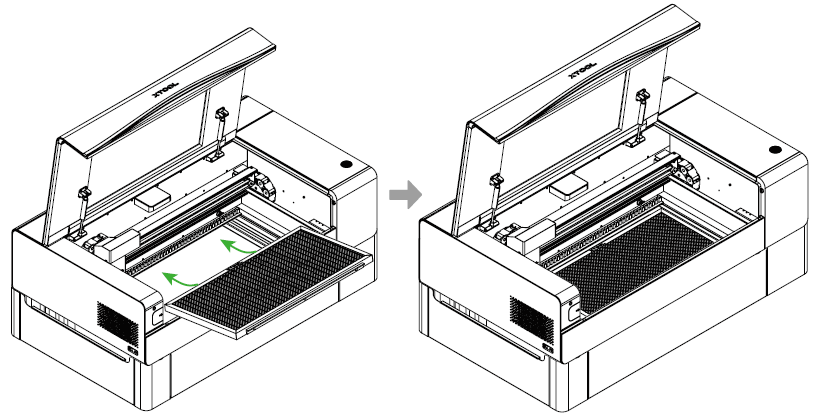
1. Remove all the slats from xTool P2/P2S.
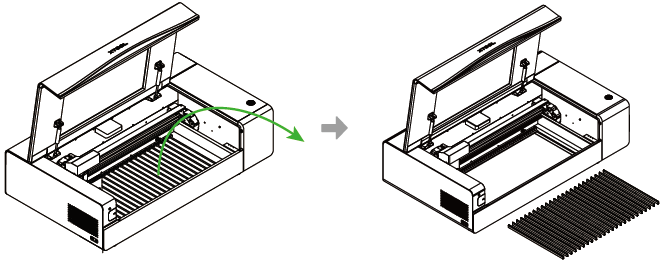
2. Place the honeycomb panel into the device, resting the fixing plates on the front and rear sides of the honeycomb panel on the slat holders.
Use the honeycomb panel with xTool P2/P2S and the riser base

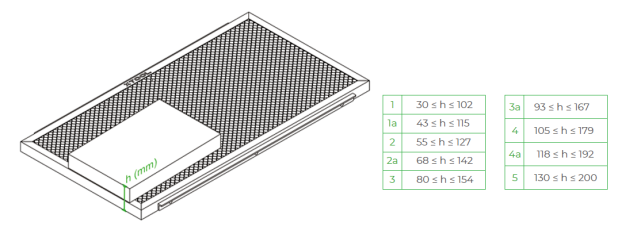
Determine the level to place the baseplate based on the thickness of the material and honeycomb panel, and then place the honeycomb panel on the baseplate.
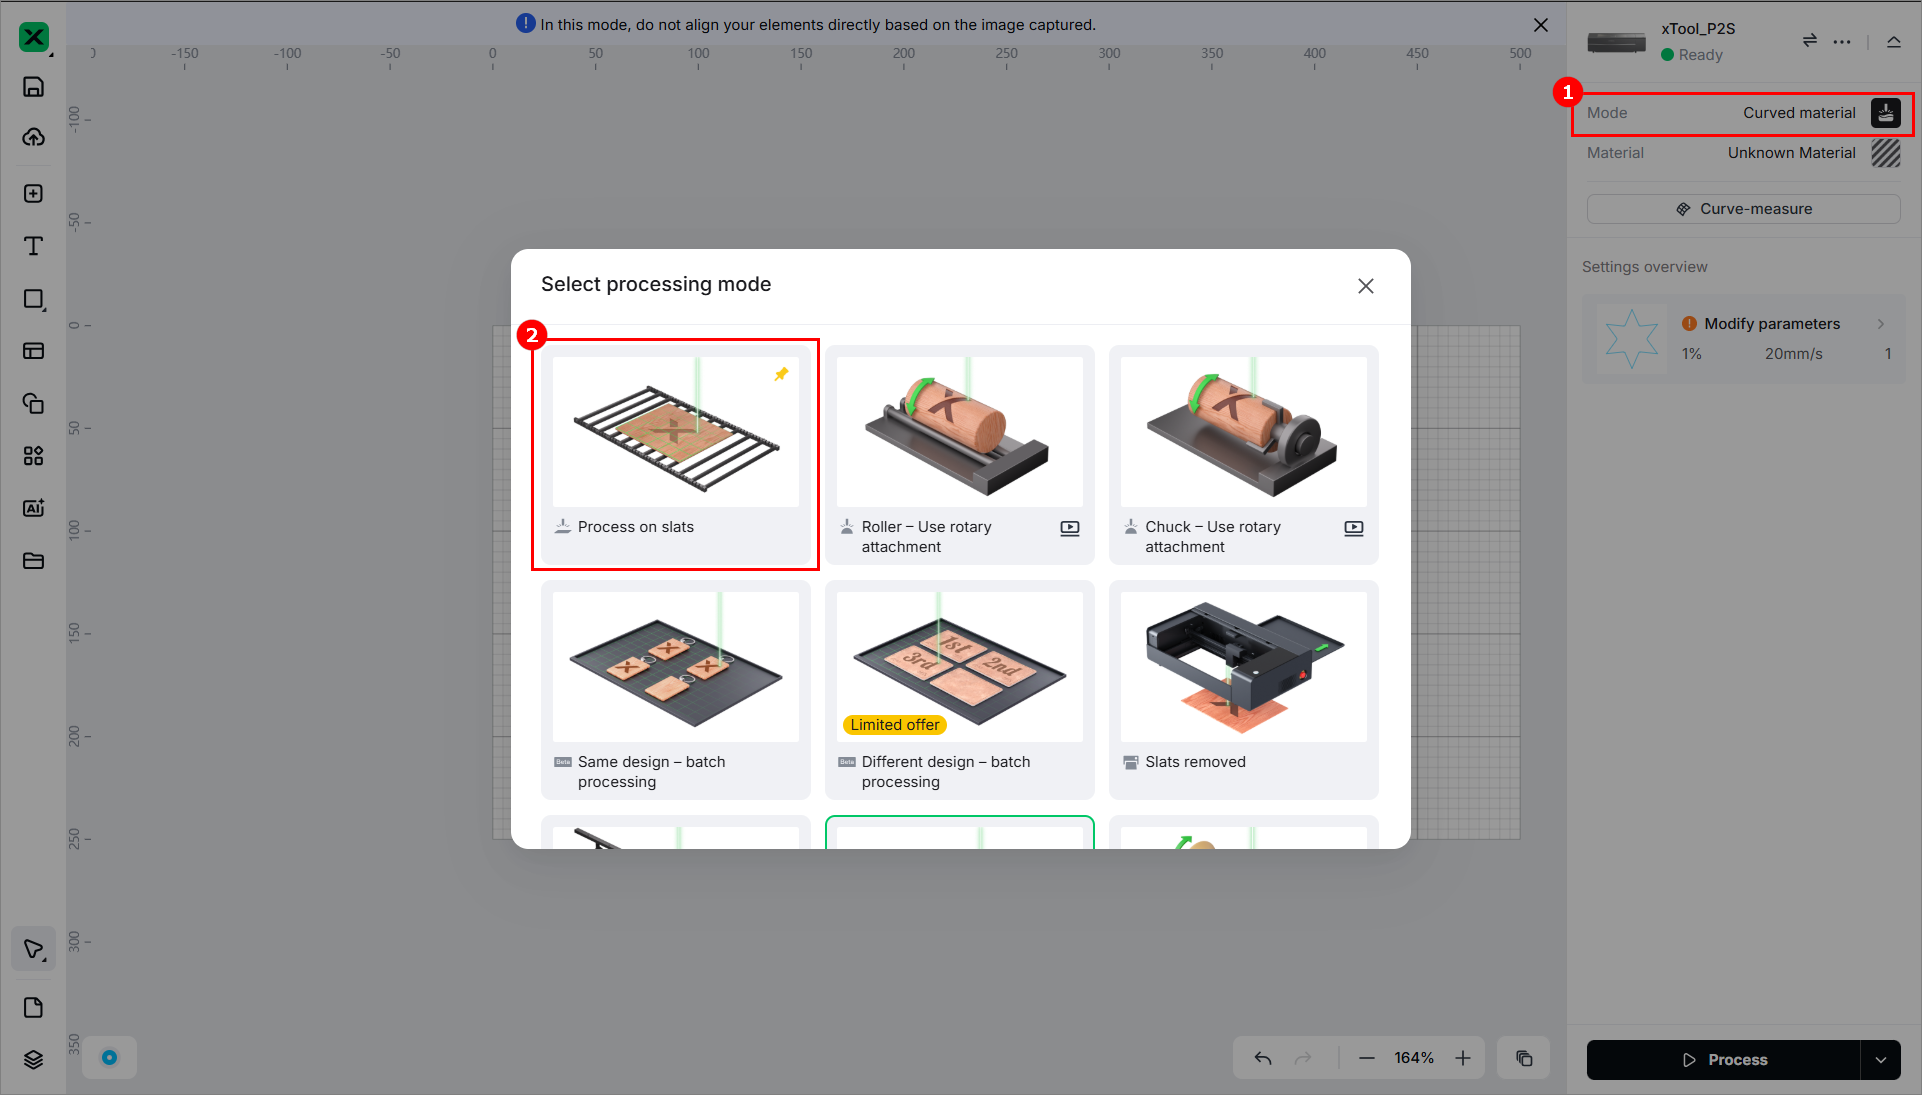
Select the processing mode
To process flat materials
- If you place the honeycomb panel inside xTool P2/P2S, set the processing mode to Process on slats. In this mode, the processing area of the honeycomb panel is 556 mm × 280 mm, which is smaller than the processing area (600 mm×305 mm) available when you use the slats.
After placing the material, click Aimed-measure or Quick-measure to measure the thickness.

Note: The honeycomb panel is equipped with non-slip floor pads. In Process on slats mode, the thickness measured may be slightly different from the actual thickness of the material. You don't need to modify the thickness value on xTool Studio. It doesn't affect the processing results.
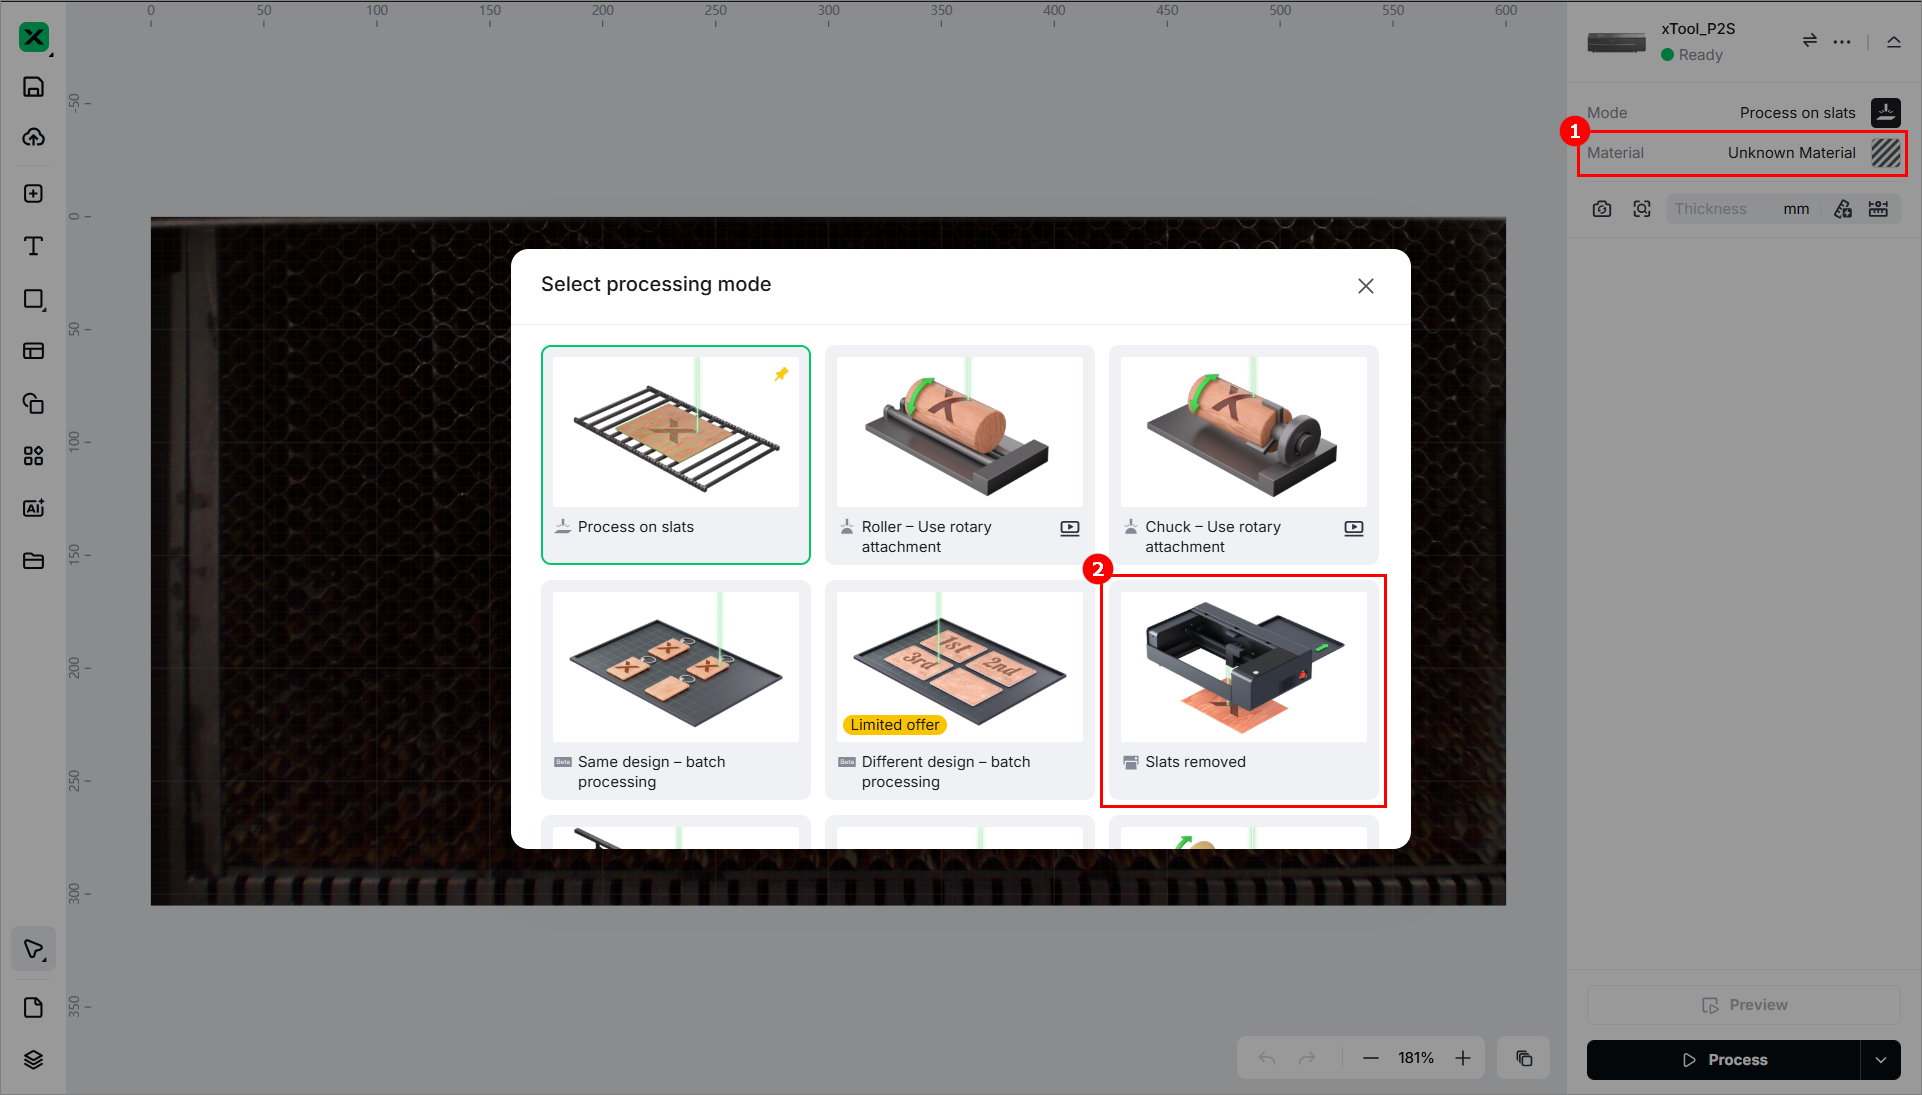
- If you place the honeycomb panel inside the riser base, set the processing mode to Slats removed. In this mode, the maximum processing area supported is 500 mm × 250 mm, which is smaller than the area (556 mm × 280 mm) of the honeycomb panel.
After placing the material, click Aimed-measure to measure the distance.

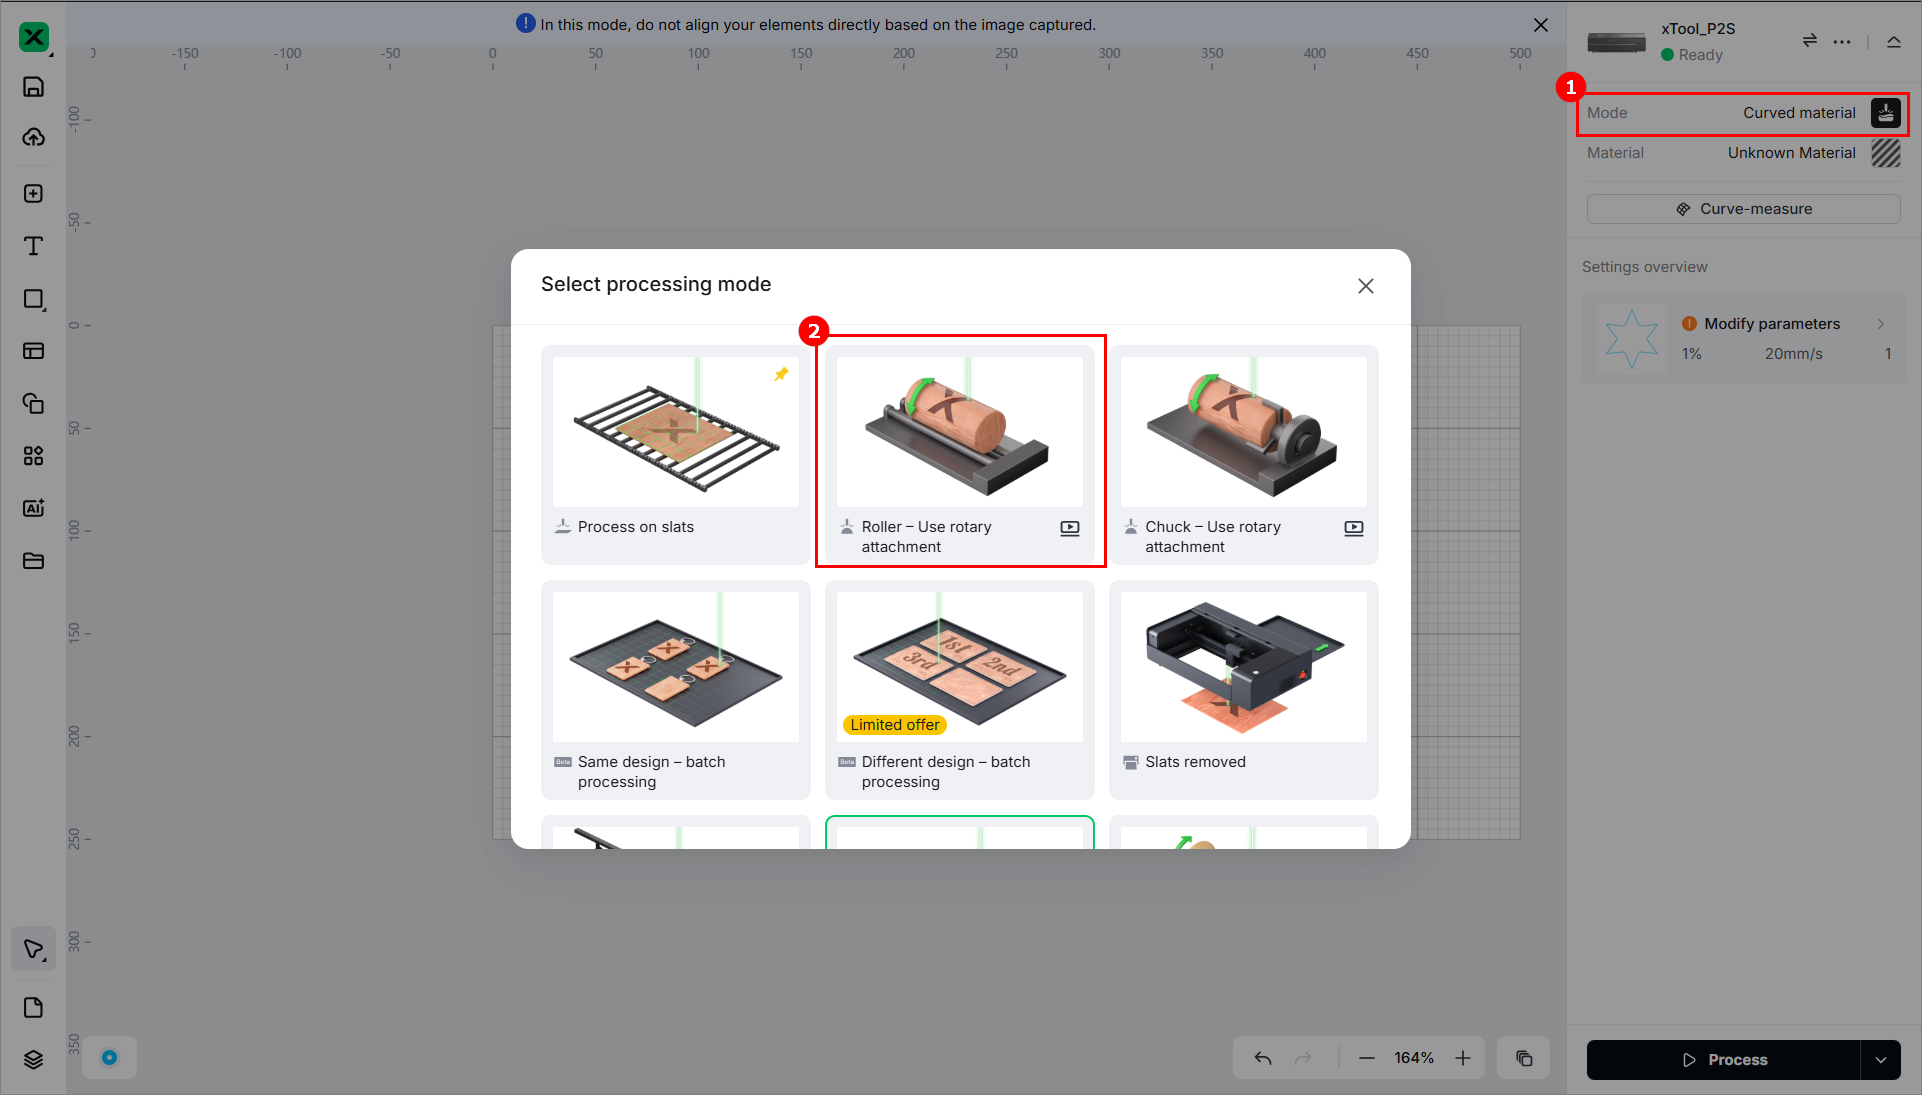
To process cylindrical materials
Set the processing mode to Roller - Use rotary attachment and ensure that the surface of the material to be processed is higher than the slats plane.
After placing the material, click Quick-measure to measure the distance.

To process materials with curved surfaces
Set the processing mode to Curve process and ensure that the surface of the material to be processed is higher than the slats plane.
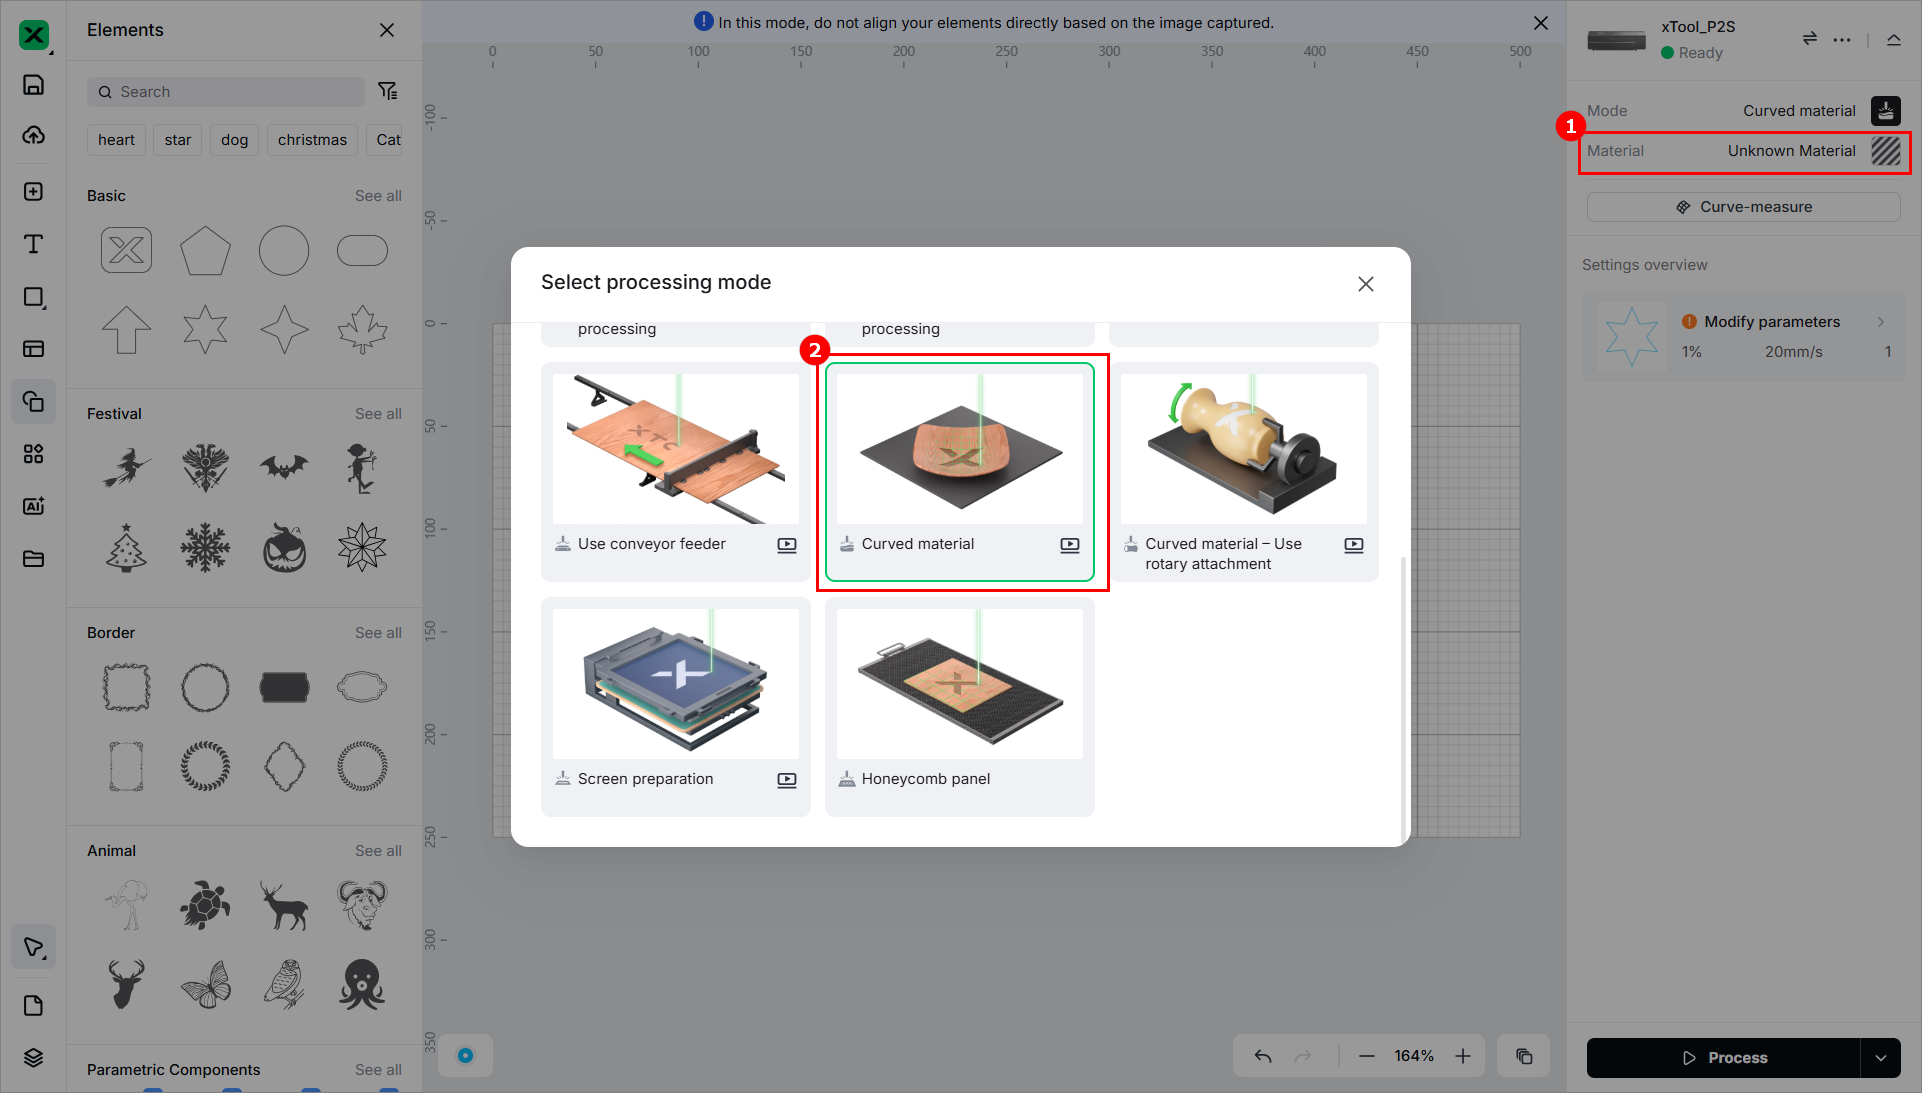
After placing the material, click Curve-measure to measure the area to be processed.

Start processing
1. Connect xTool P2/P2S to xTool Studio.
Refer to Connect and Set Up xTool P2S with xTool Studio for instructions on connecting xTool P2S to xTool Studio.
2. Design or import images or other elements for processing.
3. Set the processing mode and complete auto-measure.
Note: Use the auto-measure instead of manual-measure to measure the thickness or distance of a material.
4. Set the object processing parameters.
5. Click Process to preview the object.
6. Click Start and press the button on xTool P2/P2S to start the processing.
Wait for the processing to complete.
Note:
- For details about how to process materials in Process on slats mode, see Process on slat surfaces with xTool P2/P2S.
- For details about how to process materials in Slats removed mode, see Process without slats with xTool P2/P2S.
- For details about how to process materials in Roller - Use rotary attachment mode, see (xTool Studio) Use Rotary Attachment 2 (RA2) with xTool P2/P2S.
- For details about how to process materials in Curve process mode, see (xTool Studio)Process Materials with Curved Surfaces Using xTool P2 Series.
Maintenance
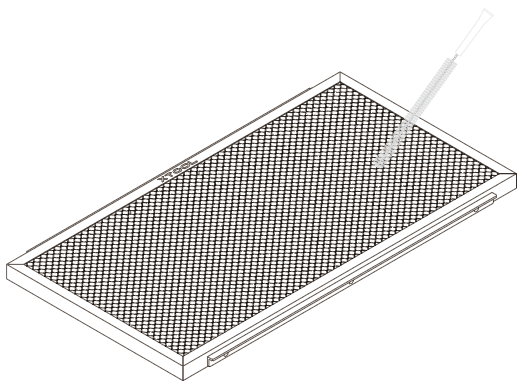
Residues may remain in the honeycomb panel after material processing. It is recommended to take it out and clean it after each processing, so that the next processing won't be affected.
You can use the brush delivered with the honeycomb panel to clean the cells of the honeycomb panel.
Services & Help
Learn & Education

Copyright © 2025 xTool All Rights Reserved.