Here we use xTool P2 as an example to process materials with curved surfaces.
Requirements for materials
Only smooth surfaces with an angle lower than 45 degrees are supported.
1. Connect xTool P2 to xTool Studio
(1) Use a USB cable to connect your device to your computer, and turn on your device.
(2) Open xTool Studio on your computer. In the upper-right corner, click +New project.
(3) In the upper right corner, click the icon next to the device name.
(4) Click Connect Device. Select the device to connect.
Note: After the device is connected, you can configure Wi-Fi for it so that you can connect it to xTool Studio through Wi-Fi next time.
2. Place the material
(1) Remove the slats, and for thick materials, you may need to use the riser base.
Adjust the placement height of the material. The processing result is better when the material surface to be processed is close to the reference plane (slat plane).
(2) Close the lid and do not open it during the measurement and processing.
3. Select the processing mode and material
(1) Click the current processing mode and select Curved material.
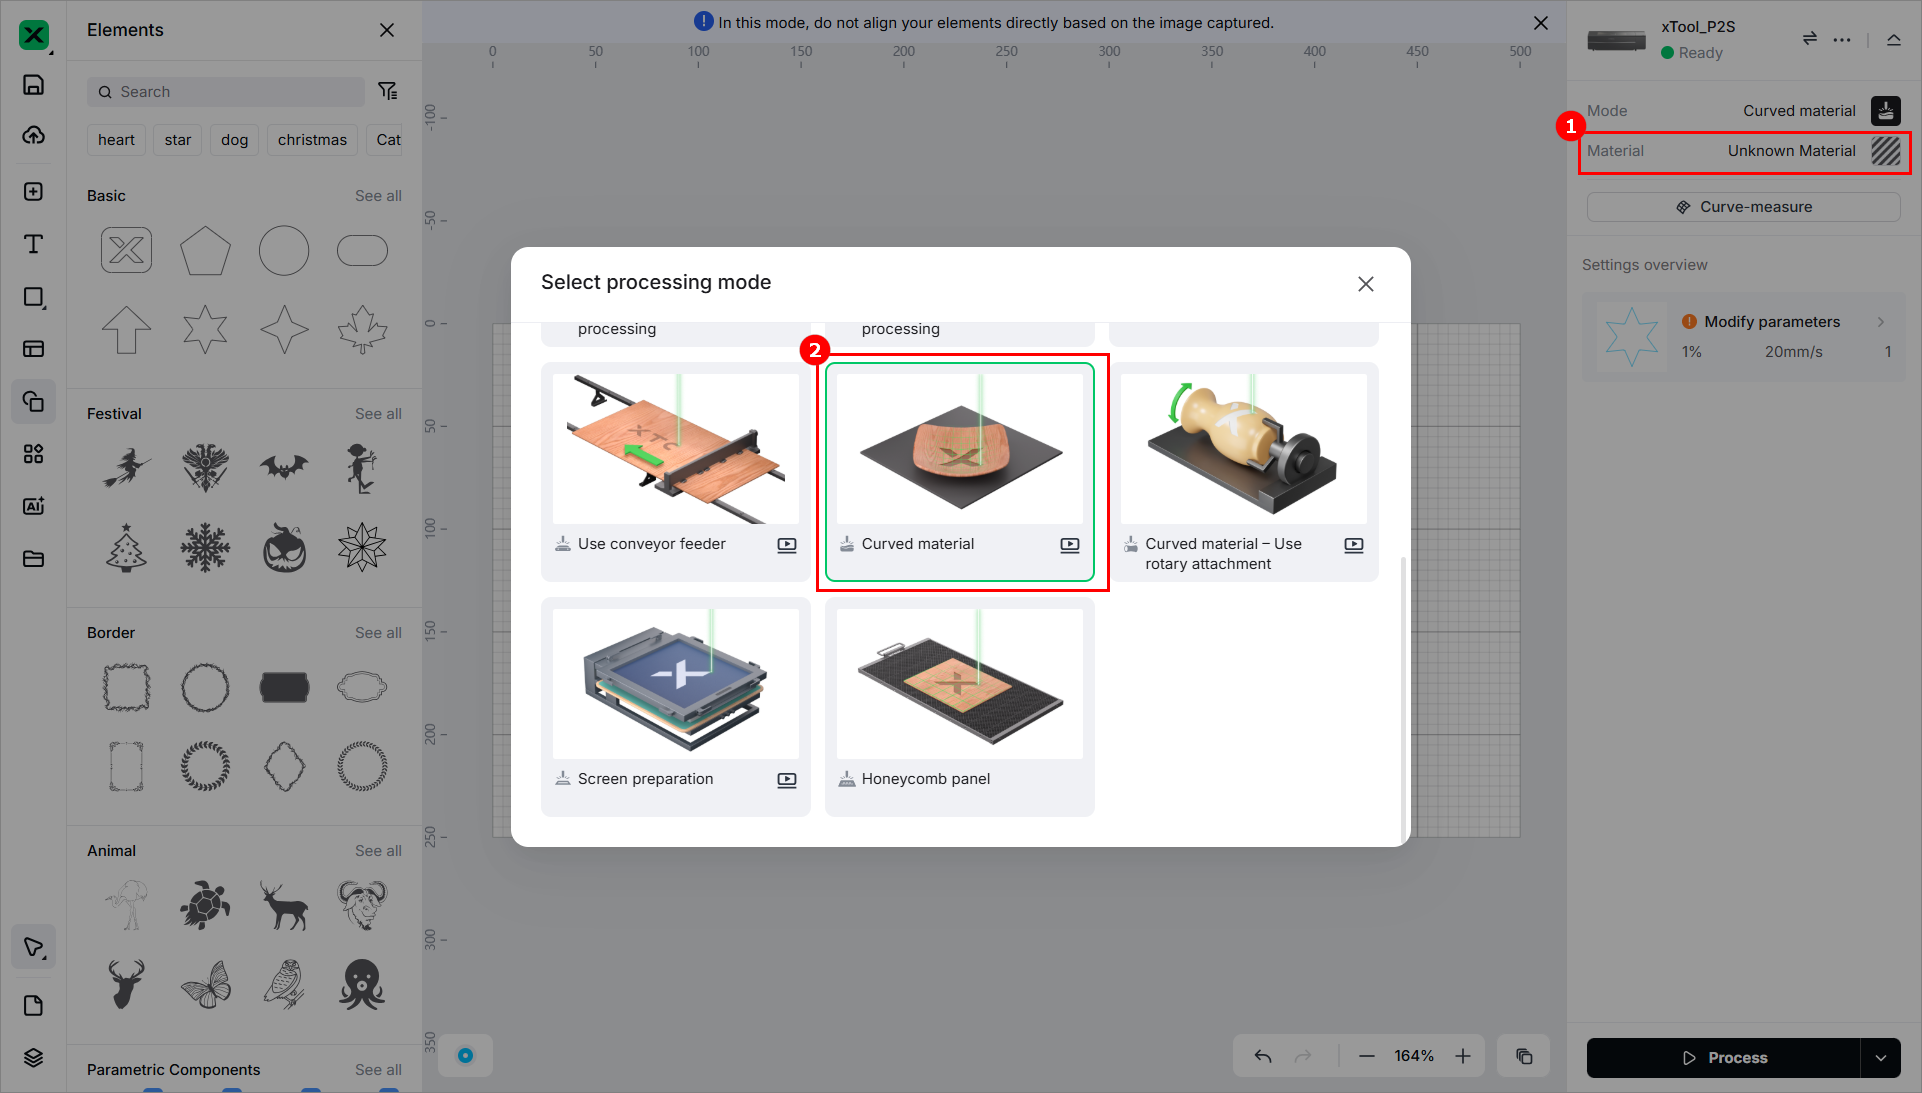
(2) Click Unknown Material, select a desired material, and click Apply.
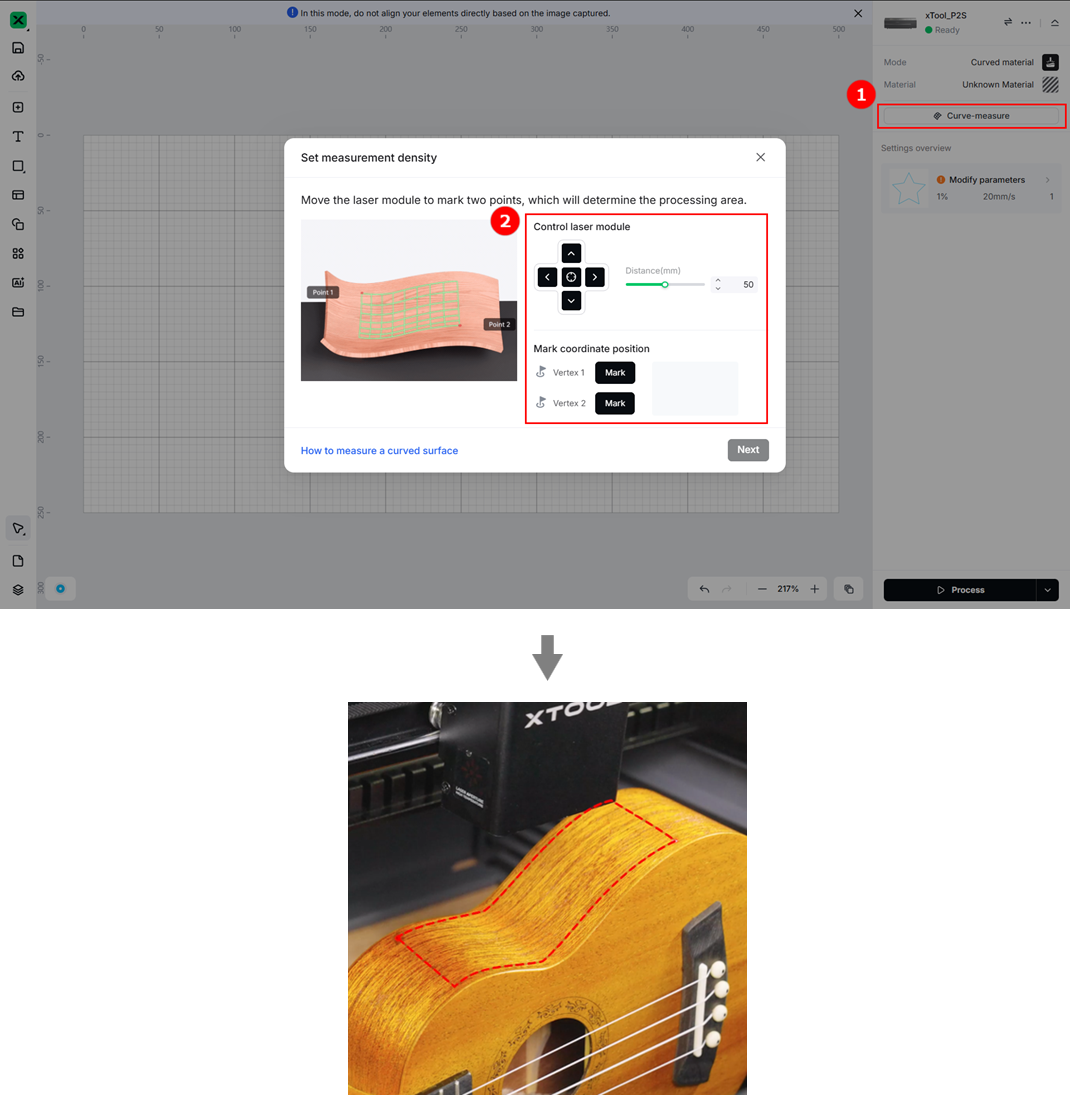
3. Set the processing area and measurement density
(1) Click Curve Measure and set the area to be measured in the dialog box that is displayed.
- Click the arrow keys to move the laser module. When the red spot fall at the upper left vertex of the area to be measured, click Mark to mark vertex 1. Perform the same step to mark vertex 2 in the bottom-right corner. Then, the software measures the area selected.
Tips: You can set the distance the laser module moves each time when you click an arrow key.
Precautions:
- To ensure optimal safety during surface processing, the surface model generated through measurement will not be saved with the file.
- Surface processing is complex; remain attentive to the processing status at all times.
- When verifying the measurement area, manipulate the laser head only with arrow keys. Refrain from manually moving the laser head.
- Employing low speeds (below 80mm/s) for processing is highly recommended. In cases of higher curvature, even lower speeds (under 50mm/s) are advised.
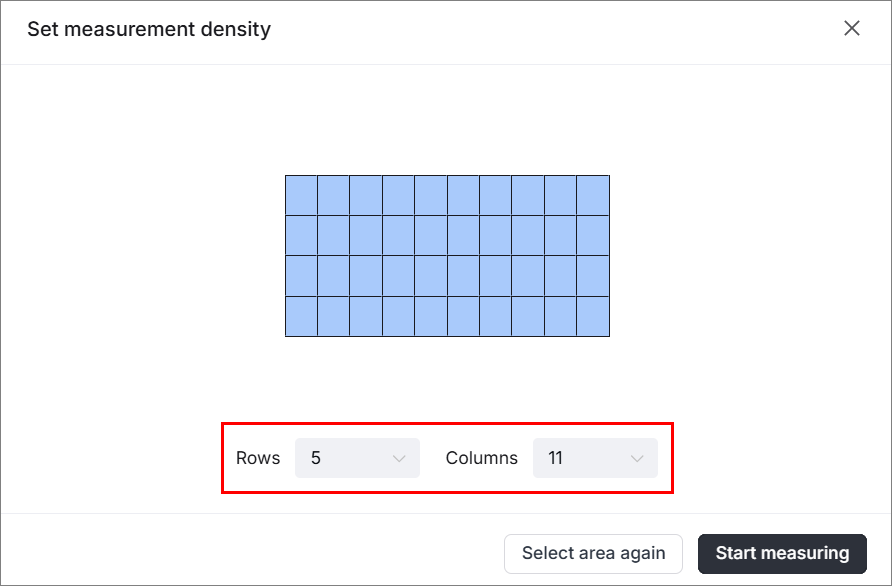
(2) Set the measurement density.
A recommended density is provided based on the size of the area. You can modify it as required. The higher the density, the more precise the model, and the longer the measurement time.
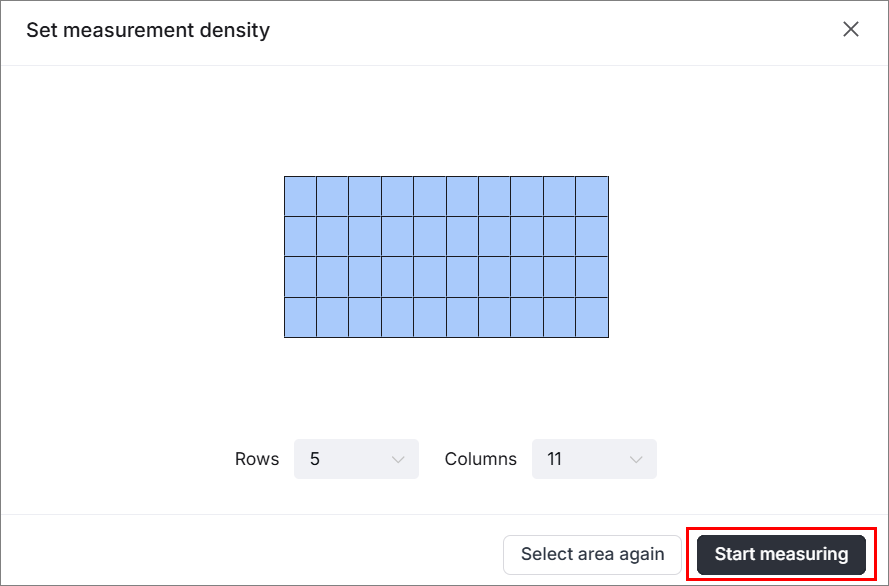
(3) Click Start measuring. xTool Studio starts to measure the area and you can see the measurement progress.
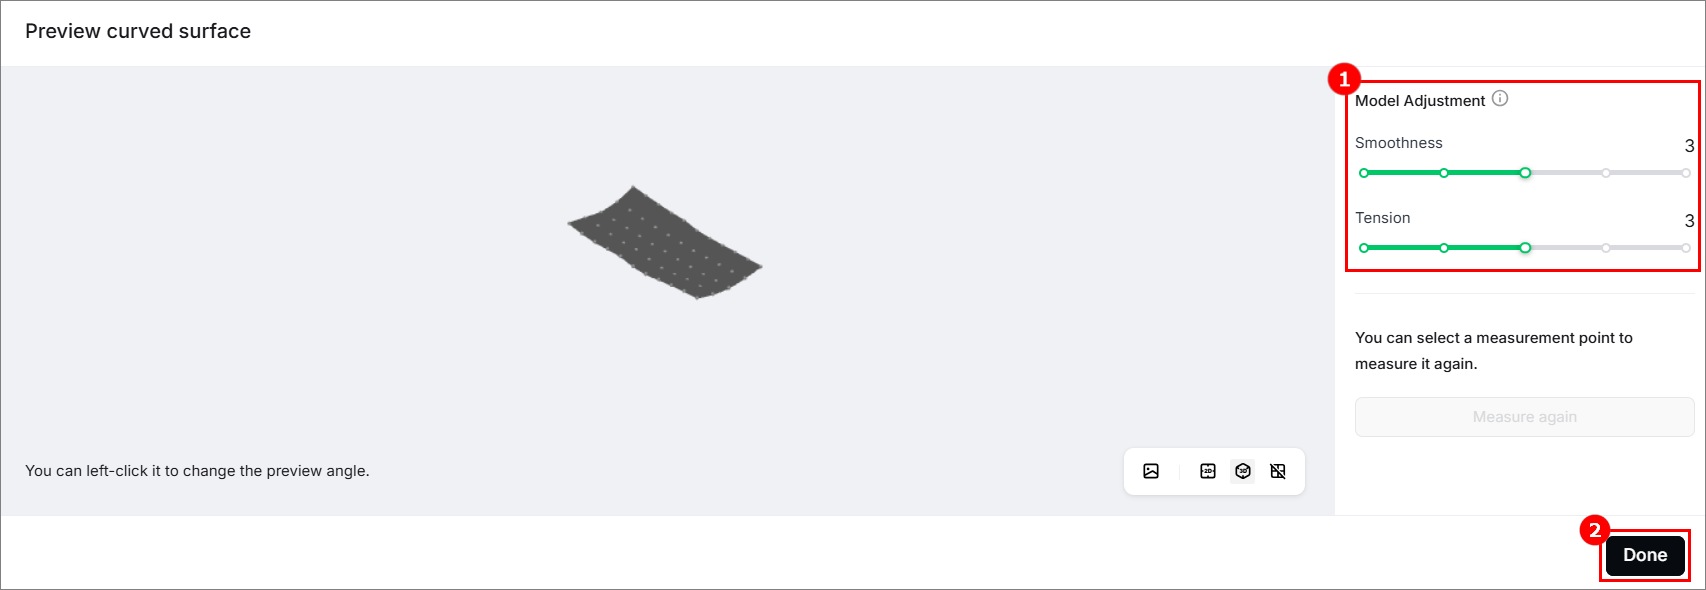
(4) Adjust the model generated, and click Done to save the model.
After the measurement is complete, xTool Studio generates a model. You can hold down the left mouse key to change the viewing angle, and you can adjust it by setting its smoothness and tension.
4. Design objects and set parameters
Set the position of and parameters for the object to be processed.
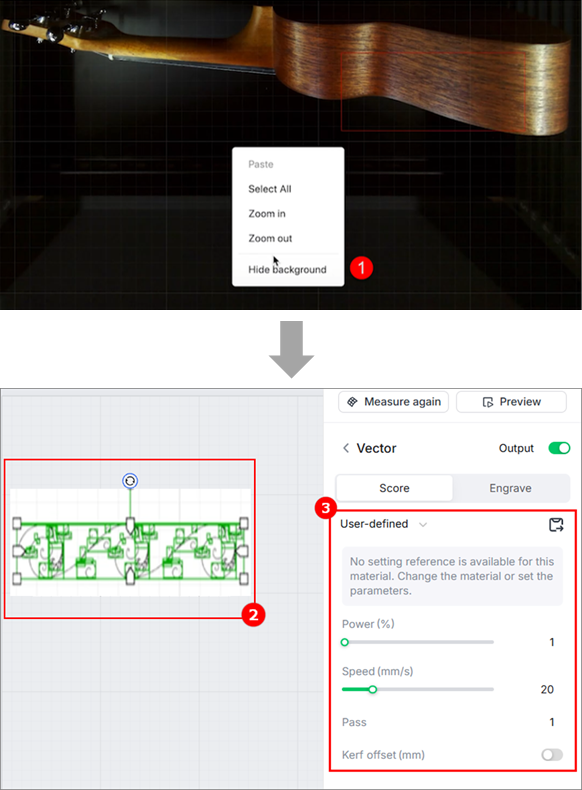
Note: In this mode, the flat view may cause perceptual biases. Do not complete the alignment based on the image captured. You can hide the background of the canvas.
(1) Design or import the object to be processed.
(2) Place the object inside the area to be processed.
(3) Set the parameters.
5. Start processing
(1) Click Process and complete the processing as prompted.

(2) After the processing is completed, you can obtain your works.
Services & Help
Learn & Education

Copyright © 2025 xTool All Rights Reserved.