This guide provides step-by-step instructions for upgrading the firmware for xTool F1 Ultra. If you want to know how to do the upgrade or have trouble during the upgrade, please refer to this guide.
Important things to know beforehand
- It's recommended to connect your machine with the USB cable for the upgrade.
- Ensure that the power supply, the internet, and the USB connection are secured during the upgrade.
- Keep your computer in an active state during the upgrade. Do not let your computer go into sleep, hibernate, or shut down state.
- Do not turn off xTool F1 Ultra or disconnect its touchscreen controller or other accessories during the upgrade.
Upgrade the firmware
(1) Ensure that your computer is connected to the internet. Open XCS or xTool Studio on your computer, and then connect xTool F1 Ultra to XCS or xTool Studio via USB cable.
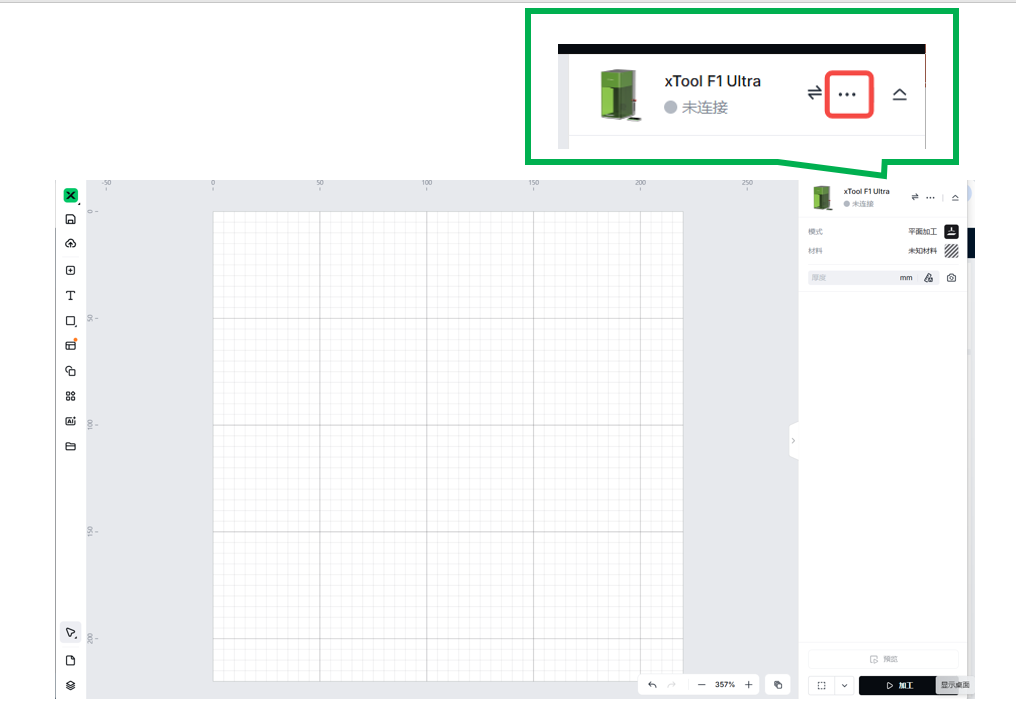
(2) In the top-right corner of XCS, click the icon next to the image of xTool F1 Ultra.
if you use xTool Studio,click the ellipsis icon next to the image of xTool F1 Ultra.
| |
XCS | xTool Studio |
(3) On the pop-up Device settings window, click the Check for updates button under Firmware version. If a new firmware version is found, update the firmware.
| |
XCS | xTool Studio |
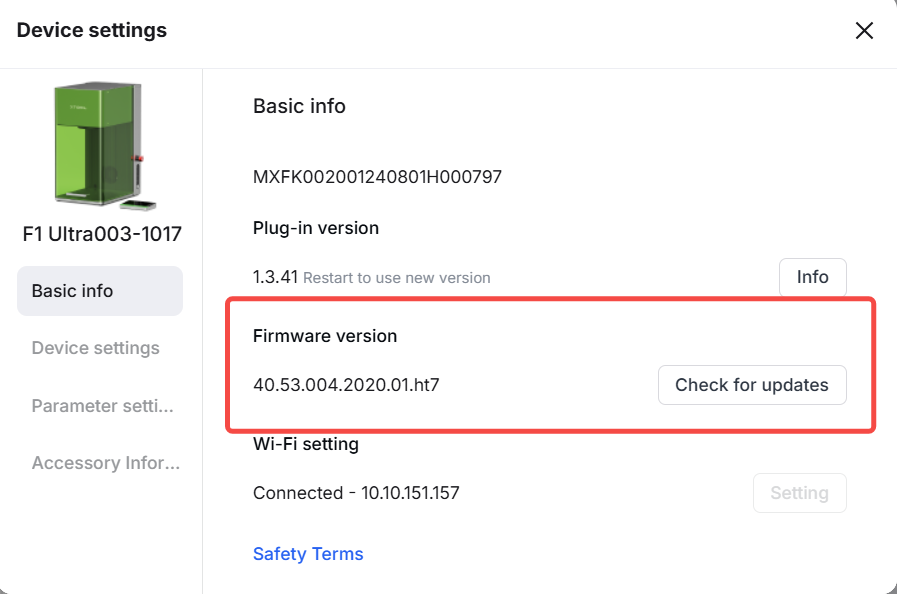
- XCS and xTool Studio downloads the firmware installation package first, and then automatically installs it on xTool F1 Ultra.
- During firmware installation, xTool F1 Ultra will be disconnected for a while and reconnected when the installation is complete.
(4) After the firmware is updated, select Device settings on the left, and then click Homing to perform Z-axis homing.
| |
XCS | xTool Studio |
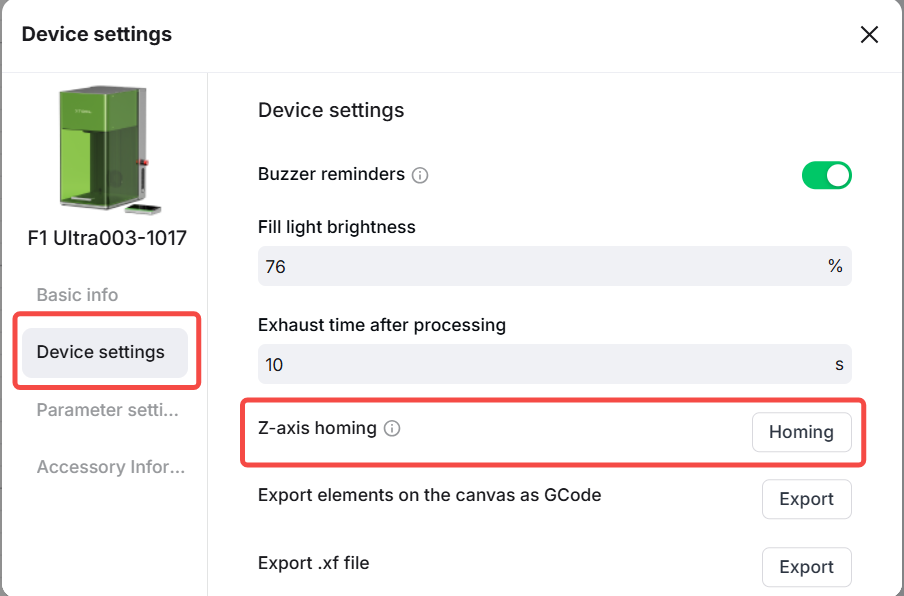
(5) When Z-axis homing is complete, press the power switch on xTool F1 Ultra to turn off the device. Then, press the power switch again to restart xTool F1 Ultra.

How to deal with firmware upgrade failure
- Check the firmware version
The software may have bugs and prompt you that the firmware update fails, even though the update actually succeeds. To check if an update succeeds, view the firmware version on the touchscreen to know if it is the latest version.

- Check the network
If there is a network exception, repair the network and try updating the firmware again. - Check the device connection
Ensure that the device is stably connected to XCS or xTool Studio by using the USB cable. If the device is disconnected from XCS or xTool Studio, reconnect the device by using the USB connection and try updating the firmware again.
- Check the computer status and the power supply for xTool F1 Ultra
If the computer goes into sleep or hibernation mode or is turned off during firmware update, or if xTool F1 Ultra is cut off from the power supply, the firmware update may fail. Check your computer settings and the power supply. Ensure that the computer stays active and the power supply is stable. Then, try updating the firmware again.
