xTool Apparel Printer Troubleshooting: Ink Damper Issues
Overview
The ink damper is a critical component of your xTool Apparel Printer that regulates ink flow to the print head.
- This section addresses common issues related to the ink dampers on your xTool Apparel Printer.
⚠️ Safety Reminder: Handle ink and components carefully to avoid spills and contamination.
Issue 1: Color contamination in prints
Problem description
Prints show incorrect colors mixed together, or colors appear where they shouldn't be (e.g., traces of cyan in a yellow area). This indicates that different colored inks are mixing within the ink system, often at the damper level.
Possible cause
Foreign color(s) is/are present inside the ink damper chamber.
Troubleshooting procedure
For minor color contamination
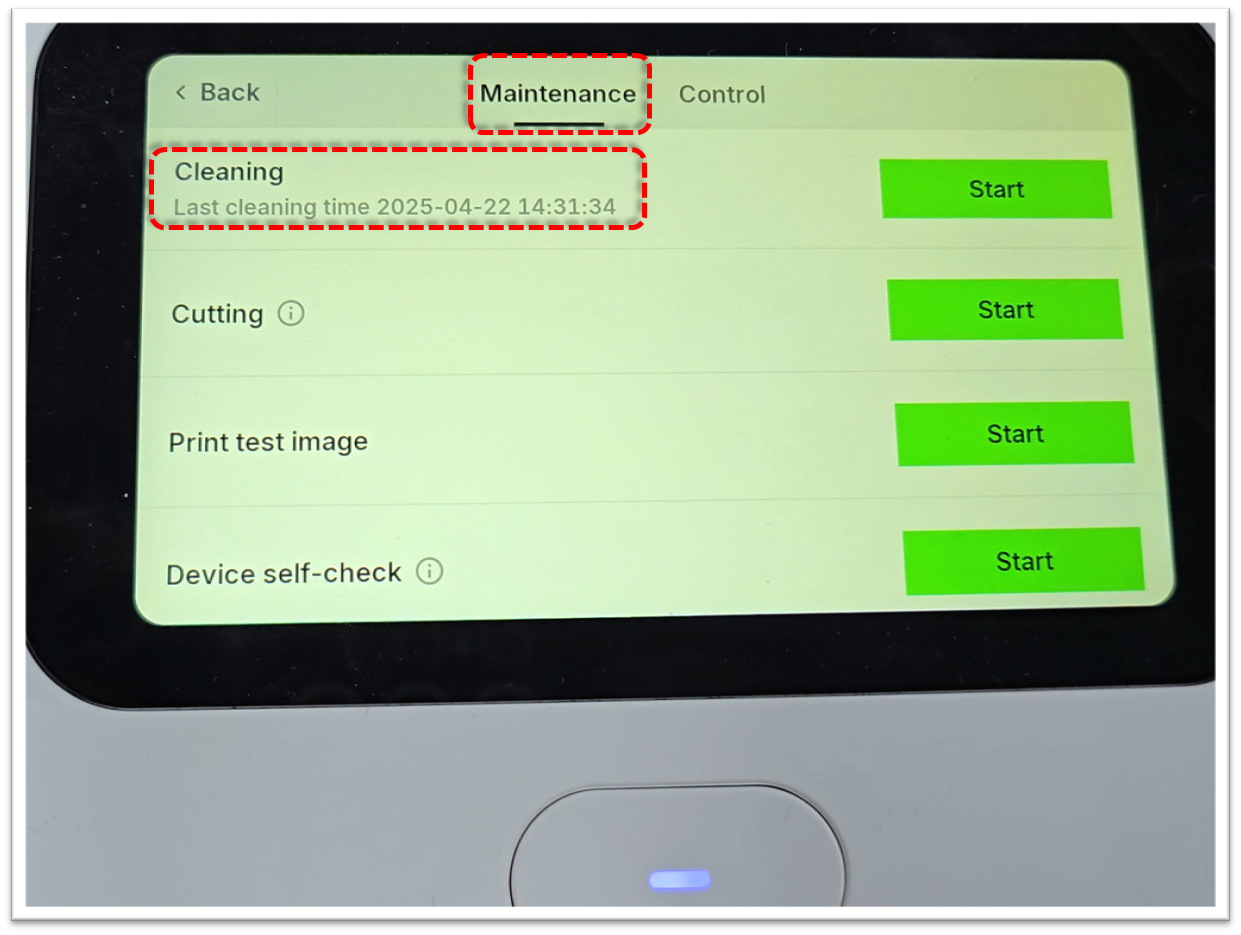
- Perform a Standard Auto Cleaning cycle 1-2 times. This function can often flush out small amounts of contaminating ink.
- Standard Auto cleaning: On the LCD panel of the printer, navigate to Maintenance → Cleaning, and tap the Start button.
- Video Tutorial: For instructions on how to perform a standard auto cleaning, please refer to the official xTool support video: Standard Auto Cleaning Guide
For severe color contamination
- Use a syringe to extract contaminated ink directly from the ink damper.
- Remove as much mixed ink as possible before proceeding.
- Tutorial: Video Tutorial: For detailed steps on how to manually extract contaminated ink from a damper, please refer to Manual Ink Extraction Guide (Specific Section: 1:25 - 1:56)
If contamination persists
- If you are unable to completely remove the contaminated ink by drawing it out, or if the contamination persists, the ink damper itself may be compromised and will need to be replaced.
- When replacing the damper, it is also crucial to clean any residual mixed ink from the connection point where the print head meets the damper.
- Tutorial: For instructions on replacing an ink damper, please refer to Ink Damper Replacement Guide
Issue 2: Ink leakage
Problem description
Ink drips or leaks from the print head nozzles or ink flow system, even when the printer is idle or has just completed a print.
Possible cause
The ink damper fails to properly contain and regulate ink flow.
Diagnostic steps
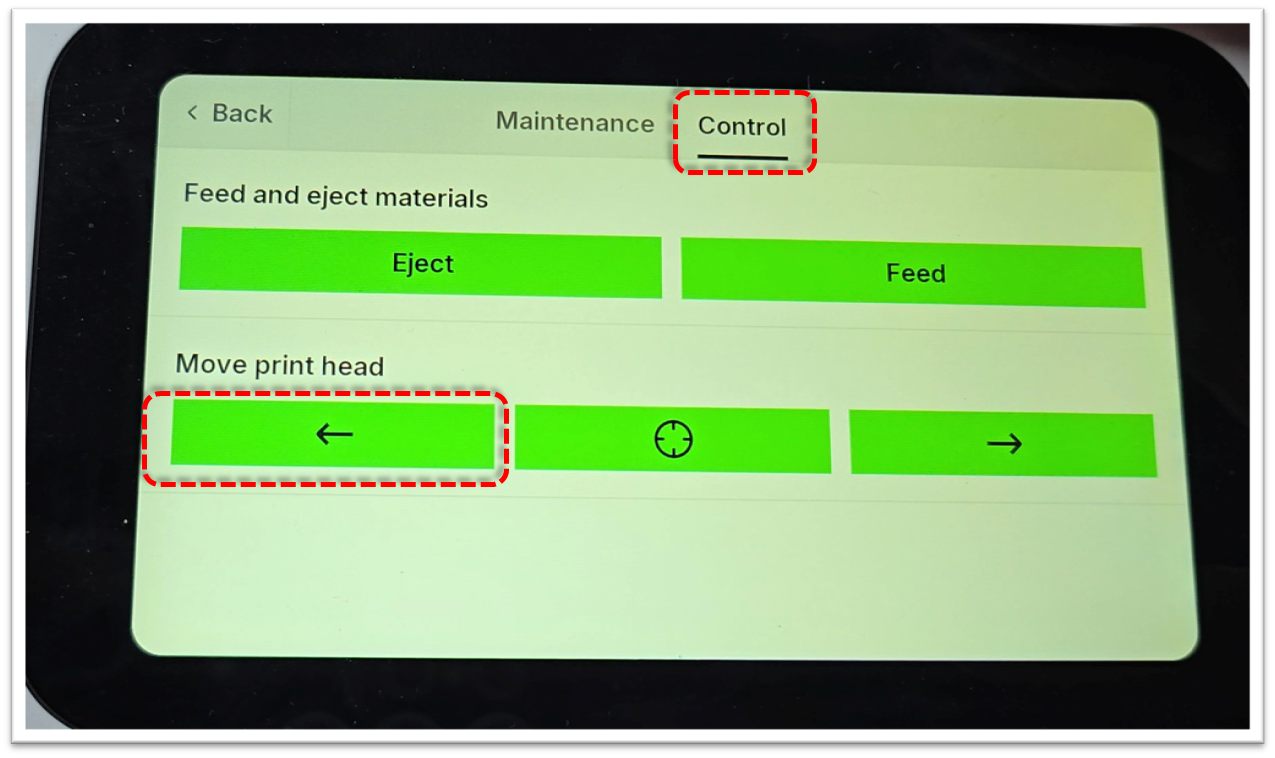
- Move the print carriage to the far left side of the printer.
- Move the carriage: On the LCD touchscreen control panel, tap Maintenance > Control, before tapping the "Left arrow" to reposition the carriage.
- Allow the printer to remain idle for 3-5 minutes.
- Observe the print head for any ink dripping.
Troubleshooting procedure
If ink dripping is observed:
- This confirms that one or more dampers are likely broken and unable to hold back the ink. The affected ink damper(s) will need to be replaced.
- Replace the ink damper(s) immediately.
- Tutorial: For instructions on replacing an ink damper, please refer to Ink Damper Replacement Guide
If no ink dripping is observed:
- The ink damper is functioning correctly.
- Carefully inspect other areas of the ink system (e.g., ink tube connections, capping station) for potential ink leakage sources.
Issue 3: Missing lines in print output
Problem description
The print output or print test image shows consistent missing lines, which indicates that one or more channels of the print head are experiencing an issue. This persists even if other ink channels on the same print head are printing normally and all the ink clips are confirmed to be released.
Possible cause
There is an internal blockage within the specific ink damper corresponding to the missing color/channel.
Prerequisites for troubleshooting
- All ink clips are properly released;
- All three other ink channels are functioning normally; and
- The issue is isolated to one specific color channel.
Troubleshooting procedure
- If you have ruled out other causes (such as a clogged print head nozzle for that specific channel, or an unreleased ink clip), and other channels on the same print head are functioning correctly, the ink damper for the problematic channel is likely blocked internally.
- Replace the affected ink damper.
- Tutorial: For instructions on replacing an ink damper, please refer to Ink Damper Replacement Guide
Still experiencing issues?
Should the issue persist after completing the preceding steps, submit a ticket via the "Submit a Ticket" button in the "Help Ticket" section below. The standard response time for xTool Customer Service is one business day.
For a prompt resolution, please include the following details:
- Issue Description: A detailed explanation of the observed problem.
- Video Evidence: Attach a video demonstrating the issue, where applicable.
- Troubleshooting Performed: Any troubleshooting steps you have already attempted, along with their results.
This information is crucial for xTool technical support engineers to provide timely assistance.
Documentation feedback
Help improve this content by providing feedback. If this content did not meet your requirements, select "No" in the "Was this page helpful?" section below. Include specific details about what was unclear or missing in the pop-up suggestion box. Feedback submissions are reviewed by xTool technical writers to enhance future documentation.
