Download PDF file (multi-language)
Riser base with honeycomb panel for xTool M1 Ultra user manual
List of items
Riser base | Honeycomb panel |
Material pin | User manual |
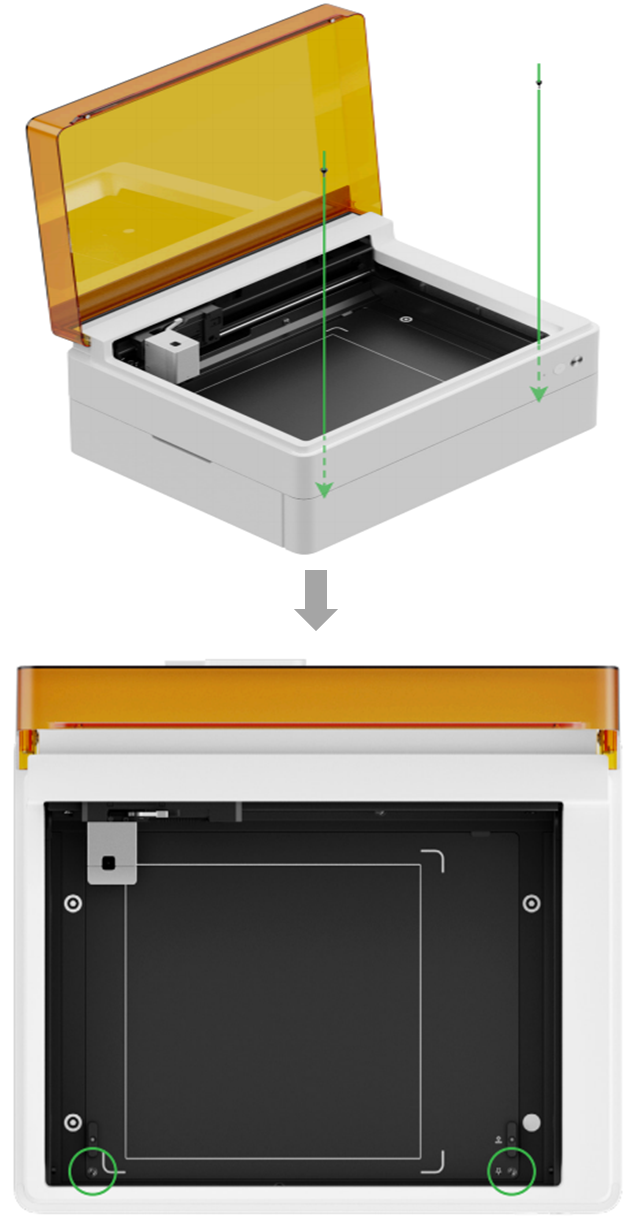
1. Remove the baseplate
(1) Open the lid of xTool M1 Ultra.
(2) Loosen the thumb screws for the baseplate anticlockwise and remove the screws.
(3) Put the removed screws into the handles on the baseplate.
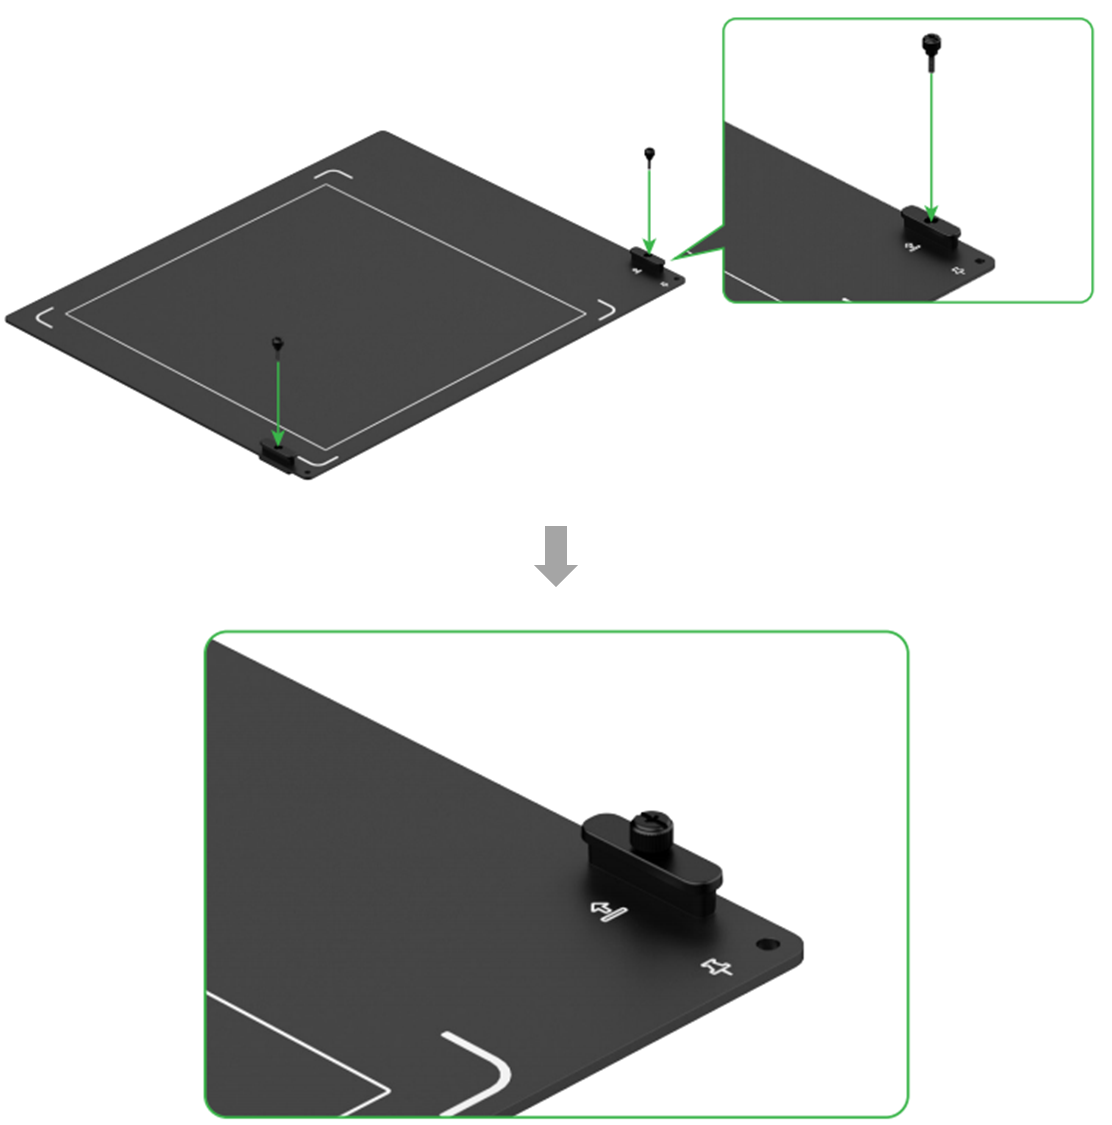
(4) Remove the baseplate by the handle.
(5) Keep the removed baseplate for subsequent use.
2. Place xTool M1 Ultra on the riser base
⚠️ Safety Reminder: Mind your hands when placing xTool M1 Ultra on the riser base.
3. Connect xTool M1 Ultra to xTool Studio
Refer to Connect and Setup xTool M1 Ultra with xTool Studio for instructions on connecting xTool M1 Ultra to xTool Studio.
4. Process materials
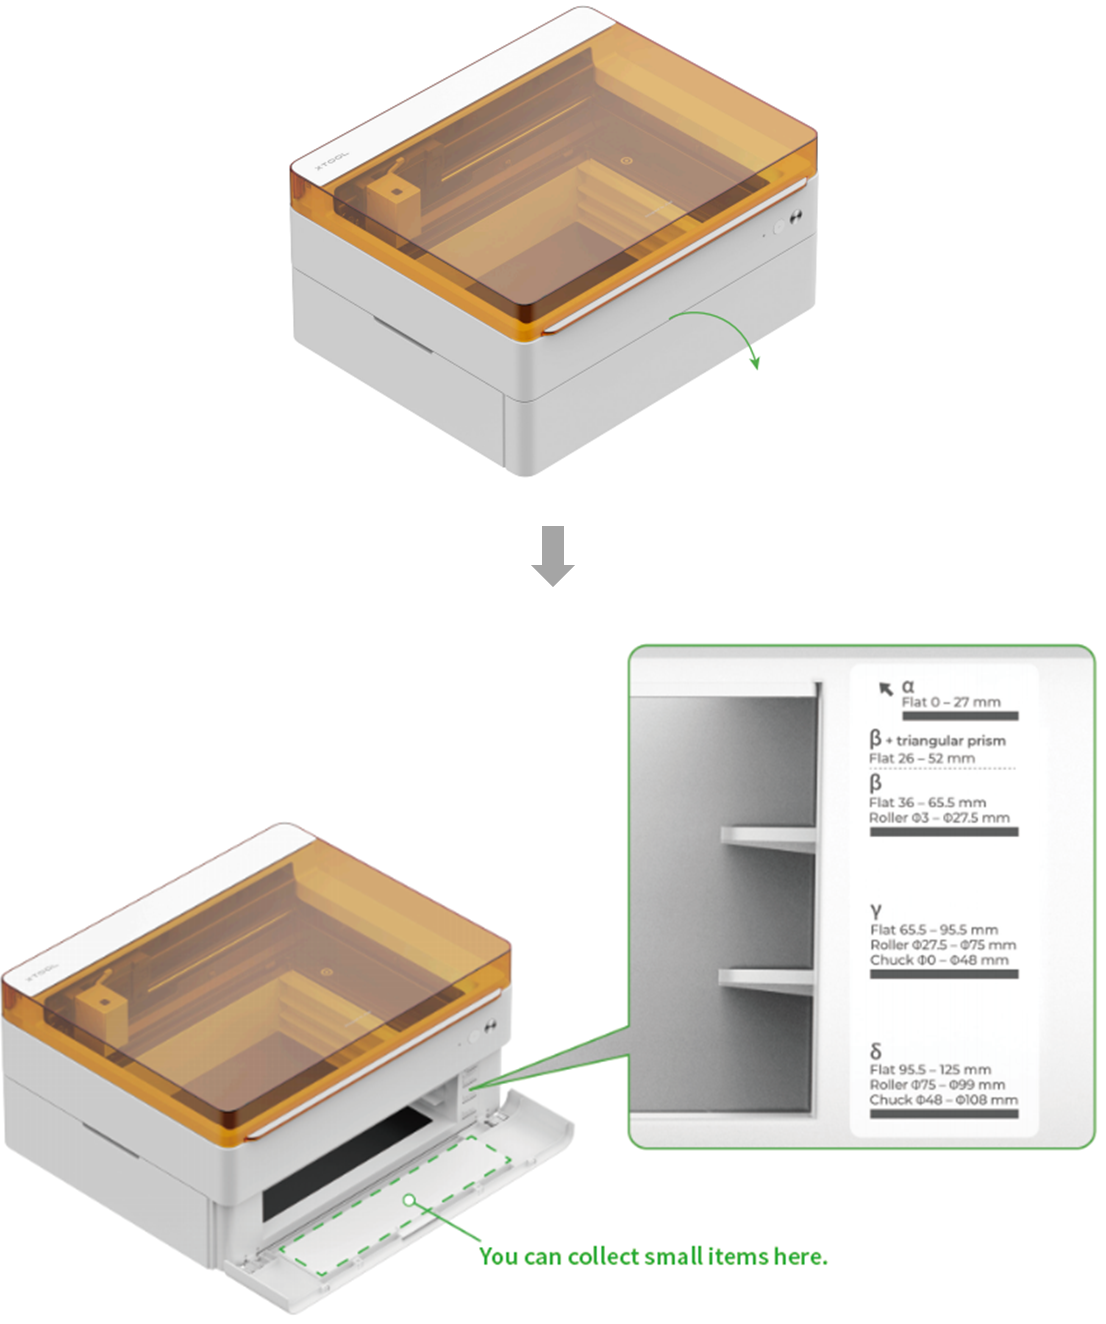
The riser base is designed with 4 placement levels to adapt to materials of multiple thicknesses. You need to determine the level at which the honeycomb panel is to be placed based on the thickness or diameter of the material to be processed.
Process flat materials
Placement level | Supported material thickness (H) |
α | 0 < H ≤ 27 mm |
β | 26 mm < H ≤ 52 mm (triangular prism used) |
36 mm ≤ H ≤ 65.5 mm | |
γ | 65.5 mm ≤ H ≤ 95.5 mm |
δ | 95.5 mm ≤ H ≤ 125 mm |
Example: a flat material with a thickness of 25 mm
Check the table above, place the honeycomb panel at Level α, and place the material on the honeycomb panel.
Example: a flat material with a thickness of 60 mm
Check the table above, place the honeycomb panel at Level β, and place the material on the honeycomb panel.
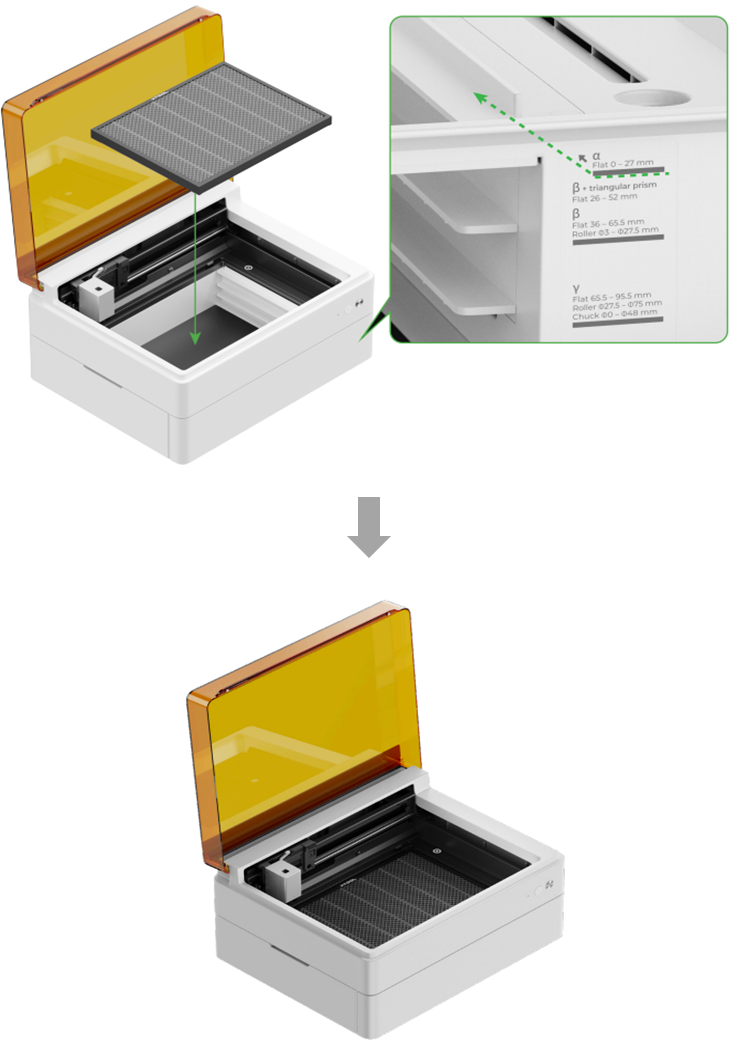
(1) Open the door panel.
(2) Slide the honeycomb panel along the guide rail at Level β.
(3) Close the door panel and lid.
Note: You can use the triangular prism at Level β as required, and the thickness of the material that can be processed is 26 mm<H ≤ 52 mm.
Note: Use the material pins
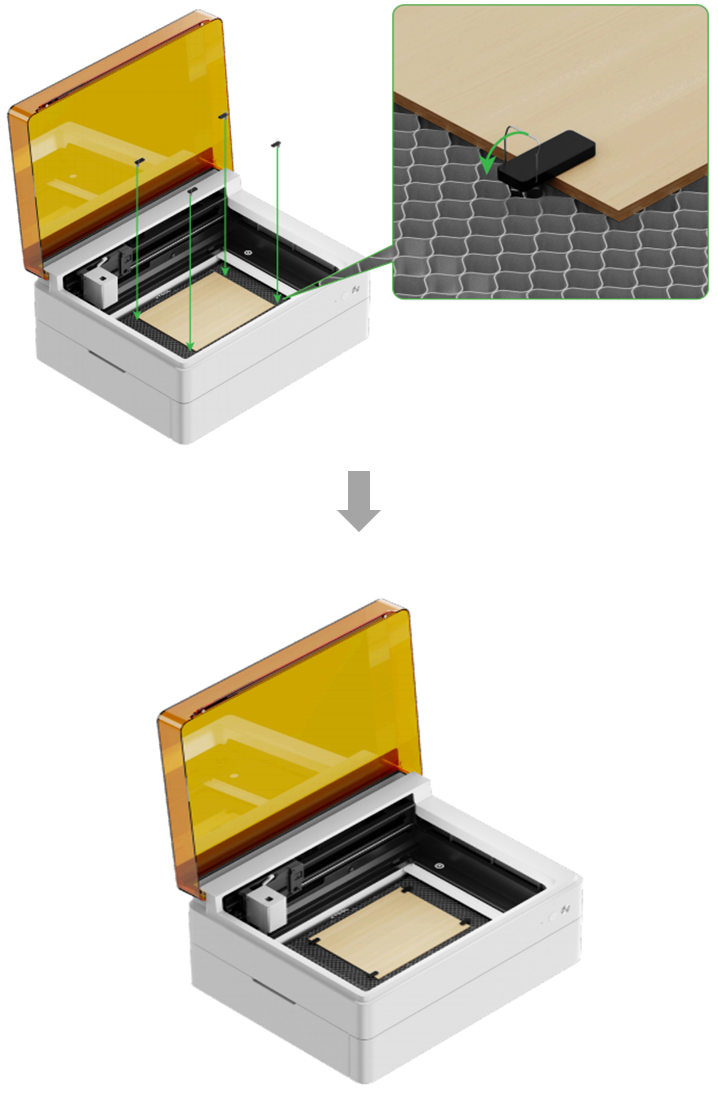
You can use the material pins to keep a material in place.
Place the material on the honeycomb panel. Then, use four material pins to secure the four corners of the material. After inserting a material pin, lay down its ring pull.
For details, refer to (xTool Studio) Lasering on Flat Surface with xTool M1 Ultra.
Process cylindrical and irregular materials
To process cylindrical and irregular materials, you can use the riser base in combination with xTool Rotary Attachment 2.
For details, refer to (xTool Studio) Use Rotary Attachment 2 (RA2) in Roller Mode with xTool M1 Ultra and (xTool Studio) Use Rotary Attachment 2 (RA2) in Chuck Mode with xTool M1 Ultra.
Use the blade cut function
To use the blade cut function, you need to reinstall the baseplate on xTool M1 Ultra.
(1) Reinstall the baseplate on the device.
(2) Take out the removed screws from the handle.
(3) Install the screws on the baseplate and tighten them clockwise.
For details, refer to (xTool Studio) Use Cutting Blade with xTool M1 Ultra.
