xTool Rotary Attachment 2 Pro allows you to process regular and irregular cylindrical materials. The rotary attachment with xTool M1 Ultra riser base should be used, which raises the height of xTool M1 Ultra.
Note:
- Rotary Attachment 2 Pro kit is sold separately. It is only included in the deluxe kit of xTool M1 Ultra.
- The usage of RA2 and RA2 Pro is the same.
1. Level setting
You need to determine the level at which the honeycomb panel is to be placed based on the diameter of the material, as described in the following table.
Placement level | Supported material diameter (D) | |
α | / | |
β | 3 mm ≤ D ≤ 27.5 mm | |
γ | 27.5 mm ≤ D ≤ 75 mm | |
δ | 75 mm ≤ D ≤ 99 mm |
In the roller mode, you need to set the level of the adjustable roller.
Roller level | Supported material diameter (D) | |
Level A | 3 mm ≤ D ≤ 50 mm | |
Level B | 45 mm ≤ D ≤ 60 mm | |
Level C | D > 60 mm |
Note: For detailed information and instructions on how to use the rotary attachment, see User Manual for Rotary Attachment 2 (RA2).
2. Place RA2 in xTool M1 Ultra
Take processing a cylinder with a diameter of 20 mm as an example.
(1) Remove the baseplate and place the honeycomb panel at Level β according to the table.
(2) Close the front panel.
(3) Set the roller to Level A.
(4) Insert one end of the connection cable into the connection port of the rotary attachment.
(5) Place the rotary attachment with the material on the honeycomb panel.
(6) Open the silicone plug of the rotary attachment port on the inner side of xTool M1 Ultra's front panel.
(7) Insert the other end of the connection cable into the rotary attachment port. Connect the rotary attachment to xTool M1 Ultra.
3. Connect xTool M1 Ultra to xTool Studio
Refer to Connect and Setup xTool M1 Ultra with xTool Studio for instructions on connecting xTool M1 Ultra to xTool Studio.
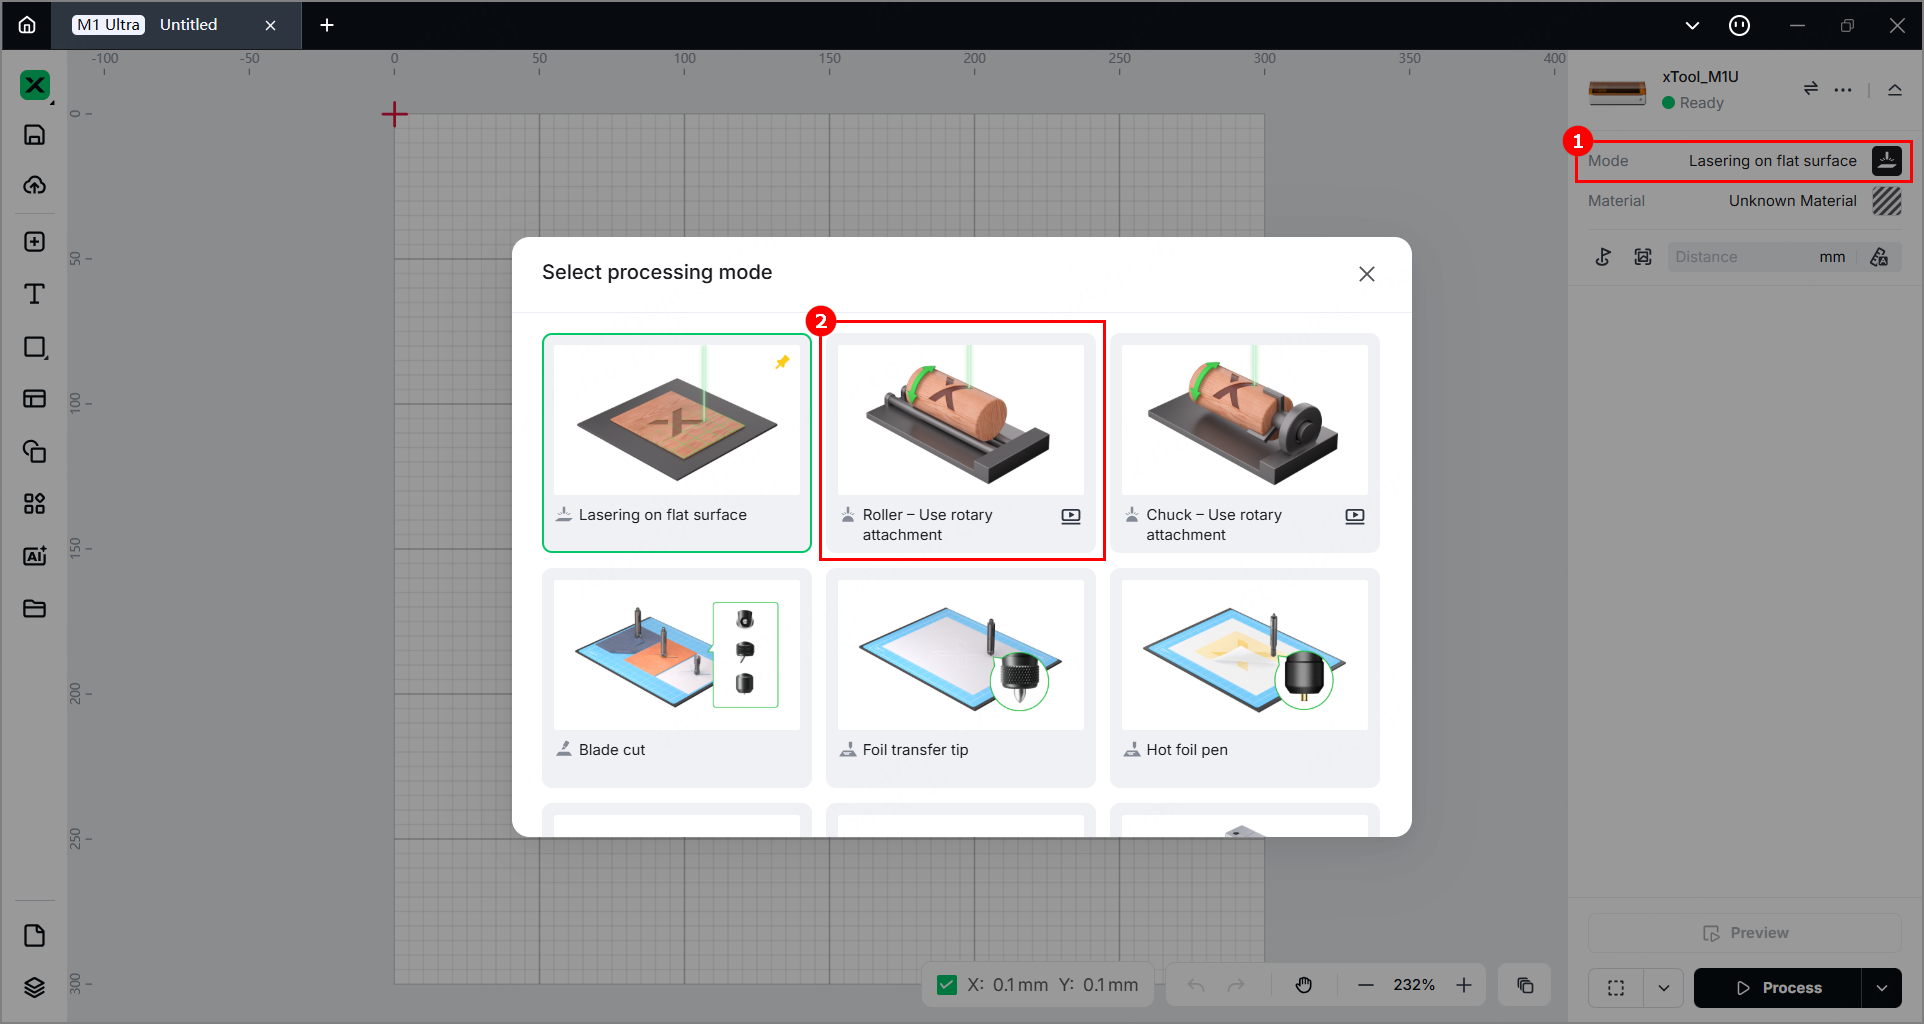
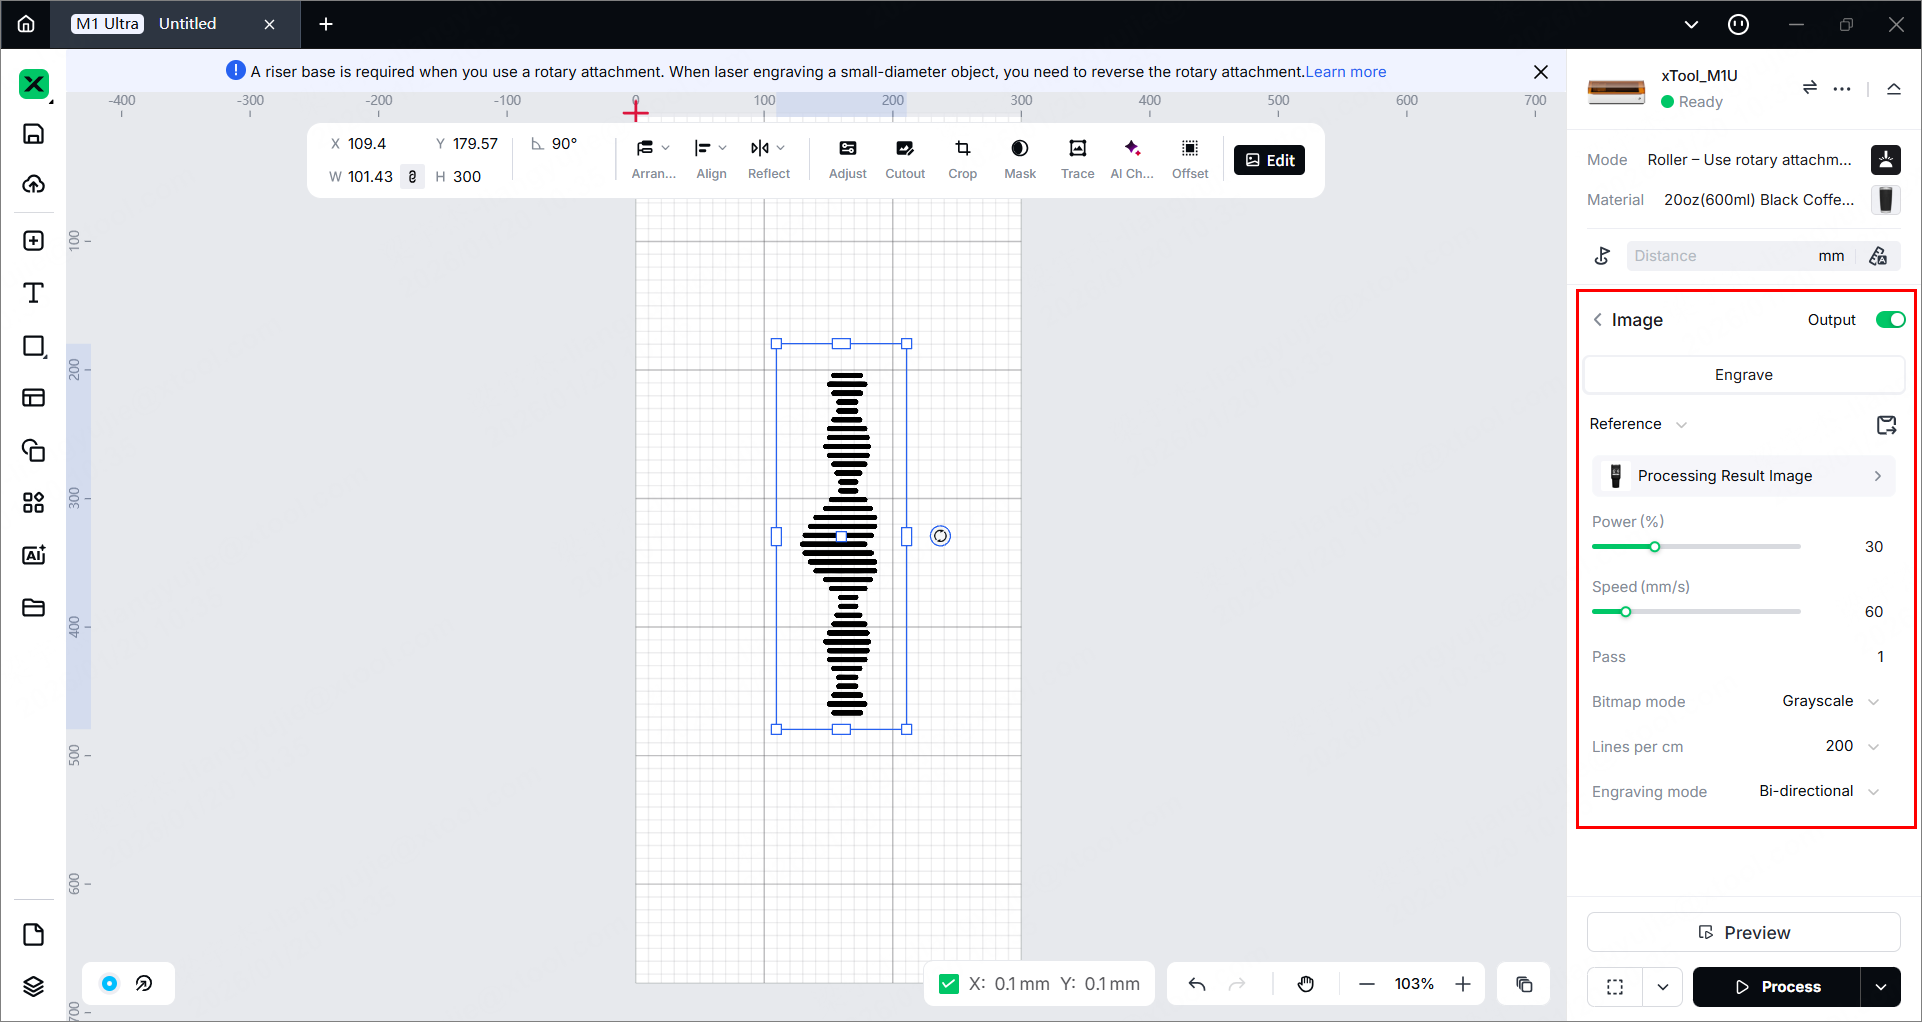
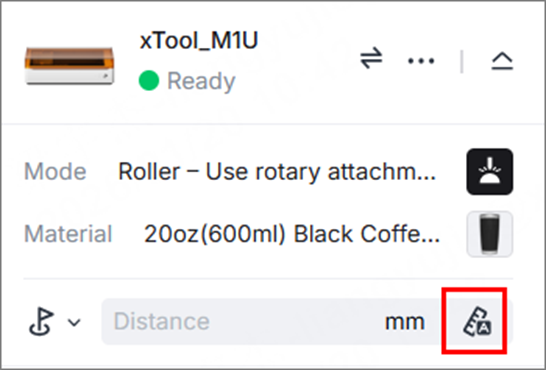
4. Select the processing mode and material
(1) In the right panel of the page, click the current processing mode, and then select Roller - Use rotary attachment.
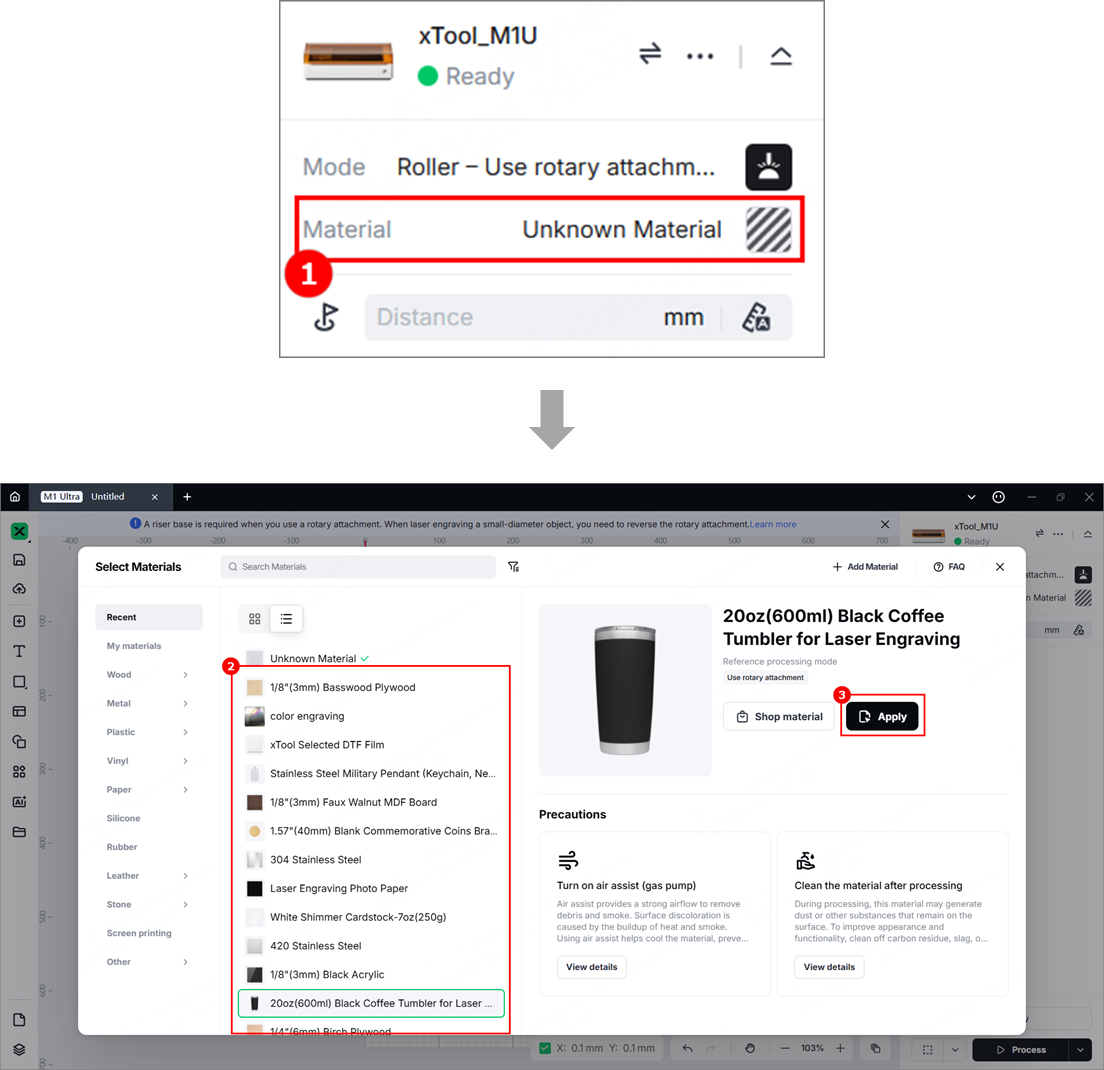
(2) Click Unknown Material, select a desired material, and click Apply.
Note:
- After you select a material from the material list, the software will automatically set parameters for laser processing. Default settings are available for xTool materials. You can adjust the settings as required.
- The recommended parameter settings can achieve the best results only when using xTool's materials. If you are using materials from third parties, it is recommended that you conduct a material test array on your own first to obtain the desired effects and parameters. Meanwhile, make sure that the materials are free from moisture or contamination, which may greatly affect the results.
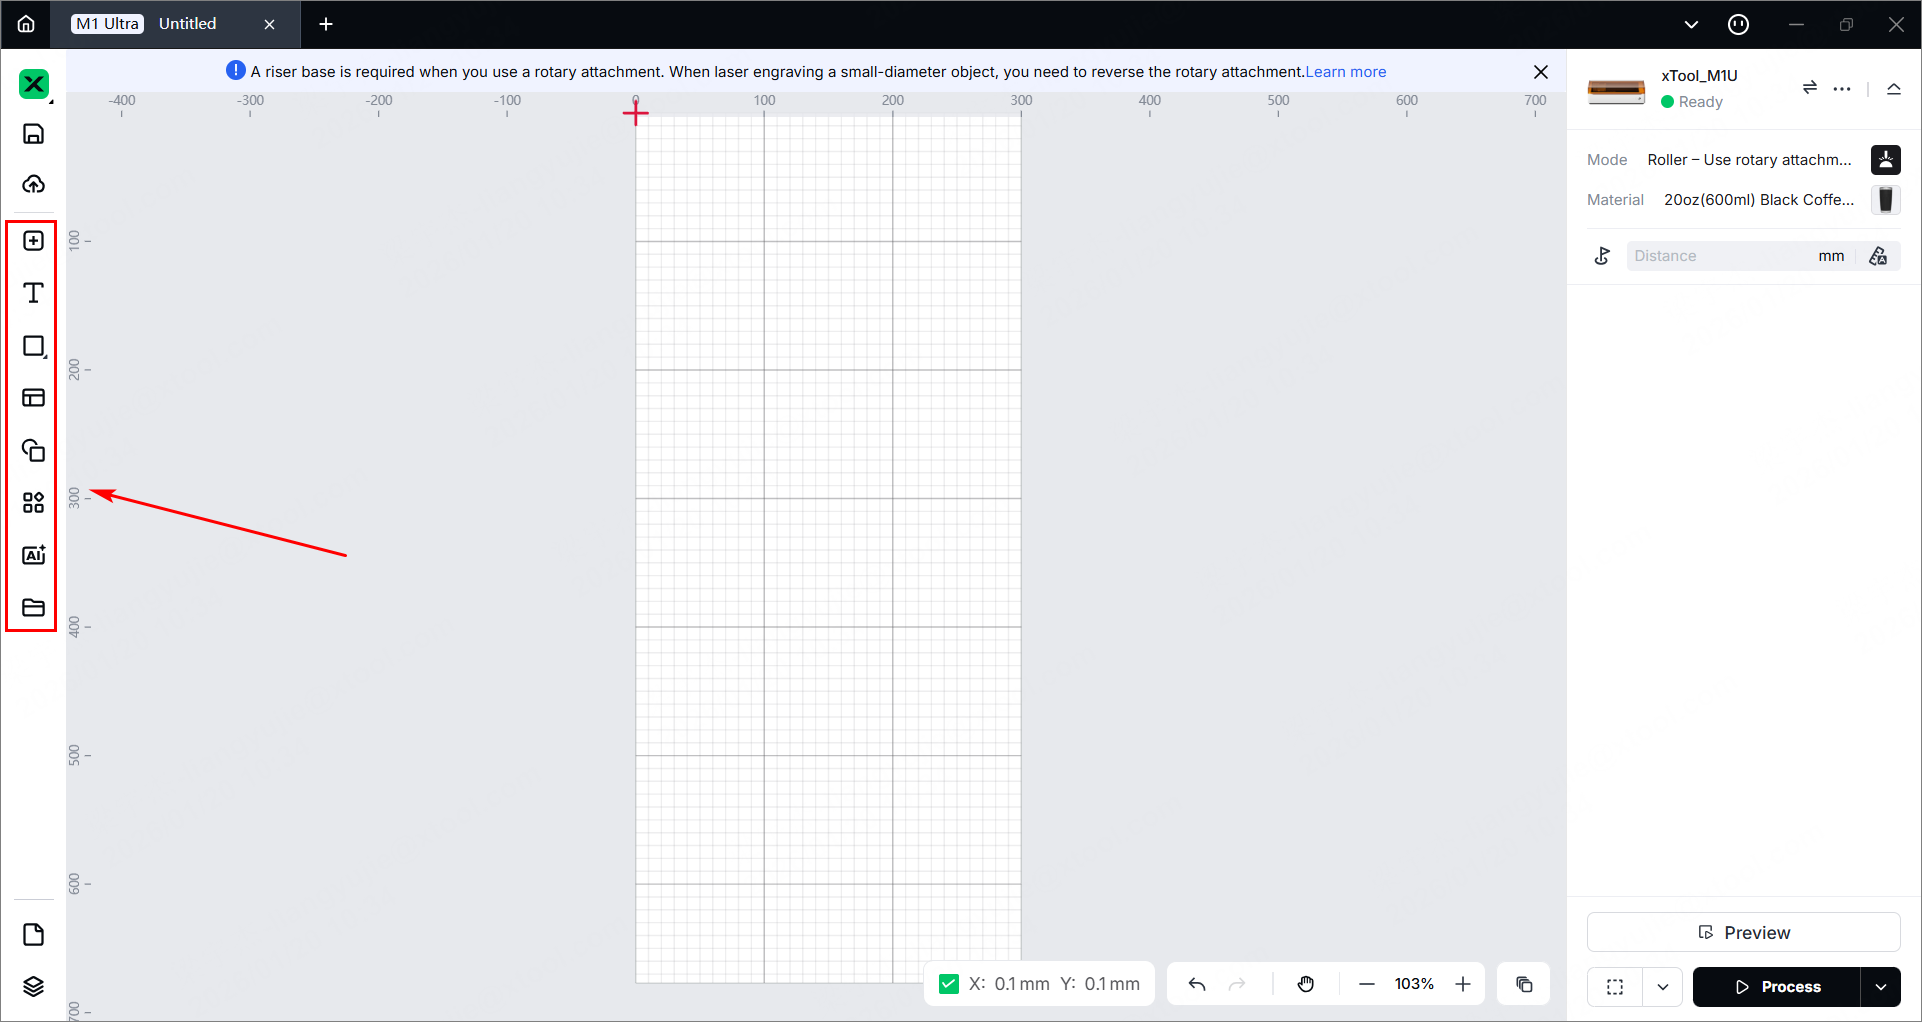
5. Design objects for processing
(1) Use the tools on the left side of the canvas to create objects. You can import images, insert shapes, enter text, or draw vector graphics.
Note: xTool Studio supports importing the following image formats: SVG, DXF, JPG, JPEG, PNG, BMP, etc.
(2) You can use the tools above the canvas for further editing when selecting objects.
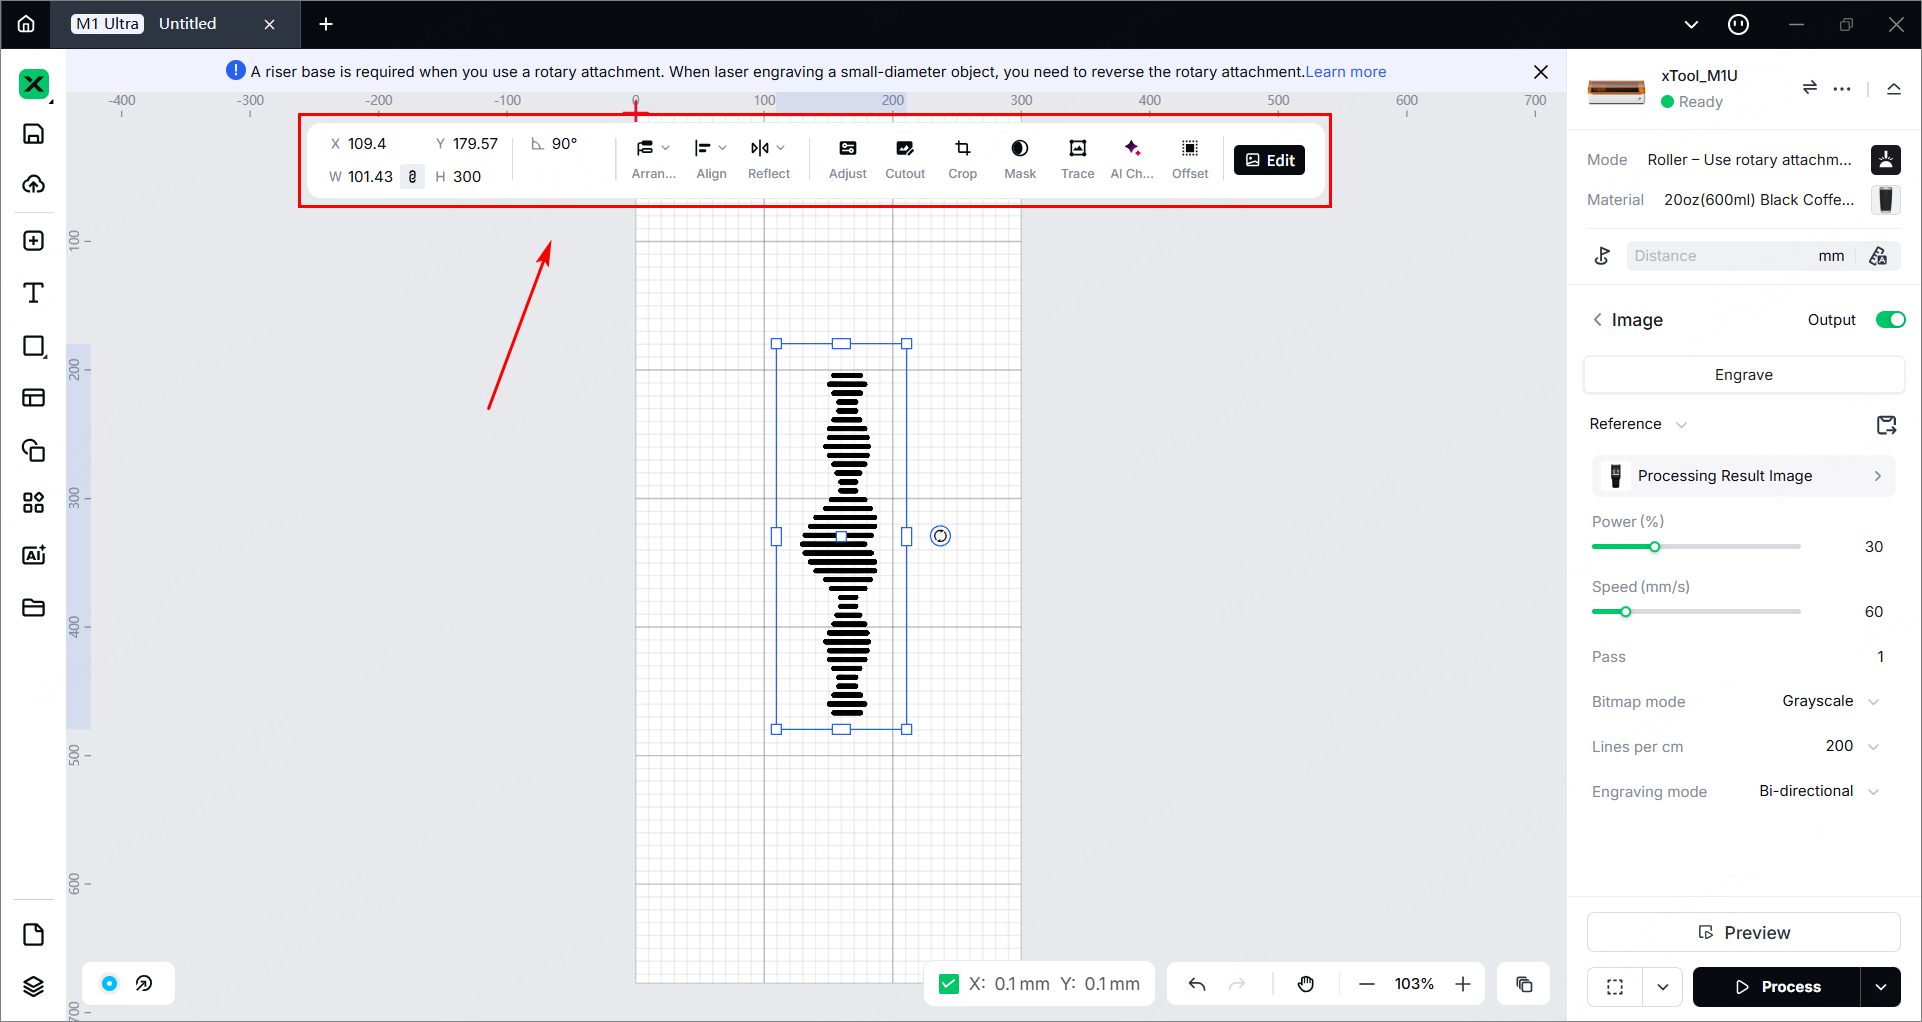
(3) Set parameters in the right panel of the page.
Note: You need to set parameters for every object. A missed object may fail to be processed.
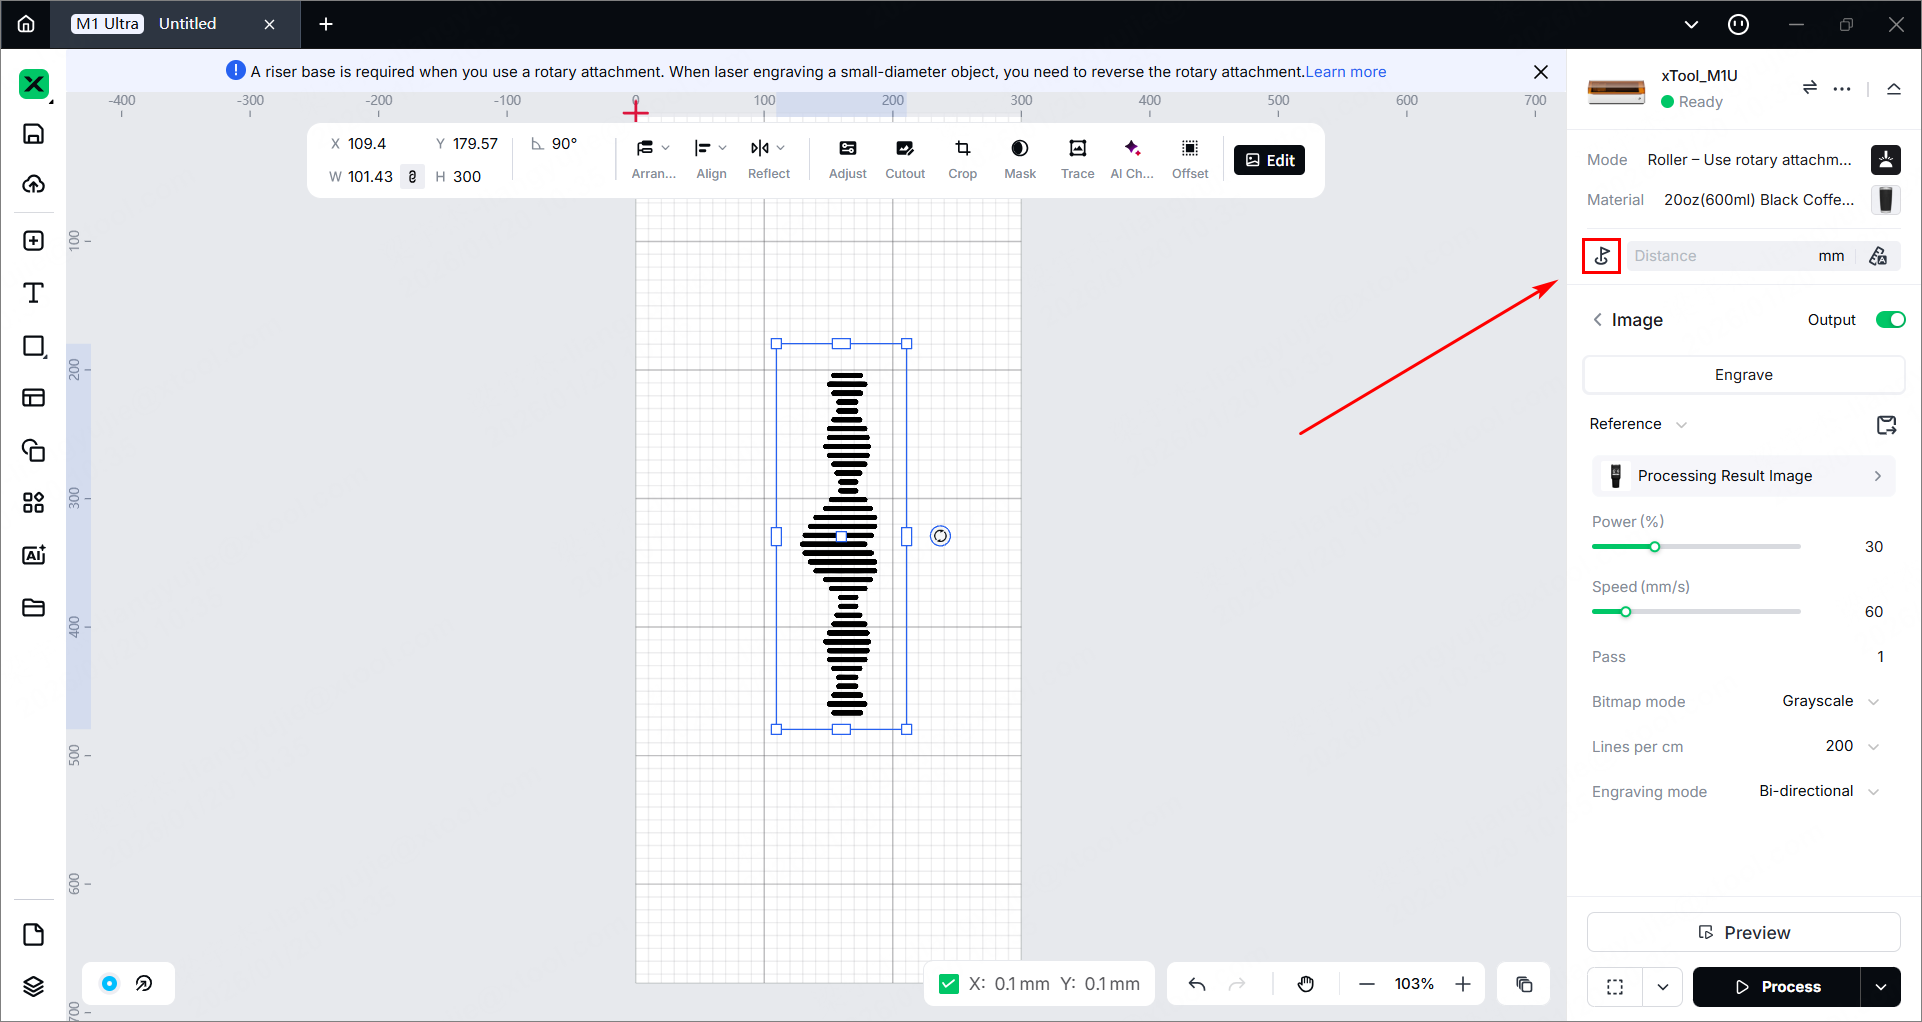
6. Mark the processing area
(1) Click the icon to mark the processing area in the right panel of the page.
(2) Select a marking mode, and click Start marking.
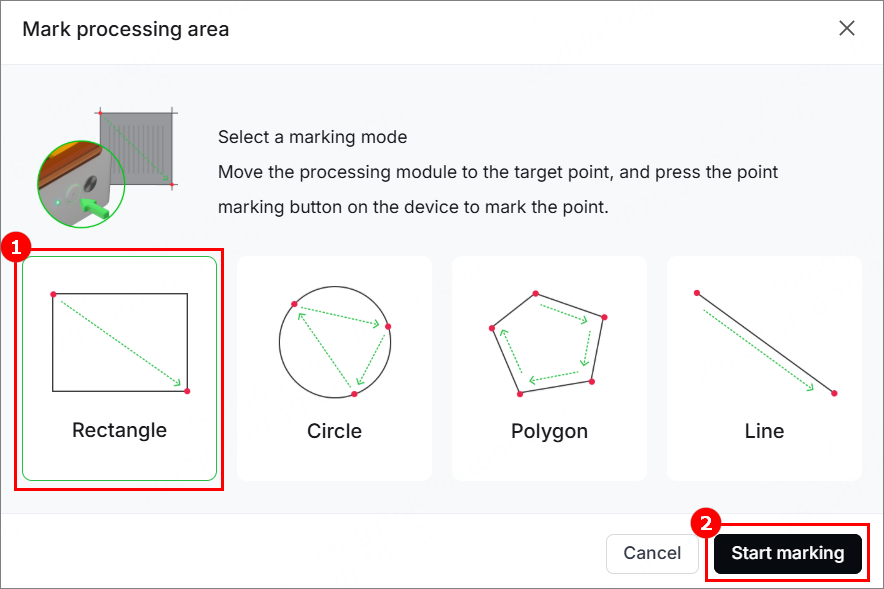
(3) Manually move the laser module to make the red cross spot fall at a vertex of the target processing area, and press the Point marking button on the device to record the position. Then, repeat the same steps to record the other required vertex(es) for the target processing area.
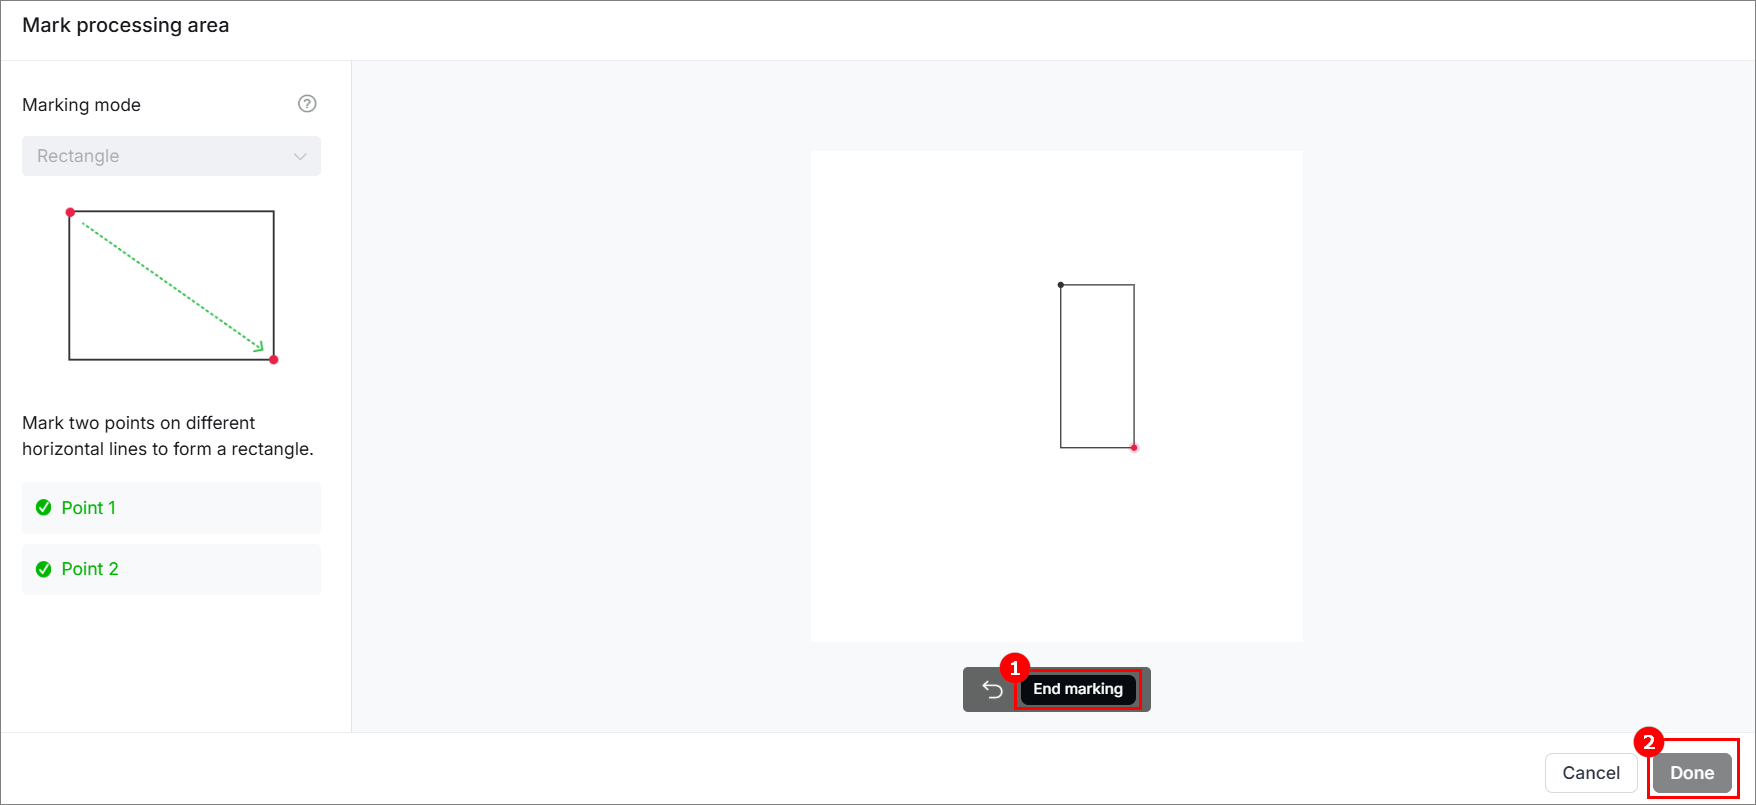
(4) Make sure two points are marked. Click End marking > Done, and then the target processing area will be marked out on the canvas.
7. Measure the distance
(1) Open the lid. Move the laser module over the material to allow the red cross to fall at the highest point of the material.
(2) Close the lid. In the right panel of the page, click the icon next to the Distance parameter, and xTool M1 Ultra will automatically measure the distance from the laser module to the material surface.
8. Preview the processing area
Framing means that the laser module moves along the boundary of the processed object on the material, so that the processed area on the material can be previewed. Perform the following steps to start framing.
(1) Click in the bottom-right corner of the software to set framing speed.
(2) Click in the bottom-right corner of the software and press the framing button on xTool M1 Ultra to start framing.
(3) After confirming the processing area is properly set, click Framing completed in xTool Studio.
9. Start processing
(1) In the bottom-right corner of the software, click Process.
(2) Click Preview Processing Path and.
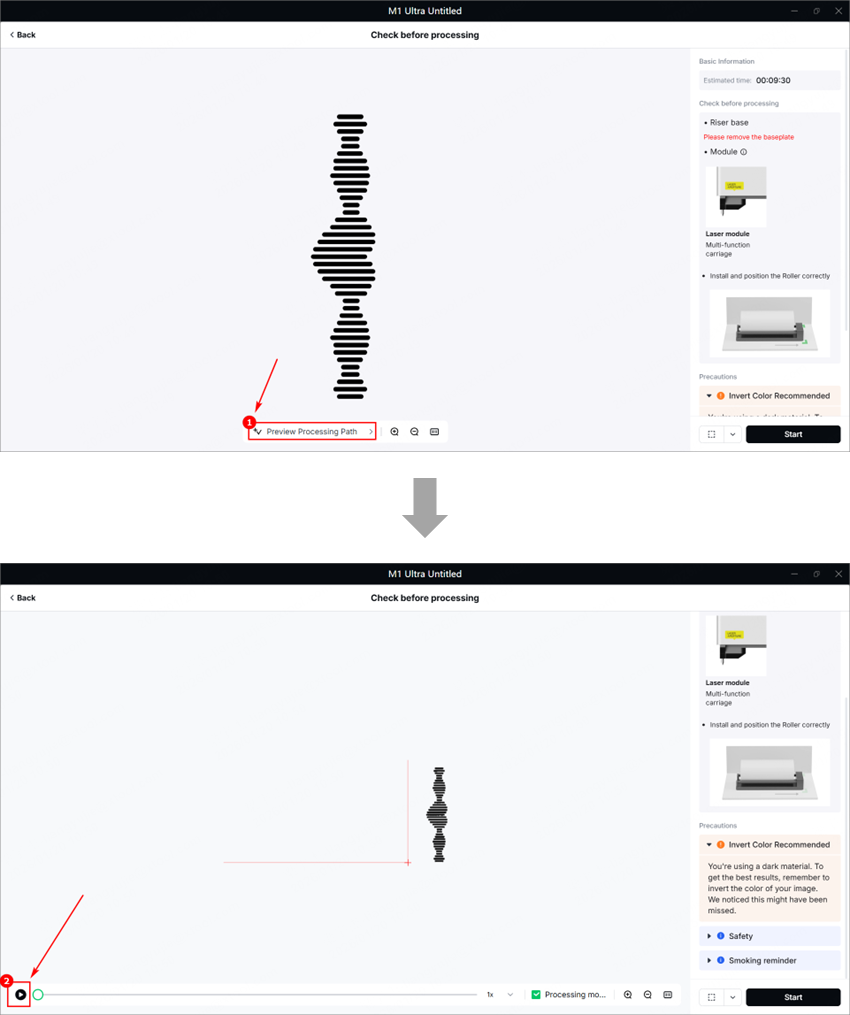
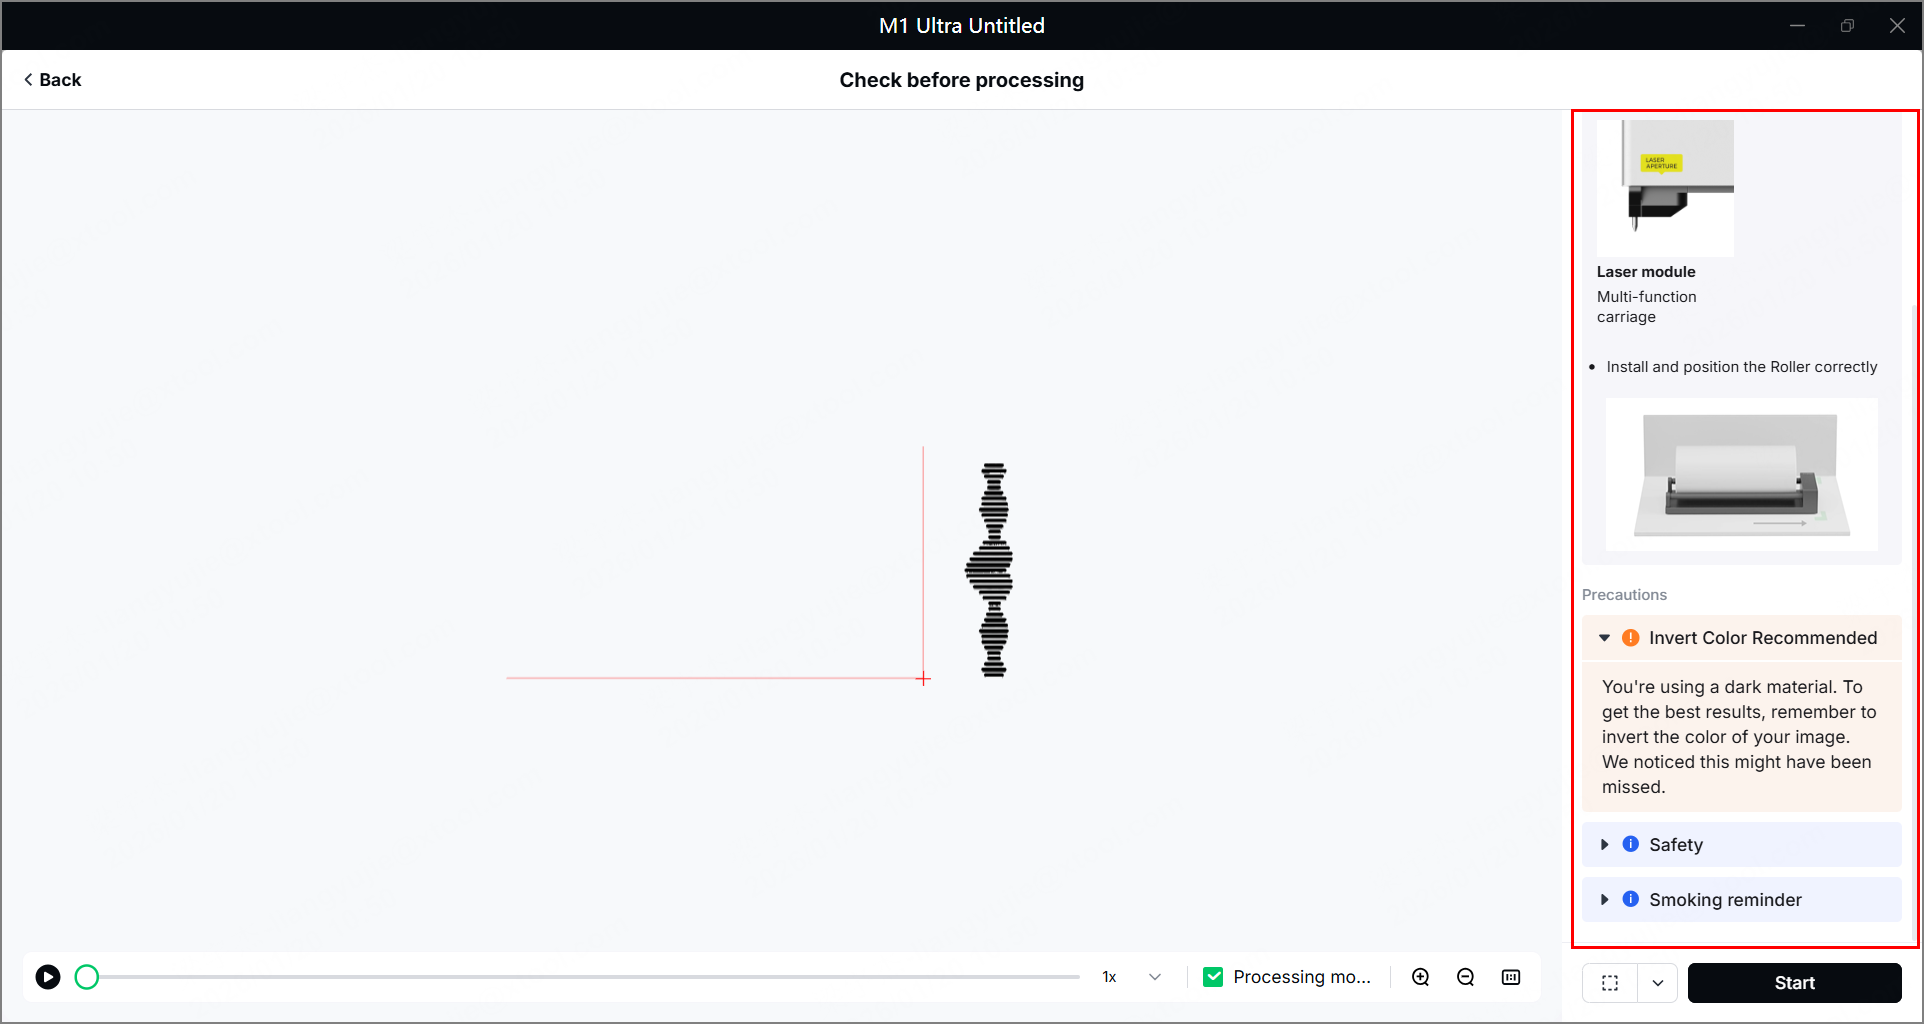
(3) Check whether the accessories or modules are prepared, and read the safety precautions.
(4) In the bottom-right corner of the software, click Start.
(5) When the software shows Ready, press the button on xTool M1 Ultra to start processing.
