Overview
This guide provides step-by-step instructions on how to connect your xTool P2 series to a Wi-Fi network using xTool Studio. Setting up a Wi-Fi connection enables seamless wireless operation of your xTool P2 series, making it easier to access, control, and manage projects directly from your computer.
Whether you're a new xTool user or need a refresher on Wi-Fi setup, this guide will walk you through each step to ensure a stable connection. Before starting, please make sure you have your USB cable and Wi-Fi network information on hand.
- If you encounter any issues during setup, refer to the troubleshooting section at the end or contact xTool Customer Service for additional support.
Configuration procedure
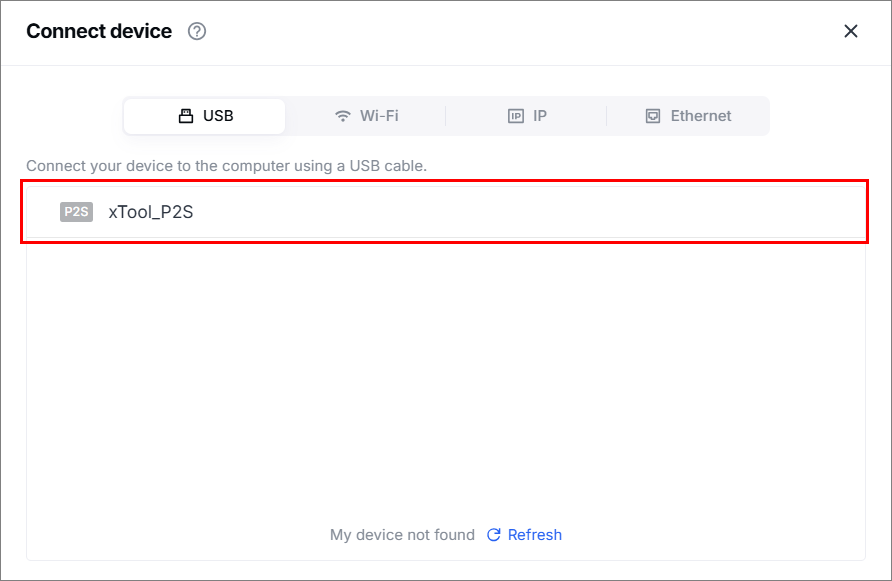
1. Connect your laser device to your computer via the USB cable included in your laser device package.
2. In xTool Studio, establish a connection via USB.
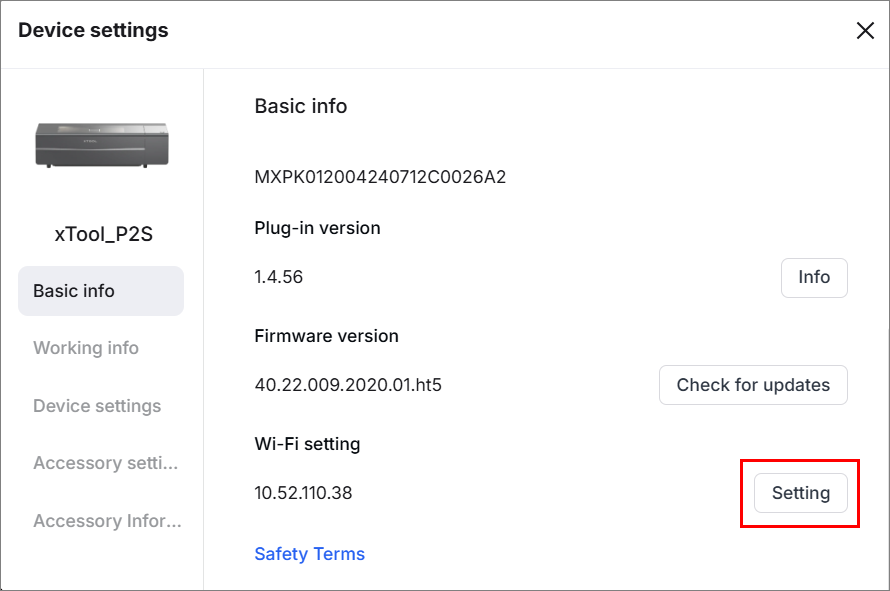
3. In the top-right corner, click the  icon> Device settings to enter the device settings dialog box.

4. In the Basic info tab, click Setting for Wi-Fi setting.
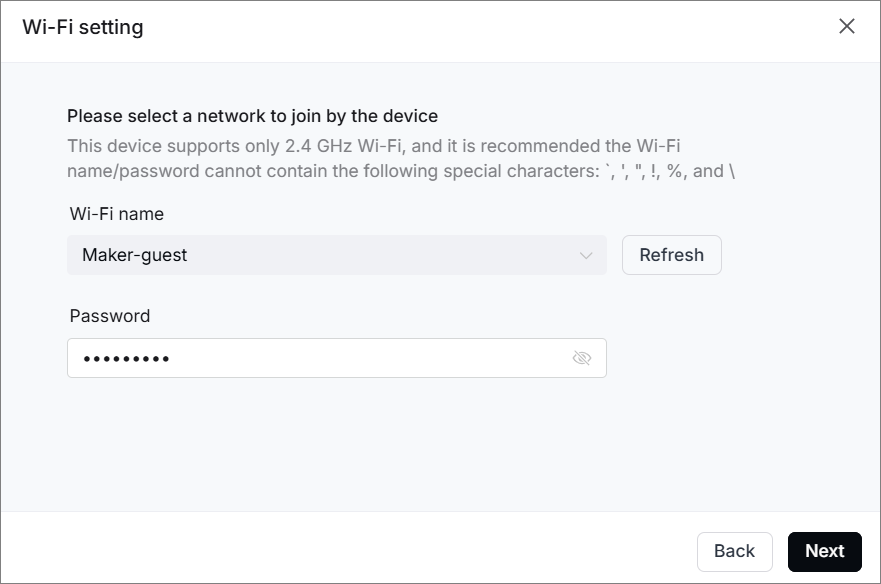
Note:
- Ensure that your laser device is connected to your computer via a USB cable before proceeding with the Wi-Fi setup.
- If your laser device is already connected via Wi-Fi, you have to first disconnect it and reconnect using a USB cable to configure new Wi-Fi settings.
5. In the Wi-Fi setting dialog box, select the desired Wi-Fi network, enter the password, and click Next
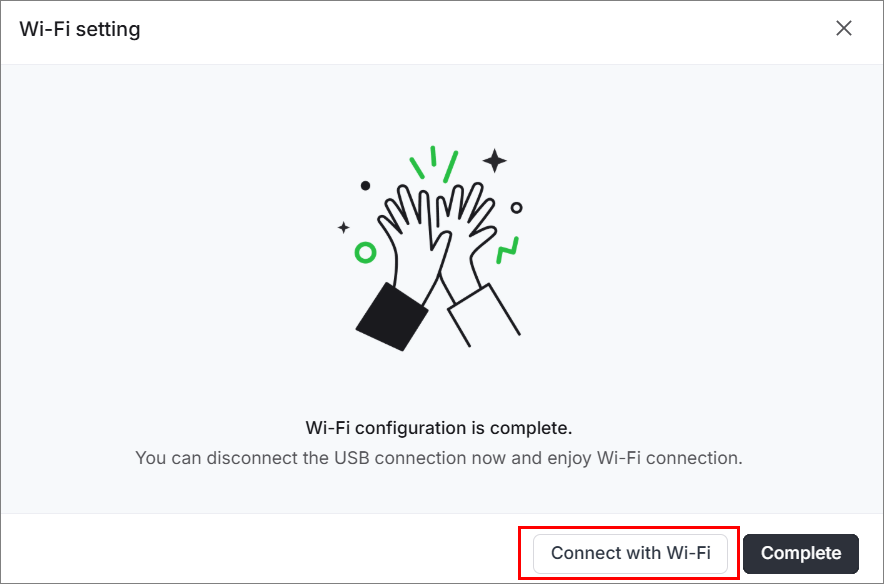
6. After Wi-Fi setting is complete, click Connect with Wi-Fi. Then, you can disconnect the USB cable to switch to the Wi-Fi connection.
 .
.
Troubleshooting
- If Wi-Fi setup fails, refer to the "Troubleshoot Wi-Fi Setup Failure" guide for additional solutions.
- Should the issue persist, submit a ticket via the Submit a Ticket in the Help Ticket section below.
For a prompt resolution, please include the following details:
- Issue description: A detailed explanation of the observed problem.
- Video evidence: Attach a video demonstrating the issue, where applicable.
- Troubleshooting performed: Any troubleshooting steps you have already attempted, along with their results.
This information is crucial for xTool technical support engineers to provide timely assistance.
Services & Help
Learn & Education

Copyright © 2025 xTool All Rights Reserved.