
Download PDF file (multi-language)
OR1 Rotary Attachment first-use video
Click here to watch the video.
Safety precautions
UV light safety
 WARNING - UV radiation emitted. Avoid unnecessary exposure.
- Long-time exposure to UV light may cause eye or skin damage.
- Do not look directly at UV light while the product is in operation.
- It is strongly recommended to operate the device with the covers closed. If operation with the covers open is necessary, maintain a safe distance of at least 20 cm from the device and wear appropriate safety goggles.
- Do not operate the device with the cover open when children are present.
Operation safety
- The product features a magnetic quick-release design. When installing the jaws, keep your hands away from the jaw chuck to avoid pinching.
- The product contains small parts. Keep it away from children to prevent accidental ingestion.
Note: Click here for multi-language safety instructions.
List of items
Unbox xTool OR1 Rotary Attachment for Omni Printer and check the items inside the pack. If you find items missing or broken, please contact us for after-sales support.
|
|
|
|
|---|---|---|---|
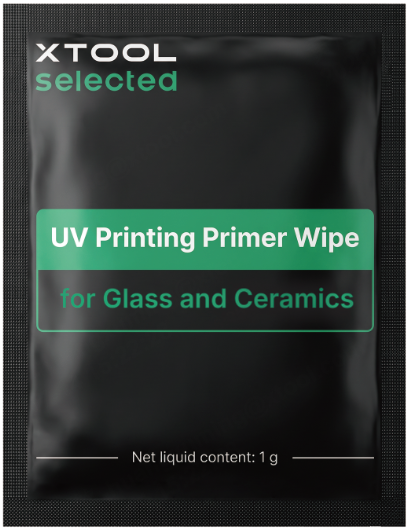
Rotary attachment main unit | Tail module | Cleaning wipe | Primer wipe |
|
|
| |
Tweezers | Quick start guide | Safety instructions |
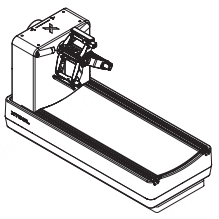
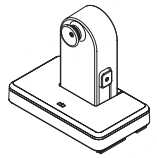

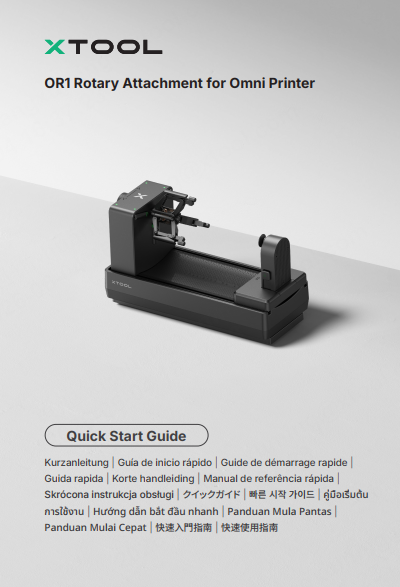

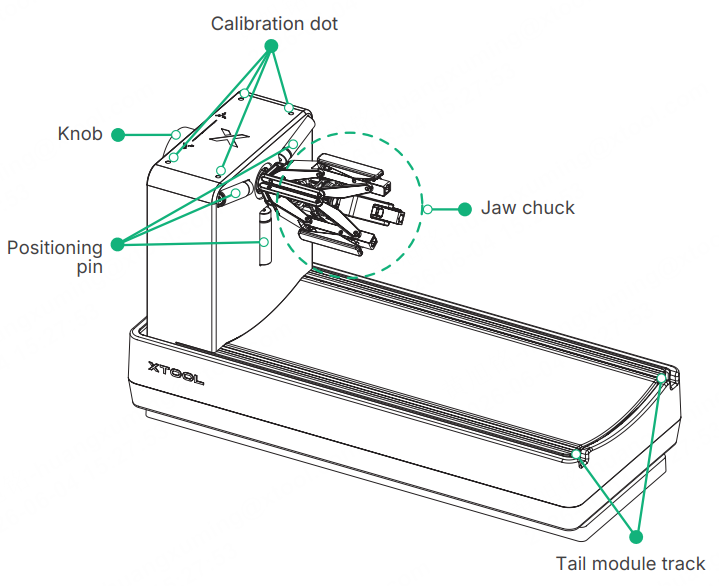
Meet xTool OR1 Rotary Attachment for Omni Printer
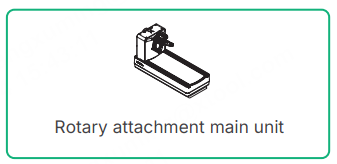
Rotary attachment main unit
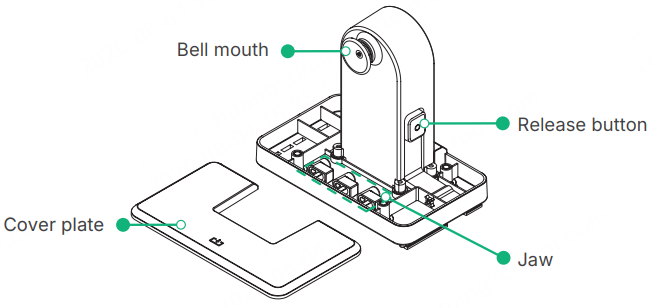
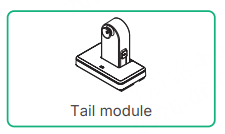
Tail module
Printable workpiece types, specifications, and pretreatment requirements
Printable workpiece types and specifications
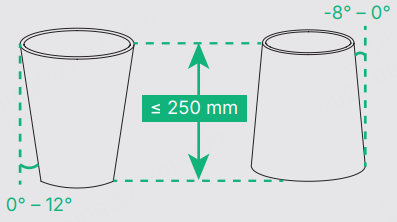
Open rotary containers
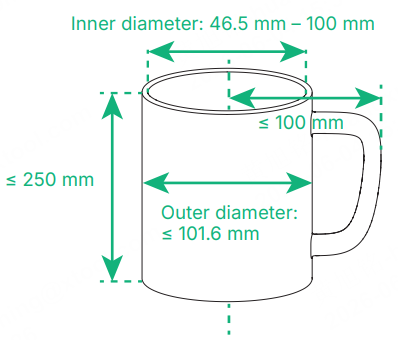
Note: Truncated cone containers: Taper range is -8° to 12°, and the inner and outer diameter range is consistent with that of a mug.
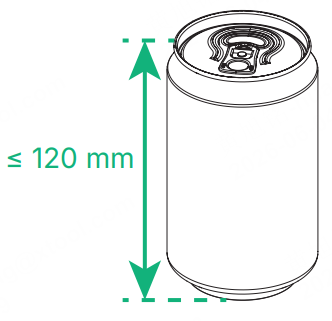
Beverage cans
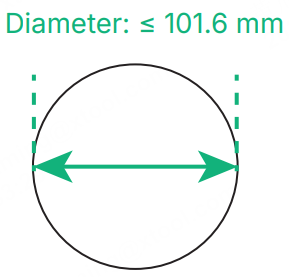
Spherical objects
Note: Click here for detailed information on the range of workpieces compatible with the rotary attachment.
Workpiece pretreatment
1. Inspect and remove any oil or grease from the workpiece surface.
- Inner surface: Remove any oil or grease with a cleaning agent, then dry thoroughly.
- Outer surface: Wipe off any oil or grease with the included cleaning wipe.
2. Apply primer to glass, ceramic, and stainless steel workpieces.
- Glass and ceramic workpieces
After the workpiece surface has air-dried, wipe the print area with the included primer wipe.
- Stainless steel workpieces
After the workpiece surface has air-dried, wipe the print area with the UV Printing Primer Wipe for Metals. It is available for purchase on xTool's official website.
Note: For glass, ceramic, and stainless steel workpieces, if the appropriate primer wipe is not used to wipe the print area as instructed, the printed image may appear normal immediately after printing. However, over time, adhesion may decrease, causing the image to wrinkle, lift, or peel off.
Use xTool OR1 Rotary Attachment for Omni Printer
Install the main unit of the rotary attachment
1. Ensure that xTool O1 Omni Printer is powered on. Press the Start/Stop button, and the extension base will automatically eject.
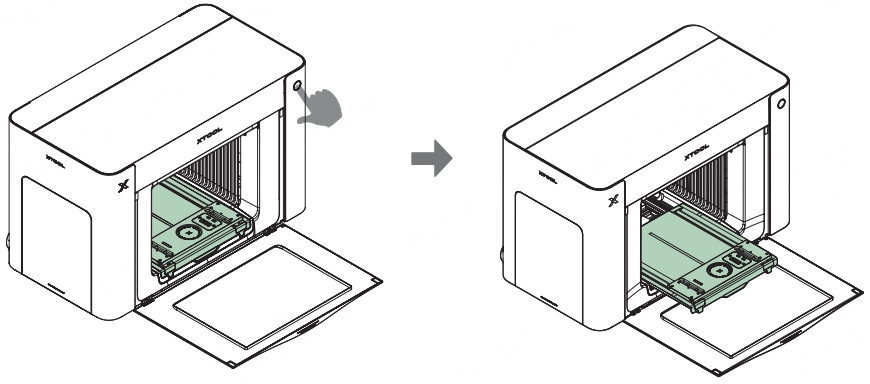
Note: If a baseplate is installed on the extension base, remove the baseplate first.
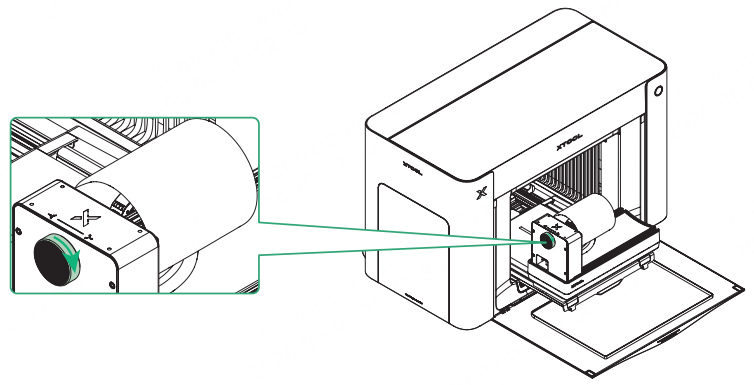
2. Install the main unit of the rotary attachment.
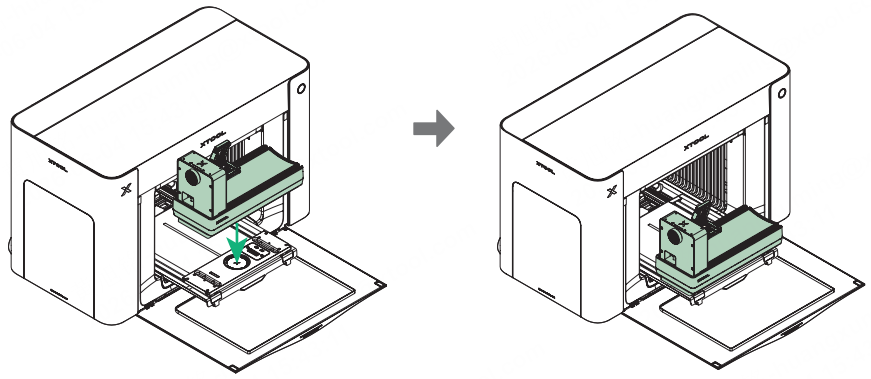
Note: Ensure that the main unit of the rotary attachment is securely installed on the extension base using magnetic attachment.
Axis calibration (first use)
When using the rotary attachment for the first time, perform axis calibration using the four calibration dots on the rotary attachment. Before starting the calibration, ensure that the calibration dots are clean and unobstructed. Follow the instructions in the xTool software to complete the axis calibration. For more details, click here.
Note: Before starting axis calibration, ensure that no workpiece is installed. Turn the knob counterclockwise to reduce the jaw chuck opening to its minimum.
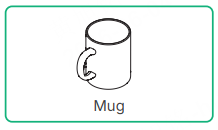
Install the workpiece—mug
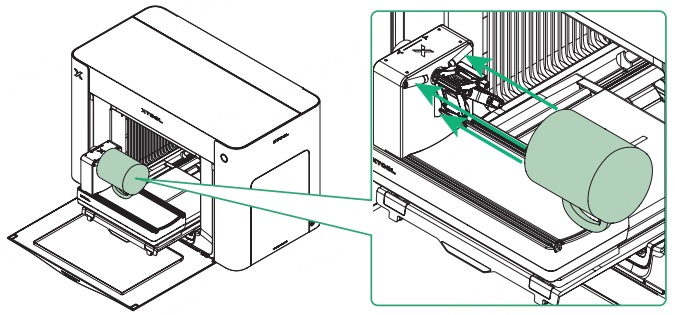
1. Fit the mug rim over the outside of the jaw chuck.
Note: Do not use the jaw chuck to grip the mug for printing, as the mug may fall or the print may come out blurred.
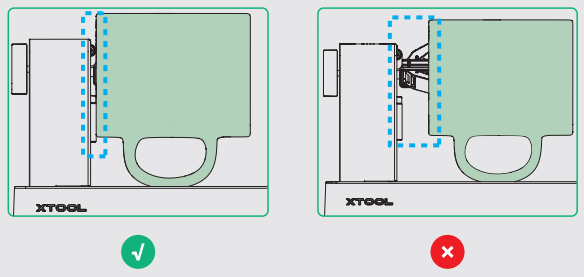
Note: For optimal printing results, ensure that the rim is closely aligned with the positioning pins and the handle faces downward.
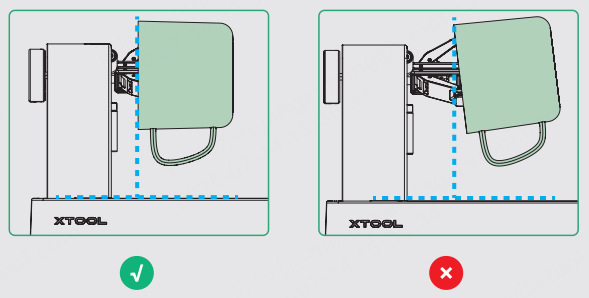
Note: If the mug is too short to align closely with the positioning pins, adjust the rim so that it is perpendicular to the horizontal plane.
2. Turn the knob clockwise to gradually open the jaw chuck until it securely clamps the mug.
Install the workpiece—beverage can
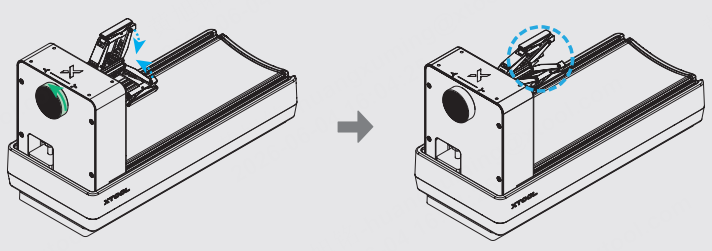
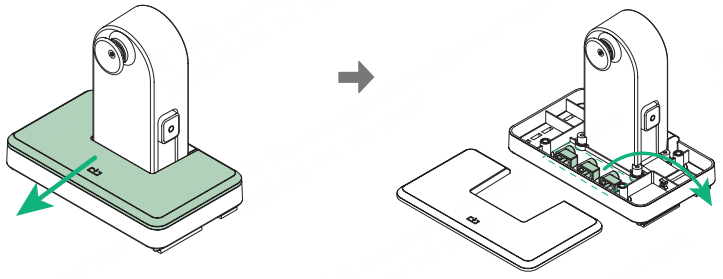
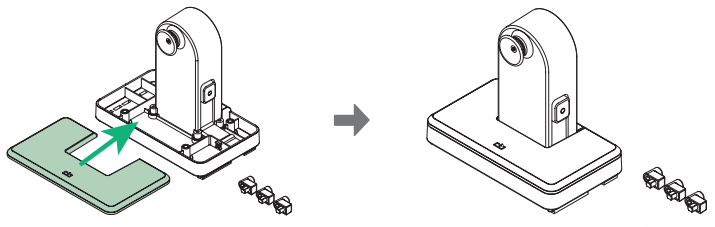
1. Open the cover plate on the tail module, remove the three jaws, and then restore the cover plate to its original position.
2. Install the jaws onto the jaw chuck.
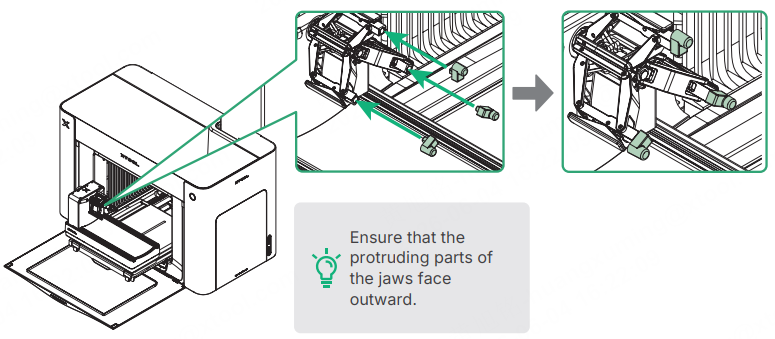
3. Turn the knob counterclockwise to appropriately reduce the opening angle of the jaw chuck.
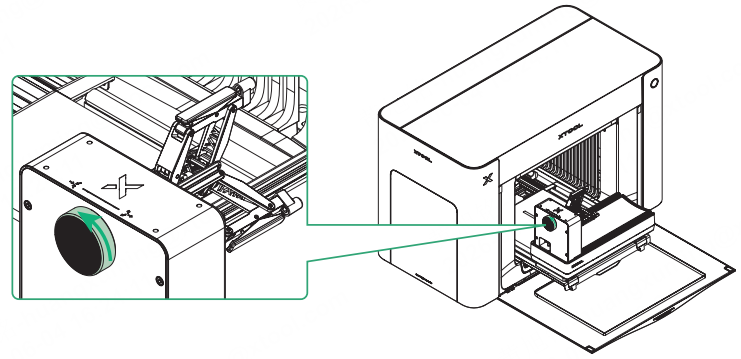
4. Place the beverage can closely against the jaws.
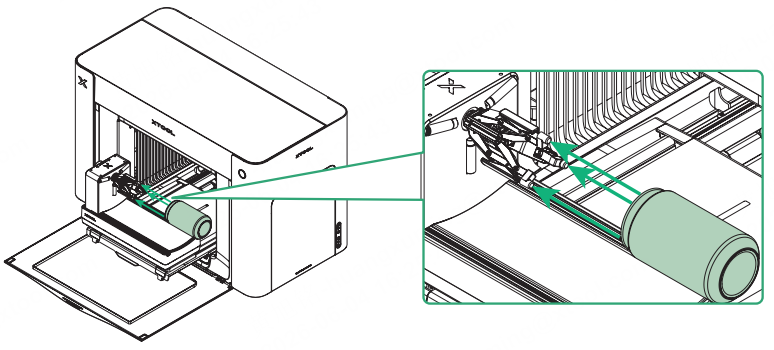
5. Turn the knob clockwise to adjust the position of the jaws, ensuring that the edges of the jaws fit closely against the edge of the top surface of the beverage can.
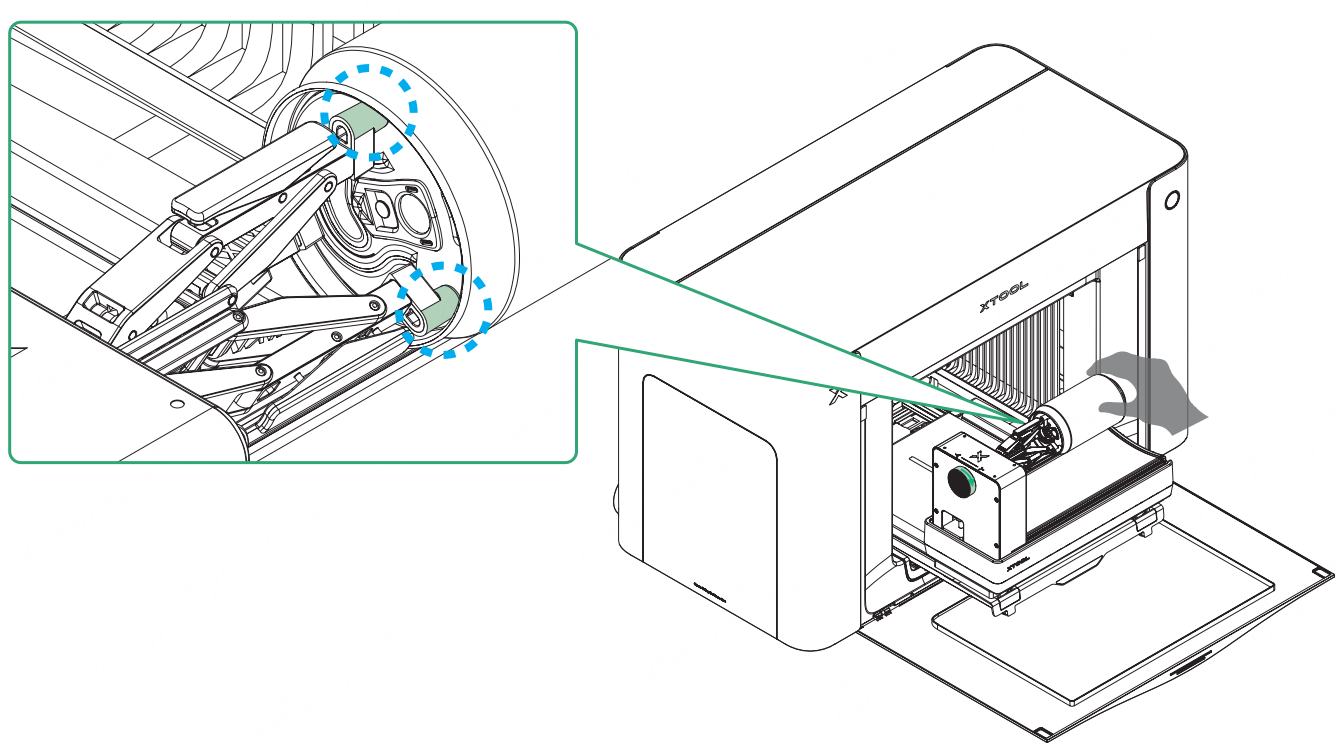
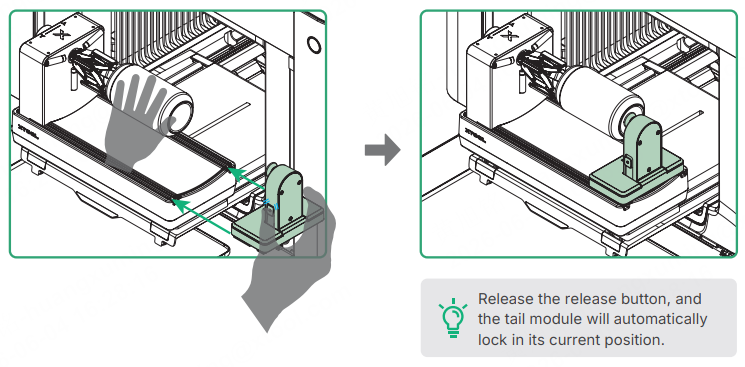
6. Install the tail module.
Note: Press and hold the release button on the tail module, and slide the tail module along the tail module track. Then slide the tail module until it rests against the bottom of the beverage can.
Install the workpiece—spherical object
1. Open the cover plate on the tail module, remove the three jaws, and then restore the cover plate to its original position.
2. Install the jaws onto the jaw chuck.
3. Press and hold the release button on the tail module, and slide the tail module along the tail module track.
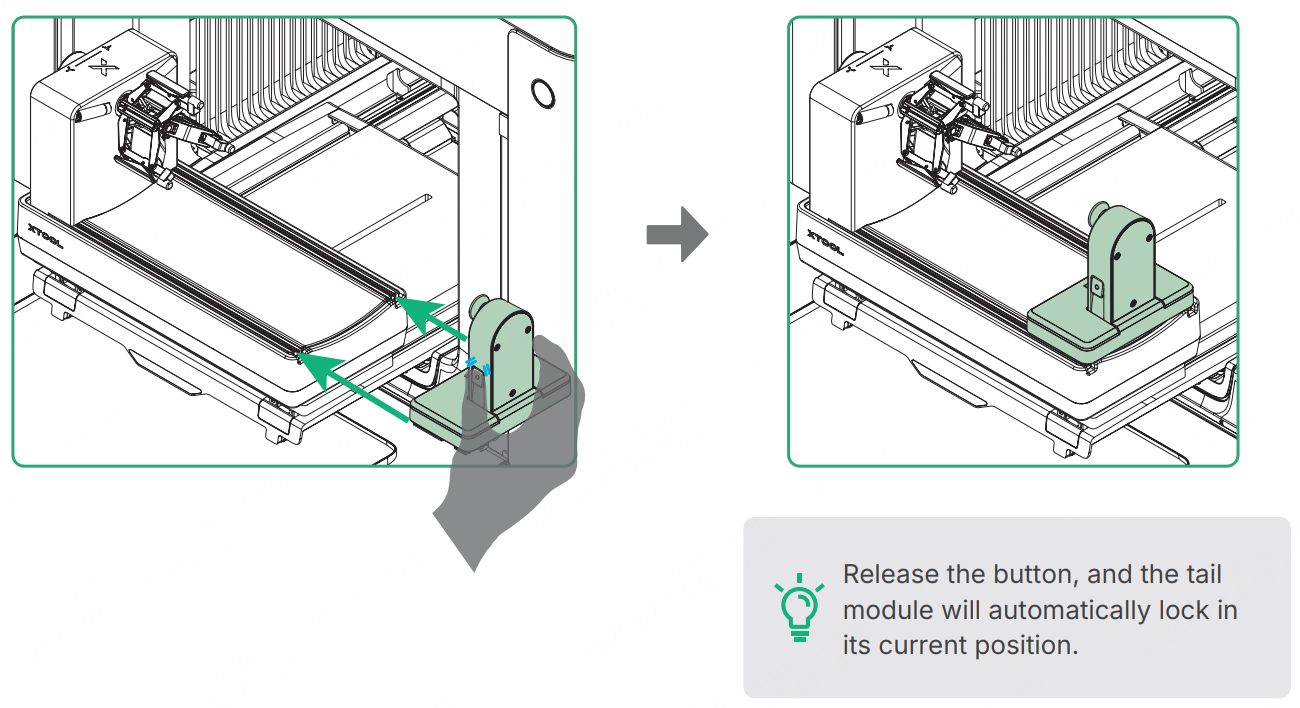
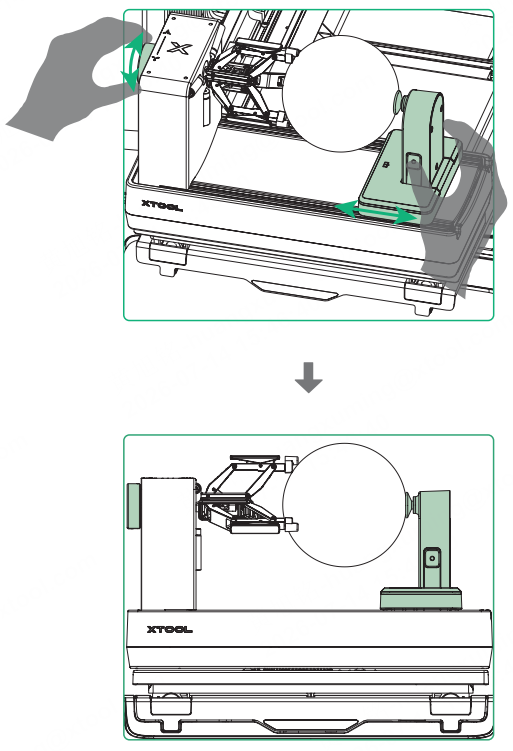
4. Place the spherical object between the jaws and the tail module. Press and hold the release button to slide the tail module, and turn the knob to adjust the jaw opening until the spherical object is securely clamped. Refer to the illustrations below to verify that the spherical object is clamped correctly.
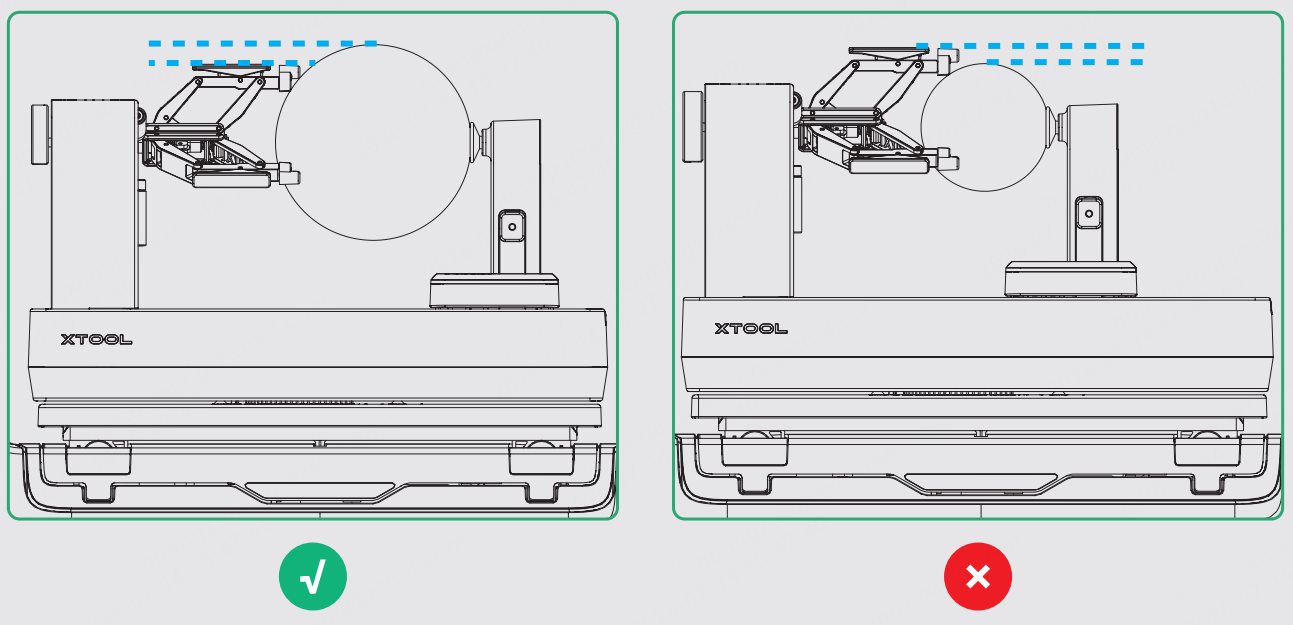
Ensure that the top of the jaw chuck is lower than that of the spherical object. Otherwise, the image cannot be printed on the spherical object.
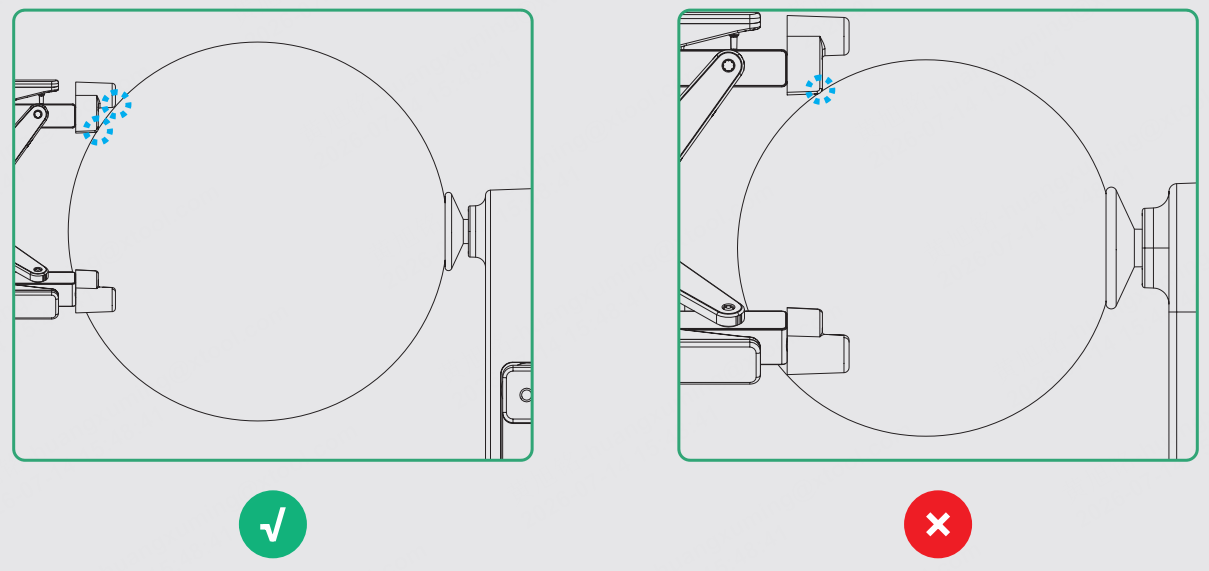
Ensure that each jaw contacts the spherical object at two points, as shown in the illustration below.
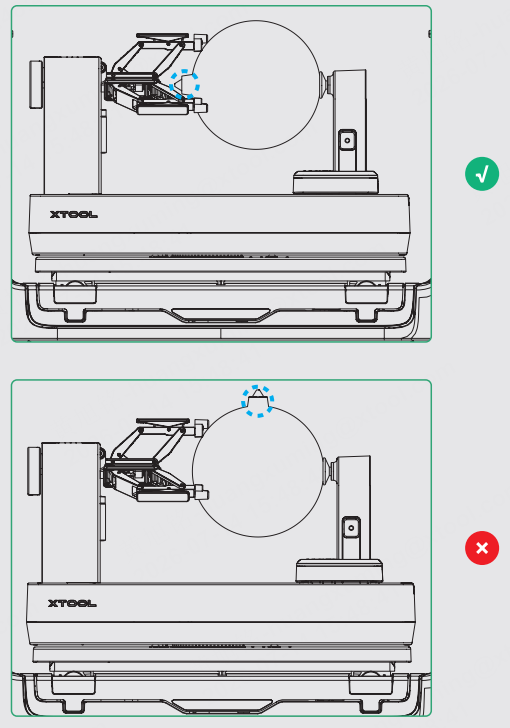
For Christmas ornaments or other spherical objects with protrusions, position the protrusions toward the jaw chuck so that they remain outside the print area.
Print on the workpiece
Follow the prompts in the xTool software to complete printing. For more details, click here.
Get finished print
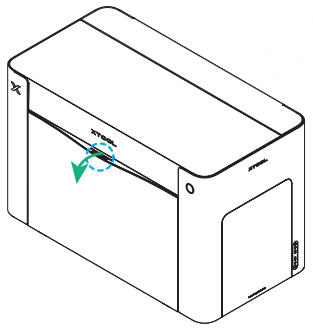
1. After processing is complete, open the front cover.
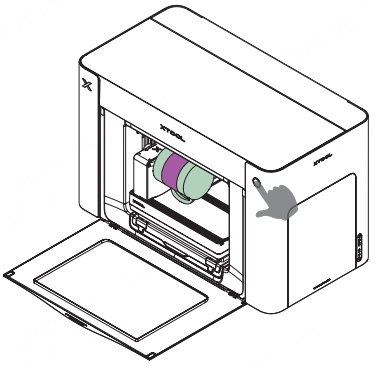
2. Press the Start/Stop button, and the extension base will automatically eject.
3. Remove the workpiece.
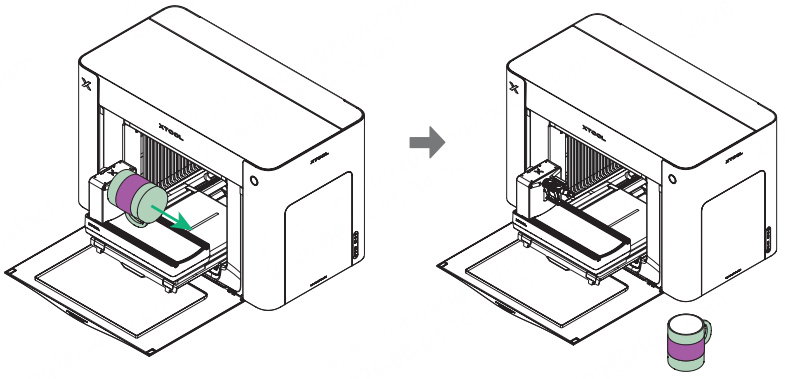
Note: If the rotary attachment is no longer needed, simply lift it to remove.
More information
xTool O1 Omni Printer User Guide
Workpiece Types Supported by xTool OR1 Rotary Attachment for Printing

