
Download PDF file (multi-language)
|
|
|
|
|
|
|
Język Polski_xTool O1 Omni Printer_Skrócona instrukcja obsługi |
|
|
| |
|
|
|
|








Unboxing video
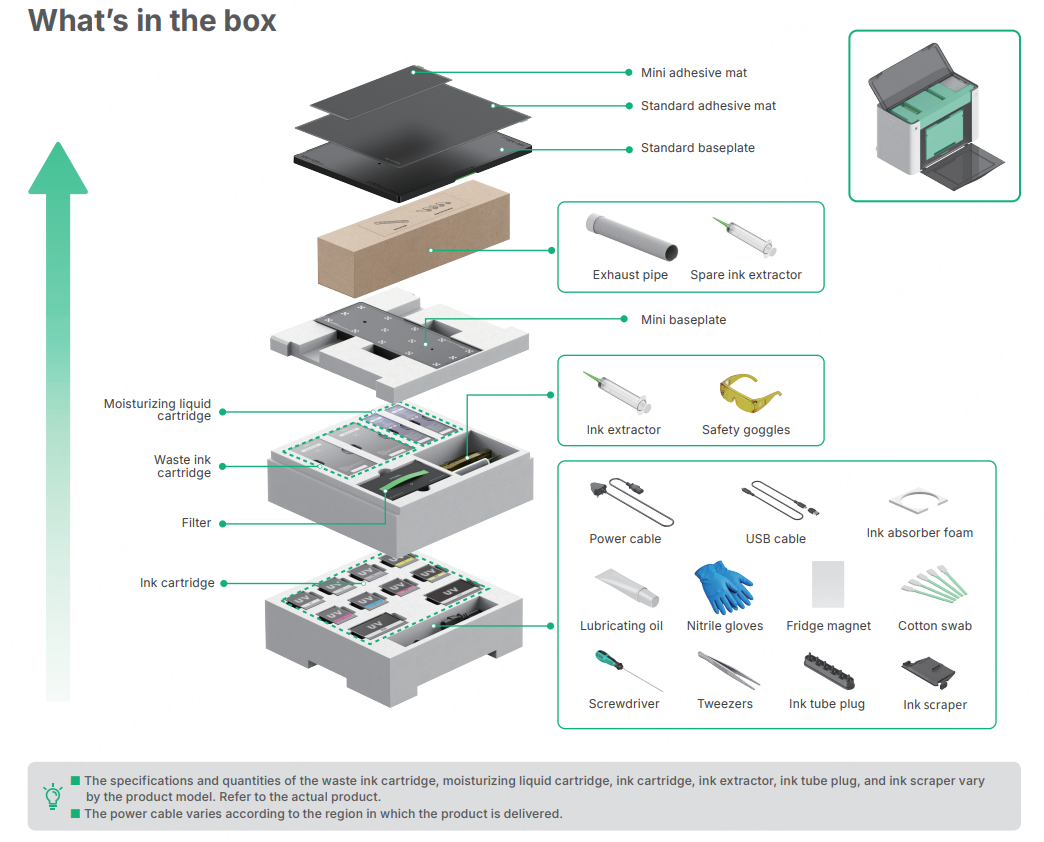
Package list
The package list varies with your device model. For details, visit the corresponding link:
- Package list for the single-UV printhead model
- Package list for the dual-UV printhead model
- Package list for the UV & DT printhead model
Meet xTool O1 Omni Printer
Front view
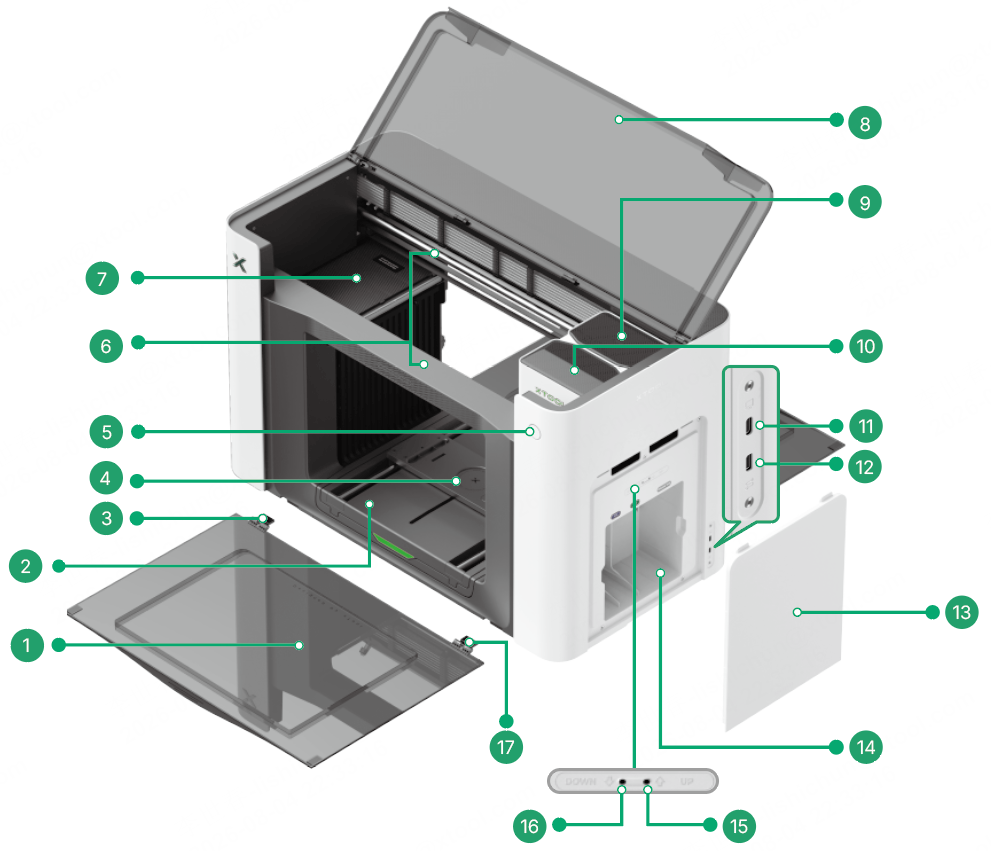

① Front cover |
|
|---|---|
② Y-axis motion assembly | Moves the baseplate and the object along the Y-axis during scanning and printing. |
③ ⑰ Magnetic catch | Holds the front cover securely in place. |
④ Extension base | Supports the baseplate and extends outward for easier loading and unloading. |
⑤ Start/Stop button (LED indicator) | Starts, pauses, or resumes an operation. The LED indicates the current device status. |
⑥ Air duct | Directs airflow through the printer and toward the filtration or exhaust system. |
⑦ Height measurement module | Detects the object height to support positioning and printing. |
⑧ Top cover | Opens for setup, maintenance, and access to the printhead area. Keep it closed during operation. |
⑨ UV printhead/DT printhead/None | This position may contain a UV printhead, a DT printhead, or no printhead, depending on the printer model. A UV printhead applies UV-curable ink, while a DT printhead applies fabric ink for garment printing. |
⑩ UV printhead | Applies UV-curable ink to the object during printing. |
⑪ Computer connection port | Connects the printer to a computer using a USB cable. |
⑫ Accessory connection port | Connects compatible xTool accessories to the printer. |
⑬ Right-side panel | Covers and protects the moisturizing liquid cartridges and waste ink cartridge installed on the right side of the printer. |
⑭ Slots for moisturizing liquid cartridges and waste ink cartridge | Hold the cartridges used to maintain moisture around the printheads and collect waste ink. |
⑮ Hole for raising the capping station | Provides access for manually raising the capping station during maintenance. |
⑯ Hole for lowering the capping station | Provides access for manually lowering the capping station during maintenance. |
⑱ Parallel light | Projects parallel light onto the object surface to support clear and accurate scanning by the CIS module. |
⑲ CIS module | The Contact Image Sensor module, which scans the object surface and captures image data for positioning and calibration. |
⑳ Printhead nozzle | Ejects tiny droplets of ink onto the material to form the printed image. Avoid touching the nozzles. |
㉑ UV lamp | Emits UV light to cure UV ink as it is deposited during printing. |
㉒ Refractor | Refracts UV light. |
Rear view

㉓㉛ Rear cover |
|
|---|---|
㉔ Magnetic catch | Hold the rear cover securely in place. |
㉕ Power port | Connects the printer to a power source. |
㉖ Ink cartridge slots | Hold the ink cartridges and supply ink to the printheads. |
㉗ Ink cartridge cover | Covers and protects the ink cartridges and cartridge slots. |
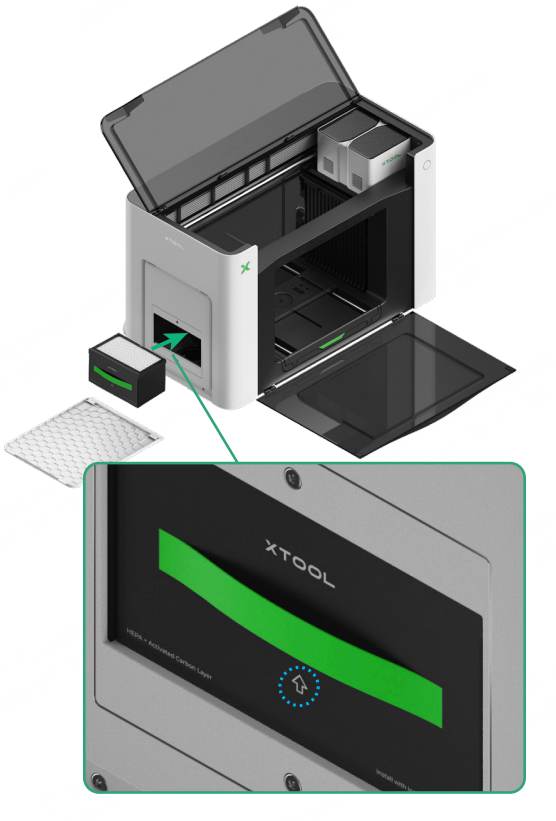
㉘ Filter slot | Holds the replaceable filter used by the printer’s air-filtration system. |
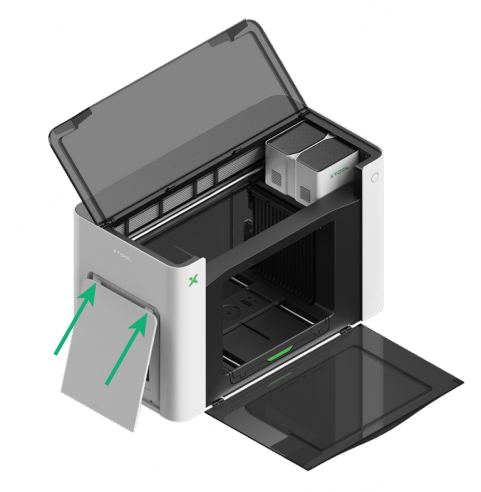
㉙ Left-side panel | Covers and protects the filter on the left side of the printer. |
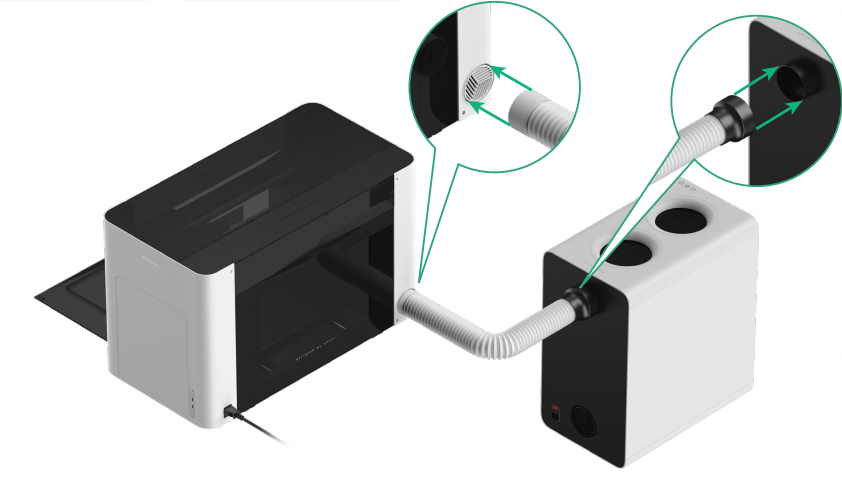
㉚ Exhaust port | Connects to the exhaust pipe or a compatible air purifier to discharge fumes from the printer. |
Garment tray
This item is only included in the UV & DT printhead model.
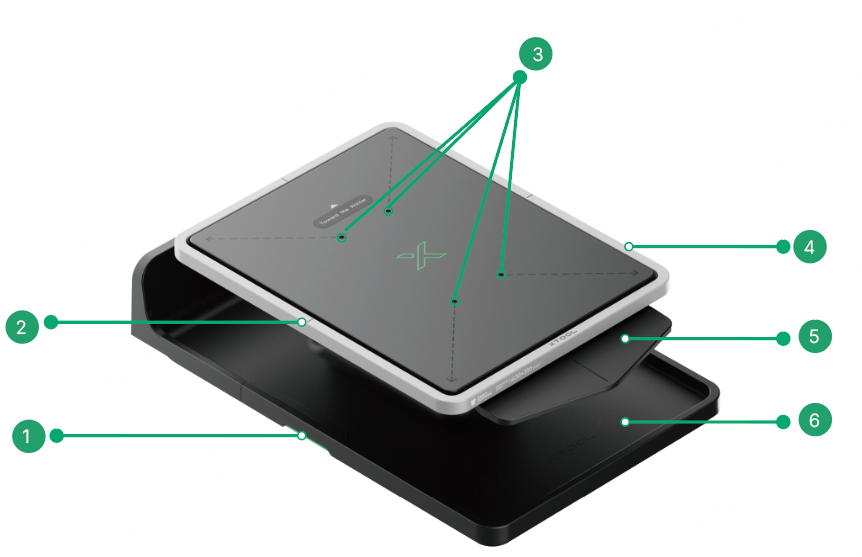
① Handhold | Provides a secure grip for carrying, installing, and removing the garment baseplate. |
|---|---|
② Installation mark | Indicates the correct orientation and position for installing the garment tray on the printer. |
③ Leveling screw | Adjusts the tray height to keep the printing surface level. Follow the prompts in xTool software when making adjustments. |
④ Magnetic frame | Holds the garment flat and in place during printing. |
⑤ Garment tray | Supports the garment and provides a flat surface for printing. |
⑥ Baseplate | Supports the garment tray and secures it to the printer. |
Product specifications
Product name | xTool O1 Omni Printer |
|---|---|
Product model |
|
Printhead model | Epson F1080 Printhead |
Processing area |
|
Print resolution | 720x1440 dpi |
Ink paths |
RW: rigid white, FW: flexible white, FR: fluorescent red, FY: fluorescent yellow
|
Supported materials |
|
Embossed print height | 7 mm (0.28") |
Vision System Resolution | 1440 x 1200 dpi |
Positioning accuracy | ±0.2 mm |
Automated maintenance | Auto white ink stirring; auto white ink circulation; auto printhead moisture protection |
Supported OS | macOS, Windows |
Main unit dimensions | 28.1" x 14.7" x 18.4" (714 x 374 x 468.5 mm) |
Weight |
|
Indicator description
Indicator status | Buzzer status | Device status |
|---|---|---|
| None | Device not connected. |
| None | Device in sleep mode; maintenance not active. |
| One beep |
|
| None |
|
| Three beeps | A minor error occurred. |
| Continuous beep | A critical error occurred. |
| None | Receiving data; printing supported. |
| One beep | Processing suspended. |
| None | Processing... |
| None | The device is being calibrated. |
| None | Printhead nozzle cleaning in progress; device in maintenance mode. |
| None | Low-power state: The device maintains only periodic automatic maintenance and network connectivity, while peripheral accessories are suspended. |
| None | Upgrading firmware... |


Assemble xTool O1 Omni Printer
1. Preparations
(1) Place the printer on a flat and stable workbench. Ensure adequate clearance at the front, rear, left, and right sides, as shown in the illustration.
Warning: DO NOT place the printer near the edge of the workbench as the front or rear cover may fall when opened.
(2) Remove tape from all sides.
(3) Take accessories and foam padding out from the printer enclosure.
(4) Prepare the printheads.
a. Remove the protective film.
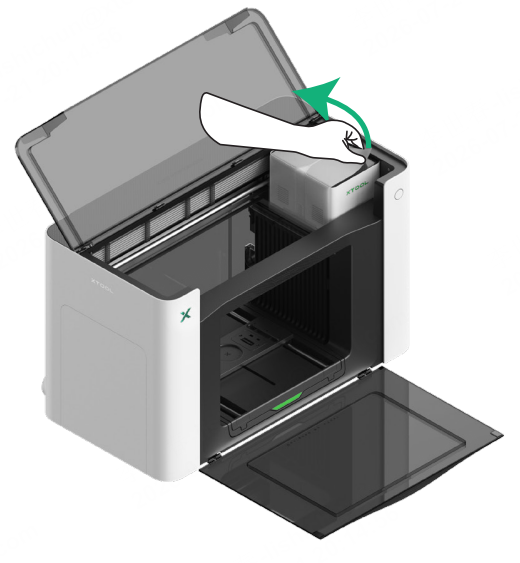
b. Move the printheads to the center for easy access. Remove the tape on both sides of the protective cover.
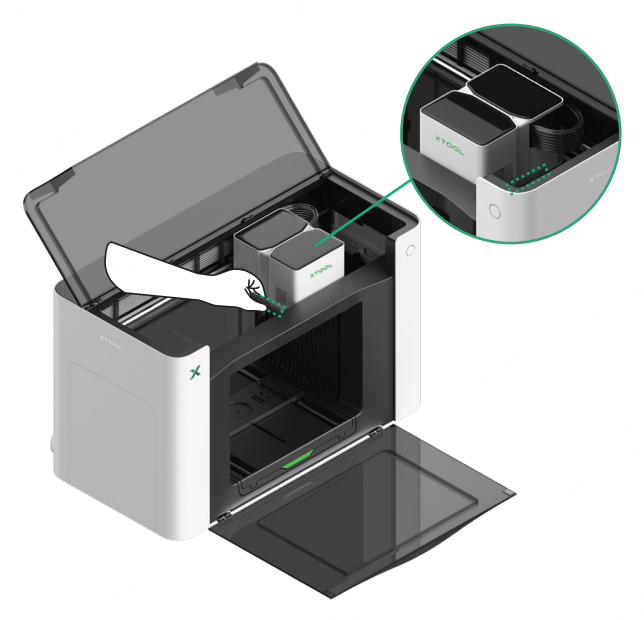
c. Check the bottom area for any remaining film, and remove it if any.
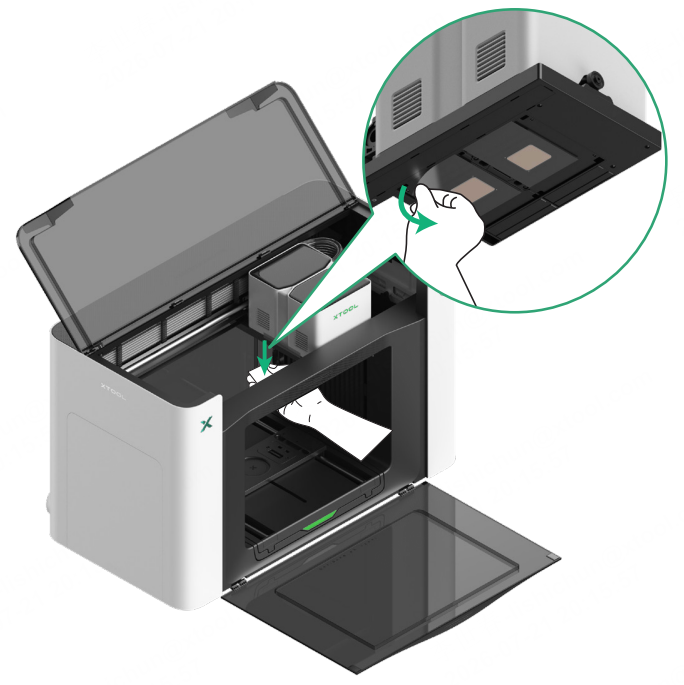
d. Move the printheads back to place.
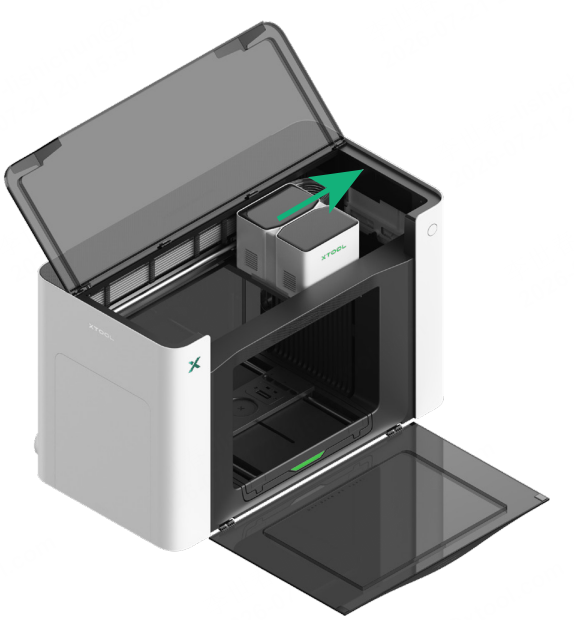
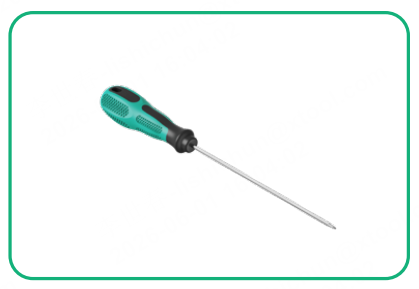
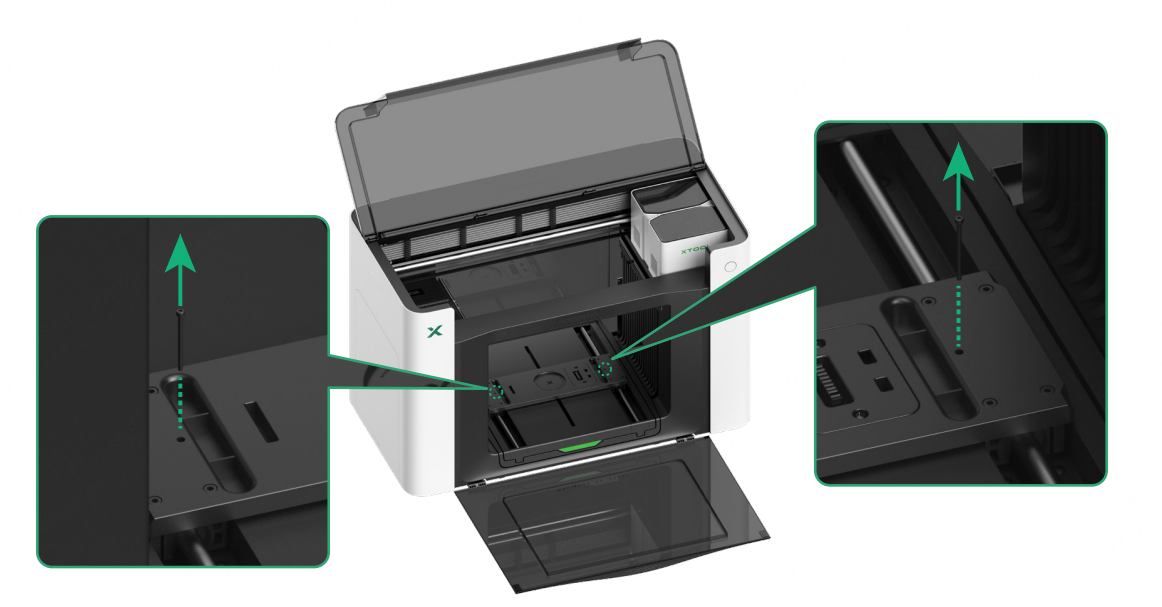
(5) Remove the two shipping screws from the extension base.
Use the flat end of the screwdriver.
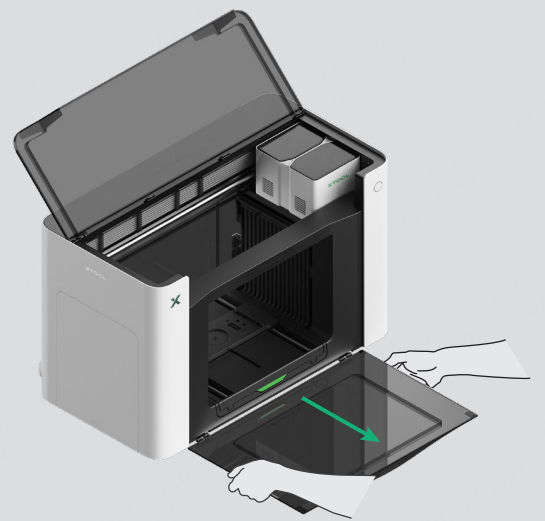
Magnetic cover installation and removal
Installation
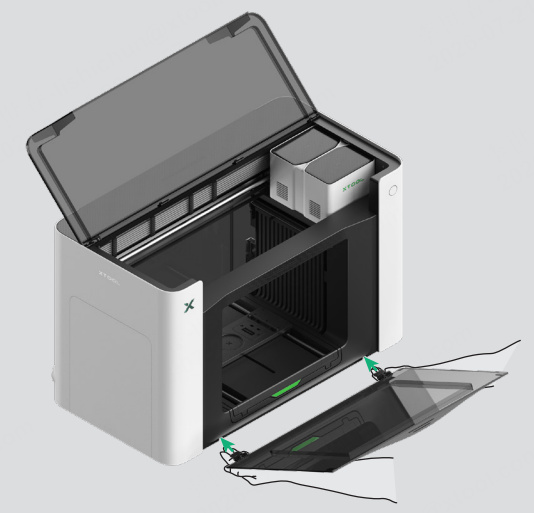
Removal
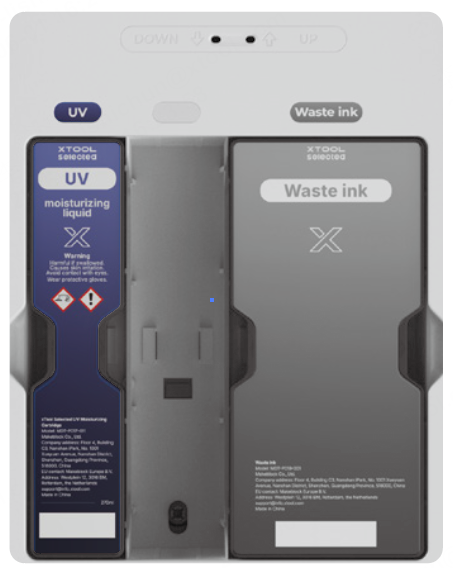
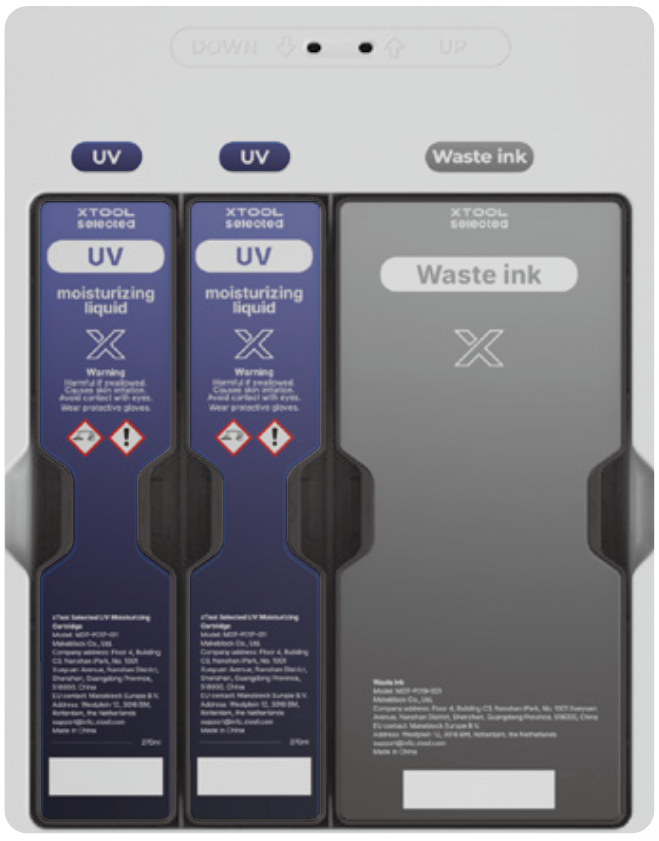
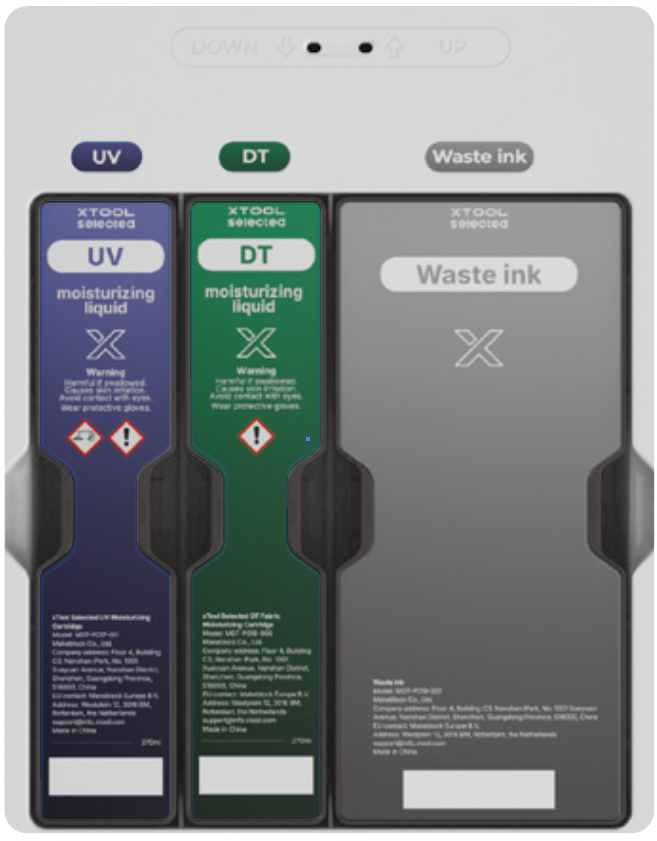
2. Install the waste ink cartridge and moisturizing liquid cartridge(s)
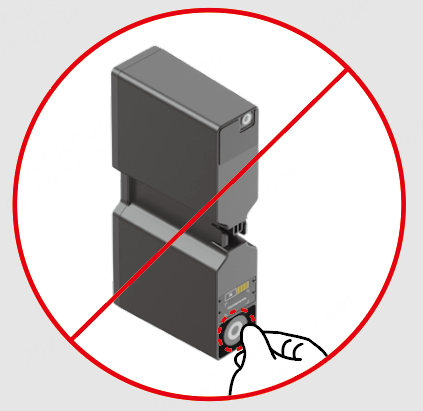 DO NOT remove the protective film from the back of the moisturizing liquid cartridge(s).
Before installation begins, it is recommended that you wear the nitrile gloves.
Installation preview
Single UV printhead model
Dual UV printhead model
UV & DT printhead model
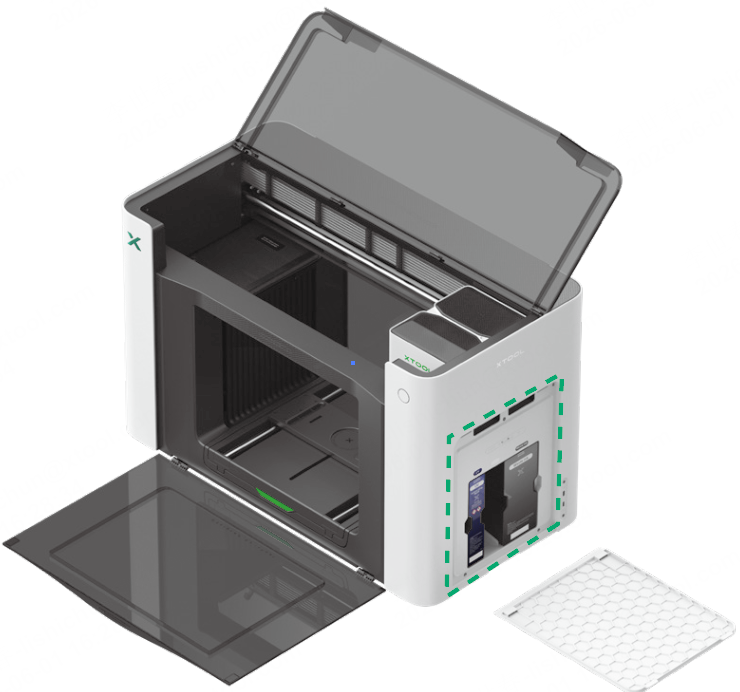
Installation steps
(1) Open the right-side panel.
(2) Install the waste ink cartridge and the moisturizing liquid cartridge.
You should see this after installation.
(4) Install the right-side panel back.
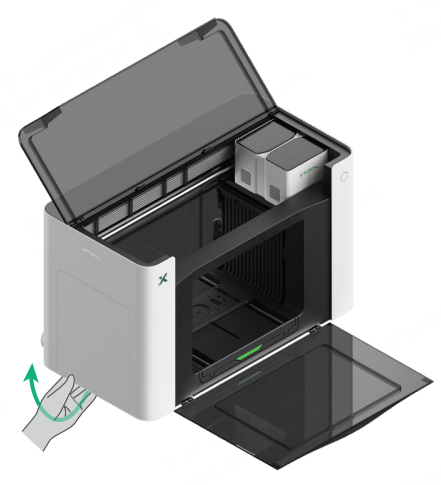
3. Install the filter
(1) Open the left-side panel.
(2) Install the filter. Note the direction of the filter.
(3) Install the left-side panel back.
4. Install ink cartridges
Warning: Shake the ink well Before installation
Warning: DO NOT remove the protective film under the ink cartridges.
Installation preview
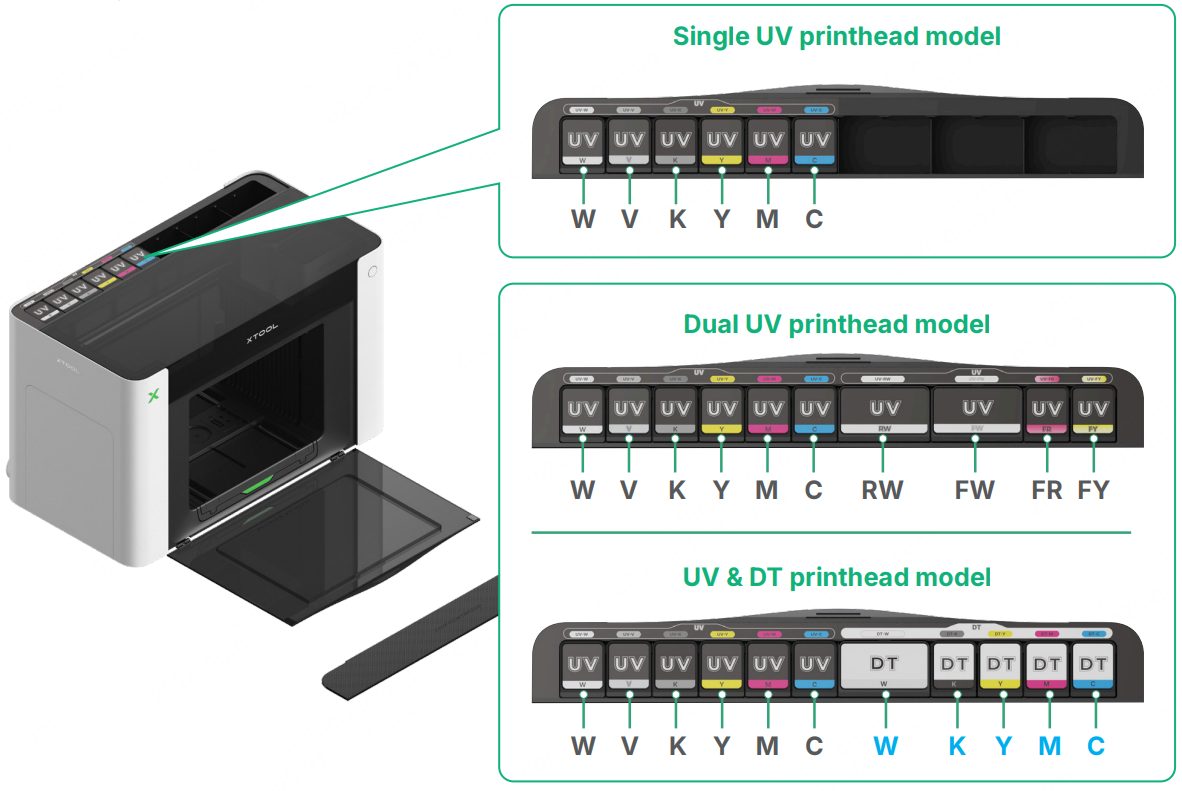
Installation steps
(1) Open the ink cartridge cover.
(2) Install the corresponding cartridges correctly according to your device model.
 Insert the ink cartridge, ensuring that the color marking on the cartridge matches that on the corresponding slot.
 Press the ink cartridge until you hear a click. Ensure that it stays in place and does not spring back.
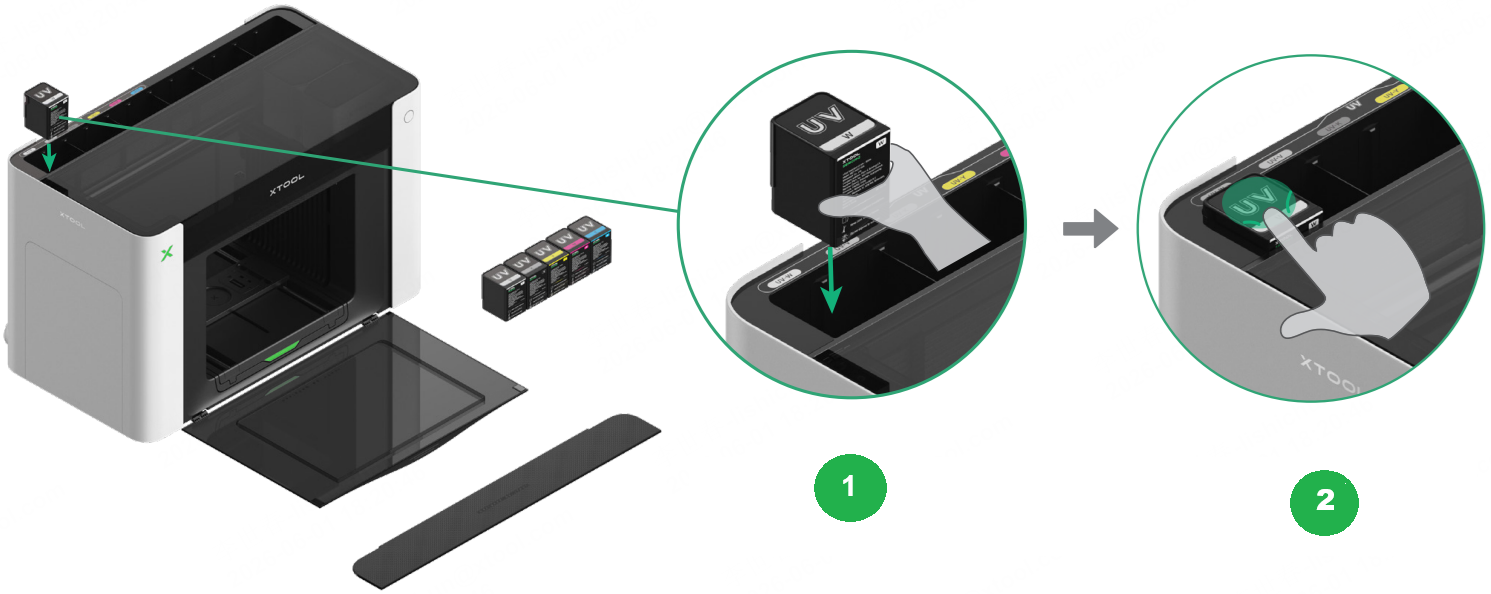
(3) Reinstall the ink cartridge cover.
Warning: When removing an ink cartridge, remove it immediately after it is ejected. Do not leave the ejected cartridge in the cartridge slot, as this may cause ink leakage.
5. Connect to a power supply
Keep the device powered for automatic maintenance to work properly.
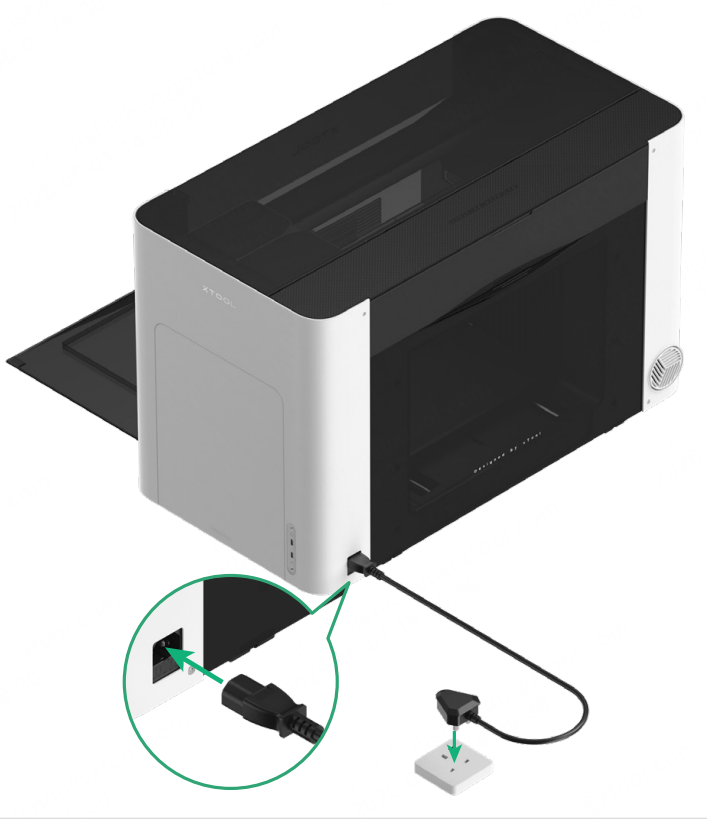
Warning: Ensure that the power cable does not bend or enter the baseplate's moving area (as shown in the dashed box), and that this area is free of debris.
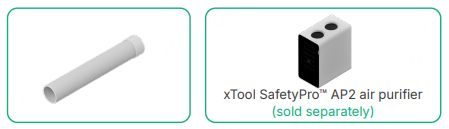
6. (Optional) Install the exhaust pipe and xTool SafetyPro™ AP2 air purifier
7. Connect to computer
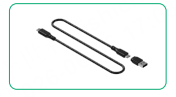
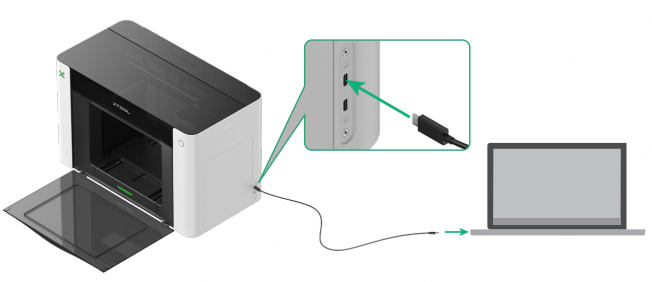
Use xTool O1 Omni Printer
1. Download and install the xTool software
(1) Download the xTool software applicable to the operating system that runs on your computer from https://www.xtool.com/pages/software.
(2) Double-click the software you've downloaded to install it.
2. Connect the printer in the software
(1) Open the software on your computer. In the top-right corner of it, click the + New Project button.
(2) On the right side of the software, click the icon and connect your O1 Omni Printer.
In the upper right corner of the software, you can see that the printer is successfully connected.
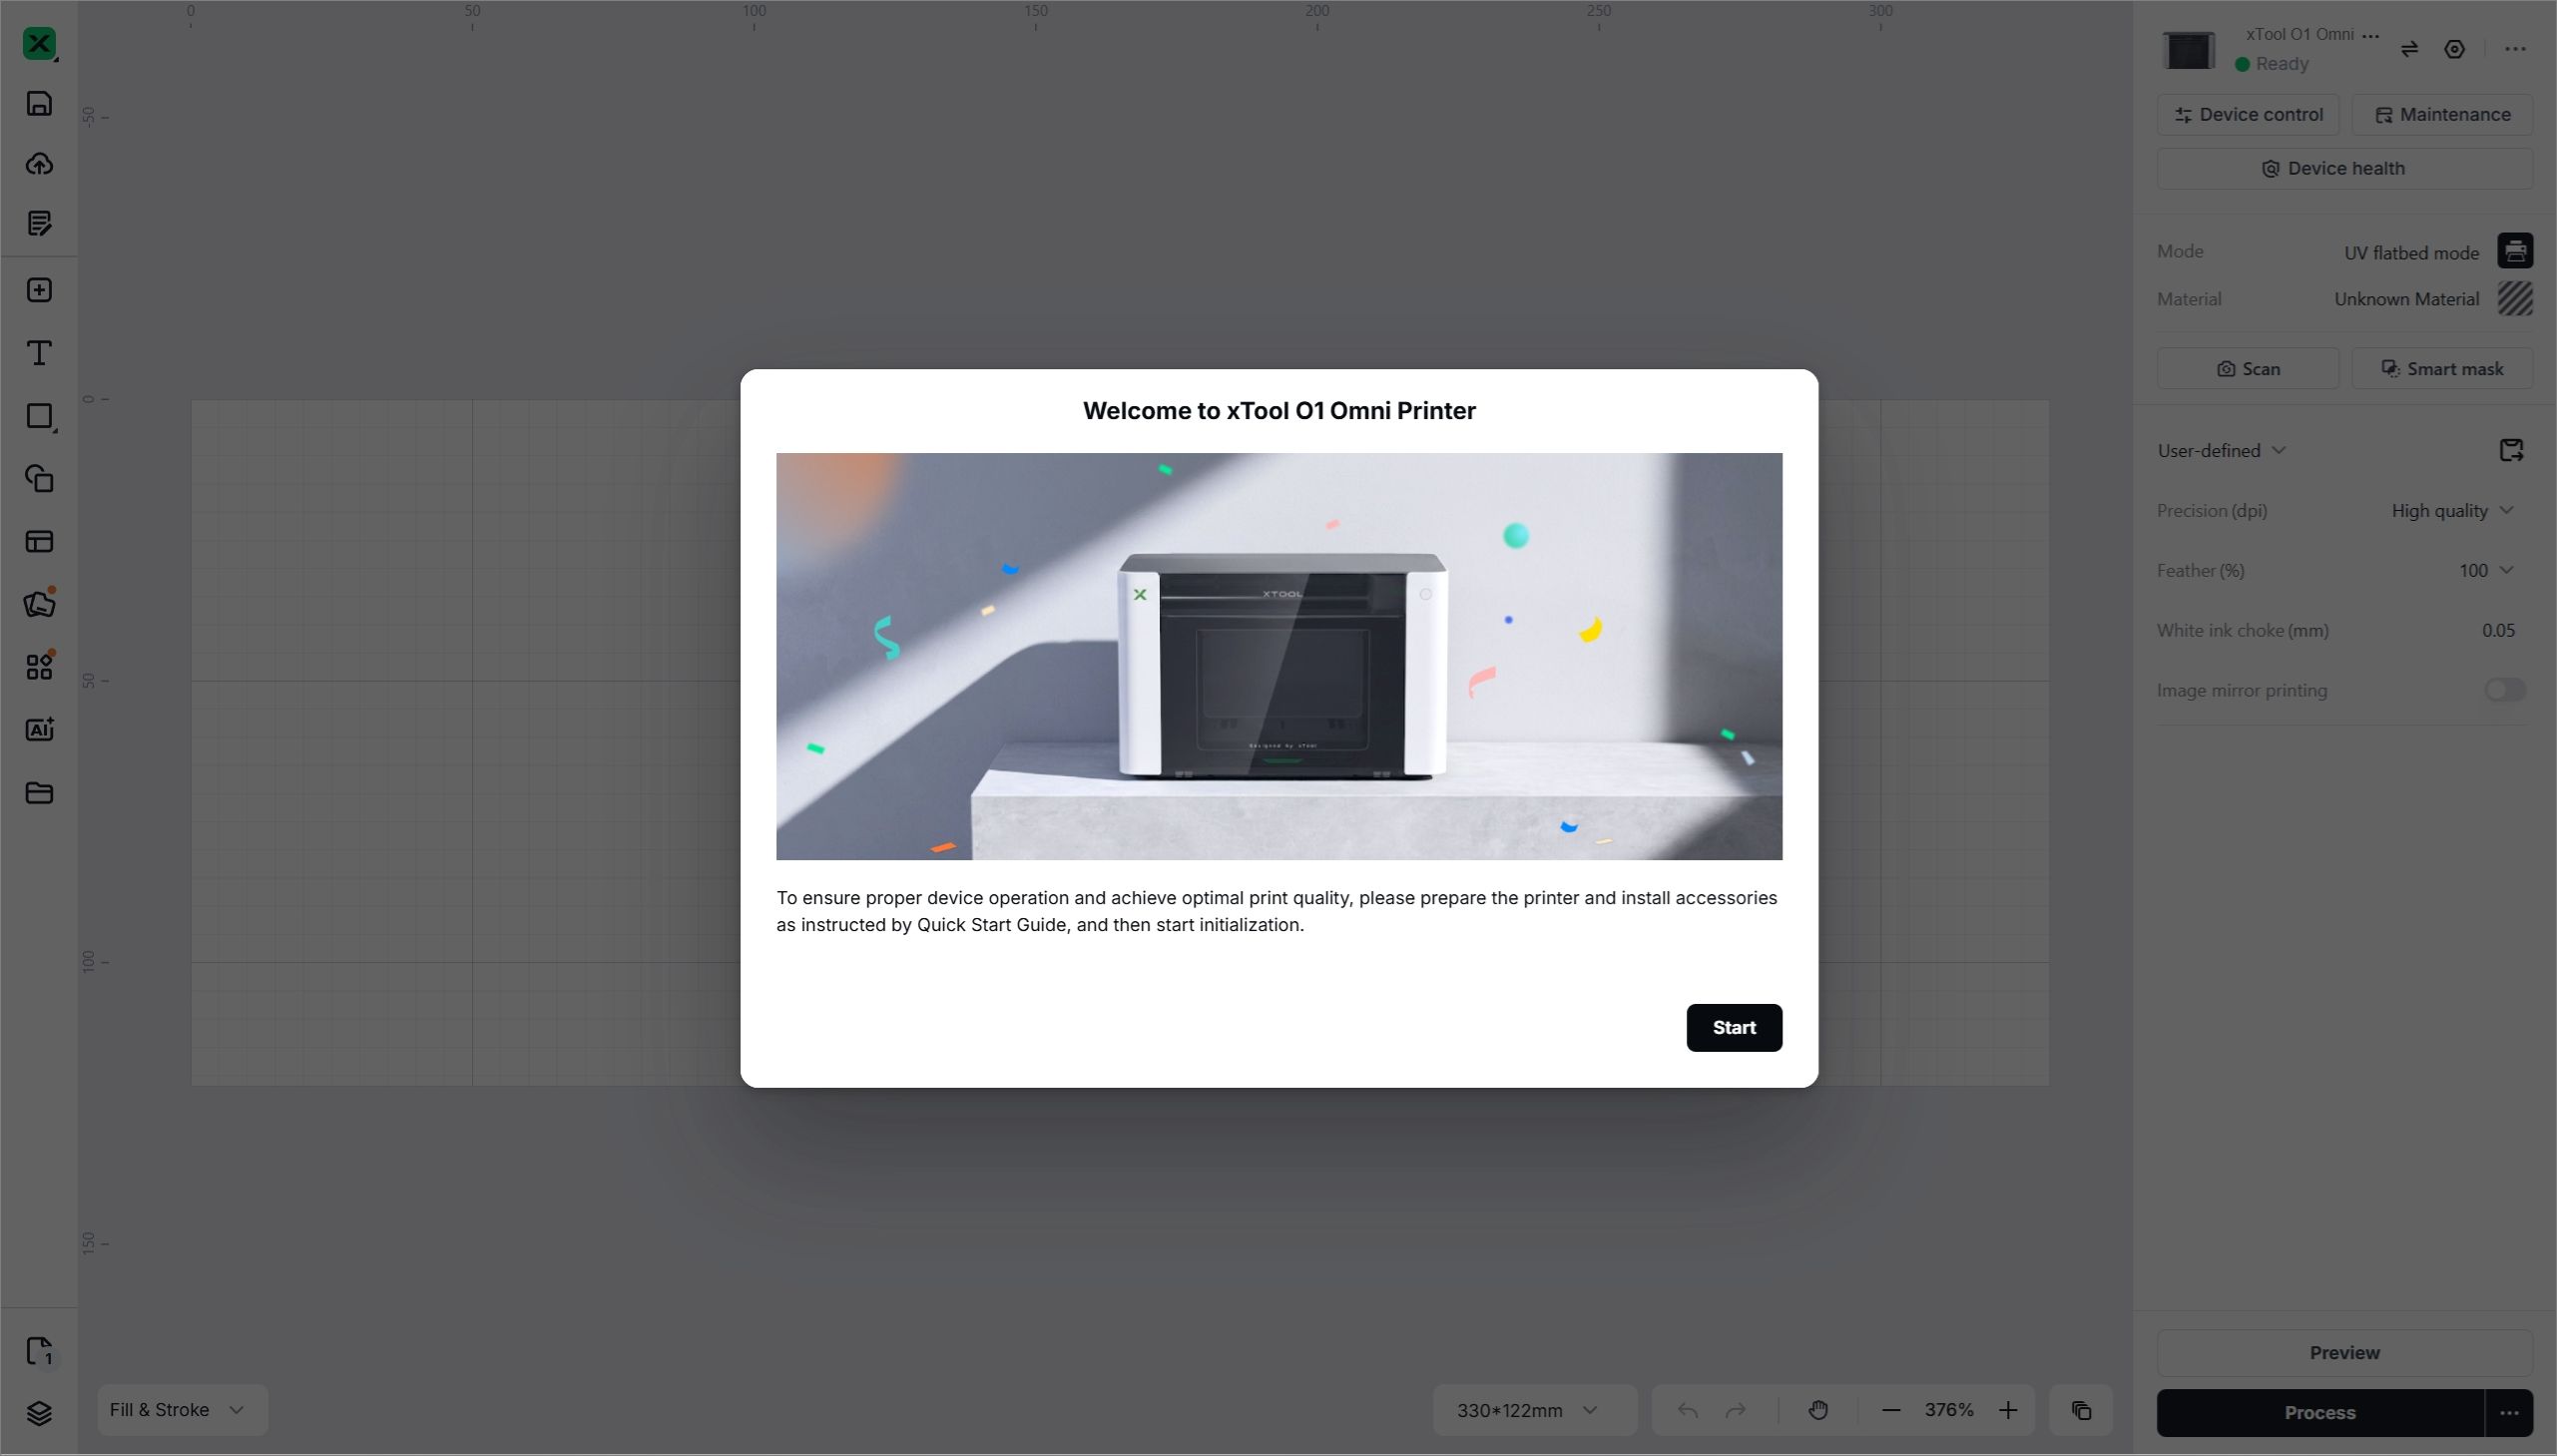
3. Complete initialization
Complete initialization as prompted. The whole initialization consists of device calibration, ink filling, and scan alignment calibration.
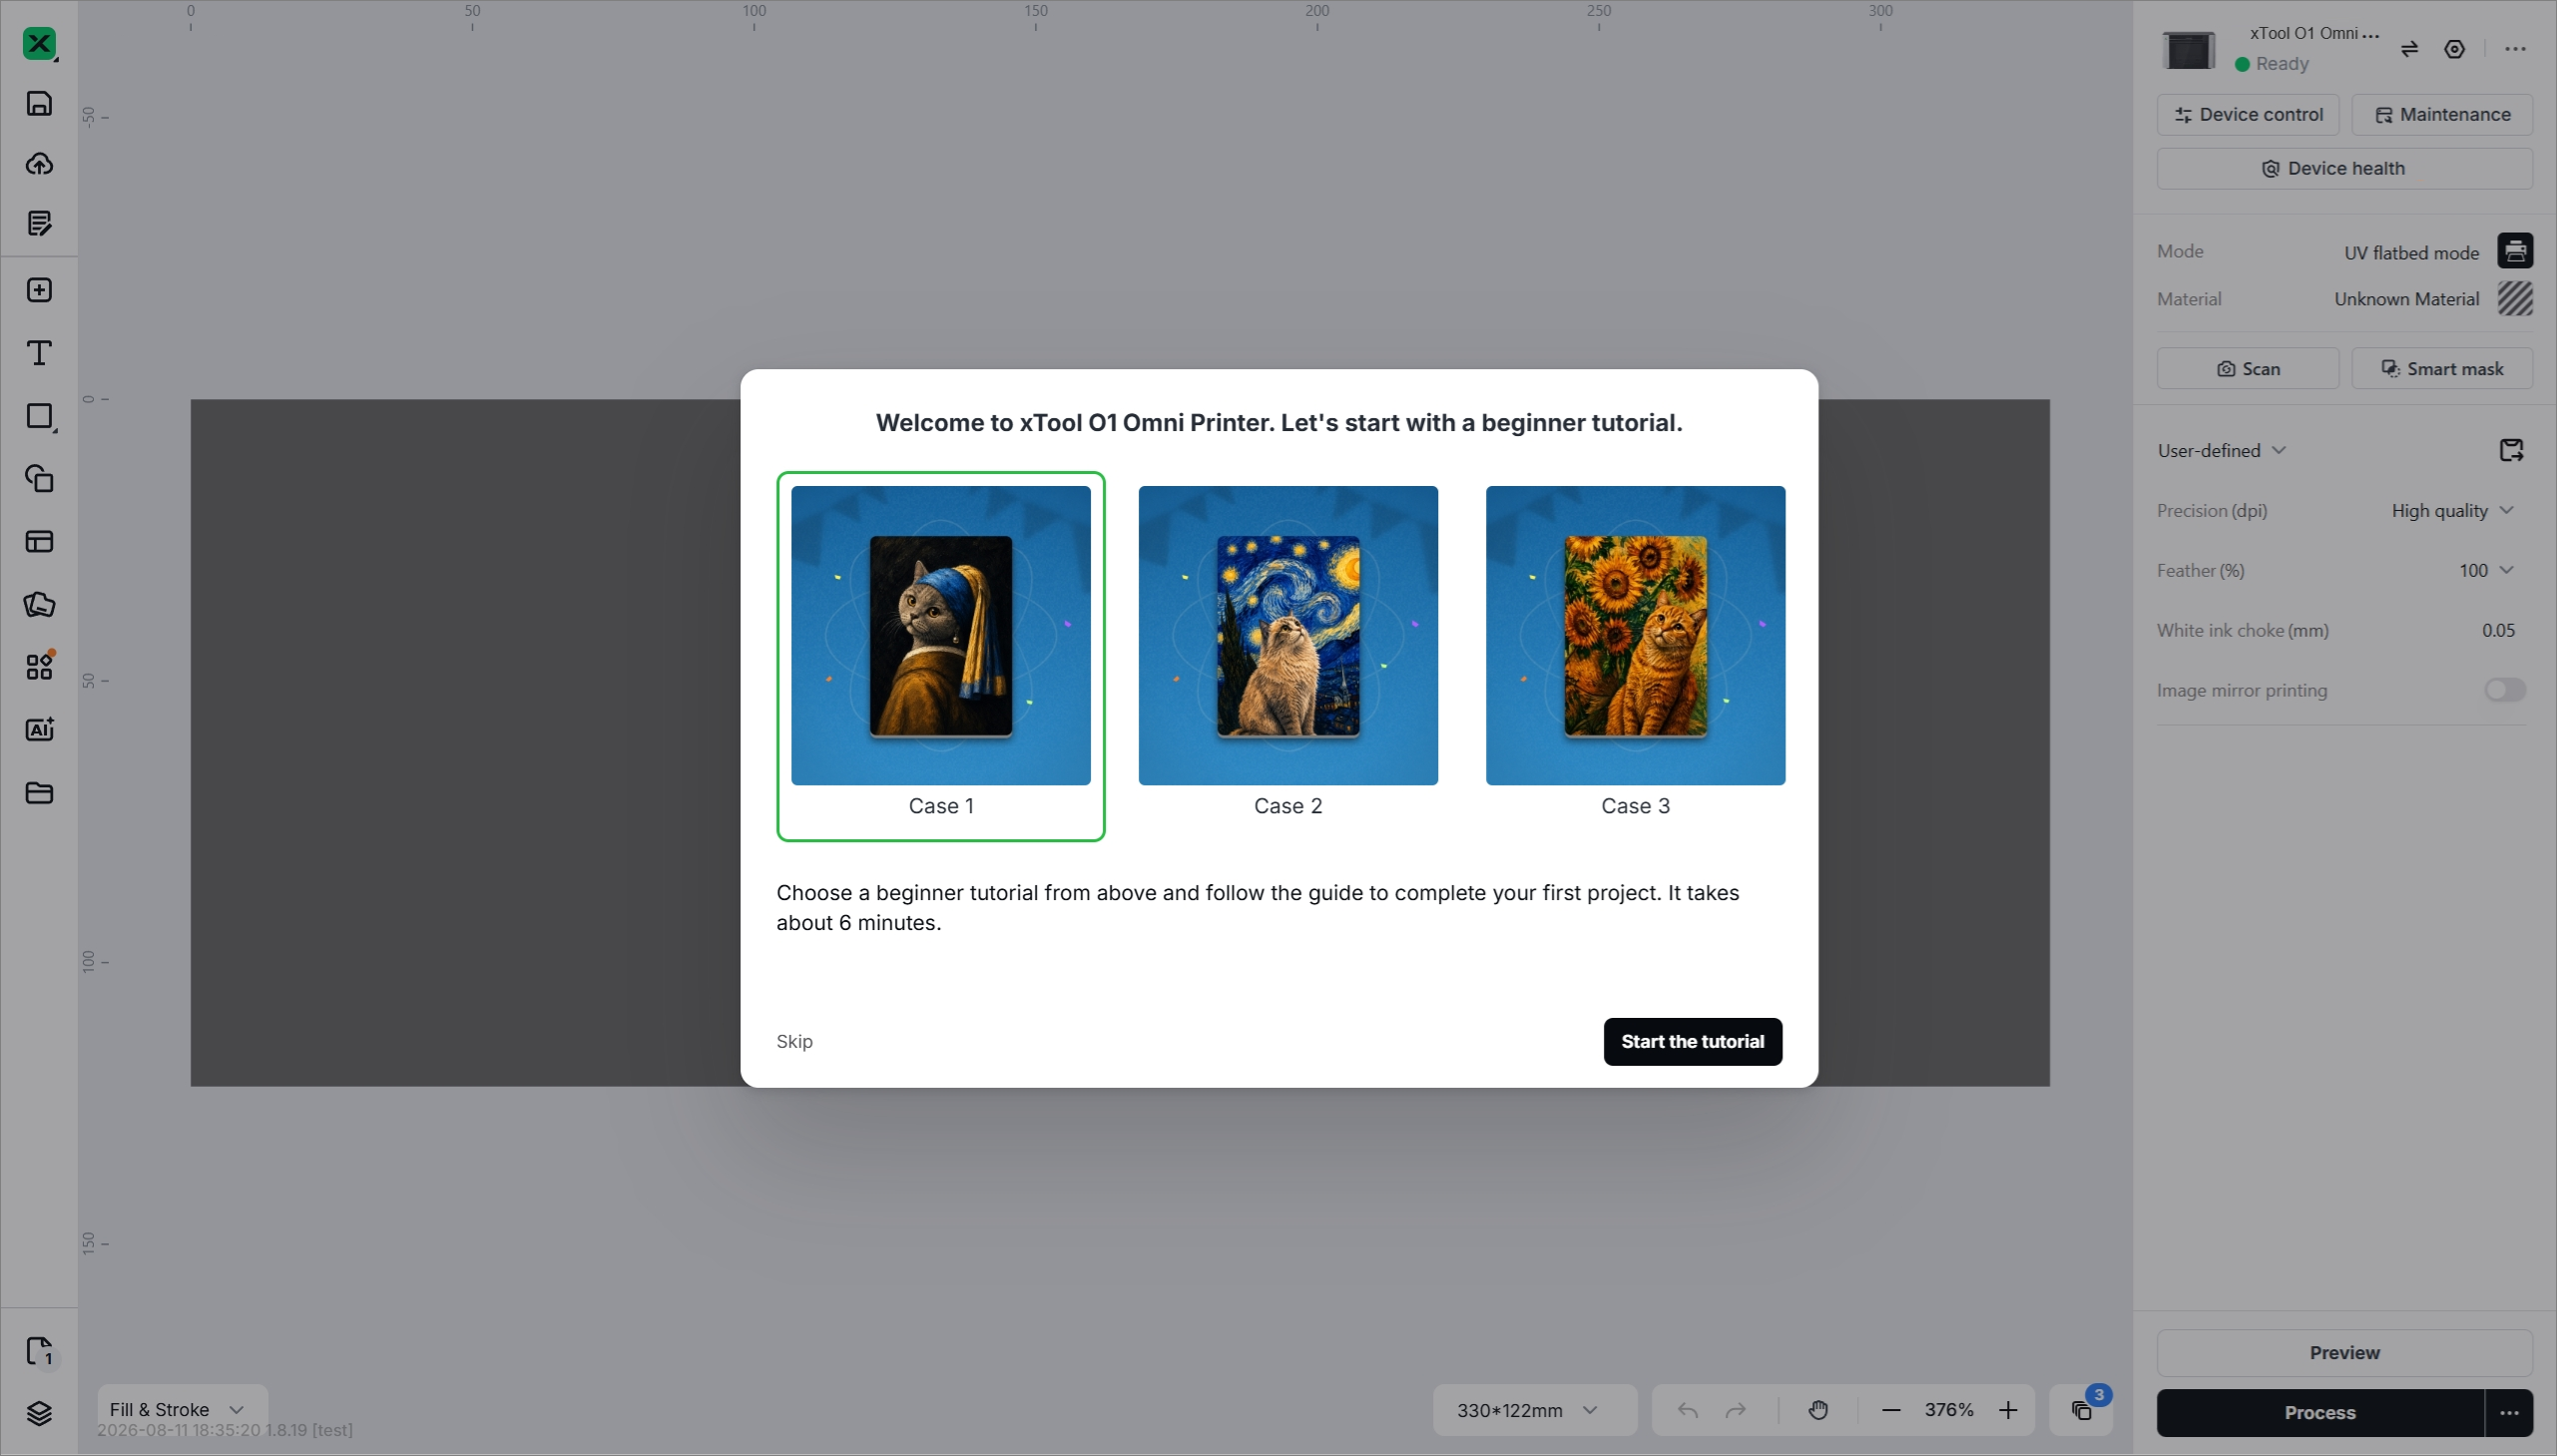
4. Try printing
Choose a beginner tutorial and follow the instructions to complete your first print.
For details about using the printer with the software, see Use xTool O1 Omni Printer with xTool Software.
More information
Use with accessories
- xTool OR1 Rotary Attachment for Omni Printer User Guide
- xTool RF1 Roll Feeder User Guide
- xTool LM1 Laminator User Guide
UV printing guides
- How to Create a Flat Print on a Rock Coaster
- How to Create a Texture Print on an Acrylic Board
- How to Create a Relief Print on a Fridge Magnet
DT printing guide
DT Printing Using O1 Omni Printer
Rotary printing guide
FAQ
Maintenance
Cleaning
- Clean the Optical Path and CIS Module for O1 Omni Printer
- Clean the UV Lamp Surface for O1 Omni Printer
- Clean the Ink Pad & Ink Scraper and Replace the Absorber Foam
- Clean the Printing Platform for O1 Omni Printer
- Guide Rail Maintenance for O1 Omni Printer
Replacement
- Replace the Printhead for O1 Omni Printer
- Replace Ink Cartridges & Ink Absorber Foams for O1 Omni Printer
- Replace the Ink Scraper, Ink Pad, and Ink Absorber Foam for O1 Omni Printer
- Replace Standard and Mini Adhesive Mats for O1 Omni Printer
- Replace Ink Cartridge Latch for O1 Omni Printer
- Replace the Lid for O1 Omni Printer
- Replace Air Filter for O1 Omni Printer
Consumables
- Ink Cartridges and Moisturizing Liquid Cartridges
- UV Maintenance Kit
- DT Maintenance Kit
- Ink Pad and Ink Scraper Replacement Kit
- Dark-Colored Garments Pretreatment Solution
- Light-Colored Garments Pretreatment Solution
- Air Filter
- Standard and Mini Adhesive Mats

