
You can use xTool F2 Ultra with xTool Rotary Attachment 3 (RA3) to process cylindrical, spherical, and irregular materials. This page provides a step-by-step guide on how to use xTool F2 Ultra with RA3.
Set up xTool Rotary Attachment 3
Rotary Attachment 3 supports two working modes: Roller mode and Chuck mode.
- If you use the Roller mode, you can set the rotary attachment to S, M, or L level based on your needs.
Level S (roller components installed onto shaft A and shaft B) | Level M (roller components installed onto shaft B and shaft C) | Level L (roller components installed onto shaft A and shaft C) |
|
|
|
Diameter of material: 5 mm ≤ d ≤ 45 mm | Diameter of material: 40 mm ≤ d ≤ 70 mm | Diameter of material: 60 mm ≤ d ≤ 100 mm |
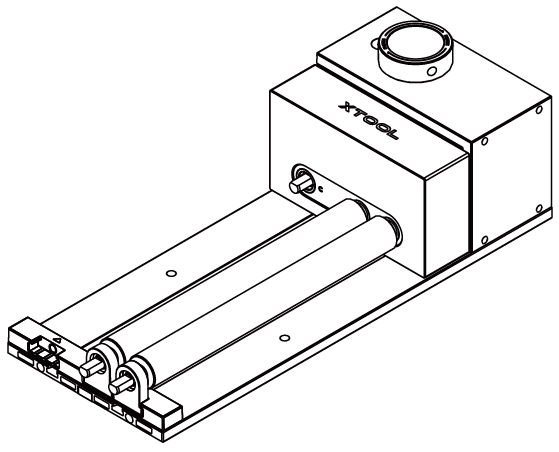
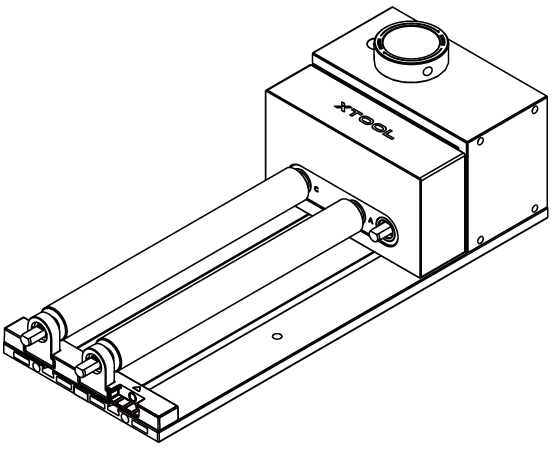
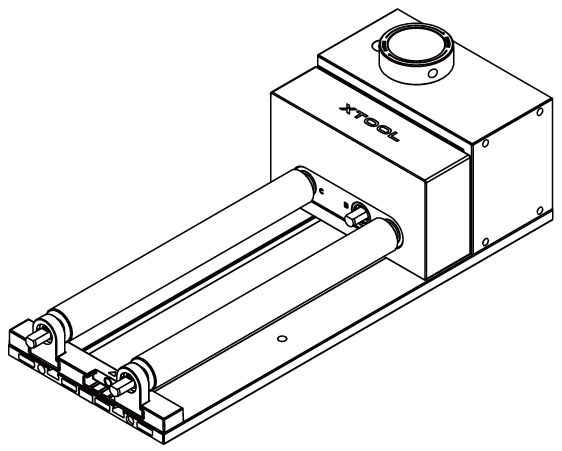
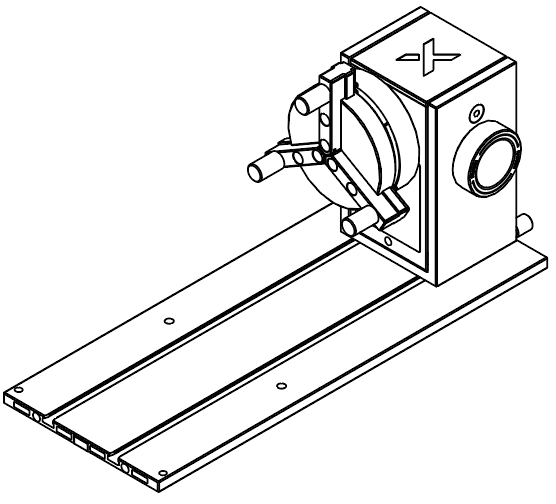
- If you use the Chuck mode, you can install jaw chuck components and other modules based on your needs.
Connect xTool Rotary Attachment 3 to xTool F2 Ultra
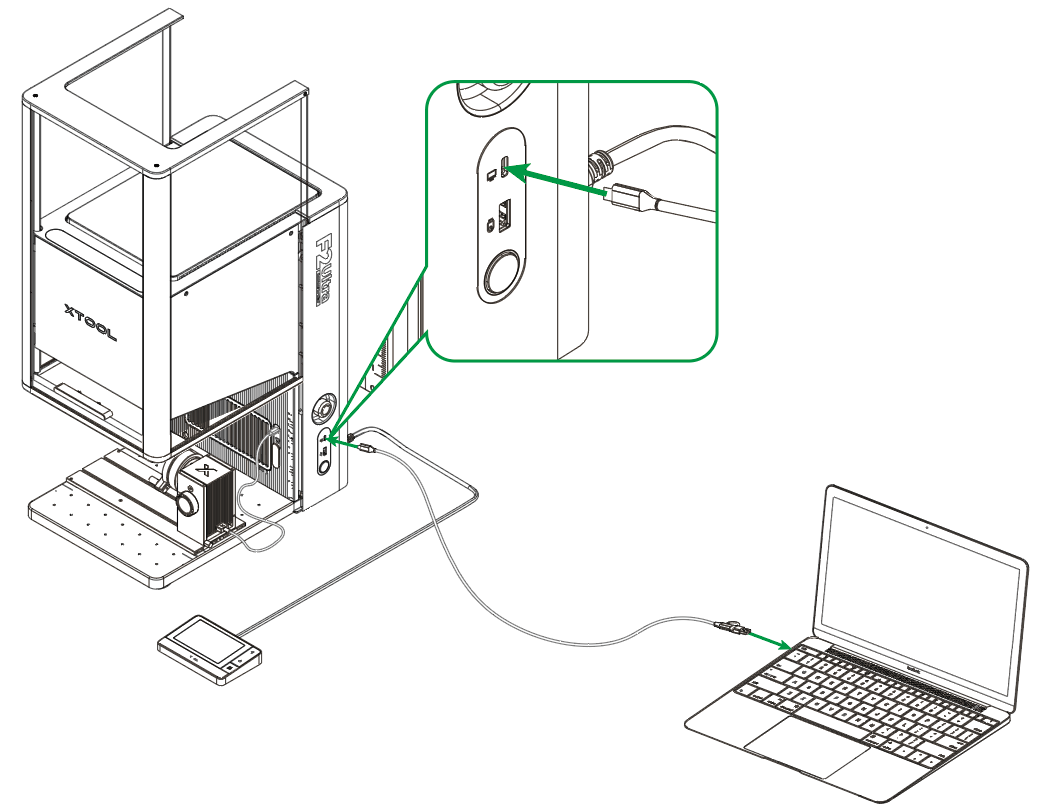
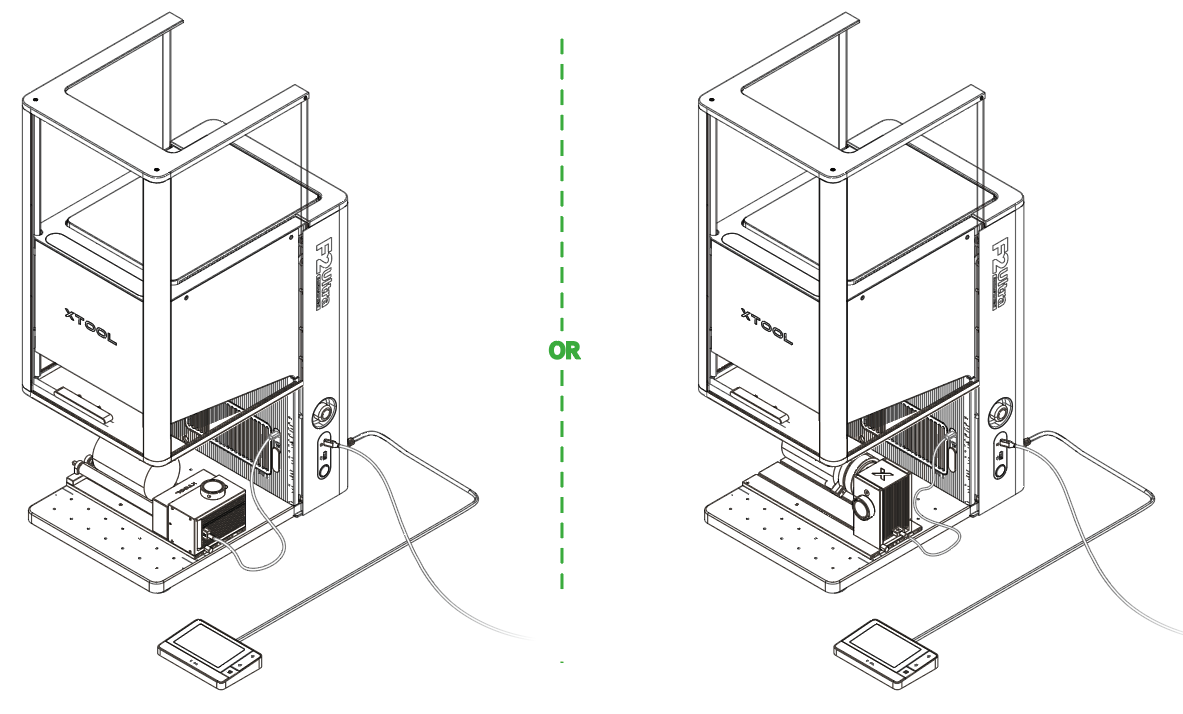
- Use the connection cable to connect the rotary attachment with xTool F2 Ultra.
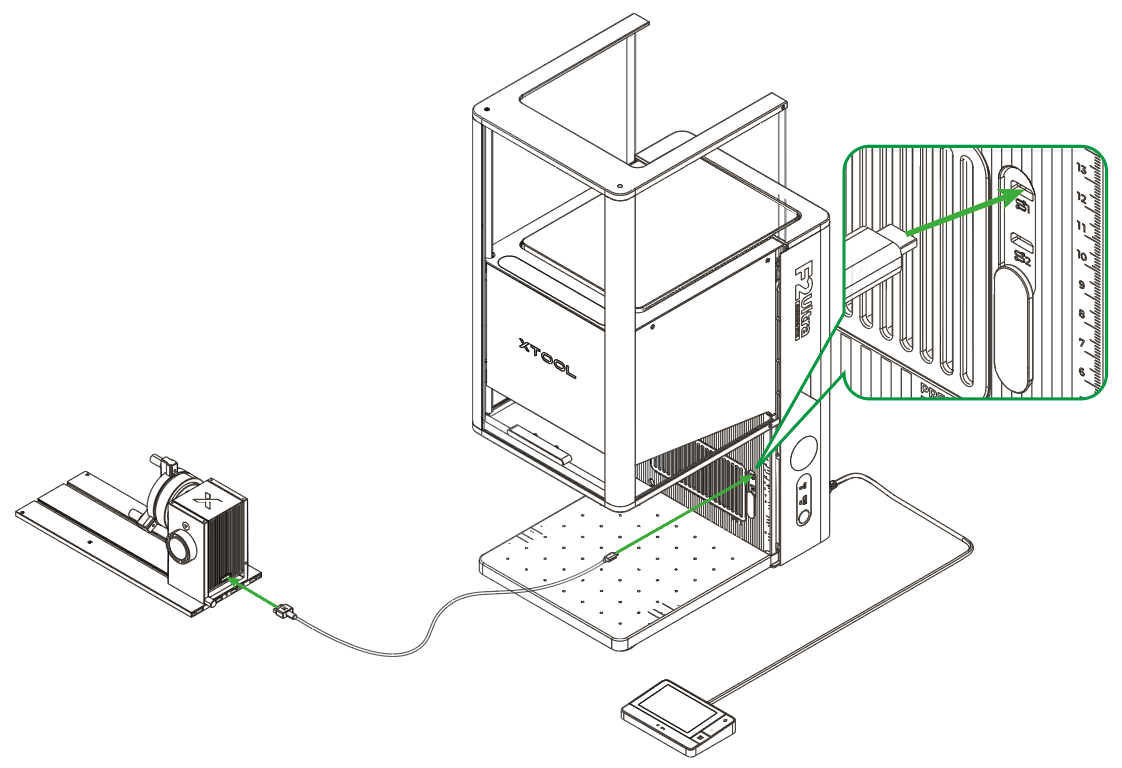
- Open the protective enclosure of xTool F2 Ultra, and place the rotary attachment on the baseplate of xTool F2 Ultra.
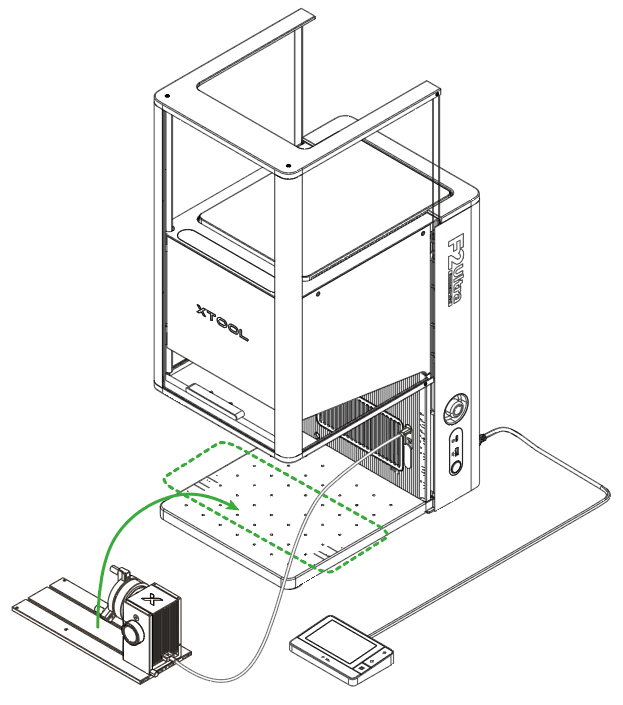
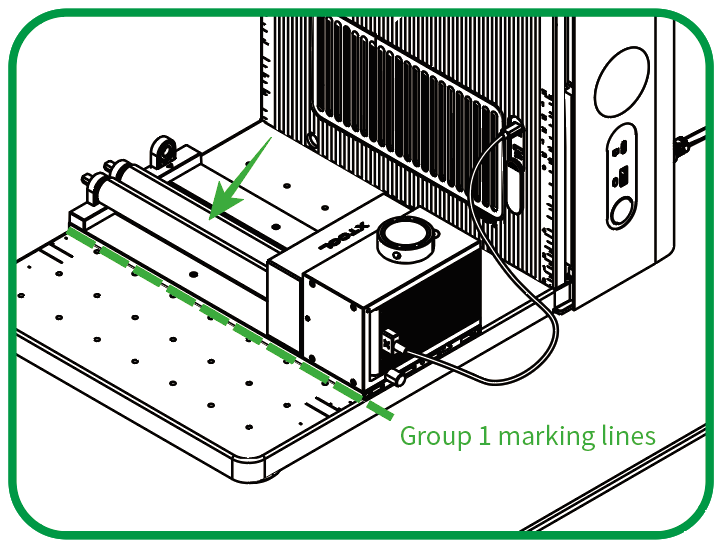
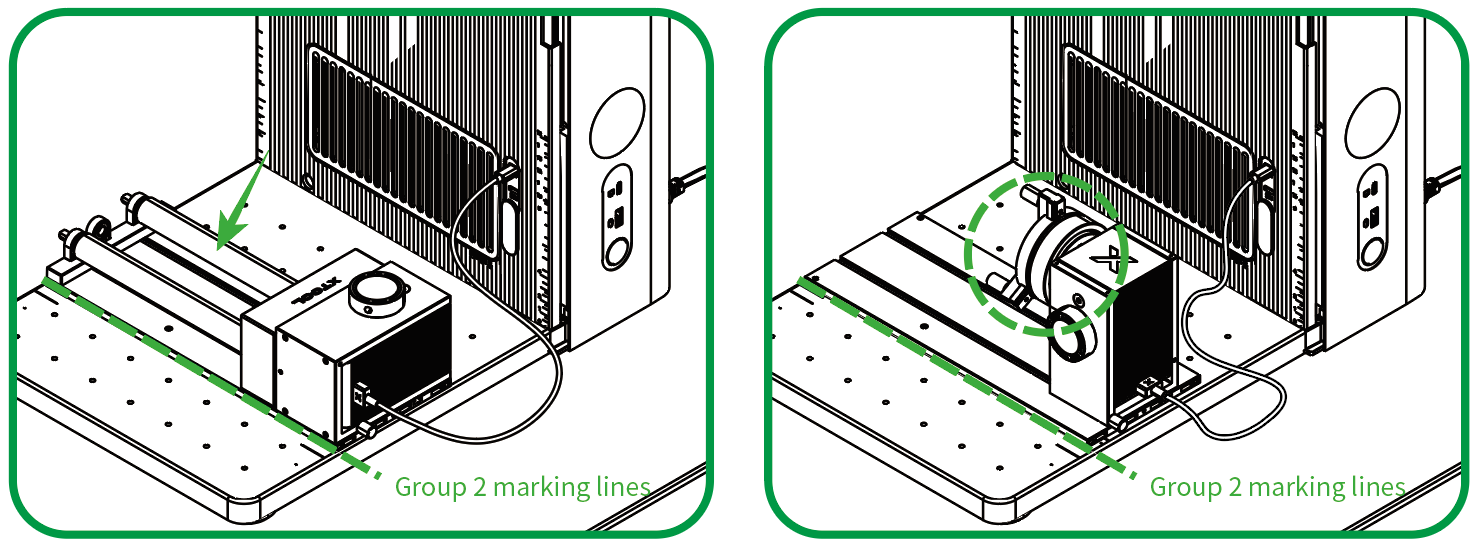
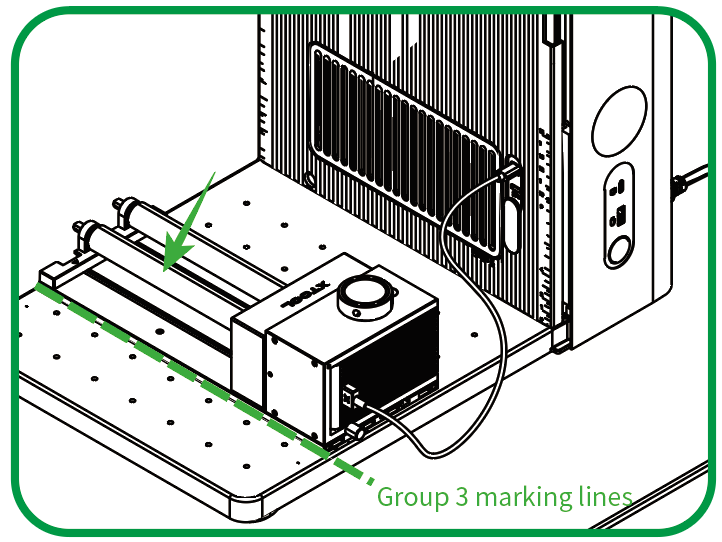
- Depending on the working mode and level set for the rotary attachment, align its front bottom edge to the corresponding marking lines on the baseplate of xTool F2 Ultra.
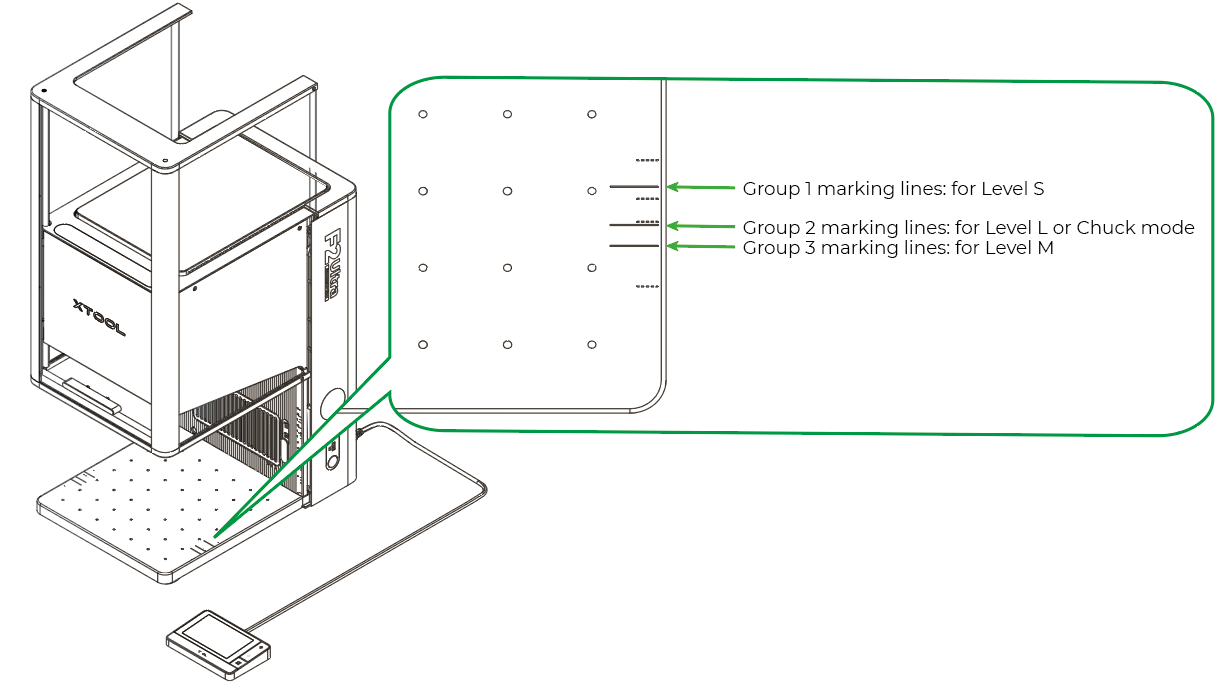
- If you use the rotary attachment in Roller mode and set it to Level S, align its front bottom edge to Group 1 marking lines.
- If you use the rotary attachment in Roller mode and set it to Level L or use the Chuck mode, align its front bottom edge to Group 2 marking lines.
- If you use the rotary attachment in Roller mode and set it to Level M, align its front bottom edge to Group 3 marking lines.
Process a material
1. Connect xTool F2 Ultra to xTool Studio
(1) Use the USB cable to connect xTool F2 Ultra to your computer.
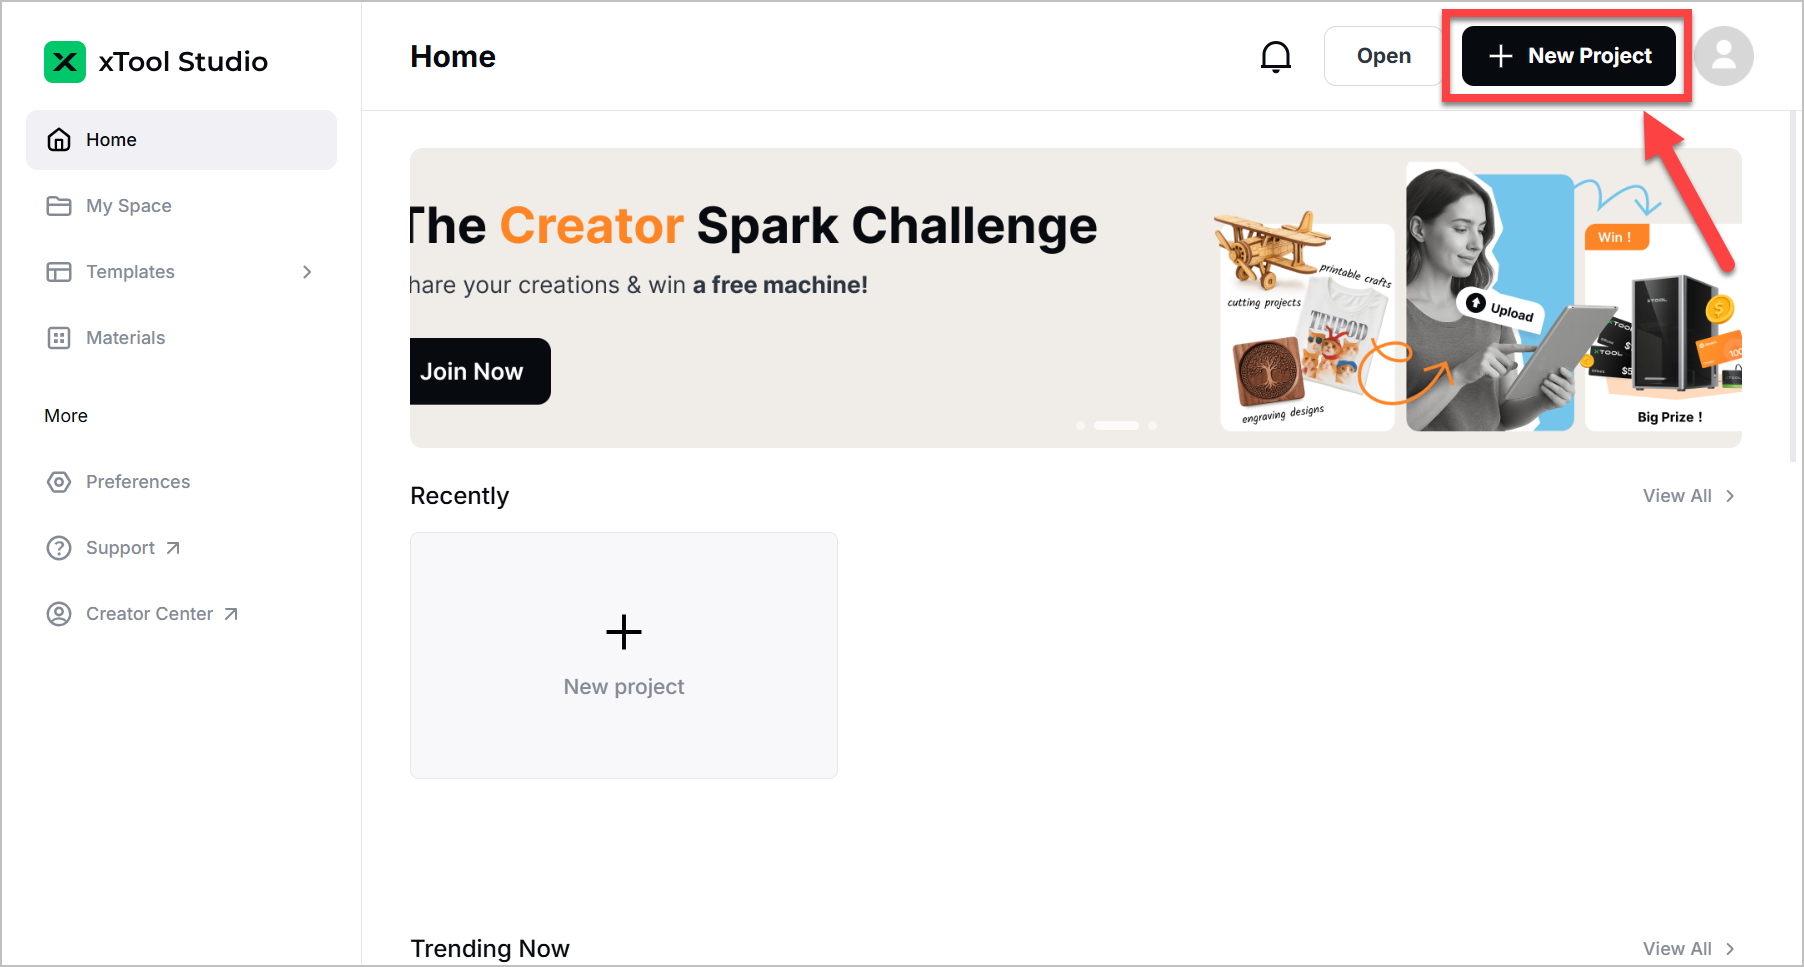
(2) Open xTool Studio on your computer. On the top-right corner of xTool Studio, click the + New Project button.
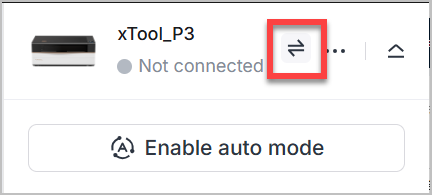
(3) On the right side of the project editing page, click Select device.
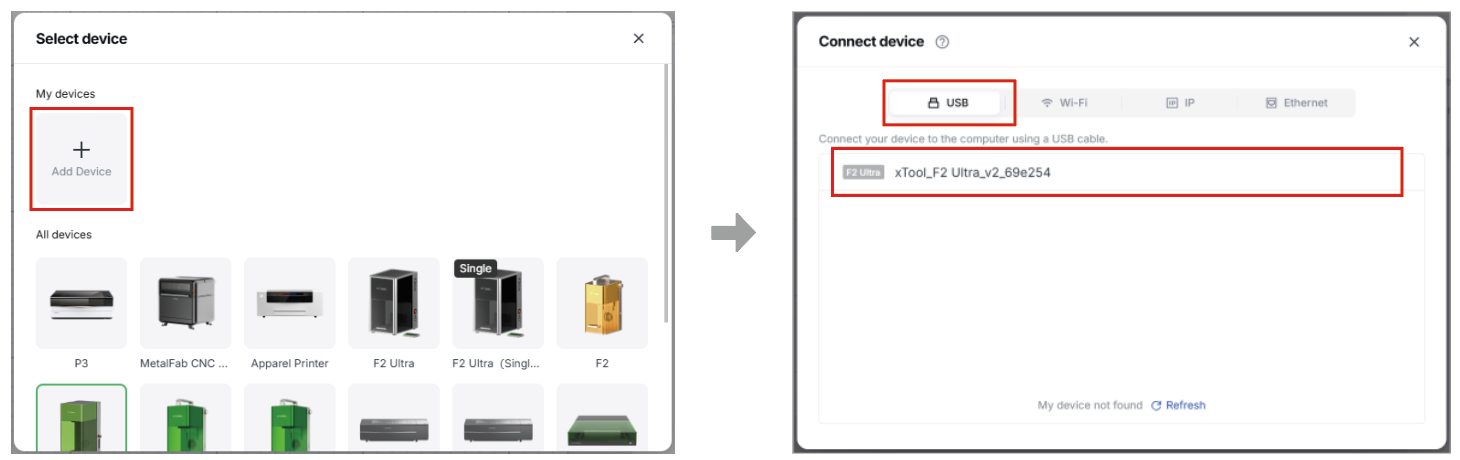
(4) On the pop-up window, click Add device > USB. Then, click the name of your device to connect to it.
2. Place the material
If you use the rotary attachment in Roller mode, place the material between the two rollers.
If you use the rotary attachment in Chuck mode, fix the material on the jaws.
3. Select the processing mode and material name
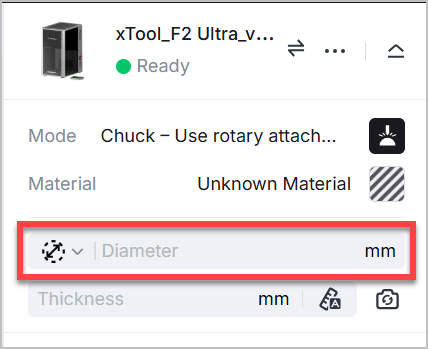
(1) On the right of xTool Studio, click the name of the current processing mode, and then select the processing mode you use for the rotary attachment.
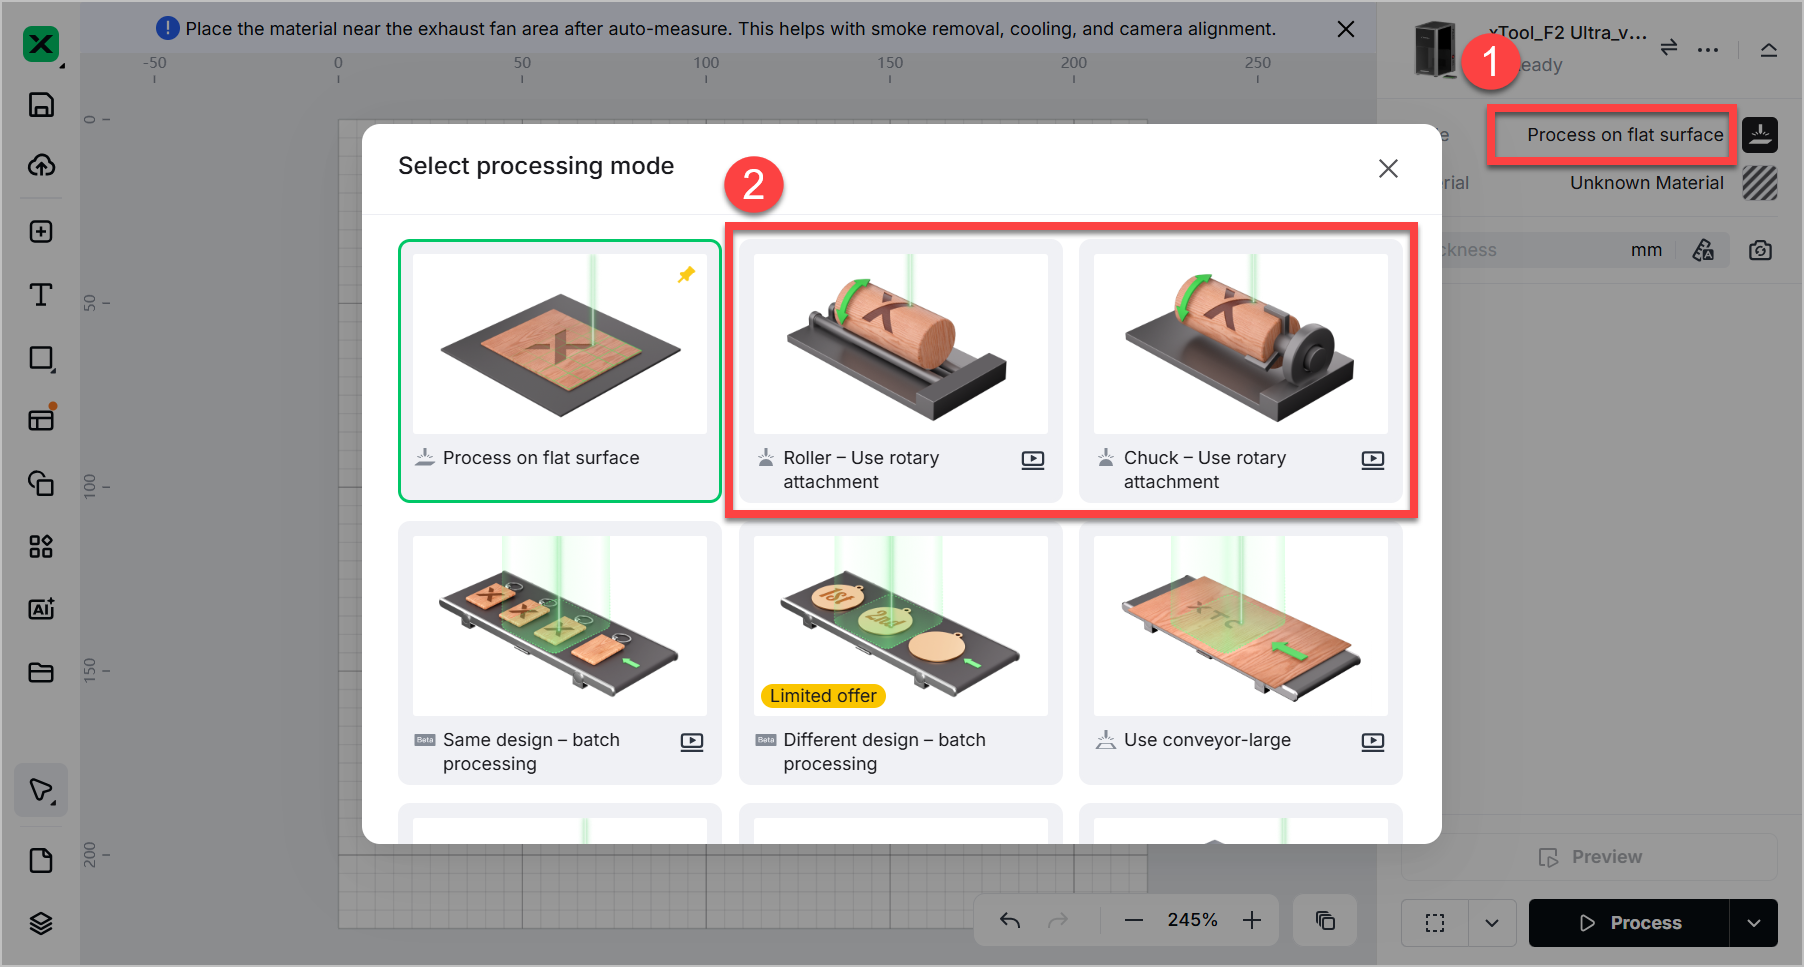
- Roller - Use rotary attachment
If you use the rotary attachment in Roller mode, select Roller - Use rotary attachment.
- Chuck - Use rotary attachment
If you use the rotary attachment in Chuck mode, select Chuck - Use rotary attachment.
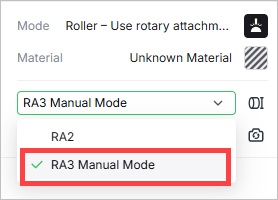
(2) Switch RA2 to RA3 Manual Mode.
(3) On the right side, click Unknown material, select the name of your material, and click Apply.
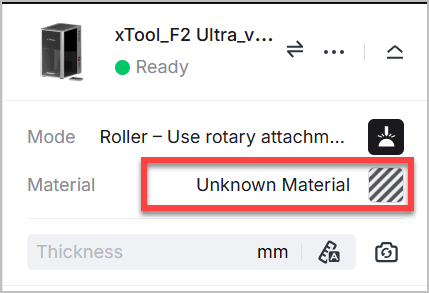
- If you can't find your material in the list, you can leave it as Unknown material and set parameters manually in the later steps.
- If you select a material from the material list, the software will automatically set parameters for laser processing. The default settings apply to xTool materials. You can adjust the settings based on your needs.
4. Perform laser focusing and background shooting
(1) Check whether the red and blue light spots are both at the top of the material. If not, follow the steps in "Connect xTool Rotary Attachment 3 to xTool F2 Ultra" to readjust the position of the rotary attachment.
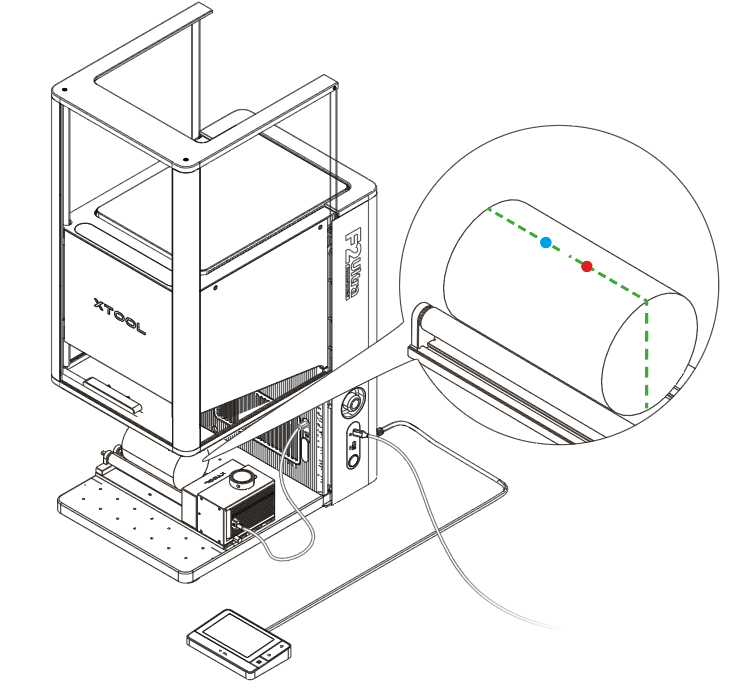
(2) Pull down the protective enclosure as low as possible.
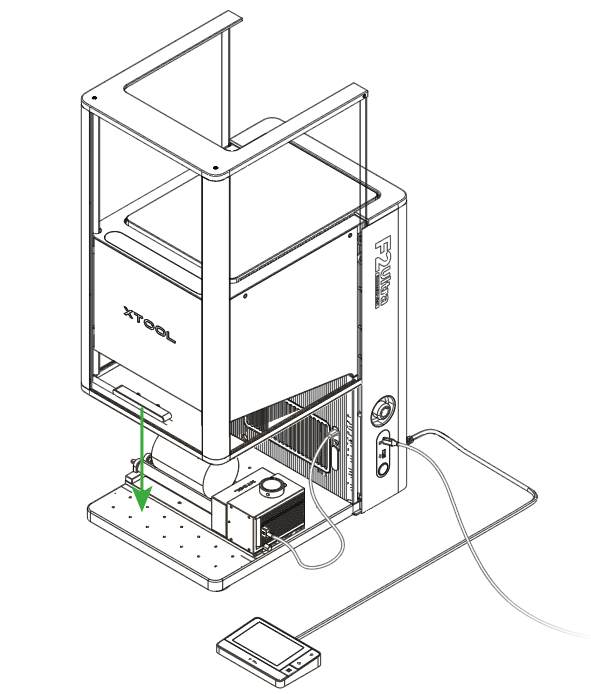
(3) Click the Auto-measure icon. The machine first performs auto-focusing and then takes a photo of xTool F2 Ultra’s working area.

- On the material, the red and blue light spots overlap.
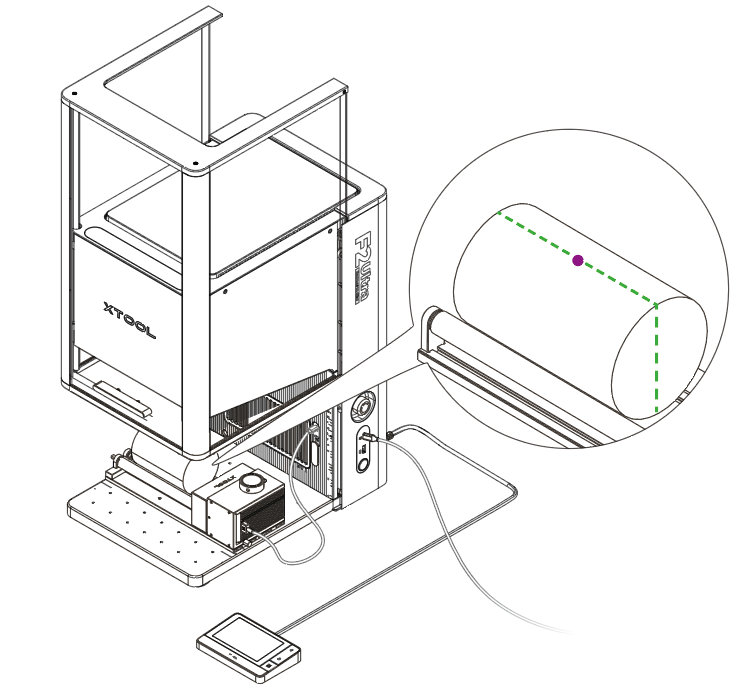
- On the canvas, the captured image is used as the background.
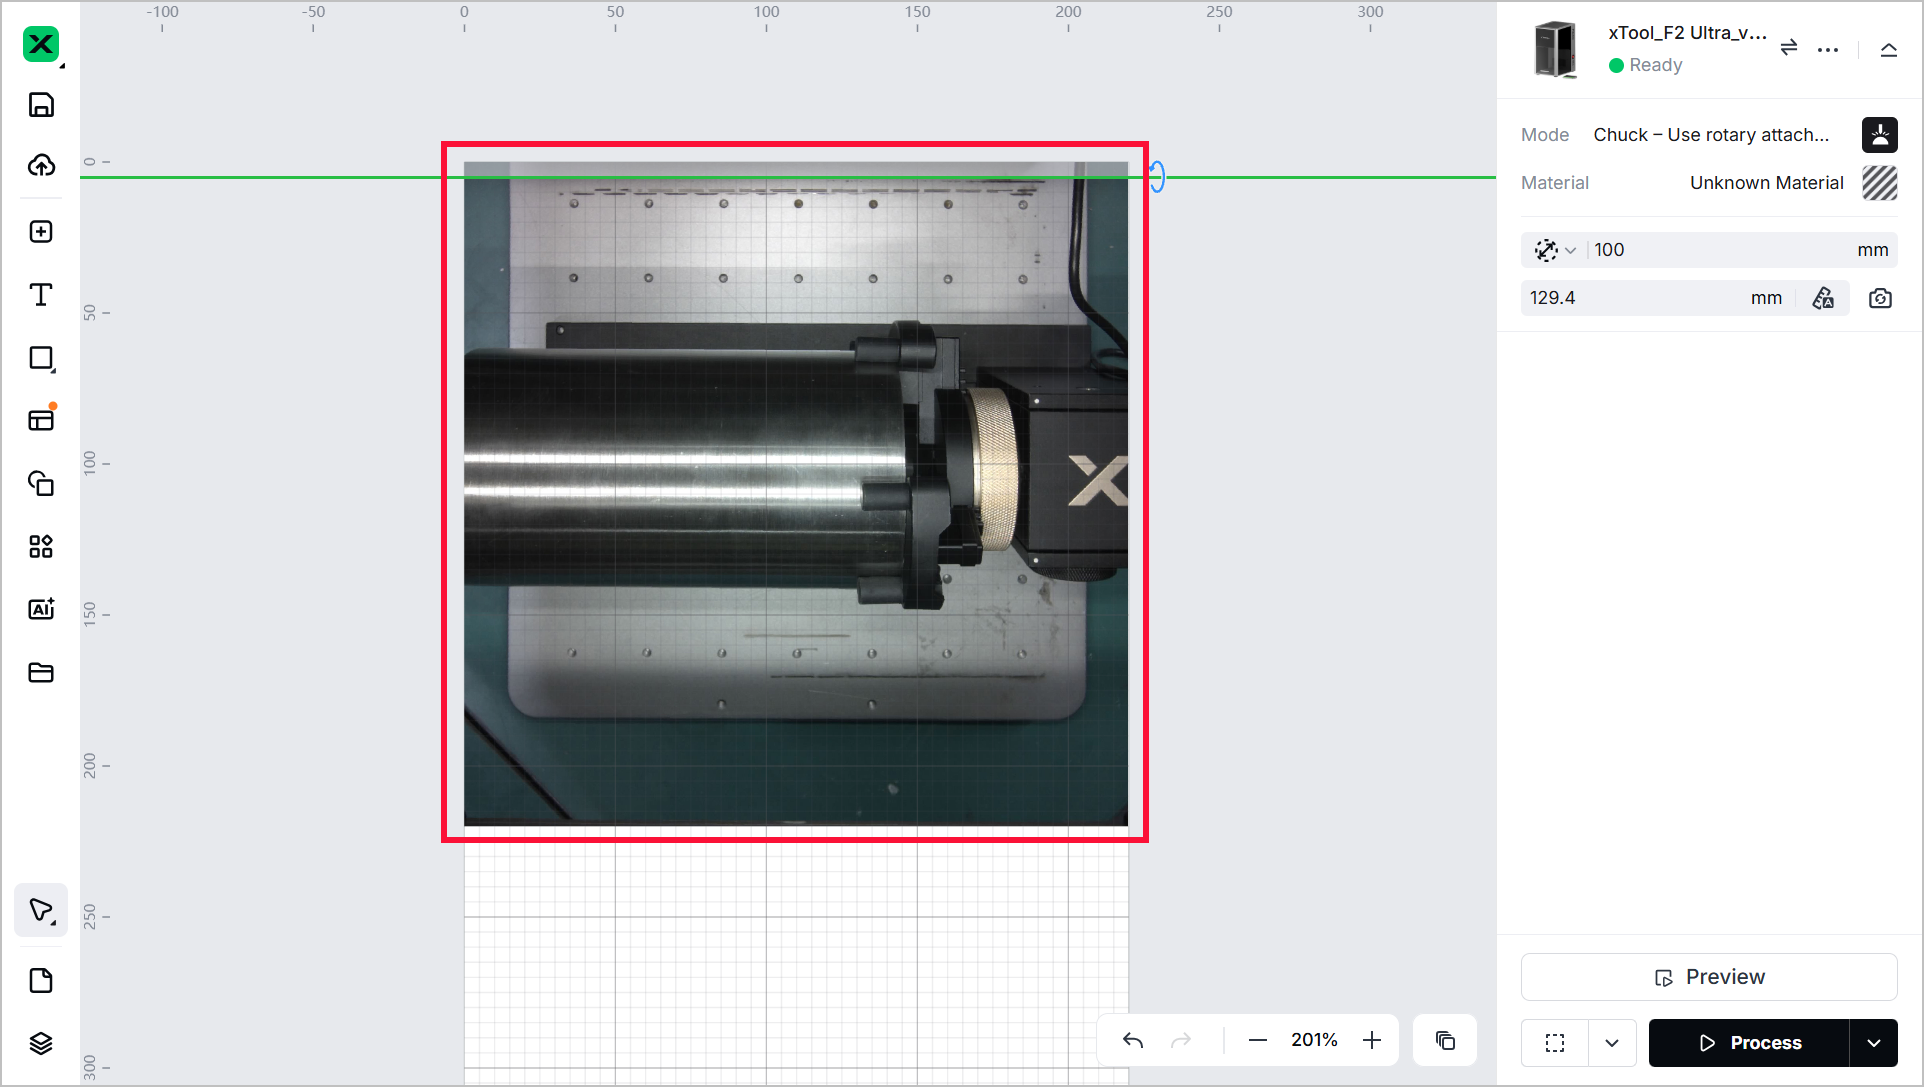
(4) Drag the green line to make it cross the center of the material.
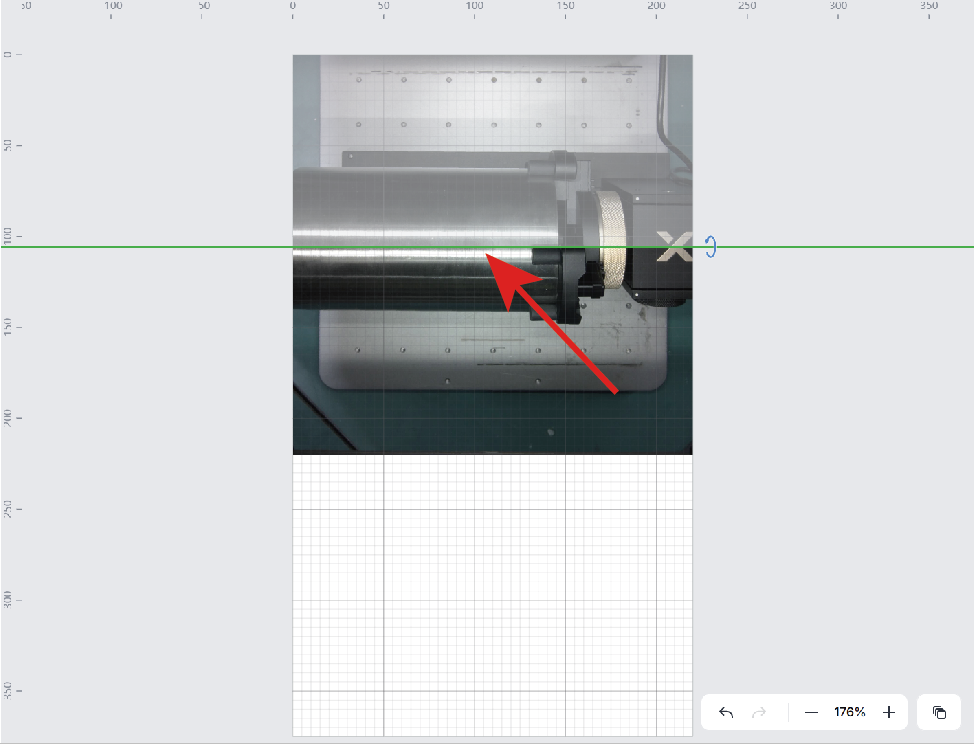
5. Design processing objects
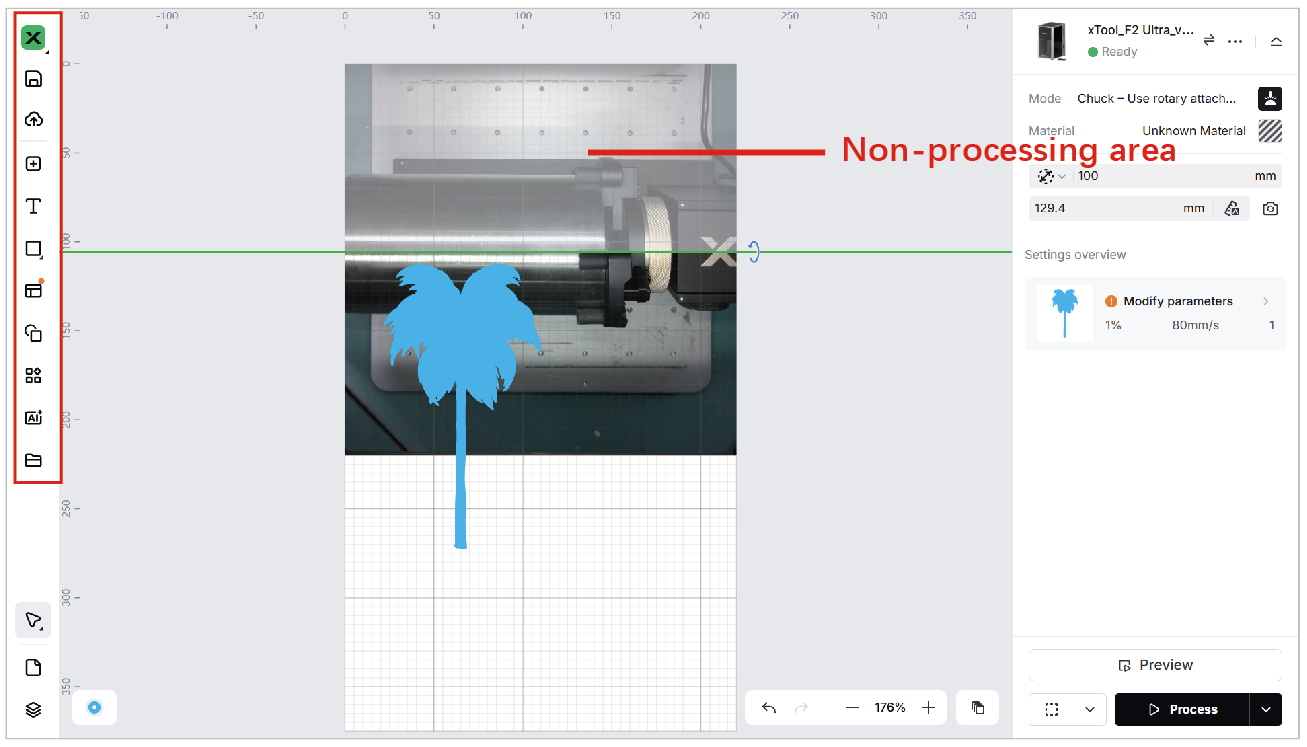
(1) Design processing objects on the canvas below the green line.
You can use the tools to the left of the canvas to import images, insert shapes, enter text, draw vector graphics, and so on.
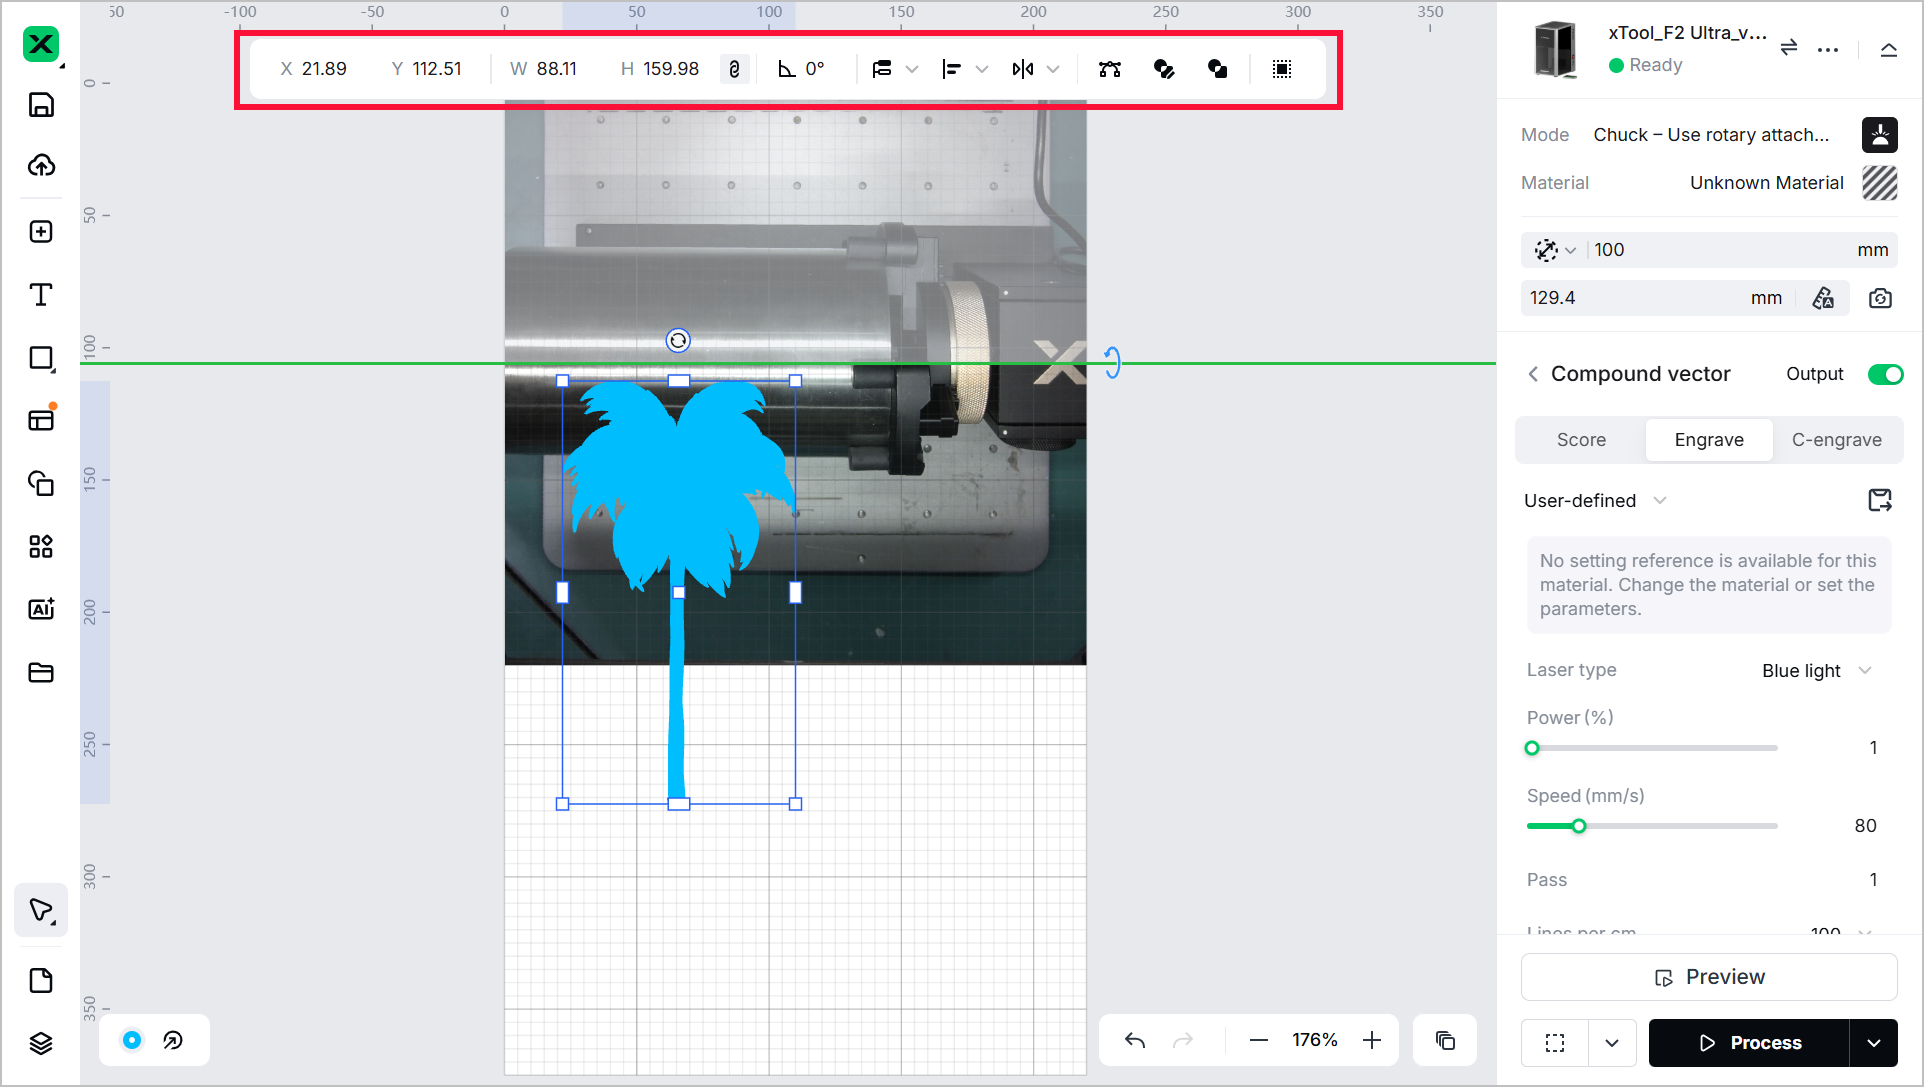
(5) Select the objects to further edit them using the tools on the top ribbon.
6. Set processing parameters and processing path
(1) Select objects on the canvas. On the right side of xTool Studio, set parameters for the selected objects.
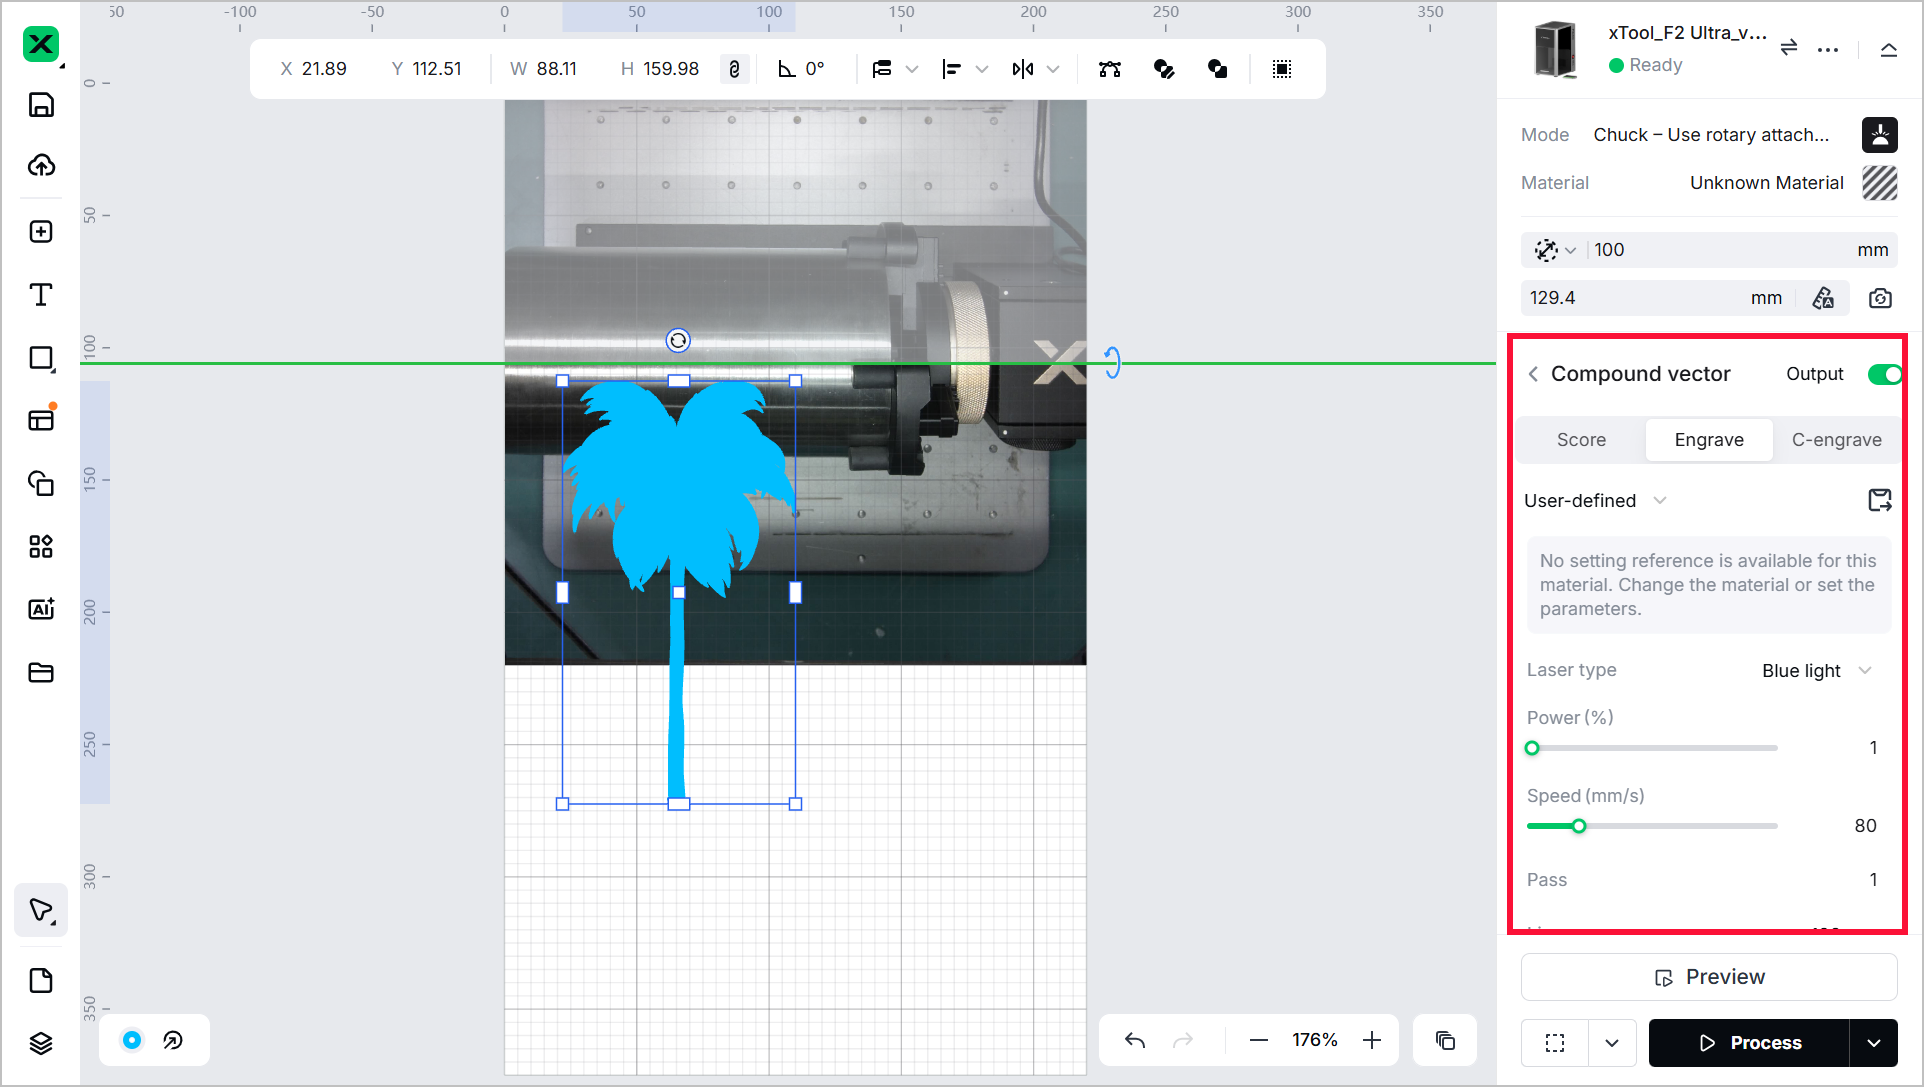
- You need to set parameters for every object. A missed object may fail to be processed.
- The parameters that can be set for bitmap objects and vector objects are different. You can select multiple objects of the same type and set parameters for them at once.
(2) In the bottom-right corner of xTool Studio, click the  icon to set the processing path.
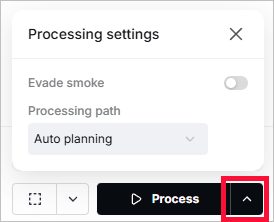
Evade smoke: When this feature is enabled, the device follows a path less affected by the smoke to process the material.
Processing path:
- Auto planning: xTool Studio automatically plans the processing path based on intelligent algorithms.
- User defining: xTool Studio plans the processing path based on your settings.
7. Preview the processing area
You can preview the processing area on the material by framing. Framing means laser scanning the processing area on the material. Take the following steps to start framing:
(1) In the bottom-right corner of the software, click the  icon next to the framing button to configure framing settings.
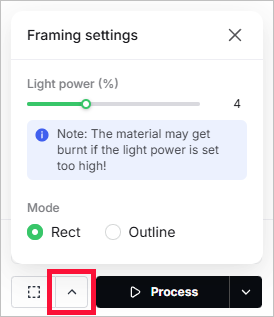
(2) Click the framing button in the software. The laser beams will scan the processing area on the material.

8. Start processing
(1) In the bottom-right corner of the software, click Process.

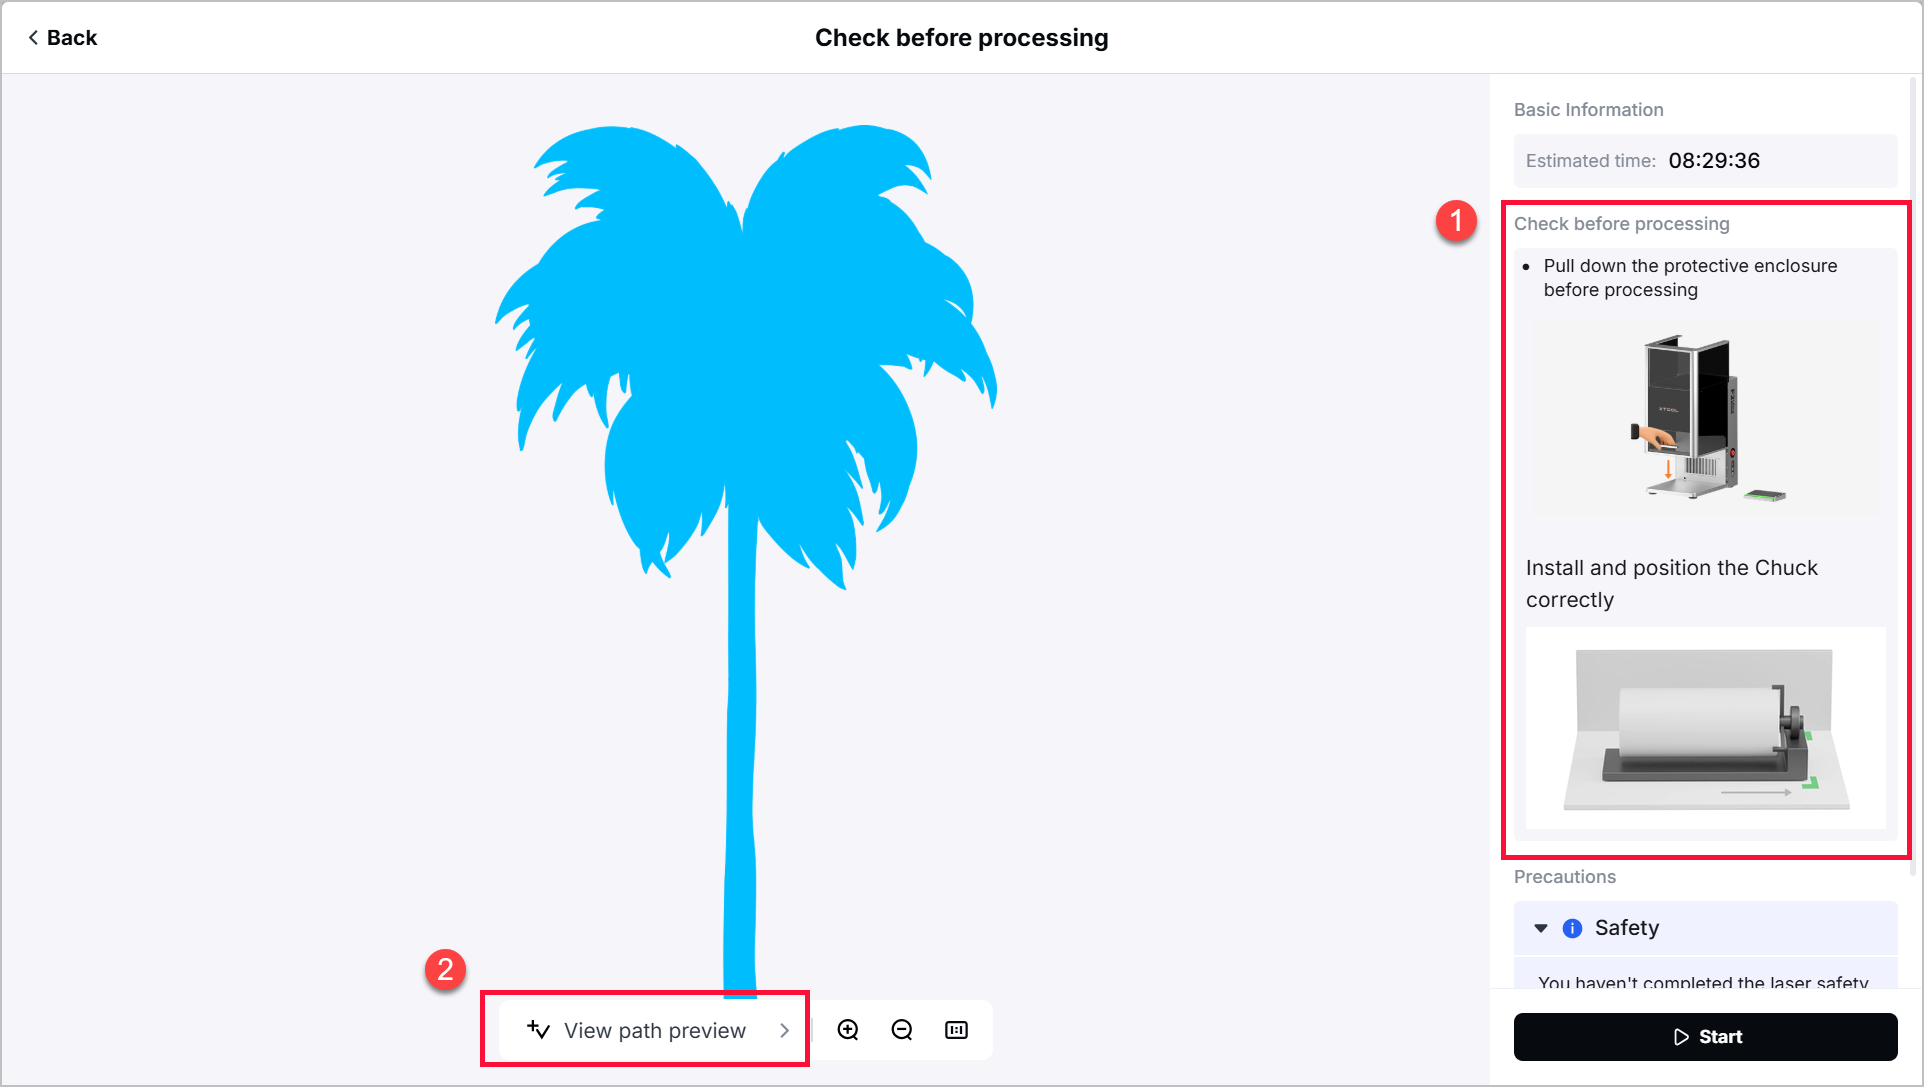
(2) Follow the notes on the right to check whether the machine and RA3 are ready.
In the bottom, click View path preview to check the processing path.
(3) Wear a pair of goggles that can shield laser beams of 445 nm and 1064 nm wavelengths.
- When xTool F2 Ultra is used with the rotary attachment, its protective enclosure cannot be fully closed. For your safety, it is recommended that you wear goggles during processing.
- Safety goggles are not included with xTool F2 Ultra or the rotary attachment. Please purchase them separately.
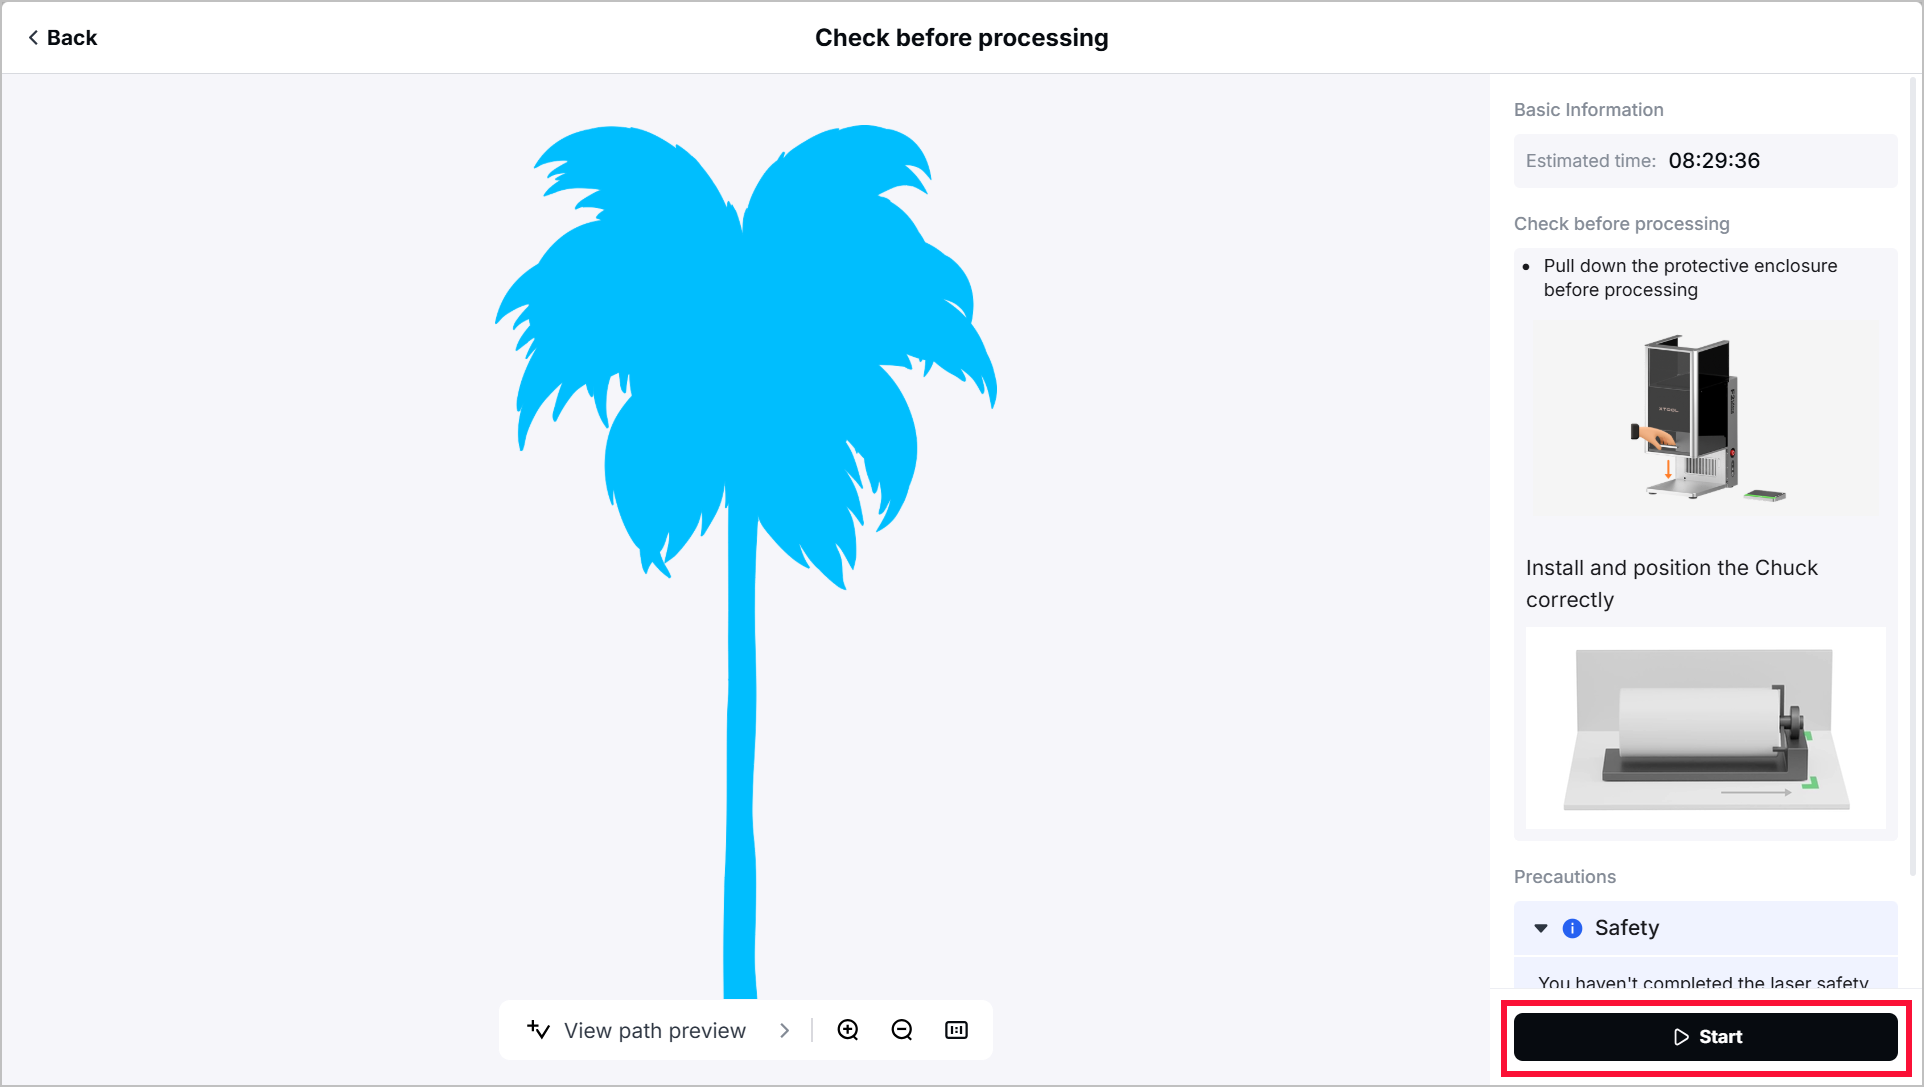
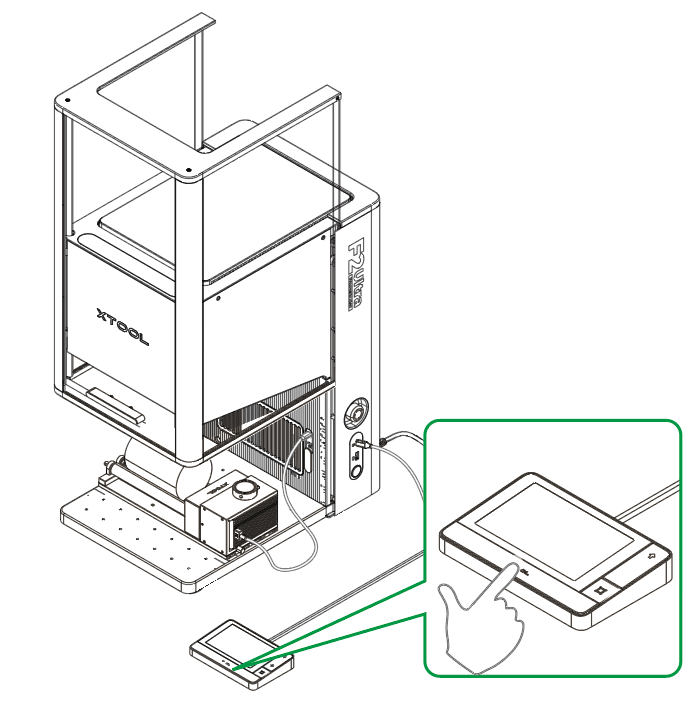
(4) In the bottom-right corner of the software, click Start. When the software shows “Ready”, press the XTOOL Start/Stop button on the touchscreen controller to start processing.
Related links
xTool F2 Ultra User Guide – EU & UK

