This guide aims to demystify the process of working on curved surfaces with xTool S1, introducing a suite of steps and strategies that are both user-friendly and geared towards enhancing precision.
Step by Step Overview
For a comprehensive understanding and practical visual aid, refer to the video tutorial below or see it here.
- Material Setup: Start by positioning the material in the designated processing zone. It's a grand idea to nestle it in a foam board that has a specially crafted hole, ensuring stability.
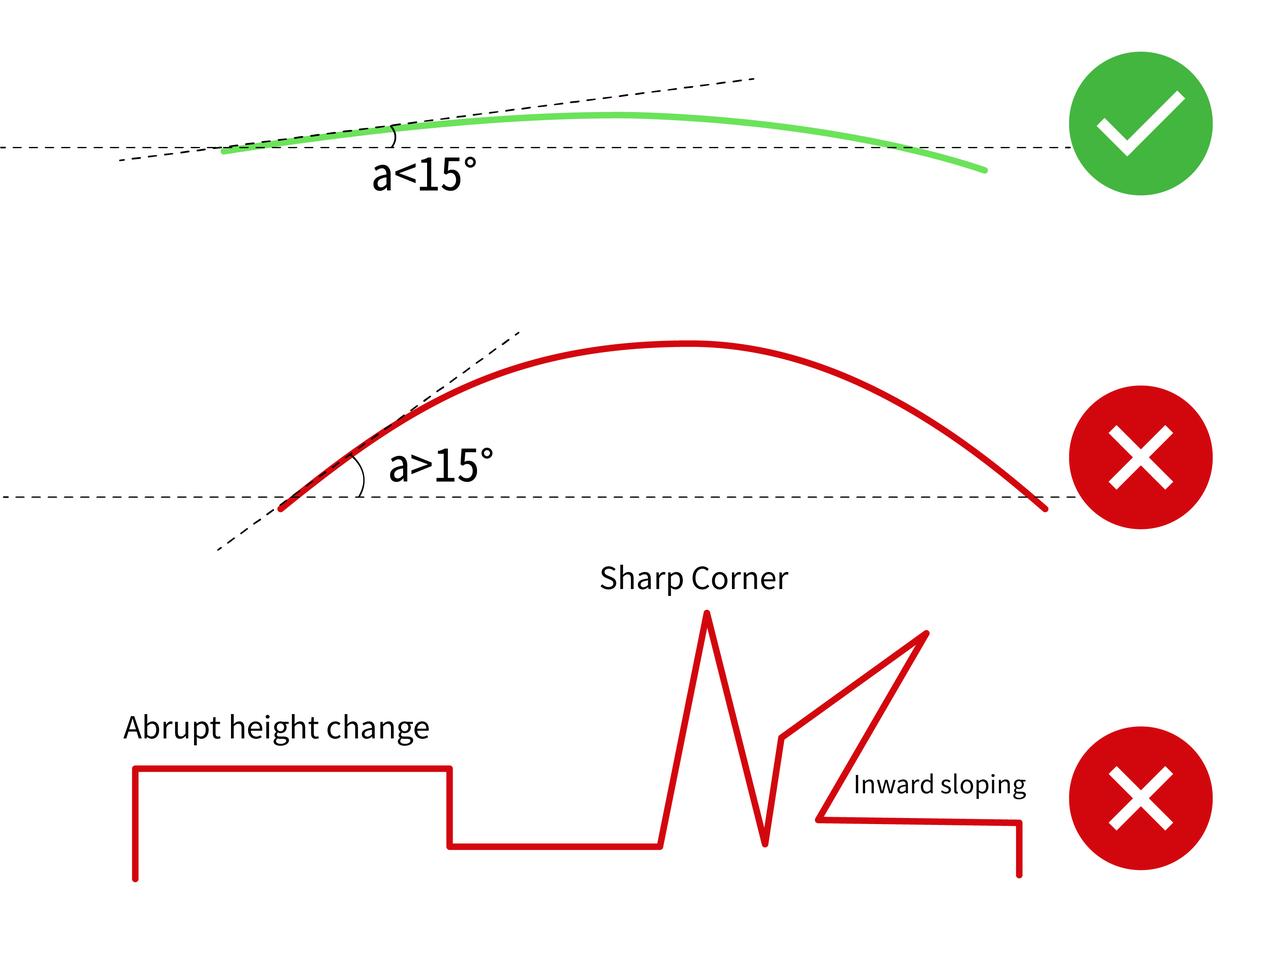
- Material constraint: Ensure that the curve angle does not exceed a 15-degree inclination.
- Curve Processing Configuration: Opt for 'Curve Process' and proceed to initiate 'Curve Measure'.
- Vertex Marking:
- Upper Left Vertex: Manipulate the laser module to orient the red cross at the top-left vertex of the intended processing precinct, marking the first vertex.
- Bottom Right Vertex: Similarly, pinpoint and mark the second vertex at the bottom-right juncture.
- Density Dynamics: Fine-tune the material density anchored in the area size.
- 3D Model Preview: Relish the sight of the resultant 3D model. Feel free to tweak the smoothness and tension parameters.
- Element Placement: Place the elements within the highlighted processing area on the canvas.
- Initiate Processing: Set the parameters and click "Start".
The Preemptive Measures
Securing the Object
The S1 operates through a contact-style distance measurement, making it susceptible to object displacement during the probe’s engagement. Consequently, you might face issues such as incorrect area modeling and imprecise processing locales post-displacement. Anchor the object staunchly using blue tack or clamps to obviate any shift.
Issues with xTouch Getting Knocked Off During Measurement
The xTouch uses physical contact to measure objects and is magnetically attached to prevent any interference with the laser head. However, this can cause it to become dislodged or misaligned during contact with the object being measured. In such cases, the XCS software will prompt the user to reinstall the xTouch and try again.

It's important to note that the xTouch has limitations when it comes to measuring curvature and may fail at angles greater than 15 degrees.
Optimal Point Selection for Measurements
When measuring or modeling a curved surface, the number of points chosen for measurement is critical. More points will yield a more precise model but will slow down the modeling speed. It is advised to choose the number of points based on the complexity and the area of the surface. In simple terms, a larger and more complex surface requires more points for a more precise model.
Curved Surface Processing Speed
The overall speed of curved surface processing is slower compared to flat surface processing. During flat surface processing, the laser head only moves along the X and Y axes, whereas, for curved surfaces, frequent adjustments and movements along the Z-axis (vertical direction) are necessary. This increased complexity in movements restricts the processing speed.

Services & Help
Learn & Education
Copyright © 2025 xTool All Rights Reserved.