Issue description
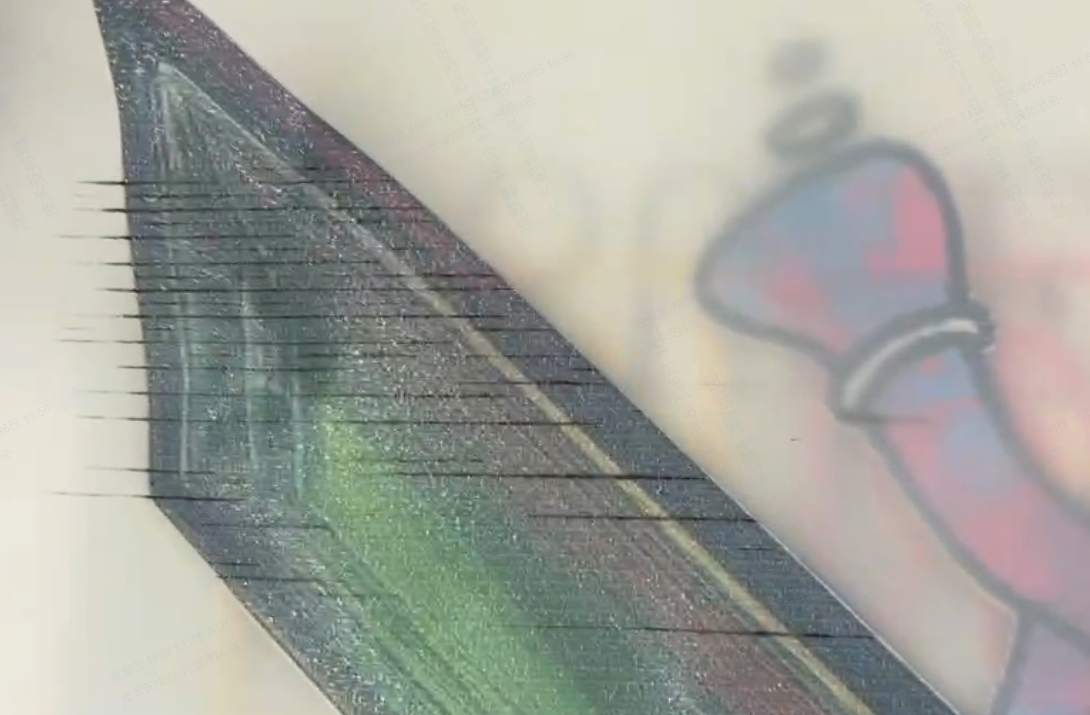
After completing a printing and curing task, you notice that the finished PET film has noticeable scratches or horizontal stripes across the printed design.
- Refer to this guide for troubleshooting.
Possible causes
- Mid-to-end section scratches
1. Insufficient adhesive powder
2. Powder not being applied by the curing unit - Middle section scratches
Calibration failure or incorrect calibration data - Full-width scratches
1. Not aligned with the white reference line
2. Ink residue on the collision strips
3. Cured ink buildup on the bottom of the printhead
Troubleshooting procedure
Before proceeding to specific scenarios, please perform these essential checks, as they are common causes of scratching.
Preliminary checks
Check 1: Clean print head
- If the printhead has contacted ink, it may cause nozzle clogging. It is recommended to print a nozzle test pattern first to check for clogs and avoid further blockage.
- If clogging is detected, run the automatic cleaning procedure: Troubleshoot Missing Strip Lines / Failed Printing Sample Test for xTool Apparel Printer.
- Then continue with the troubleshooting steps below.
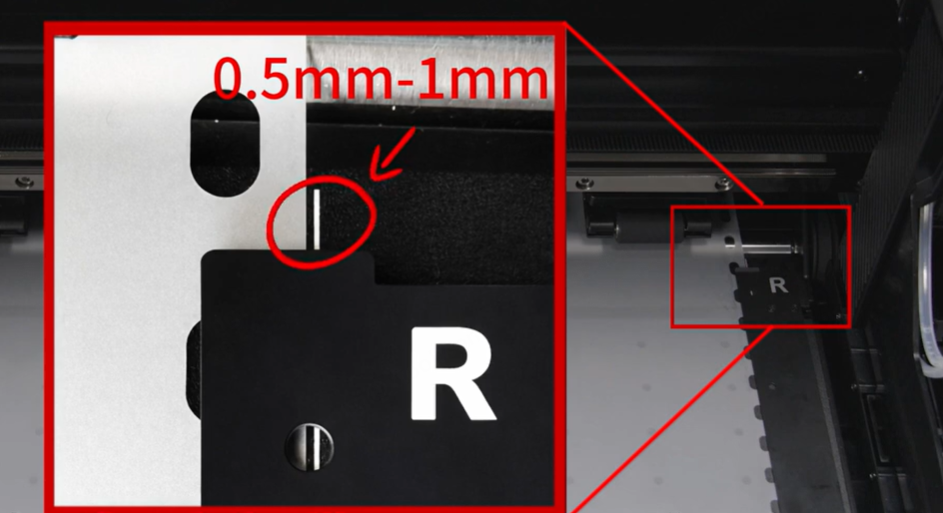
Check 2: Check the positions of the pressing plates
- The pressing plates should not be too close to the PET film. It is appropriate that half of the PET film is visible through the holes in the pressing plates.

- It is recommended that the film be positioned 0.5–1 mm away from the white line, and shall not be too far from or cover the white line.
- If everything is confirmed correct, please proceed and judge according to the position of the film scraping.
Mid-to-end section scratches (Approx. 20 cm / 8 inches)
Cause: If the scratches consistently appear on the latter half of the printed design, the issue is likely related to the adhesive powder application inside the oven.
Step 1: Check powder supply level
Insufficient powder can sometimes affect the texture and lead to issues.
- Double-tap the powder bin door to open it.
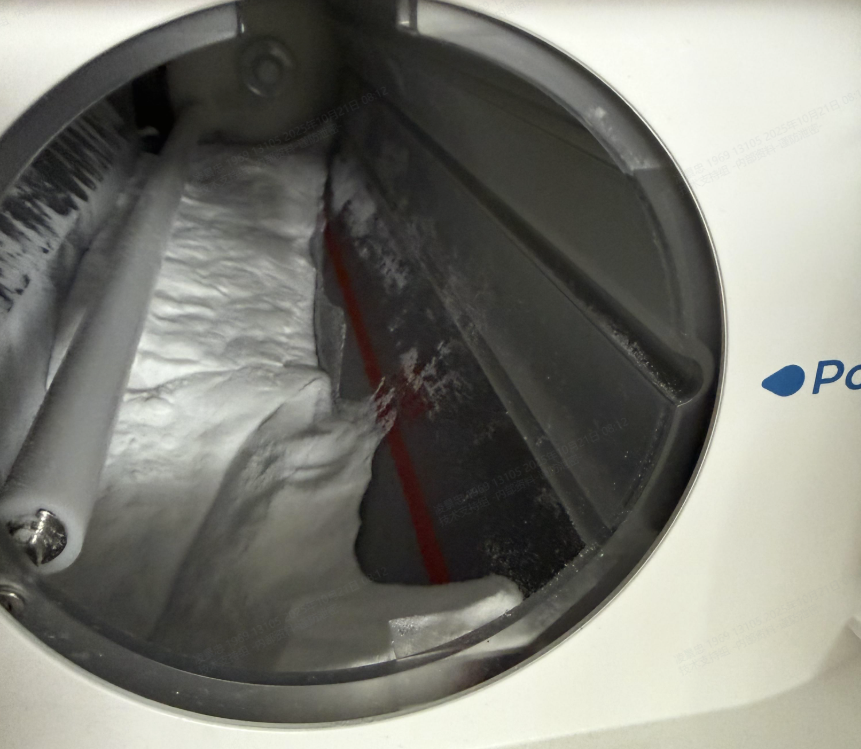
- Remove the magnetic cover from the xTool OS1 Shaker Oven and examine the powder compartment.
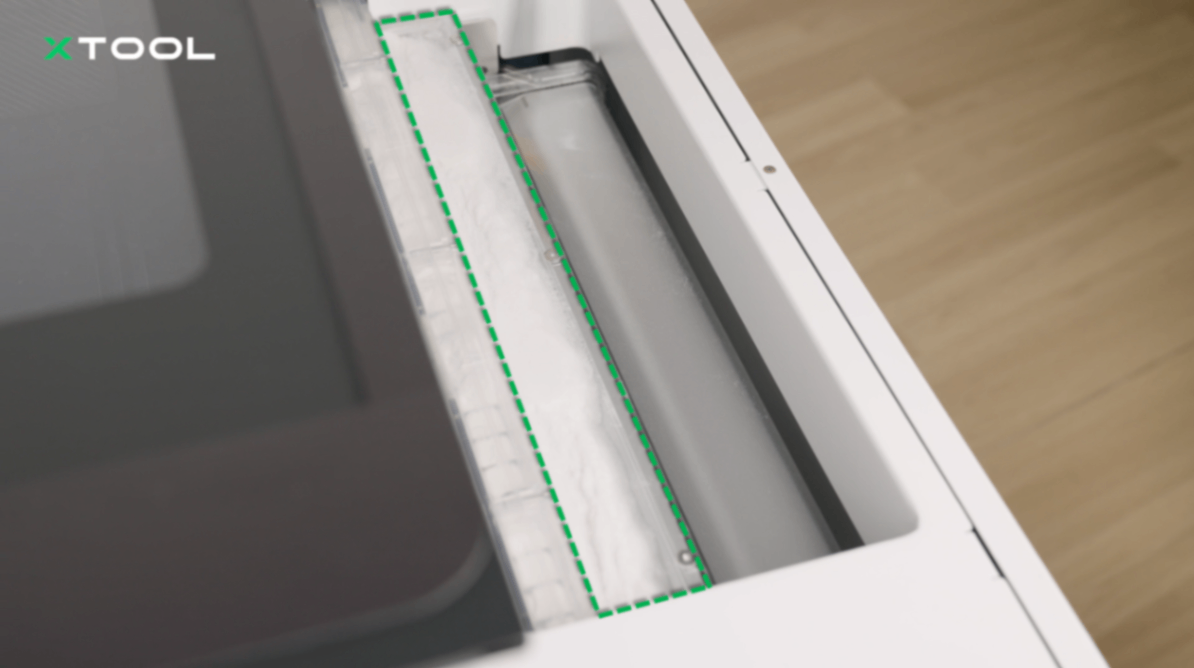
- If the powder is low: Refill the bin with DTF adhesive powder.
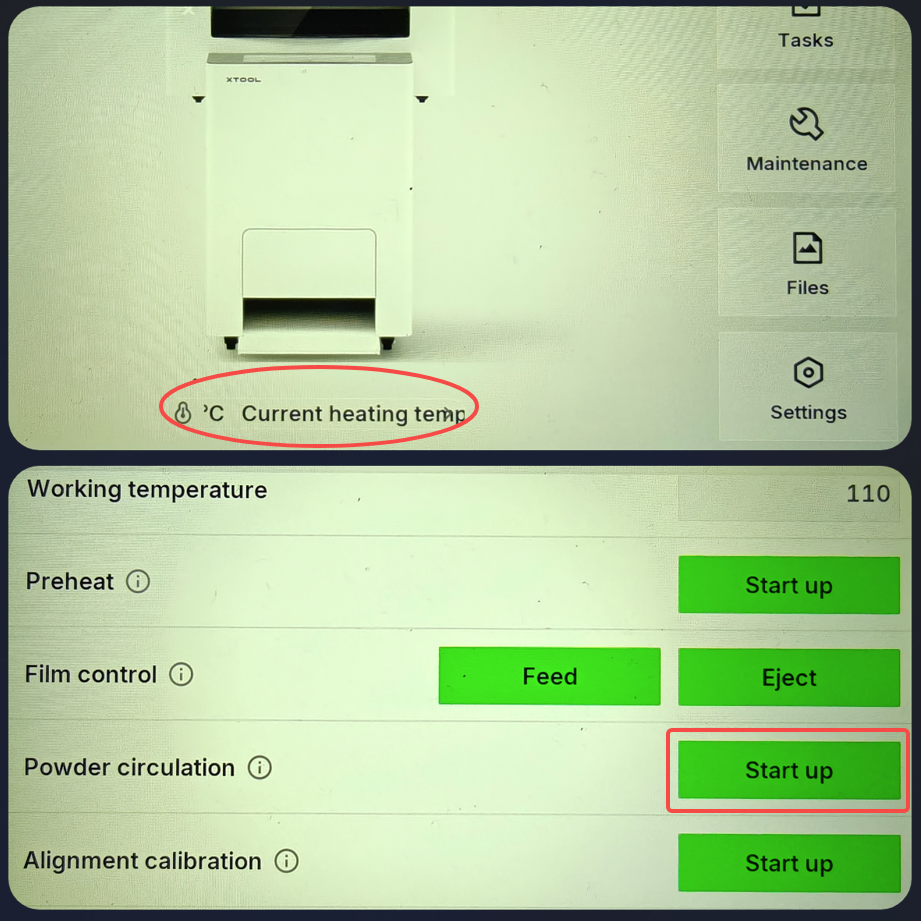
- Run Powder Circulation: After refilling, you must manually circulate the powder. On the printer's main screen, tap the Temperature icon, scroll down to Powder circulation, and tap Start up.
Note: If the powder bin is full but powder is not reaching the upper compartment, refer to the guide: Troubleshoot Powder Not Conveyed to the Top of the Powder Compartment on xTool OS1.
Middle section scratches (Approx. 230 mm to 260 mm)
Cause: If the scratches appear right in the middle of the film's travel path (around 230 mm – 260 mm from the start of the print), the issue is likely a synchronization/calibration error between the printer and the oven speeds.
Step 1: Perform alignment calibration
- Please upgrade to the latest firmware version.
- After ensuring the film and white line are correctly positioned, perform a proper alignment calibration: xTool Apparel Printer & xTool OS1: Film Alignment Calibration.
- During alignment calibration, the head of the film needs to reach within the marking line (just within the thick line, whether slightly above or below).
- If the issue persists, please proceed to Step 2.
Step 2: Reset alignment calibration values (Advanced)
- Ensure that the firmware version is 40.100.025.000.ht3 or later.
- Record the last six digits of the SN code.
- Follow the steps below to reset the alignment calibration value. Enter the last six digits of the SN number in the last step.
If the error remains unresolved after following the previous steps, it might be necessary to replace one or more components. Proceed to the "If the problem persists" section to contact xTool Customer Service for further assistance.
⚠️ IMPORTANT: After resetting via this tool, test your print. DO NOT run the Alignment Calibration on the LCD screen again, or you will overwrite the successful reset values.
Full-width scratches
Cause: If the scratches appear across the entire surface of the print, the cause is likely a physical obstruction to the print carriage.
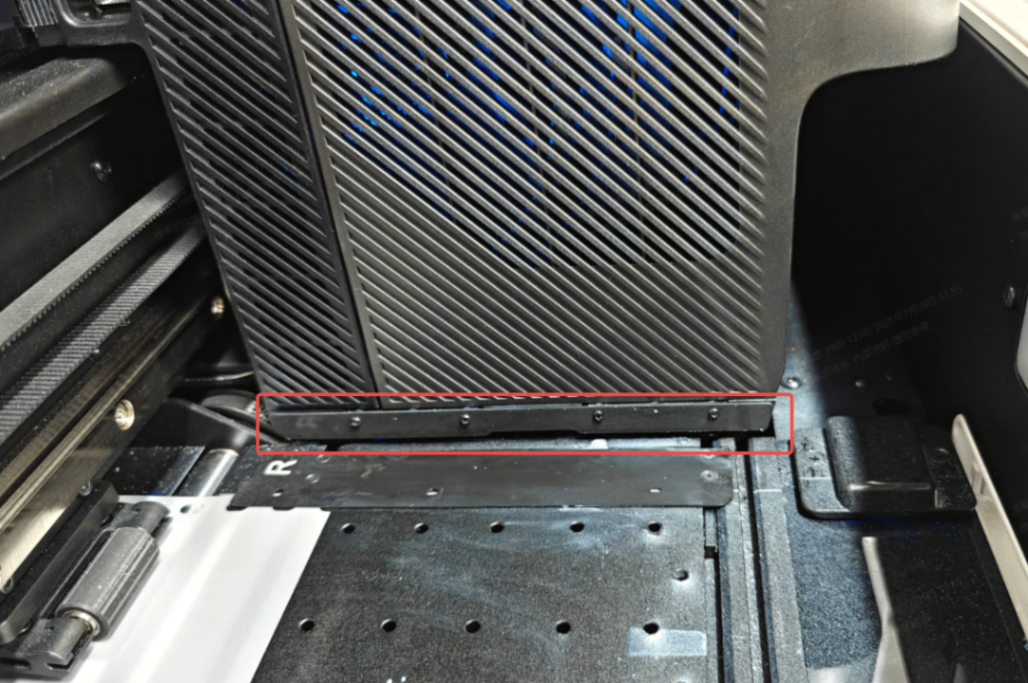
Step 1: Clean carriage collision strips
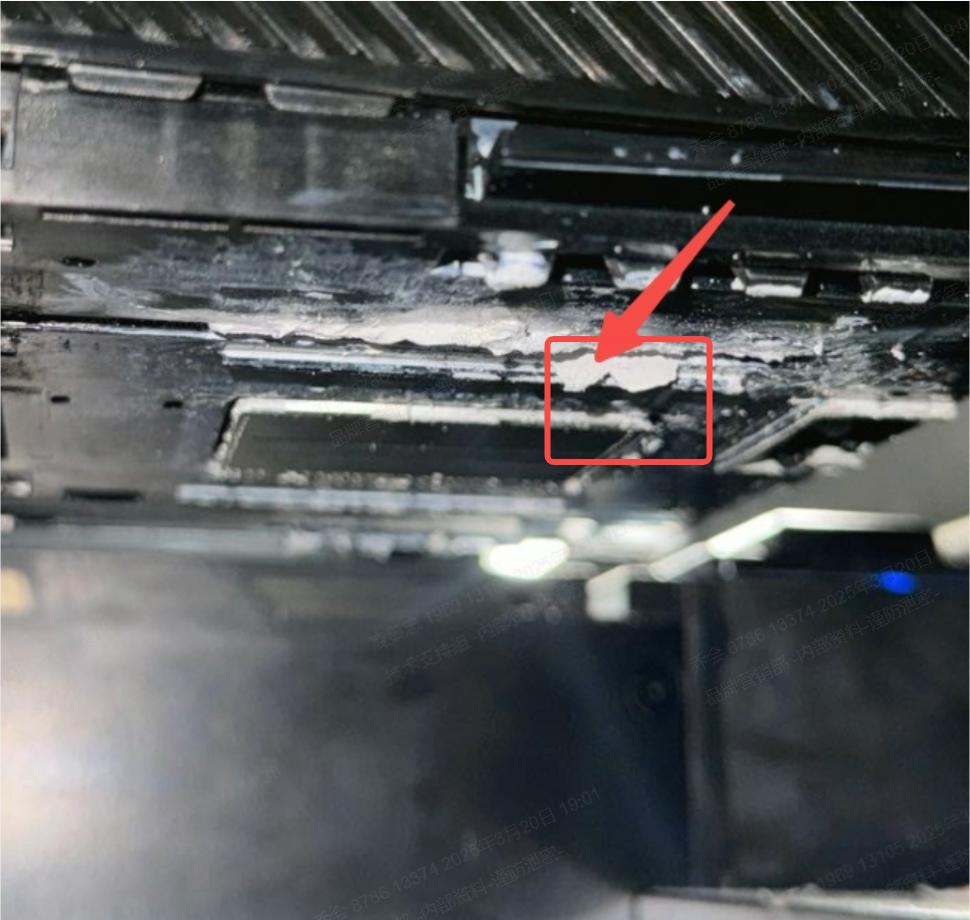
- Move the carriage to the middle part, and check the position of collision strips.
- If you find ink has solidified or adhered to the surface, please use non-woven fabric to clean it.
Note: Touching the anti-collision bars will trigger a "Bump Exceptions" error. This is normal; simply ignore the message.
- If no contamination found: Proceed to Step 2.
Step 2: Clean the print head surface
- Moisten a cleaning cotton swab with moisturizing liquid.
- Carefully clean the areas of the print head surrounding the nozzles. DO NOT wipe the nozzle plate itself. You can refer to Routine Cleaning & Care for xTool Apparel Printer.
- If the issue persists: Proceed to Step 3.
Step 3: Clean the print carriage bottom
- Remove cured ink: Clean any areas with hardened ink buildup.
- No buildup found: This step may be skipped if no contamination is present.
Further Assistance
If you have performed all the troubleshooting steps above and the issue of scratches or stripes on your prints persists, proceed to the "If the problem persists" section to contact xTool Customer Service for further assistance.
If the problem persists
Should the issue persist after completing the preceding steps, submit a ticket via the "Submit a Ticket" button in the "Help Ticket" section below. The standard response time for xTool Customer Service is one business day.
Please include the following details to facilitate a quick diagnosis:
- Photo showing the position of the film and the white marking line
- Photo of the film reaching the mark line during alignment calibration
- Video of the film showing the belt contacting the oven
- Calibration value
- Work log files
- Serial Number
- Firmware version
Documentation feedback
Help improve this content by providing feedback. If this content did not meet your requirements, select "No" in the "Was this page helpful?" section below. Include specific details about what was unclear or missing in the pop-up suggestion box. Feedback submissions are reviewed by xTool technical writers to enhance future documentation.
Services & Help
Learn & Education

Copyright © 2025 xTool All Rights Reserved.