
Issue description
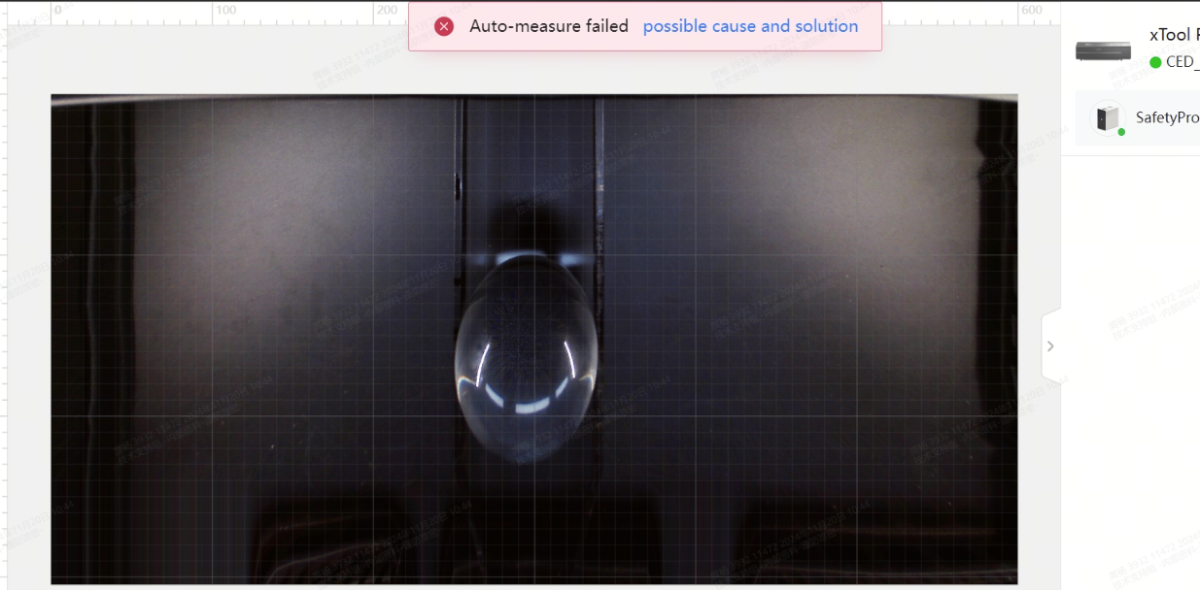
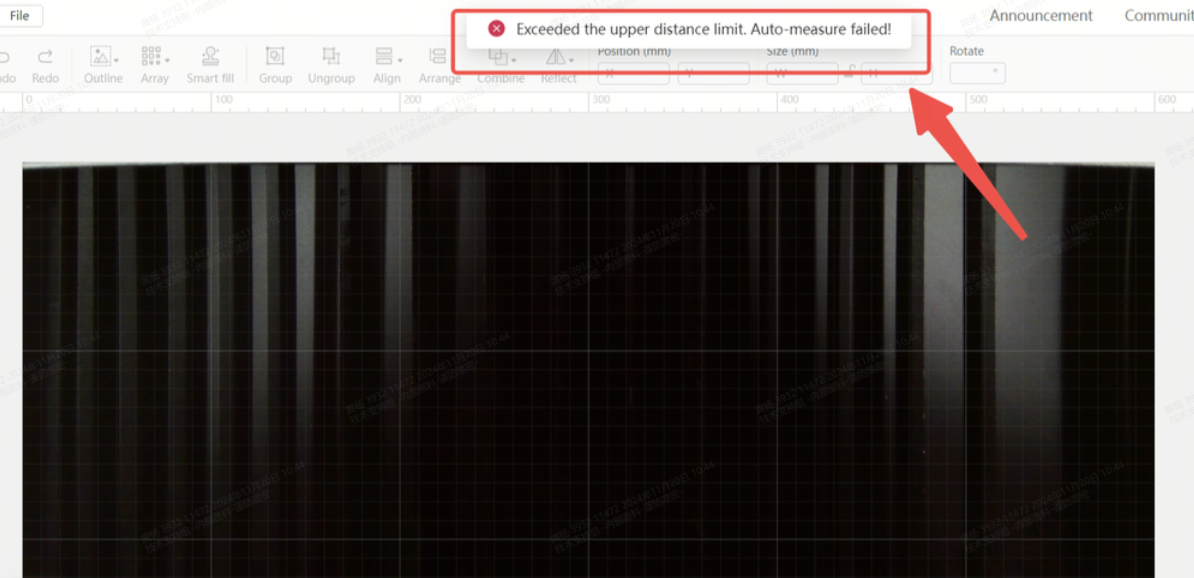
After clicking the Aimed-measure or Quick-measure button, the software displays "Auto-measure failed" or "Exceeded the upper distance limit. Auto-measure failed".
Possible causes
- Unsuitable material
- Strong light interference
- Measurement range exceeded
- Distance measurement module malfunction
- Camera malfunction
- Software issue
General troubleshooting steps
1. Check the material
Transparent and mirror-like materials cannot be measured, and dark-colored materials may cause measurement failure due to their light-absorbing properties. For these materials, place a piece of white paper on the surface and try measuring again, or use manual measurement: Manually Measure the Focal Distance for xTool P2 Series
2. Check the lighting
Strong external light may interfere with auto-measure and cause measurement failure. Avoid direct exposure of strong light to the measurement area.
3. Check the measurement range
Check whether the measurement position is within the measurement range. The slat surface is used as the reference plane, and the auto-measure height ranges for different processing modes are shown below:
Mode | Height range (mm) | Measurement Result range (mm) |
|---|---|---|
Process on slats | 0~25 | 0~25 |
Laser cylindrical | 0~25 | 0~25 |
Slats removed | –50~25 | 0~75 |
Use conveyor feeder | –50~25 | 0~75 |
Make sure that the material surface is within the auto-measure range. If it is outside the range, adjust the material position.
4. Calibrate the measurement function
If a measurable material is within the normal measurement range but the system still indicates that it is out of range, the measurement accuracy may be inaccurate. Try calibrating the measurement function using the tutorials below:
Troubleshooting steps for Quick-measure
Quick-measure relies on the distant-view camera to capture the position of the red spot. Therefore, both the red laser module and the distant-view camera must function properly for measurement to work.
1. Check the red laser module
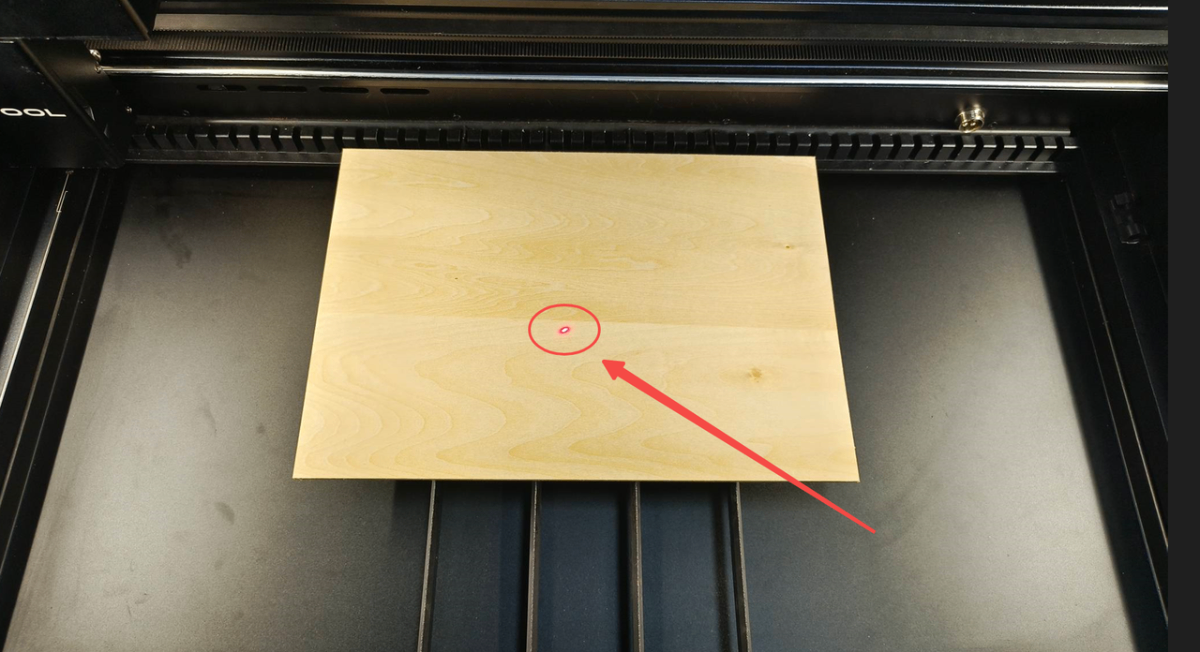
Place a wooden board at the center of the device. Power on the device and check whether the measurement red spot appears.
- If the red spot does not appear, is diffused, or is blurry, replace the red laser module.
- If a clear red spot appears, continue troubleshooting other issues.
2. Check the distant-view camera
Click to refresh the distant-view camera and check whether the camera is functioning properly.
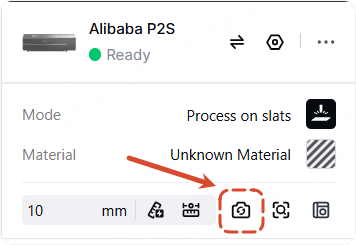
- If the camera cannot capture images, refer to the troubleshooting tutorial: Distant-View Camera of xTool P2/P2S Fails to Take Photos
- If the camera can capture images, try calibrating Quick-measure using the tutorial: Calibrate Quick Measure for P2 Series
Troubleshooting steps for Aimed-measure
1. Check the red laser module
Place a wooden board in the middle of the slat and use Aimed-measure to measure the board. Check whether a clear, focused red spot appears.
- If the red spot does not appear, is diffused, or is blurry:
- Remove the magnetic top cover of the laser head.
- Try reconnecting the measurement module cable.
- Restart the device.
If the issue persists, replace the measurement module.
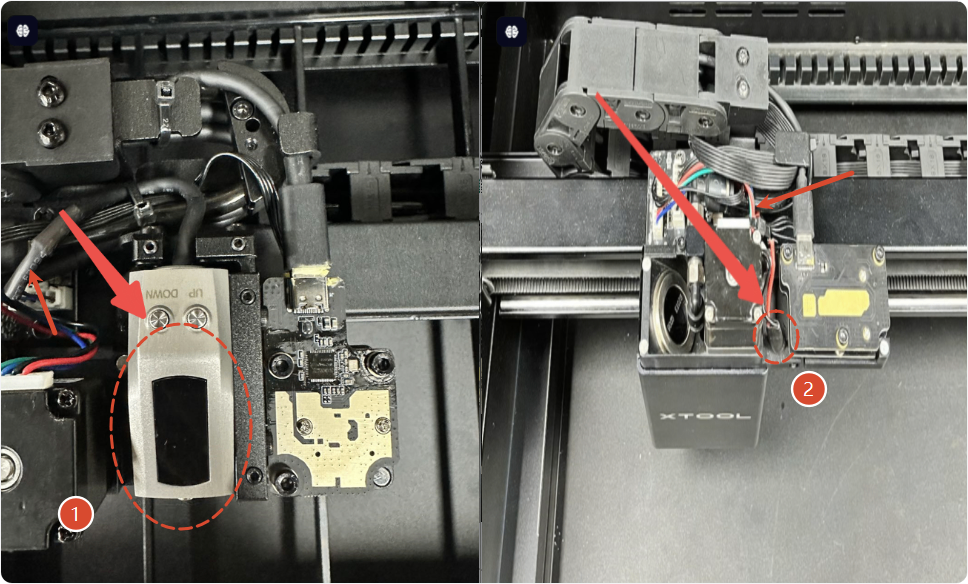
- If a clear red spot appears, check the distance sensor type shown in the figure below and follow the corresponding instruction:
- For the distance sensor marked ①, calibrate the measurement module using the tutorial: Calibrate the Aimed Measure for P2 Series. If the issue persists, replace the measurement module.
- For the distance sensor marked ②, proceed to check the close-view camera.
2. Check the close-view camera
Note: This step only applies to devices with the distance sensor marked ② in the figure above.
Click the image capture button and check whether the close-view camera can capture images.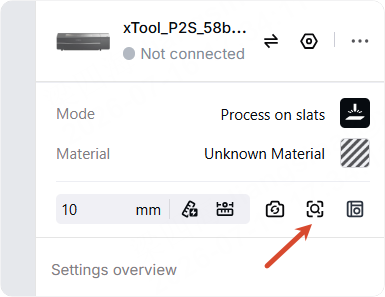
- If no image can be captured, refer to the troubleshooting tutorial: Close-View Camera of xTool P2/P2S Fails to Take Photos
- If an image can be captured, try calibrating Aimed-measure: Calibrate the Aimed Measure for P2 Series
Still experiencing issues?
Should the issue persist after completing the preceding steps, submit a ticket via the "Submit a Ticket" button in the "Help Ticket" section below. The standard response time for xTool Customer Service is one business day.
For a prompt resolution, please include the following details:
- Issue description: A detailed explanation of the observed problem.
- Video evidence: Attach a video demonstrating the issue, where applicable.
- Troubleshooting performed: Any troubleshooting steps you have already attempted, along with their results.
This information is crucial for xTool technical support engineers to provide timely assistance.
Documentation feedback
Help improve this content by providing feedback. If this content did not meet your requirements, select "No" in the "Was this page helpful?" section below. Include specific details about what was unclear or missing in the pop-up suggestion box. Feedback submissions are reviewed by xTool technical writers to enhance future documentation.

