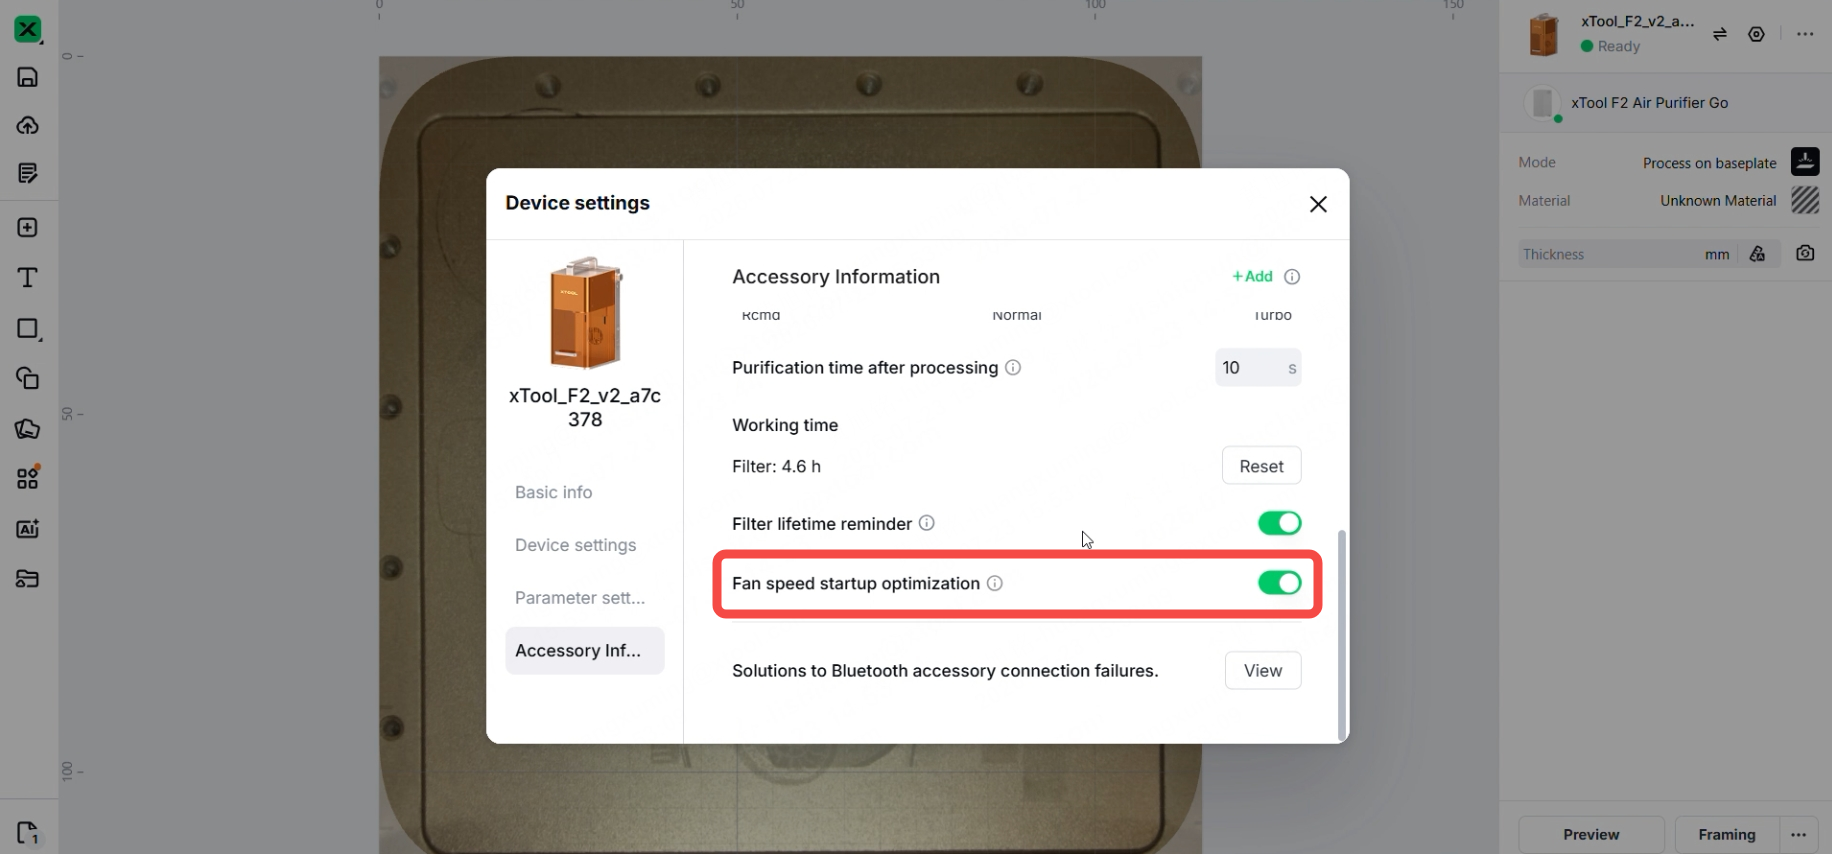
This article describes the instructions on how to use xTool F2 Air Purifier Go with xTool F2 in xTool Studio.
For more information about xTool F2, refer to xTool F2 User Guide.
Operations
Step 1
Follow the installation instructions in xTool F2 Air Purifier Go User Guide to connect the purifier to xTool F2.
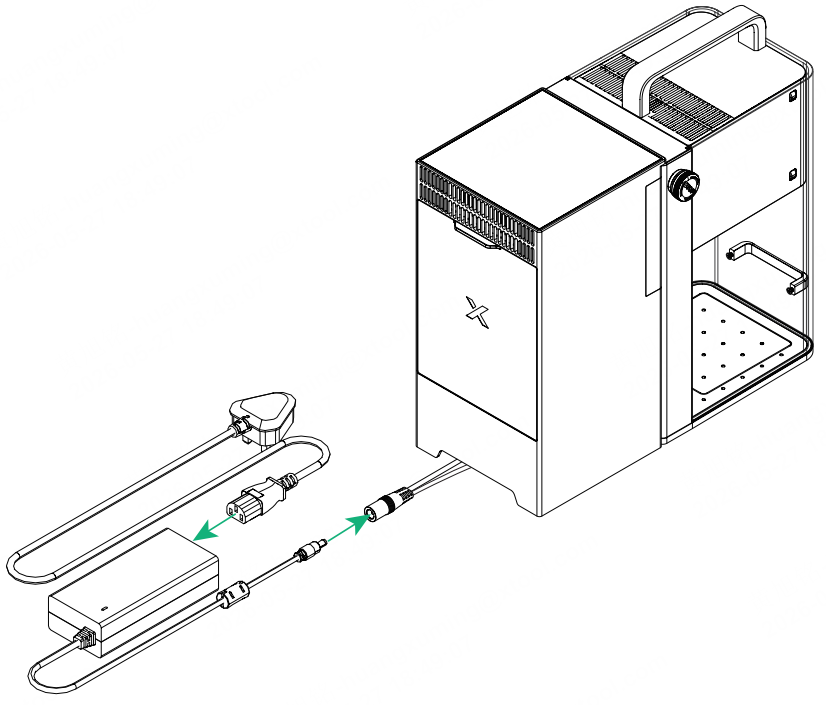
Step 2
Plug the xTool F2 power cable into a power outlet, then use the USB cable included in the xTool F2 package to connect xTool F2 to your computer.
Step 3
Open xTool Studio, and click "+ New Project" in the top-right corner.
Step 4
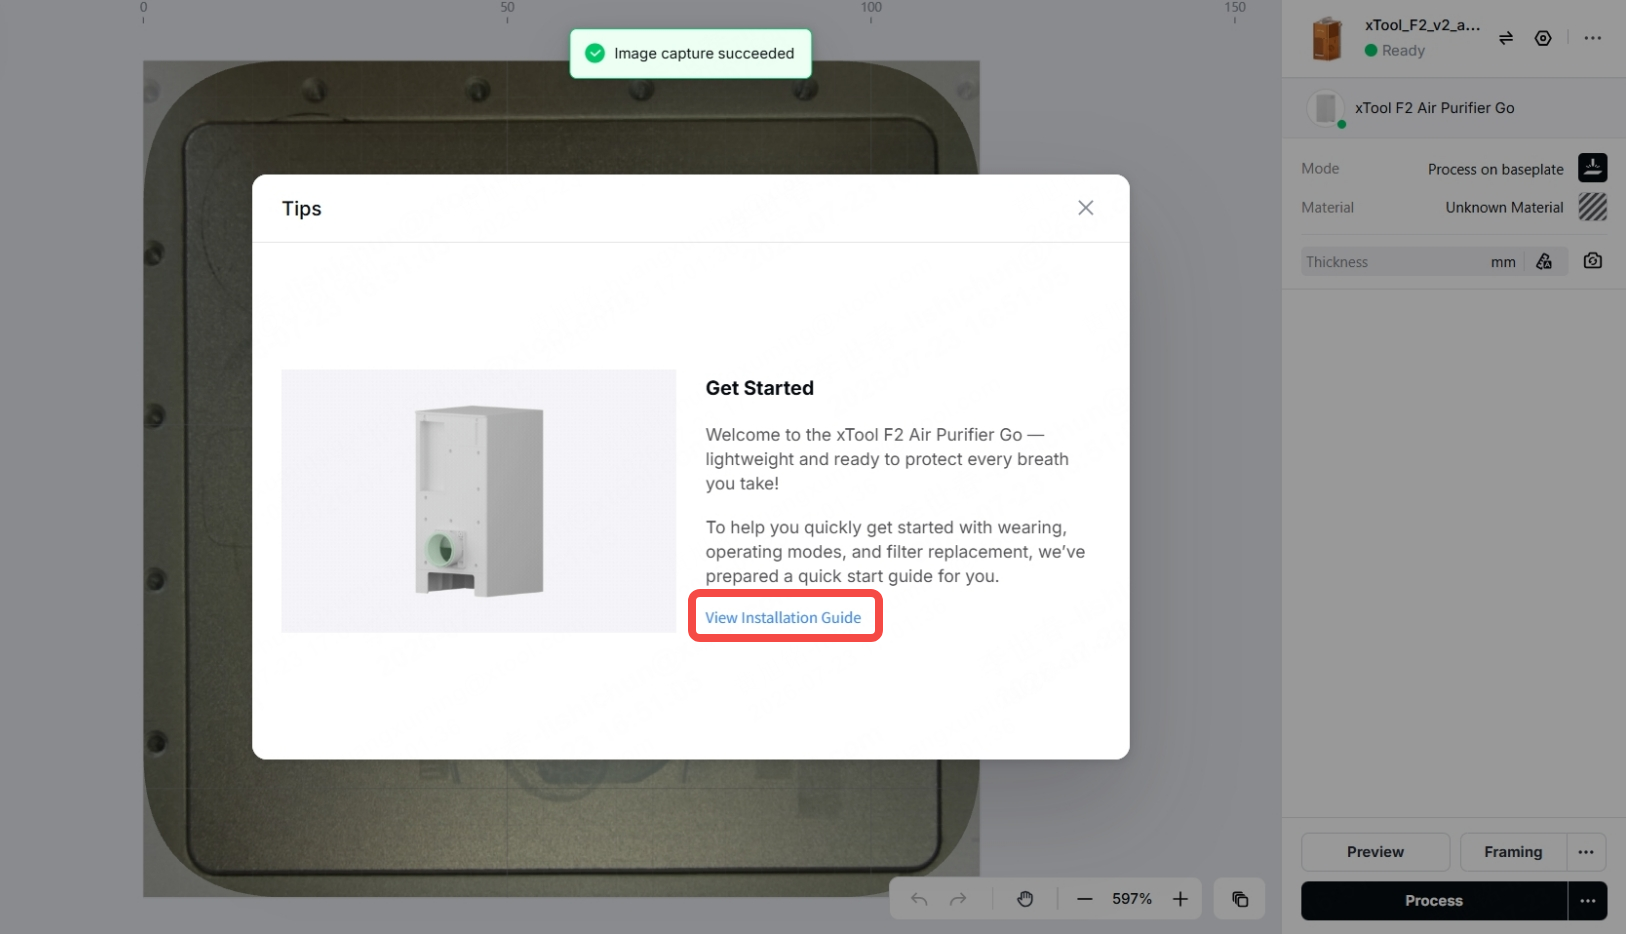
(Optional) To view the installation guide, click the "View Installation Guide" link in the "Tips" pop-up.
Step 5
Click the purifier icon in the top-right corner to view the software features related to the purifier.
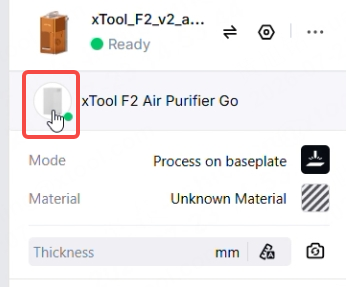
Software features of the purifier:
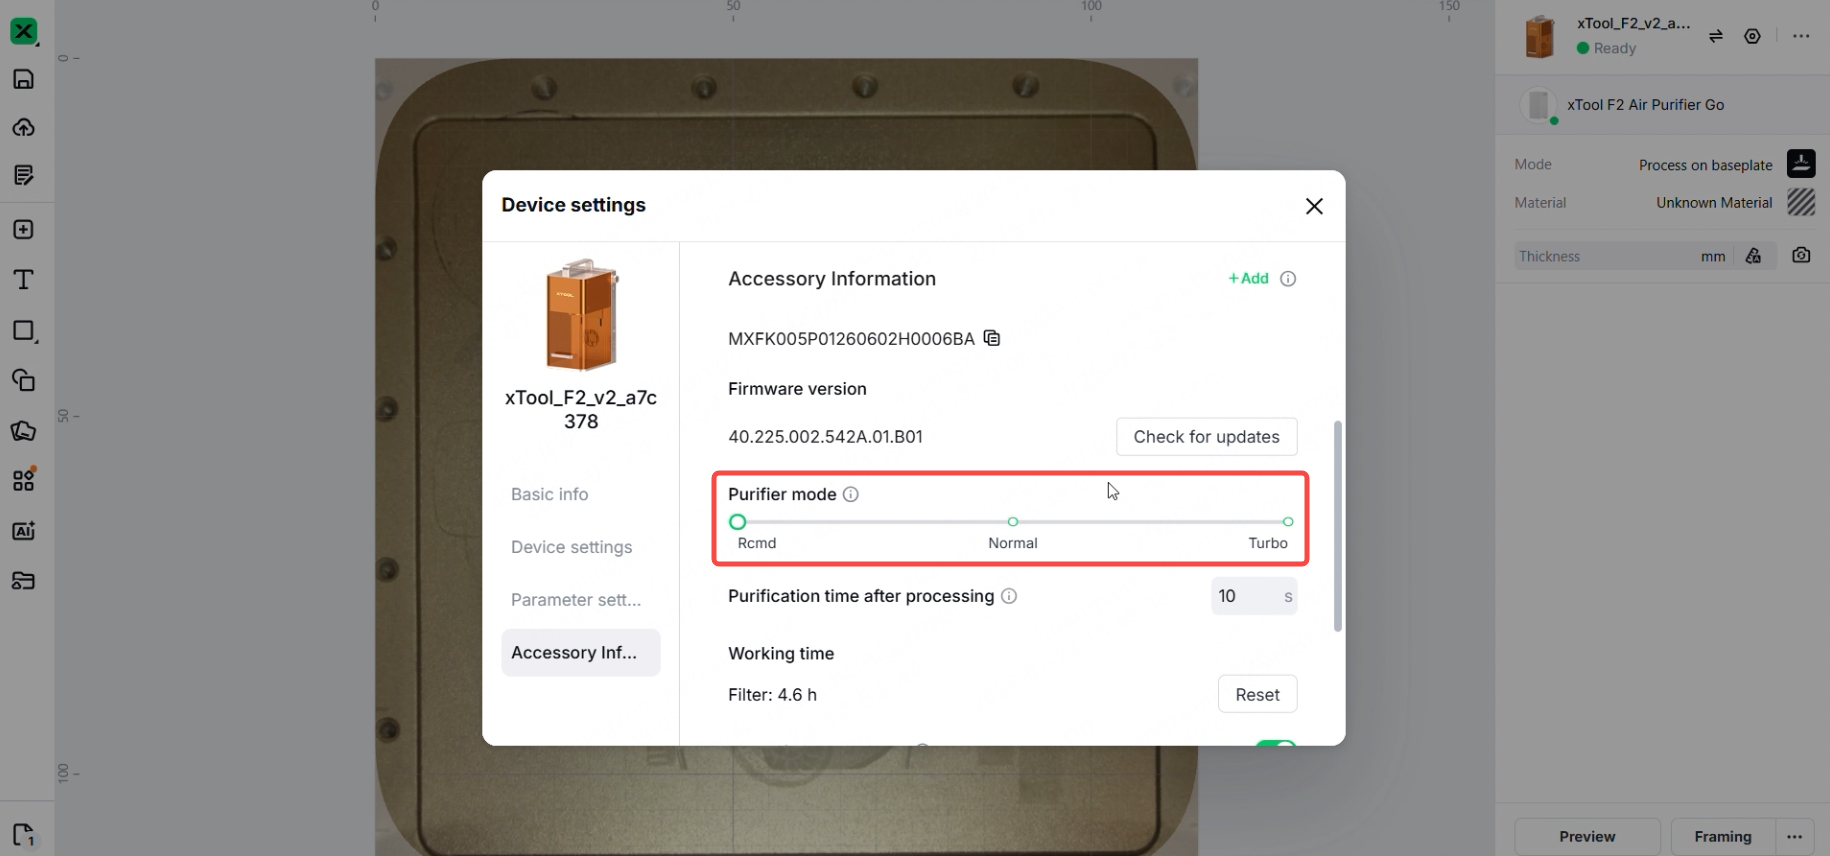
(1) Purifier mode
After the device is connected, the Purifier mode is set to Rcmd (Recommended) by default. The system automatically recommends the appropriate mode based on the selected material. If needed, you can switch to Normal or Turbo by clicking the corresponding option.
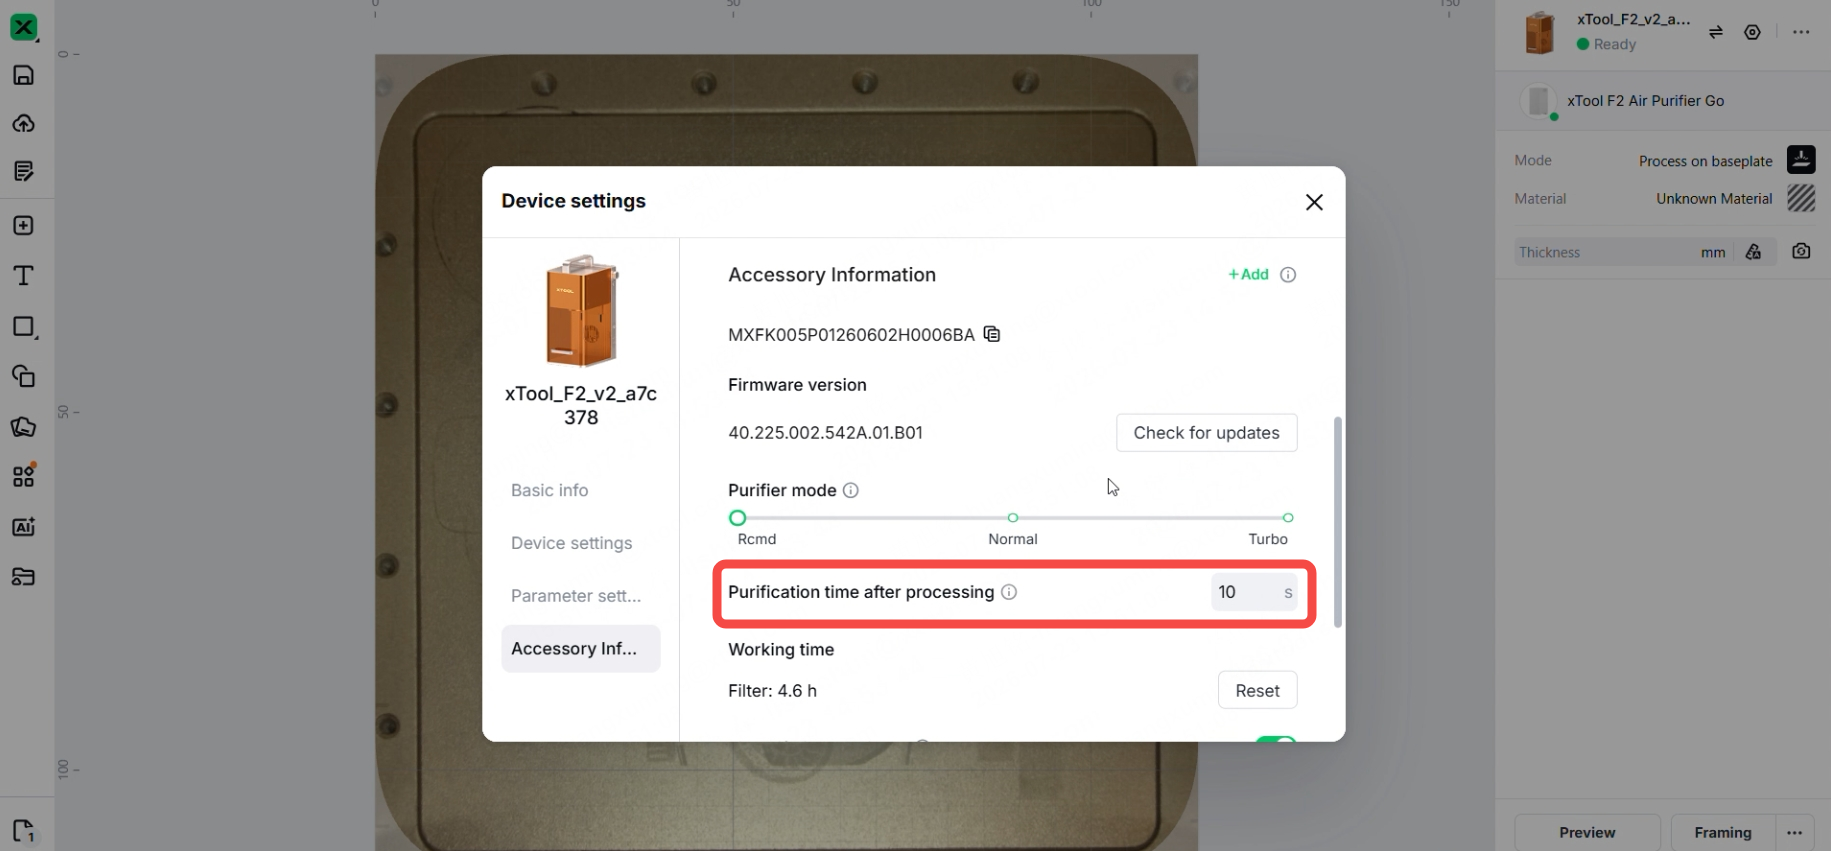
(2) Purification time after processing: ≤ 600s
You can manually adjust the purification time after processing based on the type of material being processed.
(3) Working time (of the filter): Resettable
After replacing the filter, click Reset to reset the filter's working time to zero.
When Filter lifetime reminder is enabled, the system will display a reminder to replace the filter once the filter's accumulated working time reaches the specified threshold.
When Filter lifetime reminder is disabled, you will need to determine when to replace the filter based on its actual condition. After replacing the filter, manually reset the filter's working time.
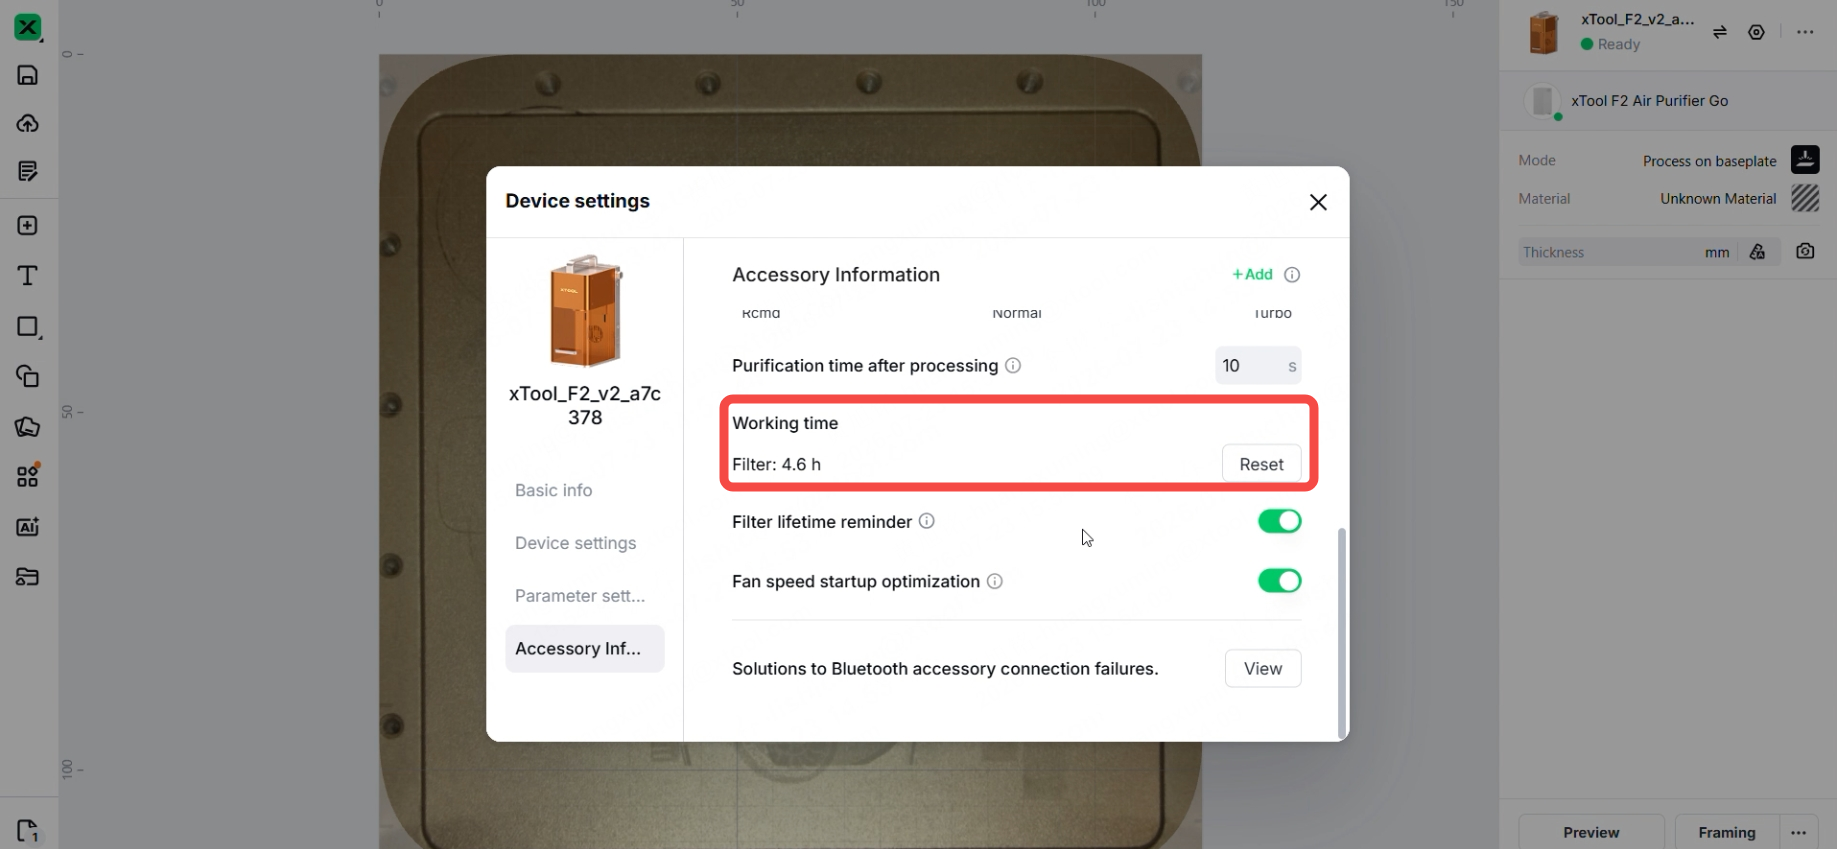
(4) Fan speed startup optimization: Recommended to keep enabled
If this feature is disabled, the startup response of the purifier may be delayed. As a result, the purifier may not start in time to extract the smoke generated by xTool F2 during processing, which may reduce purification performance.