Step 1: Clean the prepared crystal ball and container before starting the inner engraving process.
Note:
1. For optimal inner engraving results, we recommend using K9 crystal balls with diameters ranging from 60 mm to 100 mm, along with a glass cup with a diameter of 120 mm.
2. The size of the crystal ball determines the size of the container that needs to be prepared. A crystal ball that is too large will exceed the inner engraving work area of xTool F2 Ultra UV, and any part that falls outside the inner engraving work area cannot be processed by the laser.
3. The container must have a diameter larger than that of the crystal ball and a height greater than the combined size of the crystal ball and its base. This ensures that when the inner engraving oil is poured in, it can fully submerge the crystal ball without spilling over the edges of the container.
4. The bottom of the container must be flat. An uneven bottom can affect the stability of the crystal ball in the container, potentially causing it to shift during inner engraving.
5. Wear gloves and avoid leaving fingerprints or other marks on the surface of the crystal ball, as this could affect the inner engraving quality.
Step 2: Measure and record the crystal ball's diameter, as it will be input into xTool Studio later.
Step 3: Prepare an appropriate base to secure the crystal ball in the container.
Step 4: Place the base and the crystal ball in the container in sequence.
Step 5: Pour the inner engraving oil into the container.
Note:
1. The crystal ball must be securely fixed within the container. Use a fixed base at the bottom to assist with stabilization. If additional fixation is required, items can be used to press against the sides of the crystal ball to ensure it is completely secured in the container. Be careful not to place any objects that obstruct the top of the crystal ball, as any obstruction above the crystal ball will block the laser and interfere with the engraving process.
2. The oil is used to maintain consistent laser focus during the engraving process on the crystal ball, ensuring the engraving effect remains accurate. When pouring oil into the container, make sure the crystal ball is fully submerged. It is recommended that the oil level be approximately 2 mm above the surface of the crystal ball.
3. The inner engraving oil must have the following characteristics: a refractive index close to that of glass, high transmittance, non-toxic and harmless properties, and ease of handling. Based on the refractive index, glycerin, liquid paraffin, and benzyl alcohol (mildly toxic) are suitable options for inner engraving oil. The refractive indices of glycerin, liquid paraffin, and benzyl alcohol are 1.473, 1.467-1.478, and 1.538, respectively.
Step 6: Press the power button to turn off xTool F2 Ultra UV.
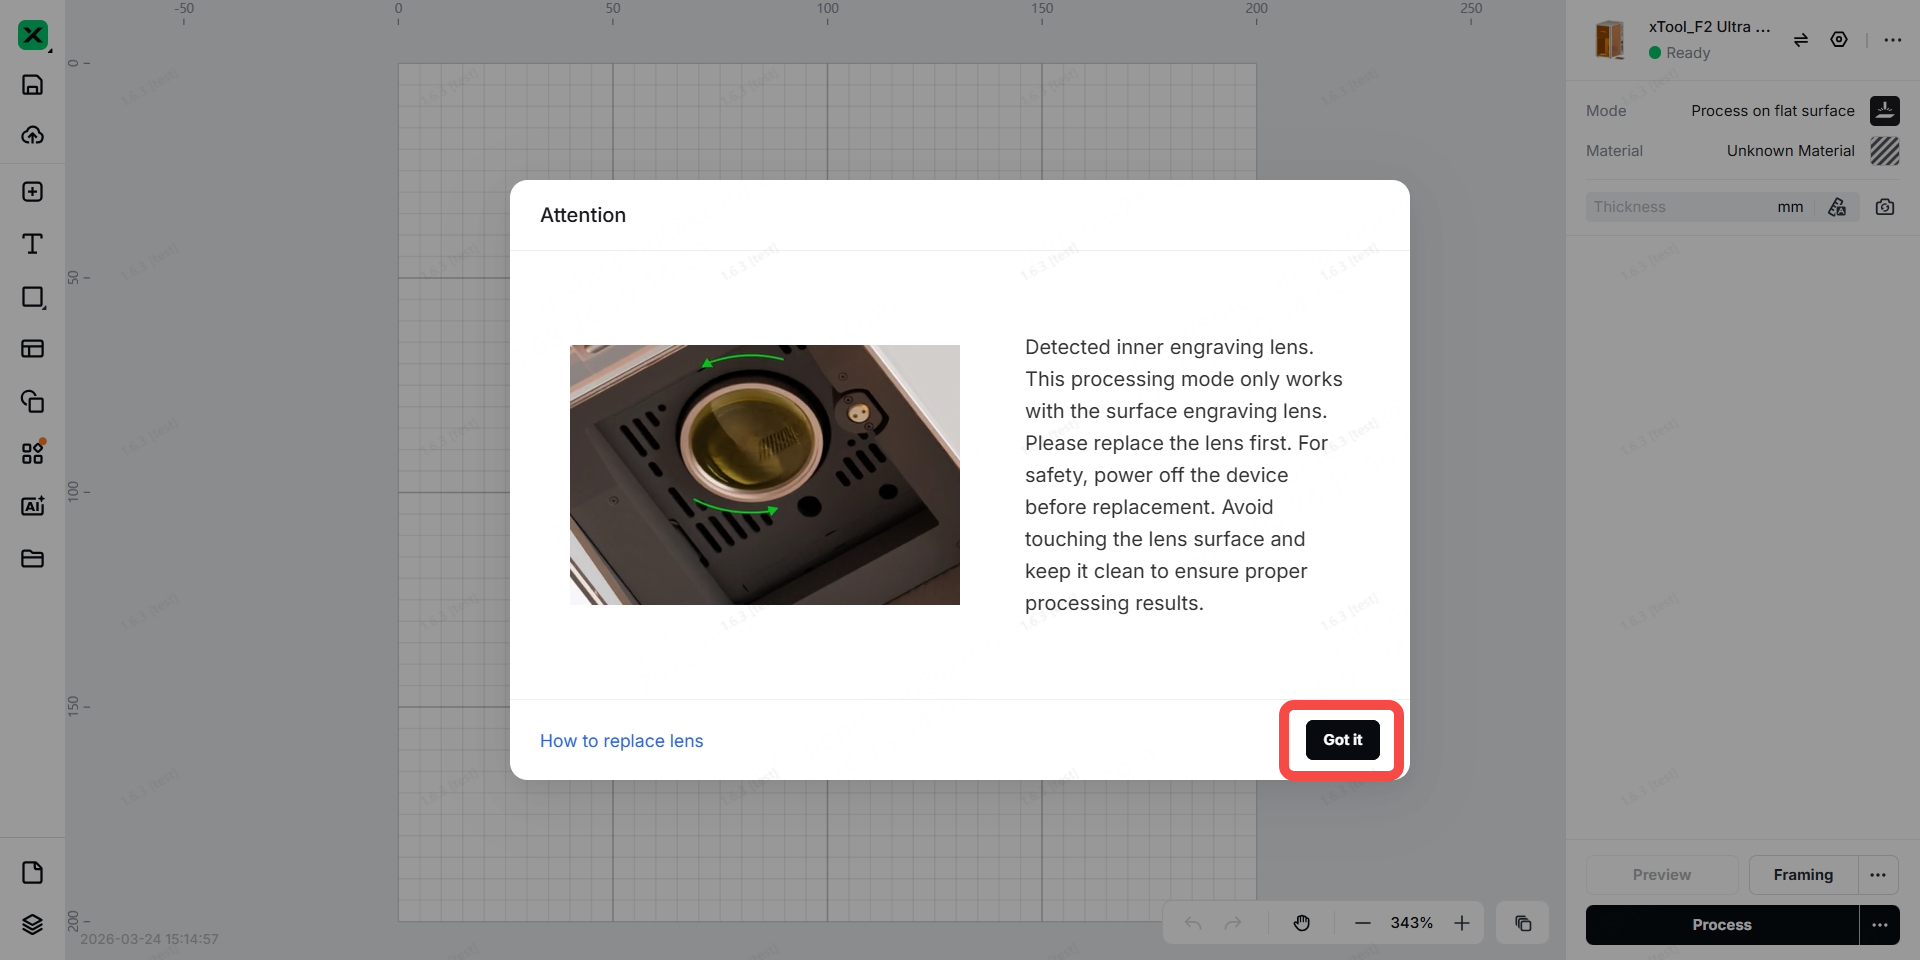
Step 7: Replace the filed lens
Note: The inner engraving lens comes in several color versions, and the exact color depends on the product you receive.
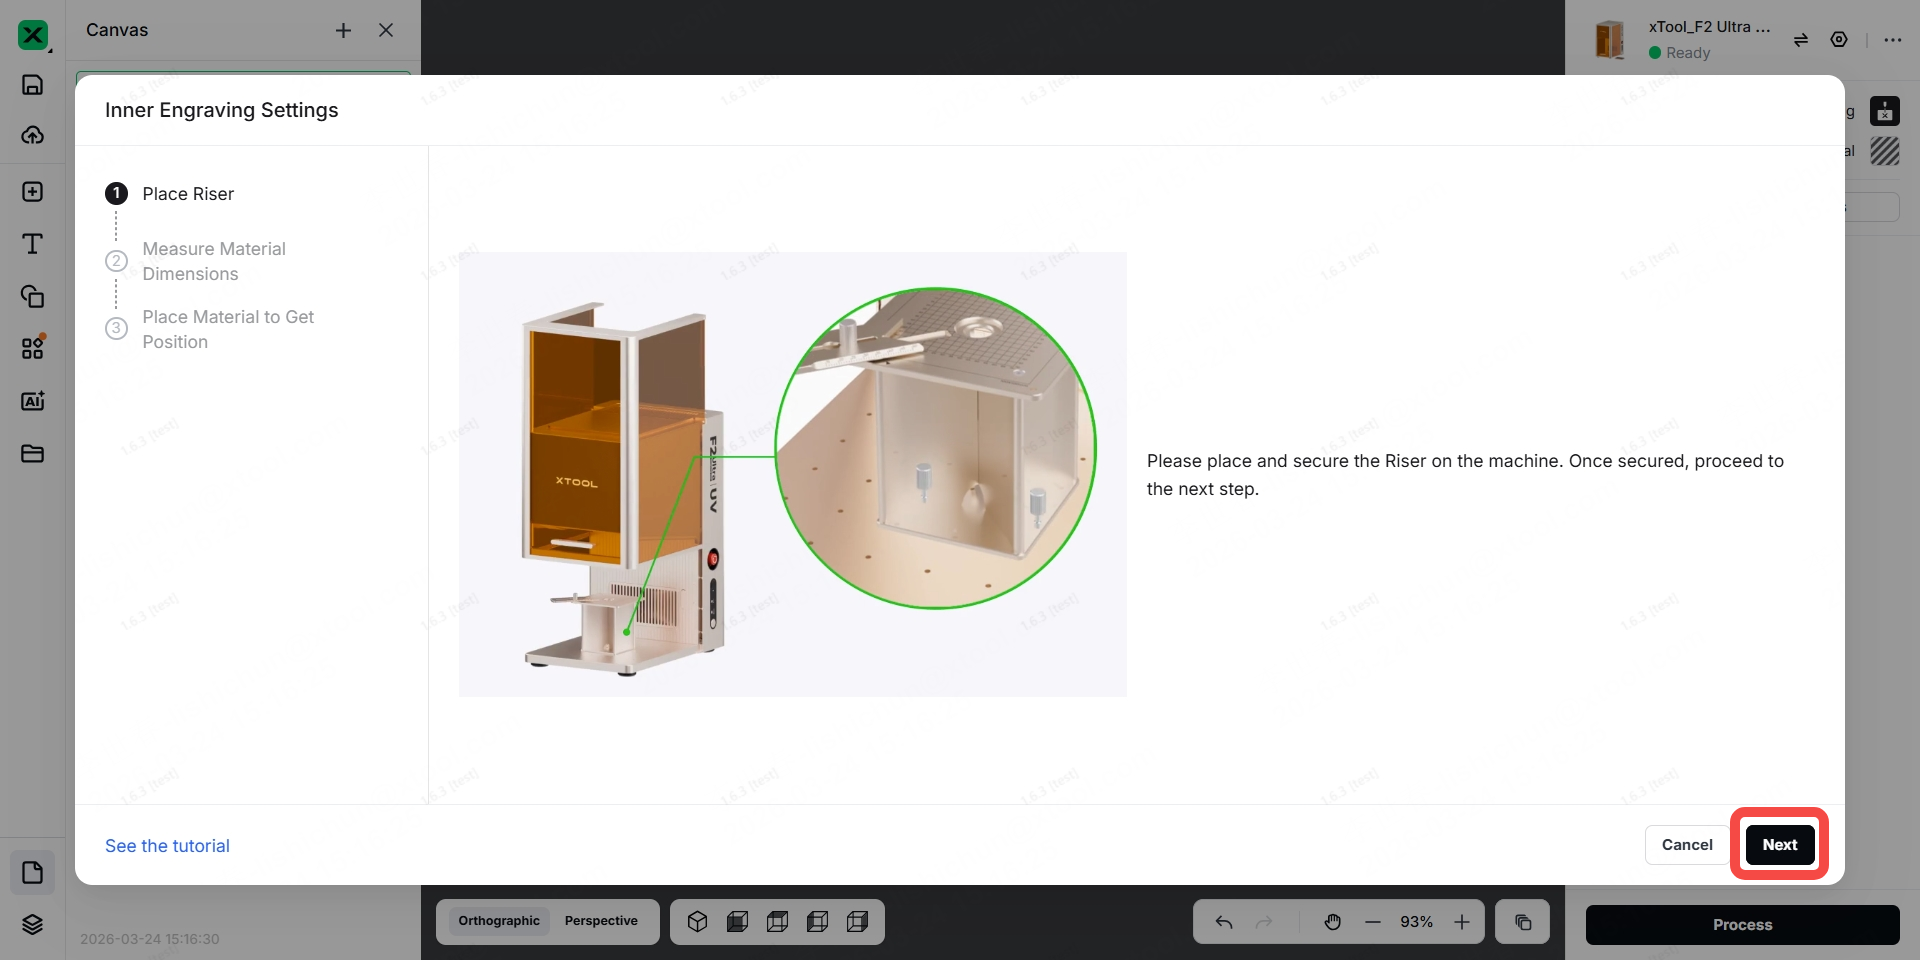
Step 8: Install the riser onto the baseplate of xTool F2 Ultra UV.
Note: The riser can assist in calibrating the device's laser and help determine the position for software modeling.
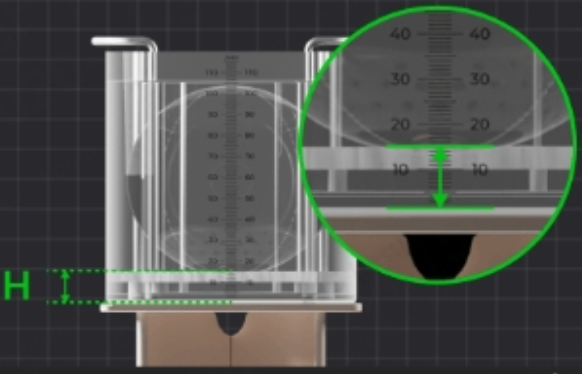
Step 9: Measure and record the distance between the bottom of the container and the lowest point of the crystal ball, as it will be input into xTool Studio later.
Step 10: Place the container holding the inner engraving oil, crystal ball and its base onto the riser, in the center of the riser top plate.
Before placing the container on the riser top plate, please check whether there are bubbles in the inner engraving oil above the crystal ball. If bubbles are present, allow the inner engraving oil to sit for a few minutes until the bubbles dissipate before placing the container; otherwise, it may compromise the engraving quality.
When placing the container onto the riser, tilt the container toward yourself. Be sure to handle it slowly, as the inner engraving oil may spill if tilted too quickly.
To prevent the inner engraving oil from shaking during the engraving process and affecting the engraving results, please try to carry out the work on a stable table.
Step 11: Press the power button to turn on F2 Ultra UV.
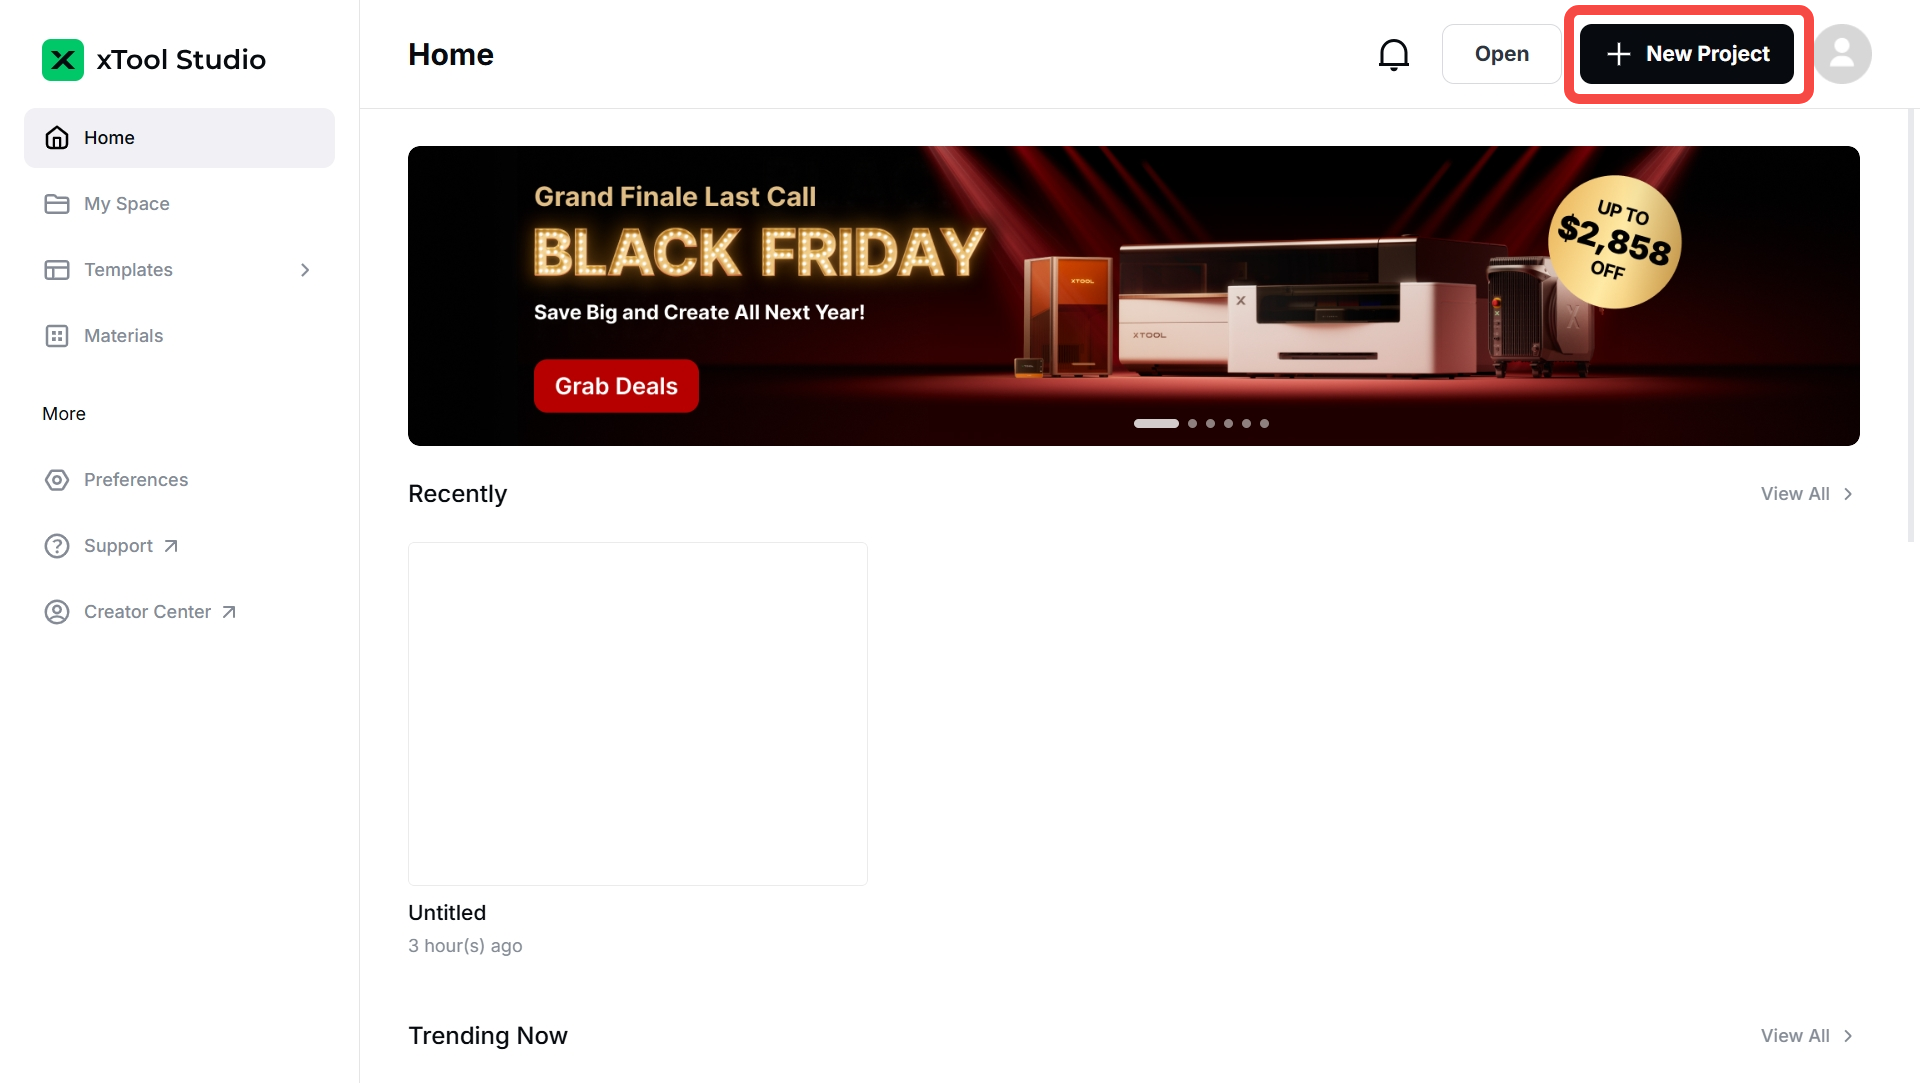
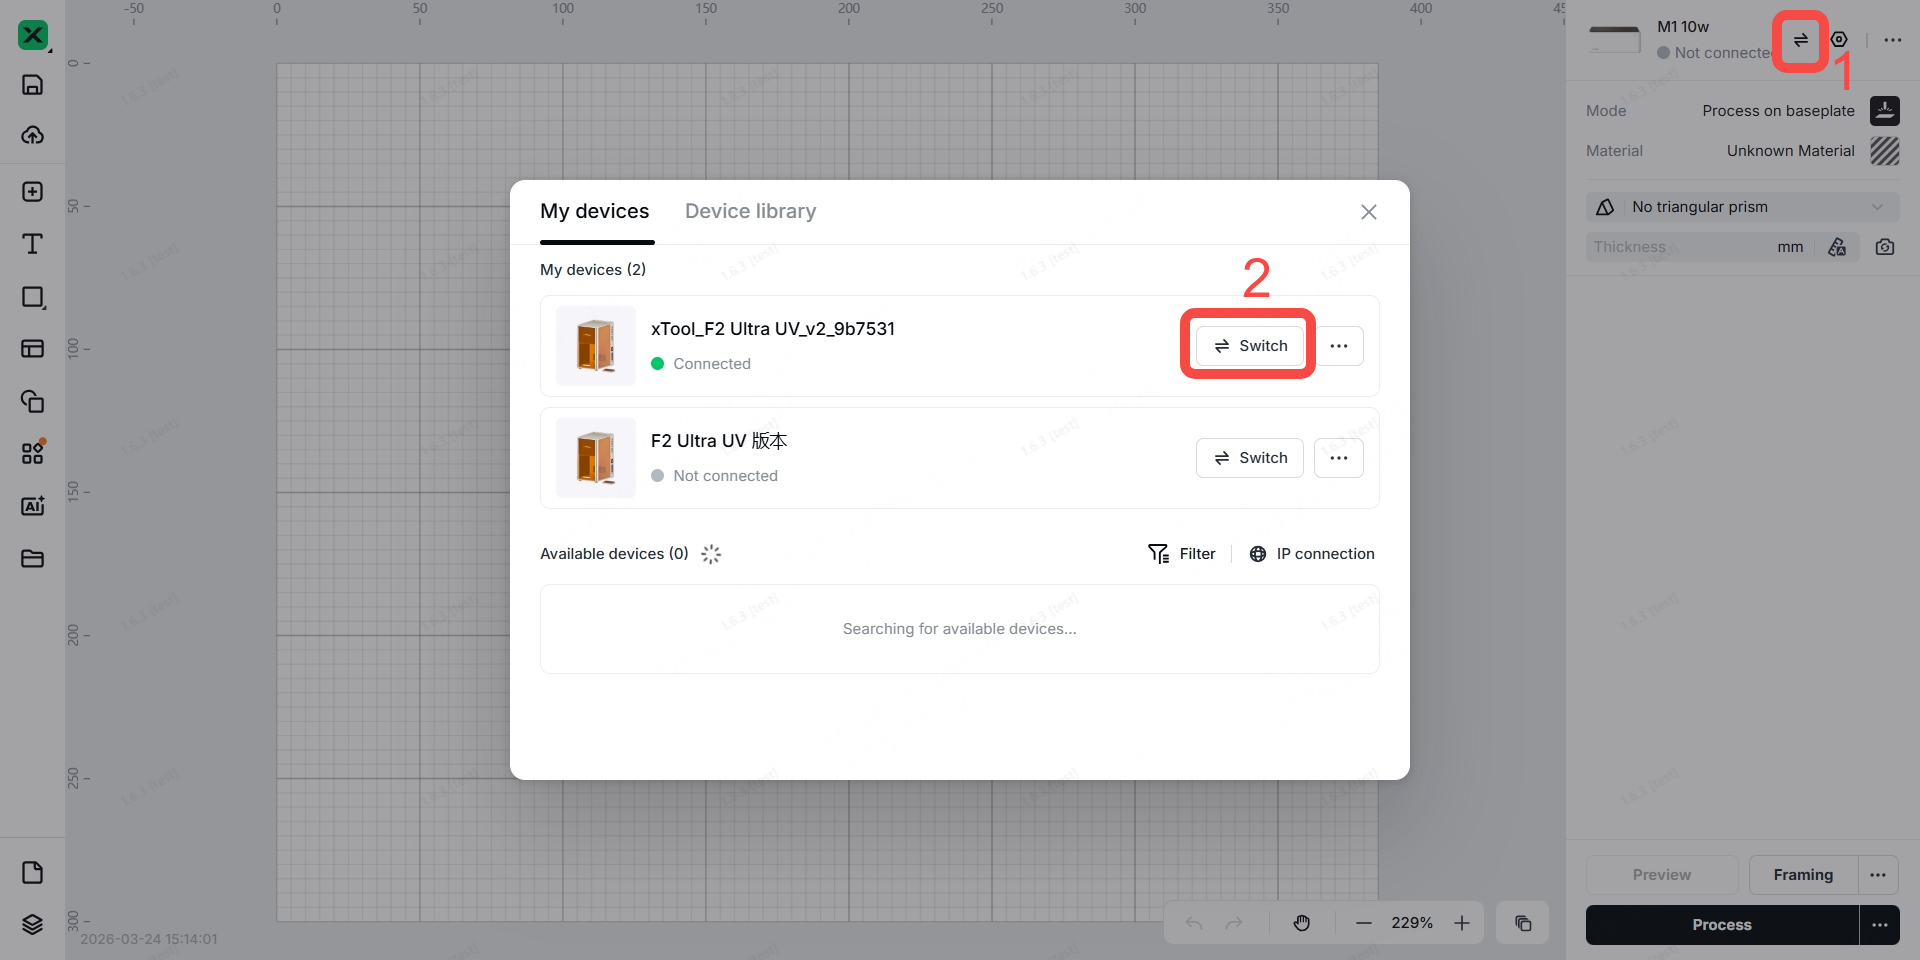
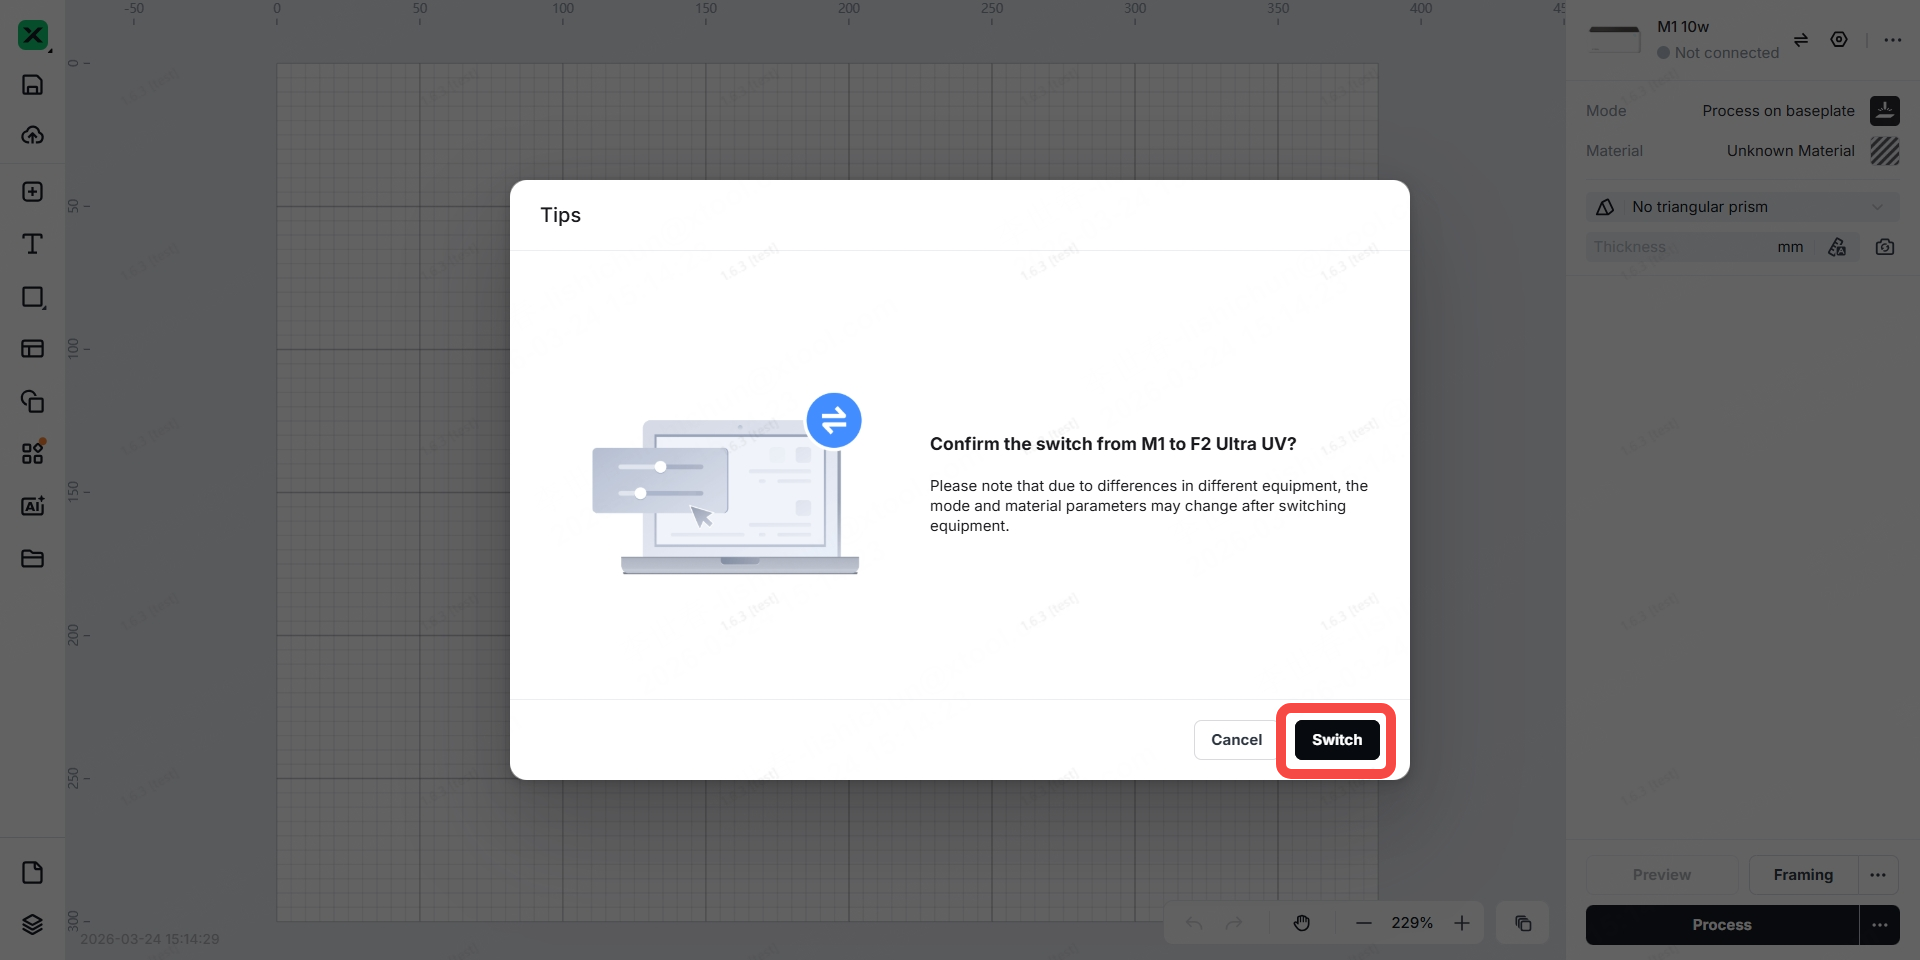
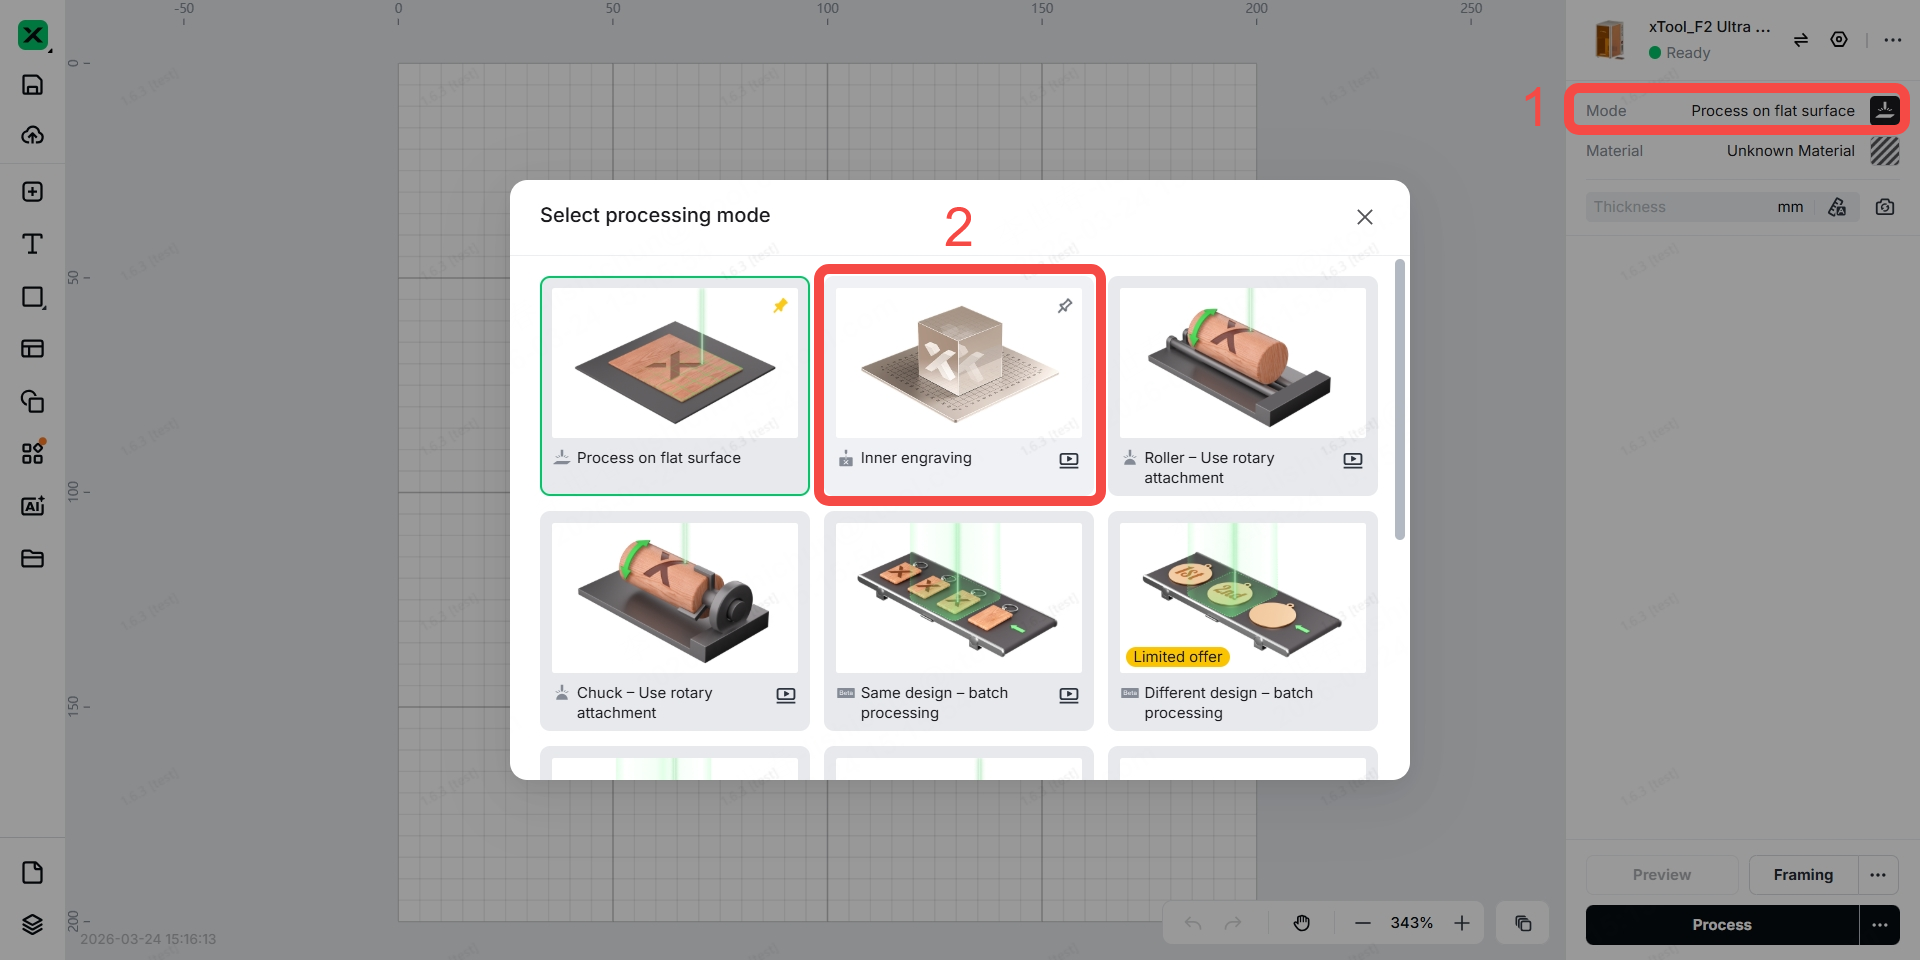
Step 12: Open xTool Studio, click "+ New Project", connect your F2 Ultra UV in the software, and set the mode to “Inner Engraving”.
Step 13: Ensure the riser is secured on the baseplate of F2 Ultra UV with the two thumb screws, then click "Next".
Step 14: Select the ball shape, then deselect the checkbox next to “Use K9 Crystal Ball Inner Engraved Kit”.
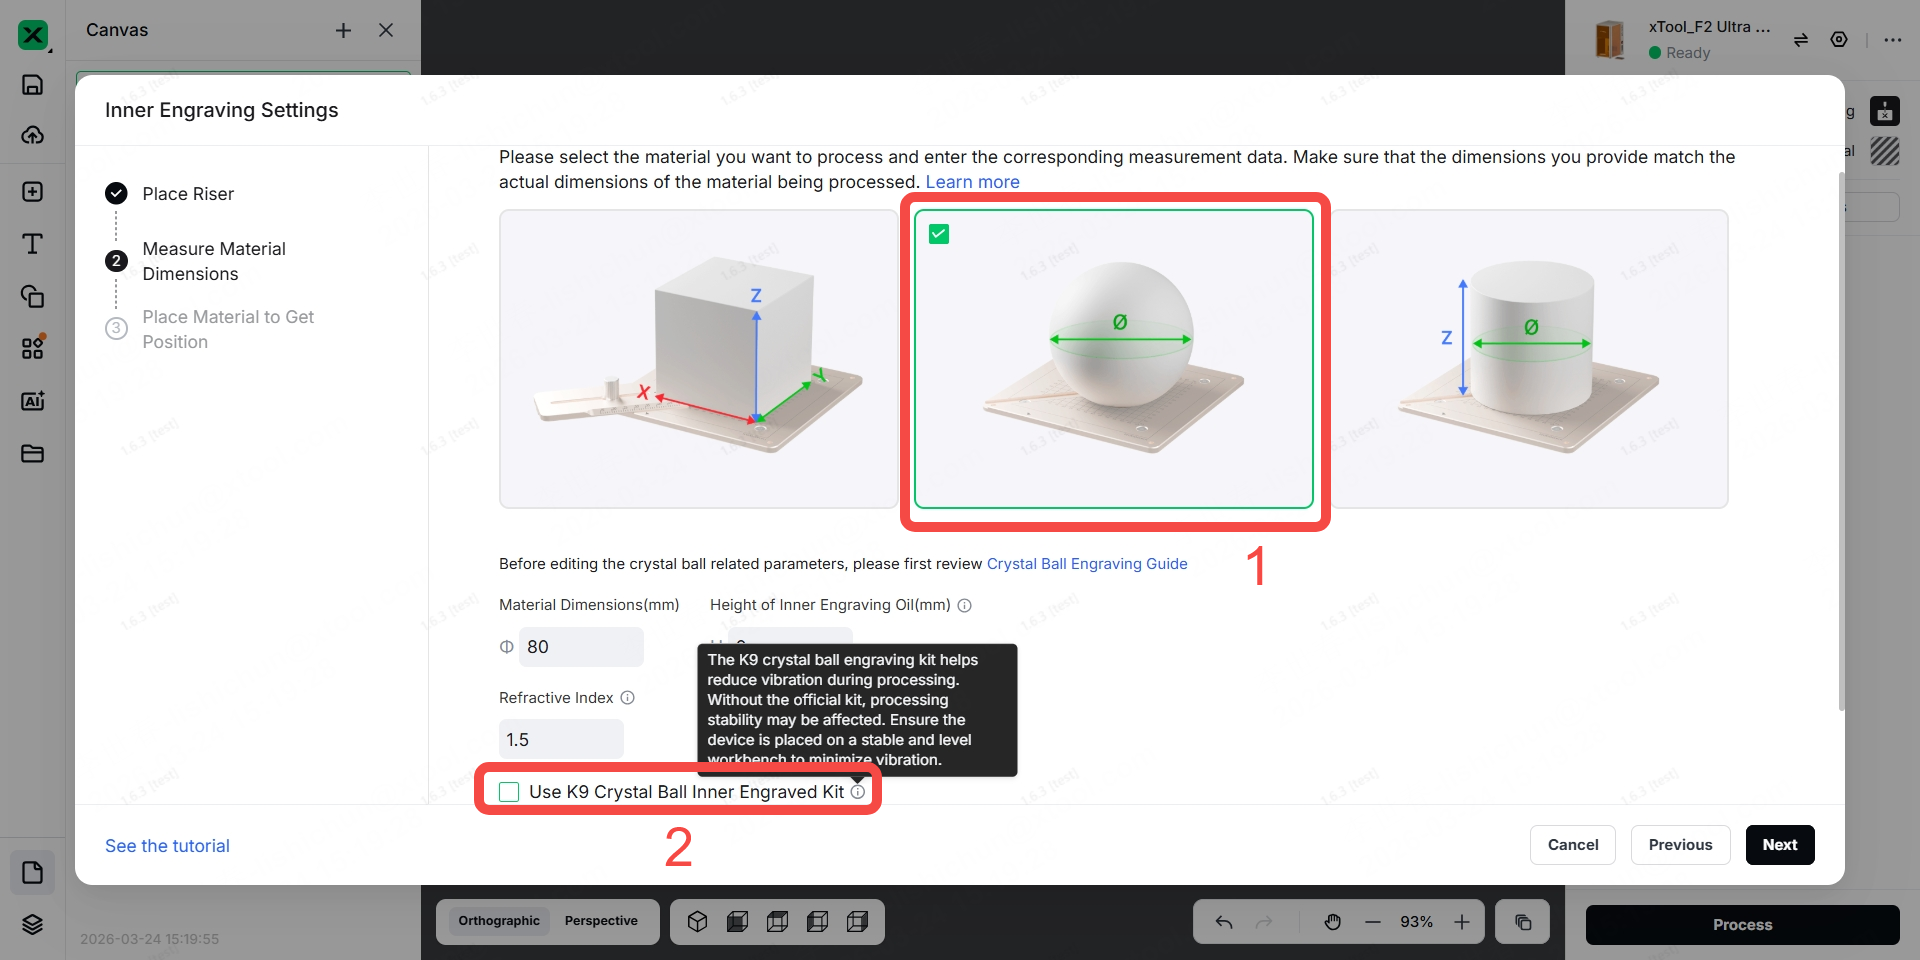
Note: If "Use K9 Crystal Ball Inner Engraved Kit" does not appear in xTool Studio, scroll down to locate it.
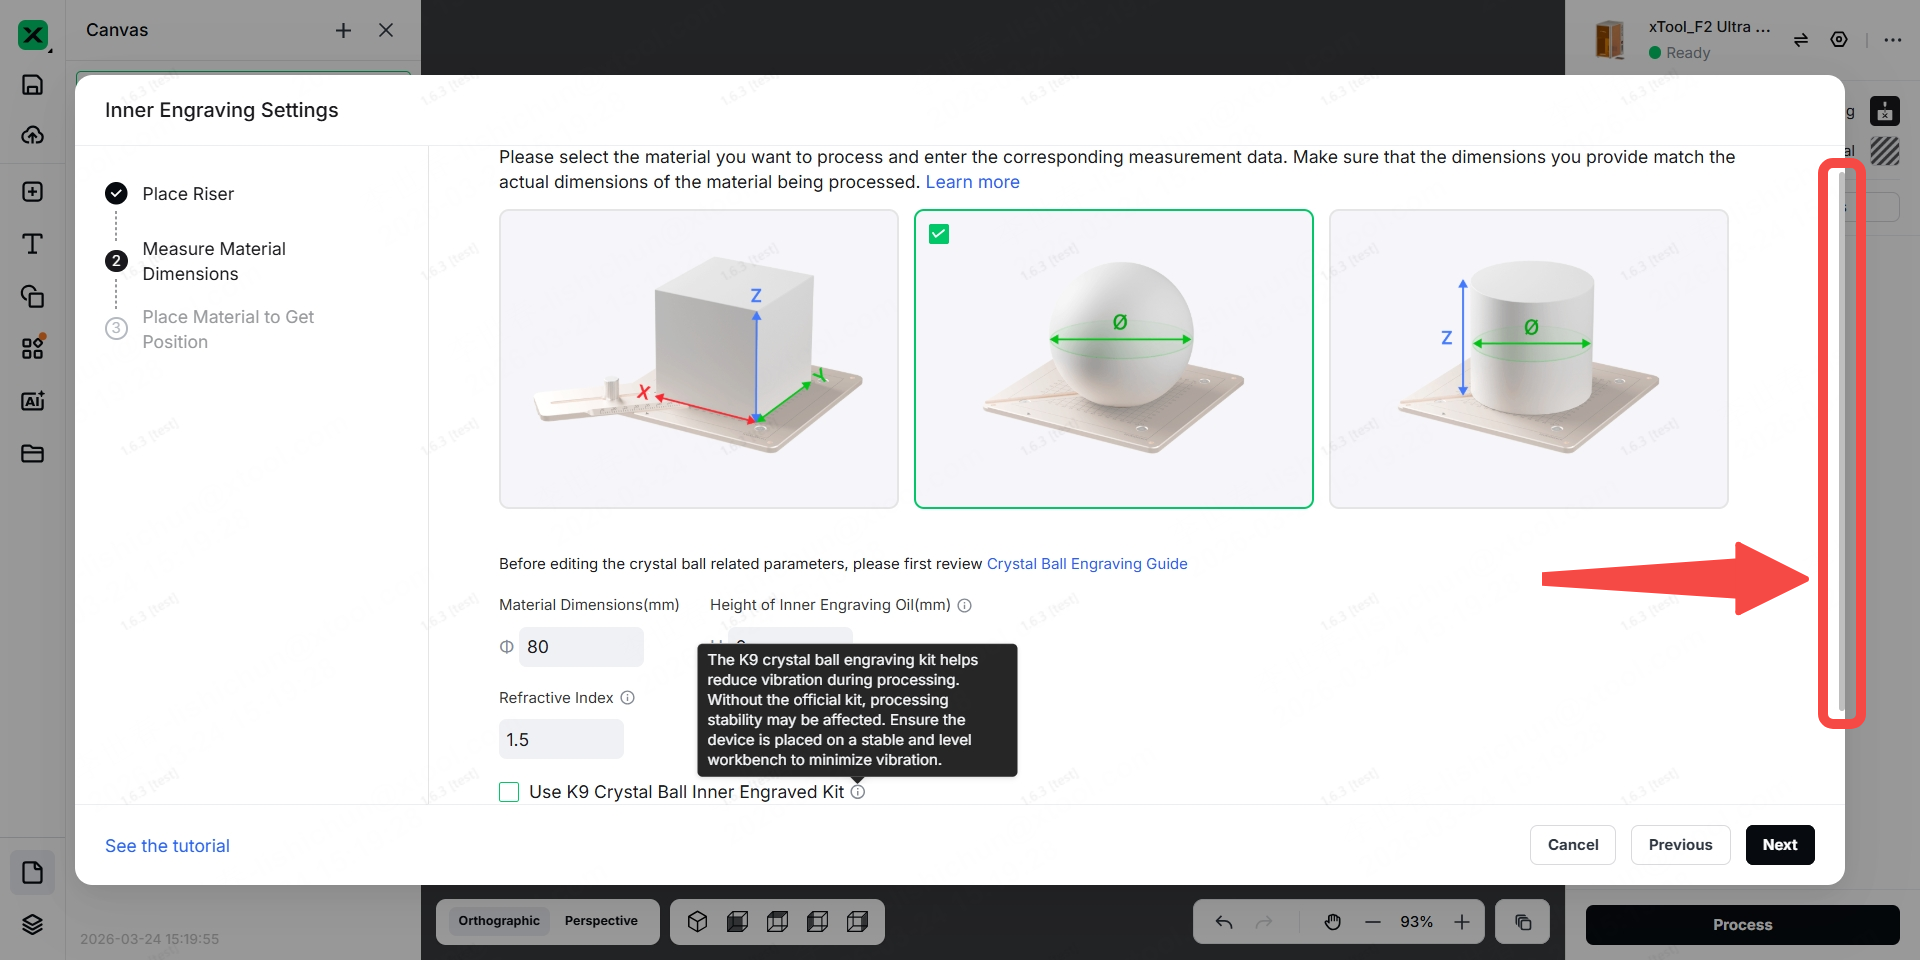
Step 15: Enter the diameter of the crystal ball, the height of the inner engraving oil, the reflactive index, and the distance between the bottom of the container and the lowest point of the crystal ball, then click "Next".

Note: The following steps are the same as those for using our K9 Crystal Ball Inner Engraved Kit. Please click here and start from Step 16 to view the subsequent operations.
More information
xTool F2 Ultra UV Unboxing and First Use
Inner Engraving Work Area Calibration
Z-axis Calibration for Inner Engraving
Replace the Field Lens for xTool F2 Ultra UV
A Guide to Glass for Inner Engraving
Inner Engraving Operation Guide for Glass Materials
Approaches to Improving Inner Engraving Results
Inner Engraving File Types for xTool F2 Ultra UV
Failure to Perform Inner Engraving on Glass
Crystal Ball Inner Engraving Operation Instructions
Start Inner Engraving with xTool F2 Ultra UV
