FAQs
Q: Why can't the crystal ball be directly engraved internally?
A: (1) Spherical lens effect: The glass ball itself acts as a lens, altering the laser's incident angle and focal position, which leads to focal distortion. (2) Change in refractive index: When the laser passes through the ball, it creates spherical aberration, causing the focal point to stretch into an ellipsoidal shape rather than a single point, which affects engraving precision. This is particularly pronounced at large incident angles. (3) Complex incident light path: The refractive index varies at different incident points, requiring the software to compensate for focal length in real time; otherwise, point positions will shift.
Q: How should a crystal ball be engraved internally?
A: Below is our official guide for internally engraving crystal balls. Follow these steps to successfully engrave your crystal ball! You can purchase our K9 Crystal Ball Inner Engraved Kit (click here to purchase) and follow the steps below to complete your first crystal ball engraving project! You can also watch this video.
The K9 Crystal Ball Inner Engraved Kit includes (but is not limited to) the following items:
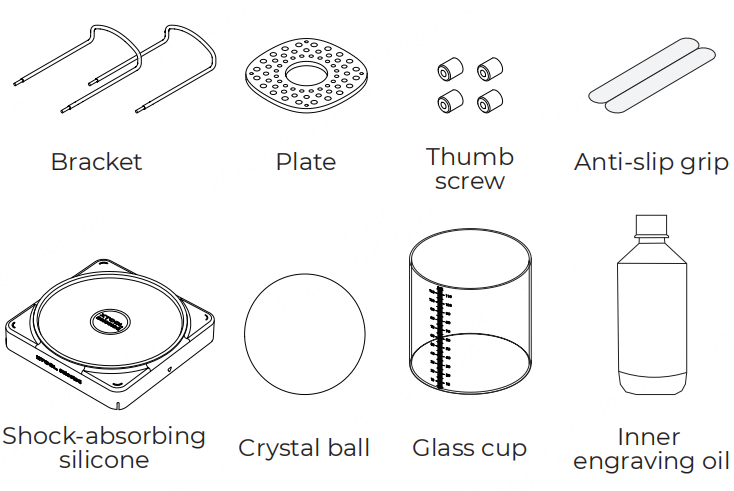
Click the following links to purchase the corresponding items:
Note: For those who do not purchase or use our K9 Crystal Ball Inner Engraved Kit, please click here to learn about the necessary preparations.
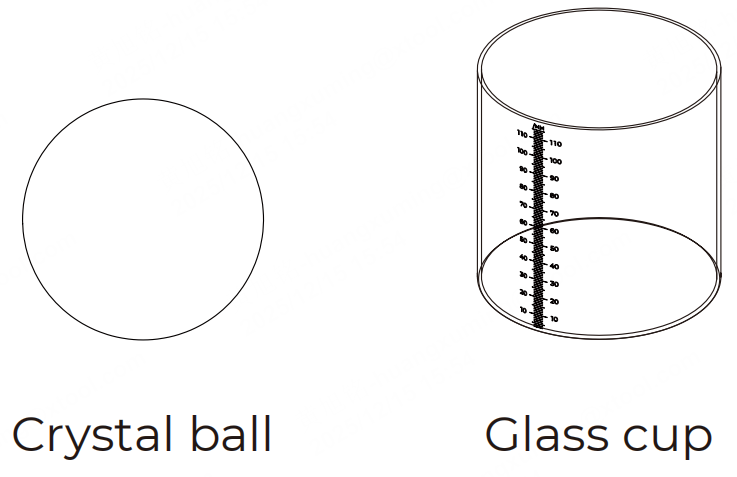
Step 1: Take out and clean the crystal ball and glass cup.
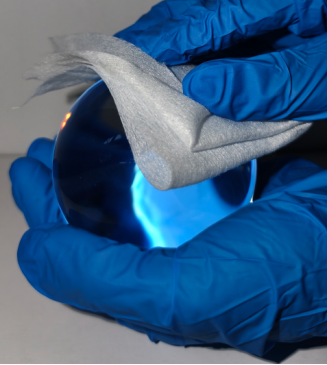
Remember to wear gloves and avoid leaving fingerprints or other marks on the surface of the crystal ball, as this could affect the inner engraving quality.
The glass cup provided is designed to hold crystal balls with diameters ranging from 60 mm to 100 mm.
Step 2: If you are using your own crystal ball, measure its diameter to ensure it falls within the range of 60 mm to 100 mm.
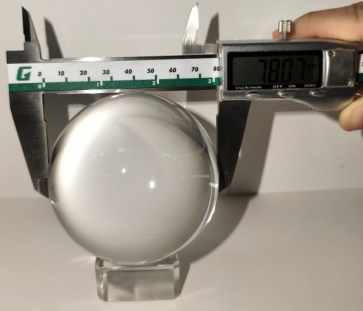
Note: The diameter of the crystal ball provided is 80 mm. If you use other crystal balls, measure the diameter of the ball and the diameter will be input into xTool Studio later.
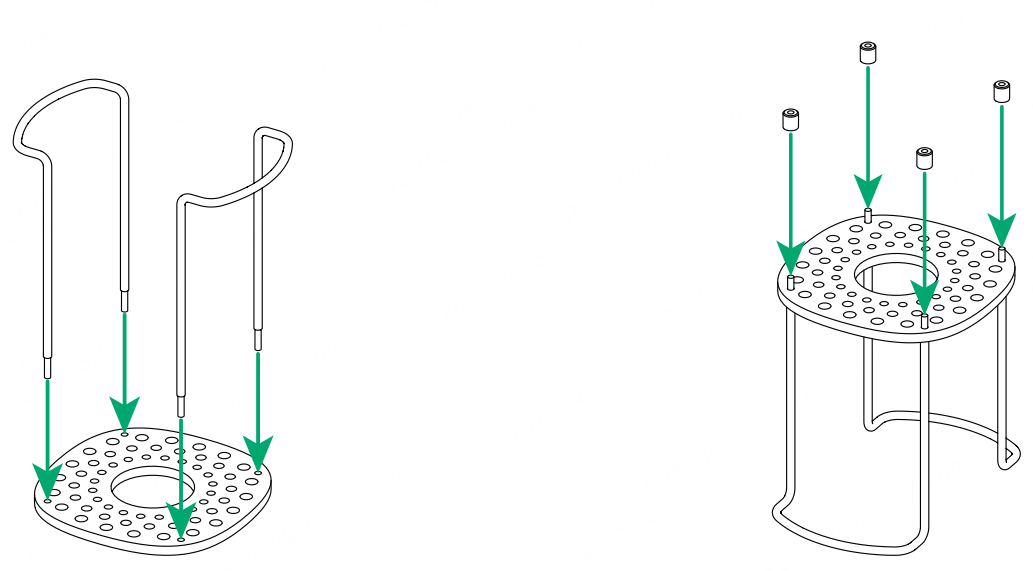
Step 3: Prepare the base to hold the crystal ball.
Insert the two brackets into the four edge holes on the plate and then tighten the four thumb screws to secure the base.
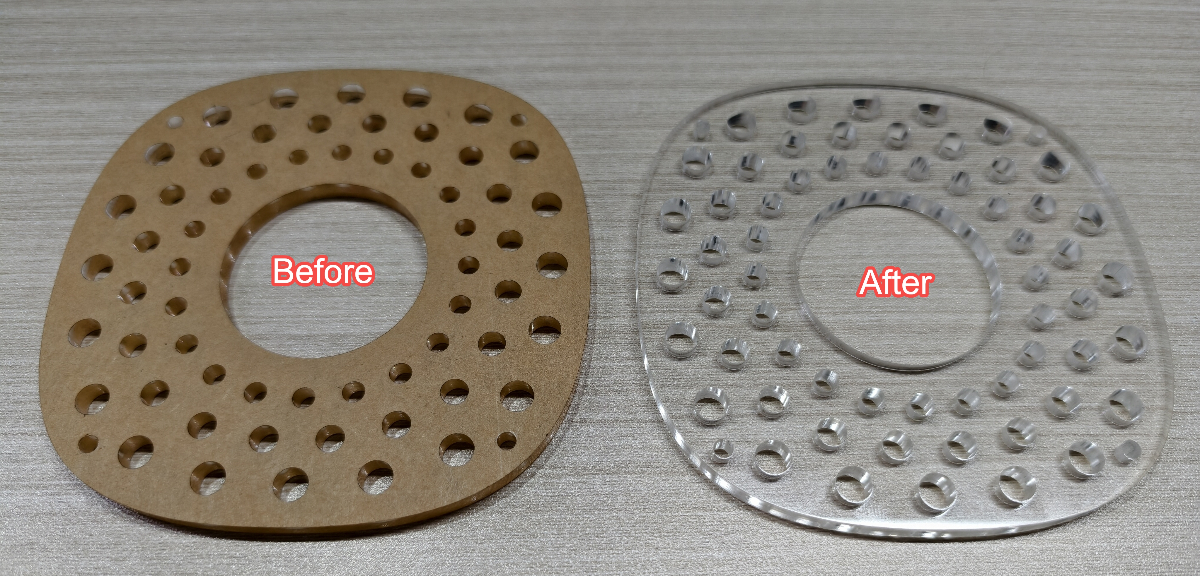
Note: The protective films on both sides of the plate can be peeled off.
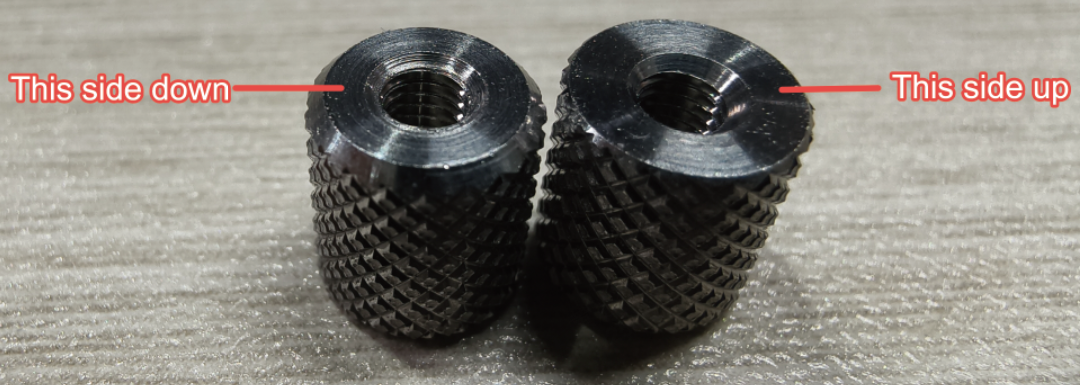
Note: The recommended installation orientation of the thumb screws is as shown below.
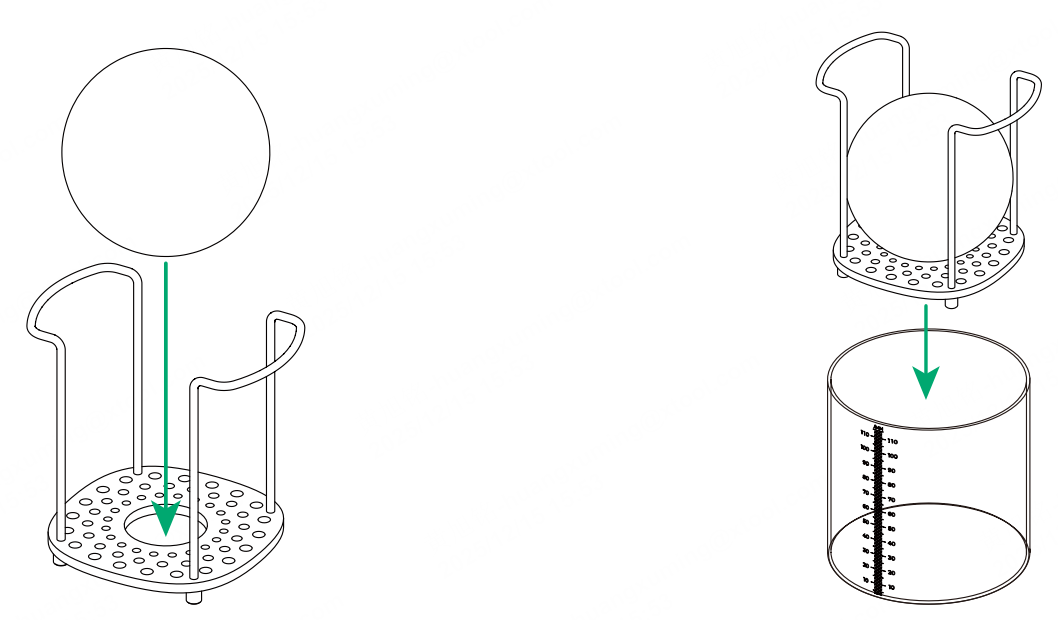
Step 4: Place the crystal ball and the stand holding the crystal ball into position.
Step 5: Peel off the backing of the anti-slip grip and attach it to the surface of the glass cup.
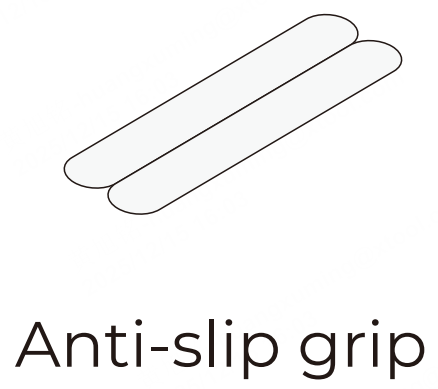
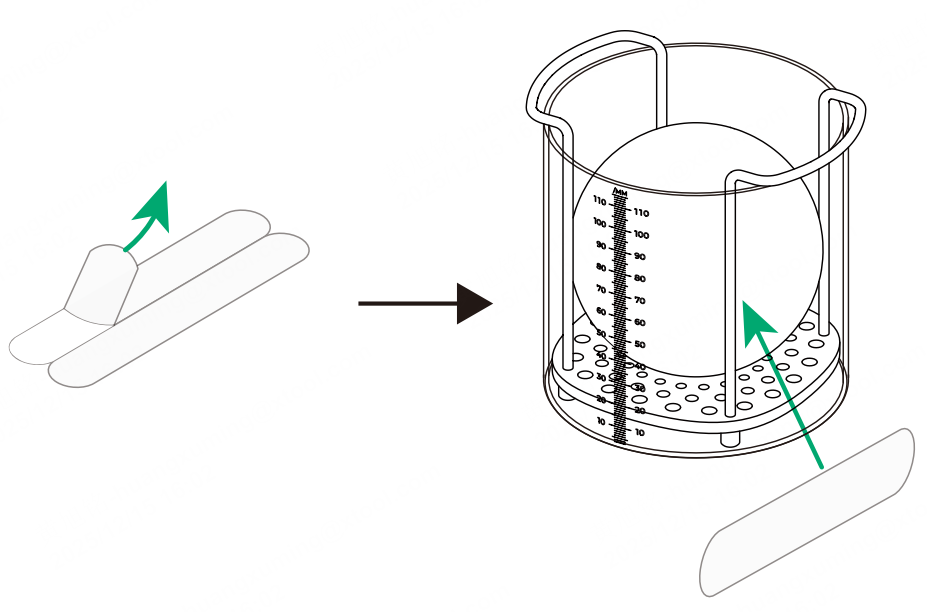
Note: Attach the anti-slip grip to the areas you will touch when removing the cup after completing inner engraving.
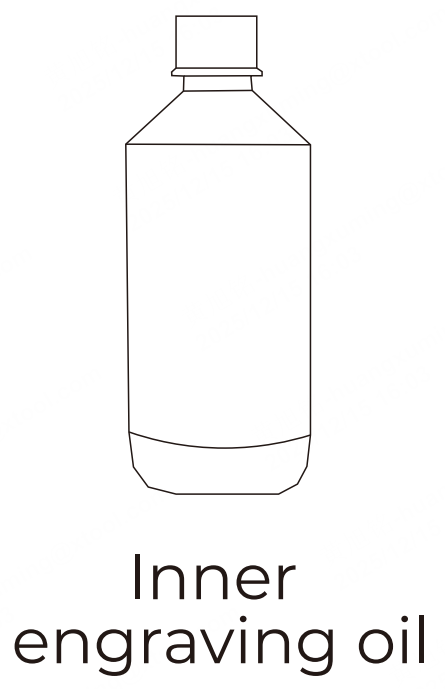
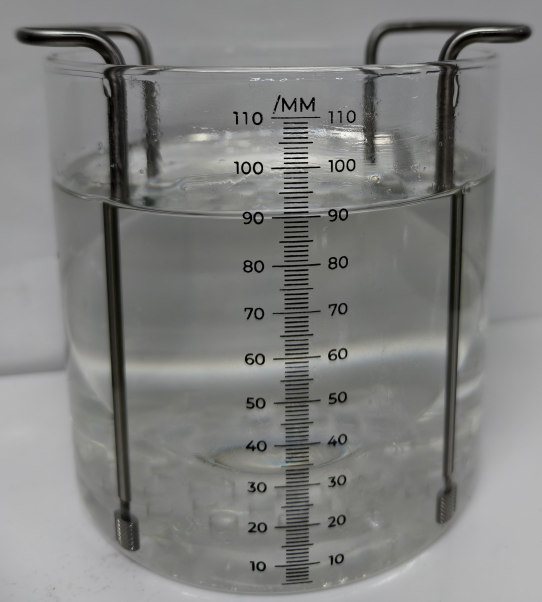
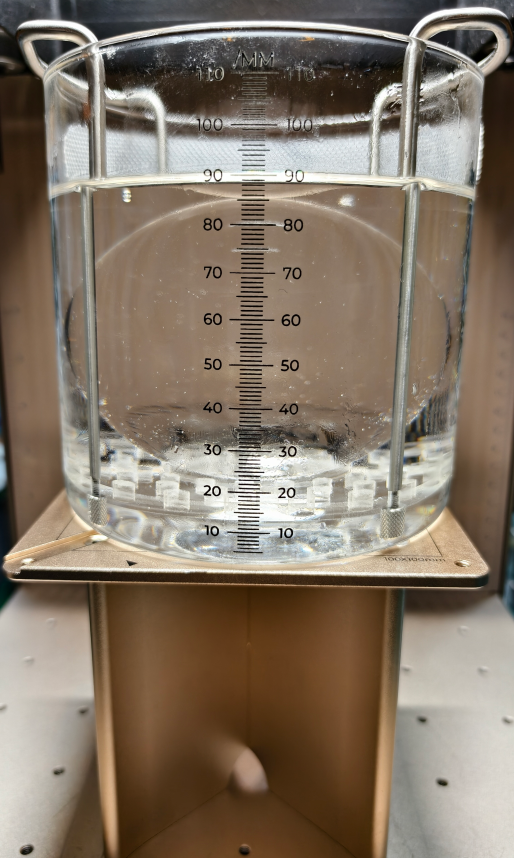
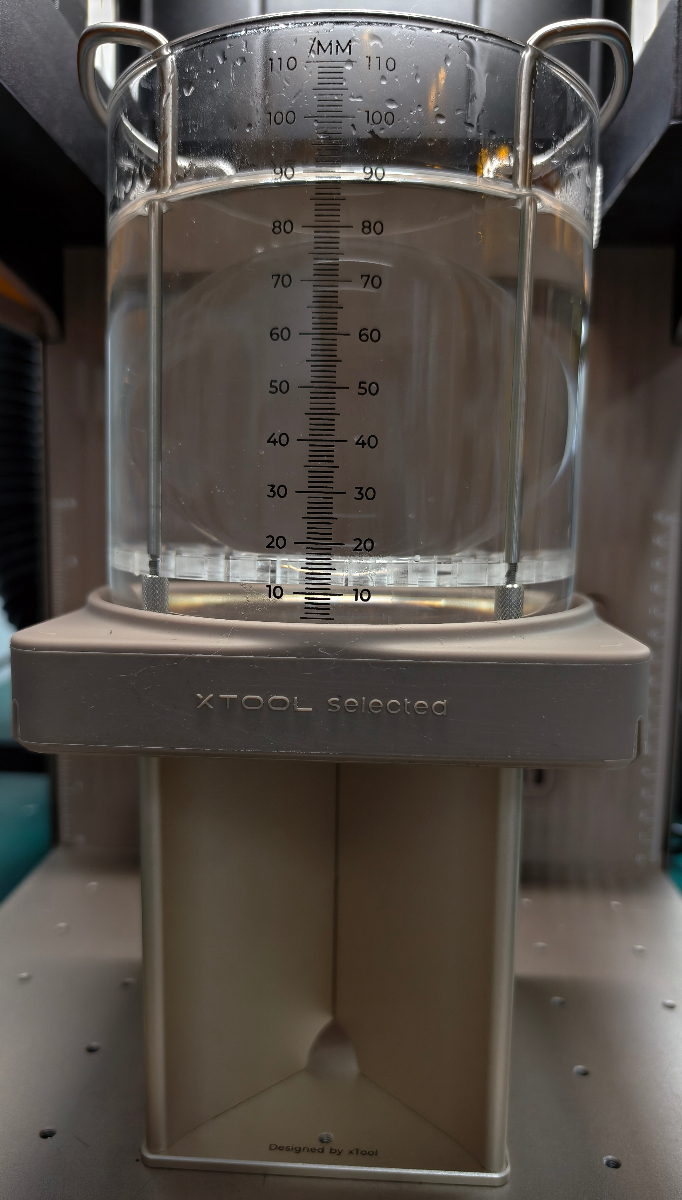
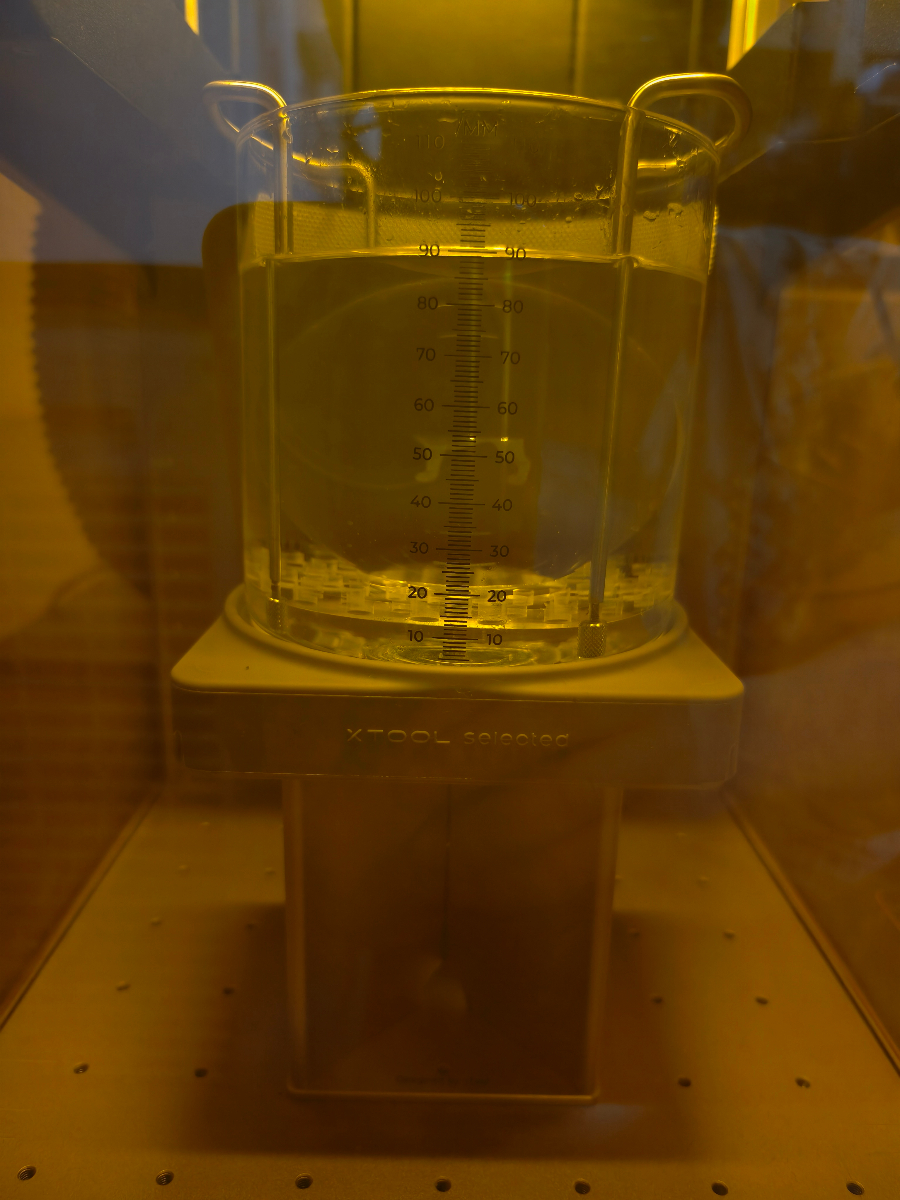
Step 6: Pour the inner engraving oil into the glass cup.
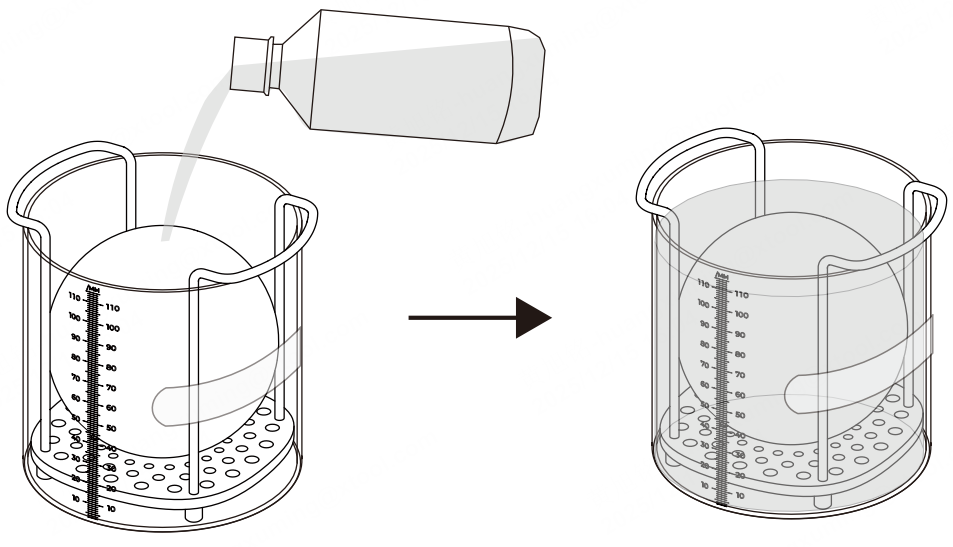
Ensure that the crystal ball is fully submerged in the inner engraving oil, and that the oil level is 2 mm above the crystal ball.
If you purchase and use our K9 Crystal Ball Inner Engraved Kit, the height of the inner engraving oil will be approximately 90 mm.
The inner engraving oil must have the following characteristics: a refractive index close to that of glass, high transmittance, non-toxic and harmless properties, and ease of handling. Based on the refractive index, glycerin, liquid paraffin, and benzyl alcohol (mildly toxic) are suitable options for inner engraving oil. The refractive indices of glycerin, liquid paraffin, and benzyl alcohol are 1.473, 1.467-1.478, and 1.538, respectively.
Step 7: Press the power button to turn off F2 Ultra UV.
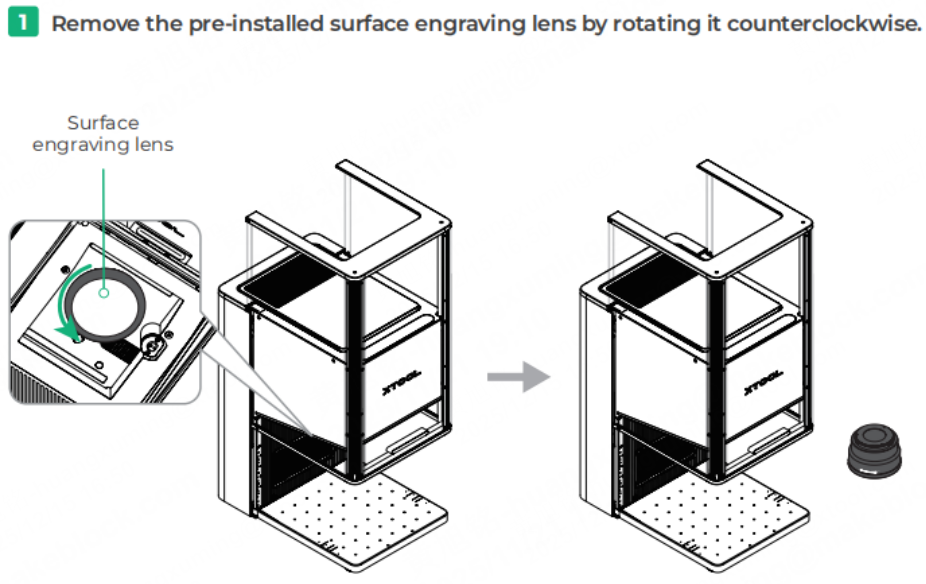
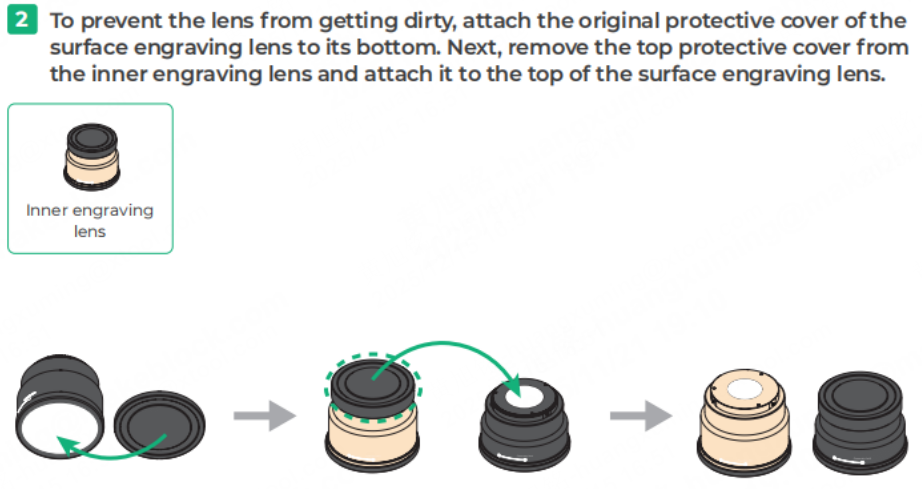
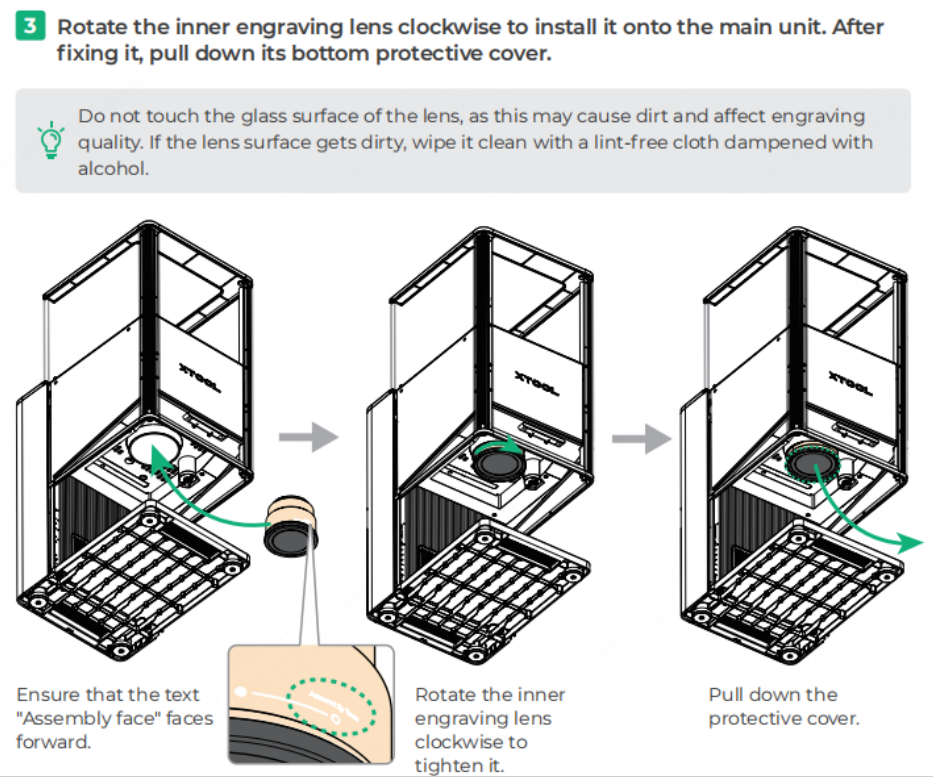
Step 8: Replace the filed lens.
Note: The inner engraving lens comes in several color versions, and the exact color depends on the product you receive.
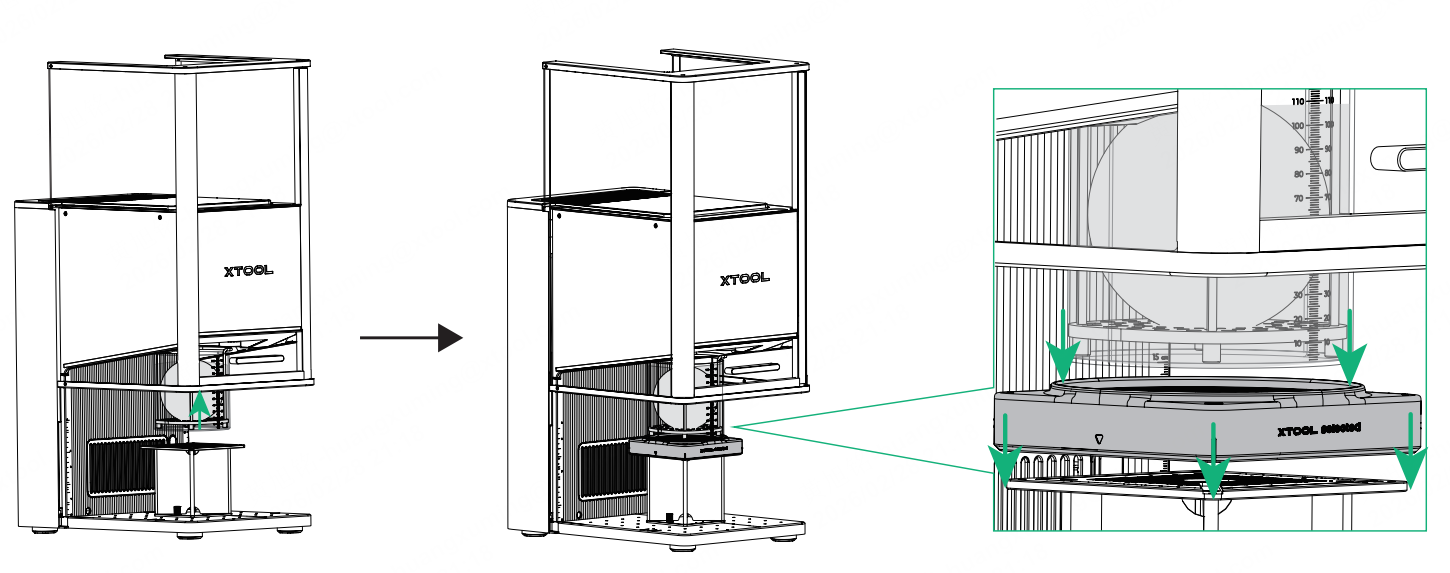
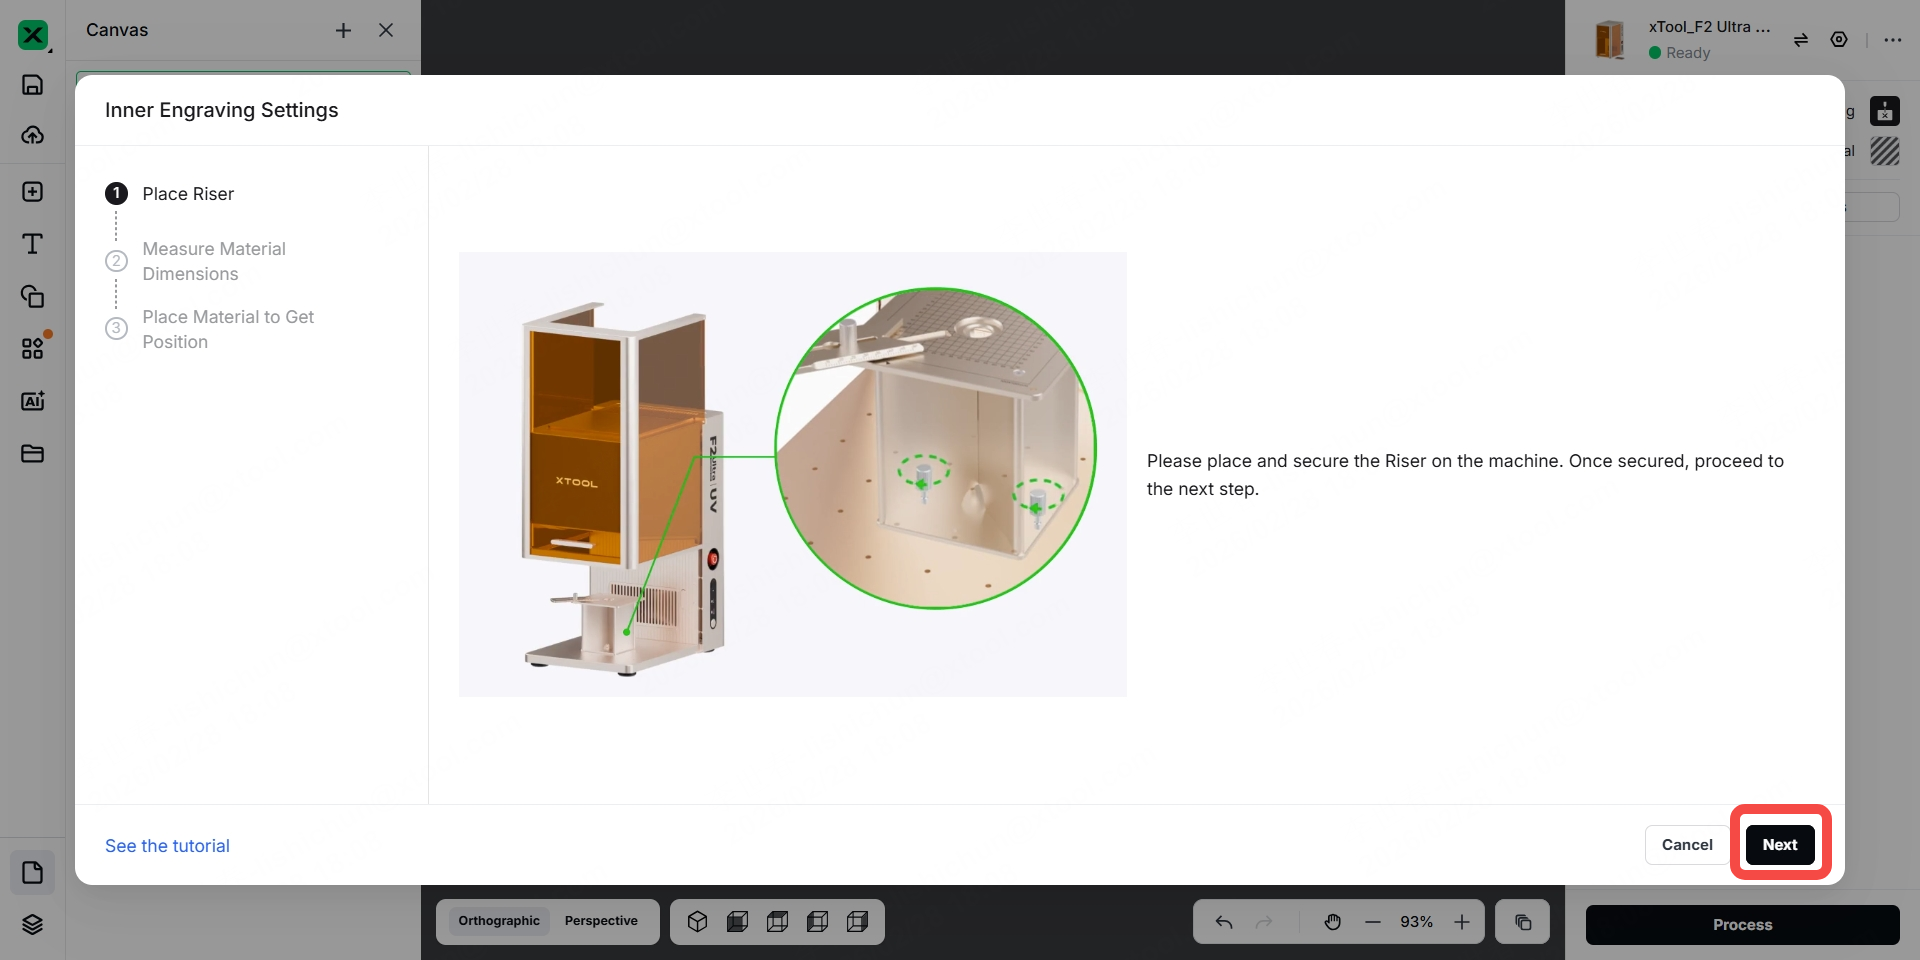
Step 9: Install the riser onto the baseplate of F2 Ultra UV.
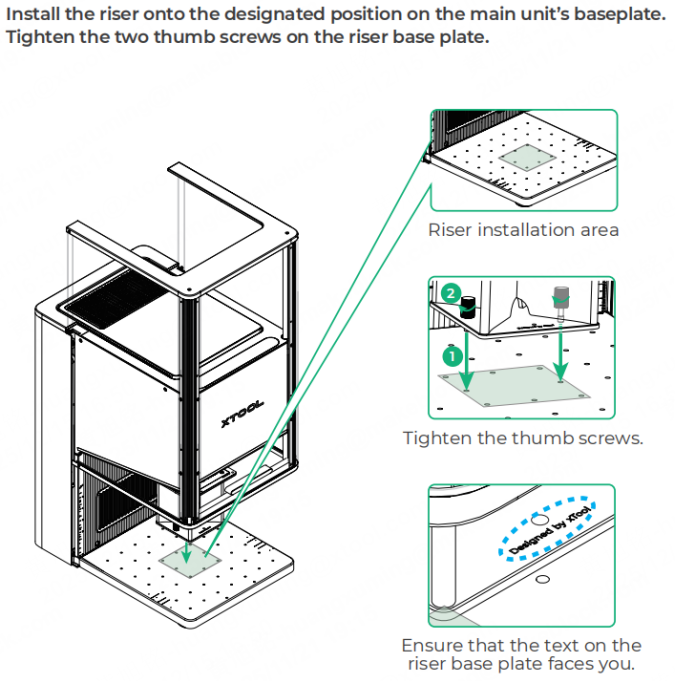
Note: The riser can assist in calibrating the device's laser and help determine the position for software modeling.
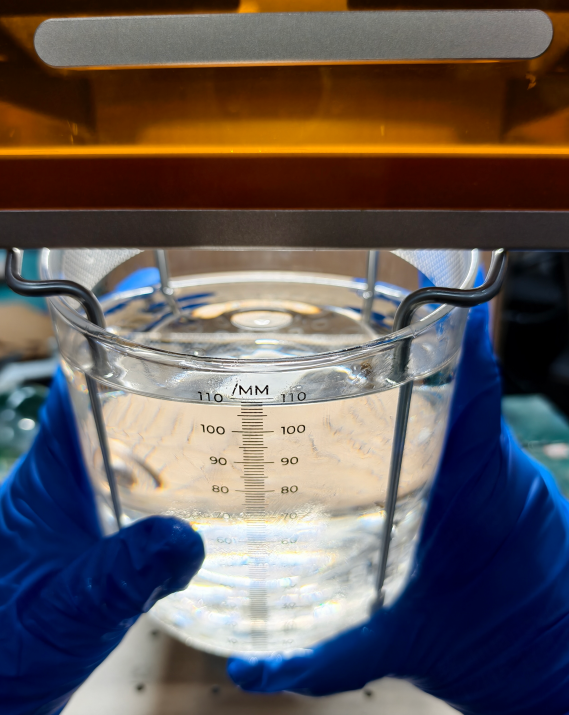
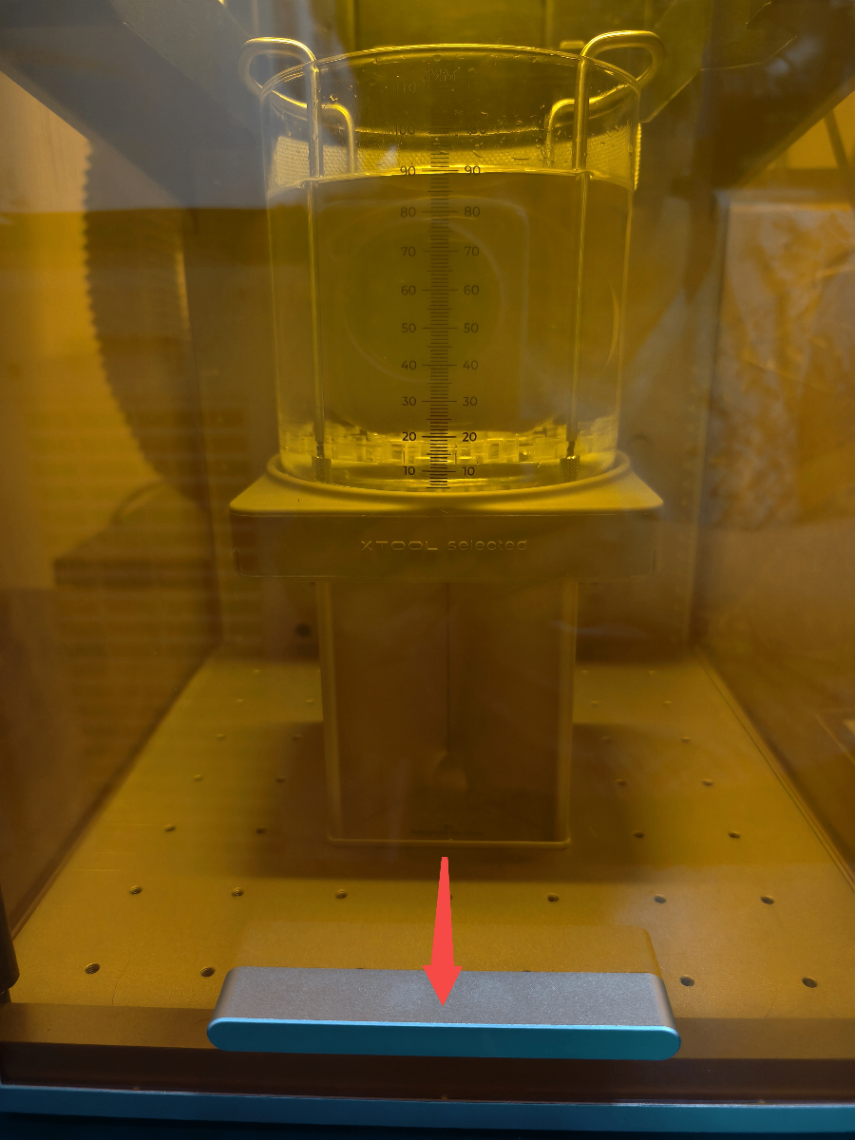
Step 10: Place the glass cup holding the inner engraving oil, crystal ball and its base onto the riser, in the center of the riser top plate.
Note: Before placing the glass cup on the riser top plate, please check whether there are bubbles in the inner engraving oil above the crystal ball. If bubbles are present, allow the inner engraving oil to sit for a few minutes until the bubbles dissipate before placing the glass cup; otherwise, it may compromise the engraving quality.
Note: When placing the glass cup onto the riser, tilt the glass cup toward yourself as shown in the photo. Be sure to handle it slowly, as the inner engraving oil may spill if tilted too quickly.
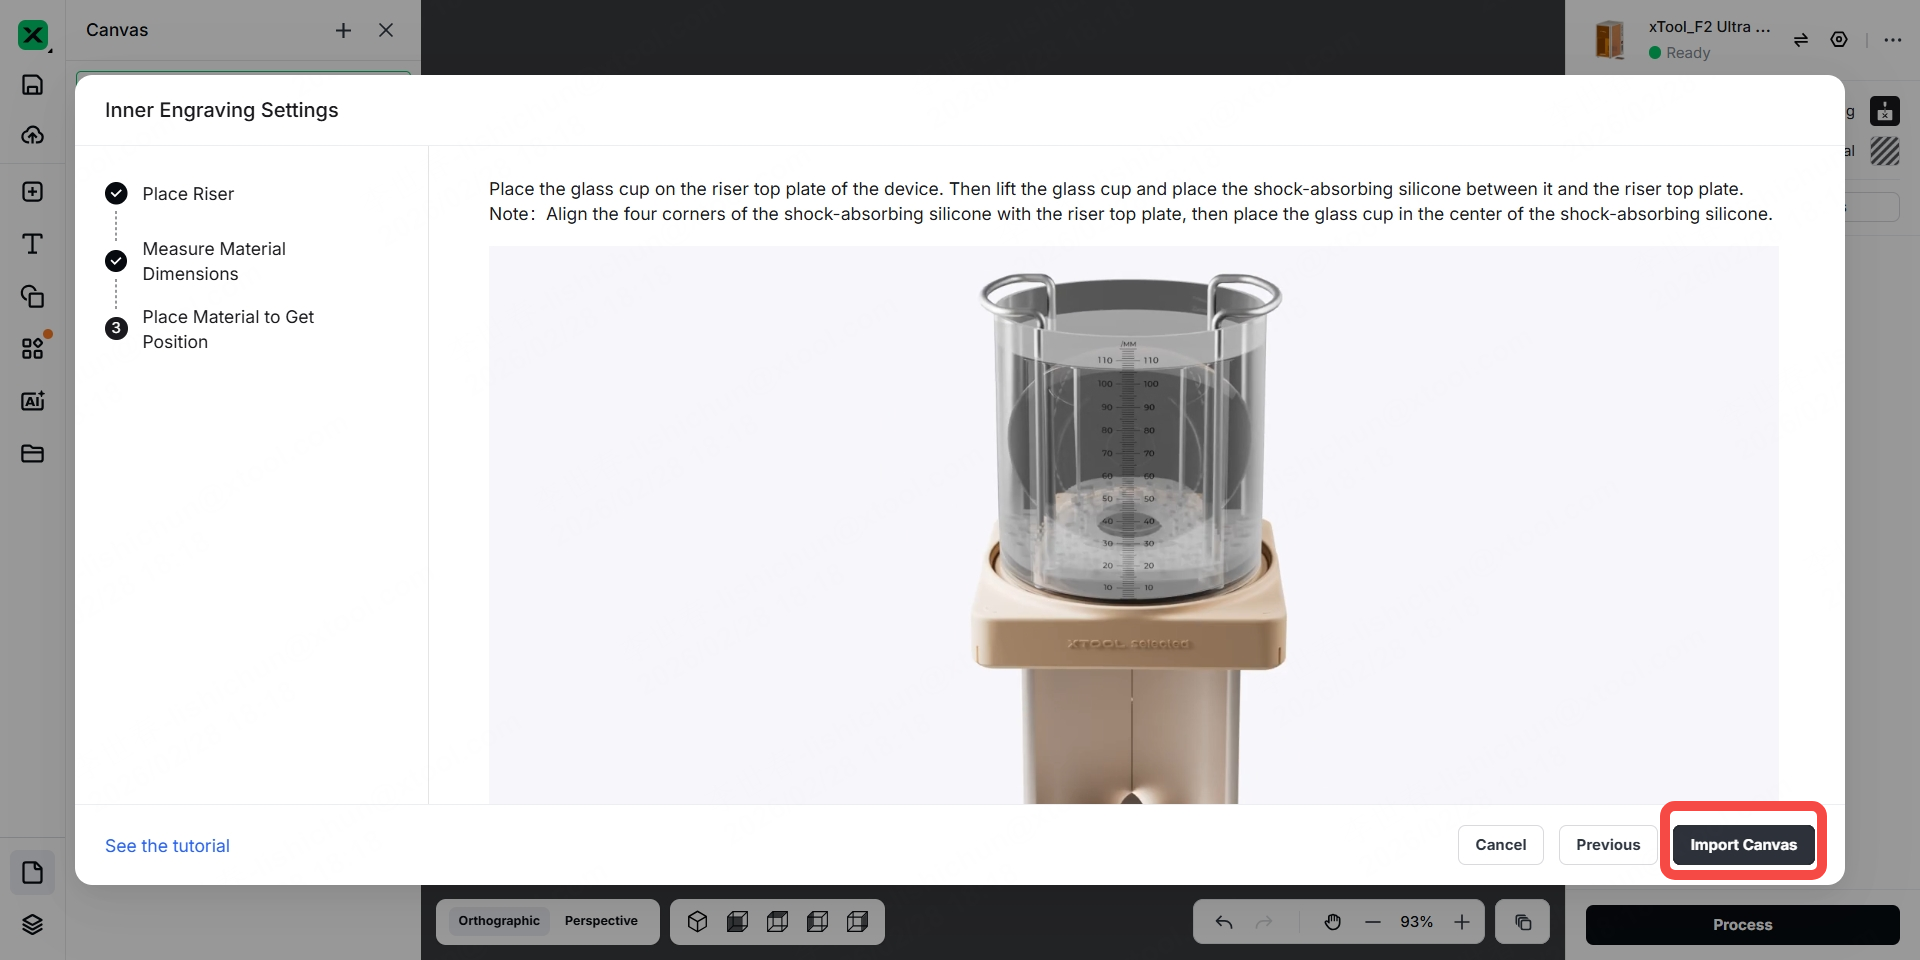
Step 11: Lift the glass cup and place the shock-absorbing silicone between it and the riser top plate.
Note: Align the four corners of the shock-absorbing silicone with the riser top plate, then place the glass cup in the center of the shock-absorbing silicone.
To prevent the inner engraving oil from shaking during the engraving process and affecting the engraving results, please try to carry out the work on a stable table.
Step 12: Press the power button to turn on F2 Ultra UV.
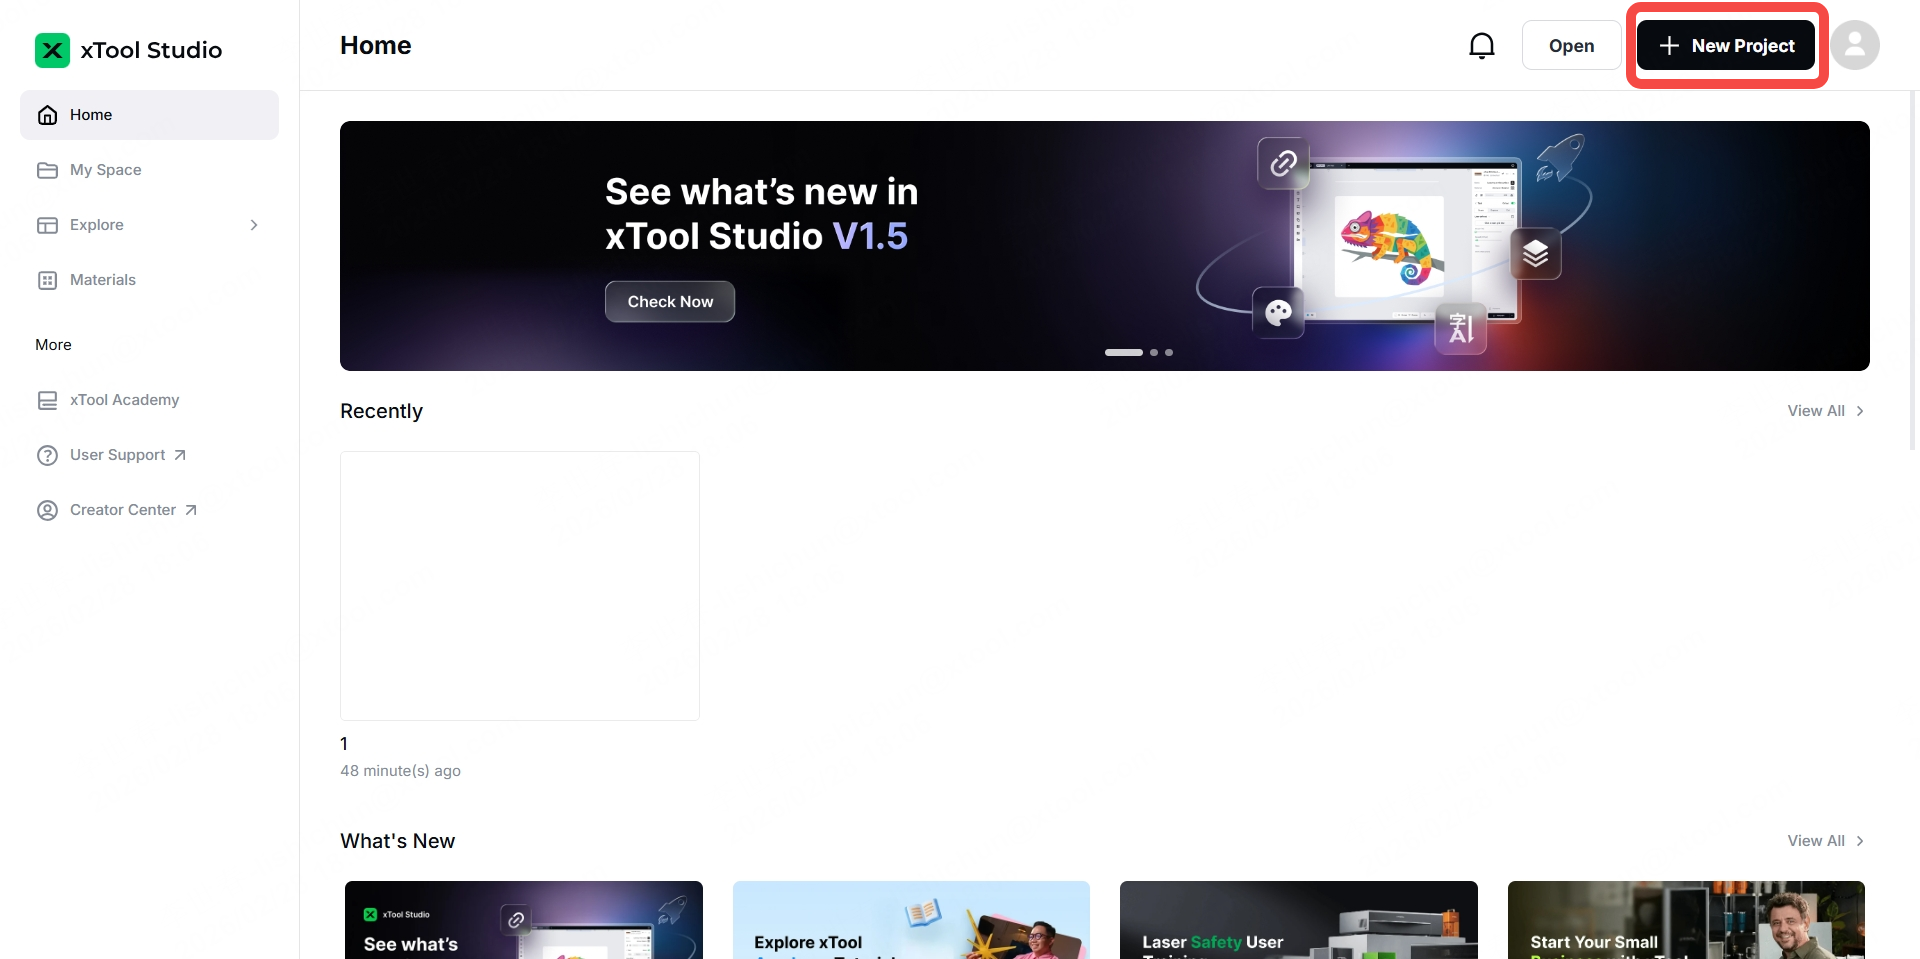
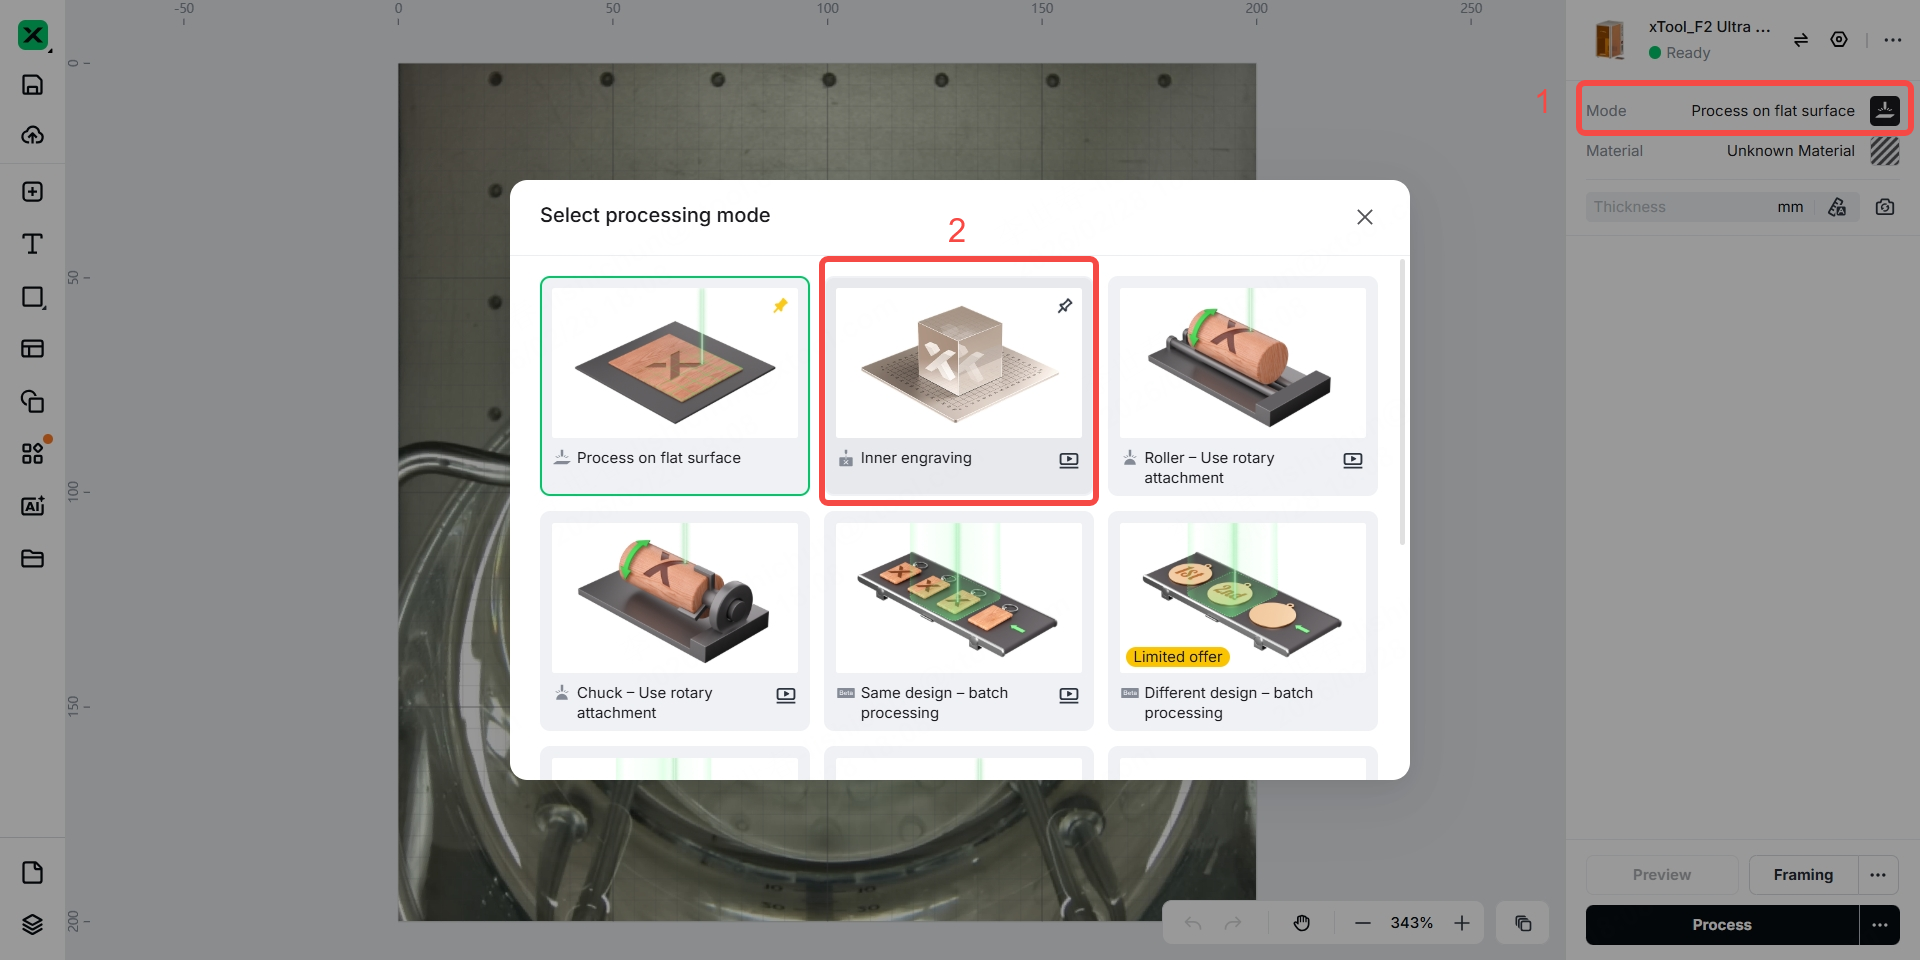
Step 13: Open xTool Studio, click "+ New Project", connect your F2 Ultra UV in the software, and set the mode to “Inner Engraving”.
Step 14: Ensure the riser is secured on the baseplate of F2 Ultra UV with the two thumb screws, then click "Next".
Step 15: Select the ball shape, then enter the diameter of the crystal ball and the height of the inner engraving oil. Next, input the refractive index, and click “Next”.

Note: Keep the preset value of 1.5 for the refractive index if you're using the crystal ball we provide.
Step 16: Click "Import Canvas".
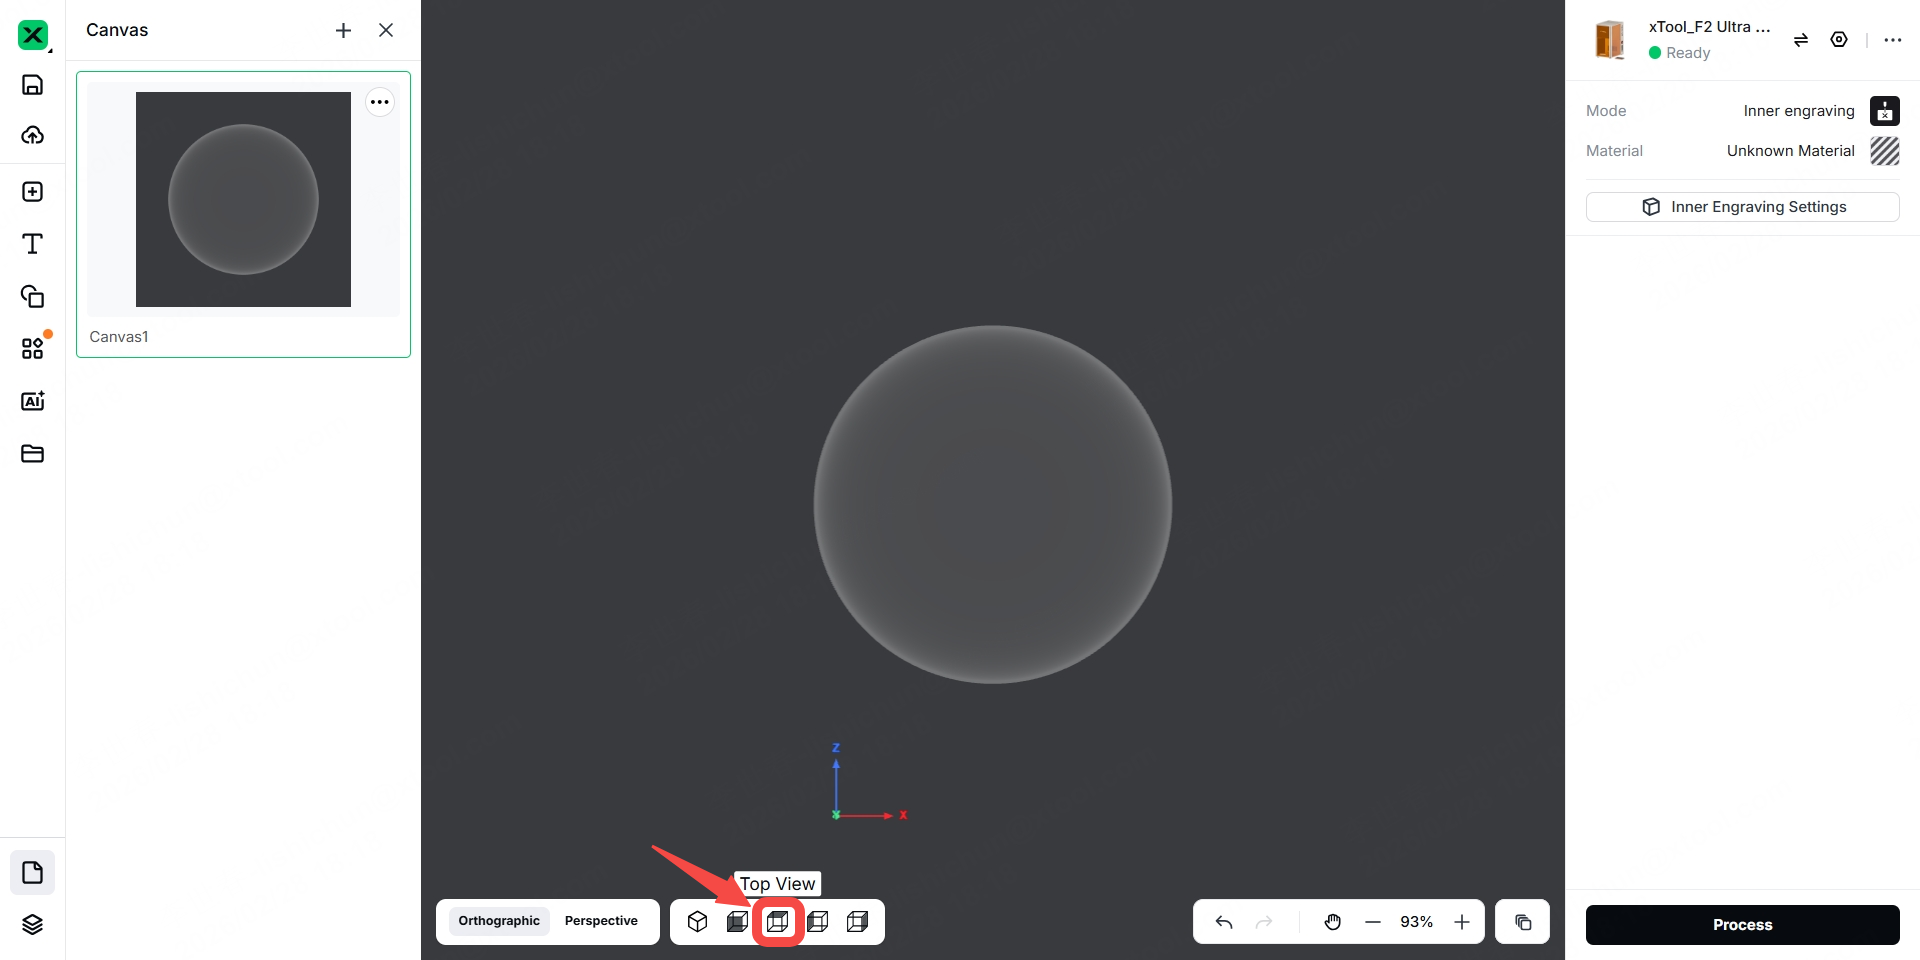
Step 17: Click the "Top View" icon indicated by the arrow. This will show the position of the crystal ball relative to the riser top plate.
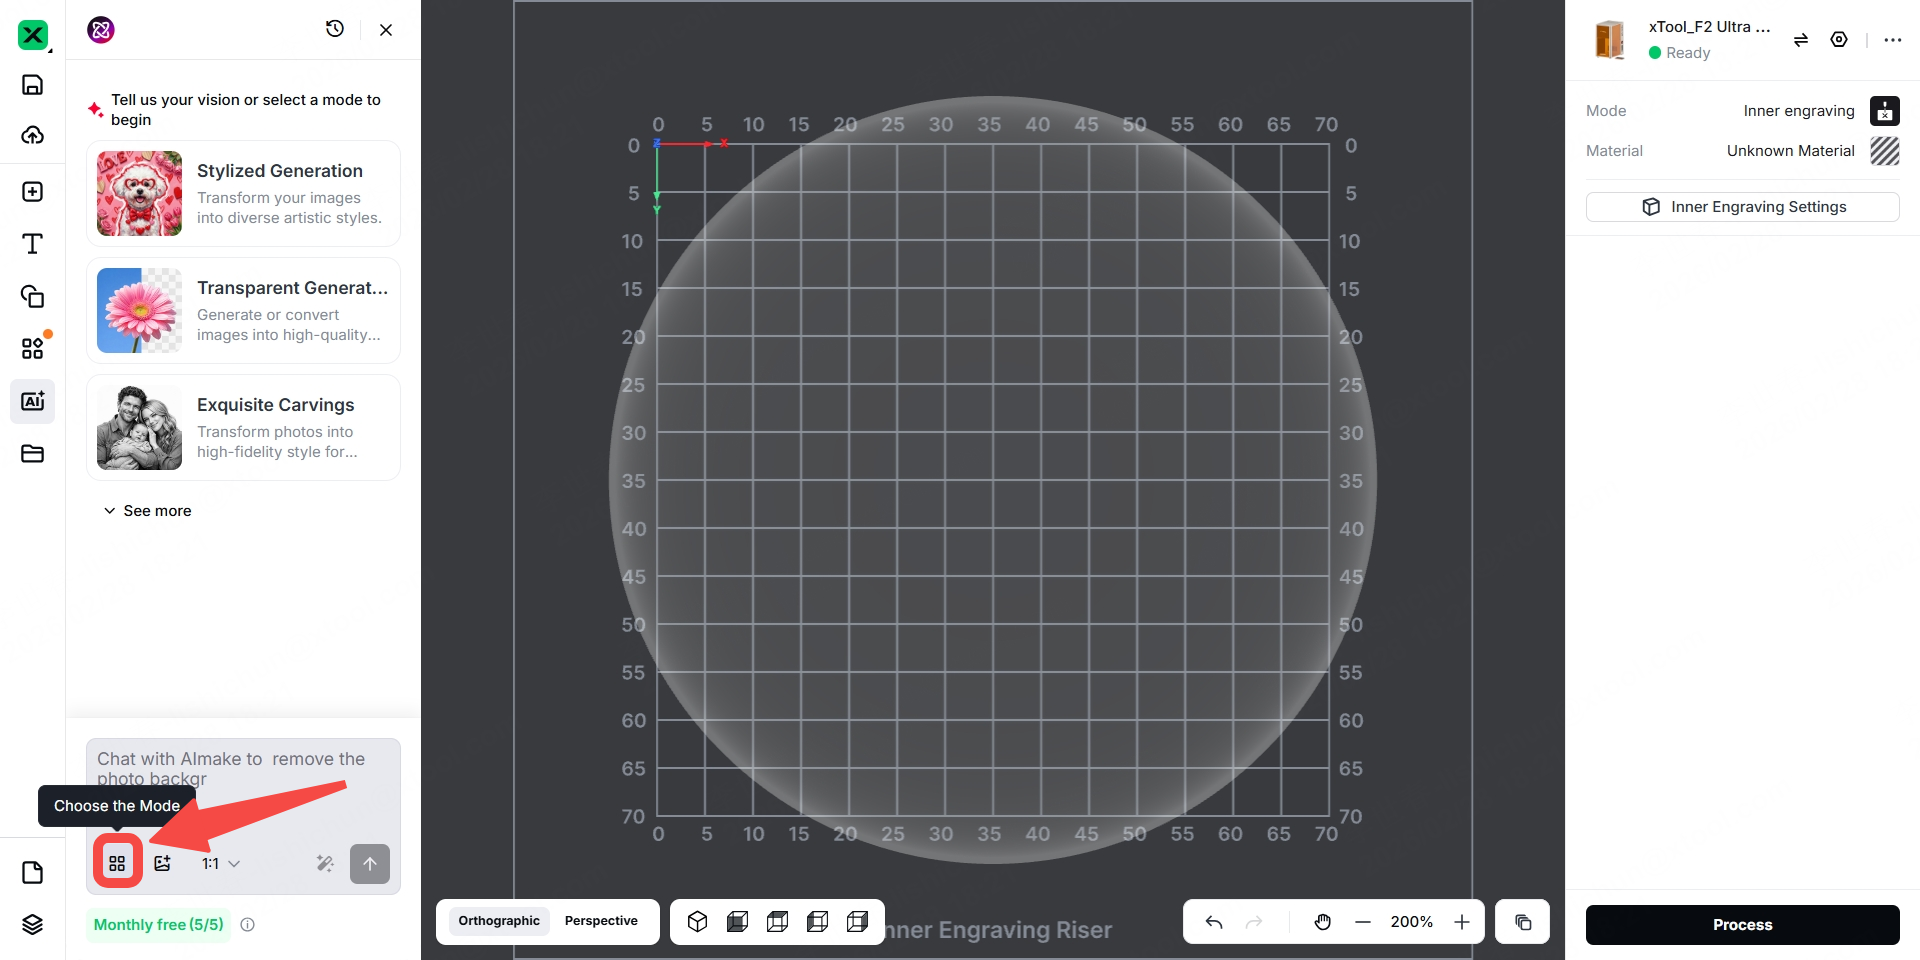
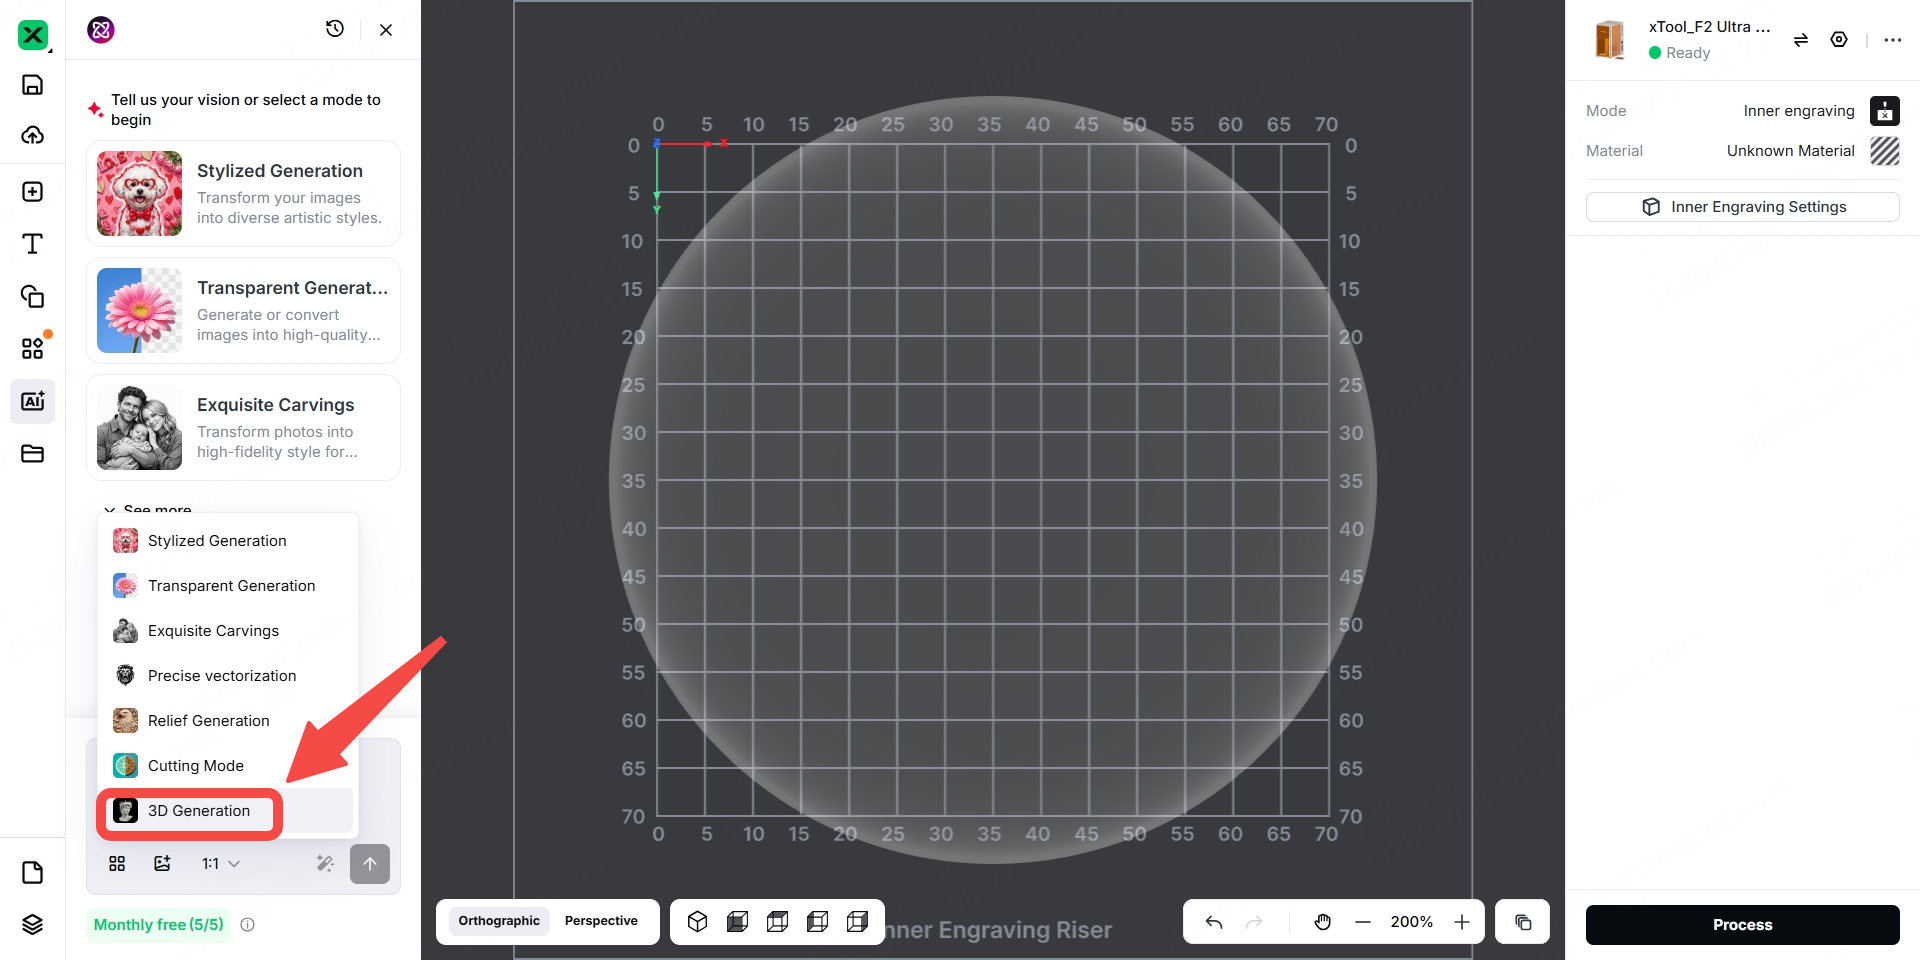
Step 18: Click the “AImake” icon indicated by the arrow.

Step 19: Click the “Choose the Mode” icon indicated by the arrow.
Step 20: Click "3D Generation".
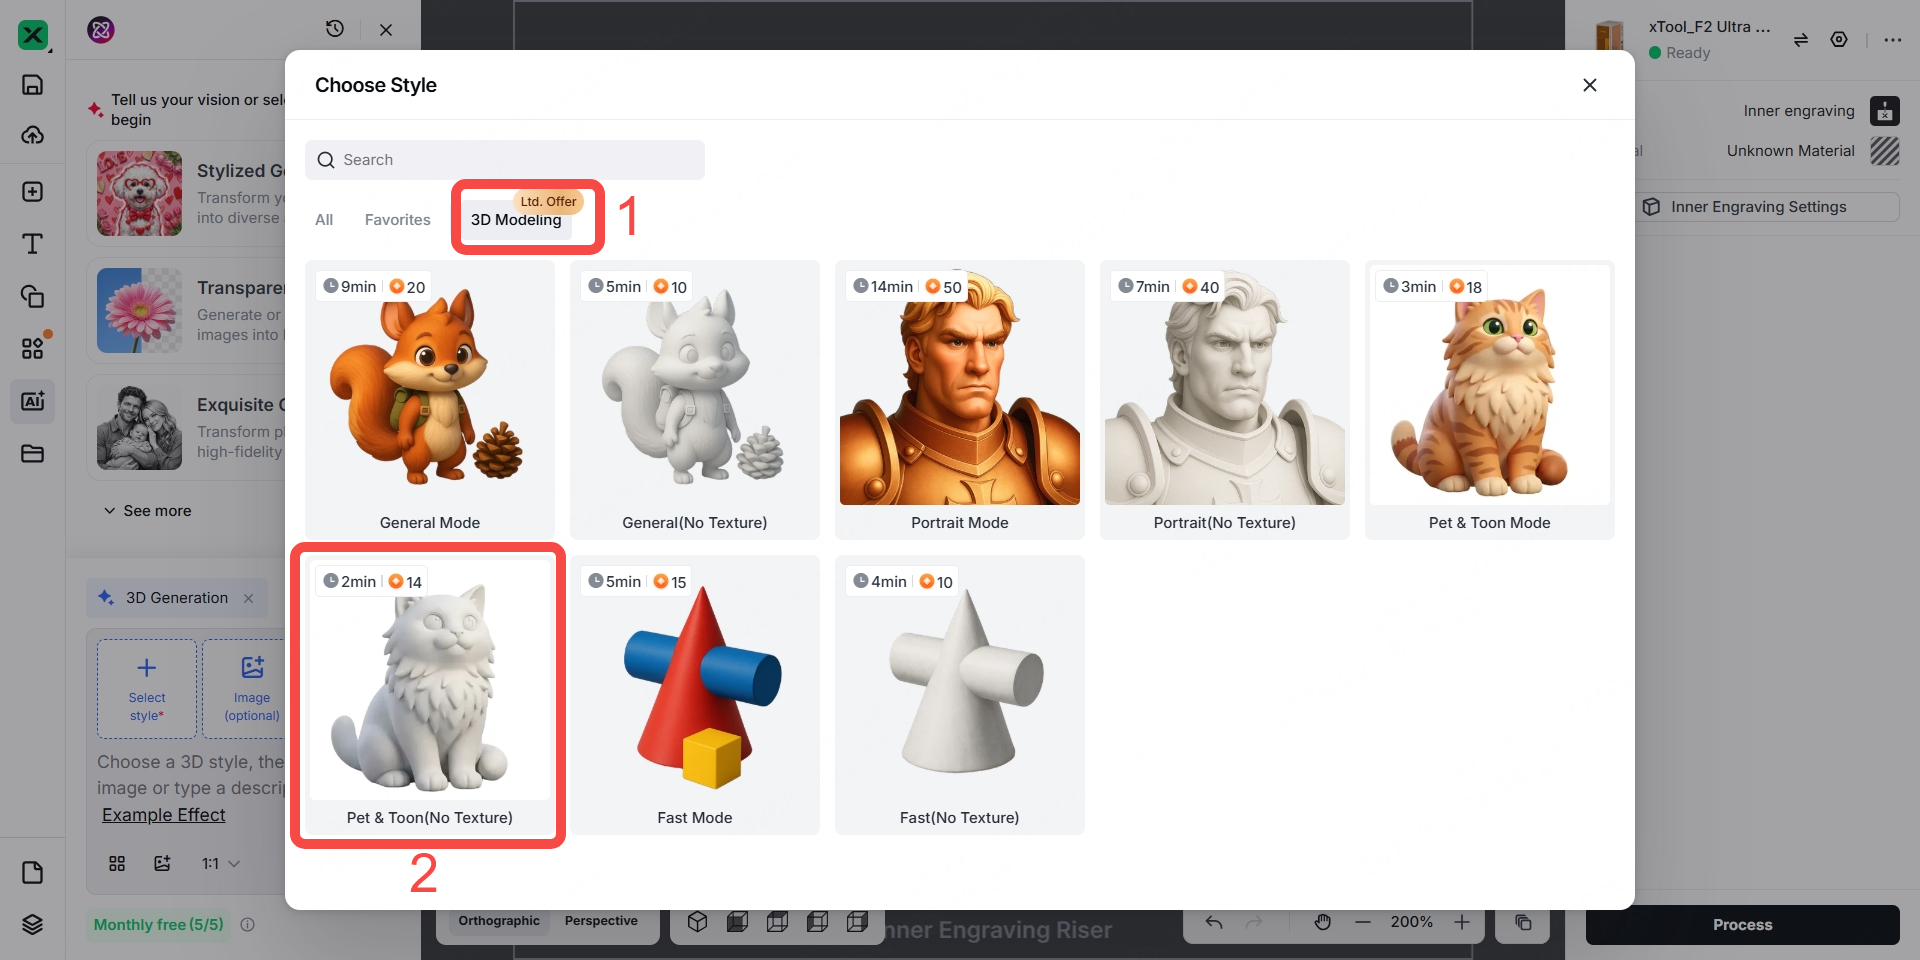
Step 21: Click "3D Modeling". Then, choose a style.
Step 22: Enter a prompt, such as "Generate a dog 3D model". Then, click the up arrow.
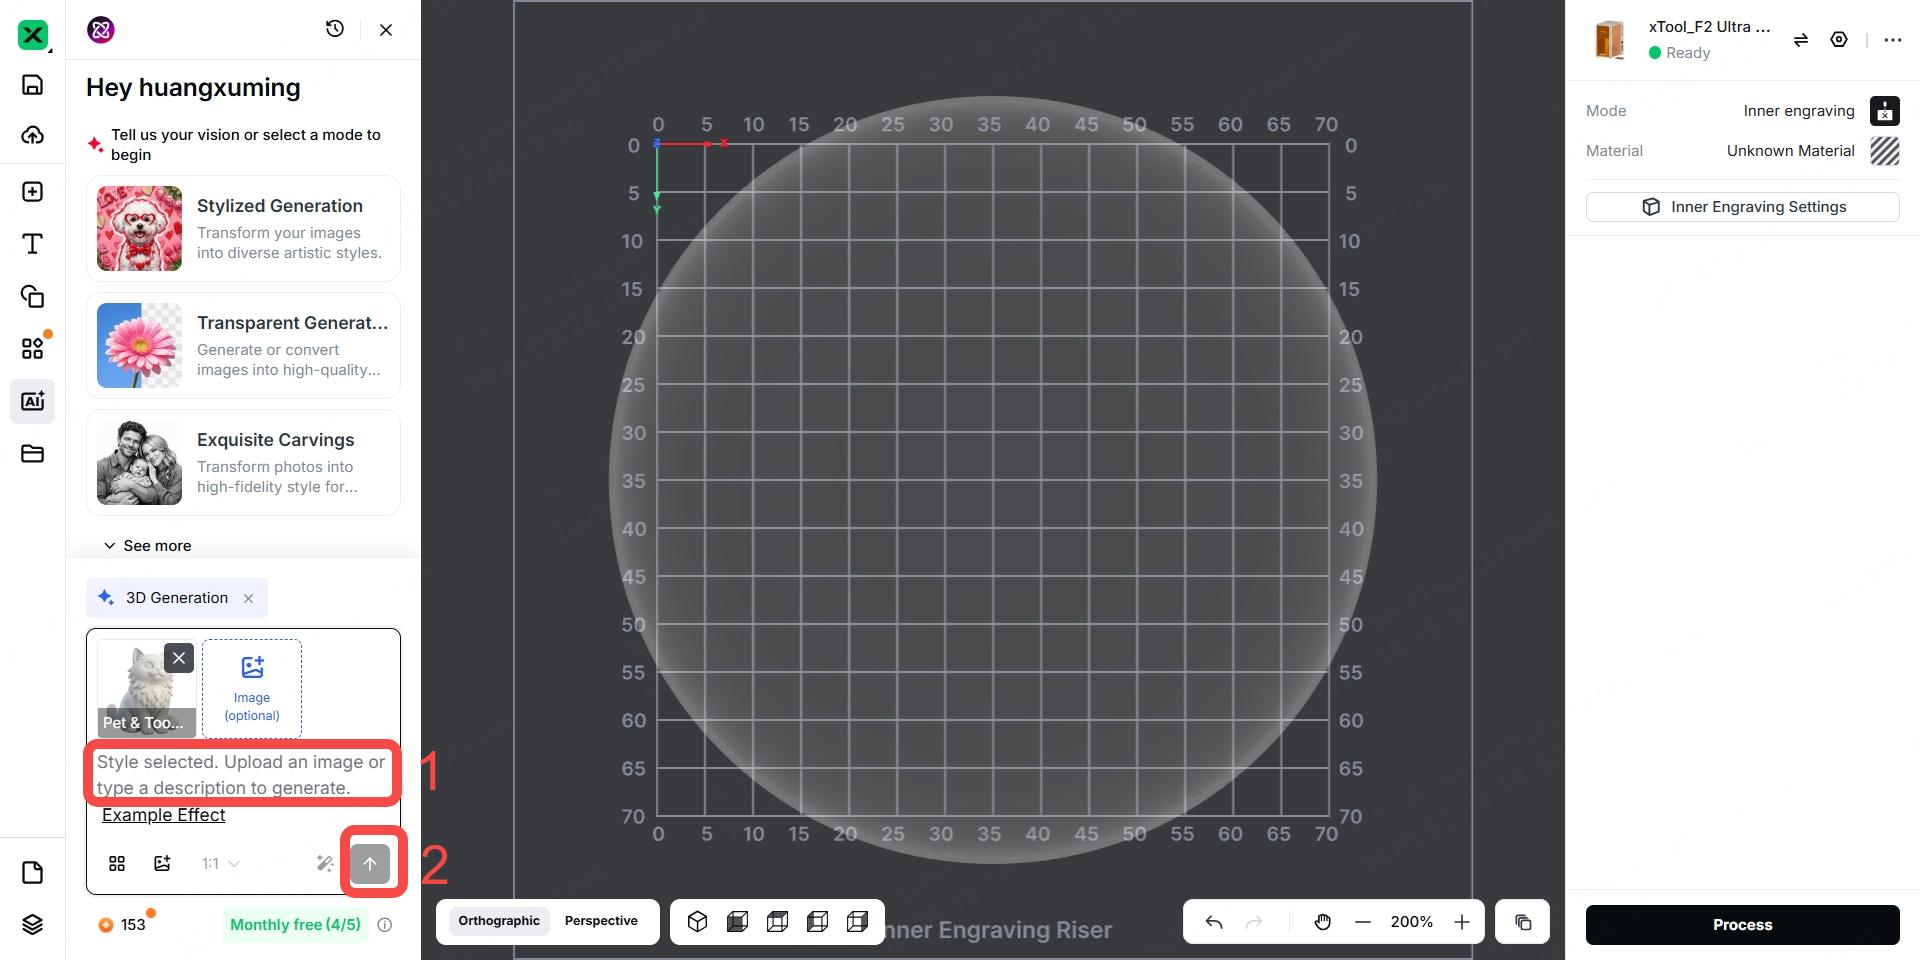
Note: It is recommended to include "3D model" in the prompt.
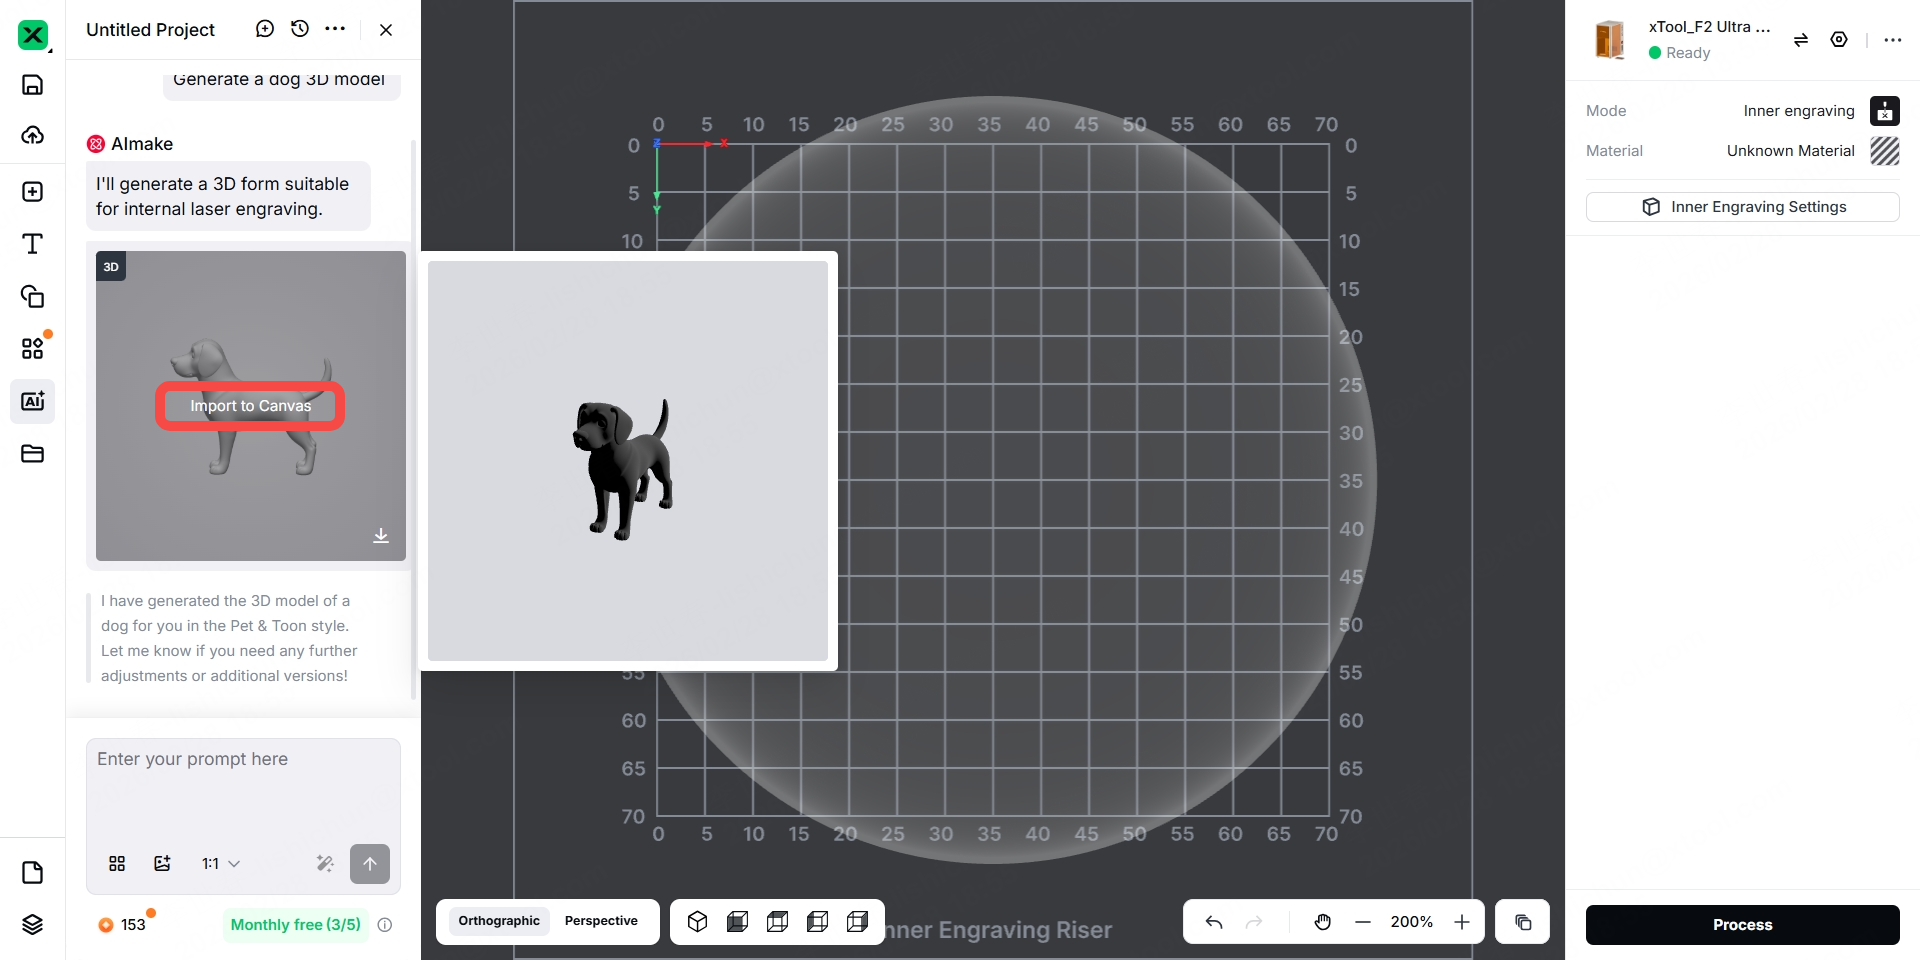
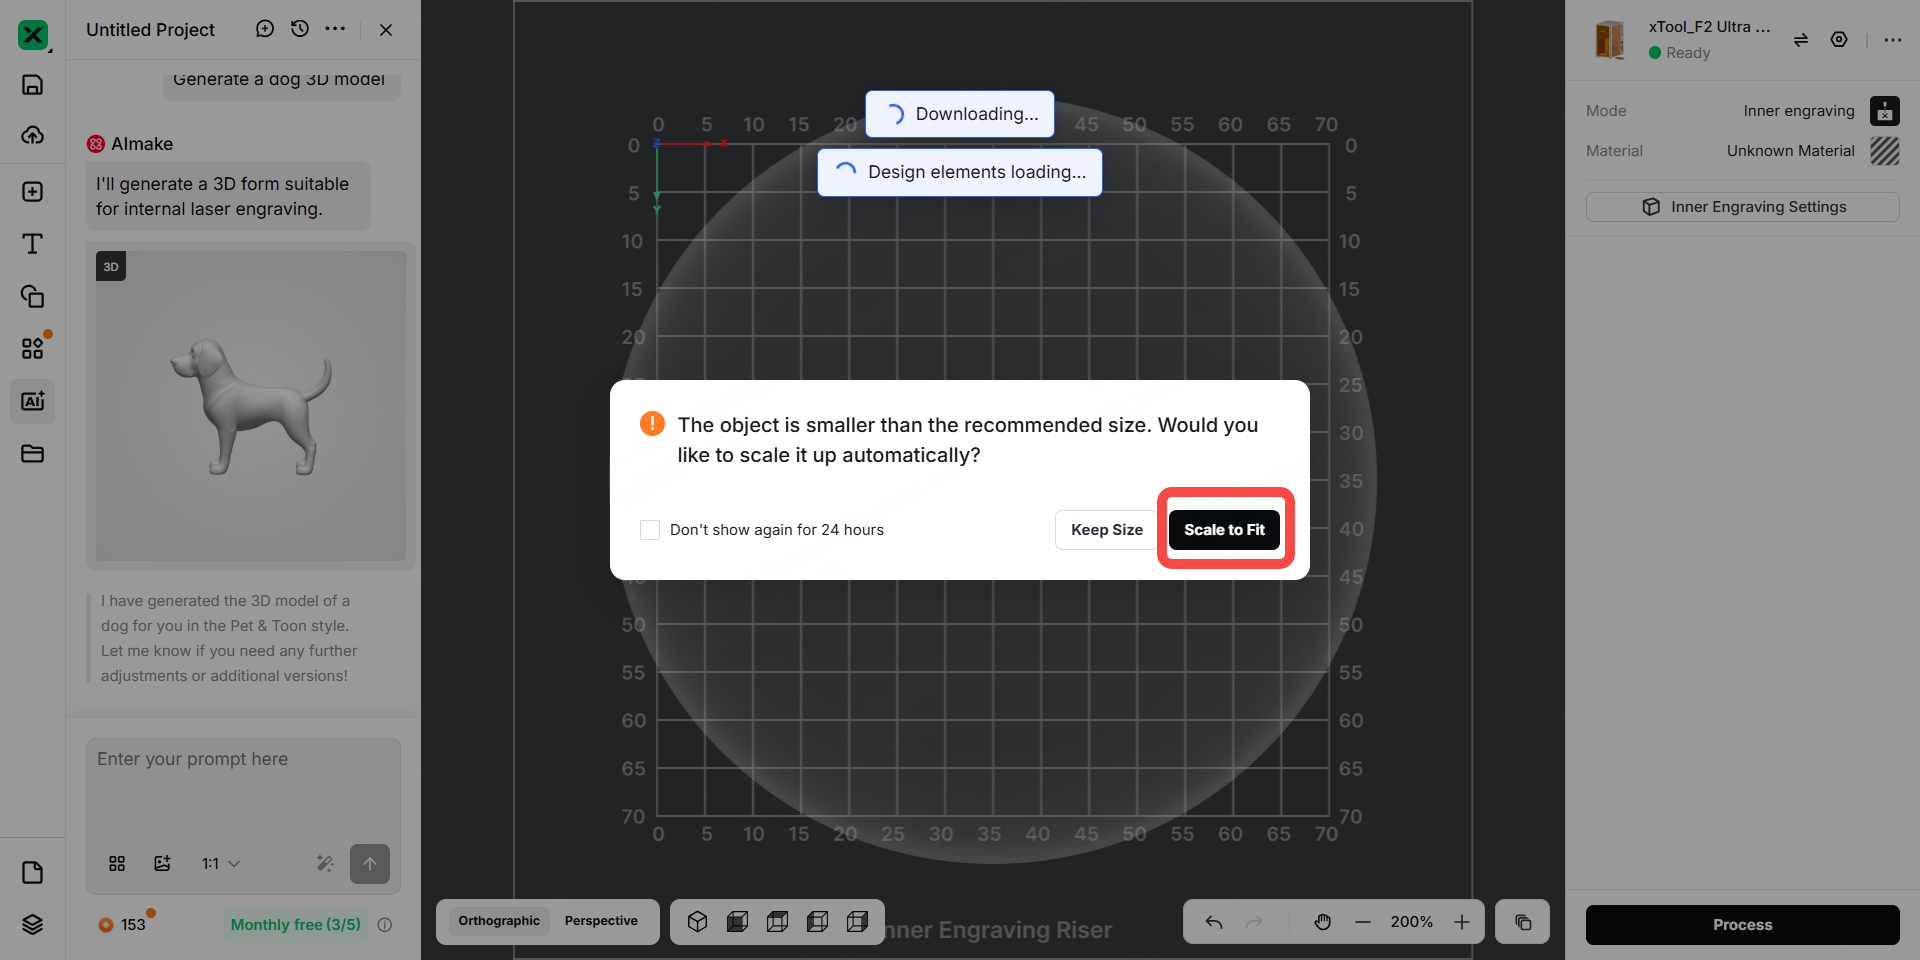
Step 23: Wait for the 3D model to be created. After the 3D model is created, click the 3D model and click "Import to Canvas".
Step 24: Click “Scale to Fit” to adjust the size of the 3D model.
Step 25: Click the "Isometric View" icon to display the following view.
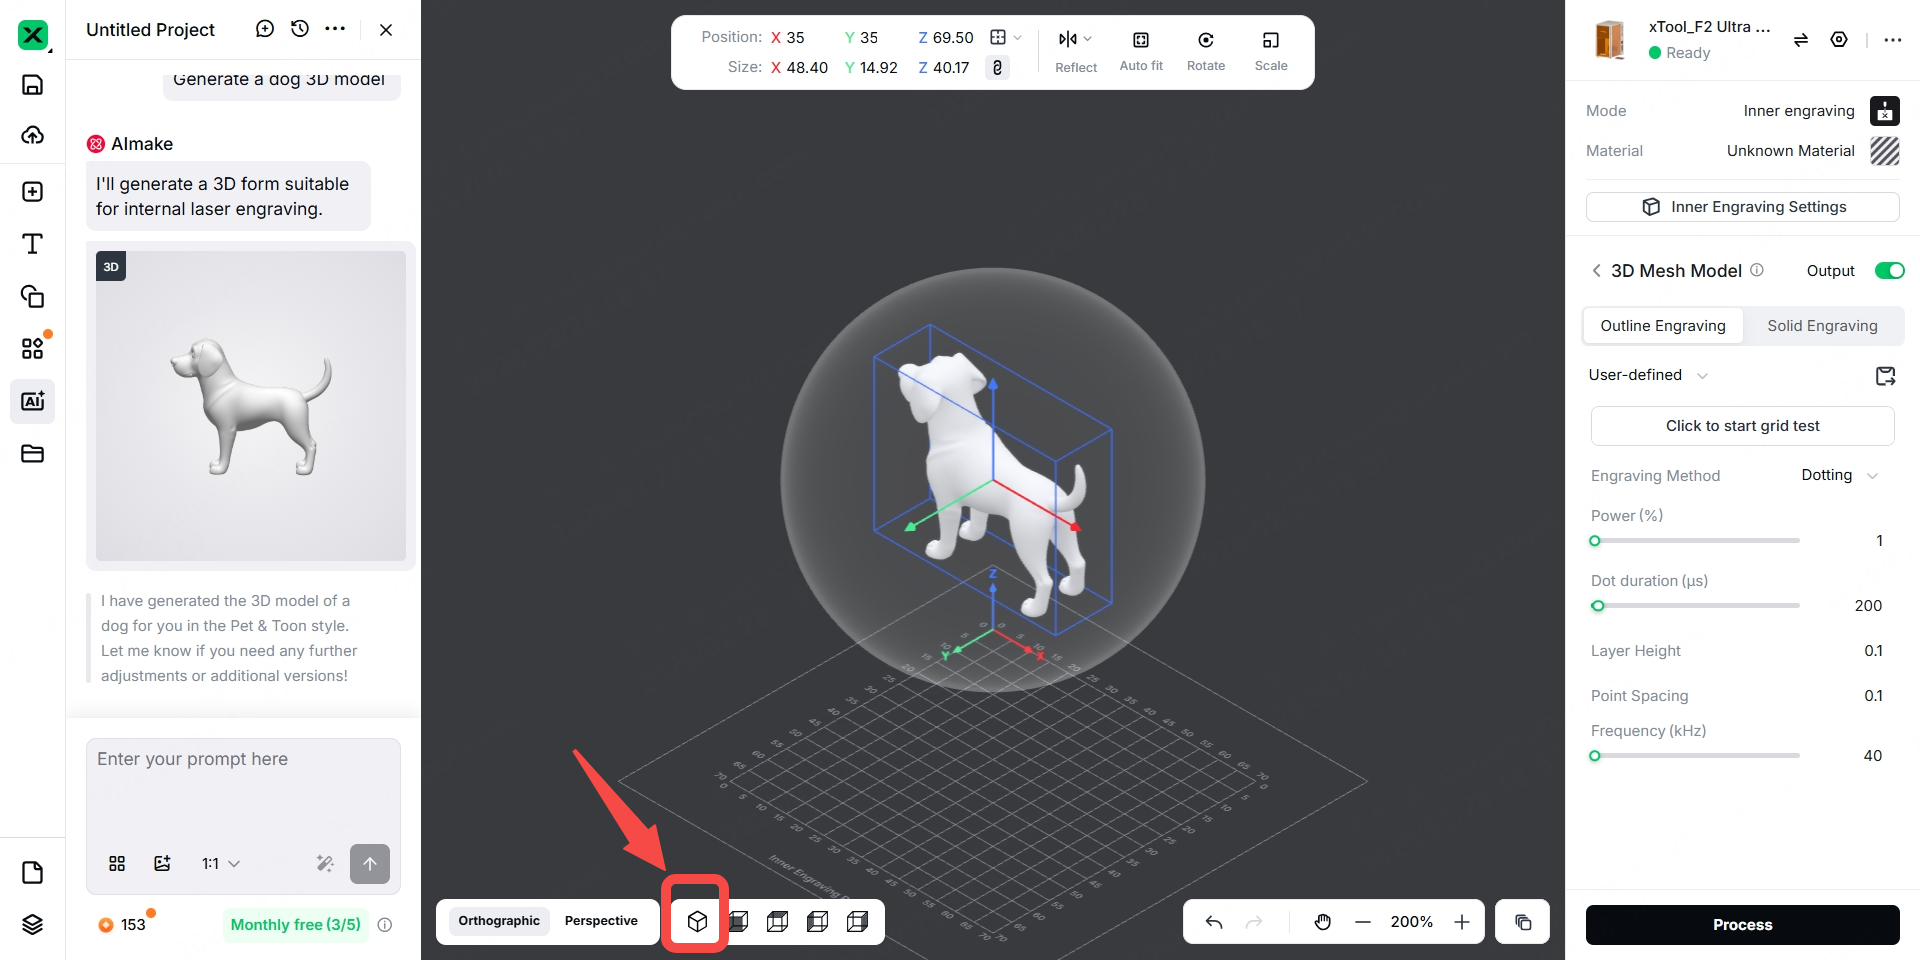
Step 26: Click the dog, and adjust the X-axis value, Y-axis value, or Z-axis value to set its size.
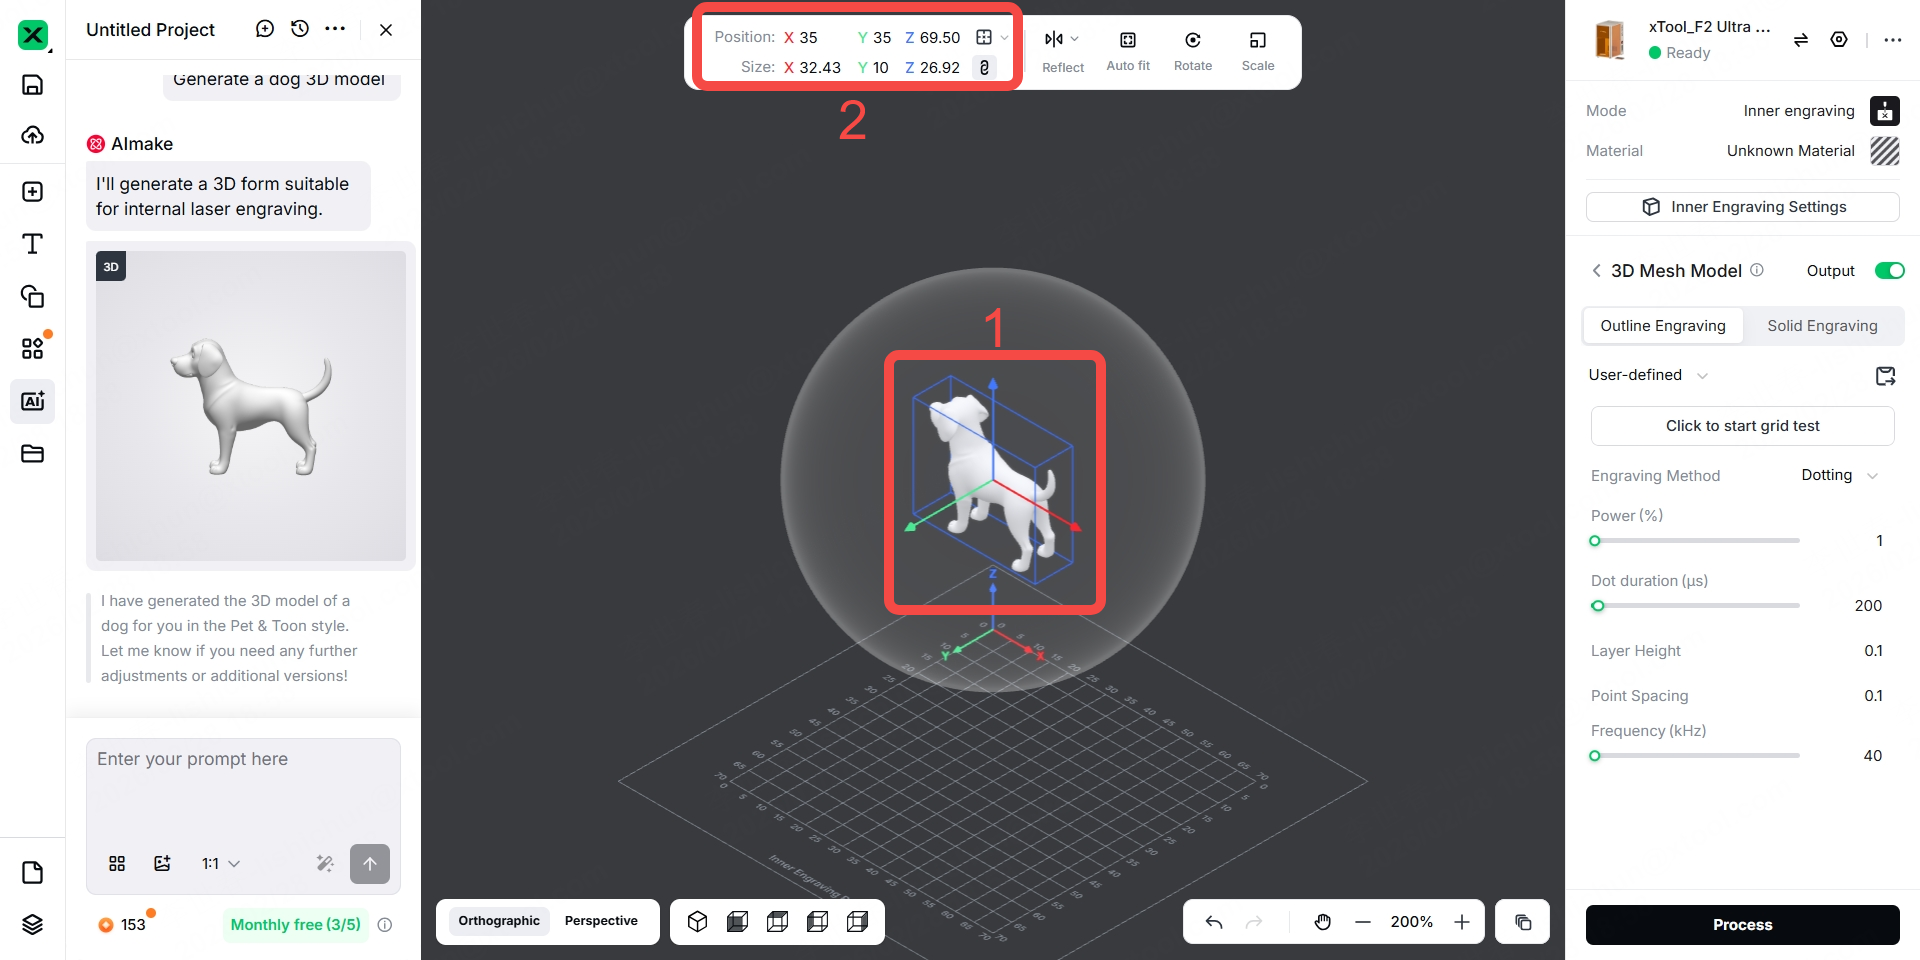
To maintain the proportion of the dog, only set the maximum value among the X-axis, Y-axis, and Z-axis values. It is recommended that this maximum value be smaller than half the diameter of the crystal ball, which should be less than 40 mm. If the maximum value is set too high, parts of the dog may not be engraved in the crystal ball.
To ensure all parts of the 3D model are engraved in the crystal ball, it is recommended to position the 3D model at the center of the crystal ball.
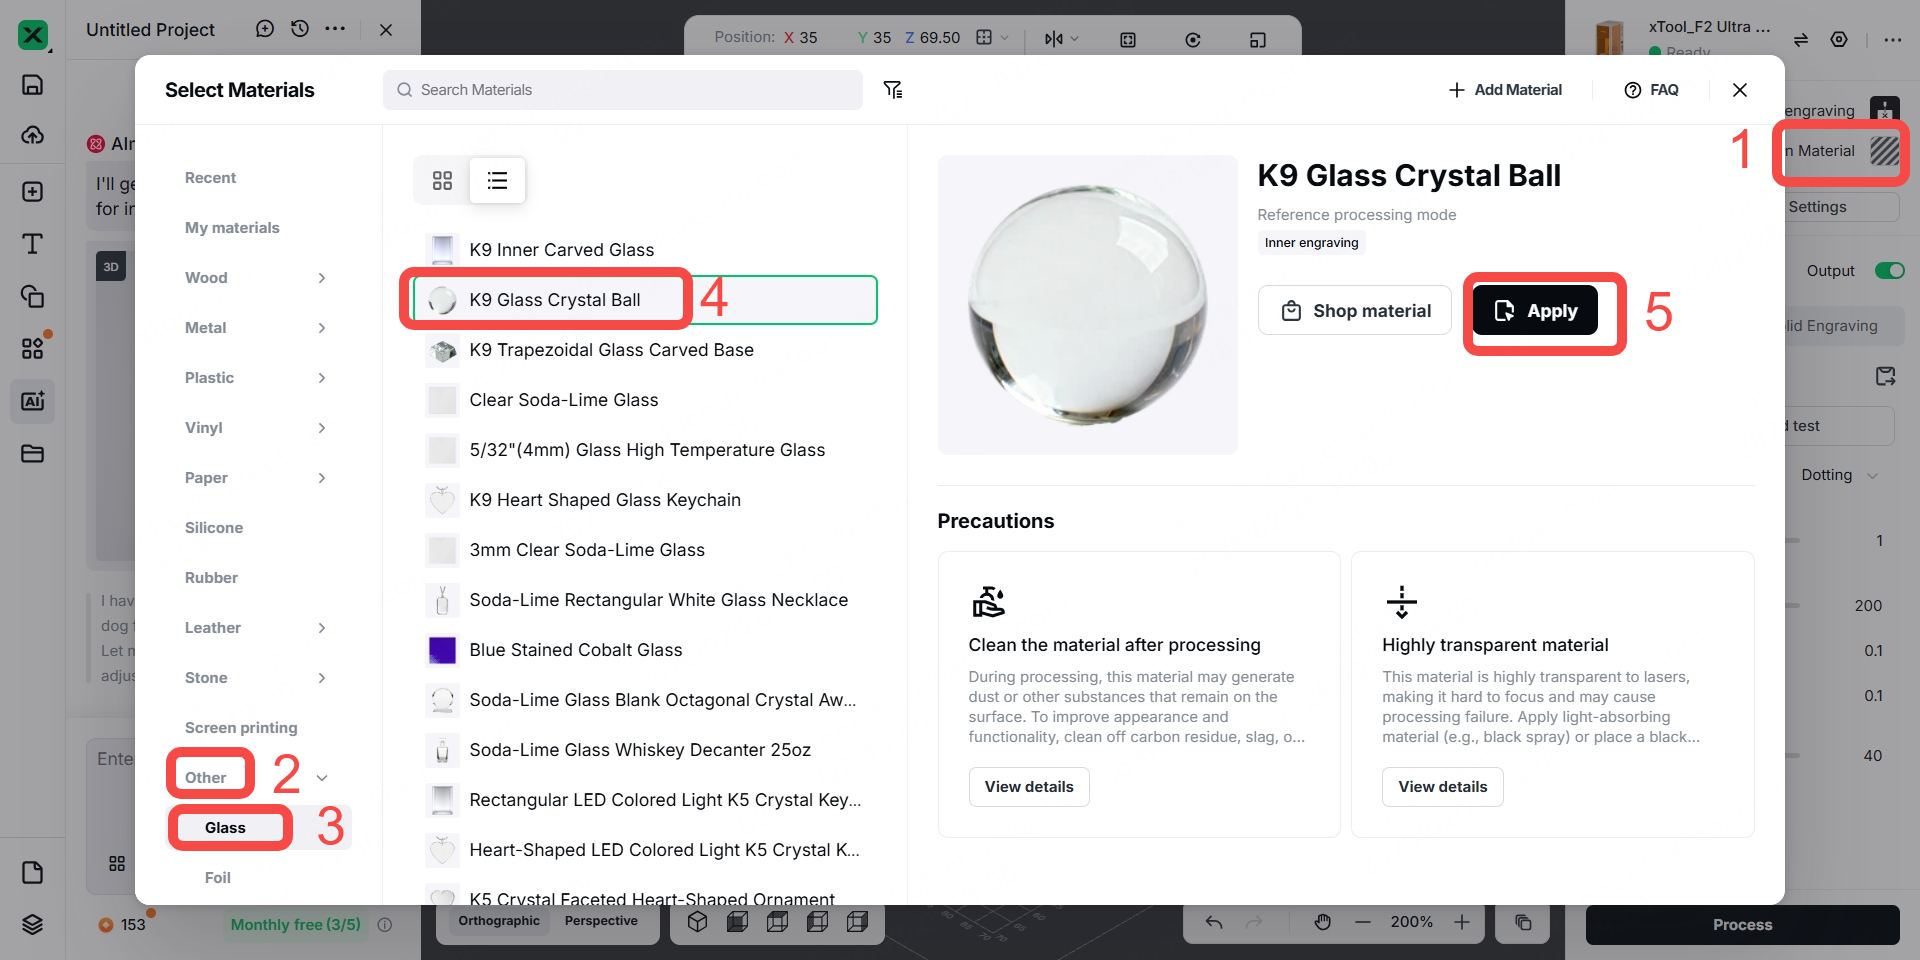
Step 27: Click "Unknown Material" > "Other" > "Glass" > "K9 Glass Crystal Ball" > "Apply".
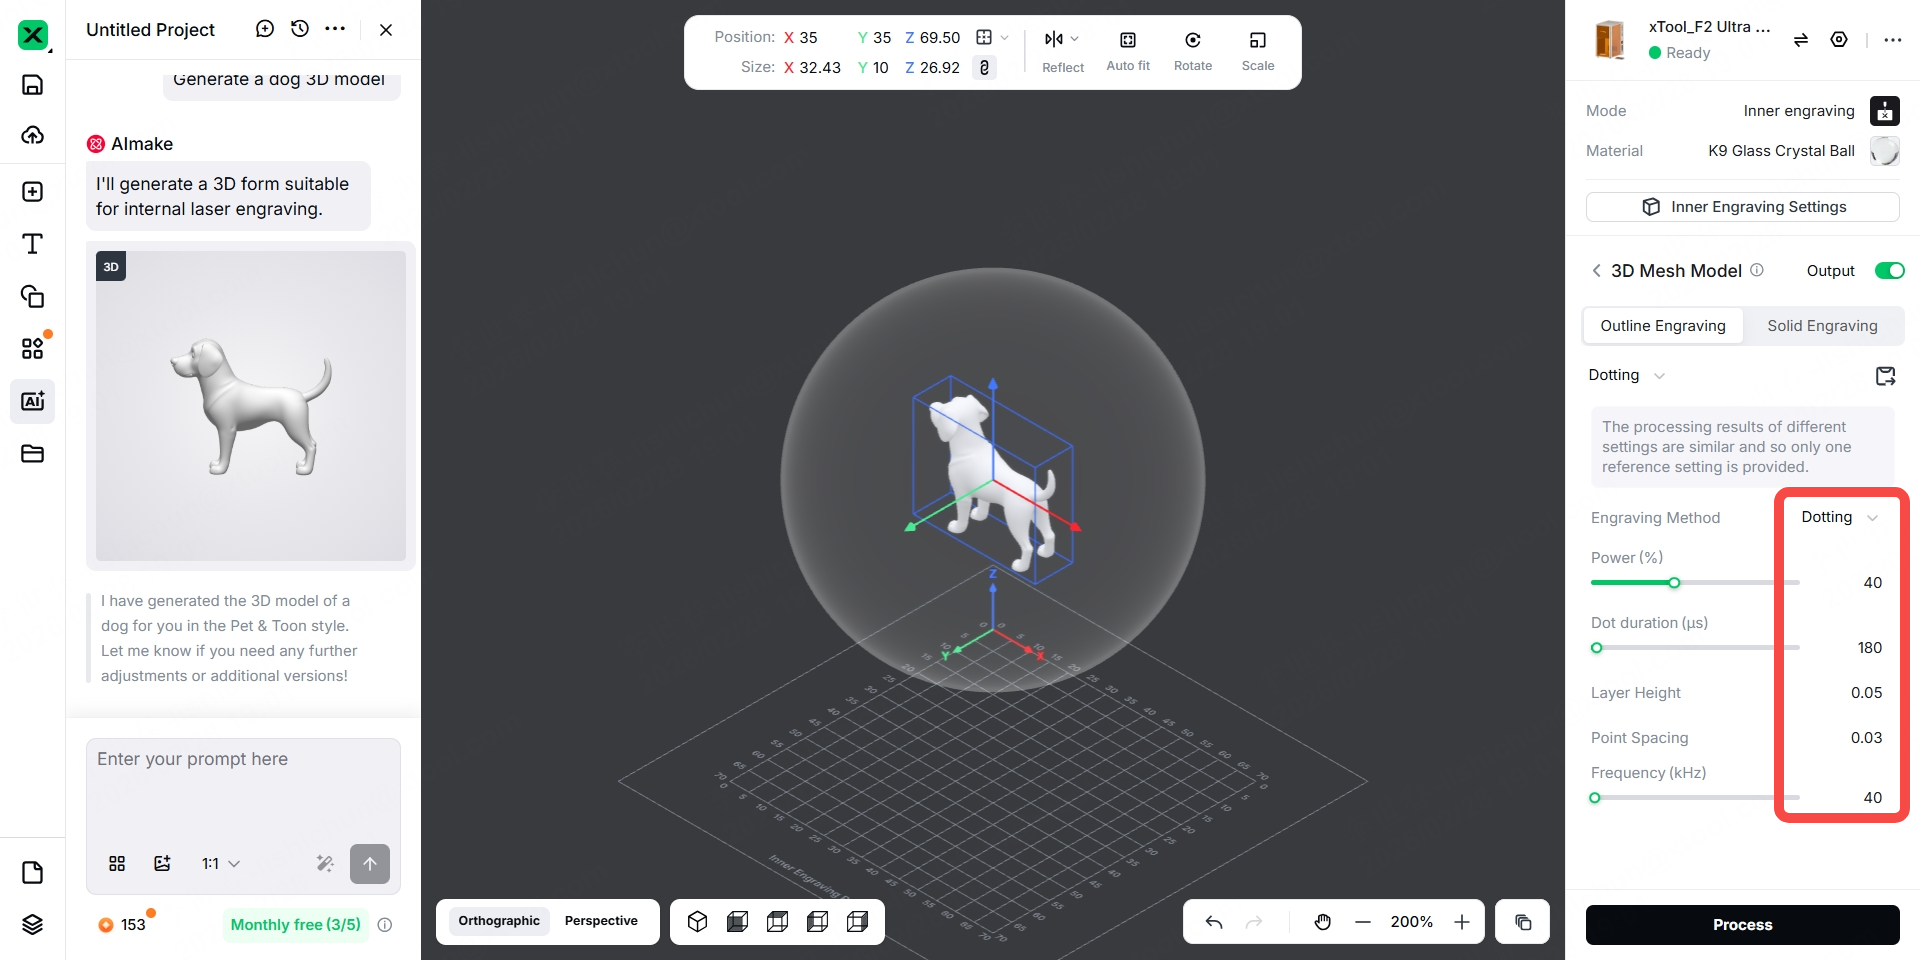
Step 28: Select "Dotting" or "Scanning" based on your 3D model. For a more refined and detailed engraving effect, "Dotting" is recommended.
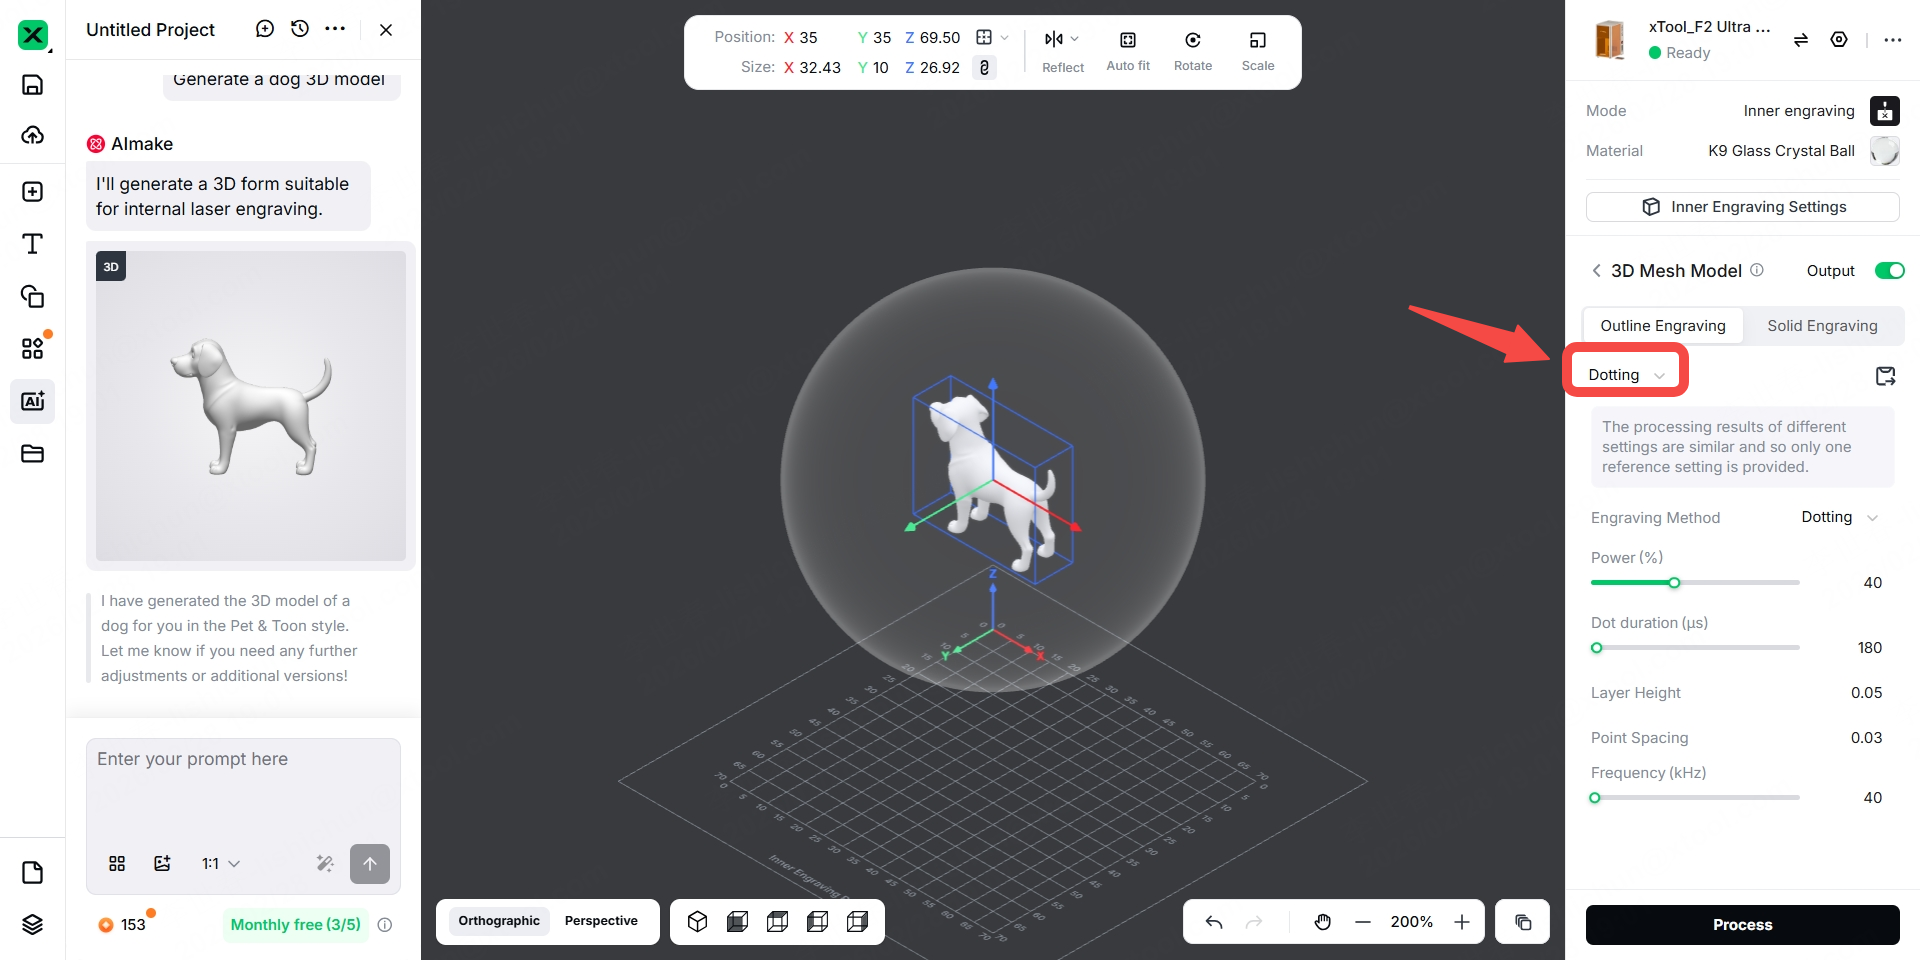
Note: It is recommended to use the suggested engraving parameters. If the engraving effect needs adjustment, you can modify the laser output by adjusting the power and speed. The laser energy output determines the clarity of the engraving effect inside the crystal ball.
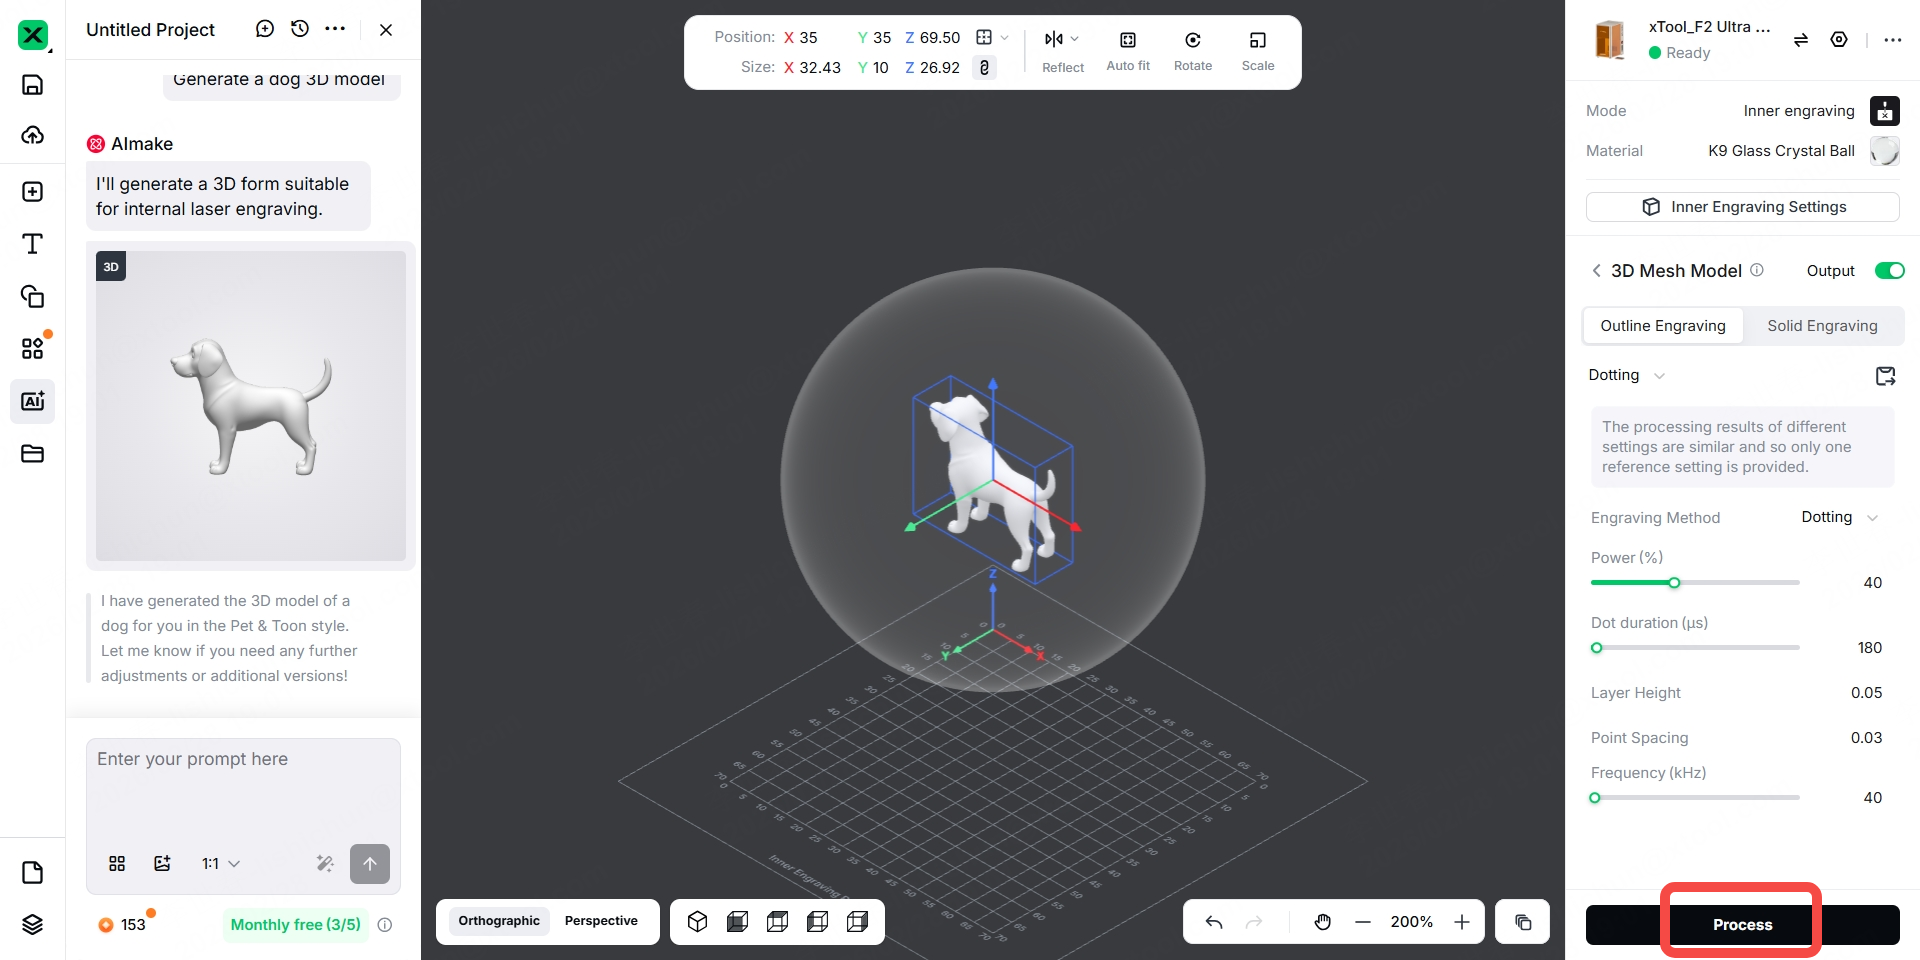
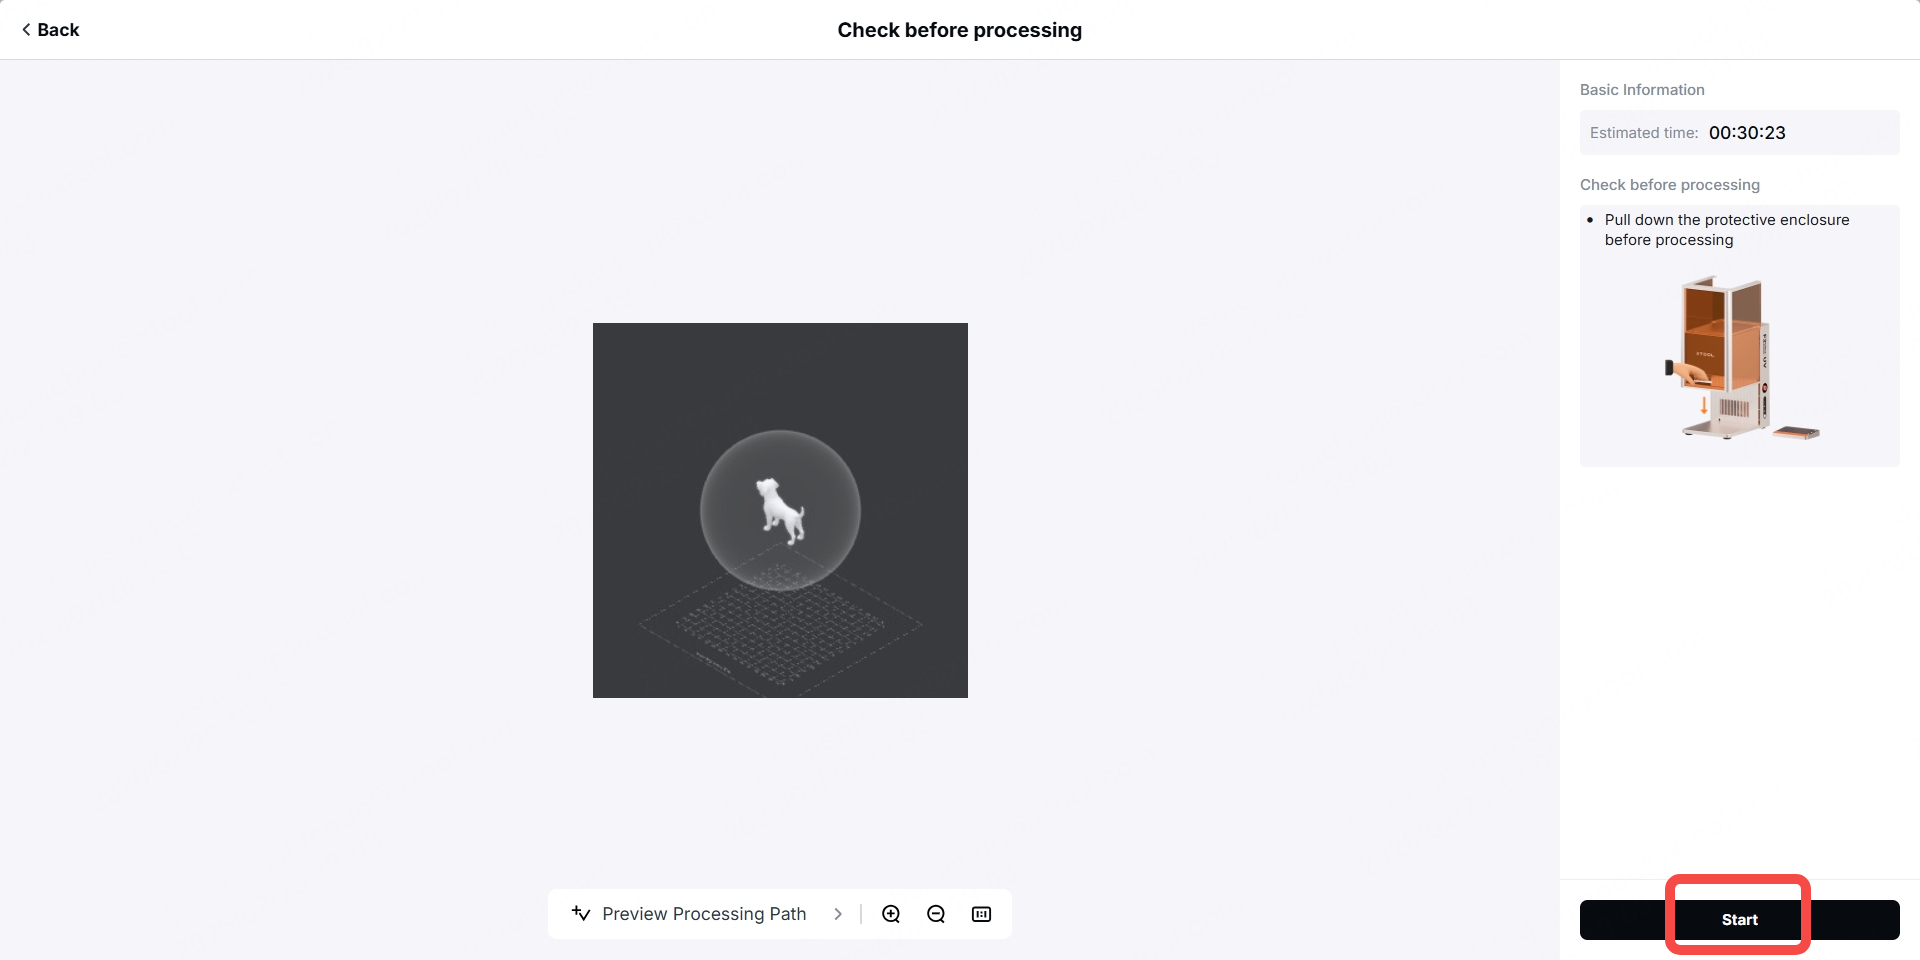
Step 29: Click "Process".
Step 30: Pull down the protective enclosure.
Step 31: Click “Start”.
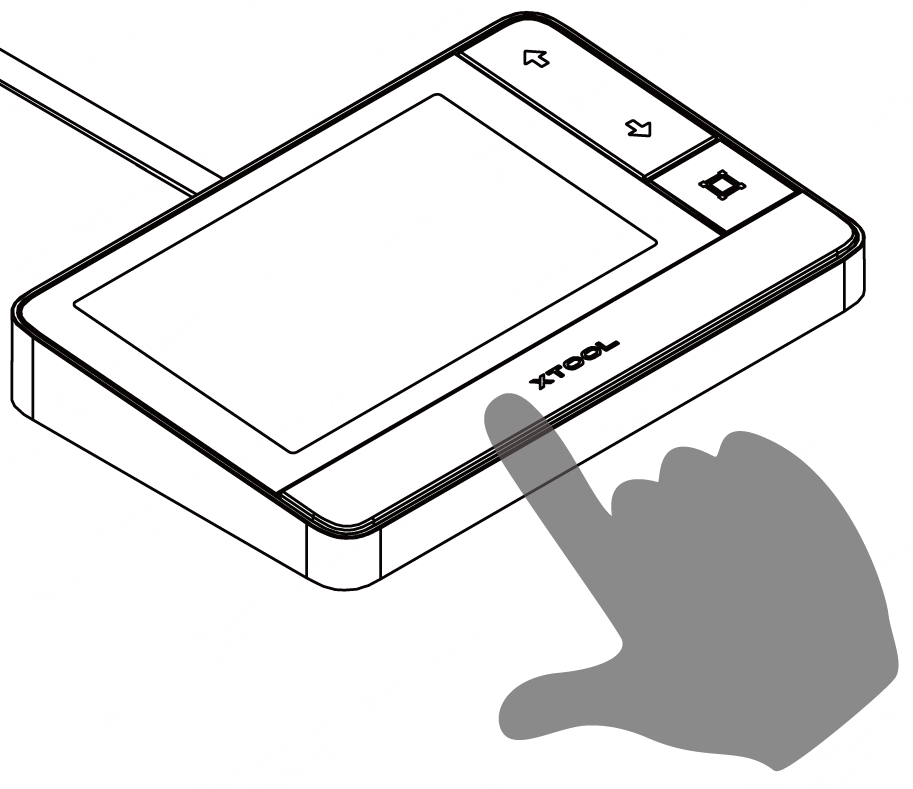
Step 32: Press the XTOOL button on the touchscreen controller to start engraving.
Step 33: Wait for the engraving to complete.
Step 34: After engraving, press the power button to turn off F2 Ultra UV, lift the protective enclosure, take out the shock-absorbing silicone, and take out the glass cup.
Note: Before taking out the glass cup, lift the glass cup and take out the shock-absorbing silicone. When taking out the glass cup, tilt the glass cup toward yourself. Be sure to handle it slowly, as the inner engraving oil may spill if tilted too quickly.
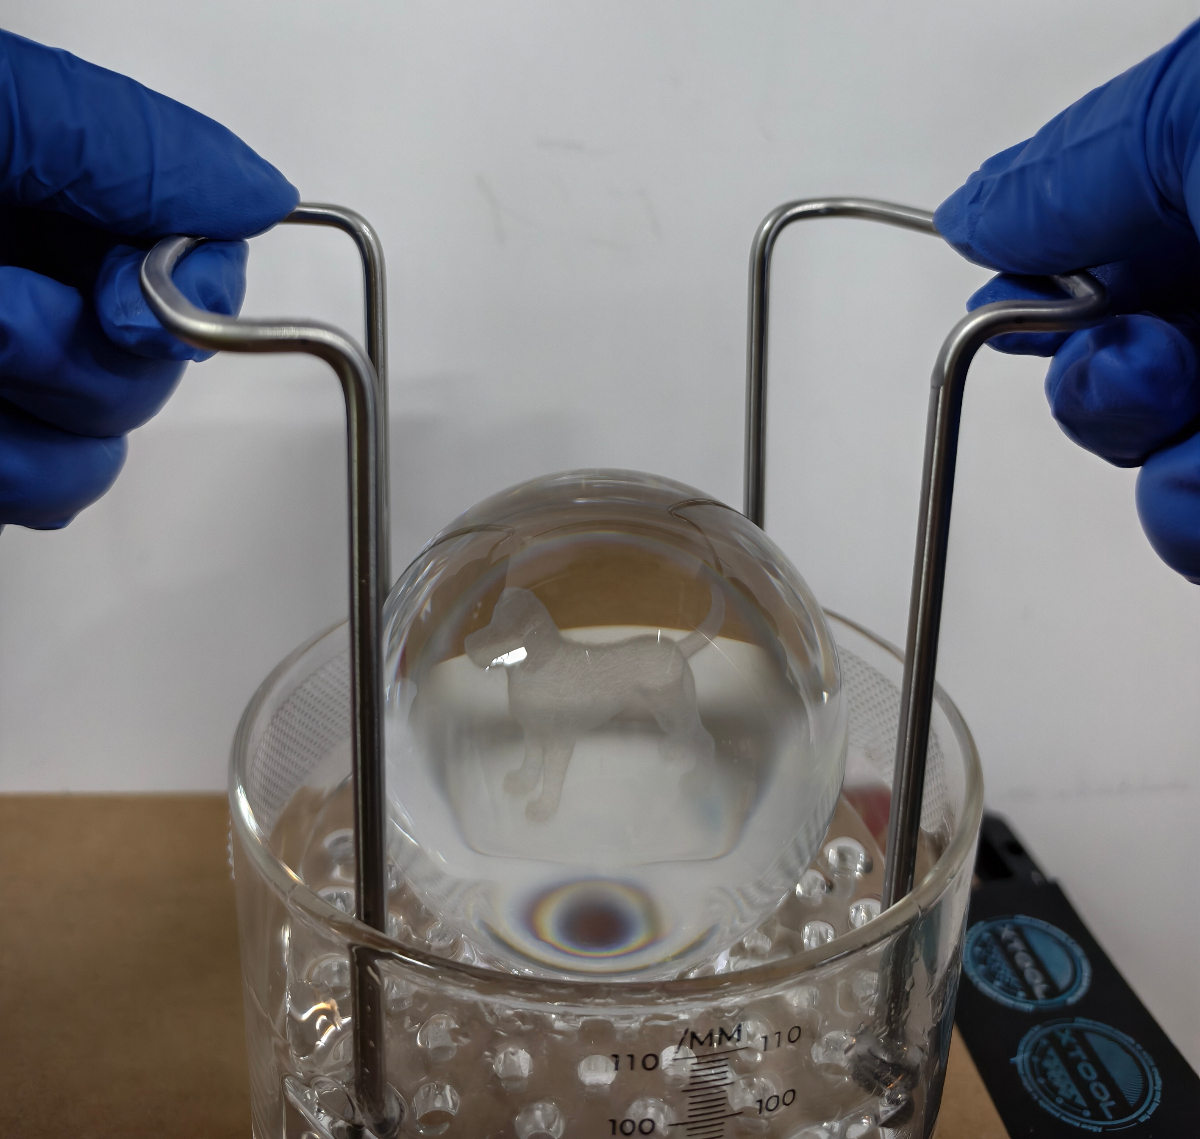
Step 35: Lift the brackets and take out the crystal ball.
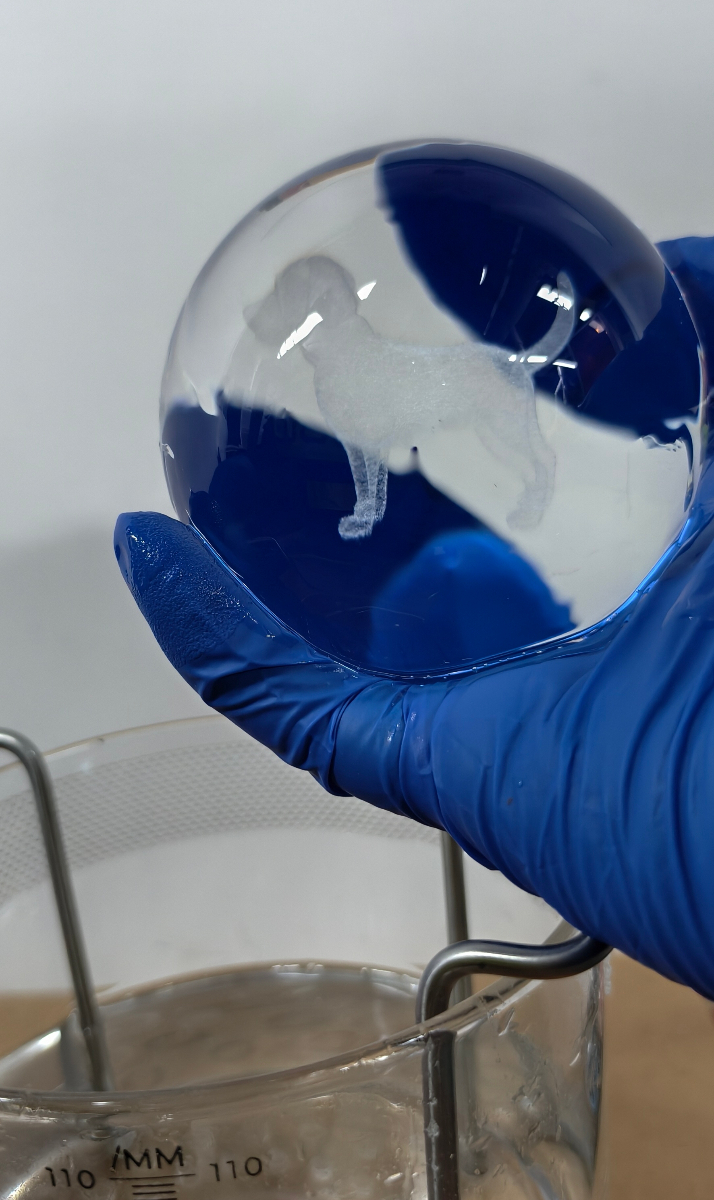
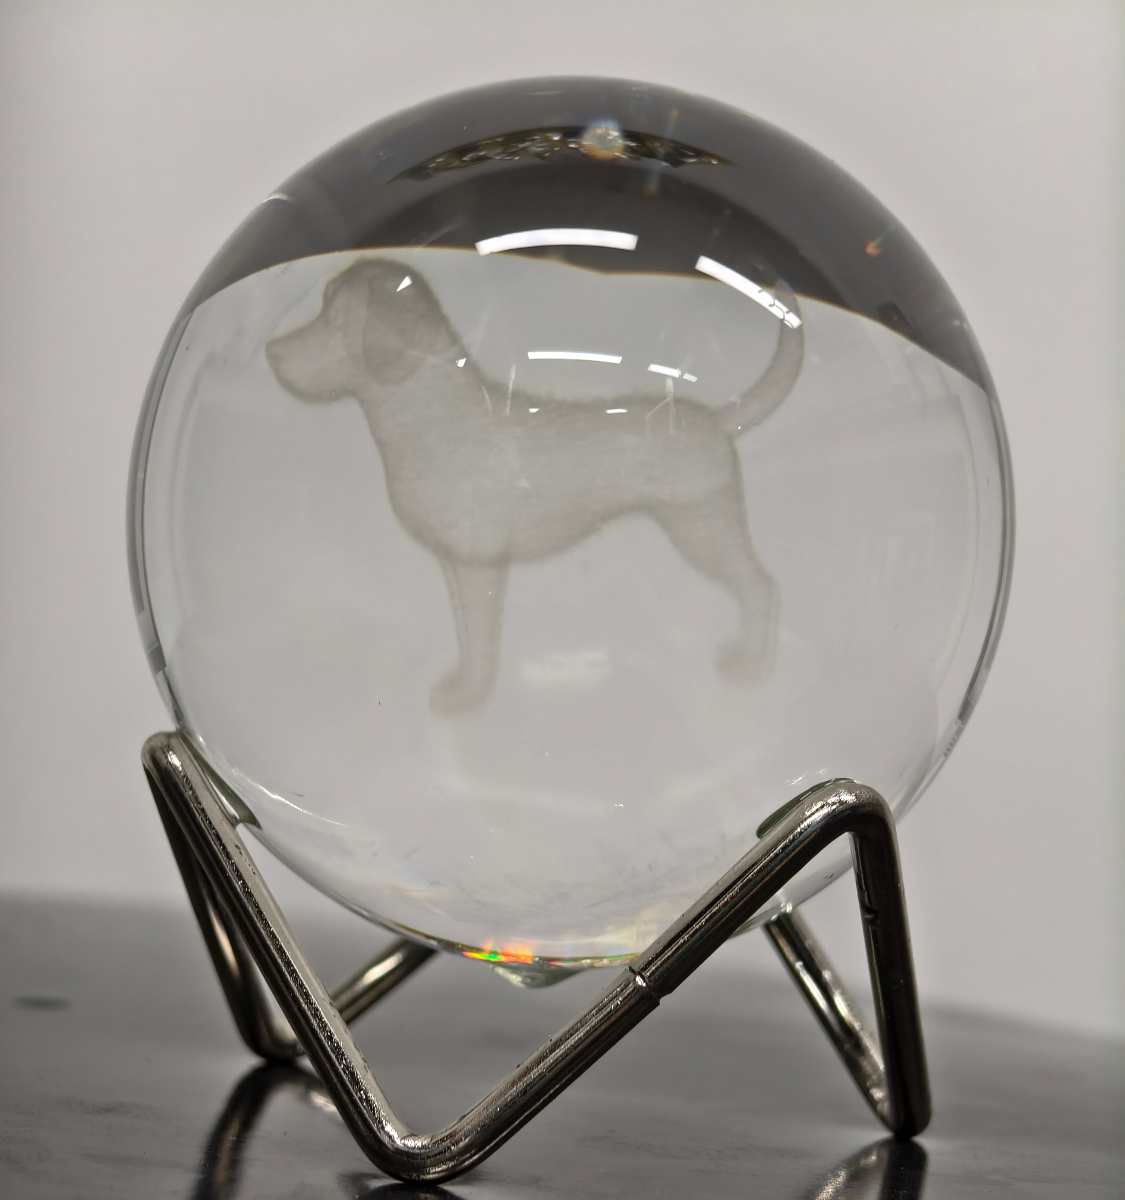
Step 36: Clean the surface of the crystal ball using detergent, then place the crystal ball on a fixed base. Enjoy your work!
More information
xTool F2 Ultra UV Unboxing and First Use
Inner Engraving Work Area Calibration
Z-axis Calibration for Inner Engraving
Replace the Field Lens for xTool F2 Ultra UV
A Guide to Glass for Inner Engraving
Inner Engraving Operation Guide for Glass Materials
Approaches to Improving Inner Engraving Results
Inner Engraving File Types for xTool F2 Ultra UV
Failure to Perform Inner Engraving on Glass
Crystal Ball Inner Engraving Operation Instructions (Without the K9 Crystal Ball Inner Engraved Kit)
Start Inner Engraving with xTool F2 Ultra UV
