Issue description
You have connected your xTool OS1 Shaker Oven to xTool Apparel Printer via the data cable, and the oven's power switch is turned on. However, the printer's LCD control panel continues to display the standalone Printer icon. Normally, when the oven is successfully connected and recognized, this icon automatically switches to a combined Printer + Oven icon.
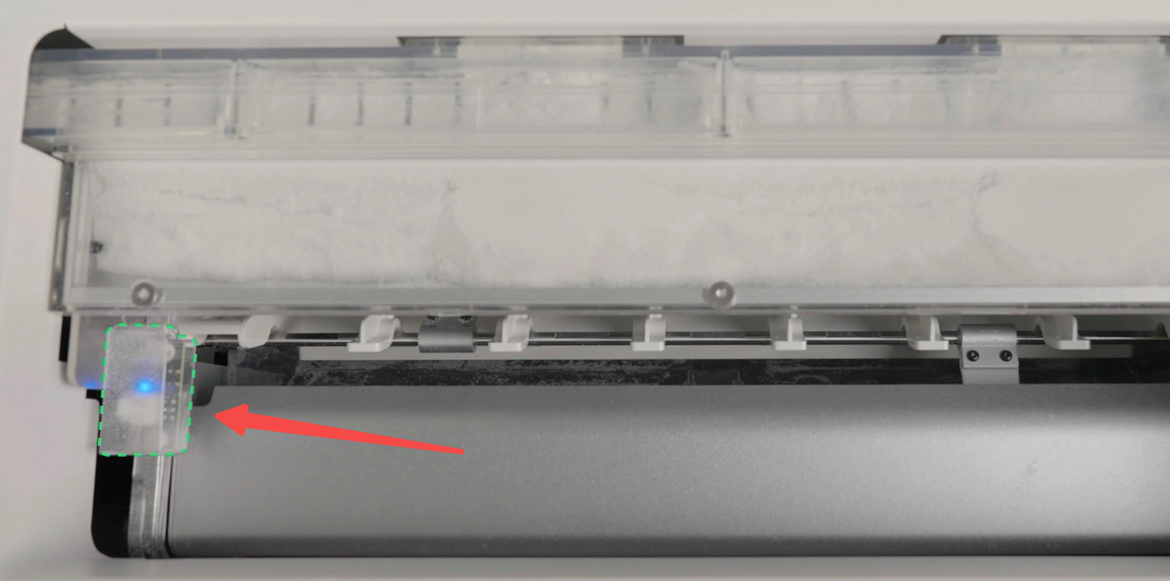
⚠️ CRITICAL NOTE: Look through the Inspection Window on top of the oven. If the sensor inside the oven is NOT lit blue, the oven has failed to boot up. Please refer to the guide: xTool Apparel Printer & OS1 Troubleshooting: Oven Fails to Power On / Boot Up instead. If the blue light IS lit, proceed with this connection troubleshooting guide.
Potential causes
- Failed External Data Cable: The main communication cable connecting the two machines is damaged.
- Printer Internal Wiring Issue: The RJ11 adapter or internal extension cable inside the printer has failed.
- Oven Internal Wiring Issue: The RJ11 adapter or internal extension cable inside the oven has failed.
- Board Failure (Rare): The port on the printer's motion controller board or the Oven's main control board is malfunctioning.
Troubleshooting steps
Step 1: Verify oven power status
Before taking anything apart, definitively confirm the oven is fully powered.
- Check if the main power rocker switch indicator light on the oven is illuminated.
- Look through the top inspection window and verify the sensor light is glowing blue.
- If either light is OFF: The issue is power-related. Go to the Oven Fails to Power On guide.
- If BOTH lights are ON: The oven is powered correctly. Proceed to Step 2.
Step 2: Test with a replacement data cable
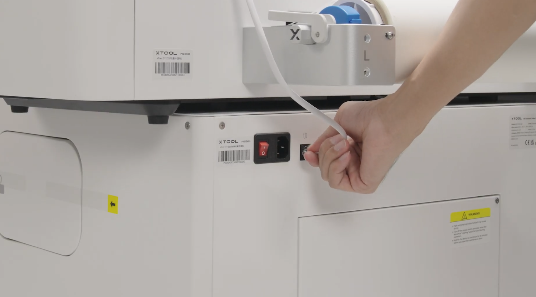
The standard connection uses an RJ11 6-conductor (6-pin) data cable.
- Obtain a replacement RJ11 6-conductor cable. (Tip: A length of at least 1.5 meters is highly recommended, as it will be necessary if you need to proceed to Steps 3 and 4).
- Swap out the original external cable linking the printer and the oven with the new one.
- Check the LCD screen on the printer.
- If the combined icon appears: The original external cable is faulty. Contact xTool Customer Service for a replacement cable.
- If the standalone printer icon remains: The external cable is not the issue. Proceed to Step 3.
Step 3: Bypass printer's internal wiring
This step tests if the printer's internal extension cable or port adapter is the culprit.
⚠️ SAFETY WARNING: Power off and unplug the printer before removing any casing.
- Remove Printer Rear Casing: Follow the instructions in the video guide (0:00~1:15): Disassemble & Assemble the Casings for xTool Apparel Printer
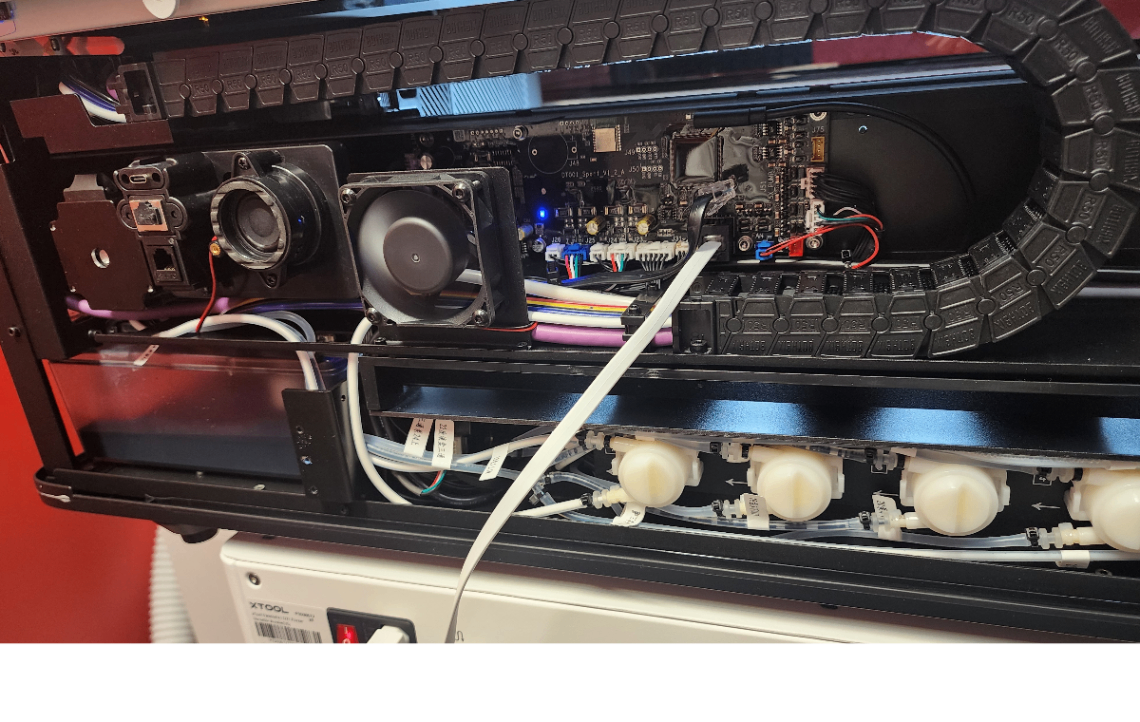
- Direct Connection: Locate the RJ11 port directly on the Motion Controller Board. Plug your test data cable directly into this board, and plug the other end into the normal external port on the oven. See the image below for reference.
- Power On & Test: Plug in the printer and turn it on.
- If recognized: The printer's internal RJ11 adapter or extension cable is faulty. Contact Customer Service for replacement parts.
- If NOT recognized: Proceed to Step 4.
Step 4: Bypass oven's internal wiring (Direct connection)
This step tests the oven's internal wiring by establishing a direct board-to-board connection.
⚠️ SAFETY WARNING: Power off the oven, unplug it from the wall, and wait for the oven to cool down completely before opening the casing.
- Remove Oven Rear Casing: Follow the video tutorial to open the oven: Replace the Main Control Board in xTool OS1 Shaker Oven
- Direct Board-to-Board Connection: Keep one end of your long test cable plugged into the printer's Motion Controller Board.
- Plug the other end directly into the RJ11 port on the Oven's main control board.
- Power On & Test: Power on both devices.
- If recognized: The oven's internal RJ11 adapter or extension cable is faulty. Contact Customer Service for a replacement.
- If NOT recognized (Rare): This indicates a likely failure of the RJ11 port on either the Oven Mainboard or the printer's Motion Controller Board. Please proceed to the section below to contact support.
If the problem persists
Should the issue persist after completing the preceding steps, submit a ticket via the "Submit a Ticket" button in the "Help Ticket" section below. The standard response time for xTool Customer Service is one business day.
Please include the following details to facilitate a quick diagnosis:
1 Visual evidence
Please provide photos or a short video showing the results of your troubleshooting, specifically showing the direct board-to-board connection attempt (Step 4) and the printer's screen.
2 Work log files
Please export and provide the device logs so our engineers can analyze the communication failure.
- Via xTool Creative Space (XCS):
Settings (gear icon) > Basic info > Export log
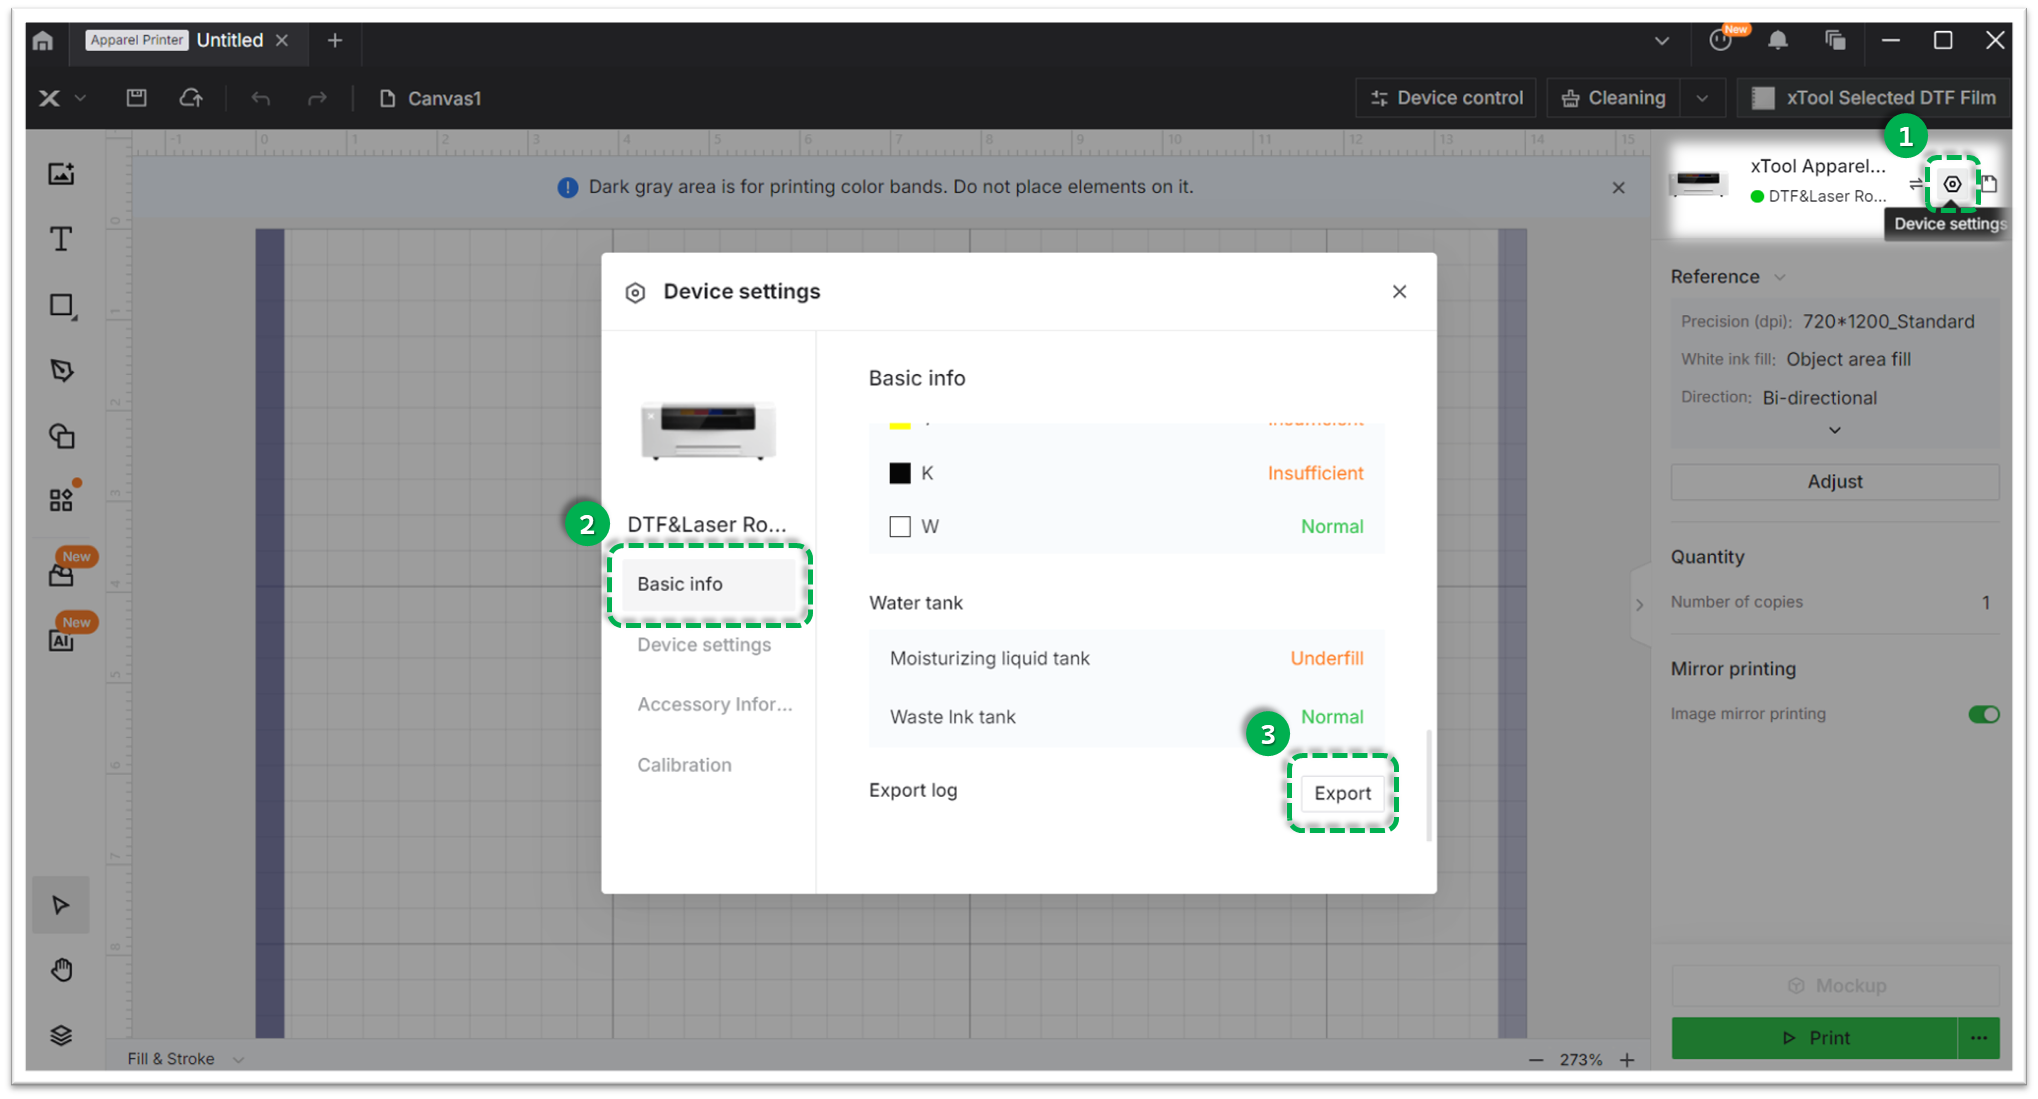
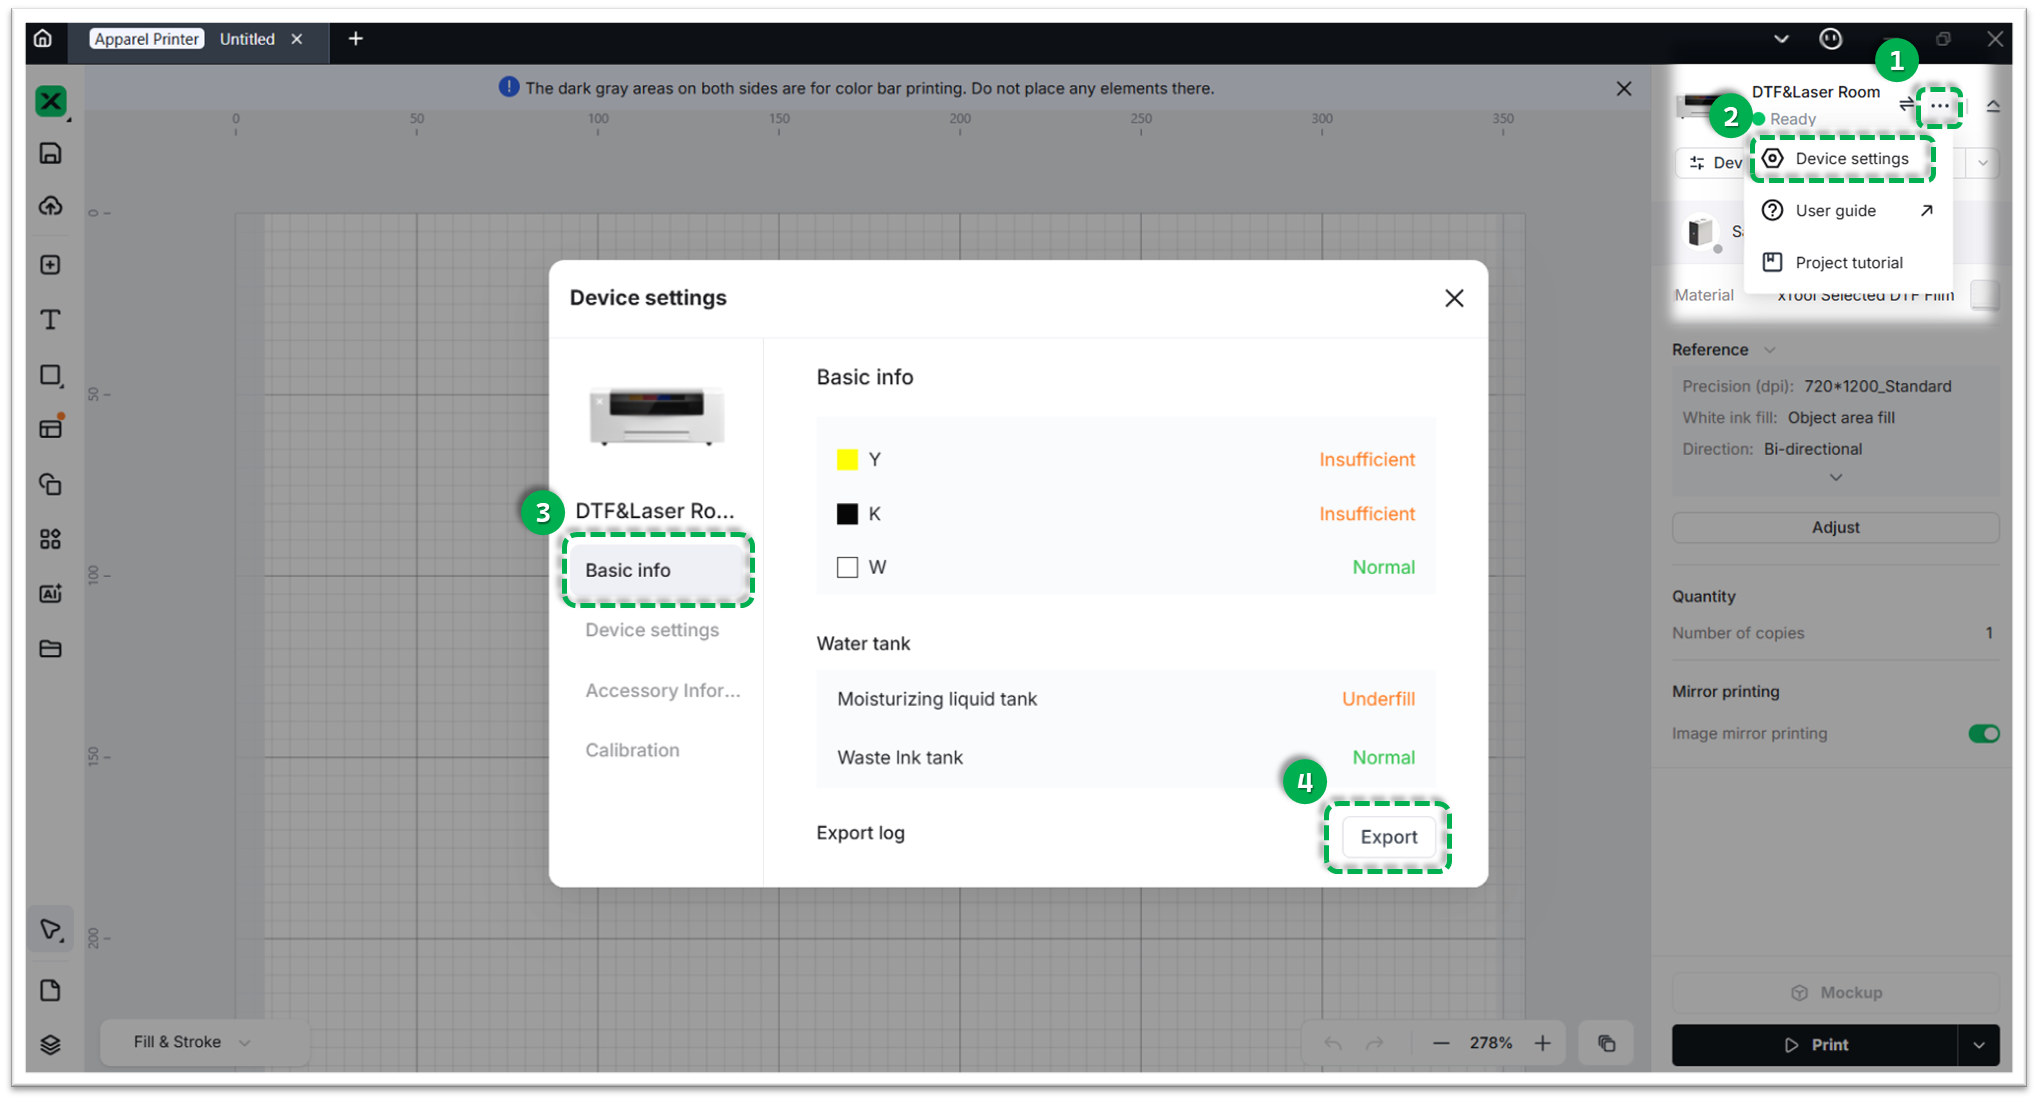
- Via xTool Studio:
Three dots icon > Device Settings > Basic info > Export log
- Compress the generated folder into a
.zipfile and attach it.
3 Device information
- Serial Number (SN): Provide the SN for both your xTool Apparel Printer and xTool OS1 Oven (located on their respective rear panel labels).
Documentation feedback
Help improve this content by providing feedback. If this content did not meet your requirements, select "No" in the "Was this page helpful?" section below. Include specific details about what was unclear or missing in the pop-up suggestion box. Feedback submissions are reviewed by xTool technical writers to enhance future documentation.
Services & Help
Learn & Education

Copyright © 2025 xTool All Rights Reserved.