For multi-color printing, preparing screens is the key to success. To improve the design editing experience and processing efficiency, xTool Studio provides functions for dividing the design into layers by color or by split CMYK channels.
This page uses xTool M1 Ultra as an example to describe how to use these functions during screen preparation.
Process screens by layer for multi-color printing
- Refer to Connect and Setup xTool M1 Ultra with xTool Studio for instructions on connecting xTool M1 Ultra to xTool Studio.
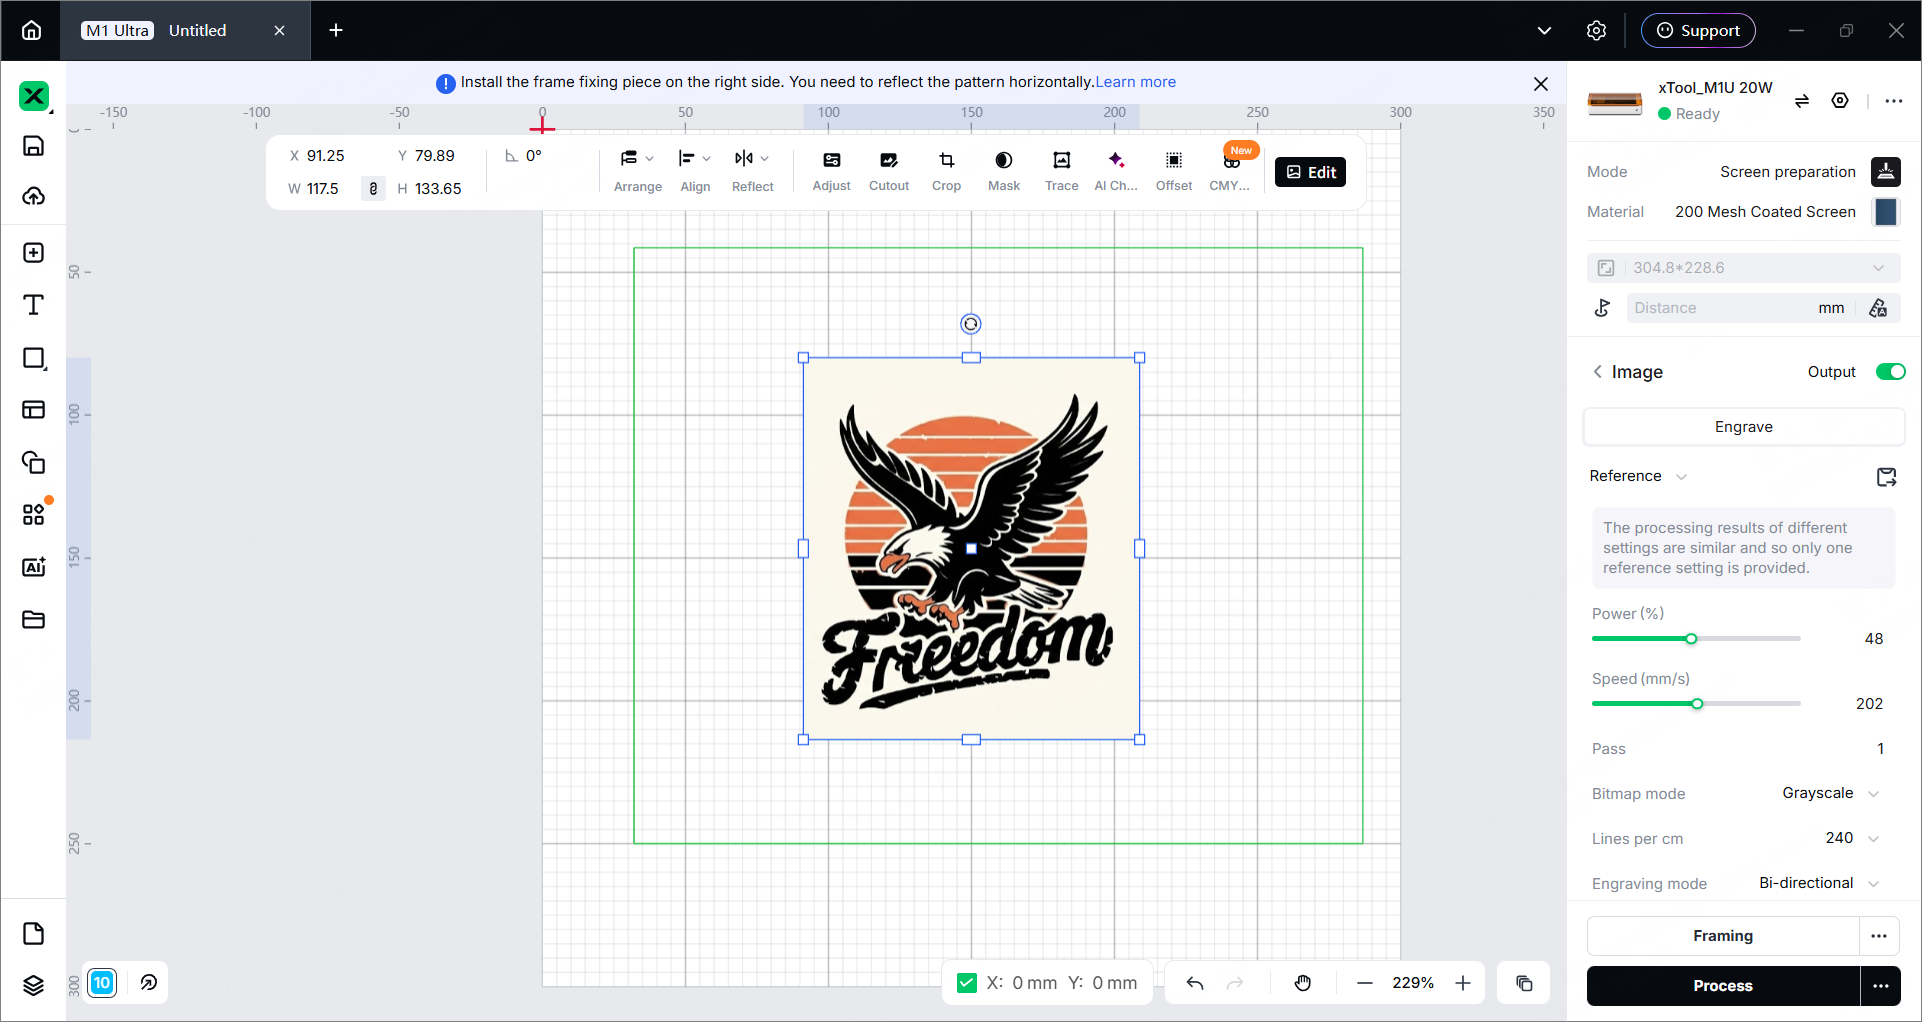
- In the right panel, click the current processing mode, and then select Screen preparation.
- Click Unknown Material, select a desired material, and click Apply.
- Import an image file or insert objects on the canvas.
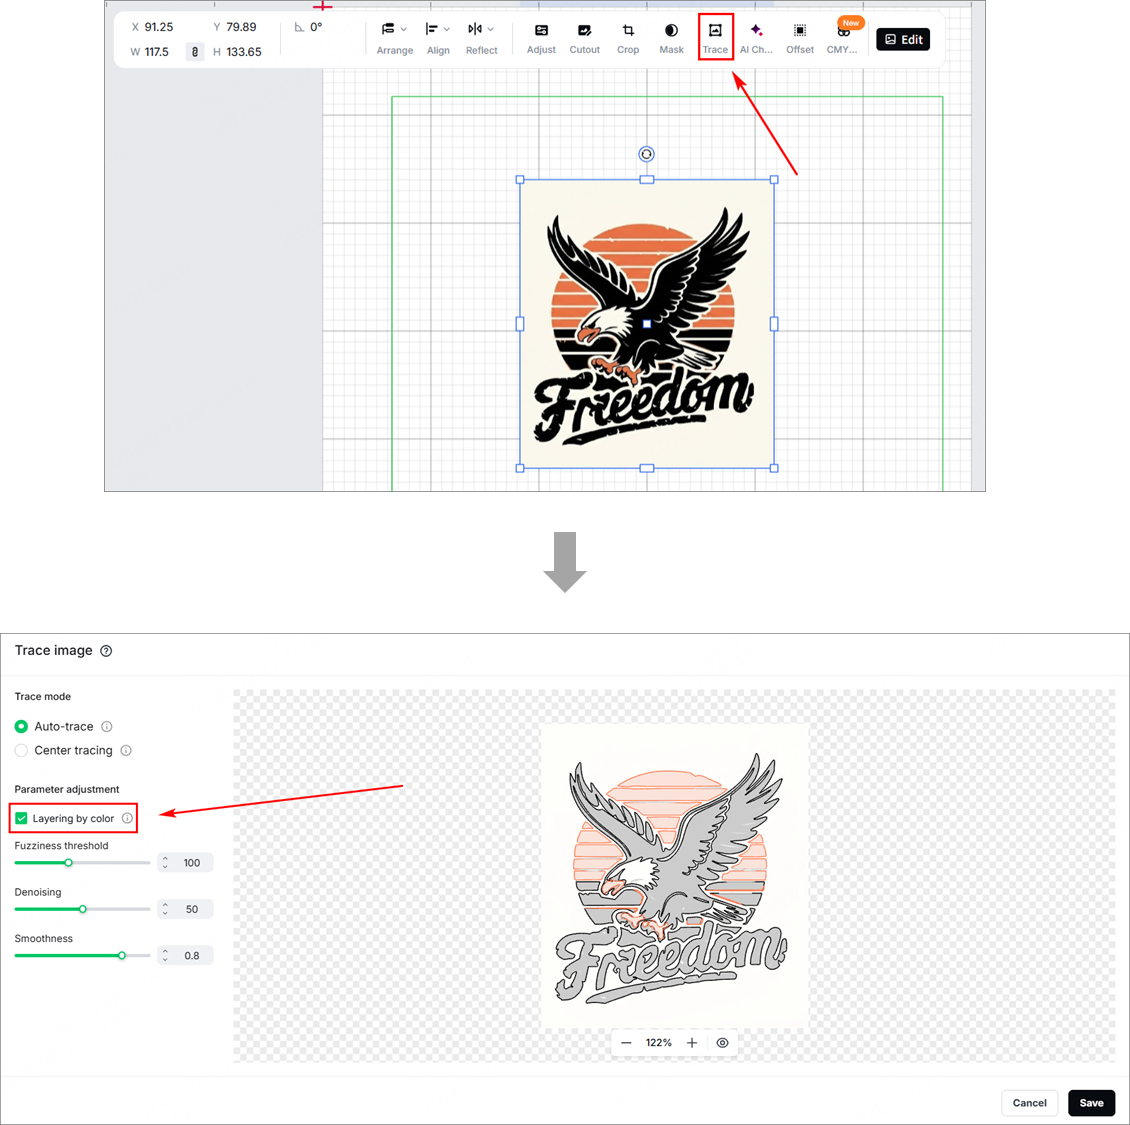
- Scale, resize, and position the image.
- Click Trace and select the Layering by color.
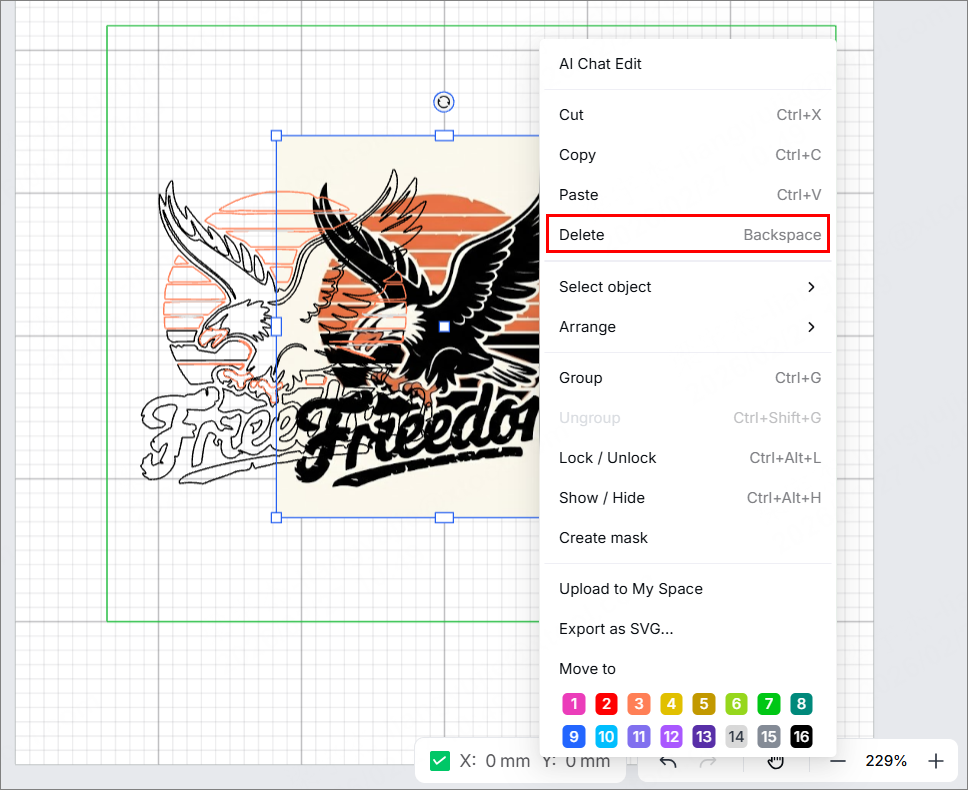
- Delete the original image, only leaving the generated vectors.
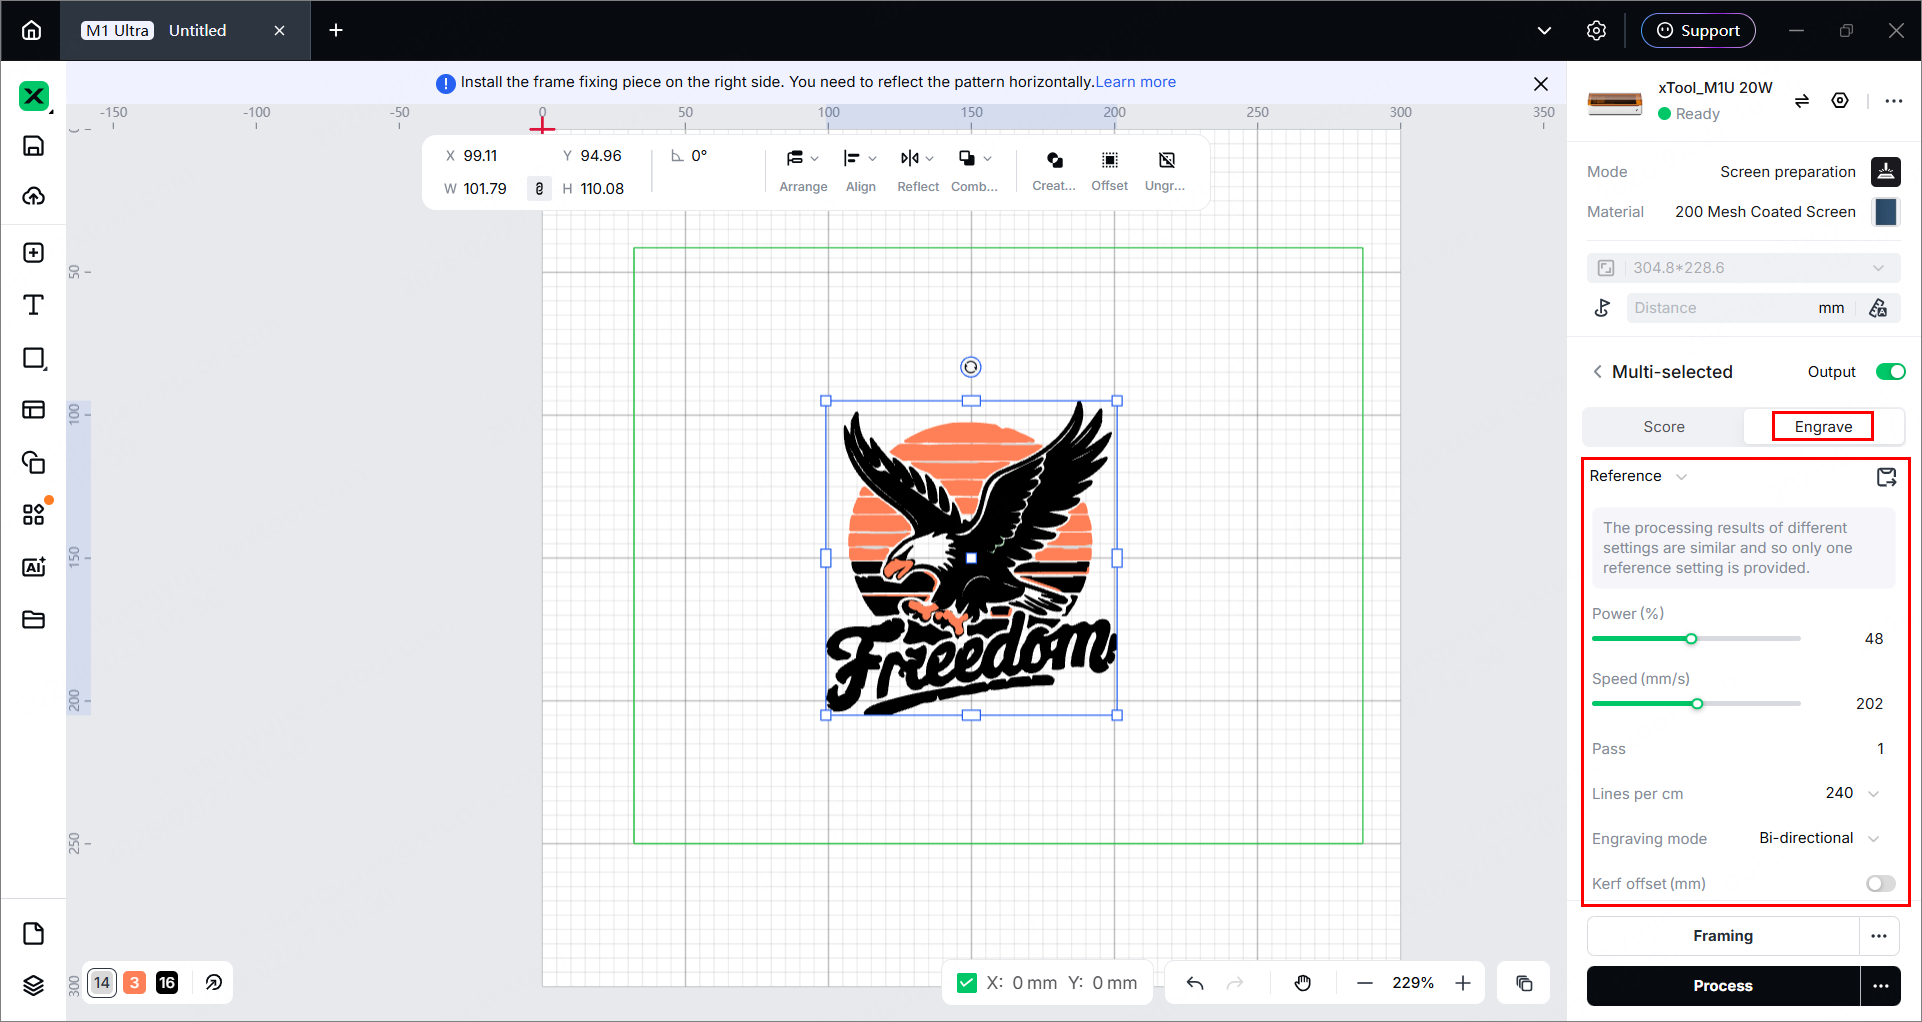
- Set the processing type to Engrave. A reference setting can be used.
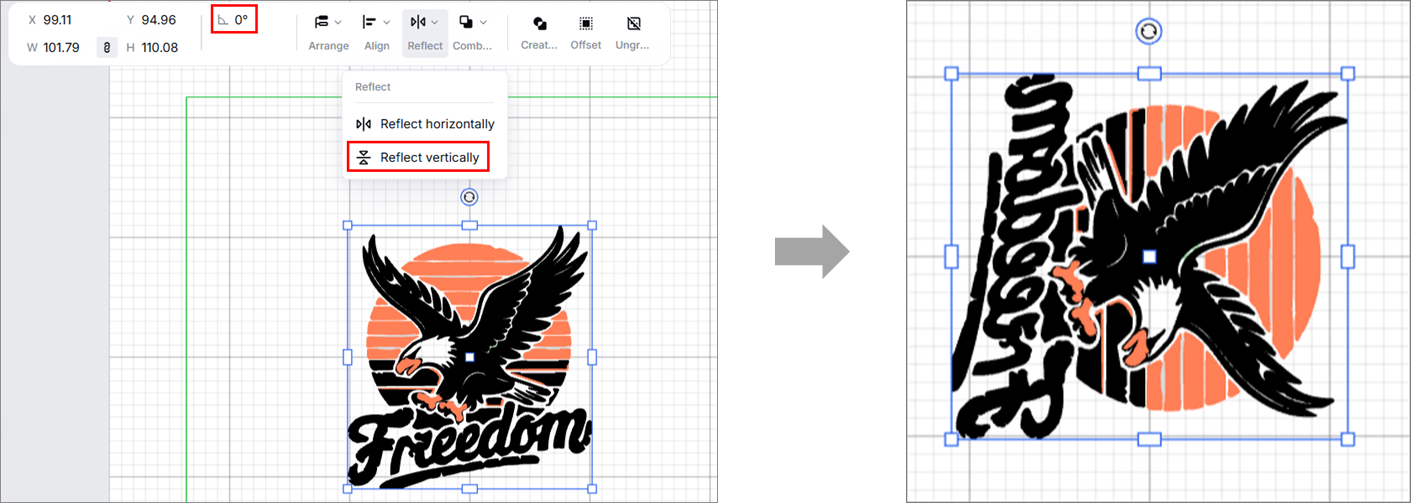
- Rotate the design 90 degrees clockwise, and then reflect it vertically.
- Click
 in the right panel to auto-measure the processing distance.
 - In the bottom-right corner of the software, click Process. Then click Preview Processing Path.

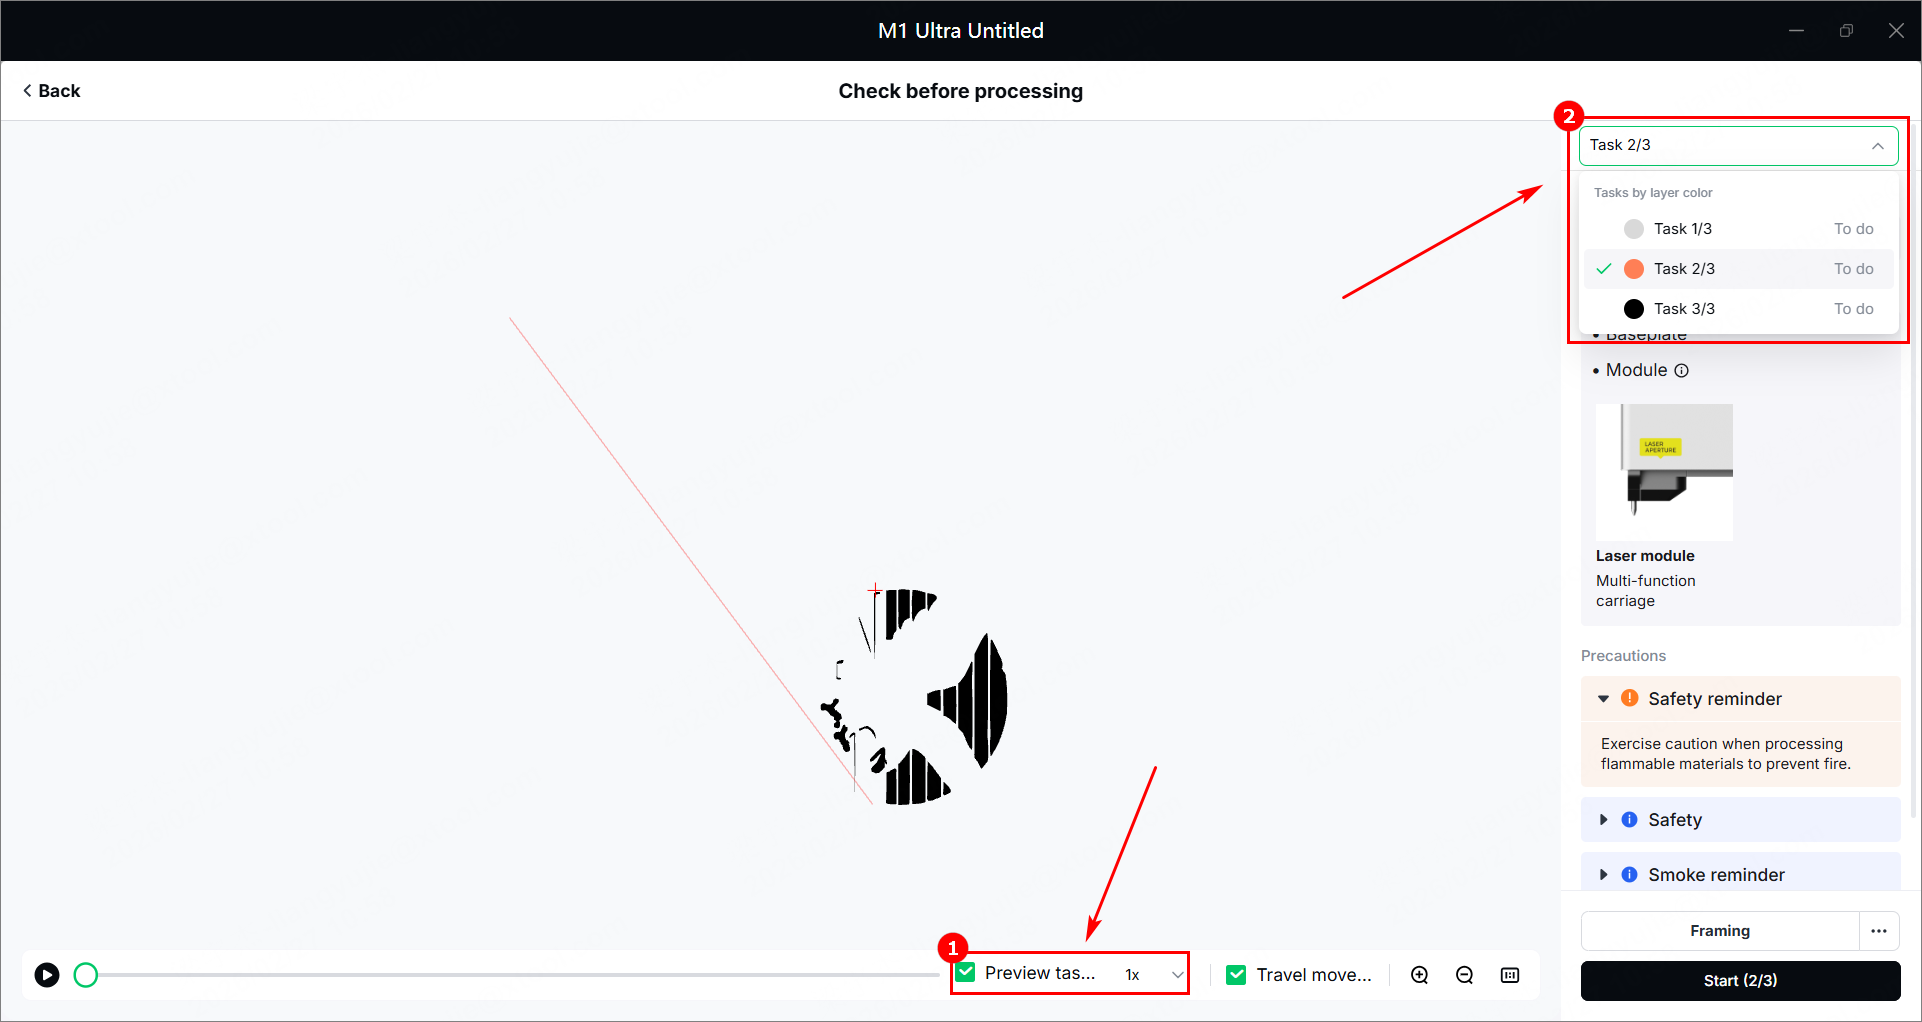
- Click Preview tasks in progress only, and you can check the objects to be processed in the selected task.
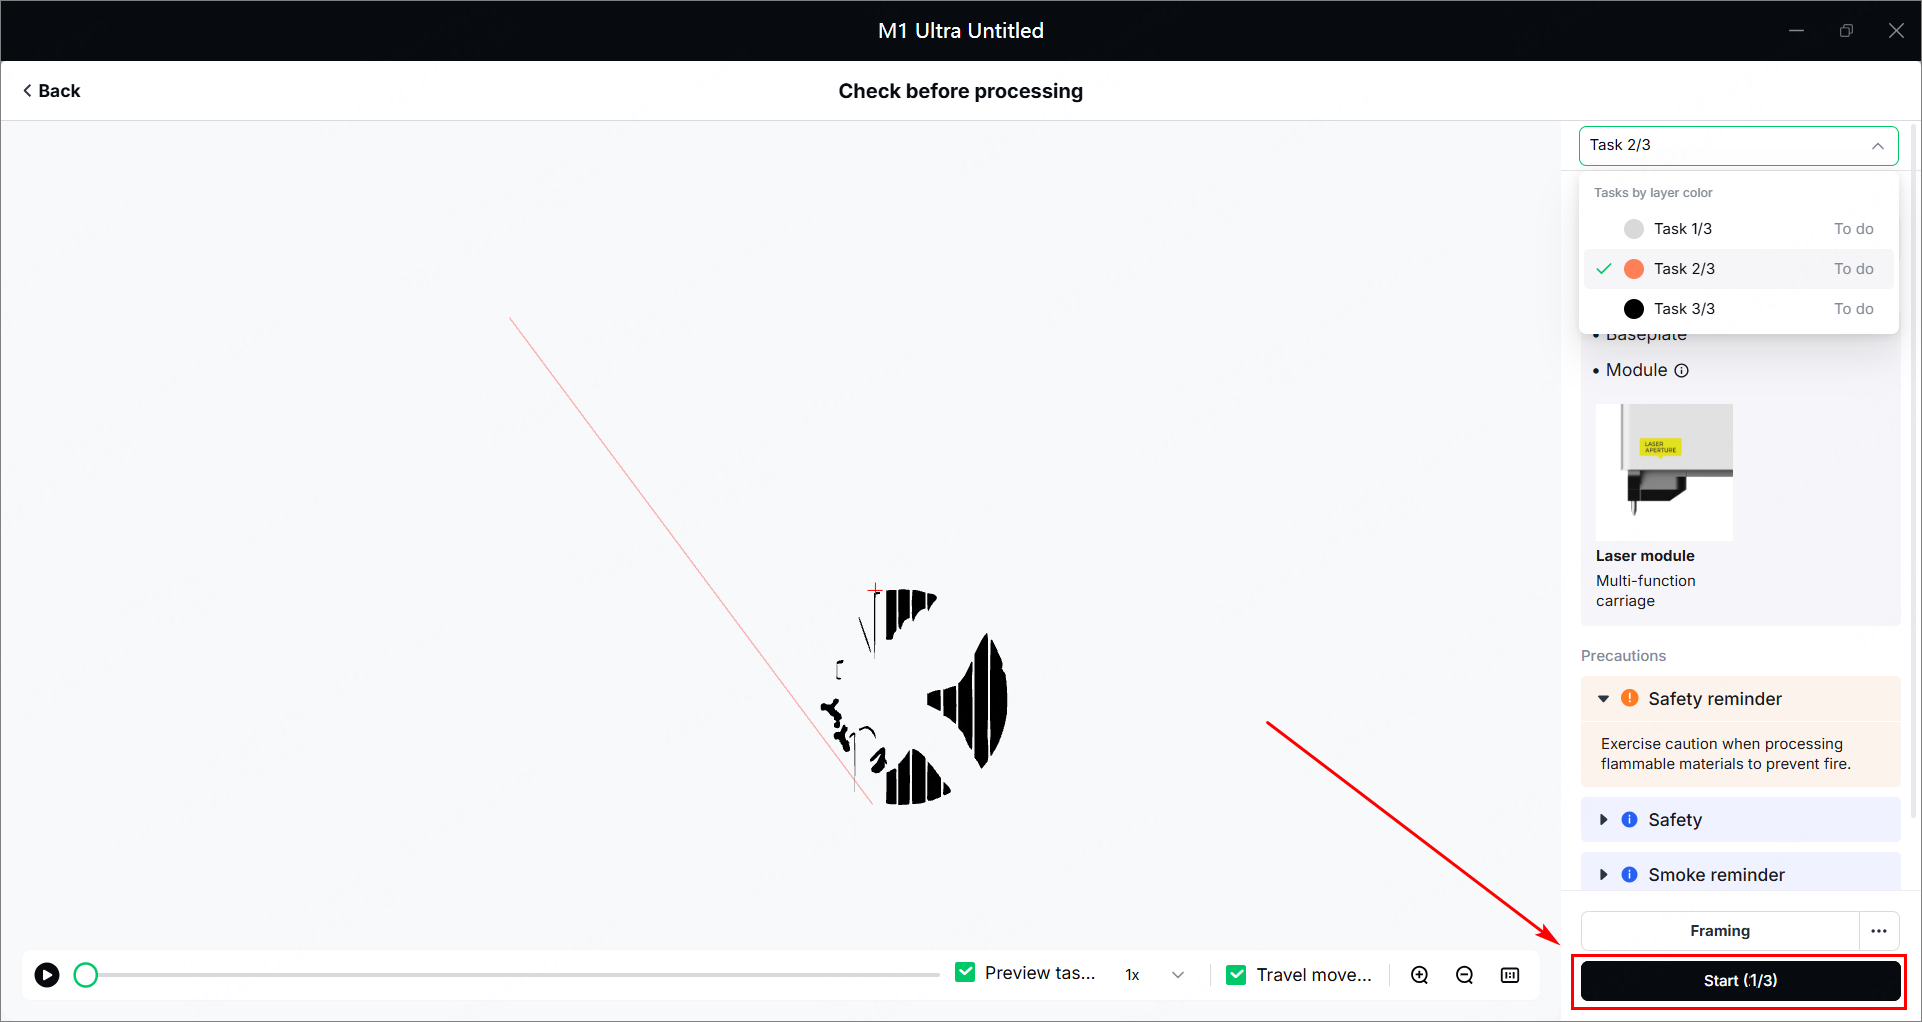
- Click Start (1/3) in the bottom-right corner to start the first task, and press the button on the device to start processing.
- Take the engraved screen out, and place a new screen into the device. Repeat the above steps and complete all processing tasks.
- Take the engraved screen out.
- Use the screens for printing.
Process screens by splitting CMYK channels for multi-color printing
Only bitmap images with large color blocks and clear color edges can be traced and extracted with decent performance, so there is no guarantee that all the bitmap images can regain their original appearance after they are converted into vector images.
To address this issue, xTool Studio provides a solution for image printing. You can halftone a bitmap image, split the CMYK channels, and process four screens accordingly. Then, use CMYK (cyan, magenta, yellow, and black) ink to print and regain the colors of the bitmap image.
- Refer to Connect and Setup xTool M1 Ultra with xTool Studio for instructions on connecting xTool M1 Ultra to xTool Studio.
- In the right panel, click the current processing mode, and then select Screen preparation.
- Click Unknown Material, select a desired material, and click Apply.
- Import an image file or insert objects on the canvas. Scale, resize, and position the image.
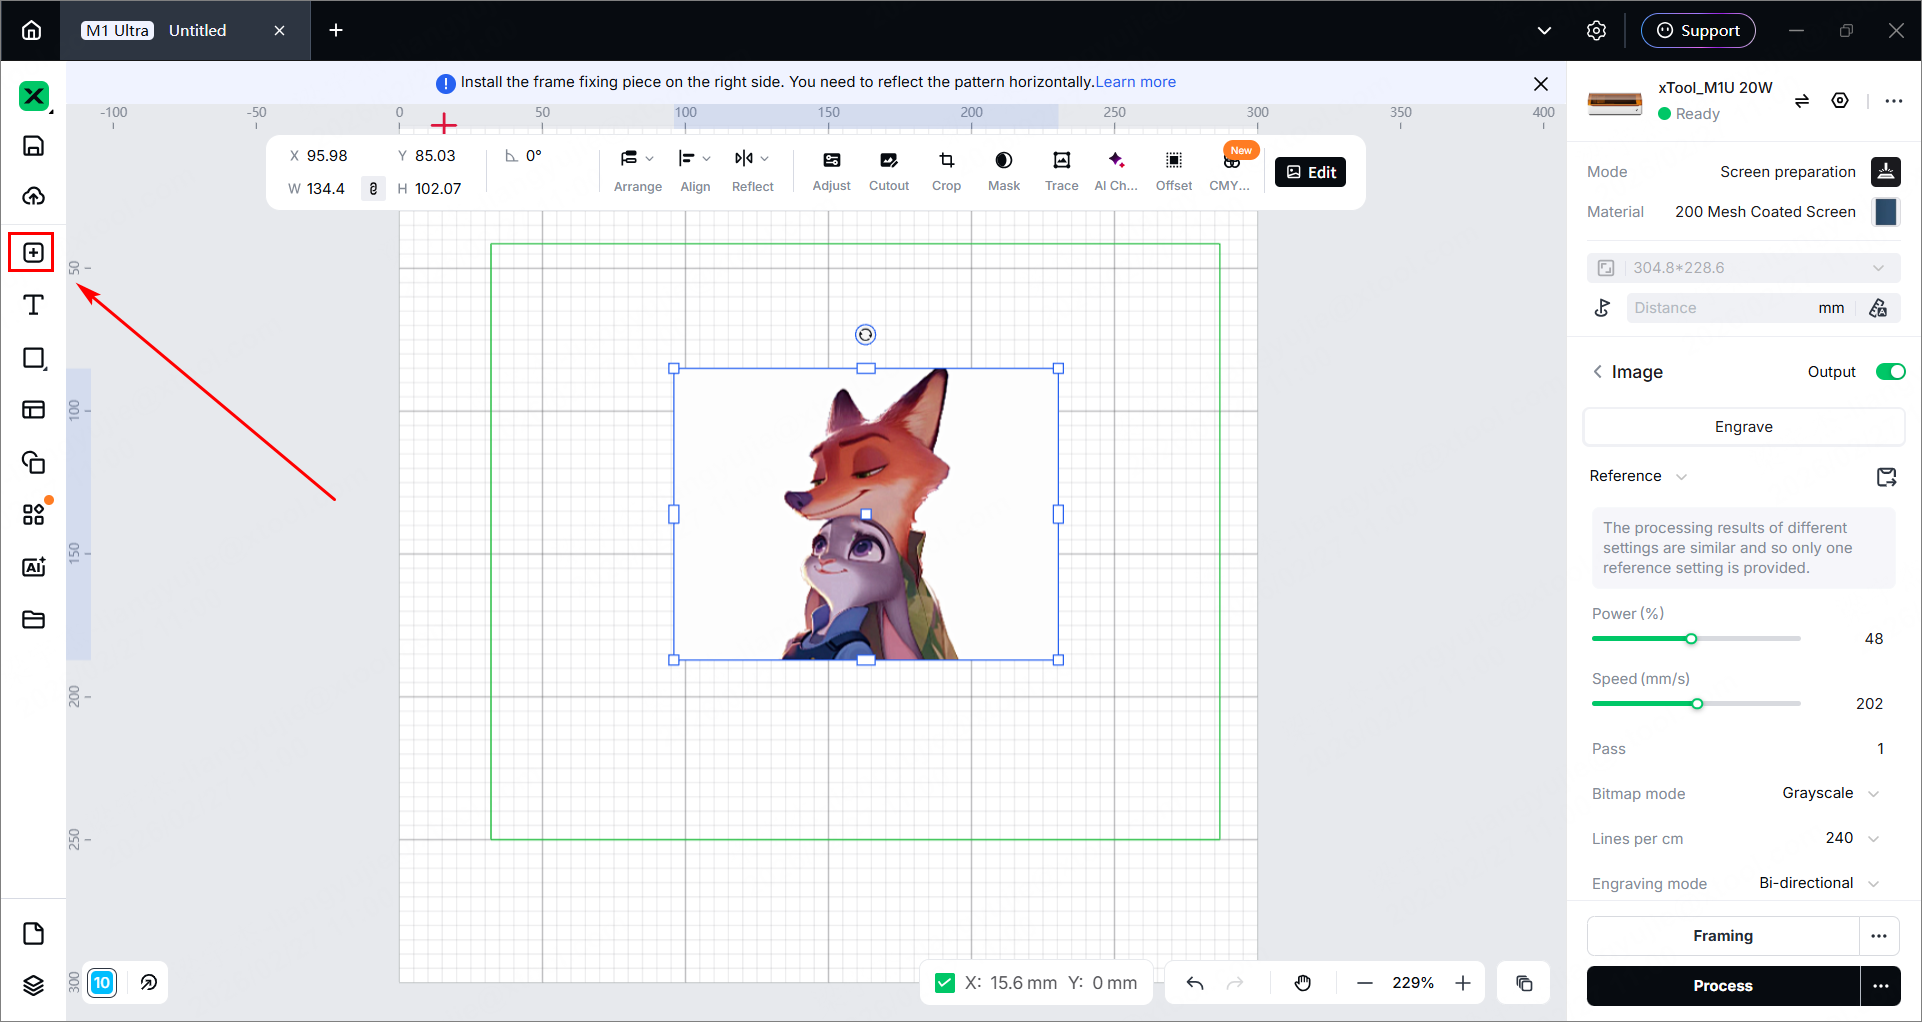
- Click
 to reflect the image horizontally as prompted.
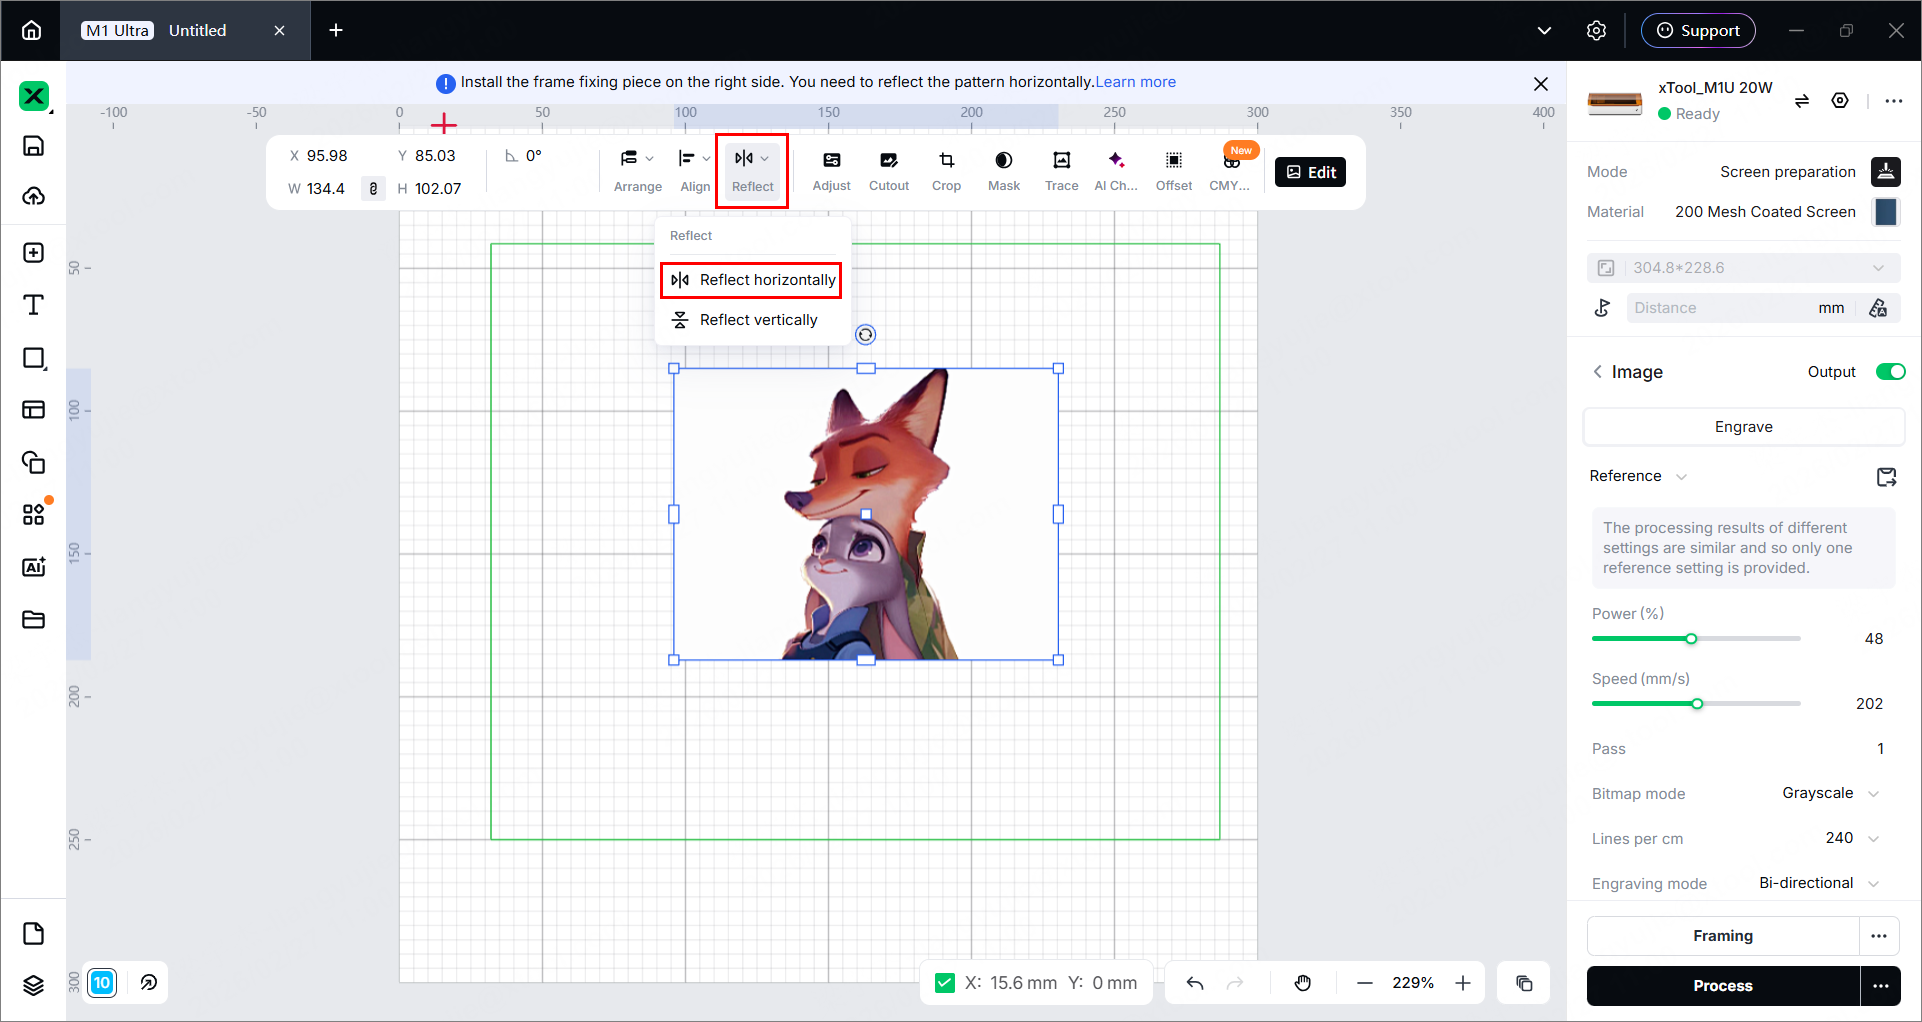
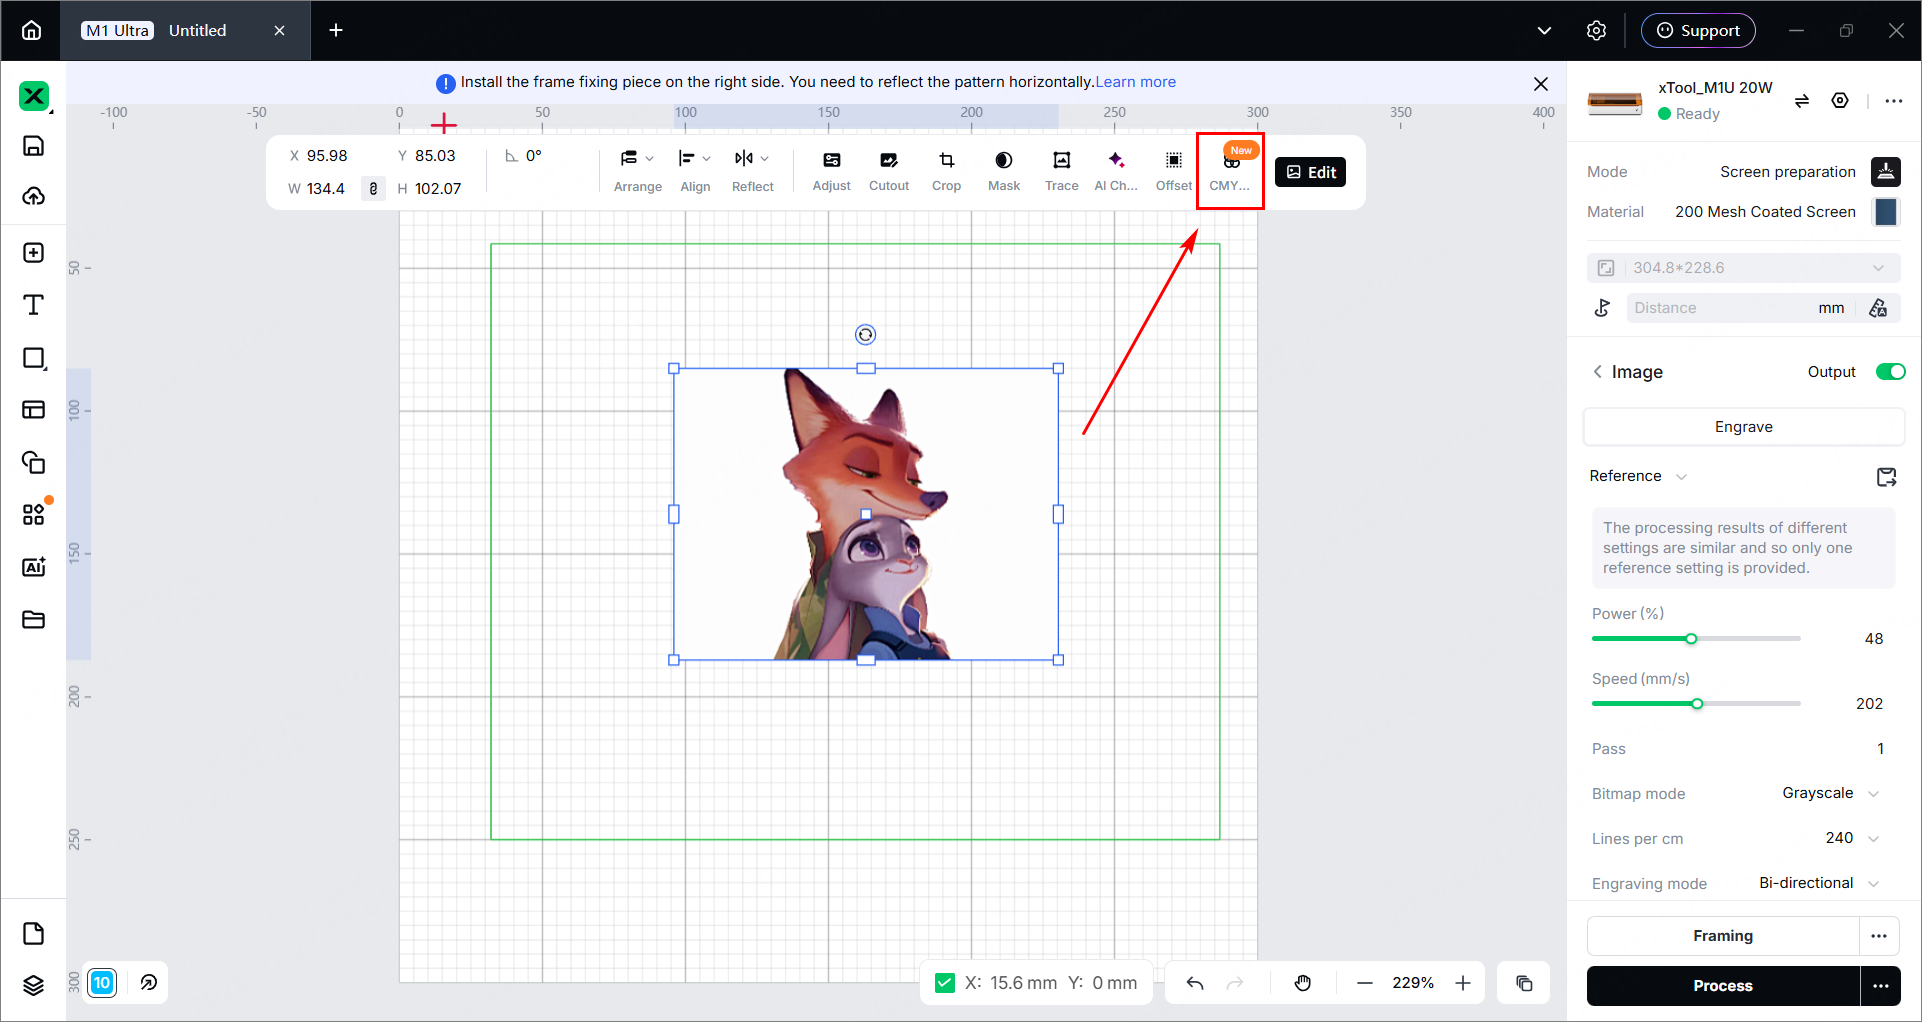
- Click the CMYK splitting icon to split CMYK channels.
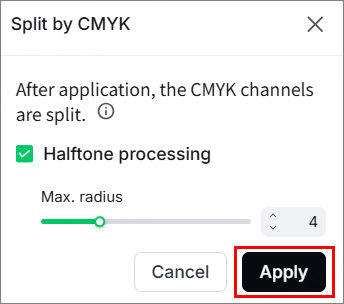
- Select the Halftone processing checkbox, adopt the default value 4 for the maximum radius, and click Apply.
- Click
 in the bottom left corner. The original bitmap image is divided into 4 images based on the split CMYK channels. Each image can be found on its corresponding layer: Cyan, Carmine, Yellow, and Black.
These 4 images are grouped automatically after the CMYK channels are split. Do not ungroup the images or move their relative positions.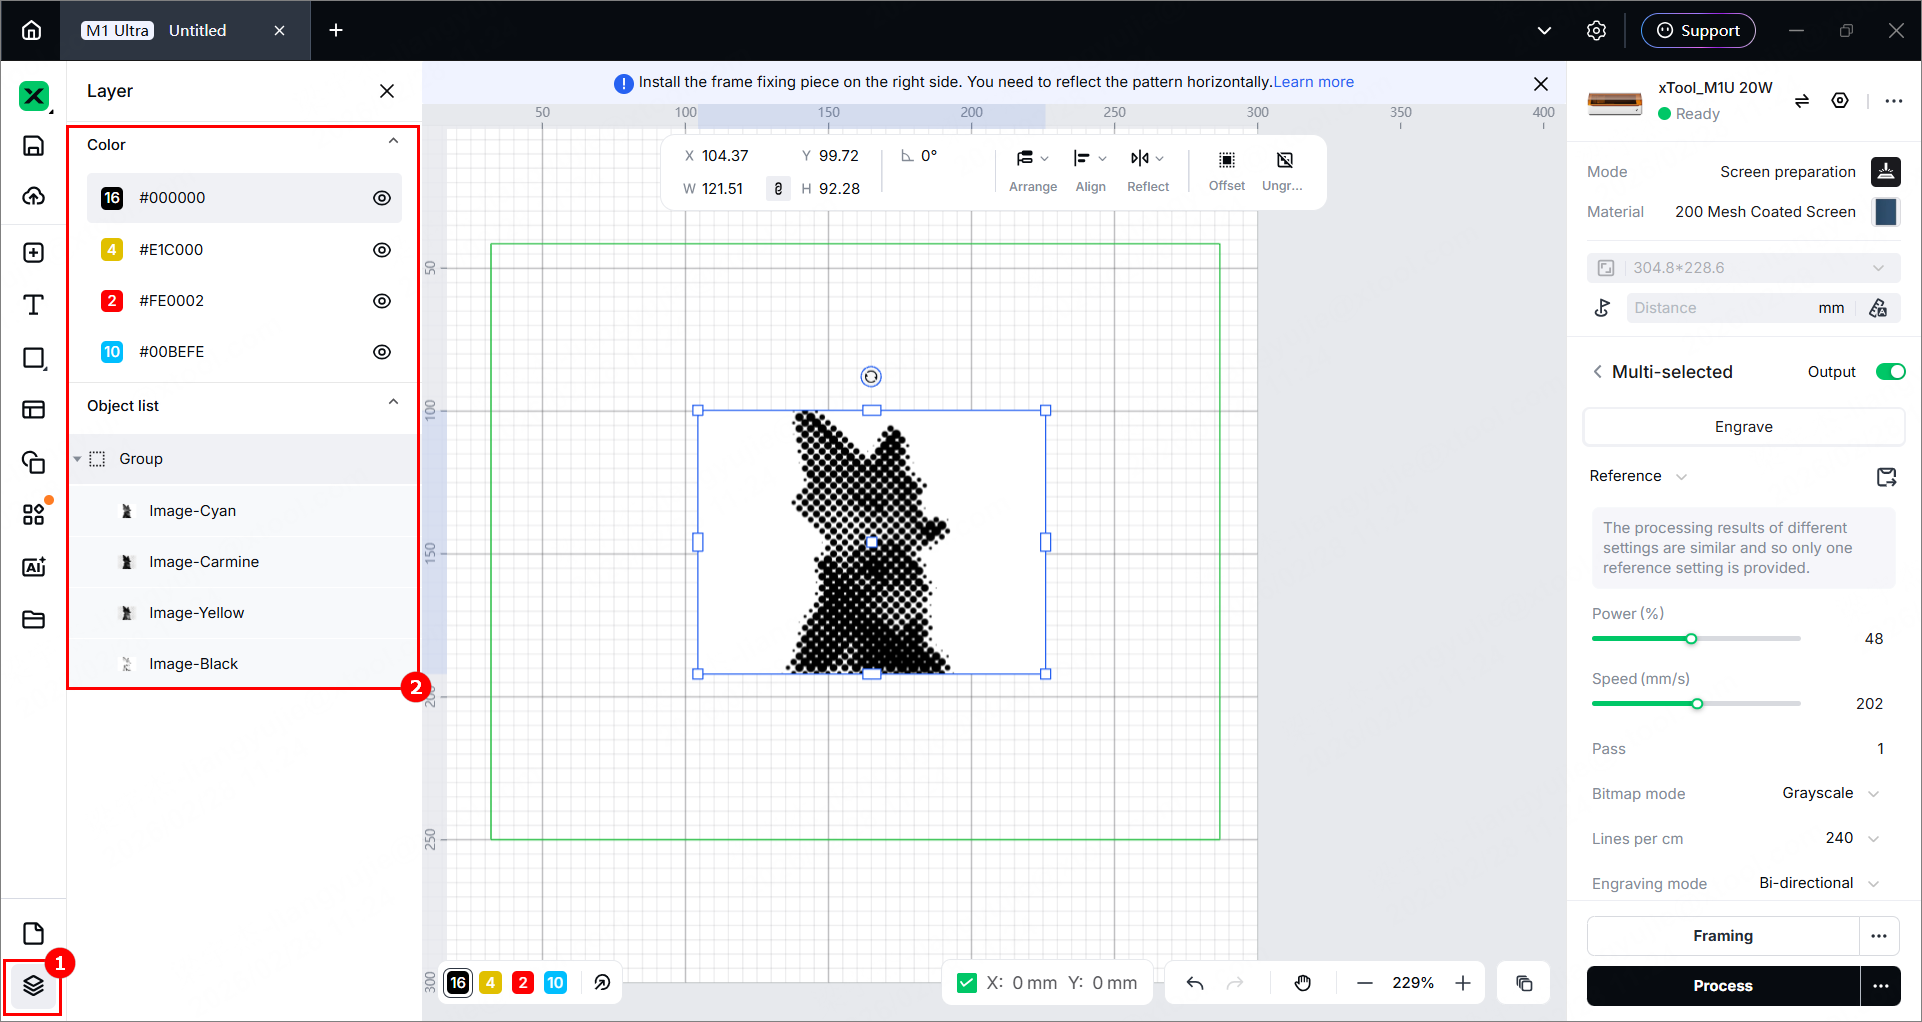
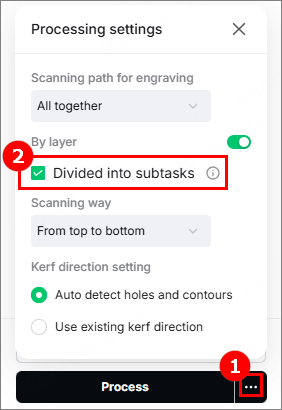
Note: The image of the magenta color is on the Carmine layer. - Use the reference parameters and click the icon next to the Process button. In the Processing settings dialog box, enable By layer and select Divided into subtasks.
- Click
to auto-measure the processing distance.
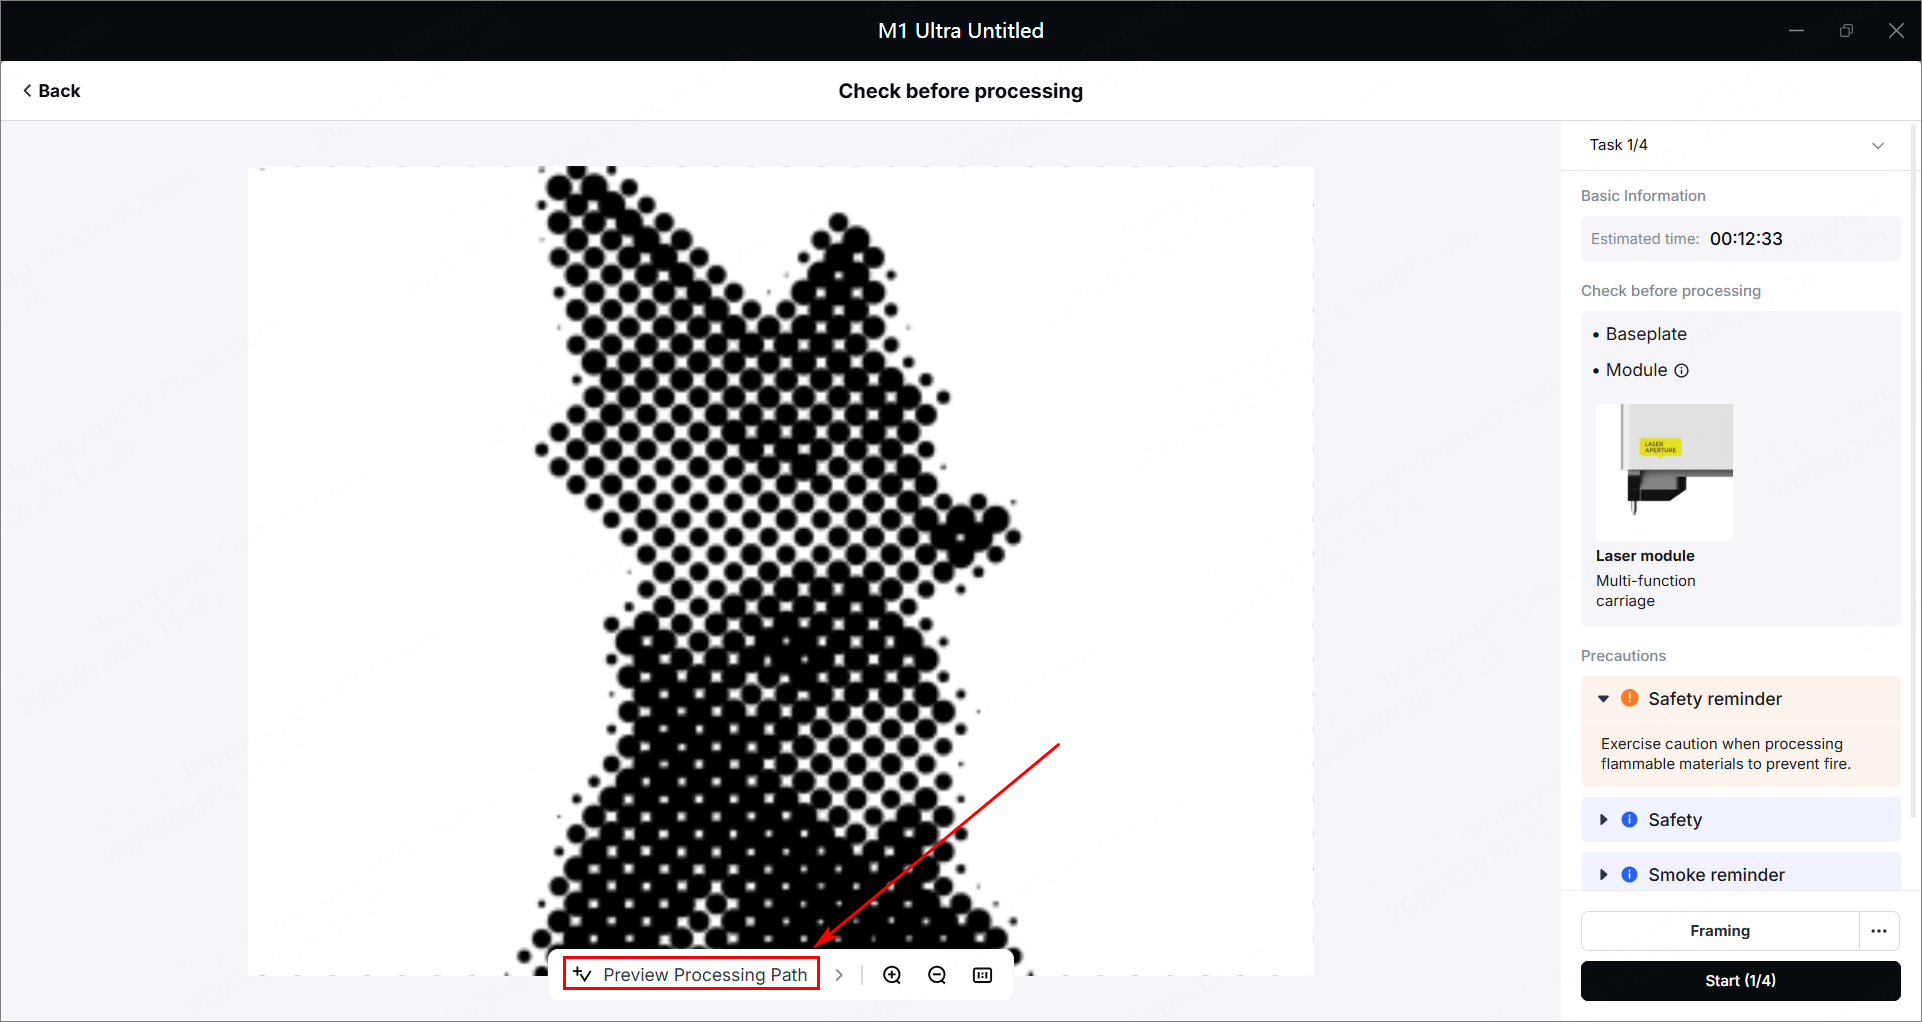
- In the bottom-right corner of the software, click Process. Then click Preview Processing Path.
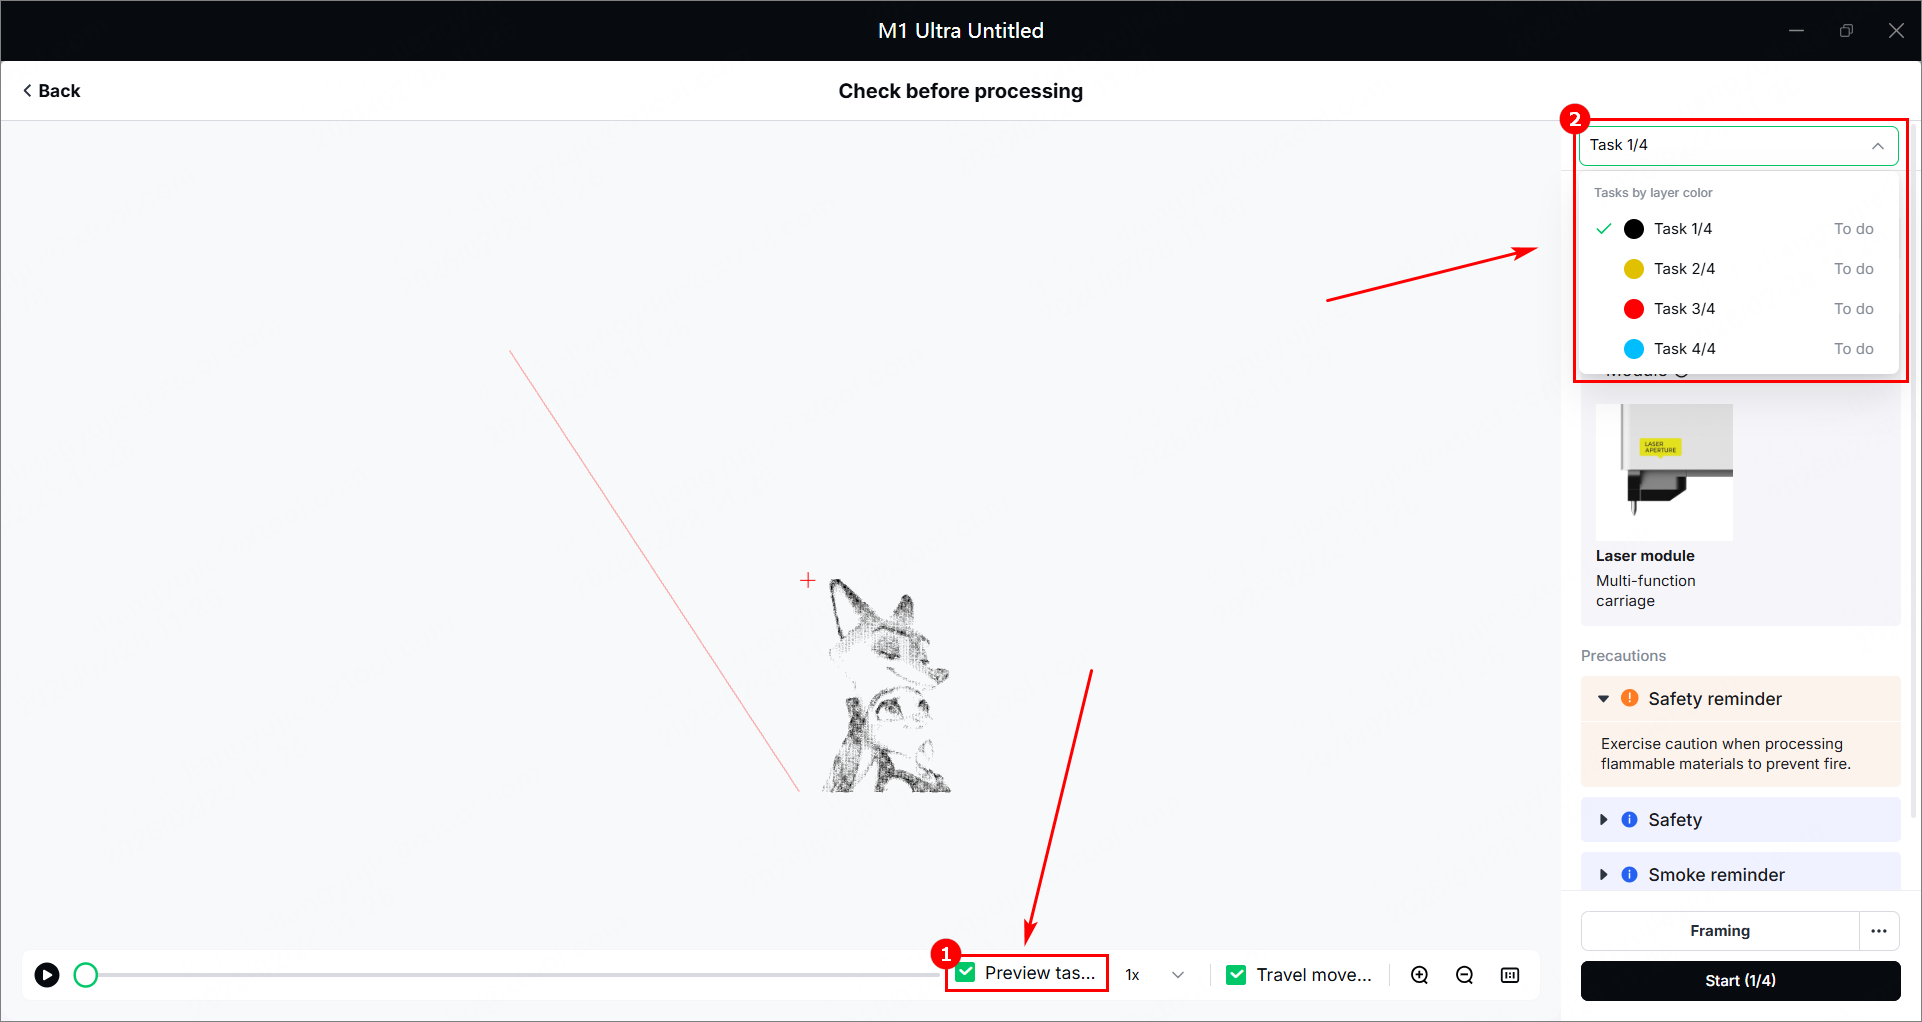
- Click Preview tasks in progress only, and you can check the objects to be processed in the selected task.
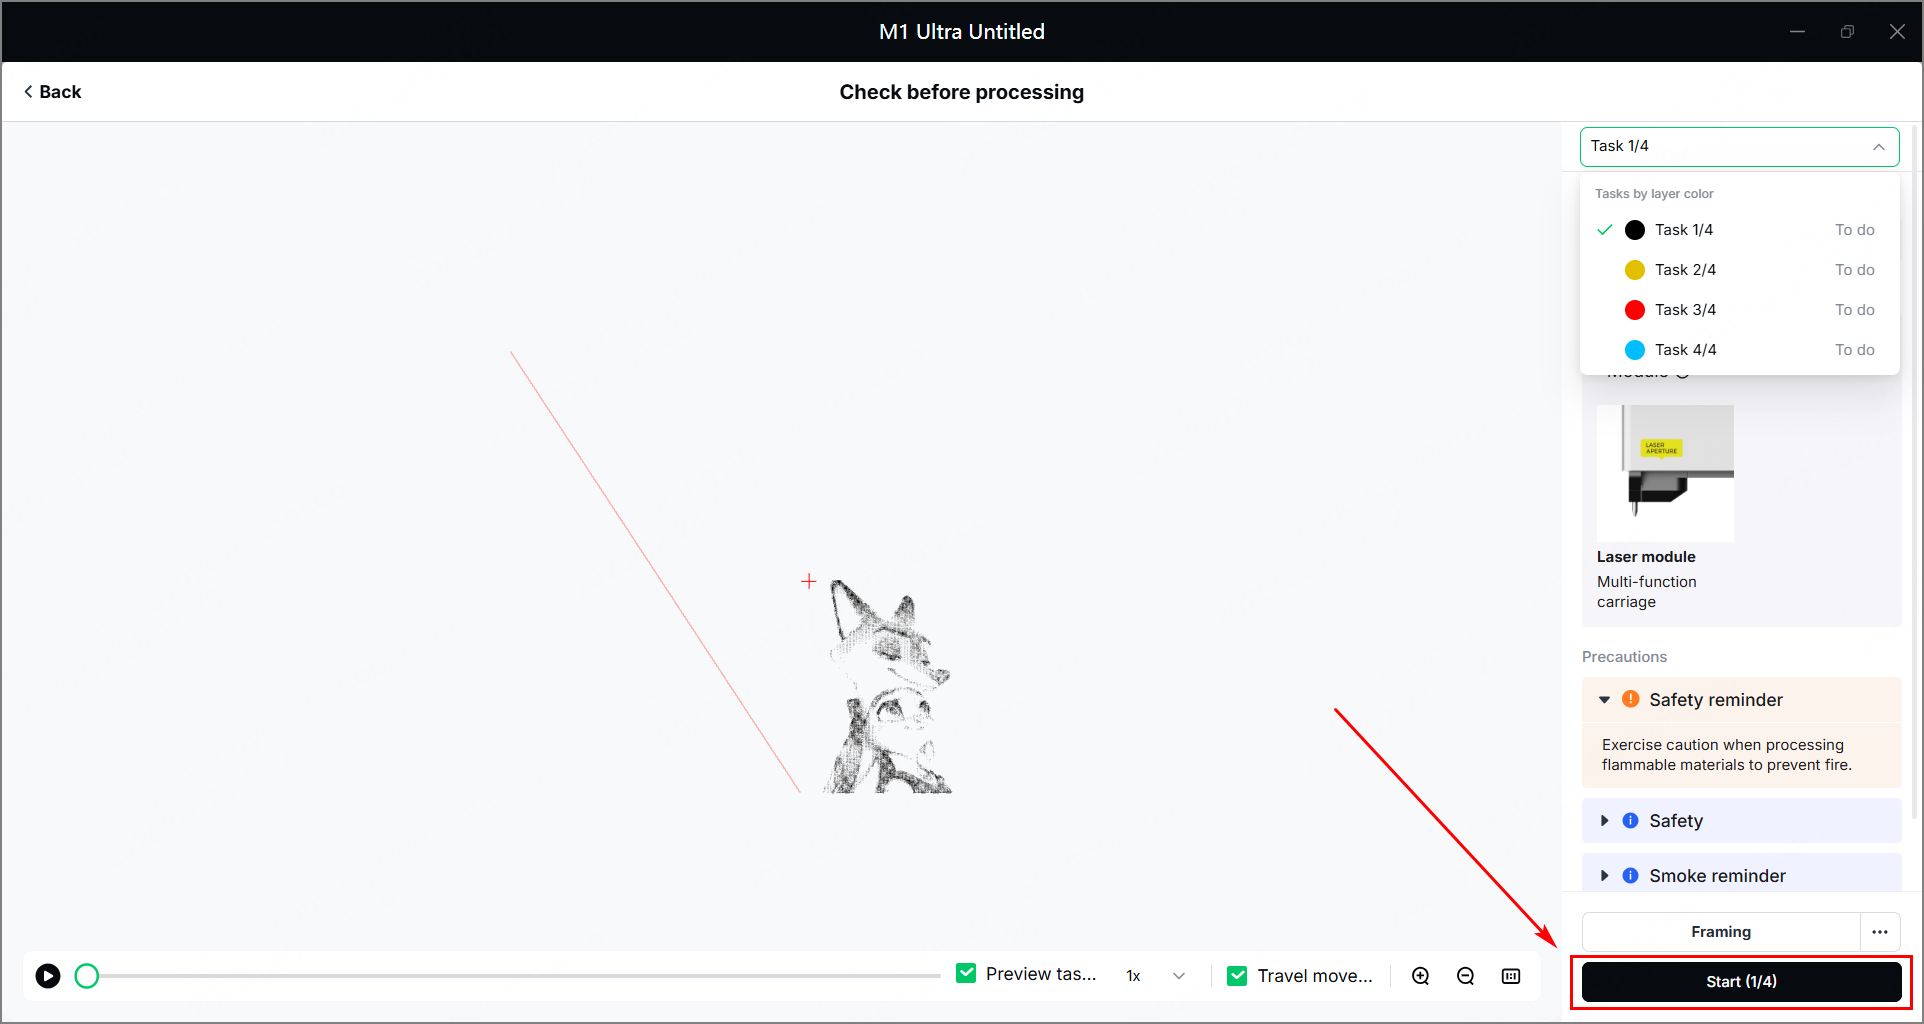
- Click Start (1/4) in the bottom-right corner to start the first task, and press the button on the device to start processing.
- Take the engraved screen out, and place a new screen into the device. Repeat the above steps and complete all processing tasks.
- Take the engraved screens out and use them for printing. Apply cyan, magenta, yellow, and black ink to the corresponding screens for multi-color printing. To faithfully reproduce the colors of the bitmap image, it is recommended to print in the following CMYK order: cyan, magenta, yellow, then black.
Note: Ensure that the ink color on one screen is consistent with the layer color of the screen image. Note that the magenta ink should be applied to the screen where the screen image is on the Carmine layer.
