1. Connect xTool M1 Ultra to xTool Studio
Refer to Connect and Setup xTool M1 Ultra with xTool Studio for instructions on connecting xTool M1 Ultra to xTool Studio.
2. Install the fine-point pen
(1) Remove the pen cap.
(2) Install the fine-point pen on the pen holder.
(3) Remove the cover of the basic carriage, and open the clamp.
(4) Insert the pen into the carriage clamp. When the pen holder is flush with the top of the clamp, close the clamp to secure it.
(5) Reinstall the cover on the basic carriage.
3. Place the material
Open the lid of xTool M1 Ultra, and place the LightGrip cutting mat on the baseplate. Place a piece of paper on the cutting mat.
4. Select the processing mode and material name
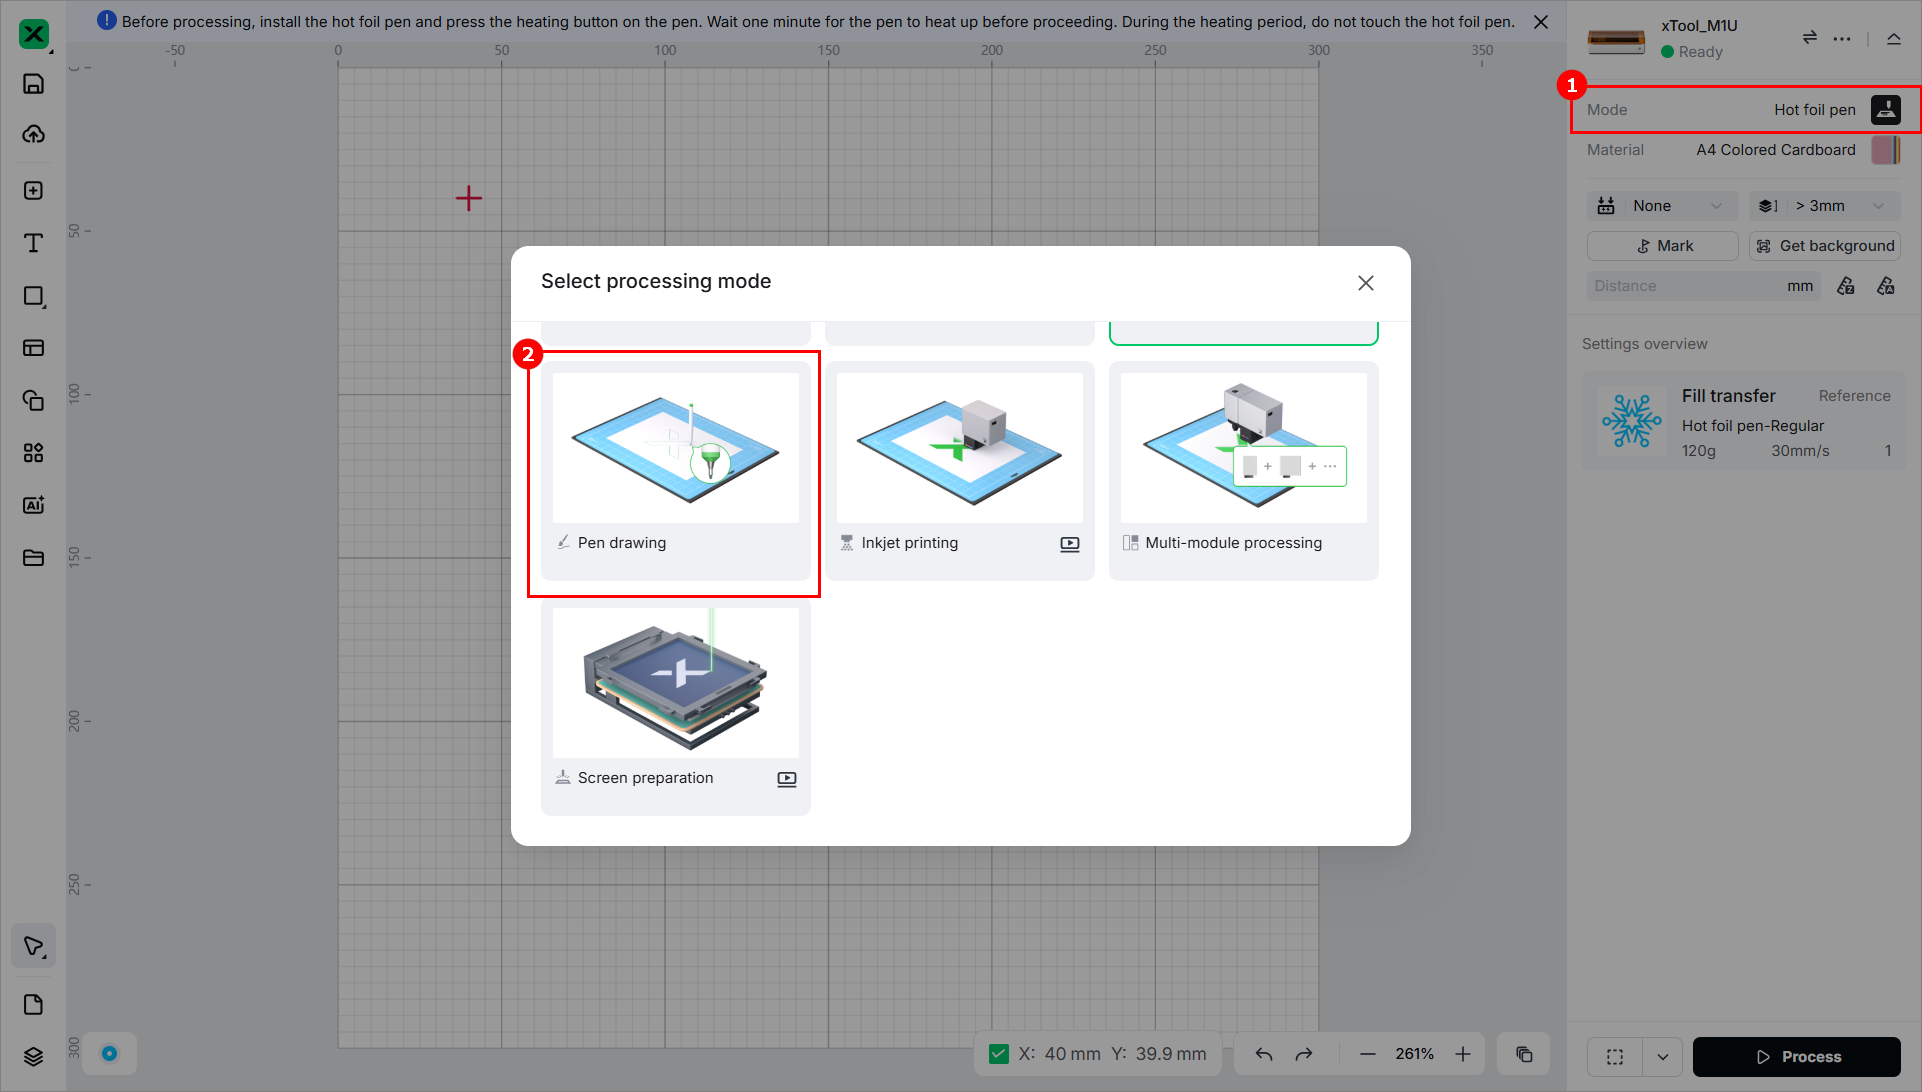
(1) In the right panel of the page, click the current processing mode, and then select Pen drawing as the processing mode.
(2) Click Unknown Material, select a desired material, and click Apply.

5. Design a processing object and set parameters
(1) Use the tools on the left side to create objects.
Note: You can import images, insert shapes, enter text, draw vector graphics, and so on. For more information on how to use xTool Studio to design objects, see Software Learning Center.
(2) Select the objects, and use the tools above the canvas for further editing.
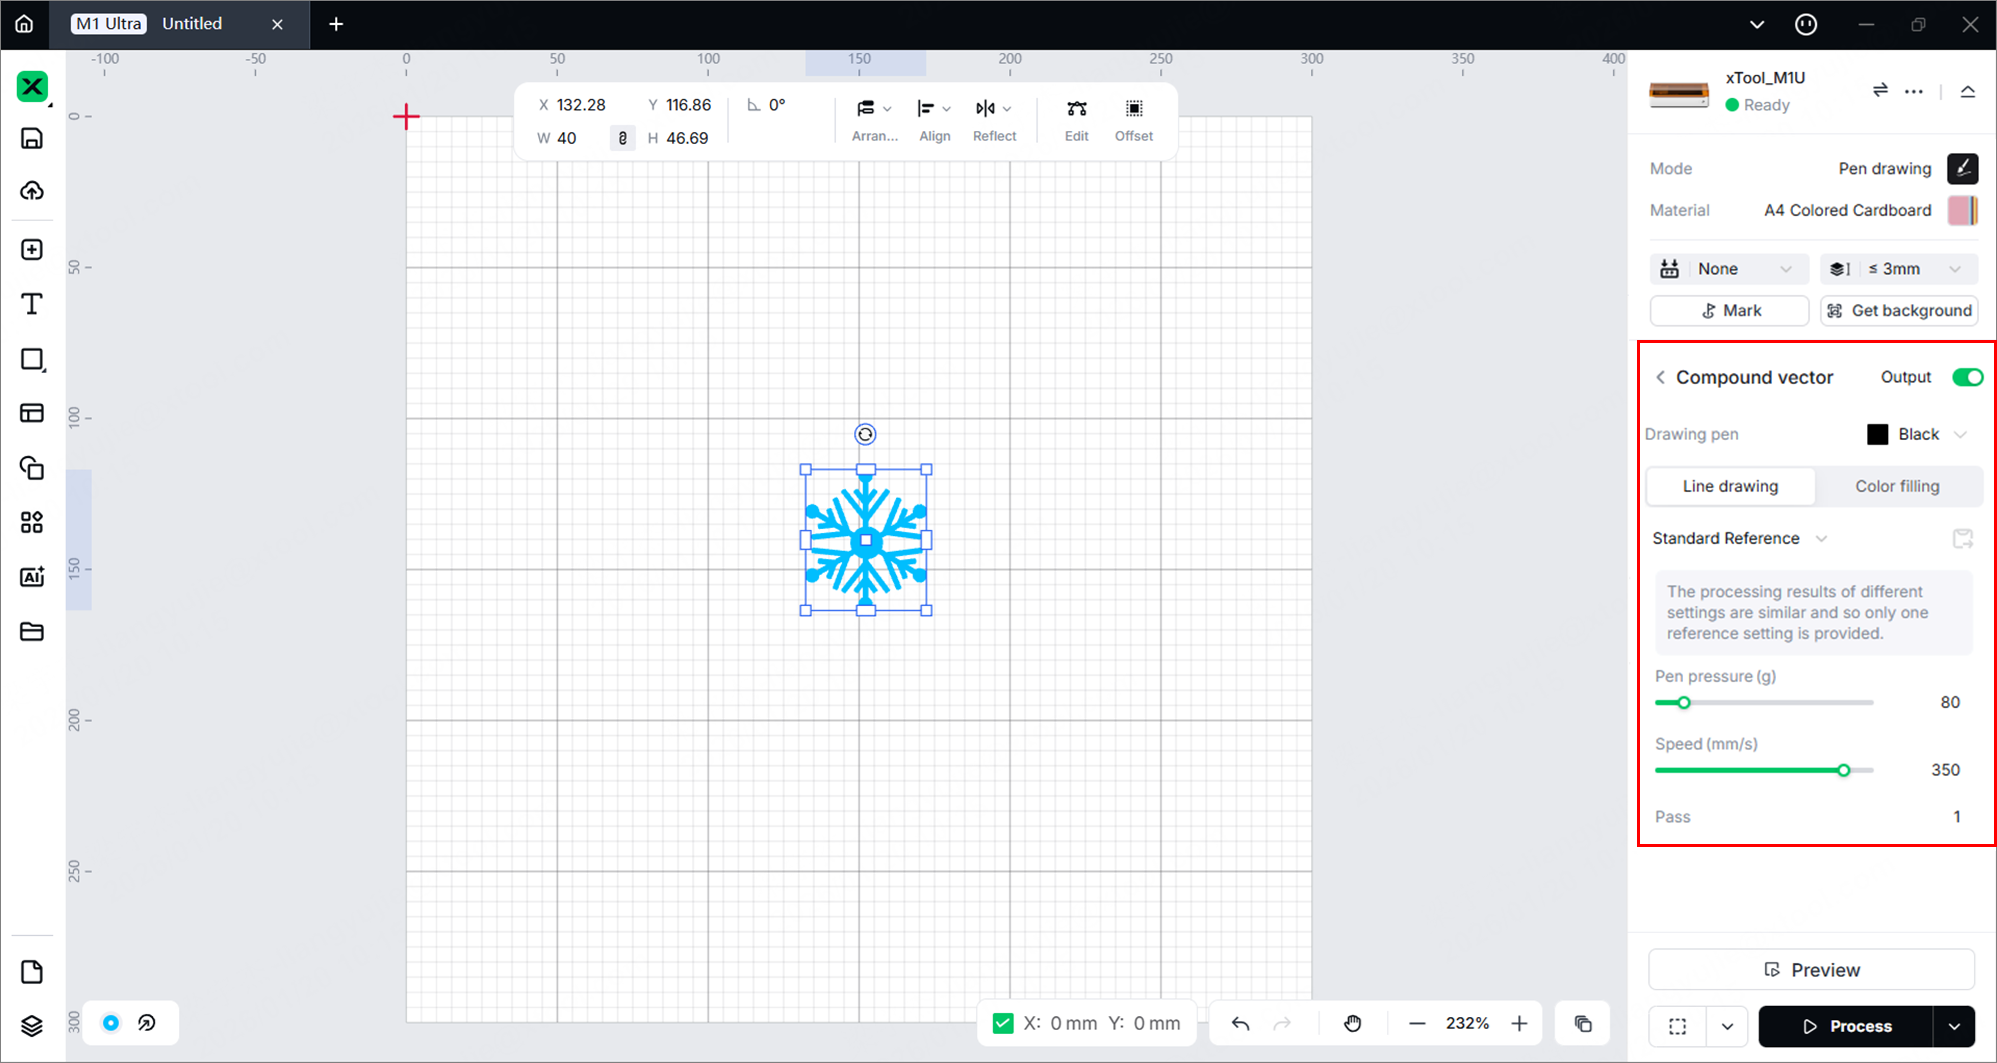
(3) Select objects on the canvas and set their parameters in the right panel.
6. Set the pen color
(1) In the right panel, click the pen color.
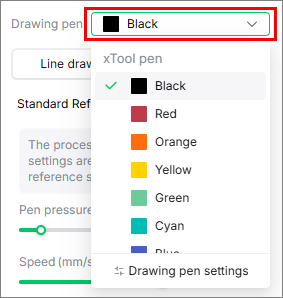
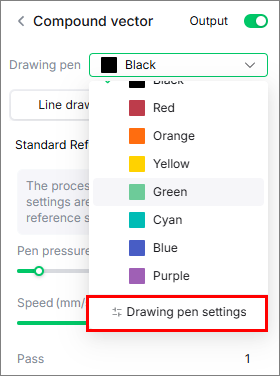
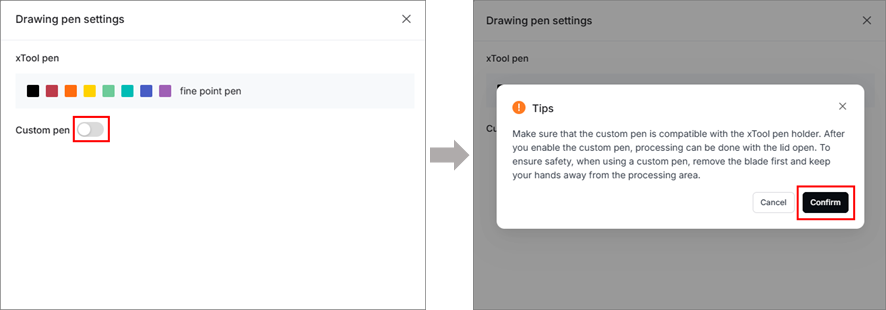
(2) Click Drawing pen settings.
(3) Click ![]() icon, read the Tips, then click Confirm.
icon, read the Tips, then click Confirm.
(4) Click ![]() icon, then set the name, pen type, stroke size, and color for the custom pen.
icon, then set the name, pen type, stroke size, and color for the custom pen.
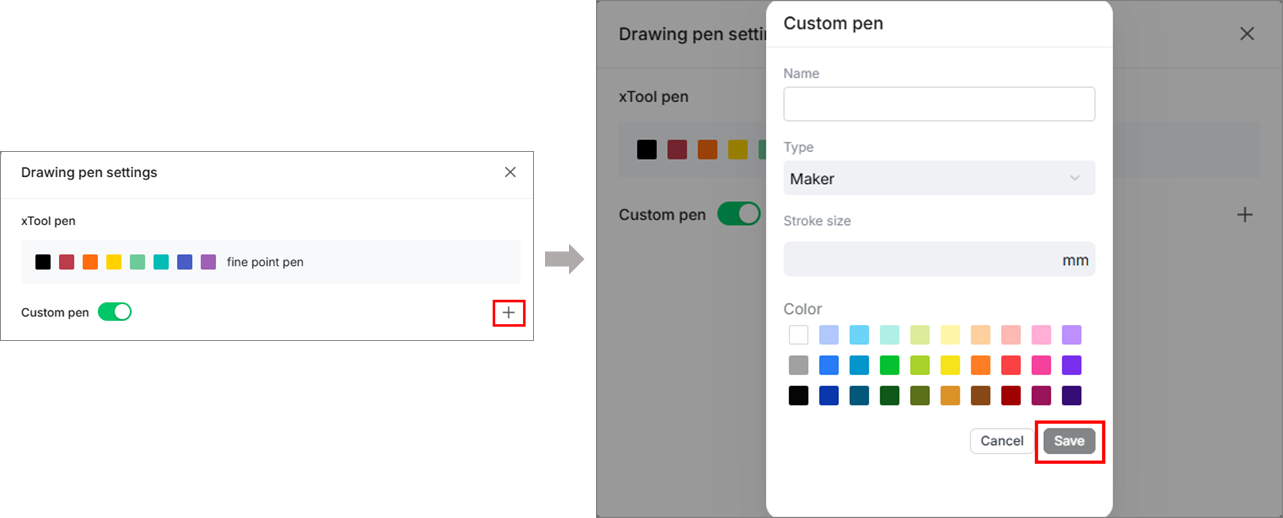
Note: If you use a custom pen, remove the blade first.
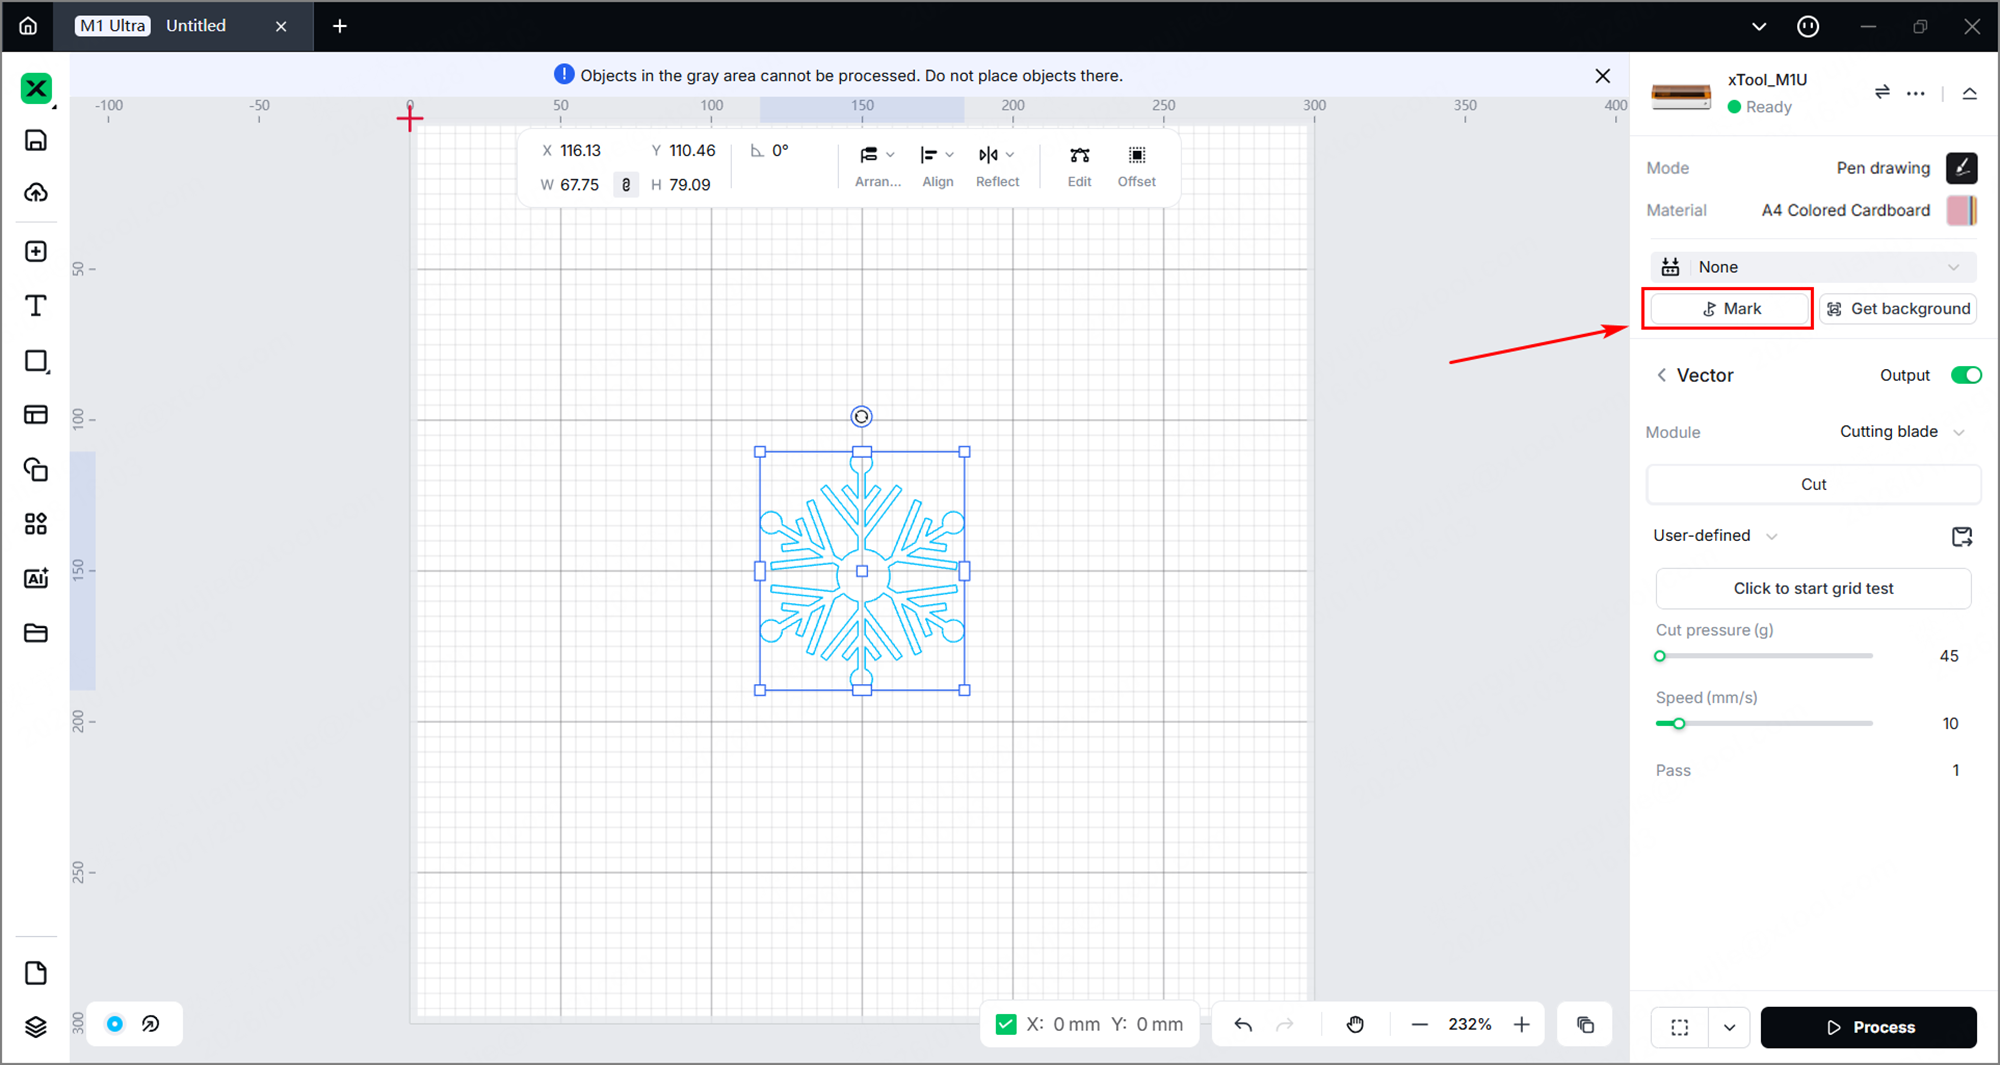
7. Mark the processing area
(1) In the right panel of the page, click Mark to mark the processing area.
(2) Select a marking mode based on the shape of the target processing area, and click Start marking.
(3) Manually move the laser module to make the red cross spot fall at a vertex of the target processing area, and press the Point marking button on the device to record the position. Then, repeat the same steps to record the other required vertex(es) for the target processing area.

(4) Make sure two points are marked. Click End marking > Done, and then the target processing area will be marked out on the canvas.
8. Preview the processing area
(1) Move the laser module over the material. Ensure that the red cross falls on the surface of the material. Then close the lid.
(2) Click  in the bottom-right corner of the software to set framing speed.
(2) Click in the bottom-right corner of the software and press the framing button on xTool M1 Ultra to start framing.
(3) After confirming the processing area is properly set, click Framing completed in xTool Studio.
9. Start processing
(1) In the bottom-right corner of the software, click Process.
(2) Check whether the accessories or modules are prepared, and read the safety precautions.
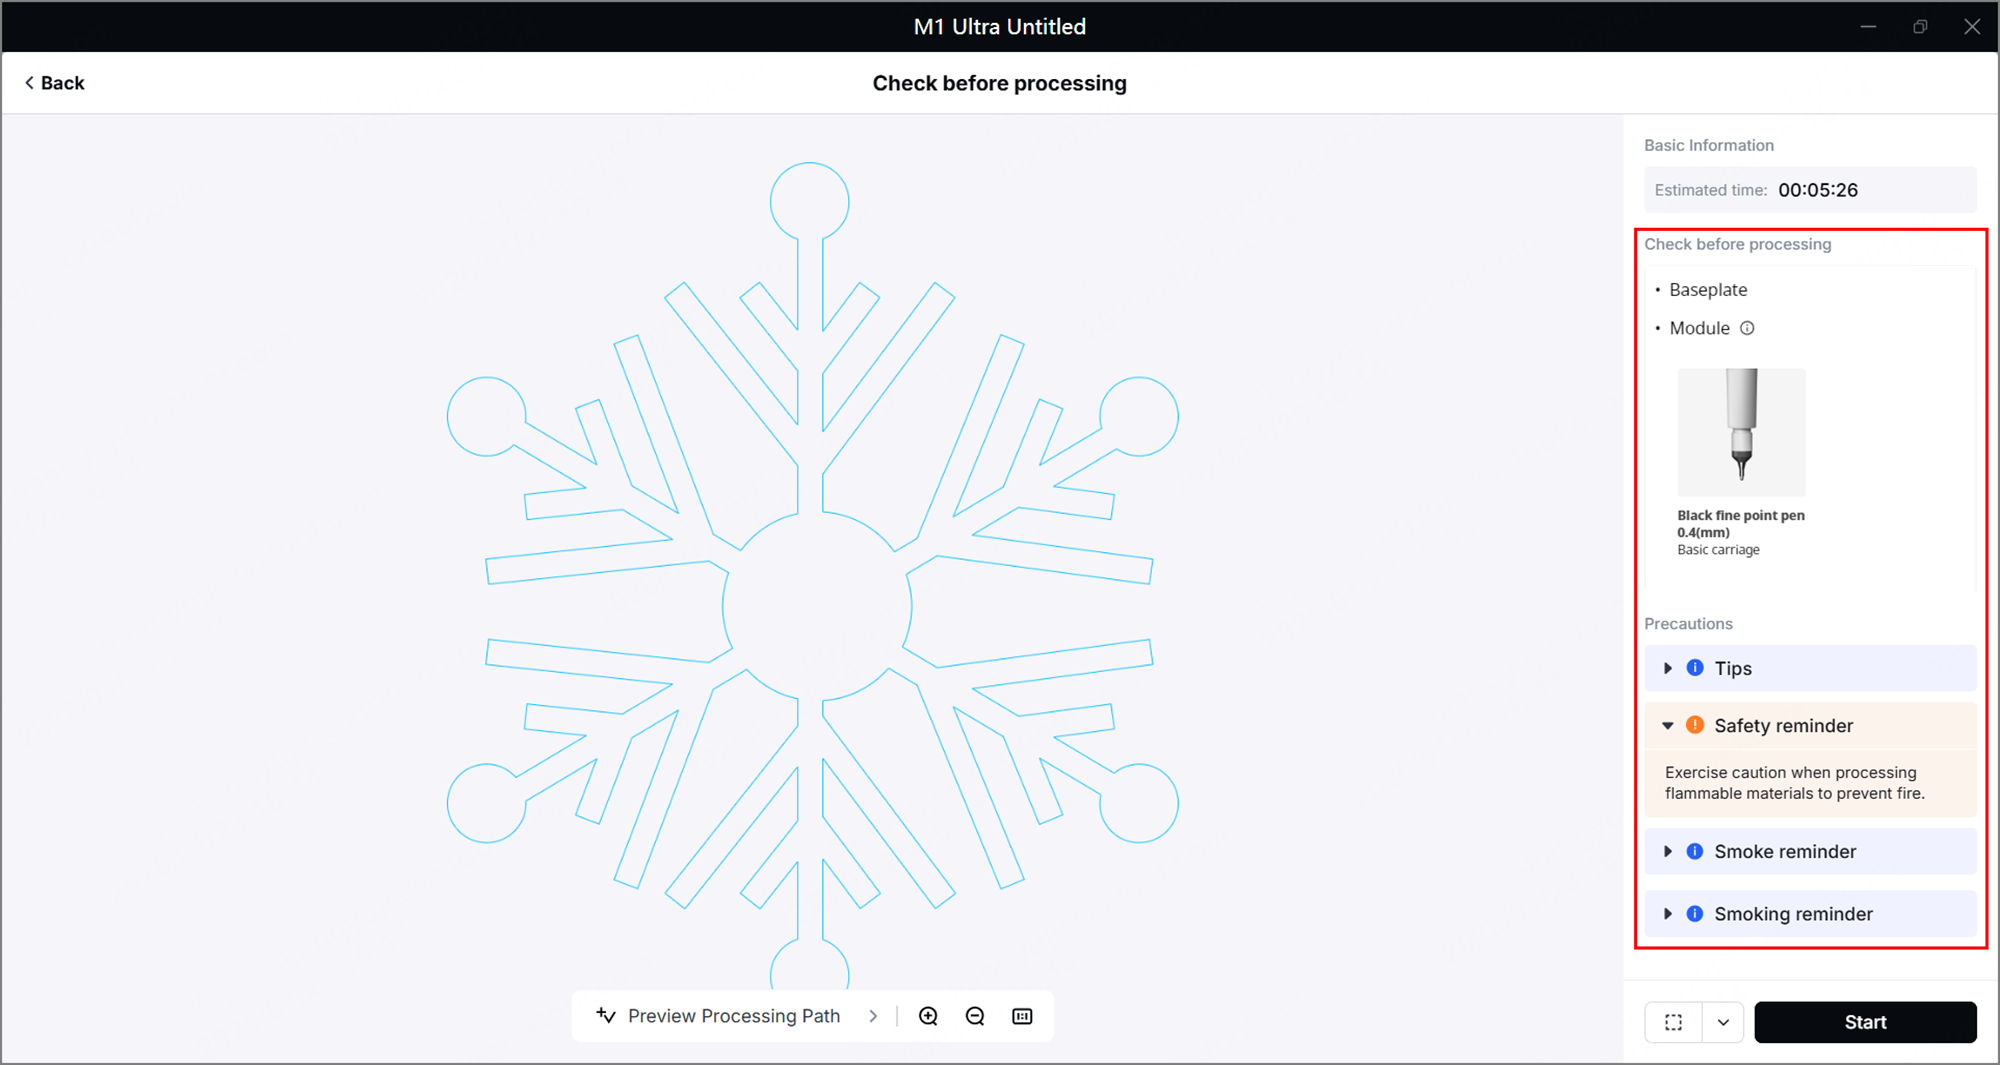
(3) Click Preview Processing Path and icon to preview the processing path.
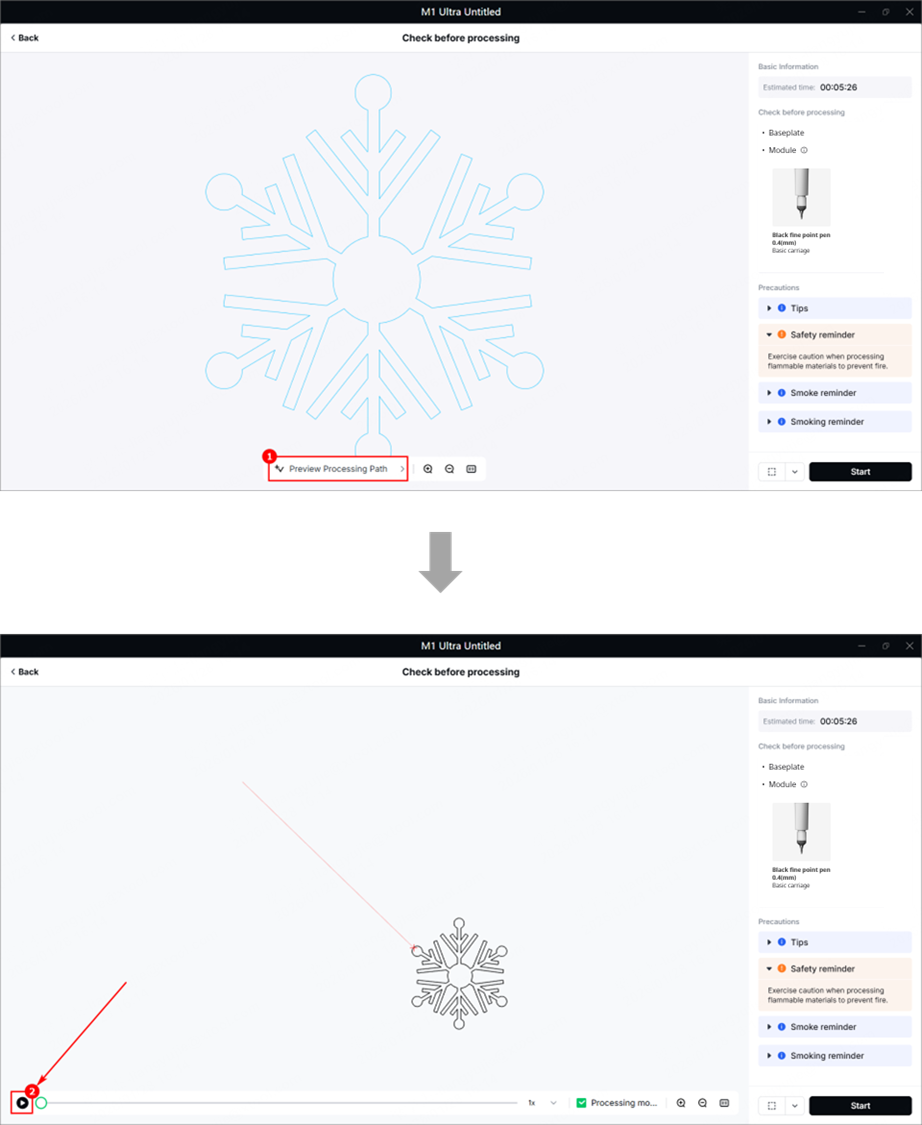
(4) In the bottom-right corner of the software, click Start.
(5) When the software shows Ready, press the button on xTool M1 Ultra to start processing.
