List of items
Electrostatic mat | Material to be processed |
Stickers | User manual |
Meet xTool M1 Ultra Electrostatic Mat
Note: The effective processing area is defined within the green dotted line, as illustrated in the image above. Due to potential minor variations during installation within an acceptable range, the exact dimensions of the usable area may vary slightly.
Install your xTool Electrostatic Mat into M1 Ultra
1. Prepare your M1 Ultra
Unscrew the thumb screws securing the baseplate of your xTool M1 Ultra. Ensure the baseplate is free from debris. Remove any existing processing module from the multi-function holder before installing the mat to prevent damage.
2. Place the Electrostatic Mat
(1) Position the electrostatic mat inside the M1 Ultra, and carefully guide the connecting cable through the opening.
(2) Orient the mat with the xTool logo facing up and align the groove to secure it in the M1 Ultra.
3. Secure the baseplate
Tighten the thumb screws to secure the baseplate of your M1 Ultra.
4. Place the electrostatic protection sheet
Carefully place the electrostatic protection sheet on top of the electrostatic mat.
Note: DO NOT place more than one electrostatic protection sheet on the electrostatic mat.
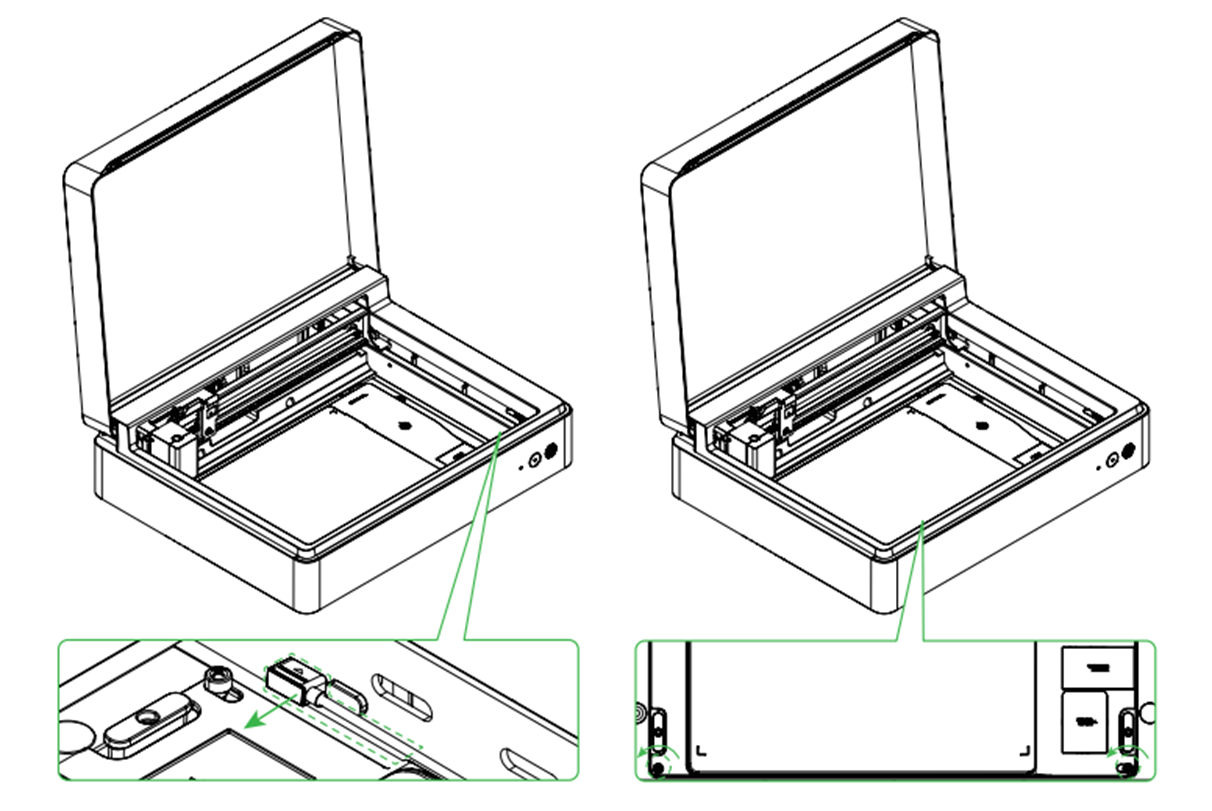
5. Connect the cable
Insert the connection cable from the electrostatic mat into the rotary attachment port on your M1 Ultra.
6. Verify connection
Confirm that the electrostatic mat is securely connected to the M1 Ultra.
Process materials with xTool Electrostatic Mat
1. Connect to xTool Studio
Refer to Connect and Setup xTool M1 Ultra with xTool Studio for instructions on connecting xTool M1 Ultra to xTool Studio.
2. Select processing mode
(1) In the top-right corner of the xTool Studio, select a desired processing mode.
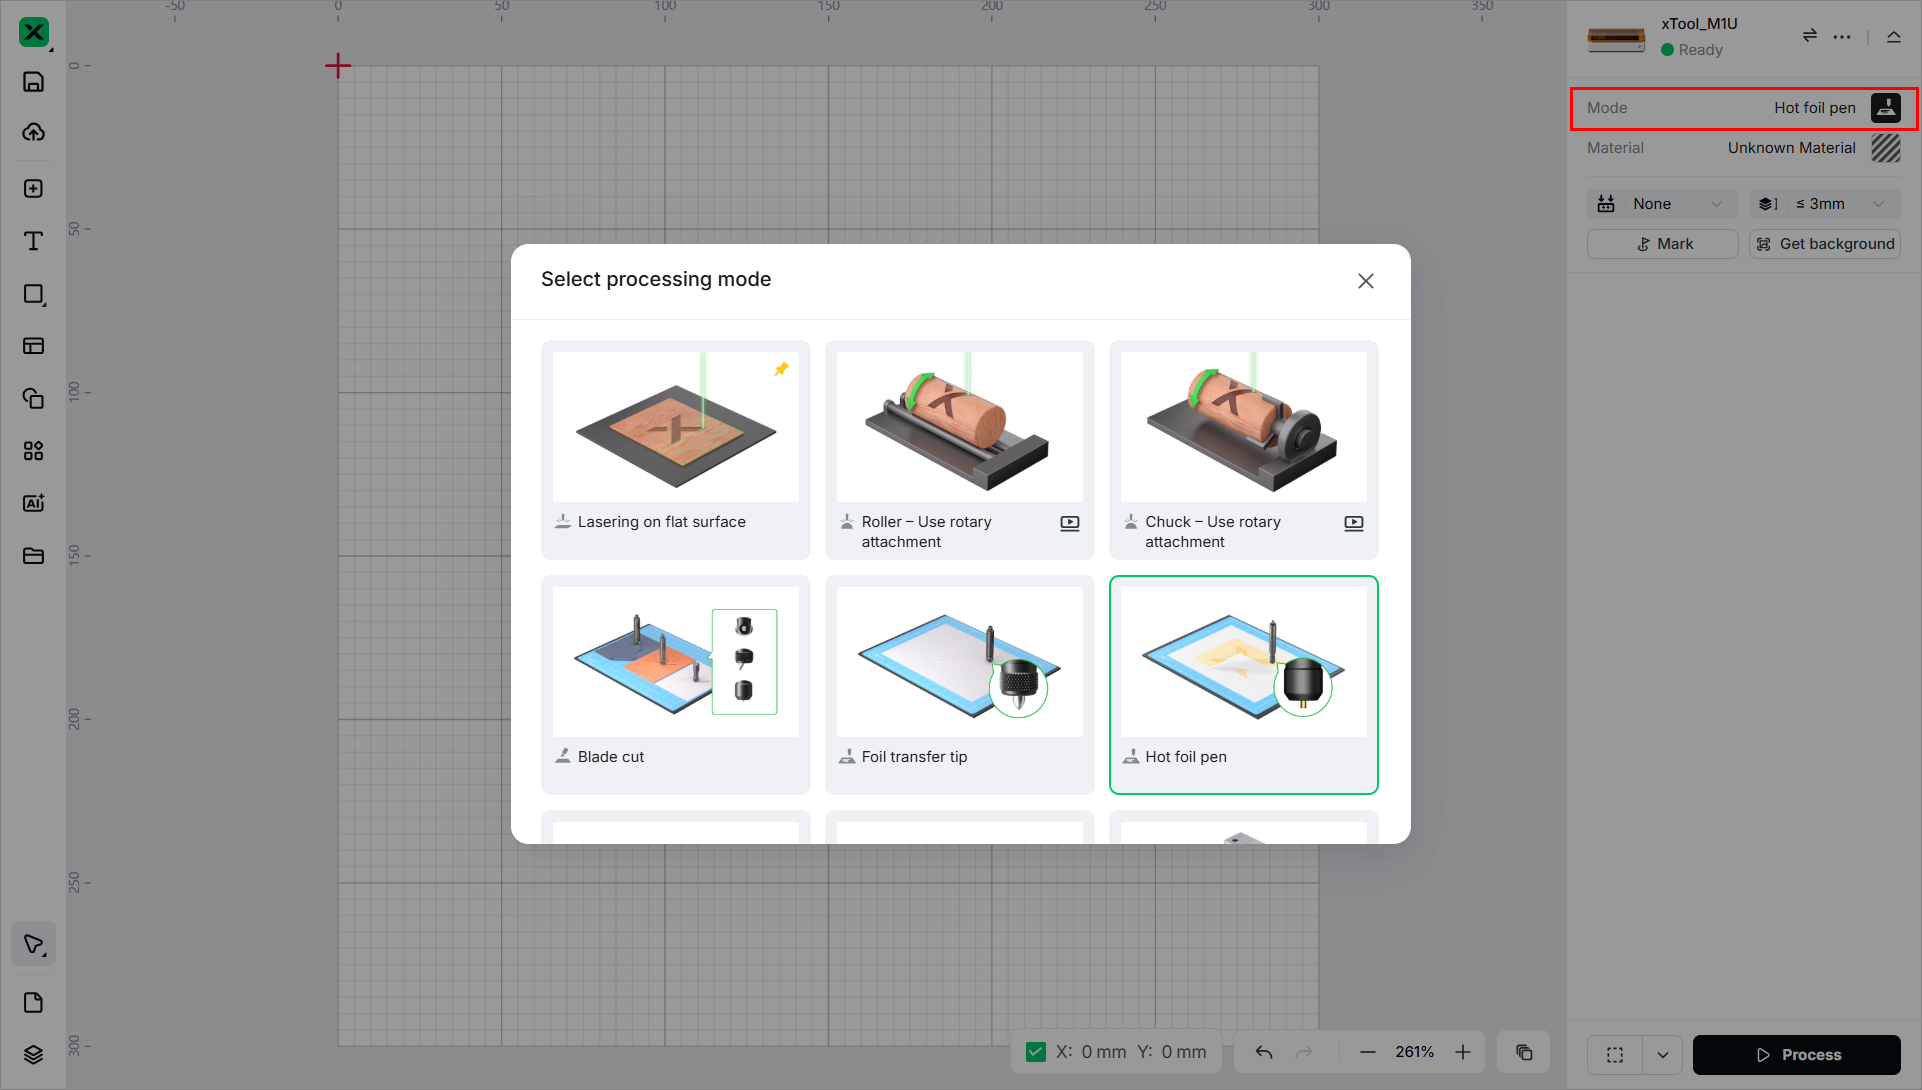
Note: xTool Electrostatic Mat is not compatible with laser processing. Please remove the mat before initiating any laser operations.
(2) On the right panel, switch the setting to Electrostatic Mat.

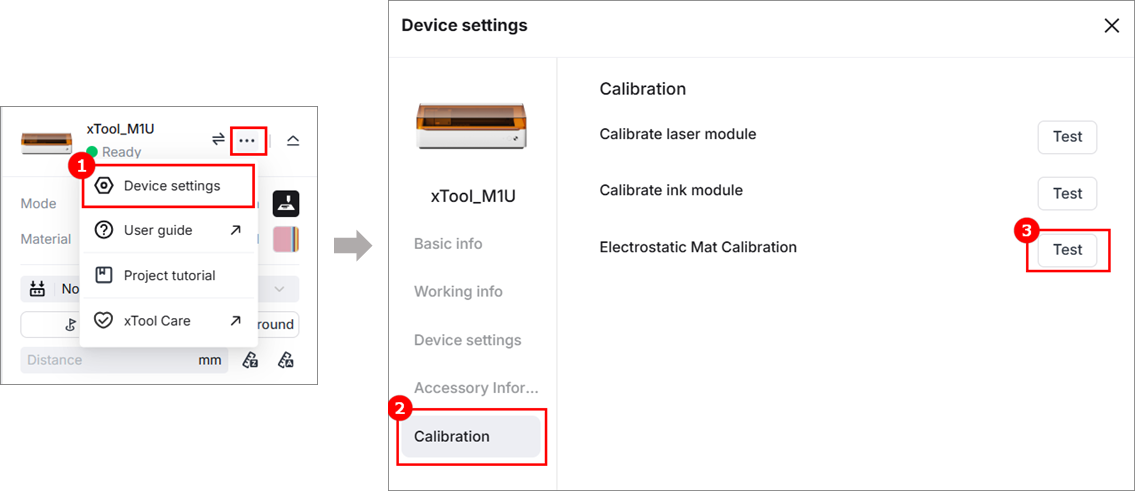
3. Calibrate your Electrostatic Mat before processing
(1) In the top-right corner of the xTool Studio, click ![]() icon > Device settings. On the Calibration page, click Test for Electrostatic Mat Calibration.
icon > Device settings. On the Calibration page, click Test for Electrostatic Mat Calibration.
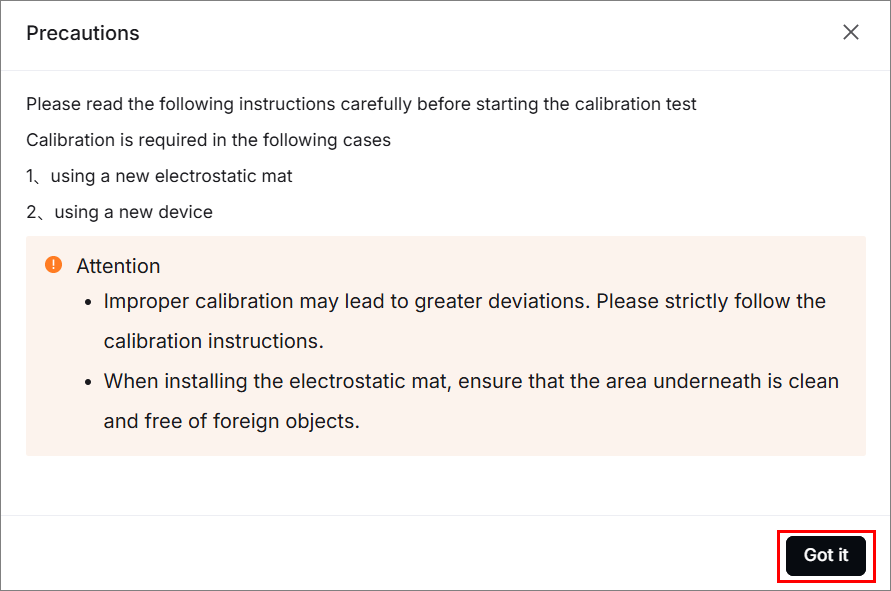
(2) Click Got it after carefully reading the instructions.
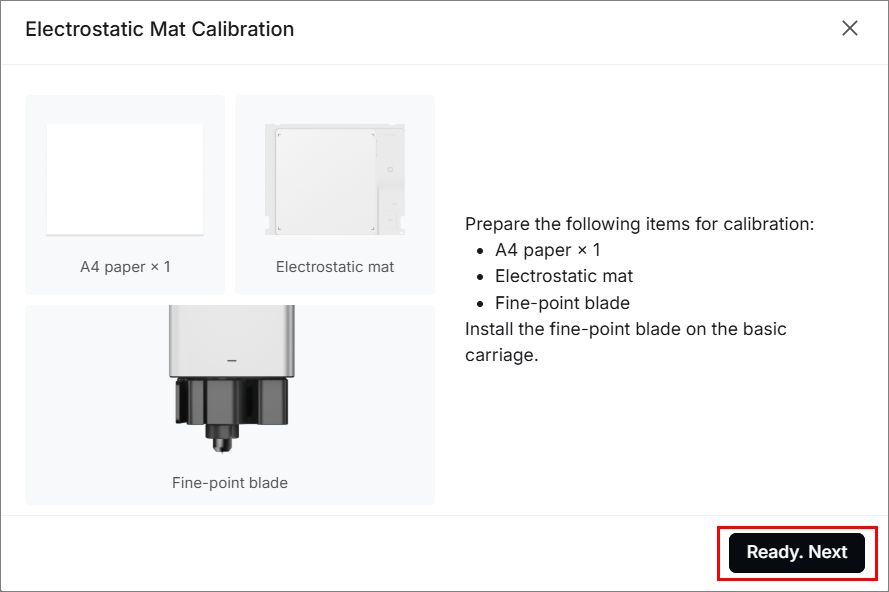
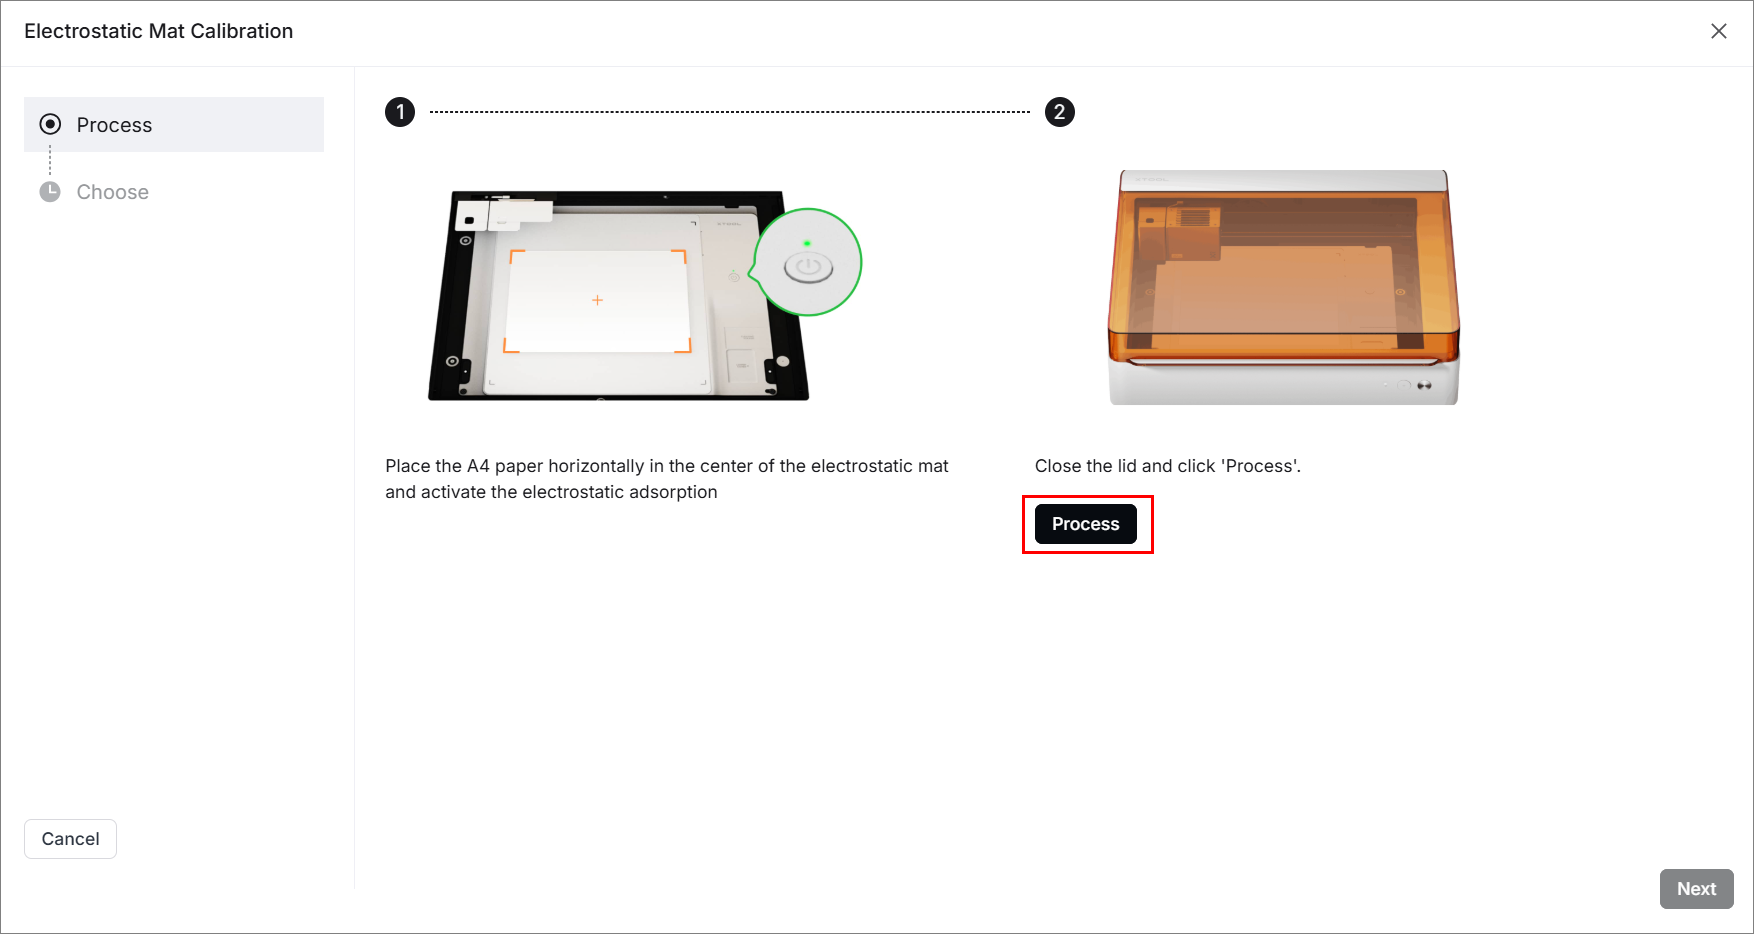
(3) Prepare all items listed on the window and click Ready. Next.
(4) Place A4 paper as instructed on the electrostatic mat. Activate electrostatic adsorption and click Process after confirmation.
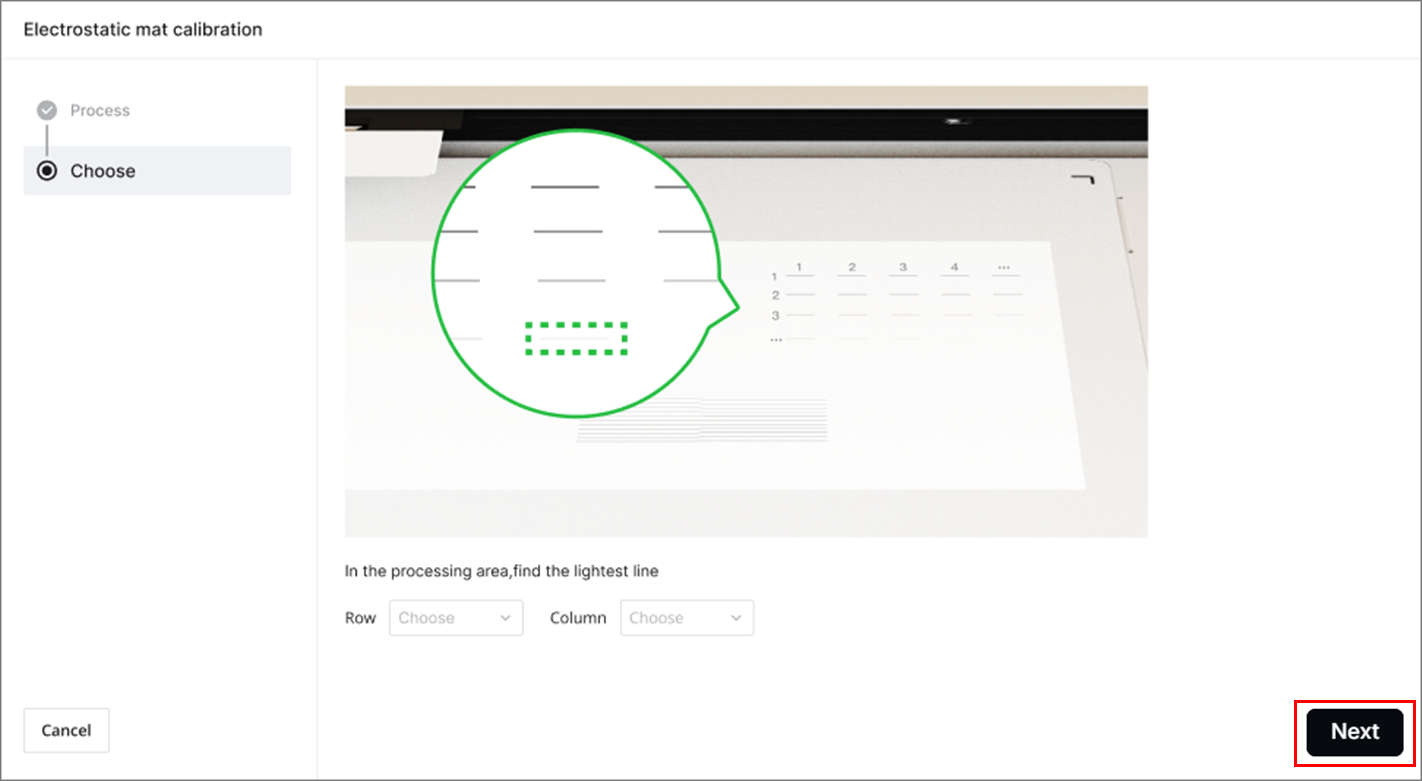
(5) In the processed area of the A4 paper, find the lightest line. Enter the row and column numbers of the lightest line in the appropriate fields and click Next.
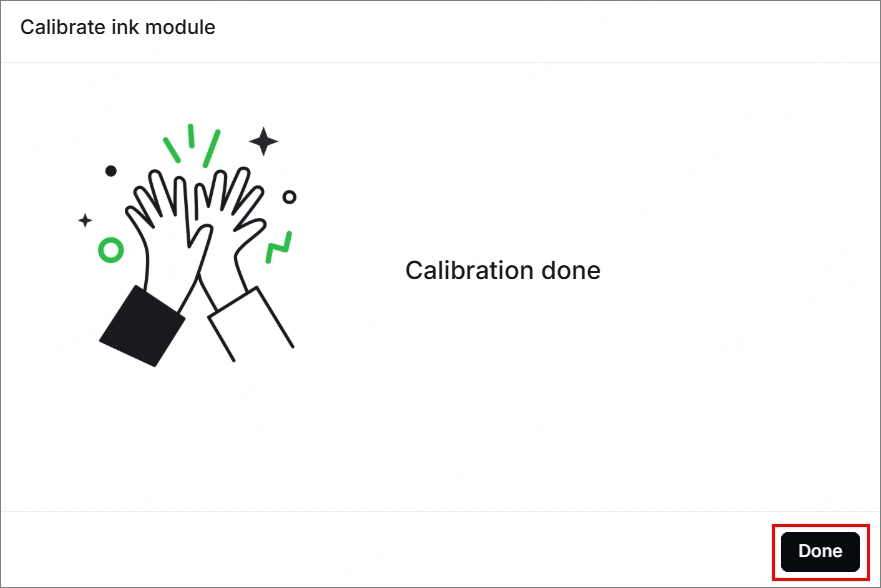
(6) Click Done, then calibration is complete.
Note: For a video reference on xTool Electrostatic Mat calibration, please refer to How to Calibrate xTool Electrostatic Mat.
4. Place the material
(1) Place the material to be processed on the electrostatic protection sheet.
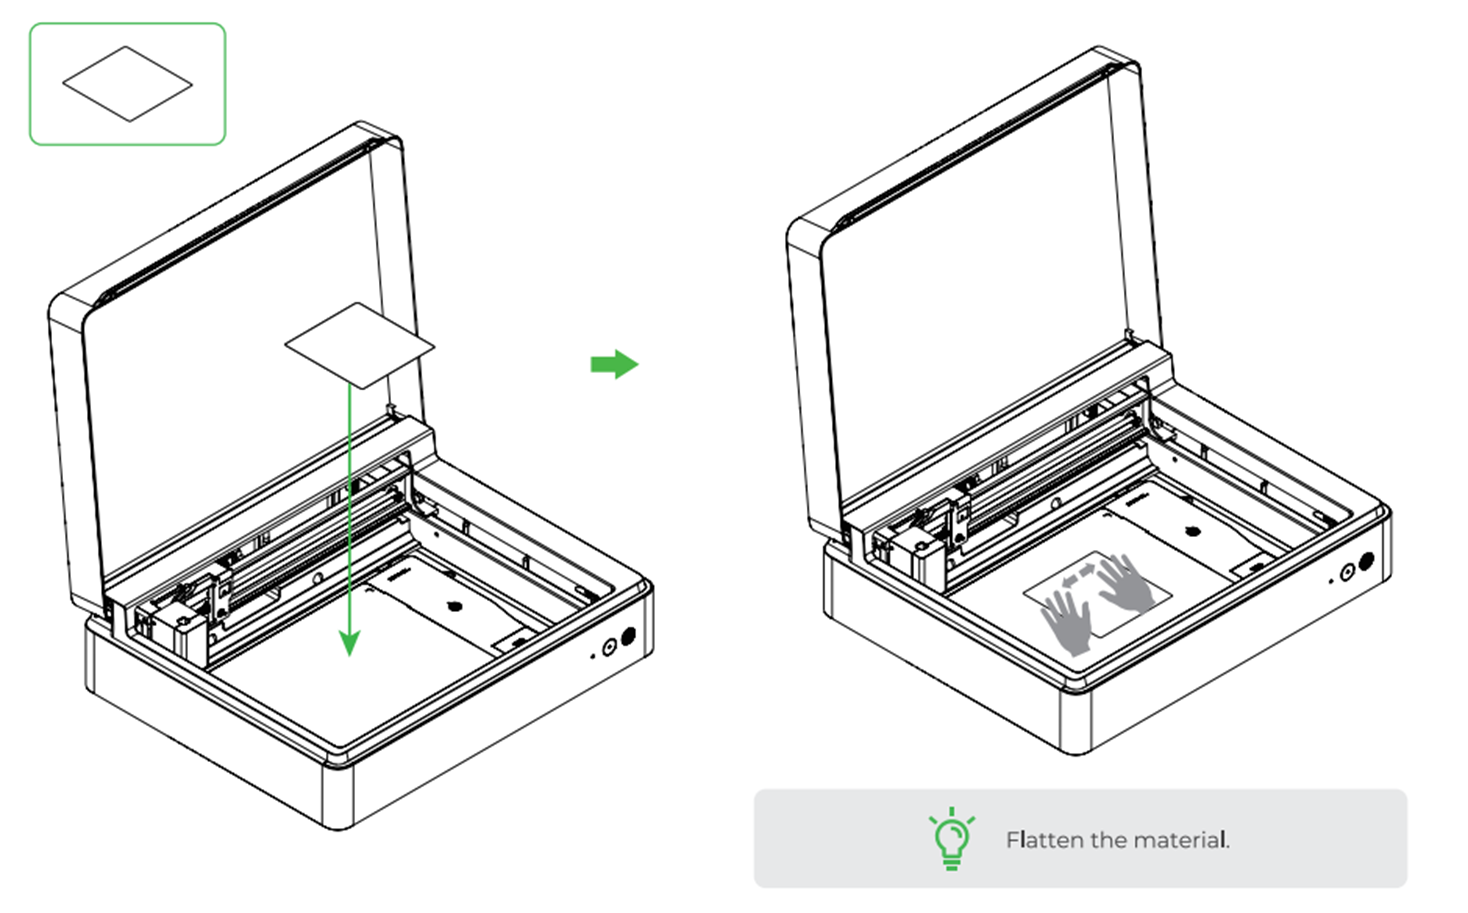
Note: For an uneven surface, flatten the material with your hands. If the edges are warped, use stickers to secure them after flattening.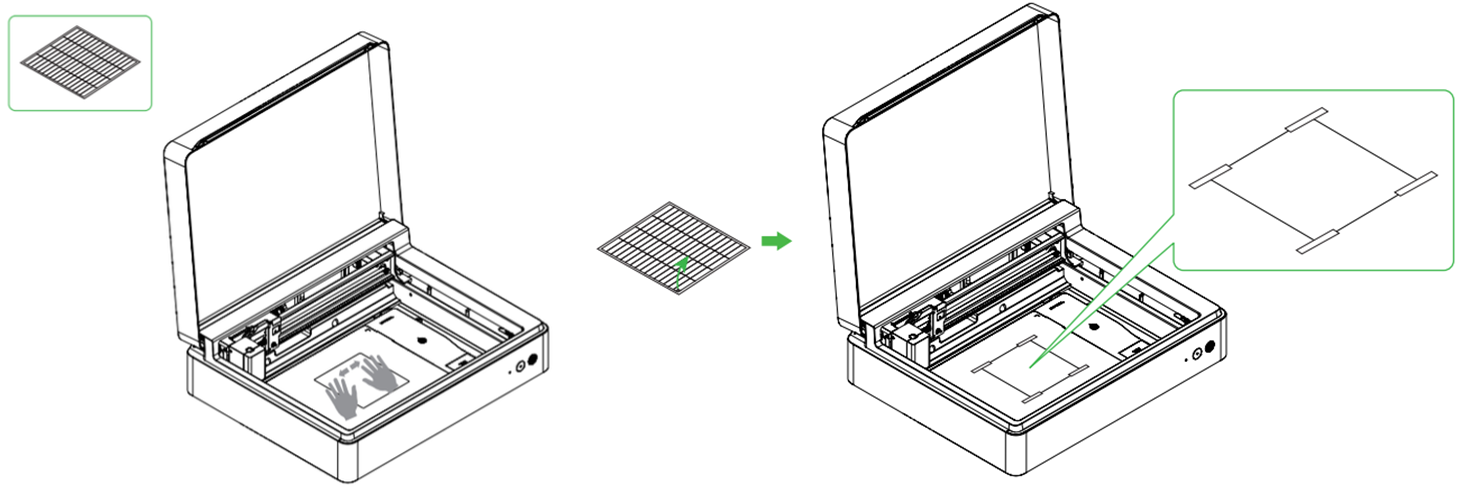
If most areas of the material cannot be adsorbed by the electrostatic mat, the electrostatic mat may not be suitable for securing that material.
(2) Click the button on the electrostatic mat to secure the material. The button will light up green when powered on.
Note: Ensure that the M1 Ultra is powered on. When Auto control in Device settings > Accessories info is enabled, electrostatic adsorption will be automatically disabled after processing.
Remove your xTool Electrostatic Mat
1. Disconnect
Unplug the connection cable first, and then unscrew the thumb screws securing the baseplate.
2. Remove safely
(1) Before removing the electrostatic mat, remove any processing module that is in the multi-function holder. This prevents damage to the mat or your M1 Ultra.

(2) Carefully take out your Electrostatic Mat.
Indicator status description
- The status light on your Electrostatic Mat indicates its power and connection state.
- Refer to the table below to interpret the indicator colors:
Description | |
🟡 Solid Yellow | xTool Electrostatic Mat is powered on but not connected to xTool M1 Ultra. |
⚪ Solid White | xTool Electrostatic Mat is powered on and connected to xTool M1 Ultra. |
🟢 Solid Green | xTool Electrostatic Mat is powered on with active electrostatic adsorption enabled. |
⚫ Off | xTool Electrostatic Mat is not powered on. |
Maintenance
- Avoid storing the electrostatic mat in damp environments.
- Always place an electrostatic protection sheet on the mat before performing blade cutting to prevent damage.
FAQs
1. What types of materials can be secured by xTool Electrostatic Mat for blade cutting?
xTool Electrostatic Mat is designed to secure paper and certain types of leather during blade cutting.
- Not suitable for fabric or wood boards.
- Leather adhesion varies depending on surface texture.
2. My electrostatic protection sheet is dirty. Can I clean it after use?
Yes. When powered off, gently wipe the electrostatic protection sheet with a damp cloth.
- Allow it to air-dry in a well-ventilated area.
- DO NOT rub the sheet while cleaning.
