
After assembling your O1 Omni Printer and connecting with xTool software, you can enjoy printing using the software.
Prerequisites
- You have assembled O1 Omni Printer.
- You have downloaded and installed the xTool software.
Connect O1 Omni Printer
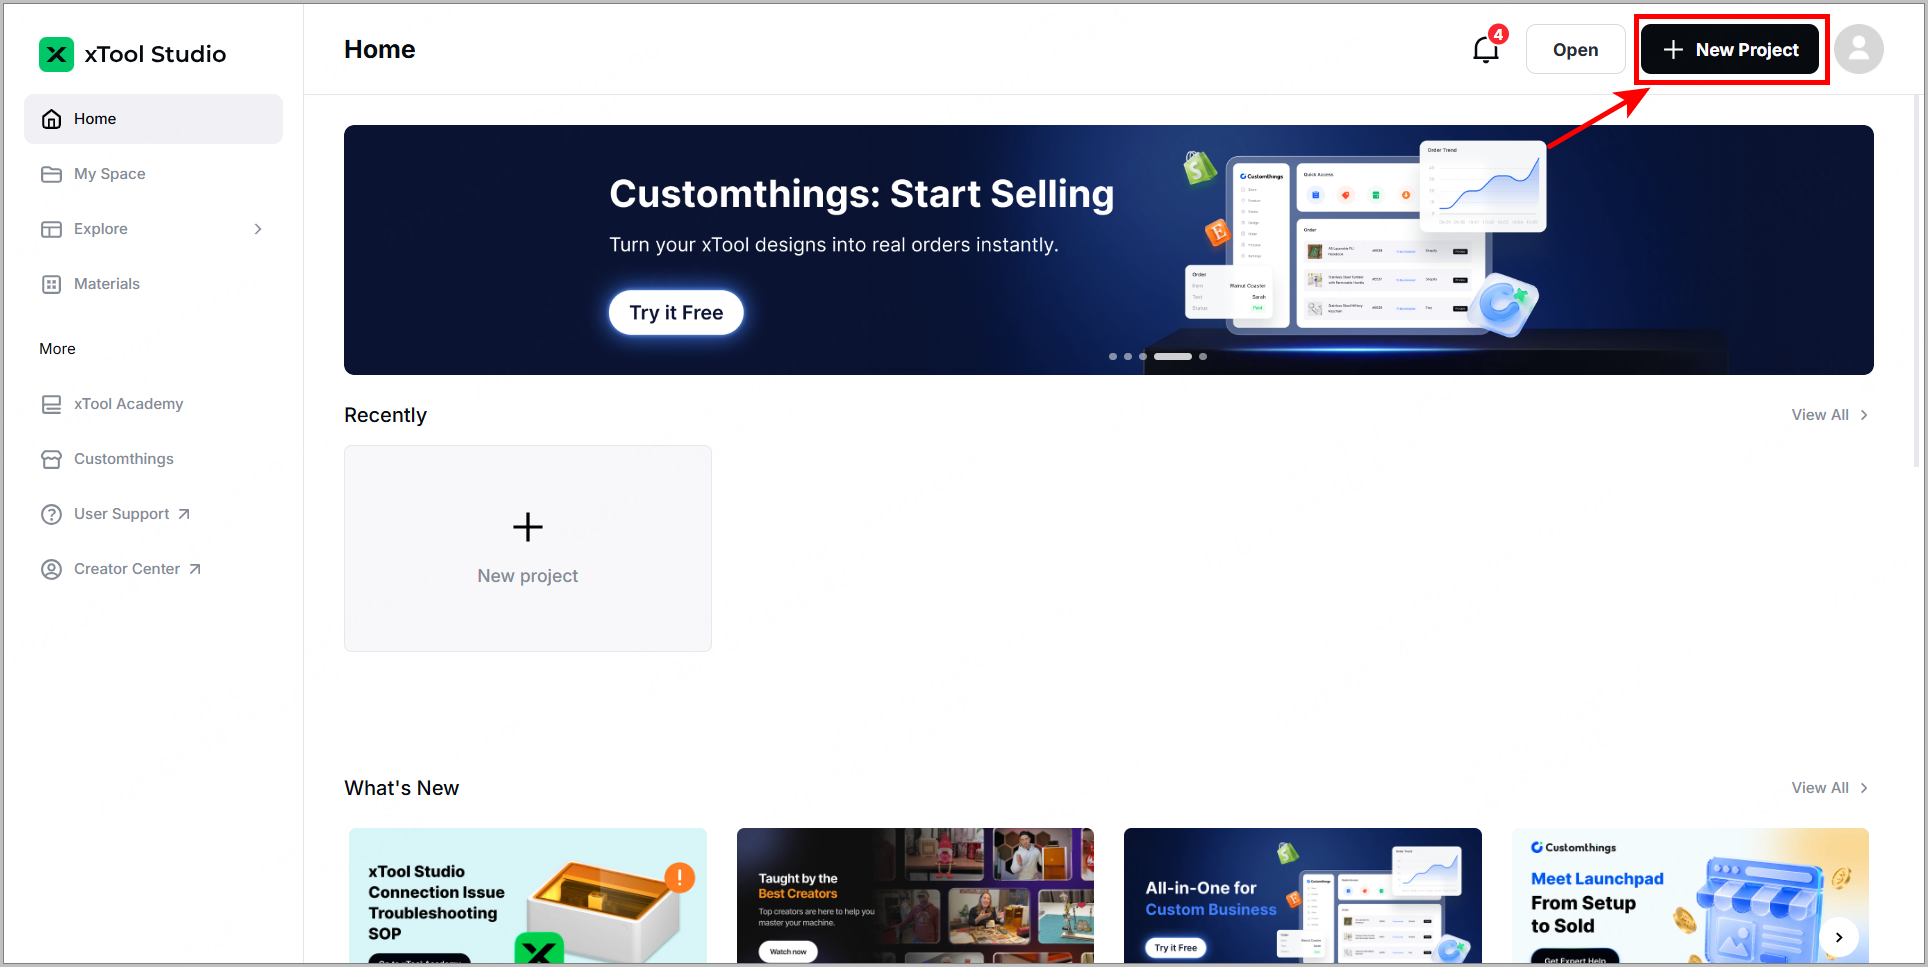
- Open the software on your computer. In the top-right corner of it, click the + New Project button.
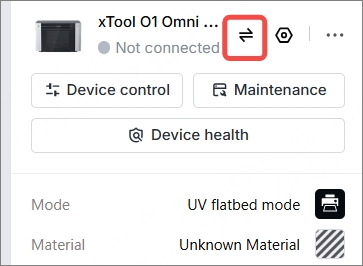
- On the right side of the software, click the
icon and connect your O1 Omni Printer.
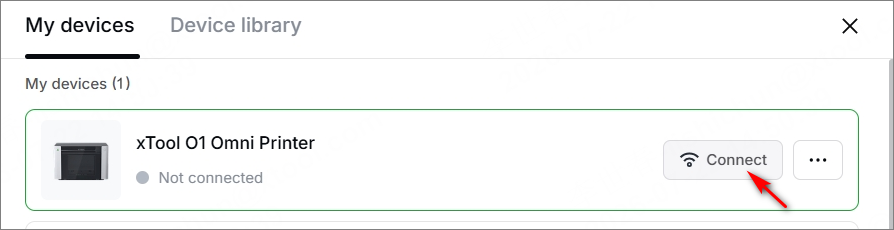
In the upper right corner of the software, xTool O1 Omni Printer is connected successfully.
View printer settings
1. In the top-right corner of the software, click the device settings icon.
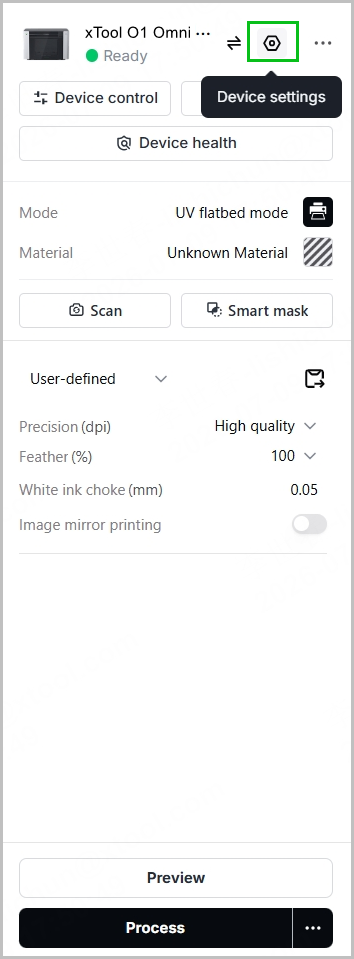
2. On the Basic info tab page, you can view the basic information of xTool O1 Omni Printer and modify some information.
- Device name: shows the name of the printer. You can enter the text box to change it.
- Firmware version: shows the firmware version. You can click Check for updates to update to the latest version if available.
- Wi-Fi setting: You can click to configure the Wi-Fi address and connect the printer to xTool Studio via Wi-Fi.


- On the Device configuration tab page, you can start initialization and enable or disable the buzzer. Usually, device initialization is required when your printer encounters problems.

4. On the Accessory Information tab page, you can learn information about the accessories connected to your O1 Omni Printer. Supported accessories include OR1 Rotary Attachment, LM1 Laminator, RF1 Roll Feeder, AP2, etc.
5. On the Calibration tab page, you can start the following calibration processes:

Access to the user guide, project tutorials, and xTool Care

Device control
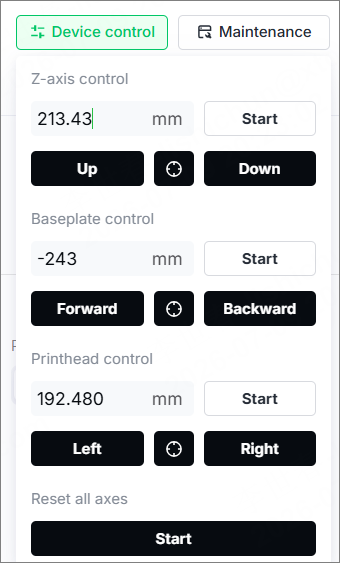
On the software, click Device control, and you can control the movement of the Z axis, baseplate, and printhead. You can also reset all axes with one click.
Processing settings
On the panel on the right, you can set processing parameters, including the processing mode, material, precision, feather percentage, white ink choke, and other parameters.

Maintenance
On the Maintenance tab page, you can check whether the printheads work properly and start the cleaning process. For the dual-UV printhead model, the software supports simultaneous check and cleaning of both UV printheads.
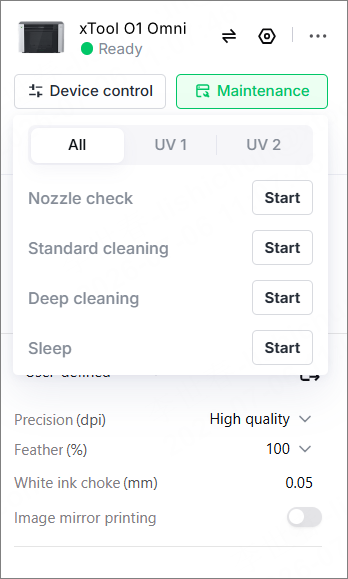
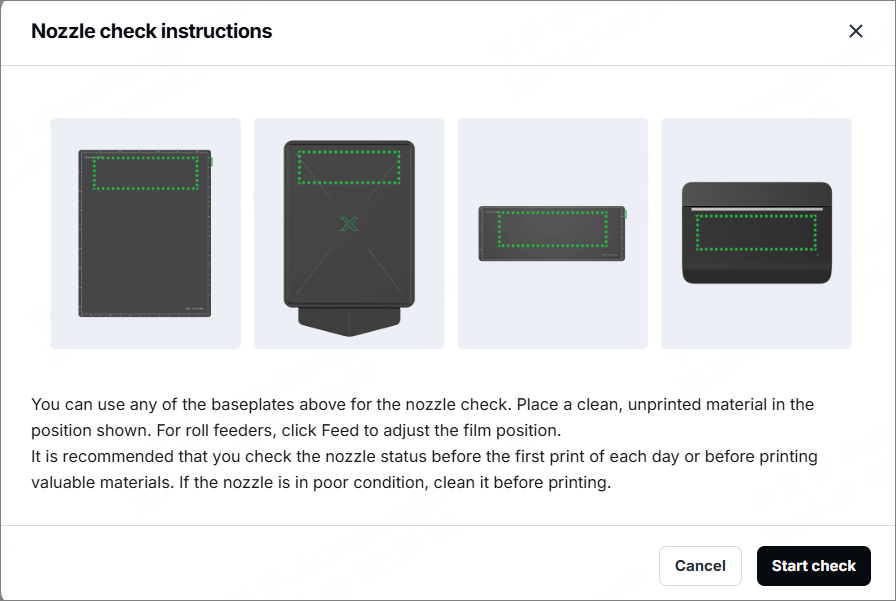
- Nozzle check: Each time before you start printing, perform this check to ensure that the printhead can print patterns properly.
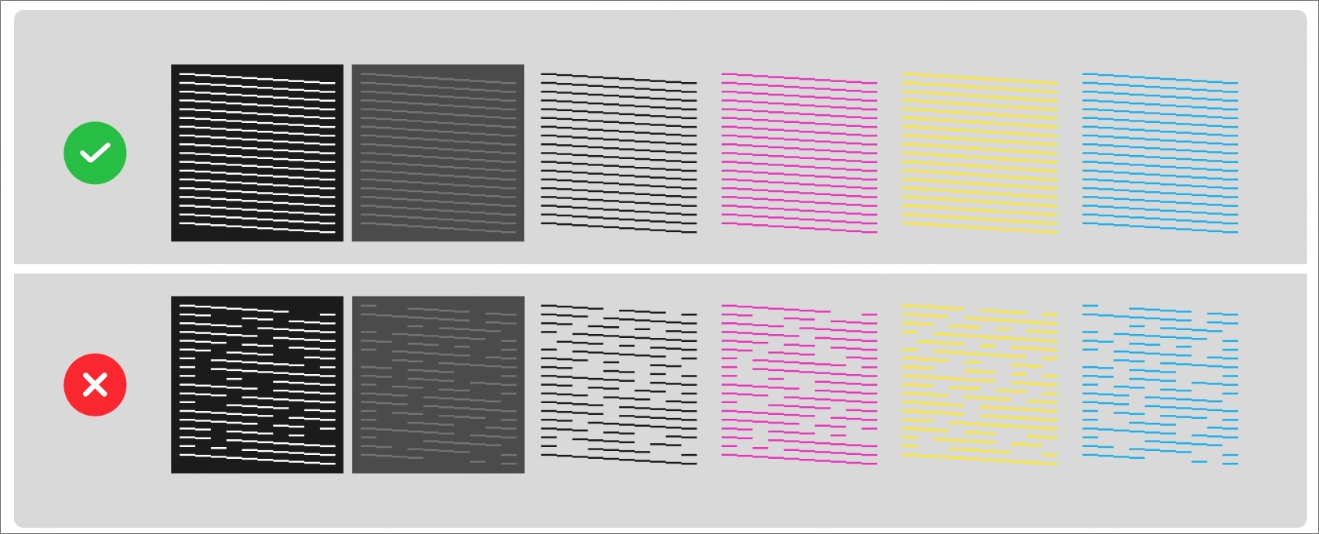
- Standard cleaning: Consumes less moisturizing liquid than the Deep cleaning mode and takes less time to finish.
- Deep cleaning: Cleans the printheads thoroughly and takes a longer time.
- Sleep: If you're not going to use the printhead, you can set the printhead to sleep mode.
Device health
Overview
On this tab page, you can monitor the state of the device parts, including:
- Status: shows the temperature of the printheads and their state, either working or sleeping. You can also set an idle printhead to Sleep state or wake up a printhead. You can also set the printheads to Enter Vacation Mode.
- Environment: shows the environment temperature and humidity.
- Waste ink cartridge: shows whether this cartridge is installed properly and whether it is full.
- Moisturizing liquid status: shows whether there is enough moisturizing liquid.
- Ink path: shows whether the ink is enough or is at a low level. When the ink level is low, you will be notified to replace it with a new one.
- Ink pad: shows its lifespan and the remaining life. After replacement, you need to select Mark replaced to reset the lifespan.
- Ink scraper: shows its lifespan and the remaining life. After replacement, you need to select Mark replaced to reset the lifespan.
- Air filter: shows its lifespan and the remaining life. After replacement, you need to select Mark replaced to reset the lifespan.
- Optical path cleaning: shows the time of the next cleaning. After cleaning, you need to select Mark cleaned to reset the period.
- UV lamp: Generally, you need to clean the UV lamp every day. The UV lamp cleaning card shows the time of the next cleaning. After cleaning, you need to select Mark cleaned to reset the period.
- Guide Rail Lubrication: shows the lubrication cycle and the time of the lubrication.


Tutorials
This page provides video tutorials for maintenance activities.

AI assistant
In the upper-right corner, you can click "Support" to access AI Assistant.
Specifically, log in and report any issue you want to resolve.

Try printing
UV flatbed printing
- How to Create a Flat Print on a Rock Coaster
- How to Create a Texture Print on an Acrylic Board
- How to Create a Relief Print on a Fridge Magnet
DT printing
DT Printing Using O1 Omni Printer
Beginner's Guide to UV DTF Film for the xTool O1 Omni: How to Make Decals
Rotary printing
More information
xTool O1 Omni Printer User Guide
Beginner's Guide to Materials for xTool O1 Omni Printer: What You Can Print On

