1. Printing with Printer Film Rolls
1.1 Installing the Printer Film Rolls
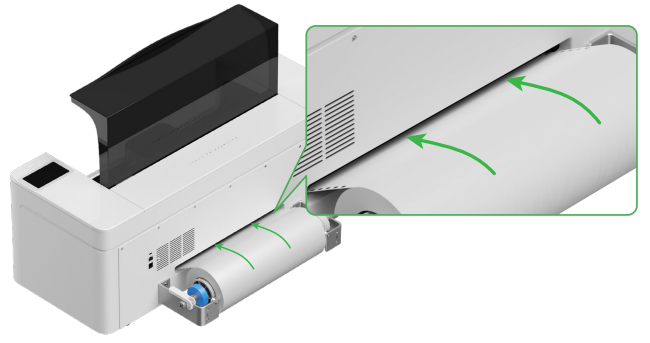
Install the Apparel Printer Film Rolls following the procedures outlined in the device user manual. After installation, perform a film movement test to confirm that the film layer moves smoothly and correctly. This helps identify and eliminate any abnormalities such as bubbling, jamming, or improper film movement during operation.
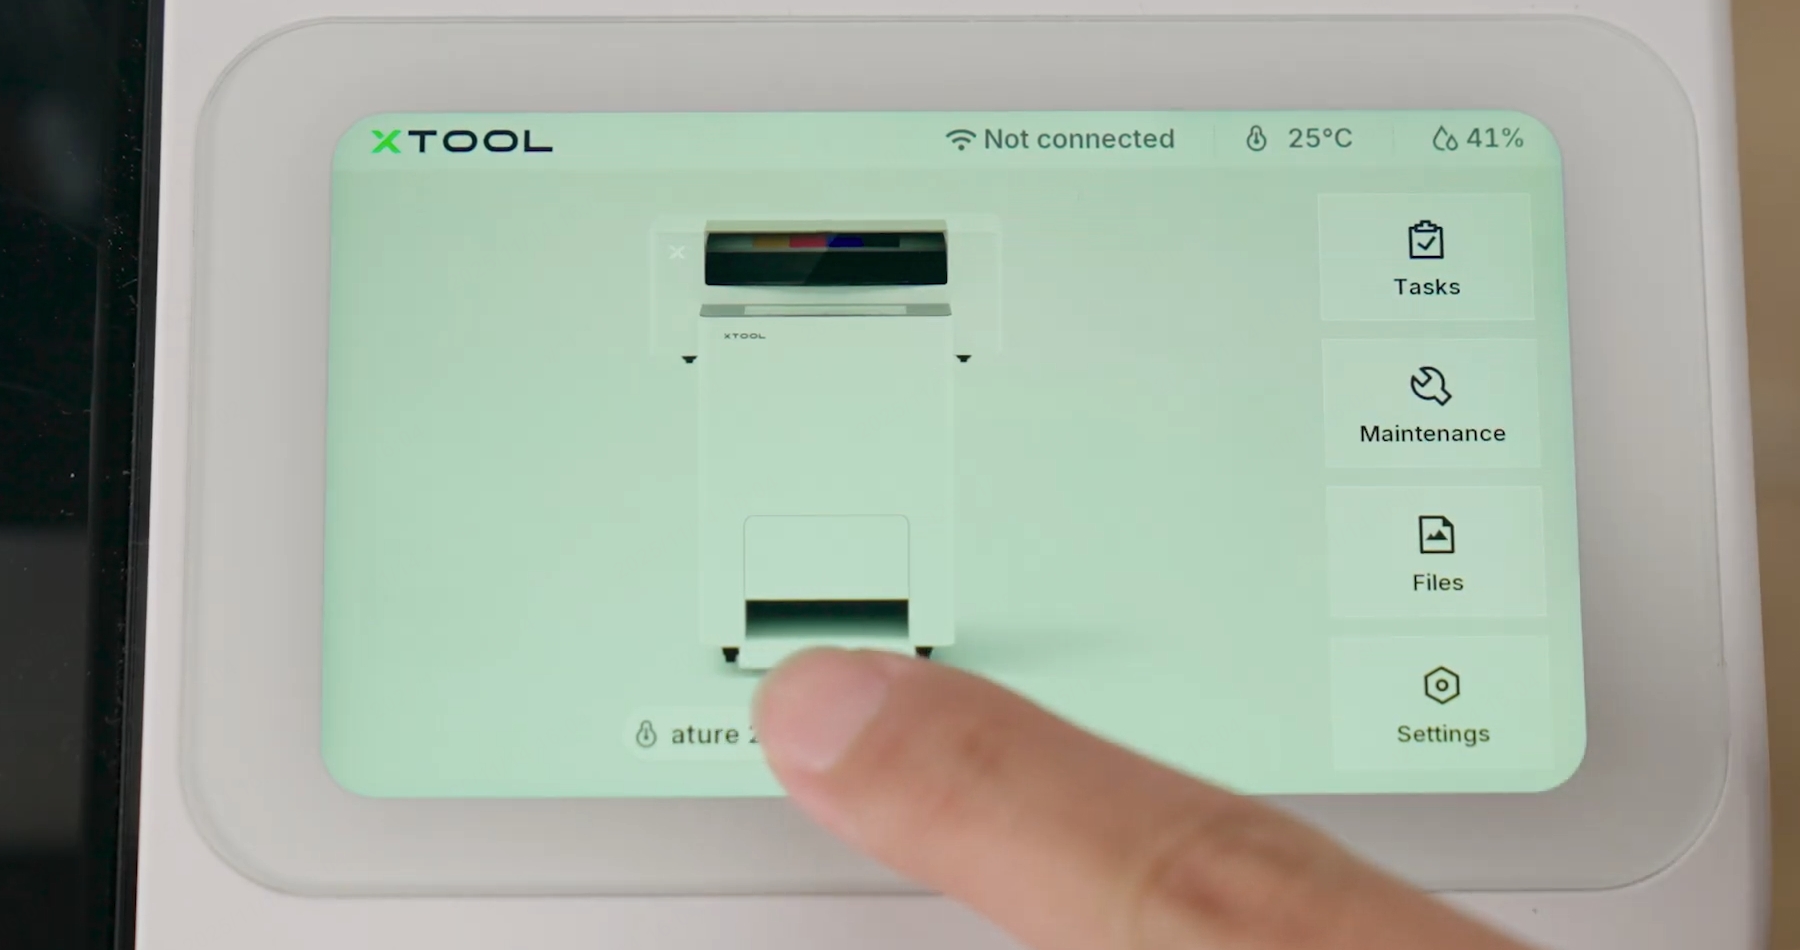
1.2 Cleaning the Printhead

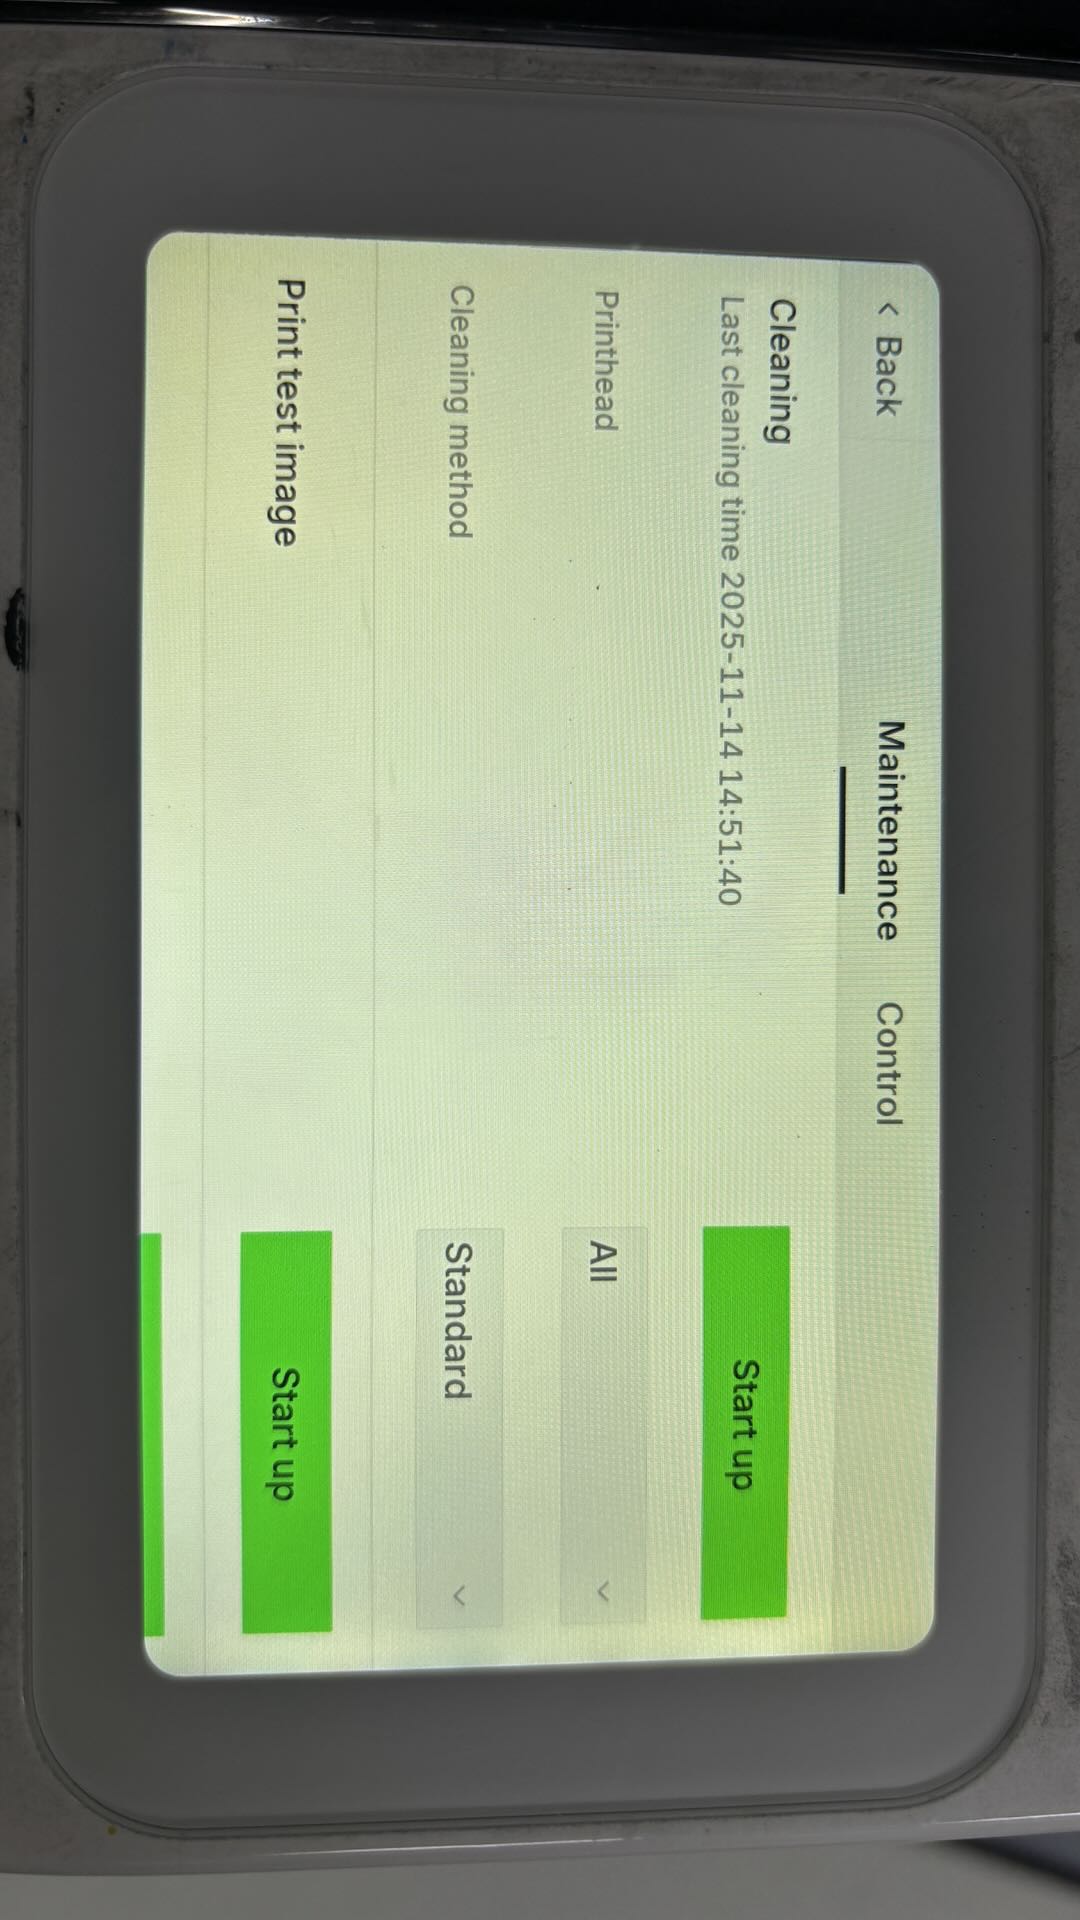
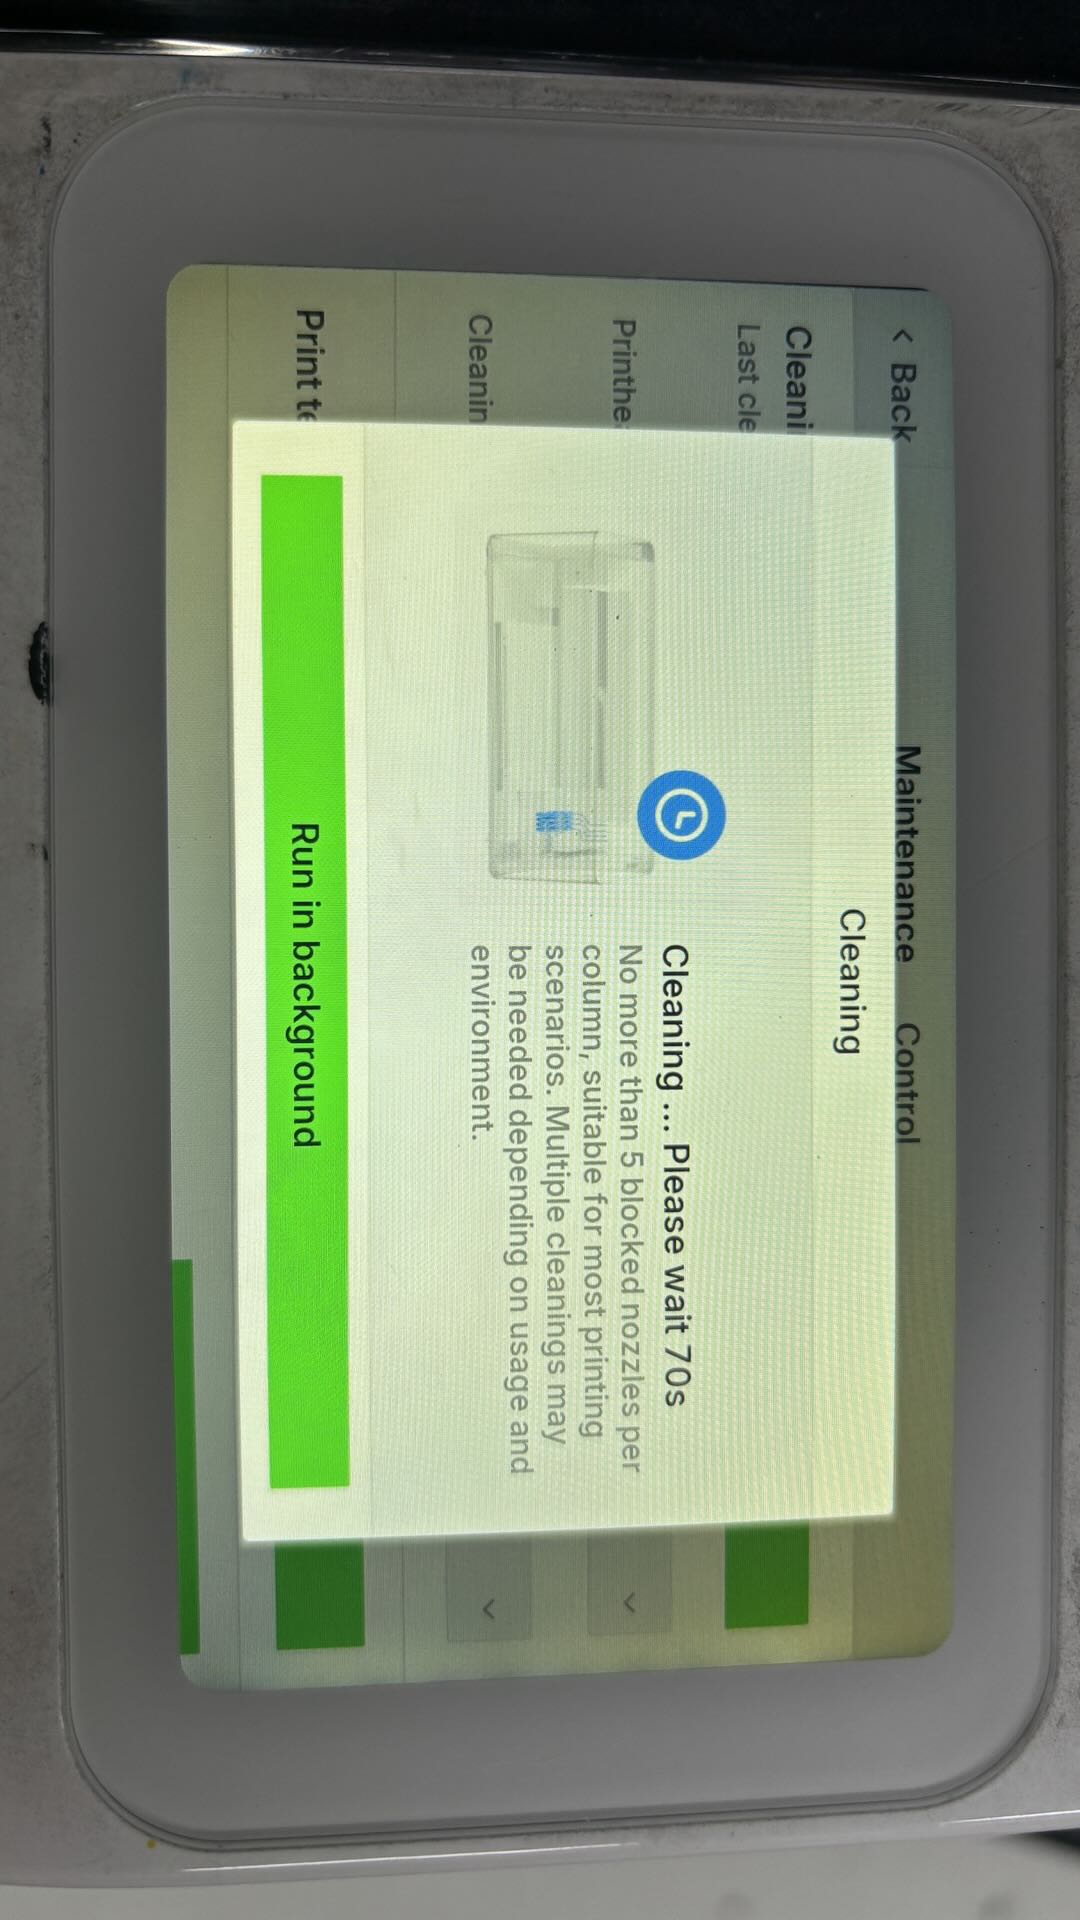
Operate the Print Head Cleaning function from the touchscreen on the Apparel Printer. Performing a cleaning cycle ensures smoother and more consistent ink discharge during inkjet printing.
1.3 Print test image
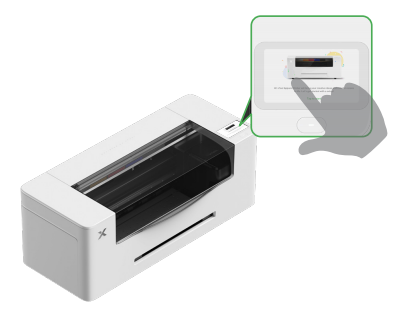
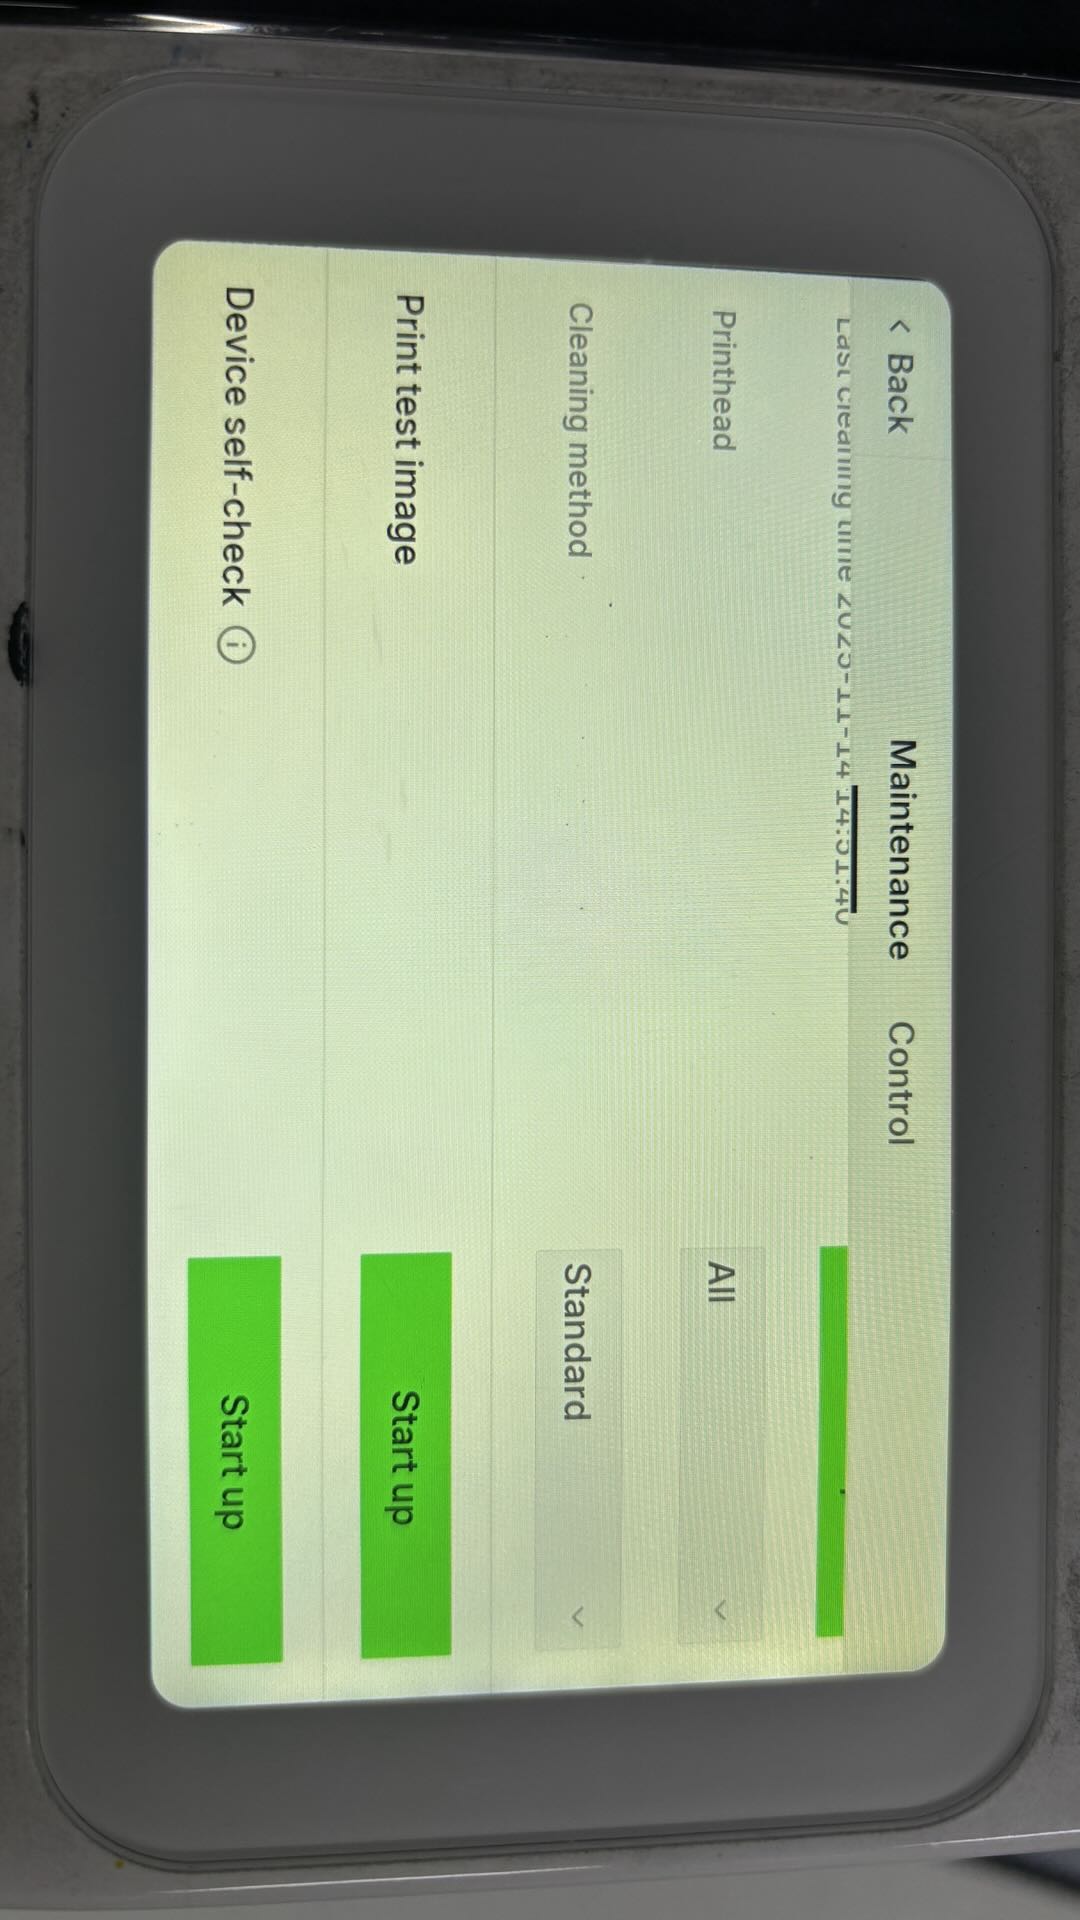
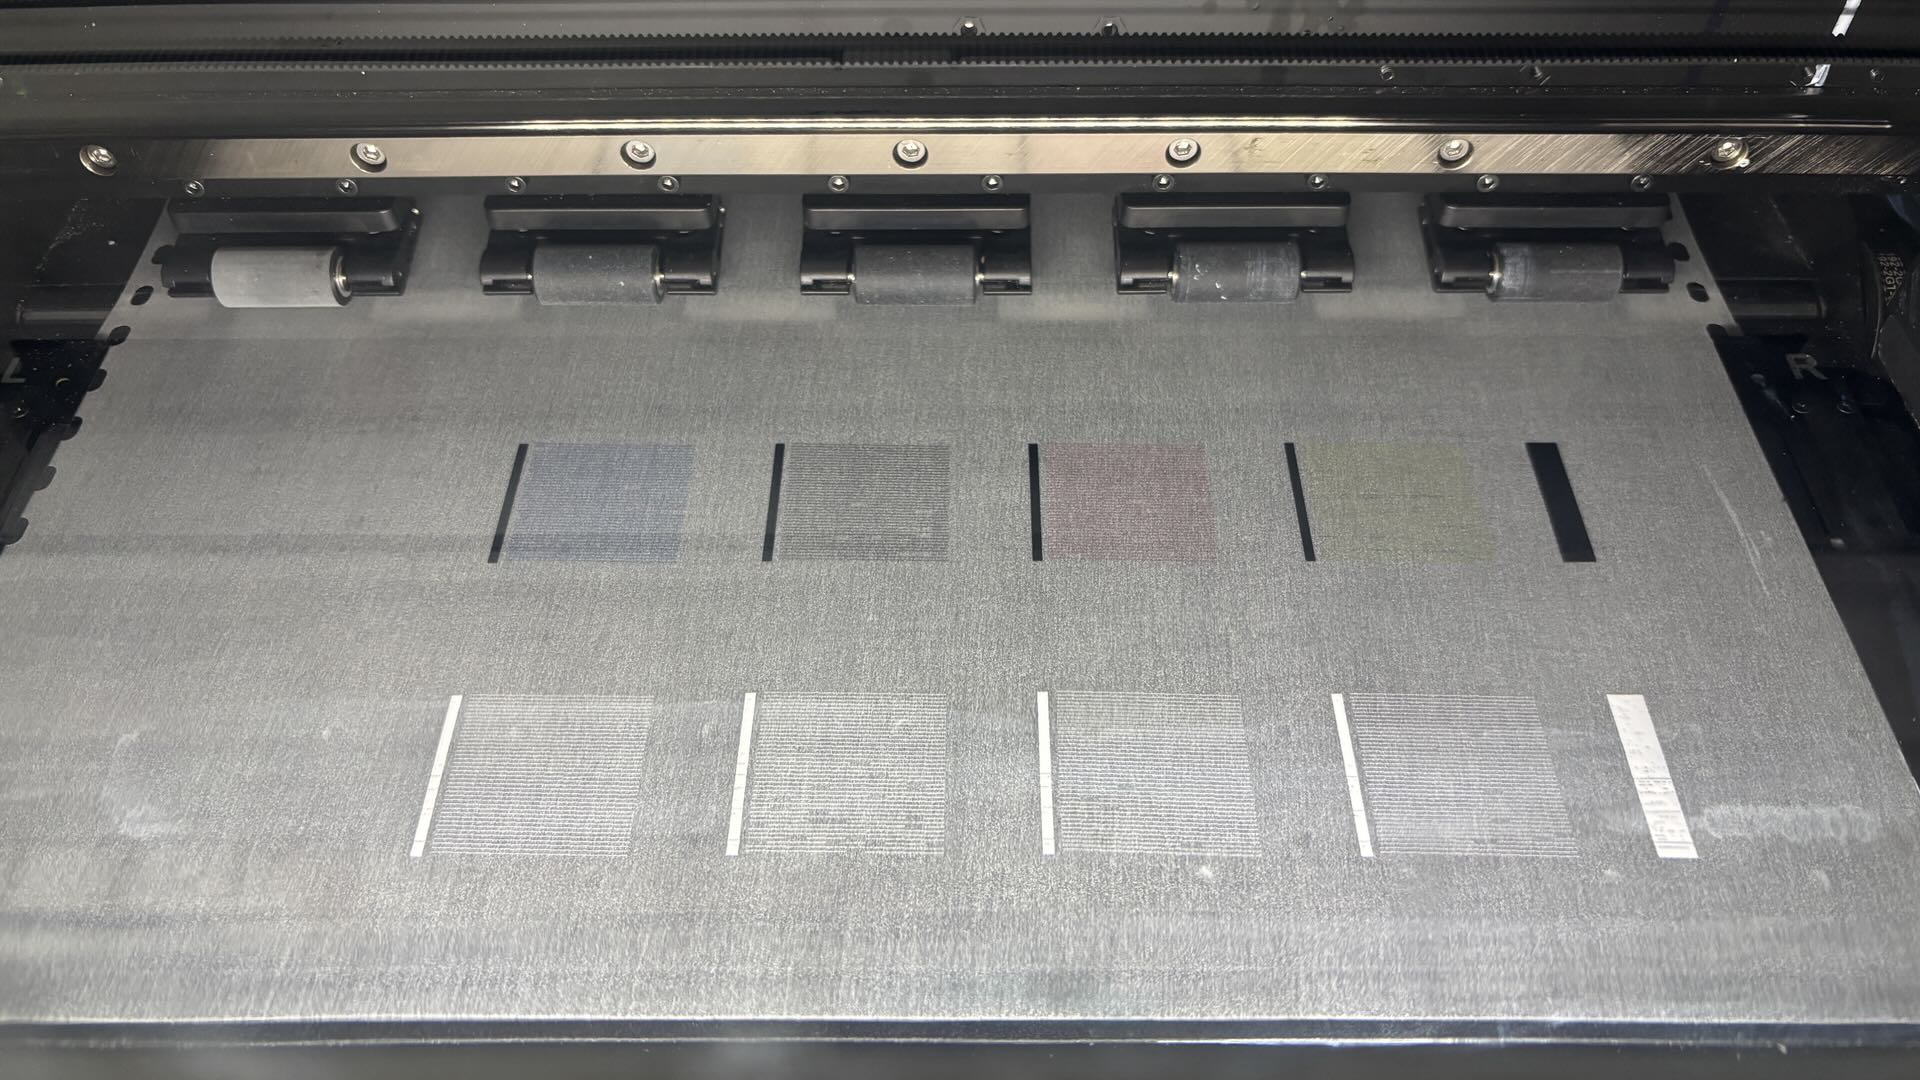
Use the touchscreen on the Apparel Printer to perform a Print Test Image. Inspect the printed test pattern and troubleshoot any abnormalities according to the guidance provided in the software. If the test image appears normal, you may proceed with the actual printing operation.
1.4 Setting Parameters and Starting the Print
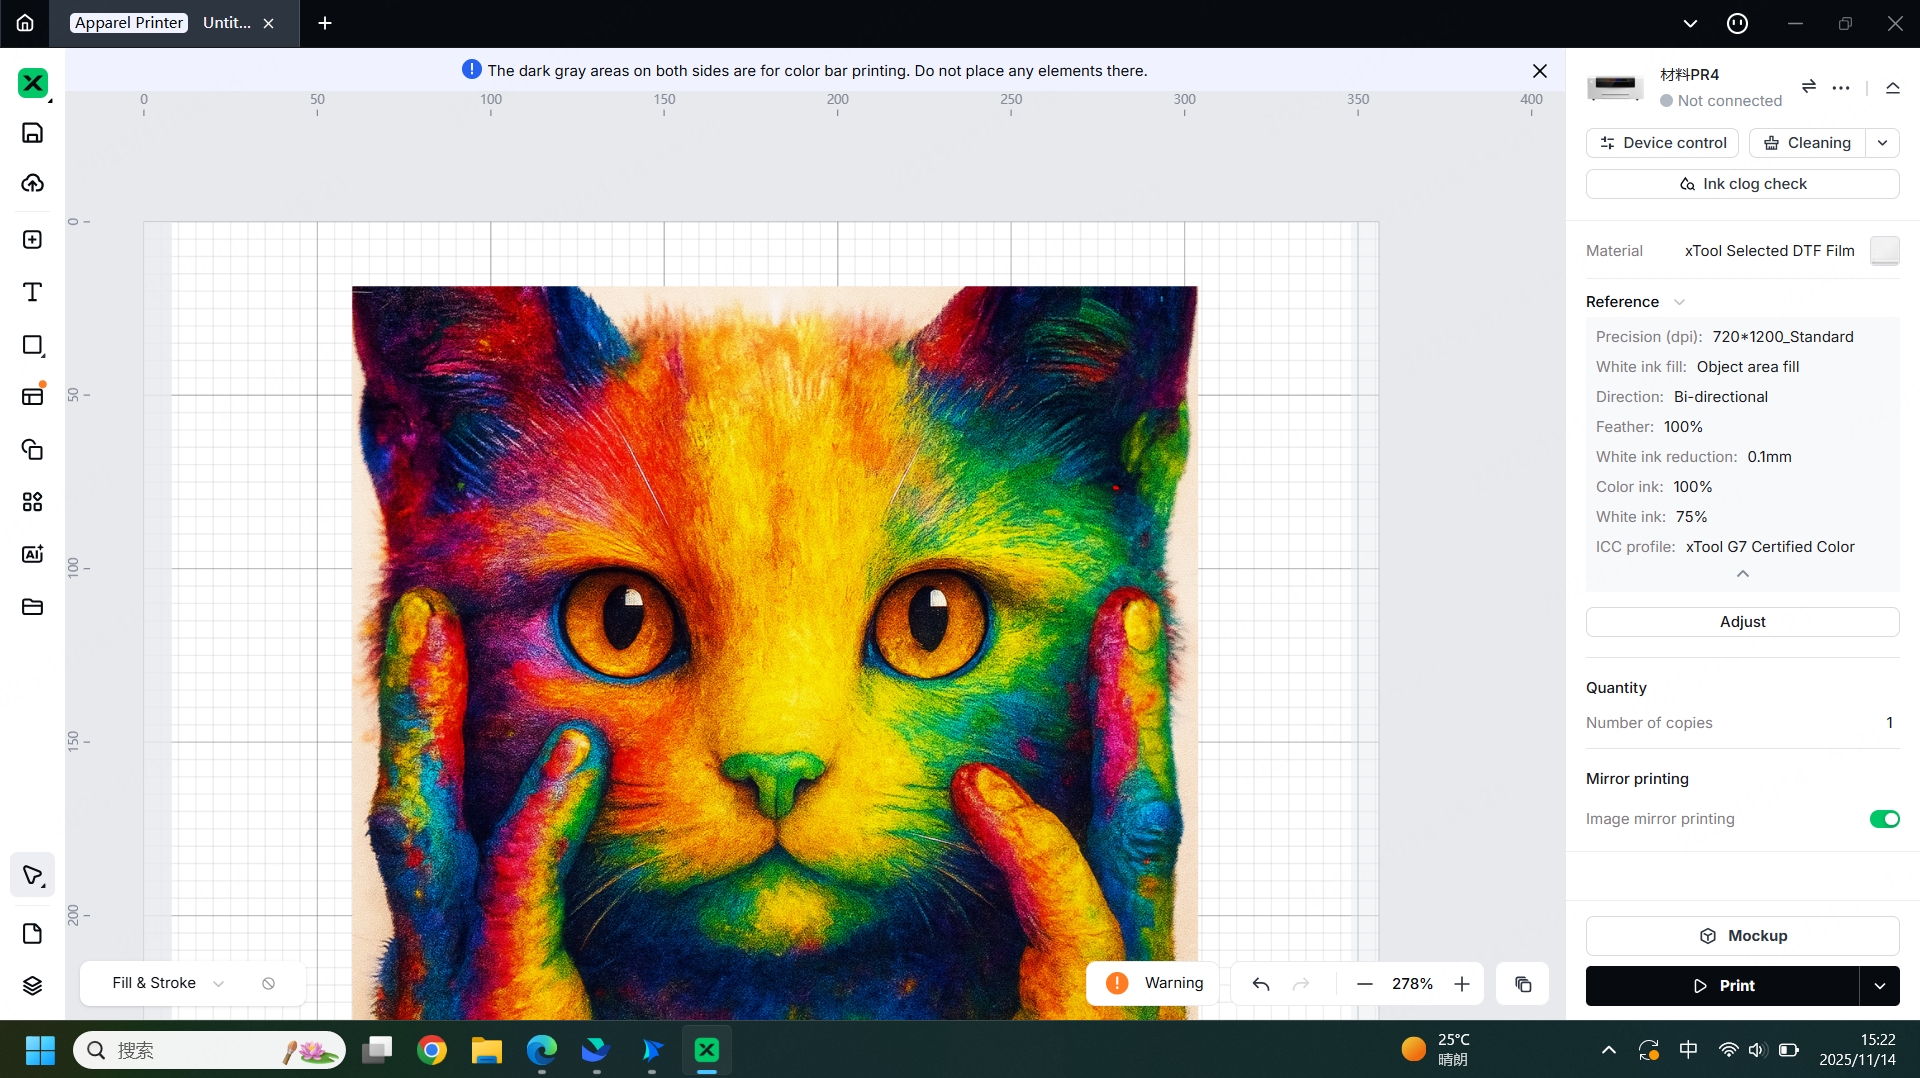
Import the image you intend to print into the software, then select the appropriate type of Apparel Printer Film Rolls under the material settings. Once the material is selected, the software will automatically provide the optimal parameters for inkjet printing. After confirming that all parameters are correct, you can press the Start Processing button to begin the printing operation.
2. Baking the Printer Film Rolls
2.1 Baking the Printer Film Rolls
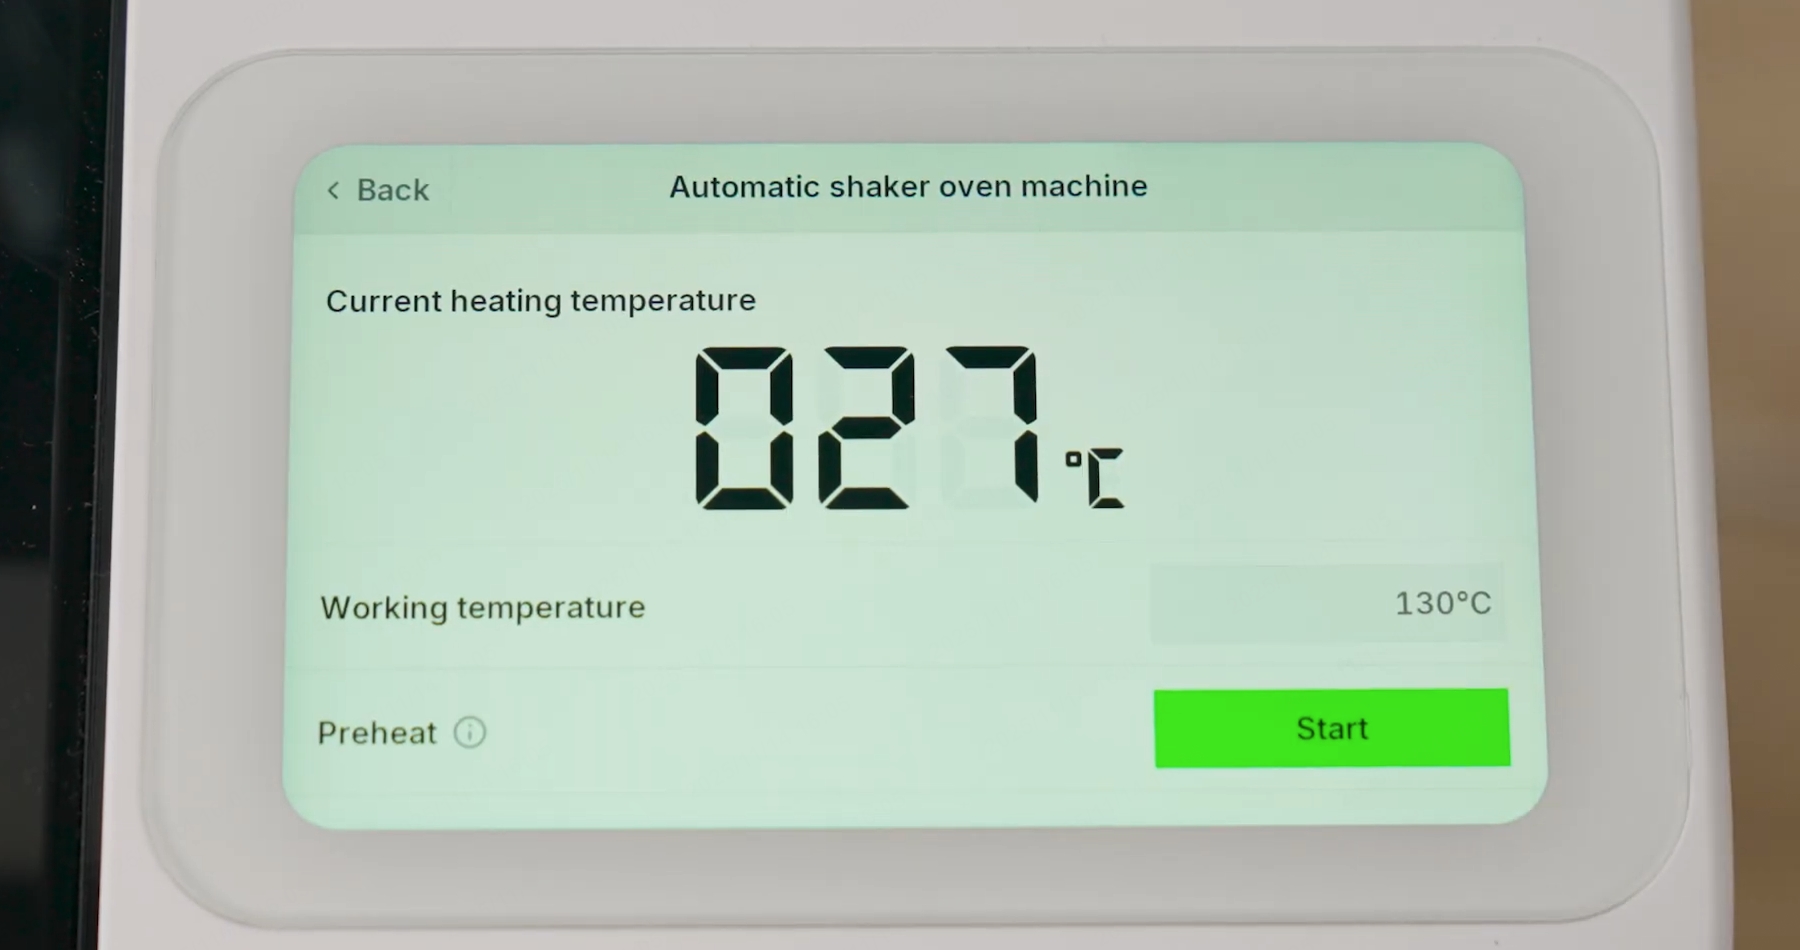
Set the baking temperature of the Automatic Shaker Oven Machine from the touchscreen on the Apparel Printer.
2.2 Applying the Printer Powder
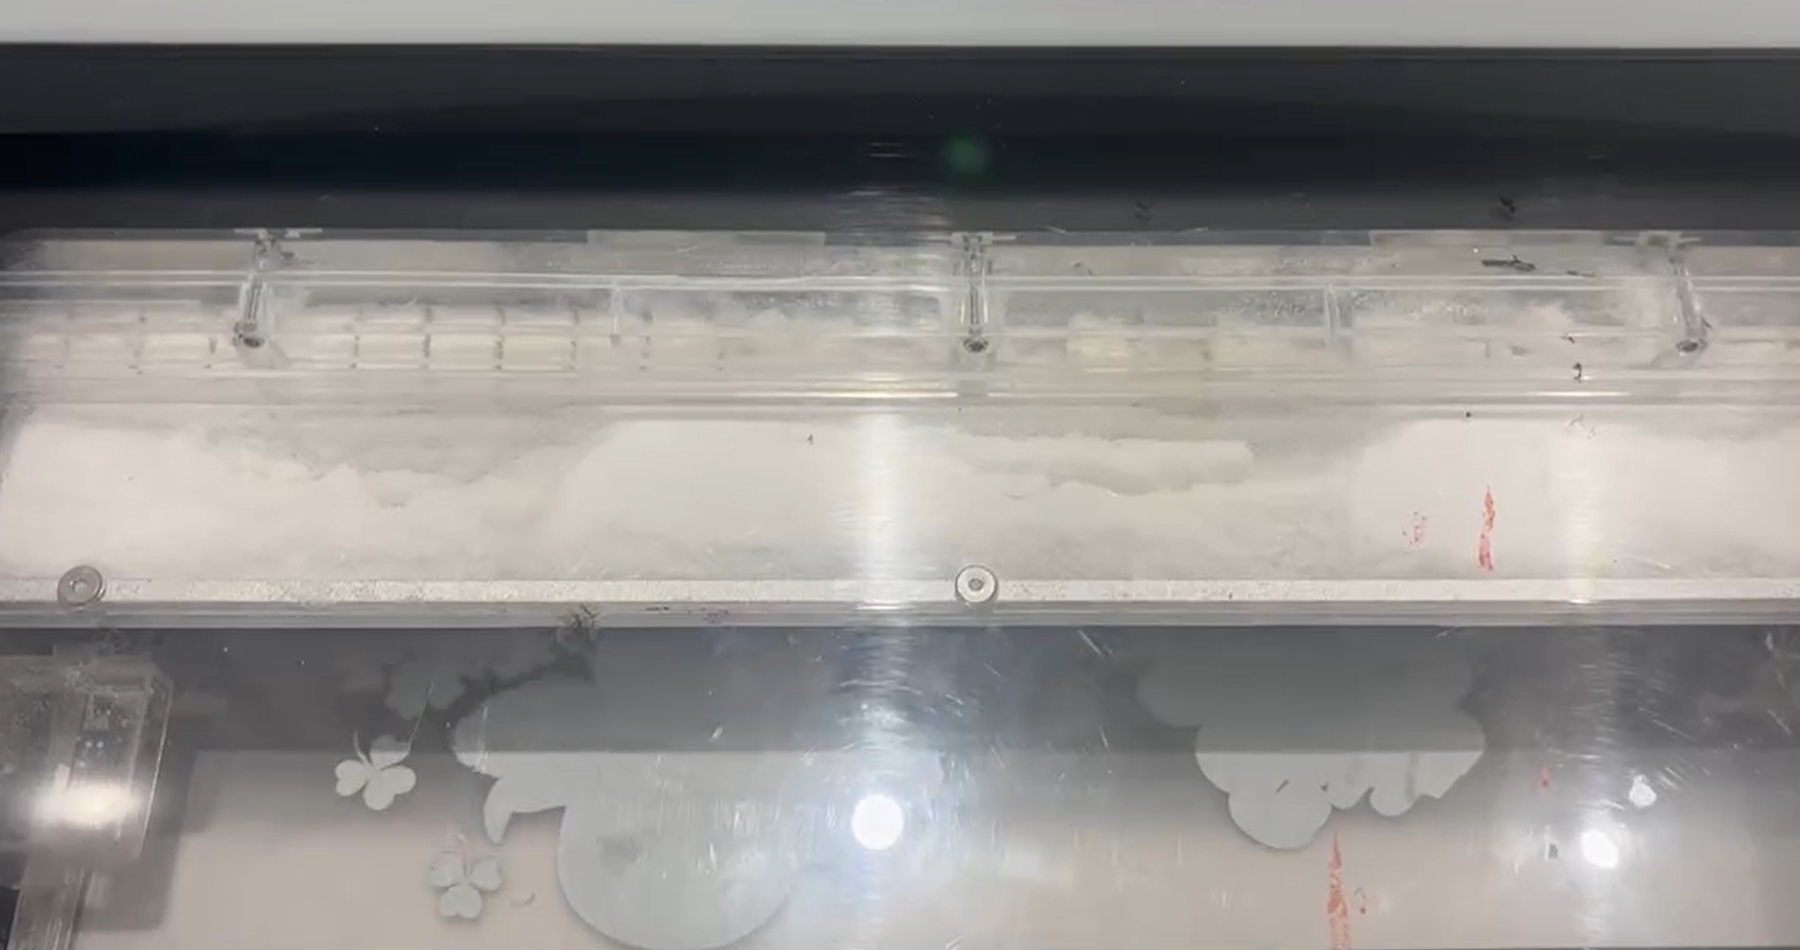
After printing is completed in the Apparel Printer, the Printer Film Rolls will be transferred into the Automatic Shaker Oven Machine. Before the baking process begins, Printer Powder will be evenly applied onto the inked surface of the printed material.
2.3 Removing the Printer Film Rolls
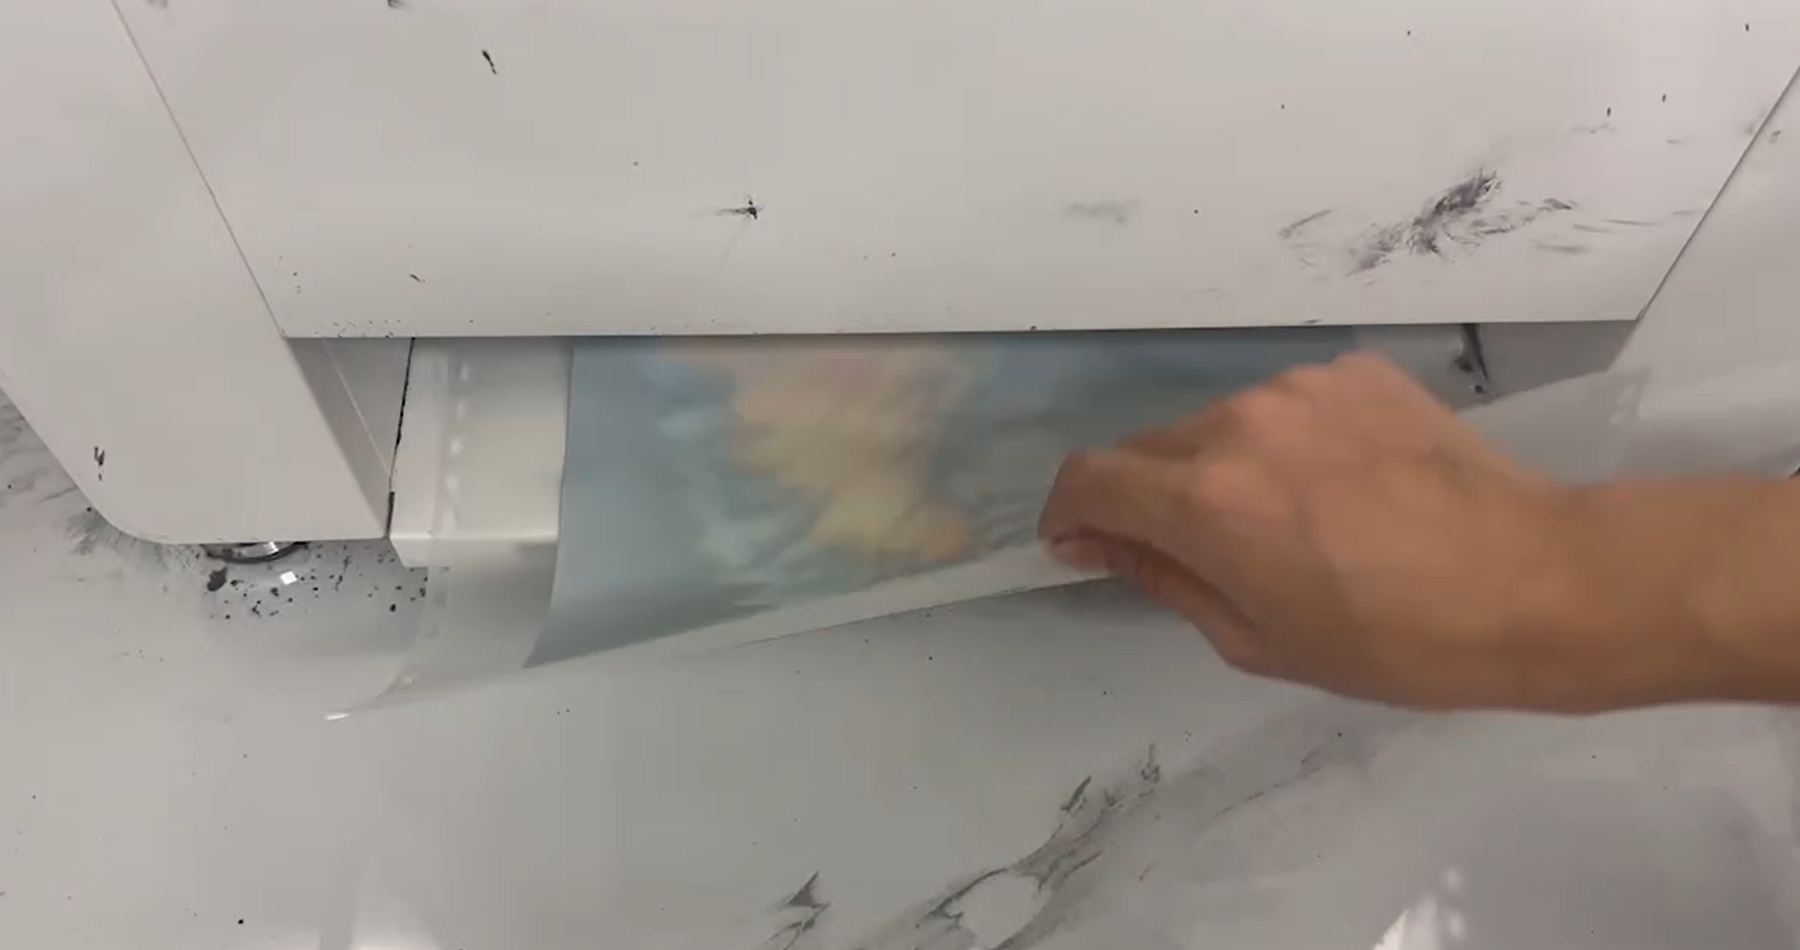
After the Printer Film Rolls are baked, remove them from the Automatic Shaker Oven Machine and inspect the baking quality. If any abnormalities are found in the printed image, the pattern should be reprinted. If the condition of the Printer Film Rolls appears abnormal, adjust the baking temperature accordingly and reprint the pattern.
3. Heat Pressing the Printer Film Rolls
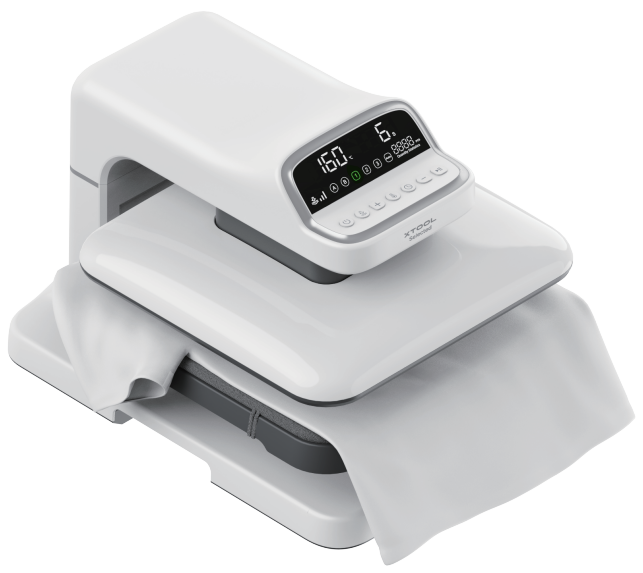
3.1 Preheating the Heat Press
Turn on the Heat Press and set the preheating parameters according to the recommended values for pressing Apparel Printer Film Rolls on the corresponding substrate in ATOMM. Once the values displayed on the device screen reach the specified maximum preset levels, the heat-pressing process can begin.
Note: The preheating parameters of the device must match the settings required for the specific substrate and the corresponding Apparel Printer Film Rolls that will be used in the upcoming heat-pressing process.
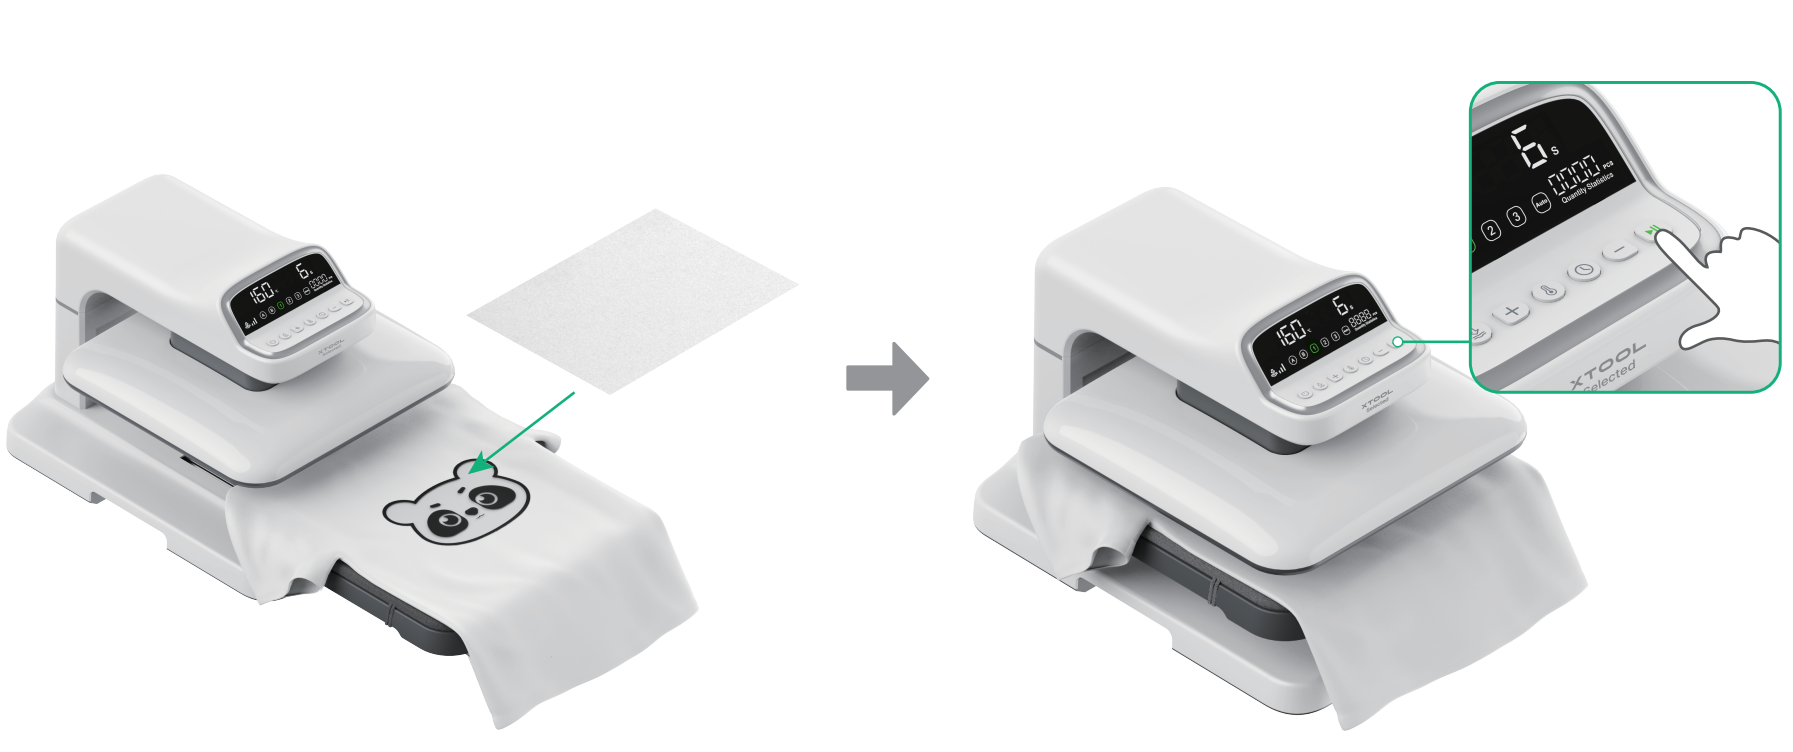
3.2 Preheating the Substrate
DTF Printed Film Heat Press Parameter Guide
Once the Heat Press has completed preheating, place the substrate to be processed flat on the ironing plate and press the start button on the device. The high temperature of the Heat Press helps flatten the substrate and evaporate any moisture on its surface, allowing the pattern on the Printer Film Rolls to adhere more firmly and uniformly in the subsequent transfer process.
3.3 Heat Pressing the Printer Film Rolls

After the substrate has been flattened and dried through high-temperature heat pressing, place the Printer Film Rolls onto the substrate with the inked side facing downward. Ensure that the film is positioned as flat and aligned as possible, as any misalignment may negatively affect the final heat-transfer result.
3.4 Peeling the Film from the Substrate

Cooling Time:After the heat-press process is completed,Moving the substrate away from the Ironing Plate allows it to cool down quickly,remove the substrate and place it on a flat, open surface. Peel off the transparent protective film covering the printed pattern only after the Printer Powder within the pattern has fully solidified. It is recommended to wait at least 10 seconds, or until the heat-pressed area has completely cooled, before removing the film.
When peeling off the transparent film layer from the surface of the printed pattern, begin from an area where the film edge has naturally lifted. Avoid using fingernails or any sharp objects to pick at the film, as this may damage the completed print.
3.5 Re-pressing
Place the substrate—after removing the transparent Printer Film Rolls layer—flat and evenly on the ironing plate of the Heat Press. Cover the printed image on the substrate with a sheet of butcher paper. Then operate the Heat Press using the same parameters applied in the previous step to perform the second heat-pressing process.
3.6 Final Quality Inspection
After removing the butcher paper from the substrate following the second heat-pressing process, the heat transfer operation is complete. If any areas along the edges of the printed pattern are not fully adhered to the substrate, place a sheet of butcher paper over the areas requiring additional adhesion. Position the unadhered sections at the center of the Heat Press heating plate, and perform an additional pressing cycle as needed.
Services & Help
Learn & Education

Copyright © 2025 xTool All Rights Reserved.