Preparation
- Install xTool P3 5W Infrared Module on xTool P3.
- Download xTool software.
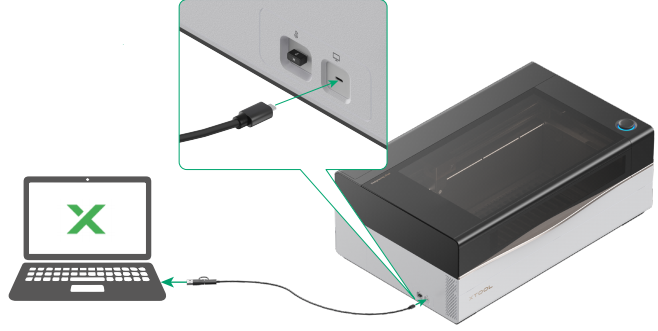
- Connect xTool P3 to your computer and connect the device in the software.
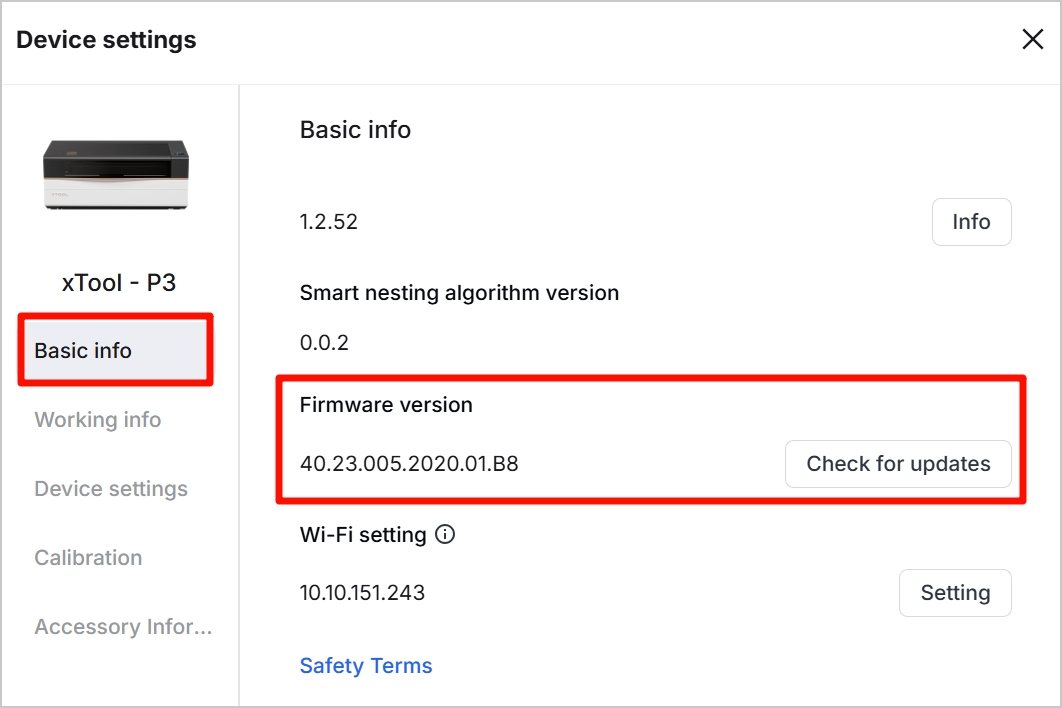
- To use the infrared module, update the firmware version to 40.23.005 or later. The following shows the update steps in xTool software.
|
|
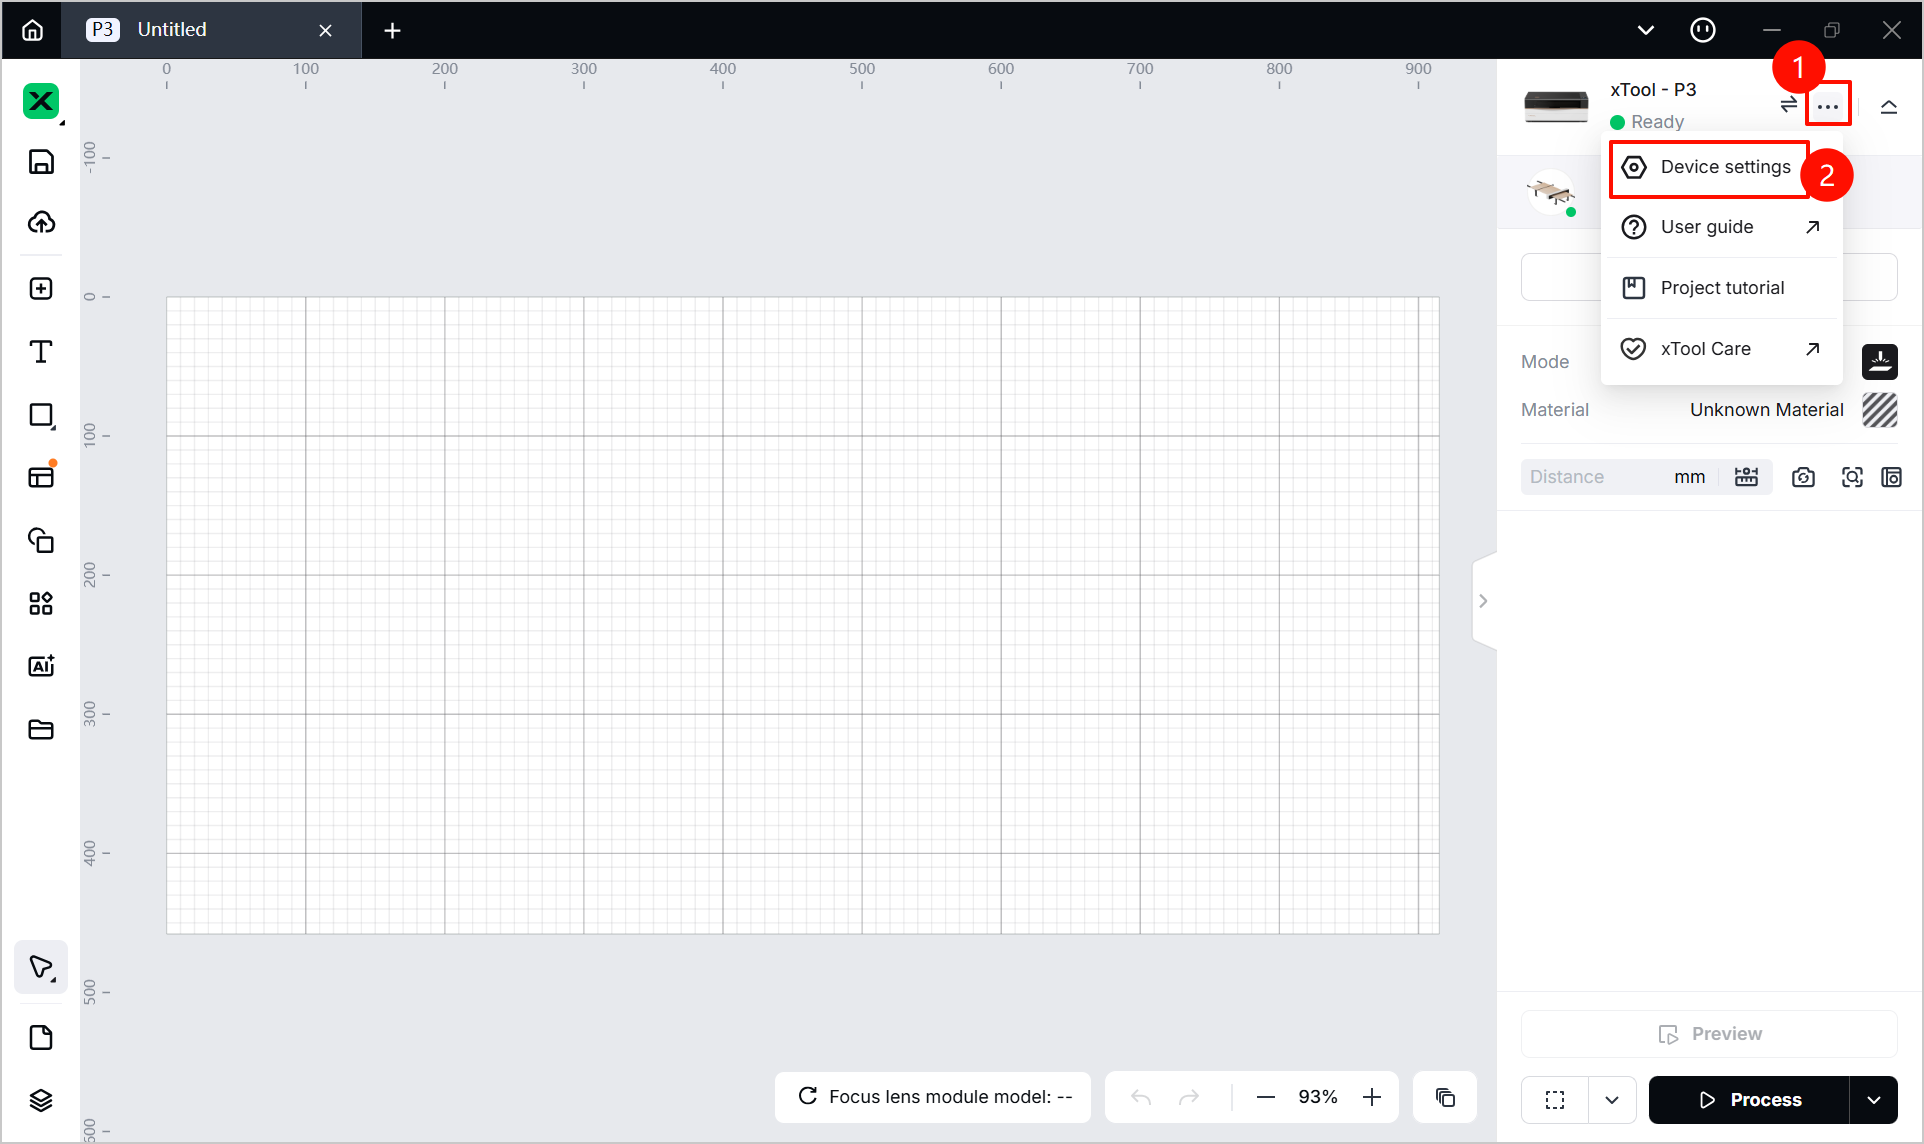
(1) Click the ... button and then Device settings. | (2) In the dialog box, click Basic info and check the firmware version. Click Check for updates when necessary. |
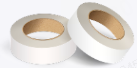
- Prepare the following items. The block and the art scratch paper are included in the infrared module package.
Image |
|
|
|
Item name | Focus block (calibration block) | Art scratch paper | Masking tape (self-provided) |
Function | For z-axis calibration | For x- and y-axis calibration | |


Calibration and use
Note:
1. Before using xTool P3 5W Infrared Module, perform the two calibration tasks first. Otherwise, the processing position may deviate.
2. Perform step 1 before step 2, DO NOT reverse the order.
Step 1: Calibration along z-axis
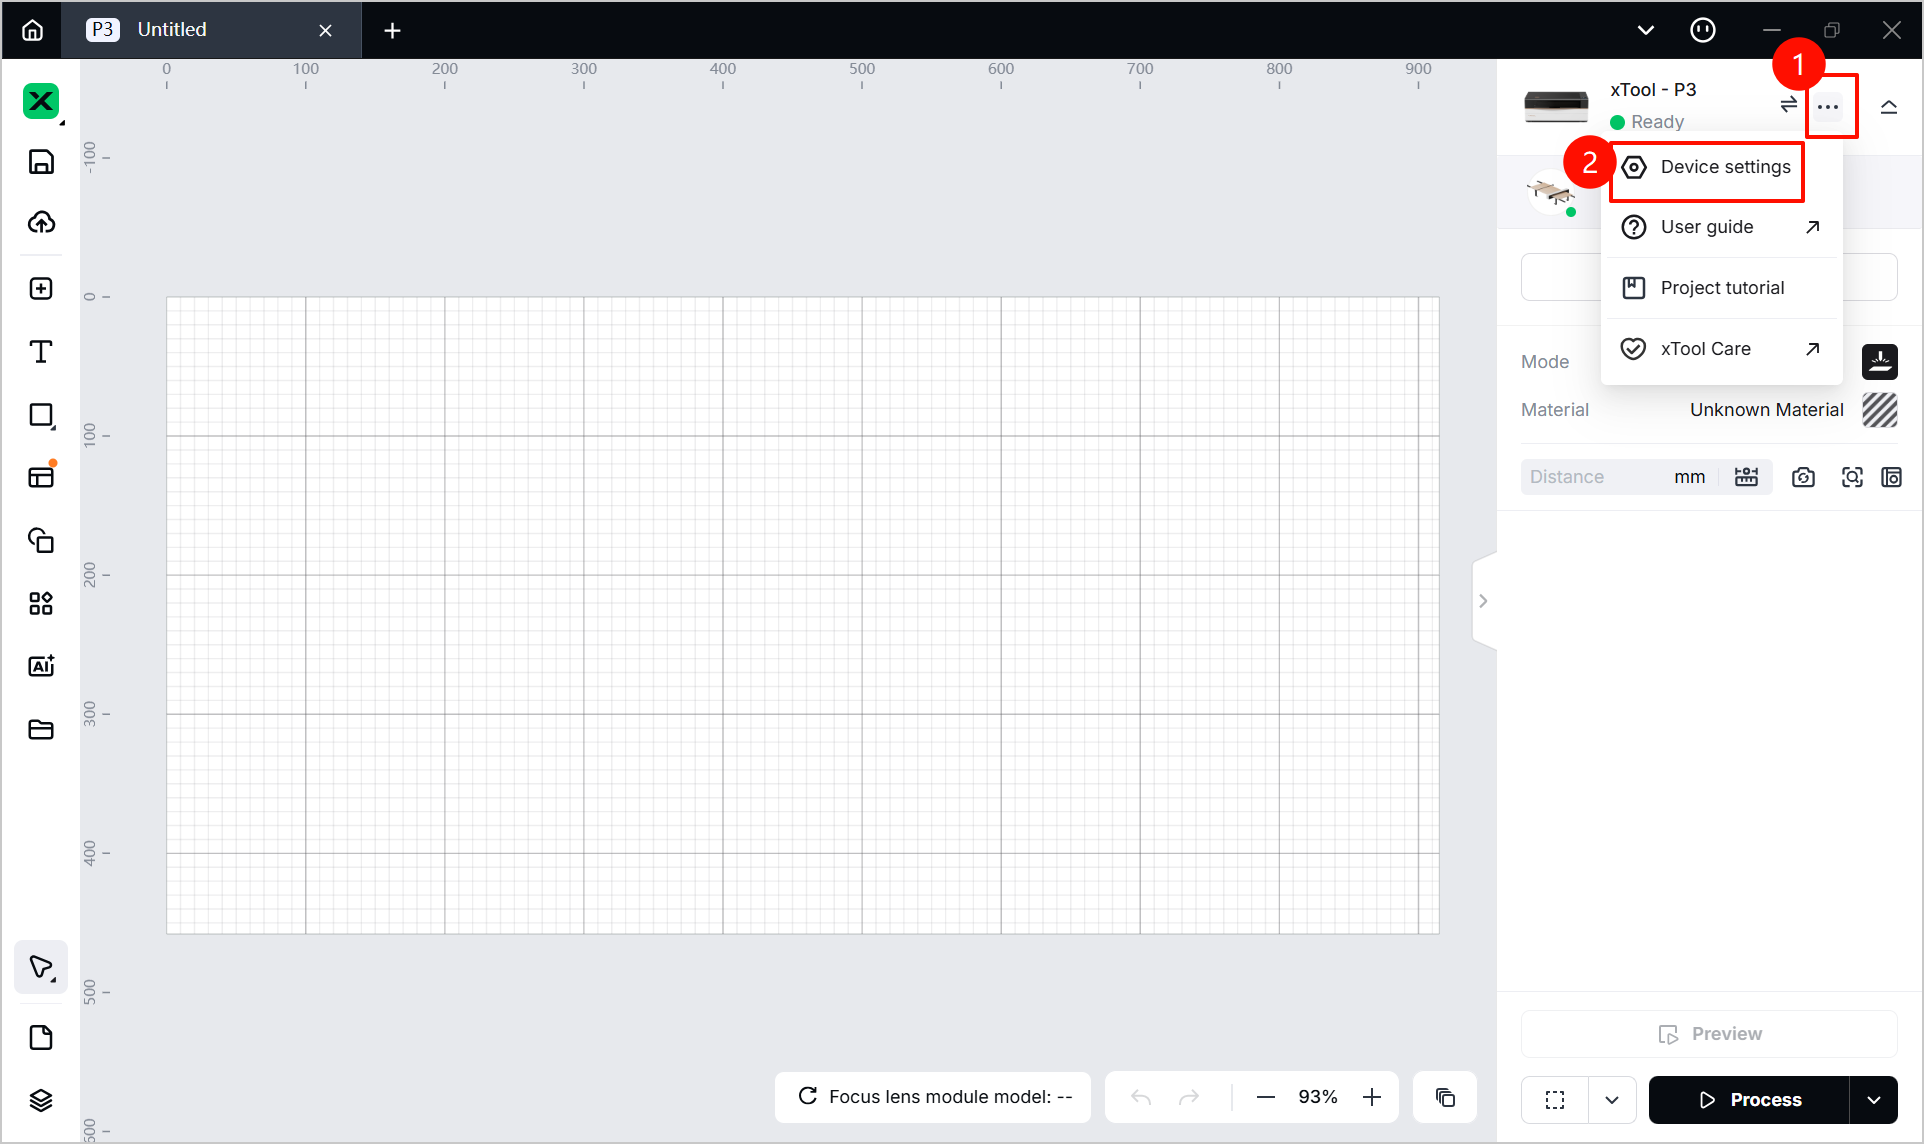
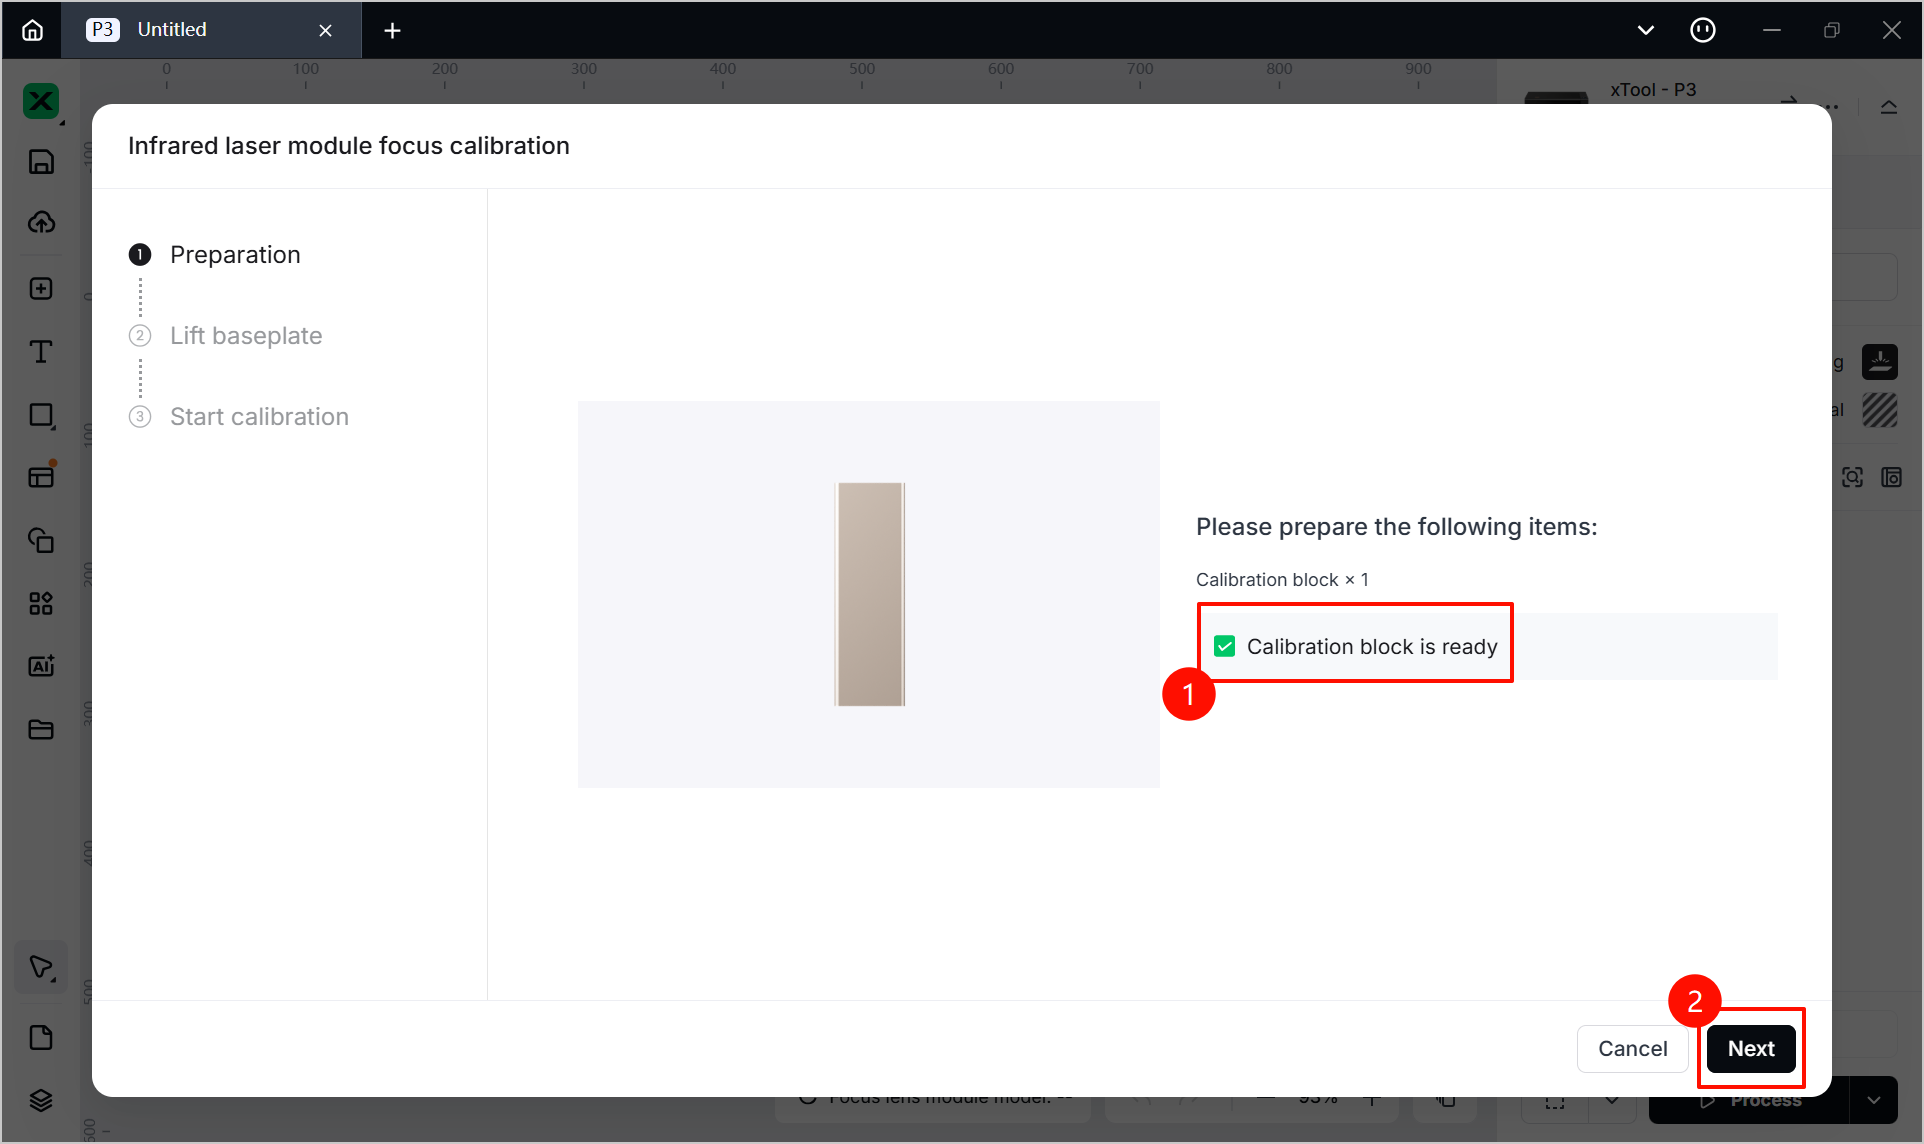
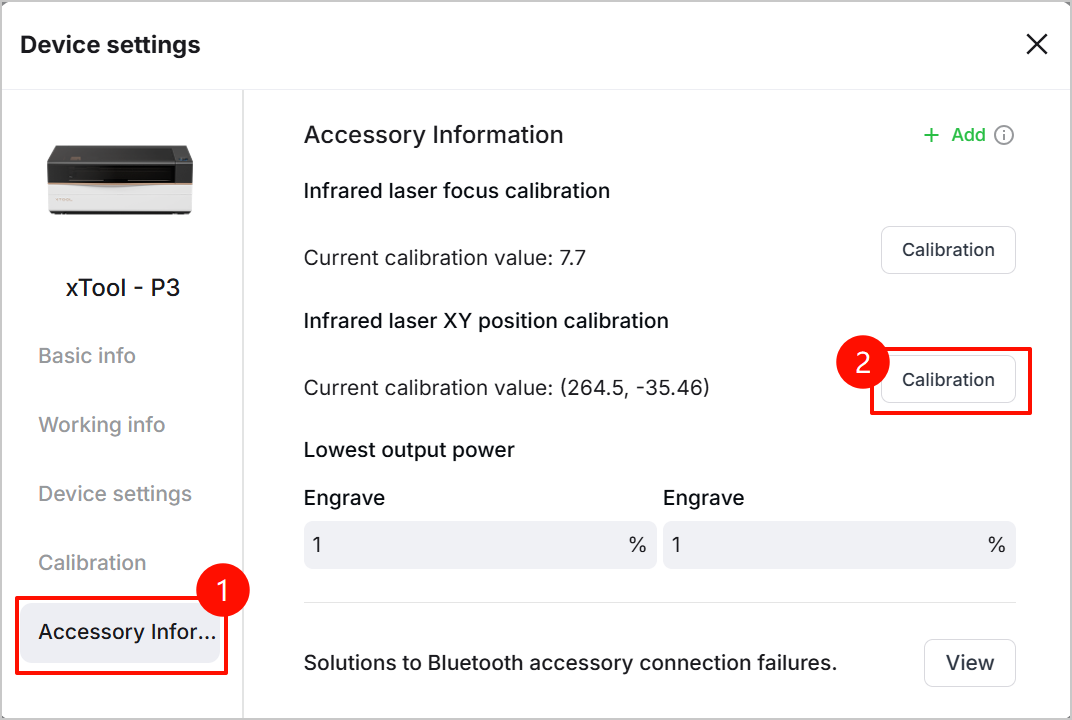
- Click the ... icon and Device settings.
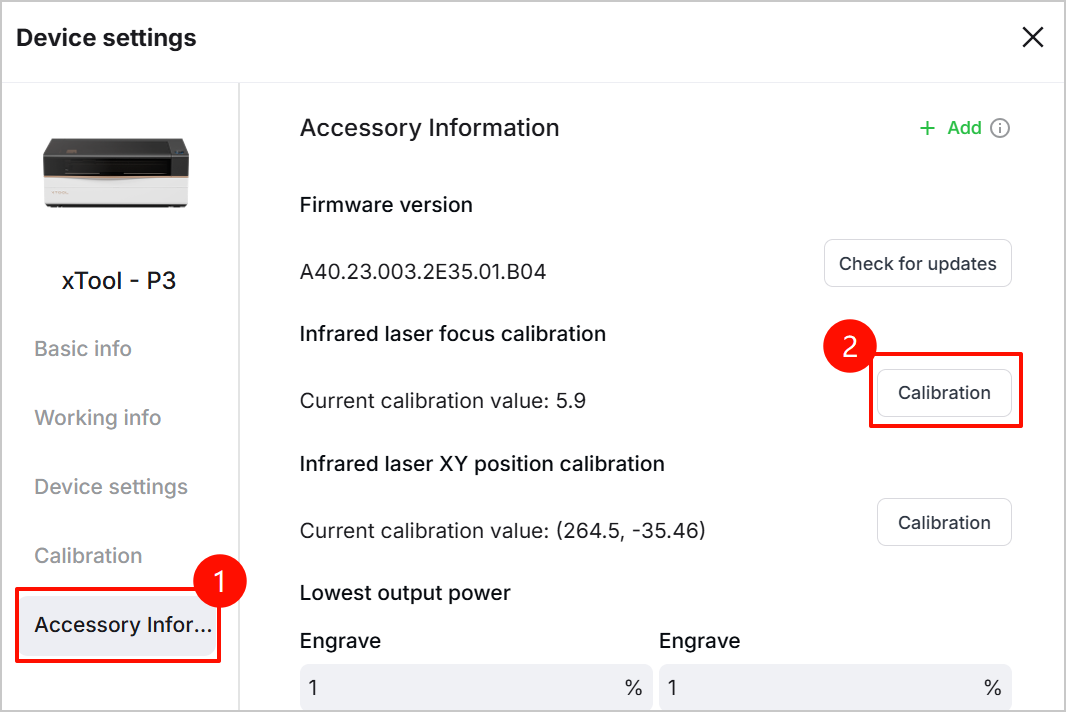
- In the dialog box, click Accessory Information in the left panel. Then, click Calibration next to Infrared laser focus calibration.
- Ensure that you've got the calibration block, check the box and click Next.
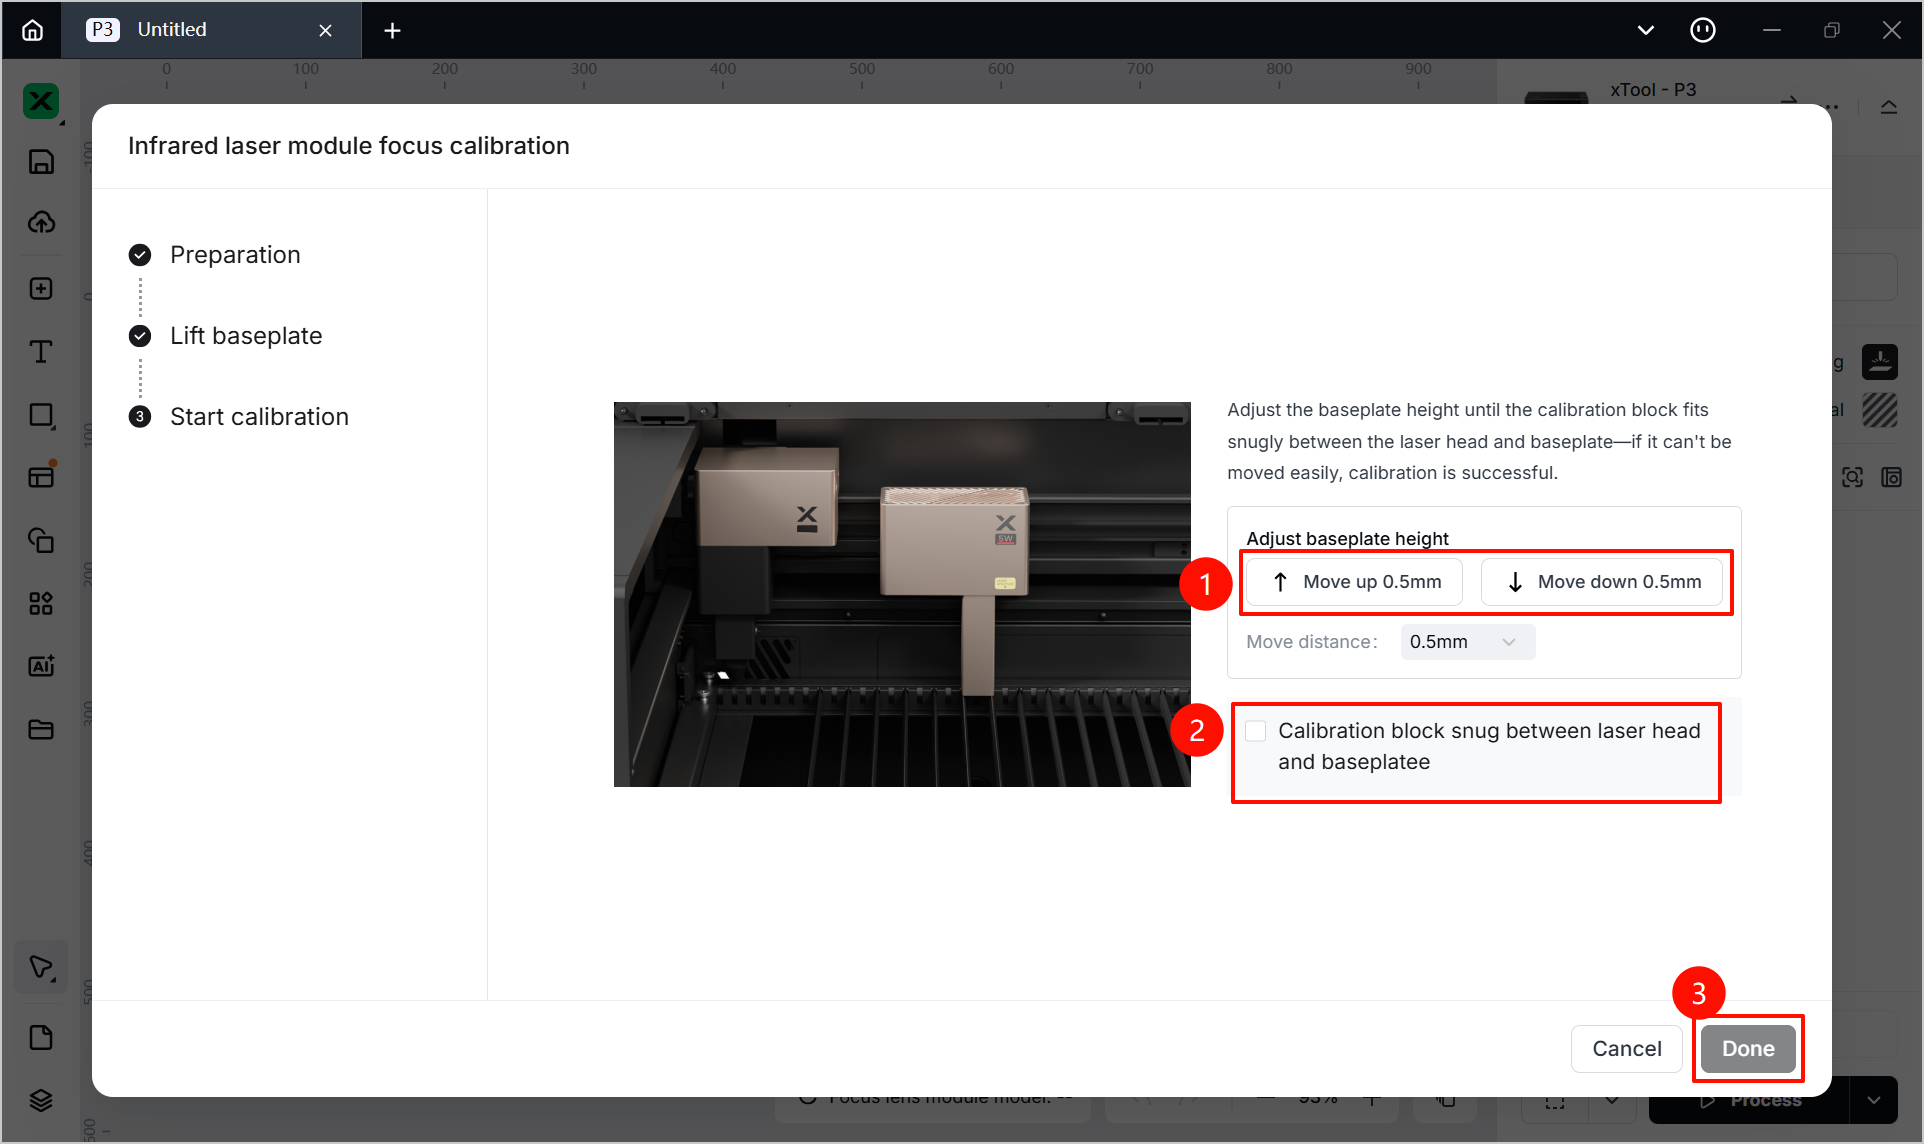
- Remove any unnecessary items on the baseplate, click Lift baseplate. Wait until the baseplate is lifted, then click Next.

- Lower the baseplate a bit by clicking Move down 0.5mm in the software.
- Place the calibration block between the infrared module and the baseplate.
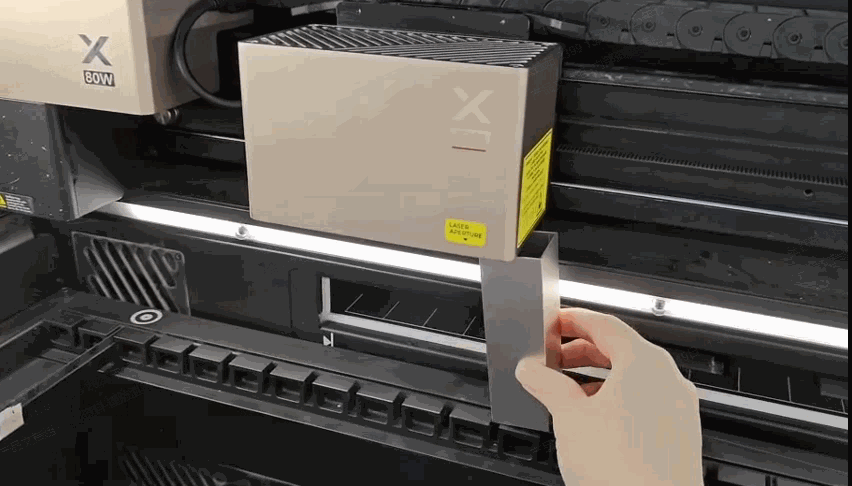
- Slightly adjust the baseplate height to snug the block between the infrared module and the baseplate.
- Click buttons in the Adjust baseplate height area. You may set Move distance for precise adjustment.
- Check the box when the block is firmly secured.
- Click Done.
- Remove the calibration block.
Step 2: Calibration along x- and y-axis
- Click the ... icon and Device settings.

- In the dialog box, click Accessory Information in the left panel. Then, click Calibration next to Infrared laser XY position calibration.
- Ensure that you've got all the necessary material and accessories, check the box and click Next.
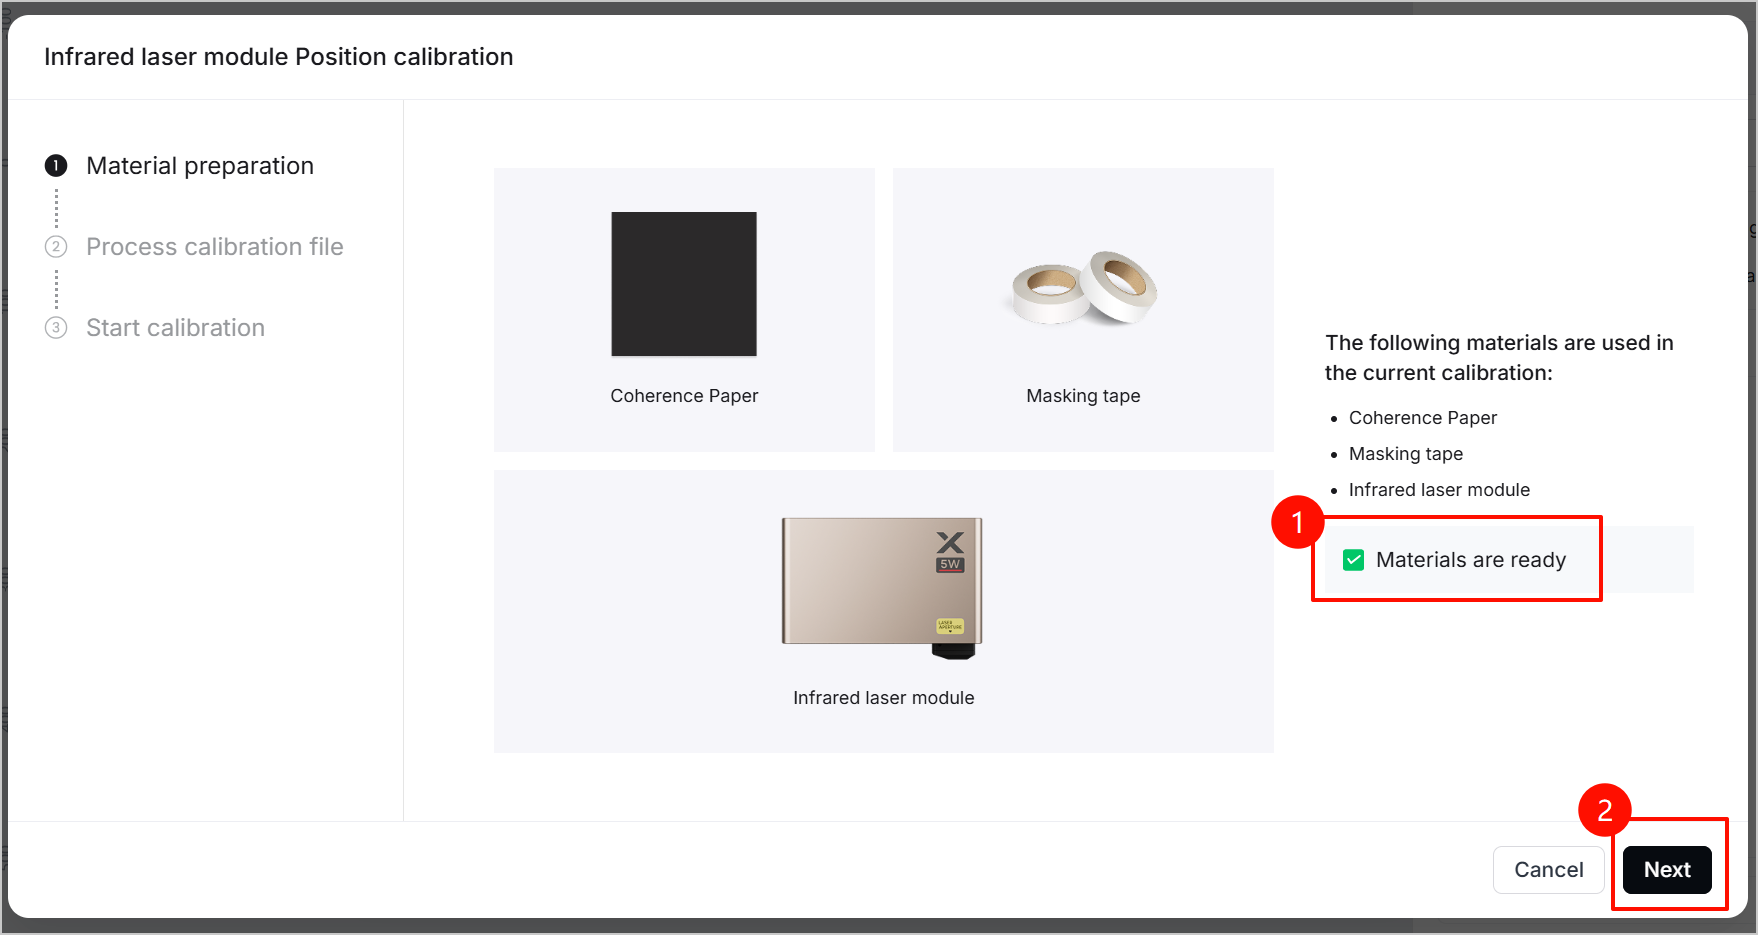
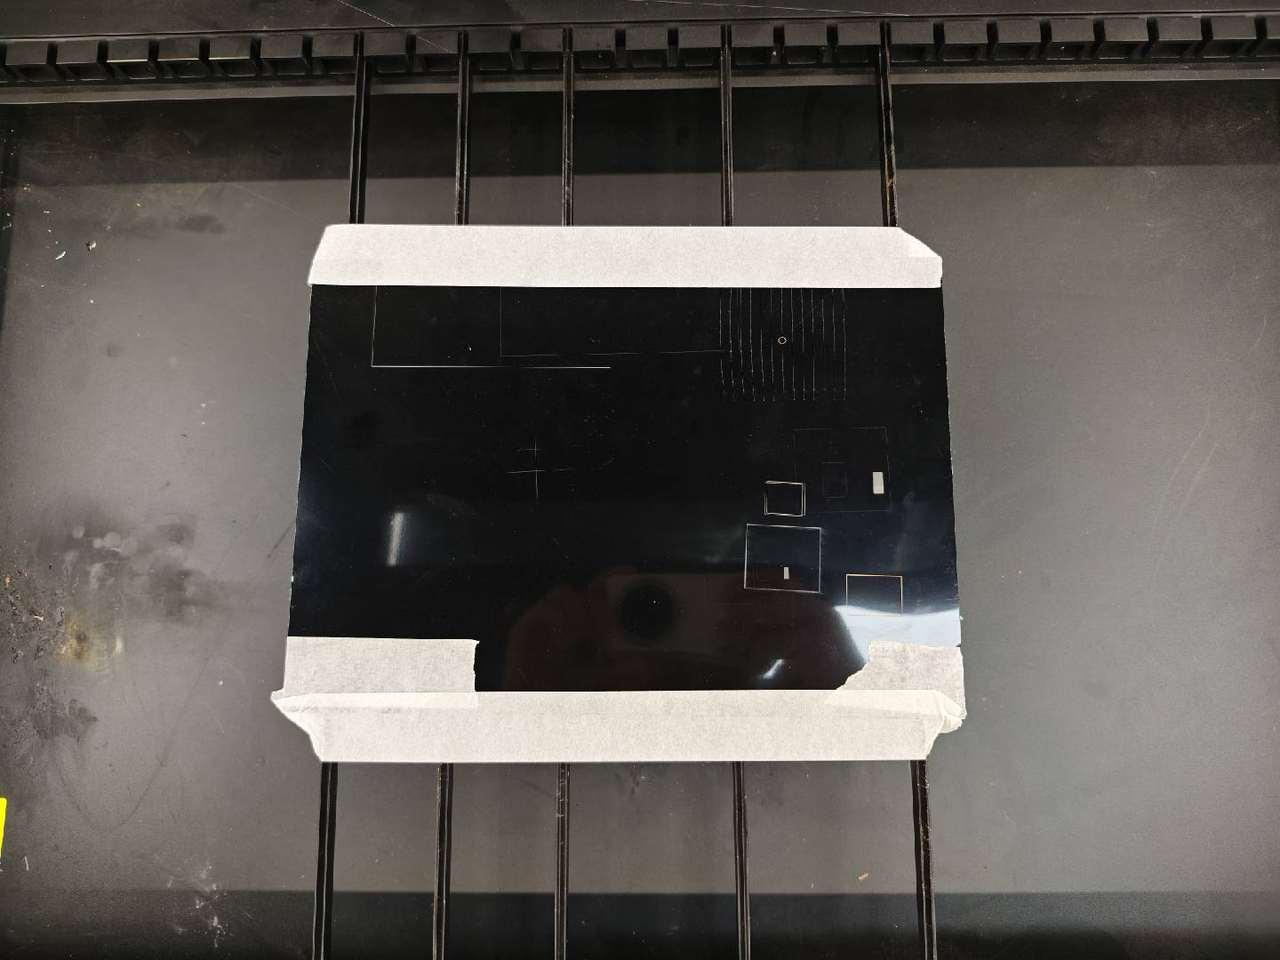
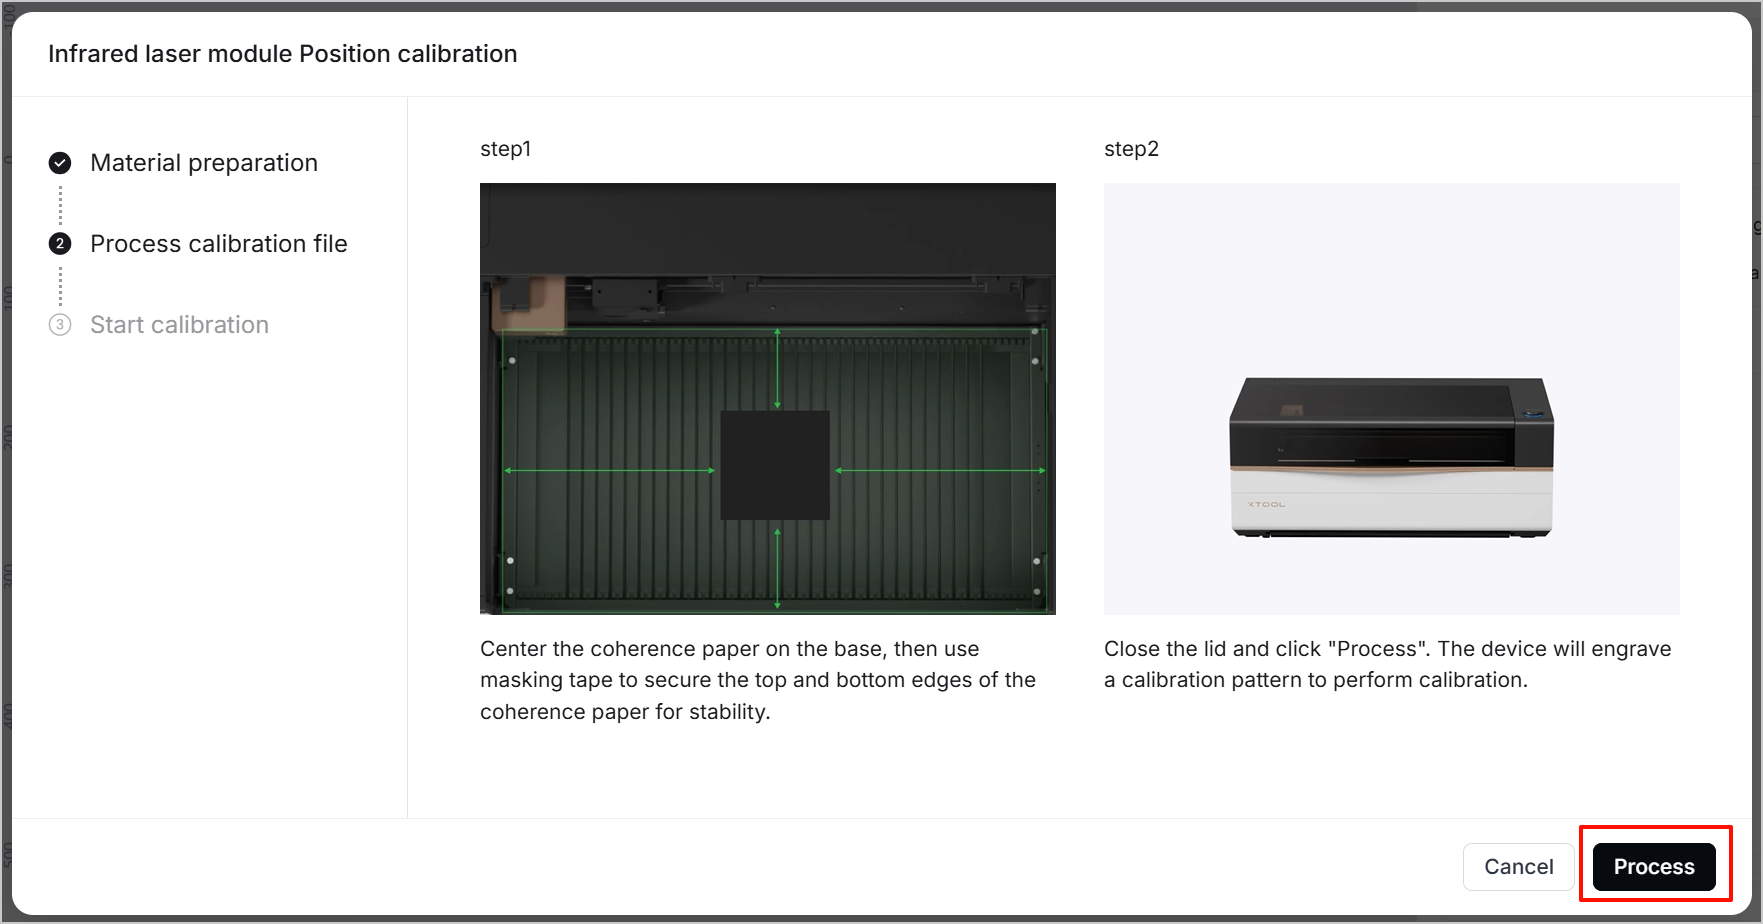
- Use masking tape to secure the art scratch paper (coherence paper) on the slats.
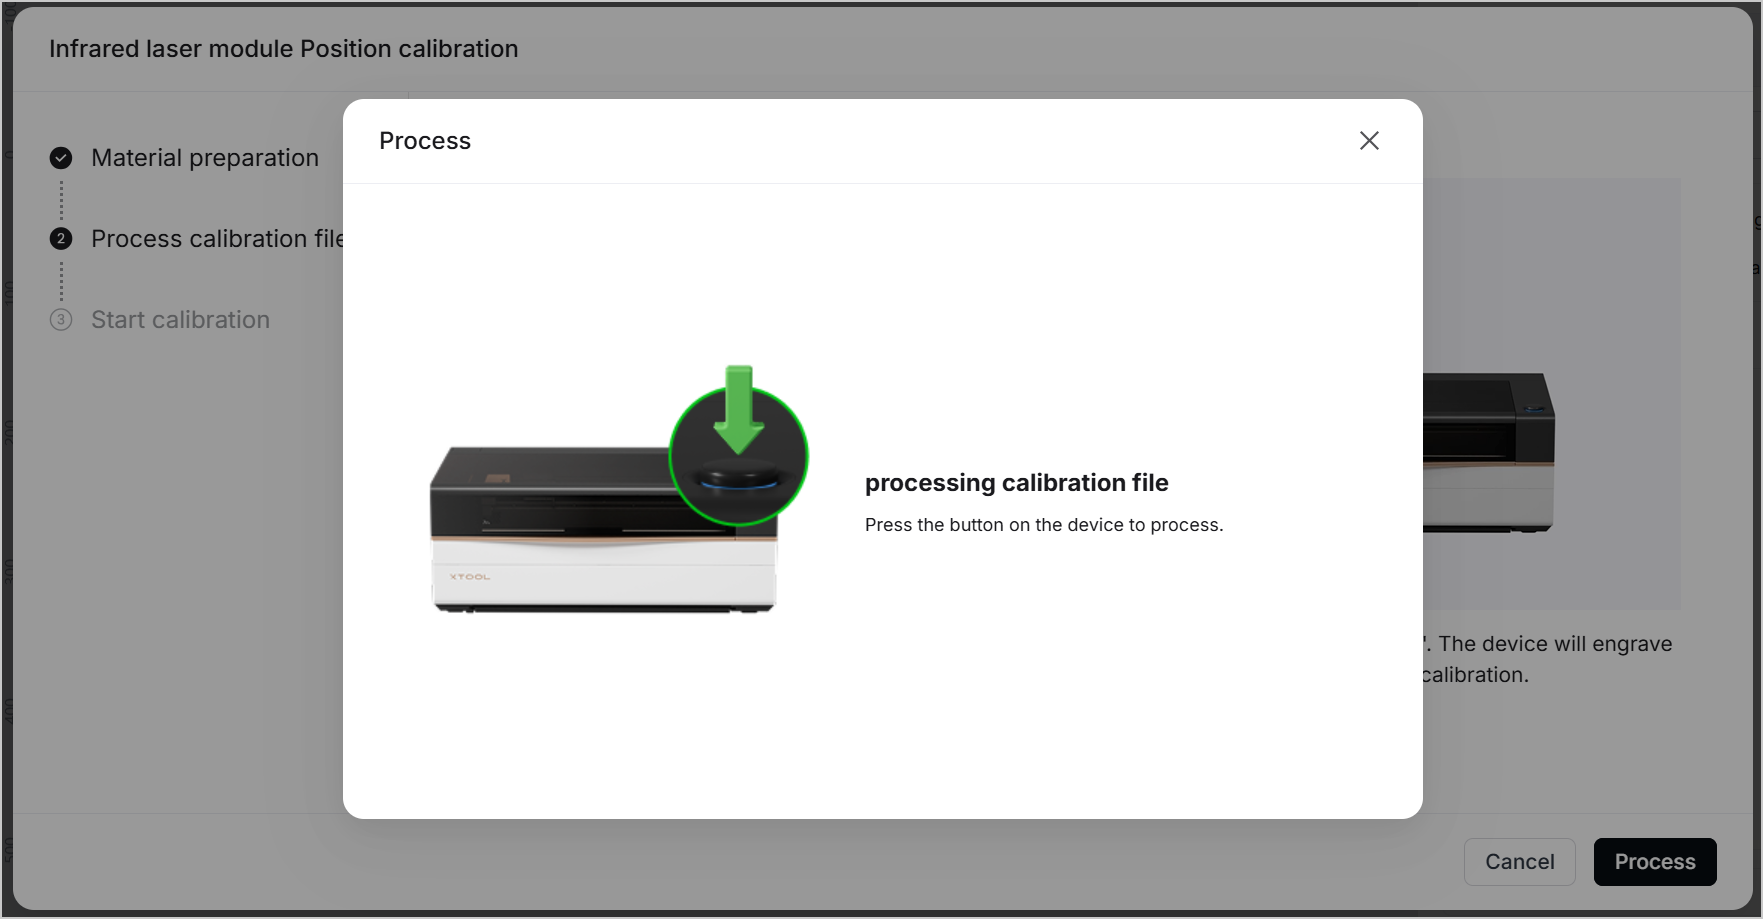
- Close xTool P3's lid, click Process, and press the button on xTool P3.
|
|
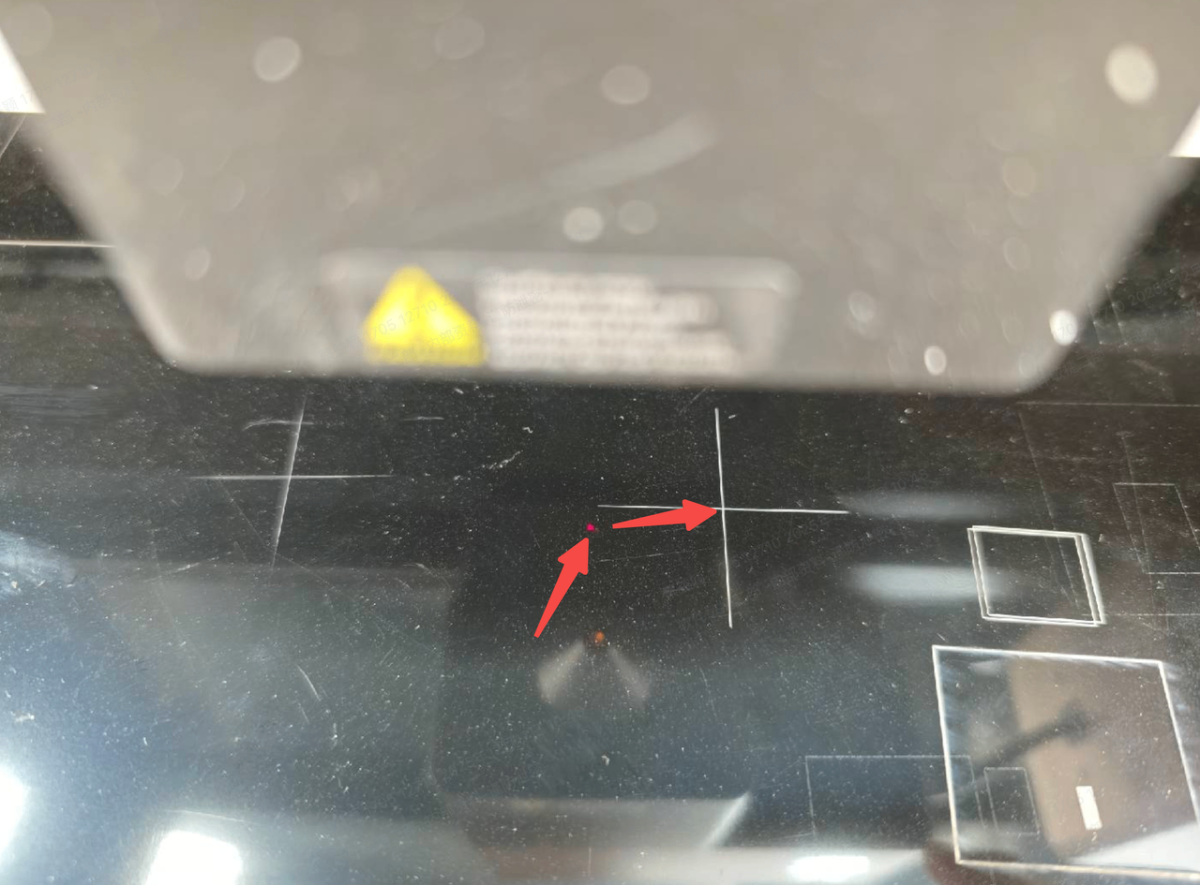
- After a white cross is engraved on the art scratch paper, adjust the red spot to the white cross center.
|
|
(1) Open the lid and observe the position of the red spot and the white cross center. | (2) Click the buttons in the Move laser module area to move the red spot to the white cross center. You may set the movement step for precise adjustment. |
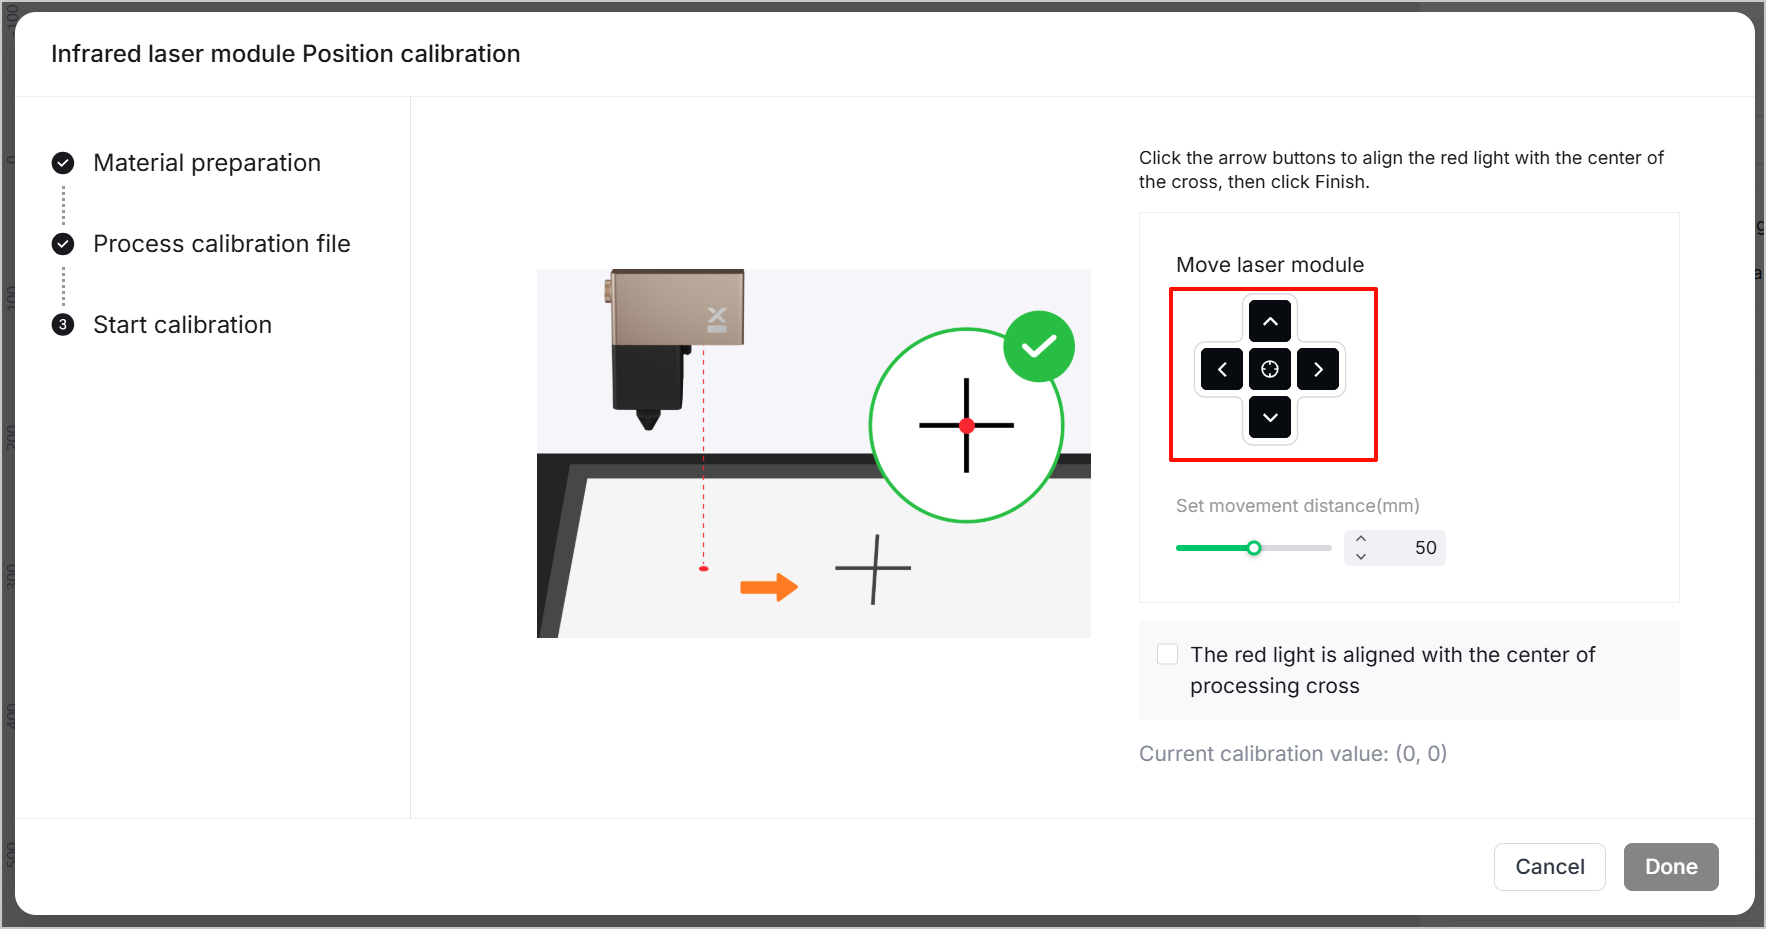
- Check the box and click Done. Then, wait until the automatic calibration is finished.
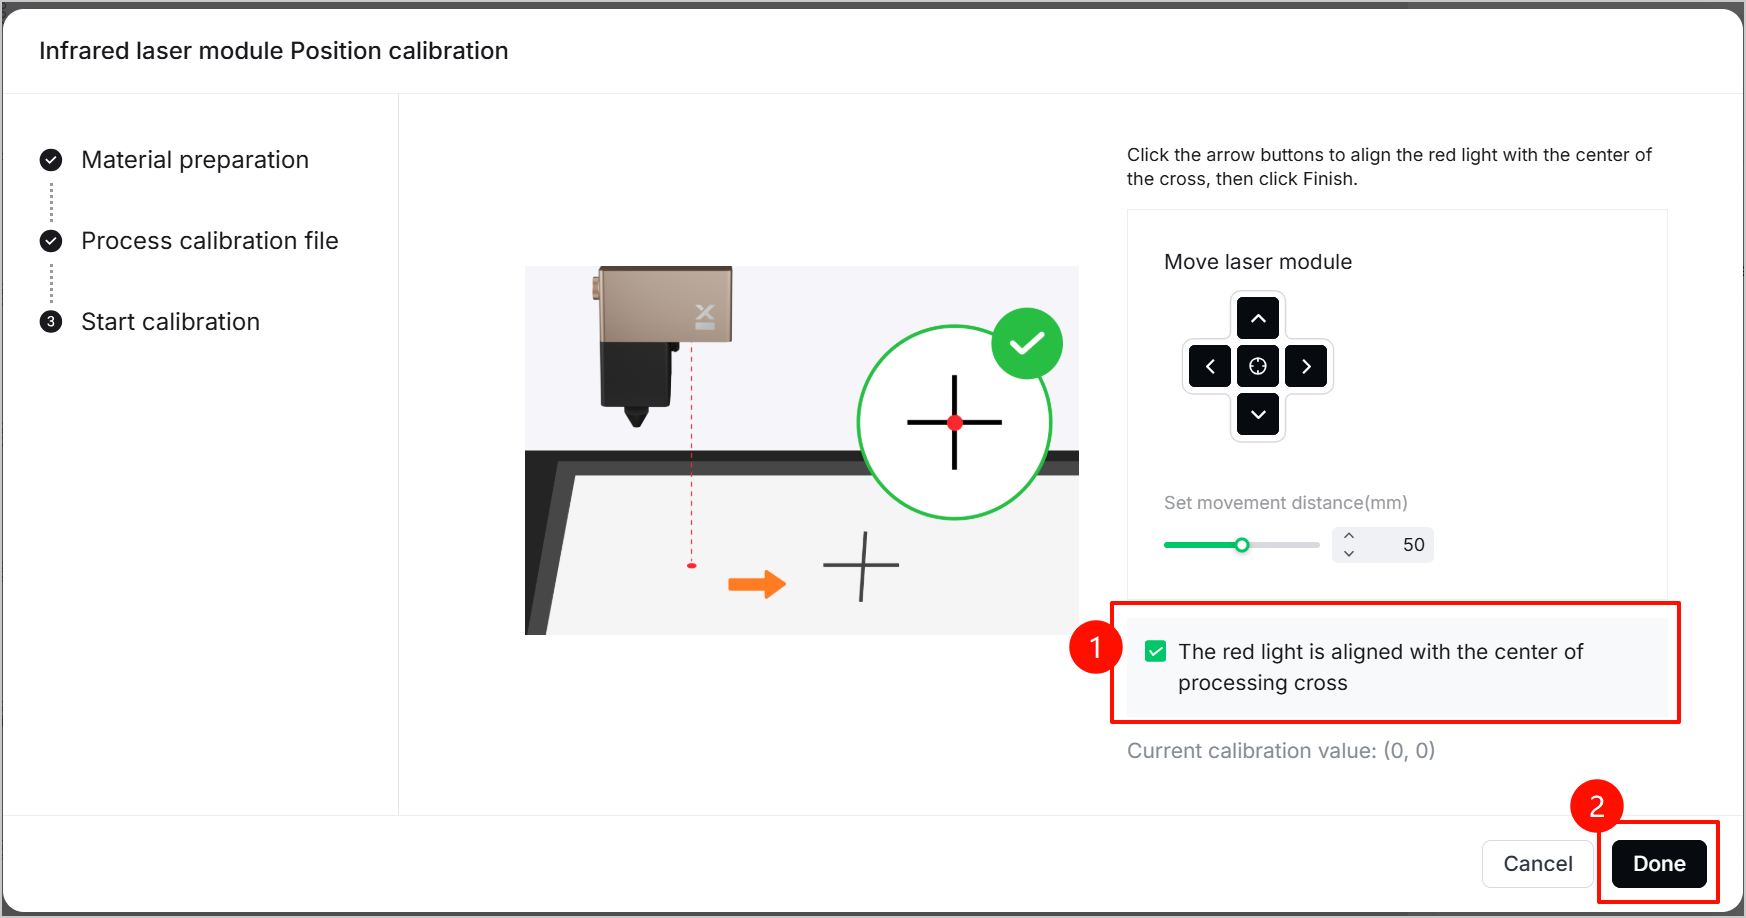
Note: You're advised to note down the calibration value before clicking Done. Or you may find the value in Device settings > Accessory Information > Infrared laser XY position calibration > Current calibration value.
When processing the same object in the same location, the pre-installed laser module and the infrared module may have a slight difference in the processing position (≤ 1 mm). In this case, perform the calibration along x- and y-axis again and slightly adjust the infrared module position by clicking buttons in the Move laser module area based on your observation.
For instance, the originally determined calibration value is (265.5,-34.86), but when the infrared module processes materials, it is found that its processing position is shifted 0.5 mm to the left compared to the pre-installed module's processing position. In this case, the calibration value should be (265, -34.86). You can click the right button by 0.5 mm for an accurate value.
Step 3: Use the infrared module
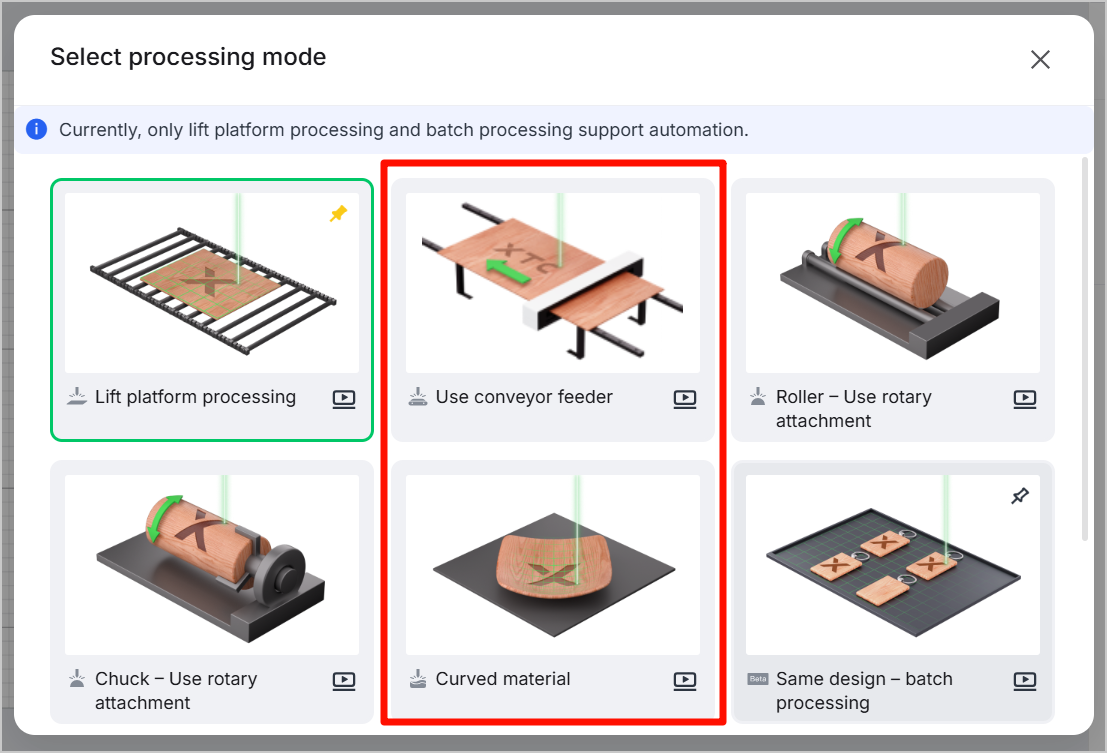
- Select the processing mode in the right panel.
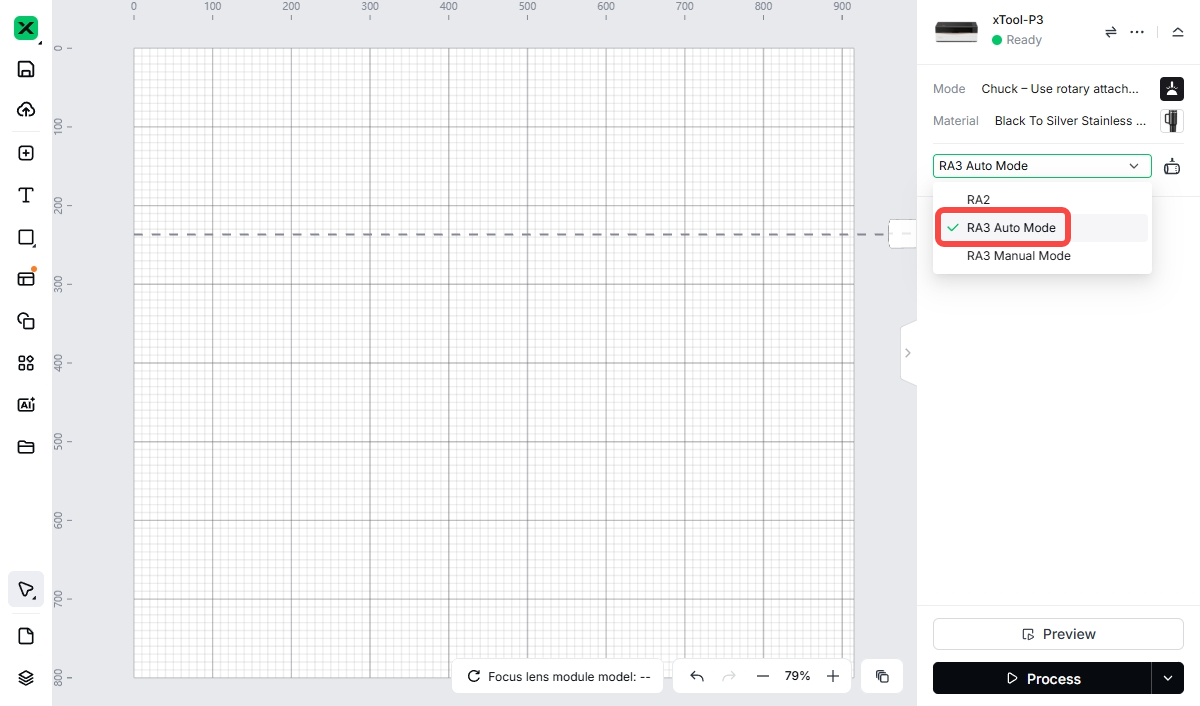
Note: xTool P3 5W Infrared module doesn't support the following processing modes:
- Use conveyor feeder
- Curved material
- Auto mode of Use rotary attachment
|
|
- Place your design on the canvas.
Click the object and select 5W Module from the Laser head list in the right panel.
- Select your processing material, set necessary parameters, and then click Process in the bottom right corner. To achieve better results, follow the instructions in the software.
Note: xTool P3 5W Infrared Module supports only scoring and engraving, not cutting.

