Application scenarios
After welding processes, laser cleaning can remove welding oxides from the weld path. This improves the aesthetic quality and ensures better corrosion resistance of the welded joint. Maximum single-pass cleaning width: 10 mm.
Handheld cleaning
The following steps use xTool MetalFab Laser Welder 1200W for illustration. You can follow the same steps to use xTool MetalFab Laser Welder 800W.
1. Remove the wire feeding tube
Note: If you have installed the wire feeding tube to the welding head, take the following steps to remove it. |
(1) Turn off the machine.
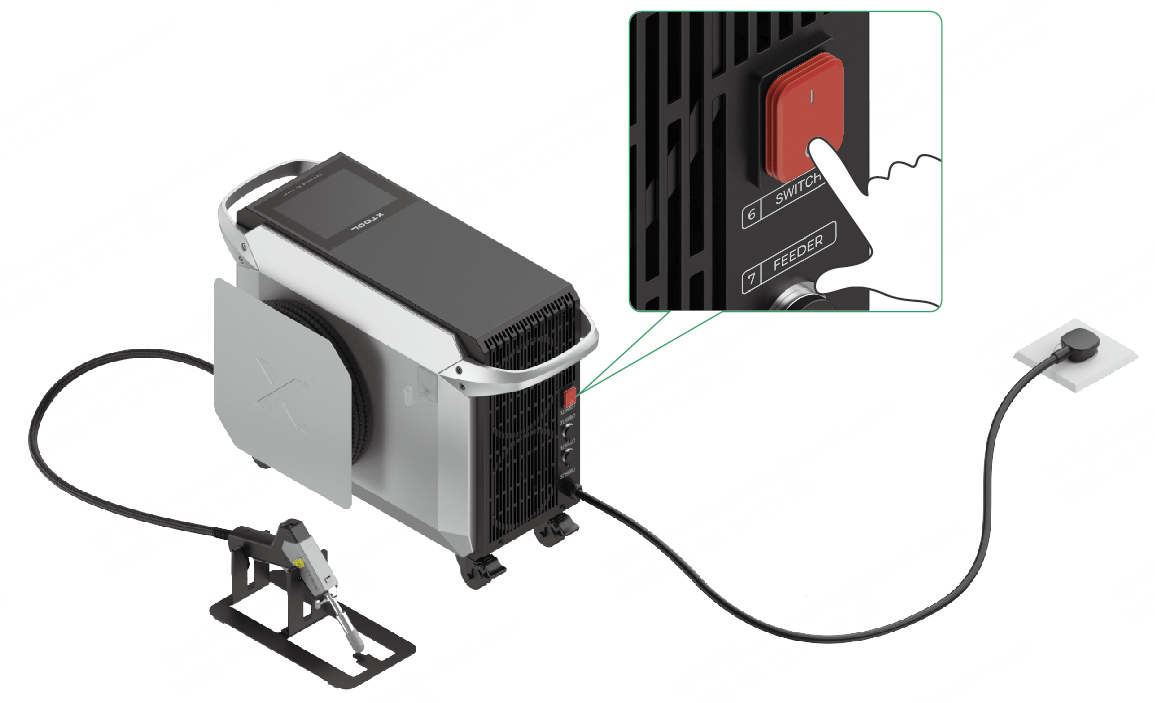
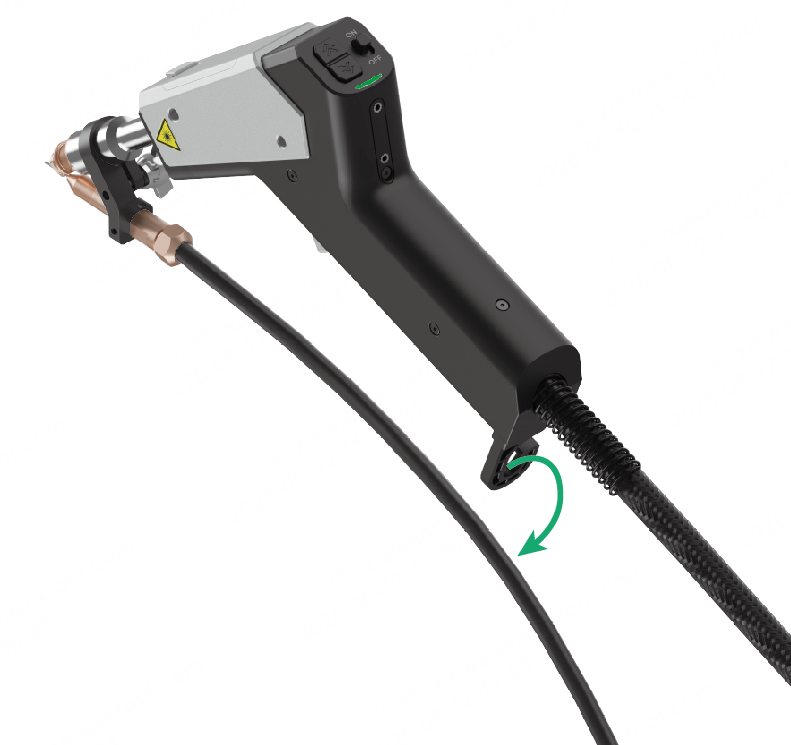
(2) Remove the wire feeding tube from the wire clamp.
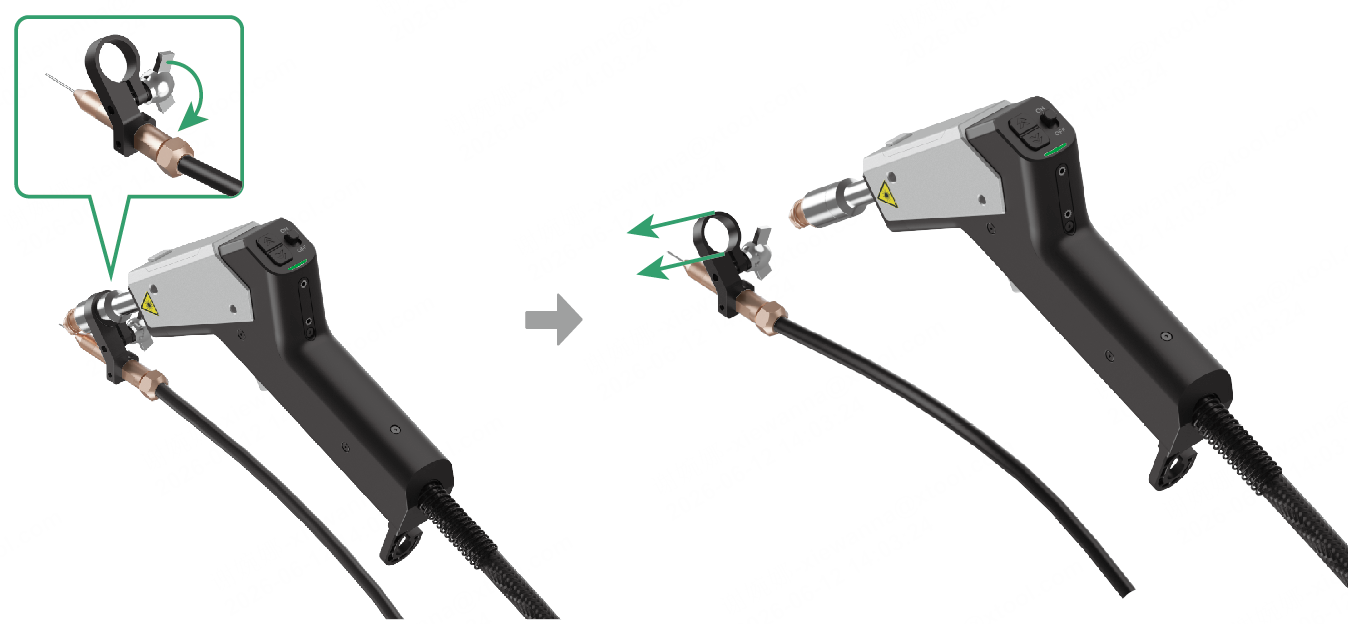
(3) Loosen the fastener and detach the wire feeding tube from the welding head.
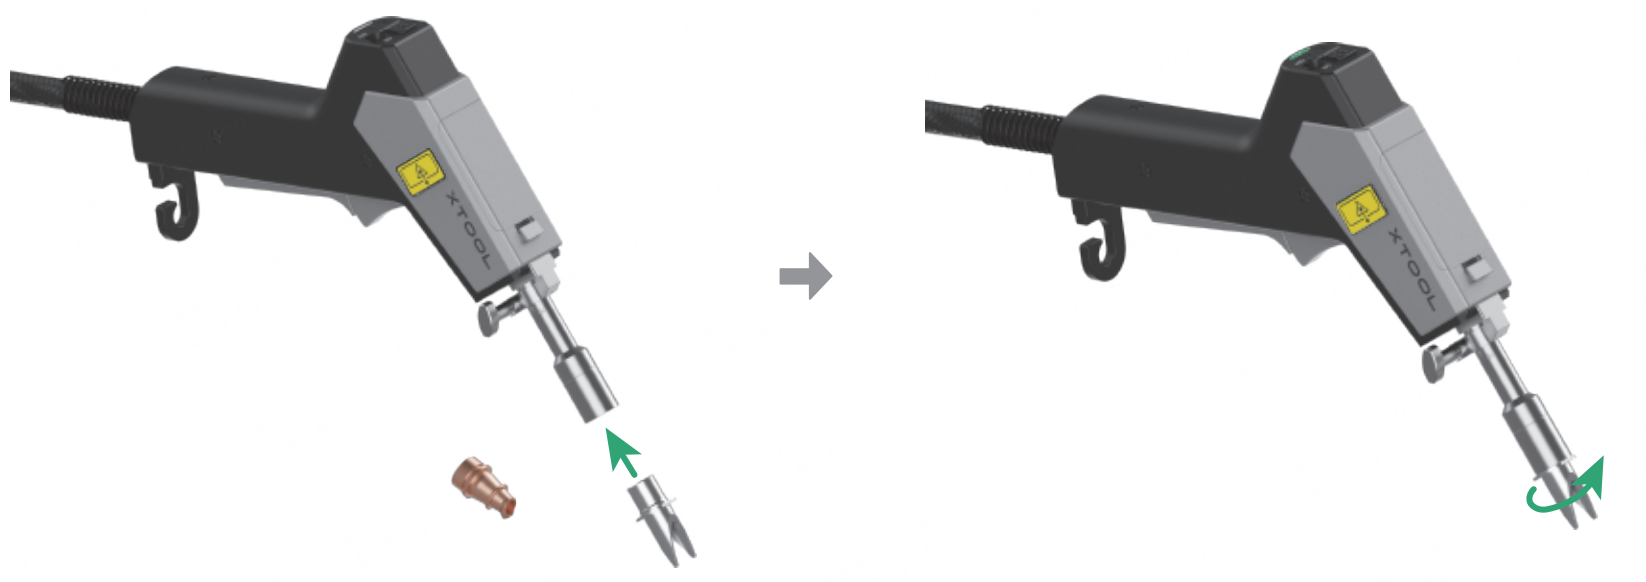
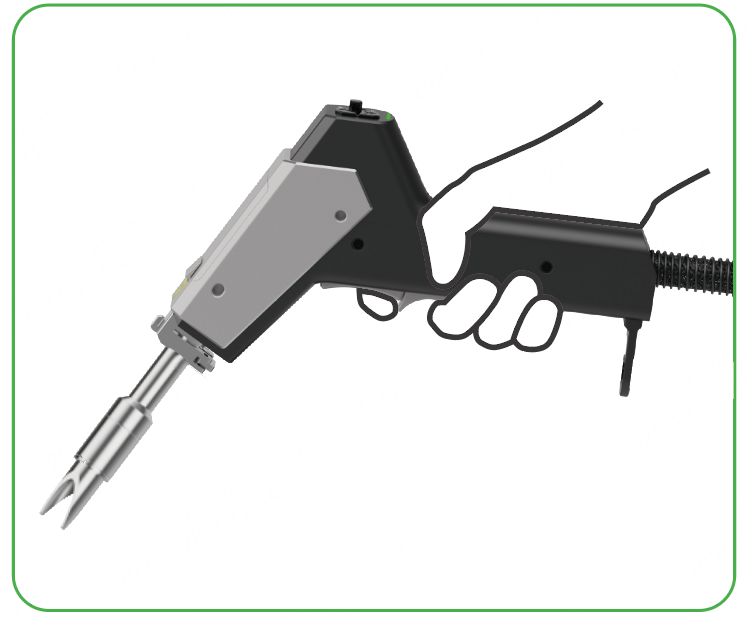
2. Replace the nozzle
Caution: Before replacement, ensure that the machine is turned off. |
(1) Remove the current nozzle.
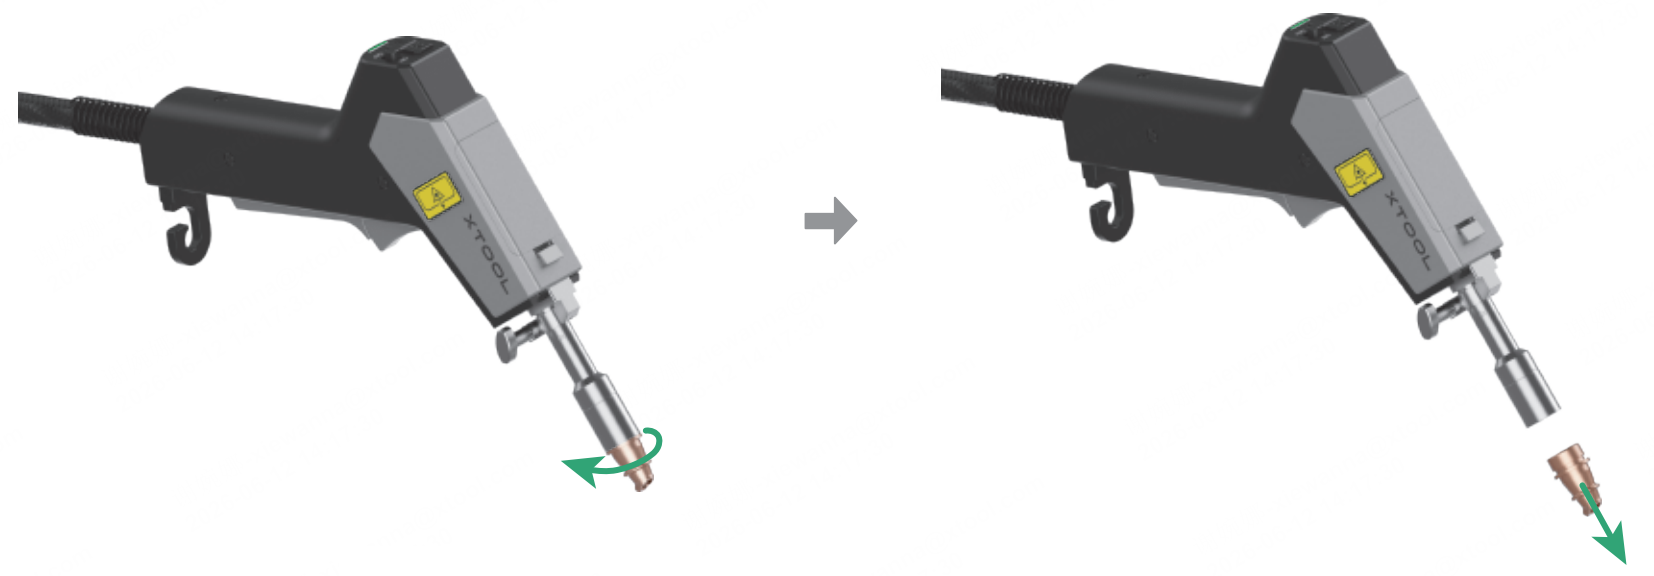
(2) Install the cleaning nozzle.
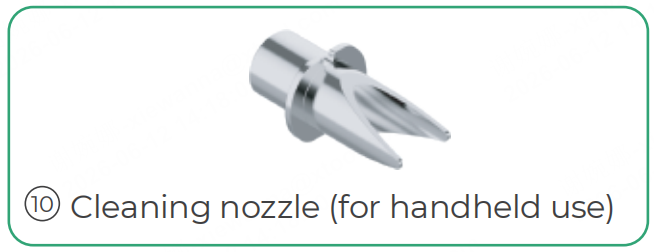
Caution: The cleaning nozzle that comes with xTool MetalFab Laser Welder is for handheld cleaning only. Do not use it for CNC cleaning. |
3. Prepare the shielding gas supply
Supported gas types: nitrogen or argon (Purity ≥ 99.99%) |
(1) Turn off the gas cylinder valve.
(2) Detach the gas flow meter from the cylinder.
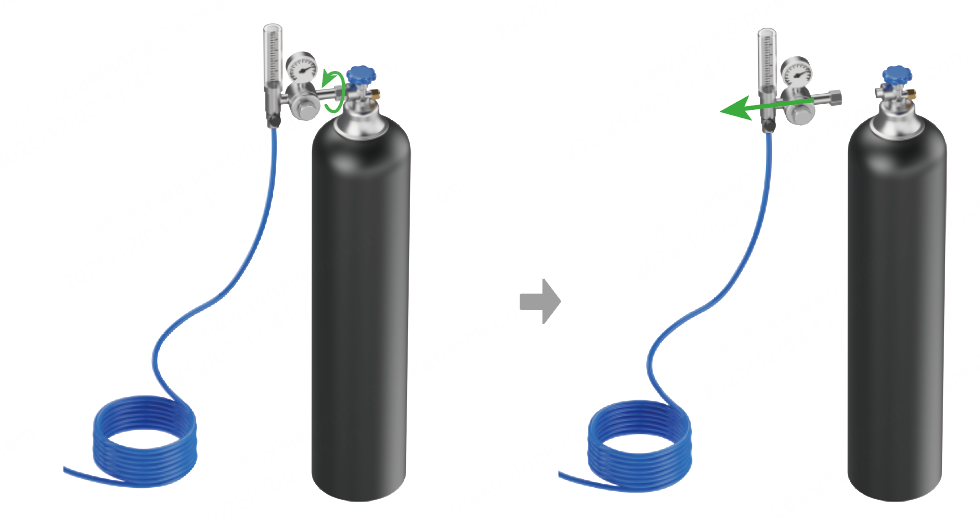
(3) Install a gas pressure regulator between the cylinder and the gas flow meter.
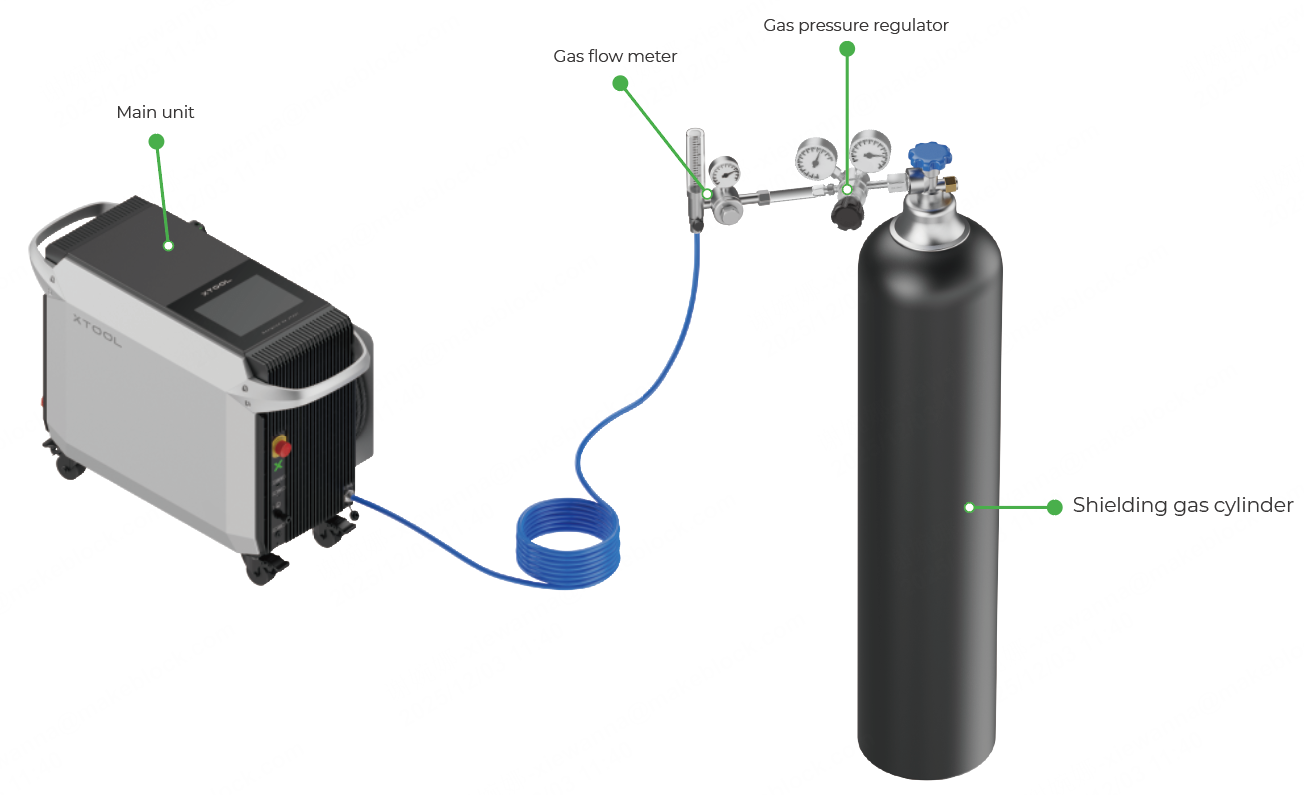
(4) Turn on the machine and open the gas cylinder valve.
(5) Press and hold the grip sensing button and trigger to allow gas flow. Meanwhile, adjust the gas pressure to 0.1 MPa – 0.2 MPa, and the gas flow rate to 20 L/min – 30 L/min.
|
|
|
|---|---|---|
Press and hold the grip sensing button and trigger | Gas pressure: 0.1 MPa – 0.2 MPa | Gas flow rate: 20 L/min – 30 L/min |
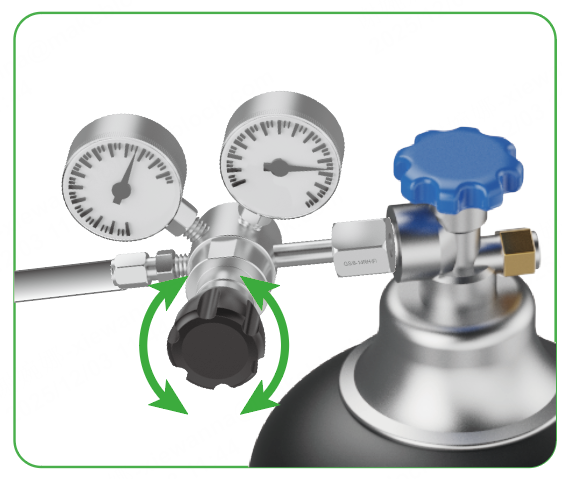

Caution: ■ The way of opening the valve may differ for different types of gas cylinders. The picture is for illustration only. |
4. Start metal cleaning
Caution: Before operating the device, please follow the safety instructions to put on PPE and take proper safety precautions. Necessary PPE includes: laser safety goggles, welding helmets, N95 dust masks, laser and heat-resistant gloves, clothing, and aprons. |
1. Clamp the workpiece sensing cable to the workpiece to be cleaned or to a conductive object connected with the workpiece, such as a metal base or a metal desktop.
Danger: It is strictly prohibited to attach the clamp to the graduated tube of the welding head. |
About the safety interlock loop A safety interlock loop exists between the welding head, the workpiece, and the main unit. Only when the welding head is in contact with the workpiece can the safety interlock loop be closed and allow the welding head to emit laser beams. |
2. On the touchscreen, choose Standard mode > Weld path clean. Select the material type and cleaning width according to the actual situation.
Tips: You can also set the laser parameters under other modes: Note: For parameter explanations, see How to Choose Welding Parameters? |
3. On the touchscreen, tap Enable lasering to allow laser emission.
4. Aim the cleaning nozzle at the starting point, with its prongs in contact with the workpiece. Then, press and hold the grip sensing button and trigger to start cleaning the metal.
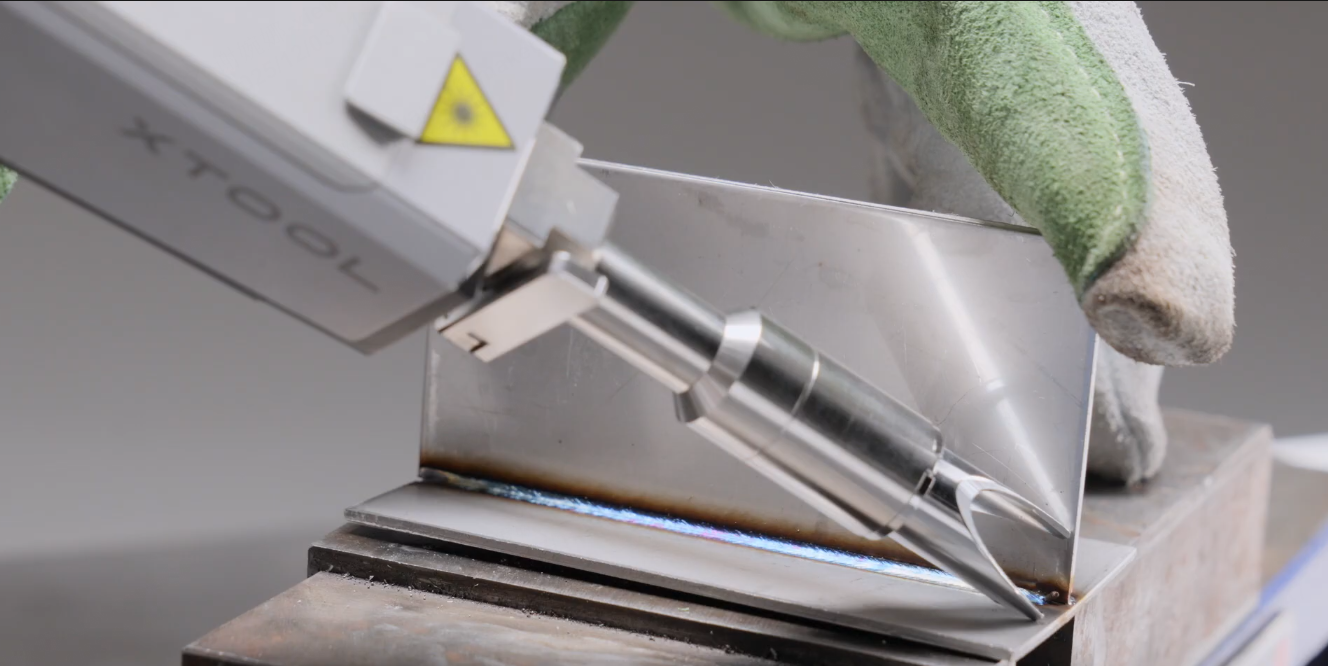
Tips: ■ To ensure a uniformly clean surface, move the welding head at a constant speed. ■ If the laser cannot clean the metal in a single pass, you can perform multiple passes to achieve the desired cleaning effect. |
Caution: ■ For a thin metal sheet, do not clean it with high power for an extended period, as this may cause deformation. ■ Ensure that the cleaning nozzle contacts the workpiece, so that the safety interlock loop can be closed and the welding head can emit laser. ■ During cleaning, ensure that no one stands in the laser reflection zone, watches from the reflection zone, or places a hand in the reflection zone. ■ After the cleaning is completed, the workpiece and parts of the welding head (such as the nozzle and the graduated tube) will remain hot for some time. Do not touch the hot areas without protection. ■ After the cleaning is completed, turn off Enable lasering on the touchscreen to prevent accidental laser emission. |
About CNC cleaning
You can use xTool MetalFab Laser Welder on xTool MetalFab CNC Cutter to perform CNC cleaning. For detailed instructions, see CNC cleaning.
Maintenance
Frequency: After every 20 hours of laser cleaning operation
Task: Clean the lens protector inside the welding head
Purpose: Avoid dust, debris, or stains on the lens protector, which may affect laser beam transmission and compromise cleaning efficiency
Instructions: Clean or Replace the Lens Protector for xTool MetalFab Laser Welder
