
Prepare the workspace and the machine
For the preparation of the workspace, machine, and other necessary devices, refer to the following guides.
For xTool Metalfab Laser Welder 1200W: |
For xTool Metalfab Laser Welder 800W: |
Prepare the workpieces and welding wire
xTool MetalFab Laser Welder supports welding the following materials: stainless steel, carbon steel, galvanized steel, aluminum, and brass.
Refer to the following table to select a proper wire based on the material type.
Workpiece material type | Recommended welding wire |
Stainless steel | Stainless steel wire |
Carbon steel | Solid iron wire |
Galvanized steel | Solid iron wire |
Brass | Tin brass wire |
Aluminum | Aluminum wire |
To ensure proper metal melting and fusion during welding, ensure that the surface of the workpiece is clean. If the surface of the workpiece is dirty (e.g., covered with grease, rust, coatings, or dust), clean it with alcohol or acetone or polish it.
Start wire-filled welding

The following steps use xTool MetalFab Laser Welder 1200W for illustration. You can follow the same steps to use xTool MetalFab Laser Welder 800W.
1. Turn on the shielding gas supply and adjust the gas flow rate to 15 L/min – 30 L/min.

|
|
(1) Open the gas cylinder valve | (2) Press and hold the grip sensing button and trigger to allow gas flow. Meanwhile, adjust the gas flow rate to 15 L/min – 30 L/min. |

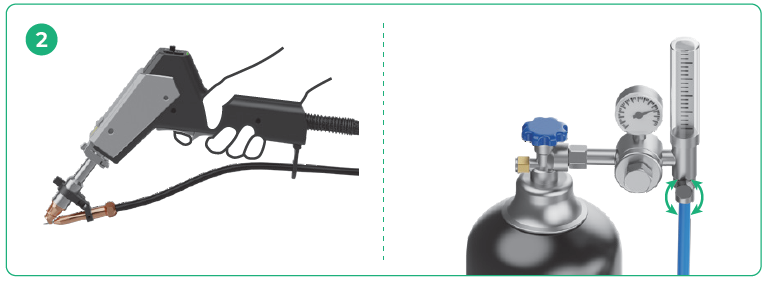
■ The way of opening the valve may differ for different types of gas cylinders. The picture is for illustration only.
■ To prevent accidentally triggering laser emission, ensure that Enable lasering is off on the touchscreen before operations.
2. Place the workpiece stably on a metal base or other support.
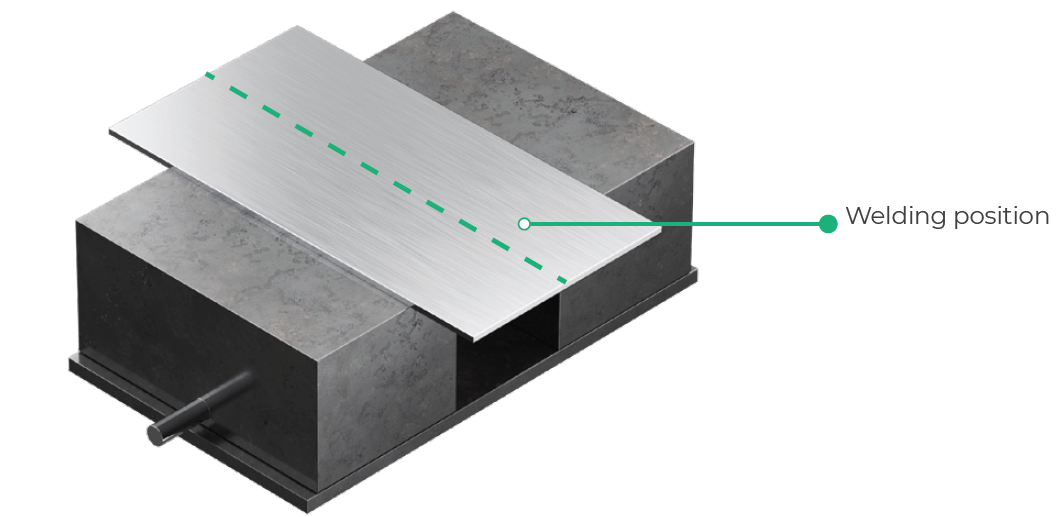
3. Clamp the workpiece sensing cable to the workpiece or to a conductive object connected with the workpiece, such as a metal base or a metal desktop.
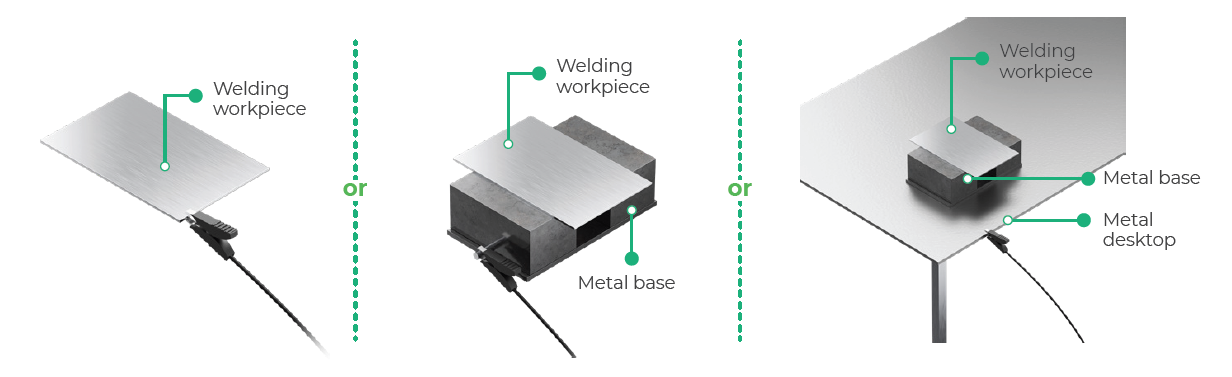

A safety interlock loop exists between the welding head, the workpiece, and the main unit. Only when the welding head is in contact with the workpiece can the safety interlock loop be closed and allow the welding head to emit laser beams.
4. On the welding head, use the feed and retract buttons to adjust the wire until its tip coincides with the red spot.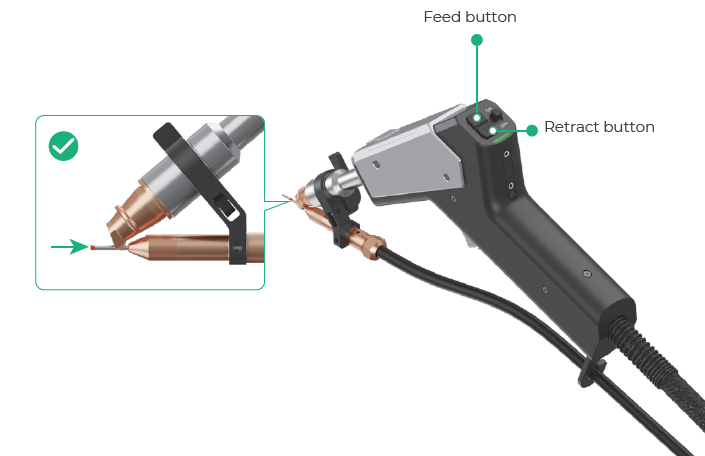
5. Turn on the wire feeding enable switch to enable the auto feeding function.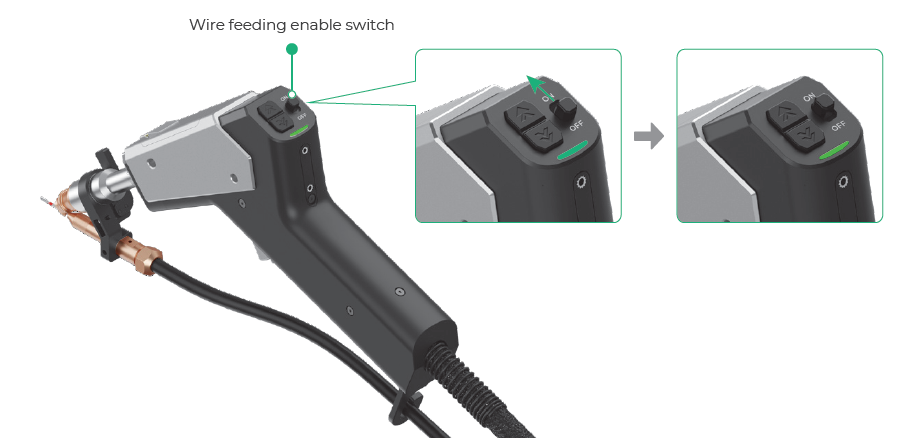
The welding head feeds wire automatically during welding only when the wire feeding enable switch is turned on.
6. On the touchscreen, choose Standard mode > Weld. Select the material type, material thickness, and wire diameter according to the actual situation.
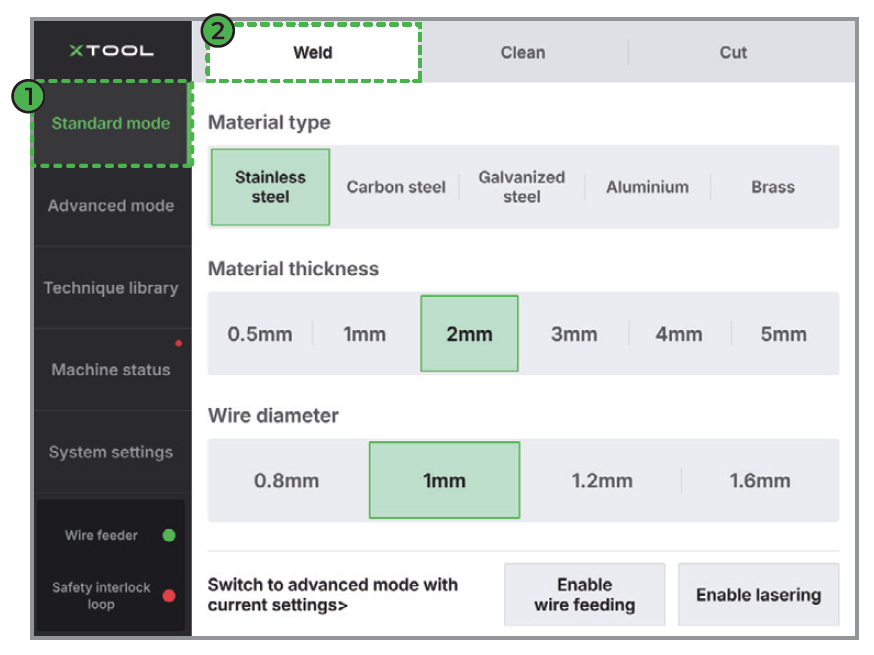
· Advanced mode: offers more welding selections and control over the basic welding parameters
To enter the advanced setting mode, tap Advanced mode on the left or Switch to advanced mode with current settings in the bottom left.
· Professional mode: offers full control over all welding parameters
To enter the professional setting mode, enter the Advanced mode > turn on Professional in the bottom left.
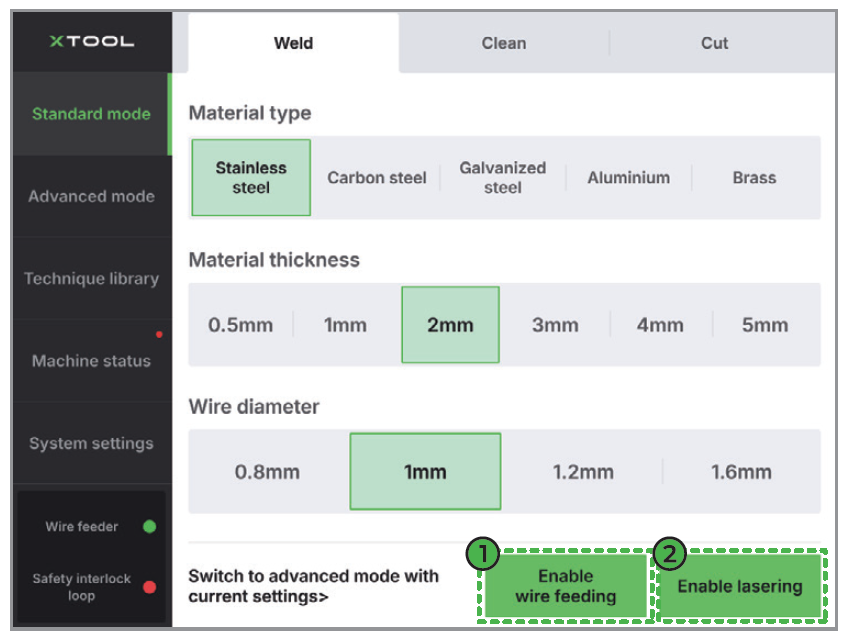
7. On the touchscreen, tap Enable wire feeding to allow wire feeding and Enable lasering to allow laser emission.
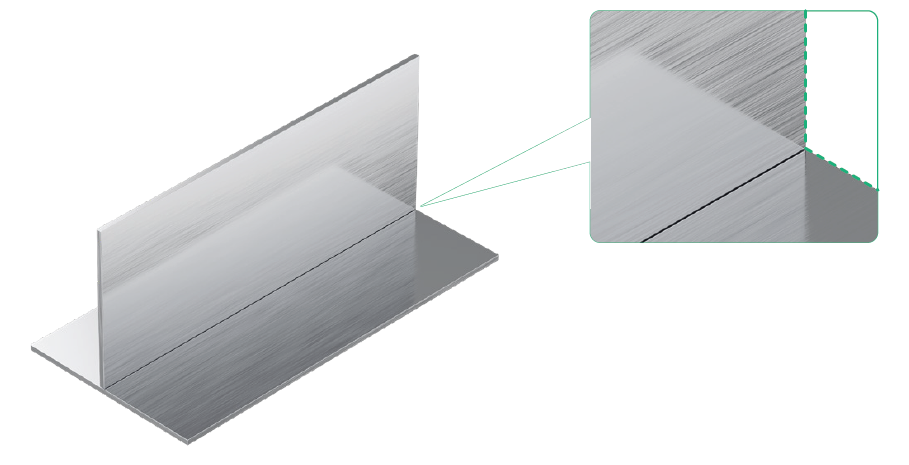
8. Align the welding parts.
9. Aiming the welding nozzle at the starting point, press and hold the grip sensing button and trigger to start welding.
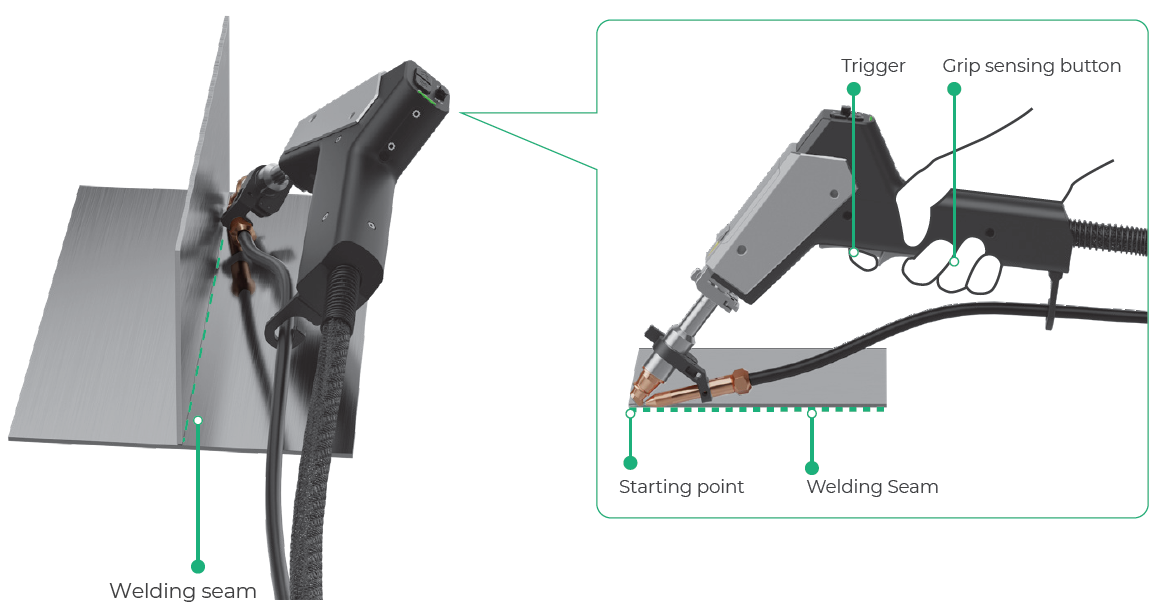
■ Ensure that the welding head tip contacts with the welding target, so that the safety interlock loop can be closed and the welding head can emit laser.
■ During welding, simply hold the welding head steadily and guide the direction. Do not push, pull, or press the welding head.
· As the welding head feeds the wire forward, a reaction force is generated from the welding point that automatically pushes the welding head backward.
· To avoid wire sticking or clogging, do not press the welding head downward.
· Ensure that the welding head moves in the same direction as the welding seam.
■ During welding, ensure that no one stands in the laser reflection zone, watches from the reflection zone, or places a hand in the reflection zone.
■ After the welding is completed, the workpiece and parts of the welding head (such as the nozzle and the graduated tube) will remain hot for some time. Do not touch the hot areas without protection.
■ After the welding is completed, turn off Enable lasering on the touchscreen to prevent accidental laser emission.
More information
If the welding does not go smoothly, or if the welding result is not as expected, refer to the following documents for solutions:
- Troubleshoot Weld Bead Offtrack
- Troubleshoot Discontinuous Weld Beads
- Troubleshoot Concave and Convex Weld Beads
- Troubleshoot Welding Wire Sticking to the Workpiece
- Troubleshoot Burn-Through for Laser Welding
- Troubleshoot Incomplete Penetration for Laser Welding
- Troubleshoot Laser Emission Failure for xTool MetalFab Laser Welder
- Troubleshoot Wire Feeding Failure for xTool MetalFab Laser Welder
- Troubleshoot Improper Wire Melting and Filling for xTool MetalFab Laser Welder
- Troubleshoot Erratic Wire Feeding for xTool MetalFab Laser Welder

