Before starting the user guide of xTool P3 Automatic Conveyor Feeder, see the unboxing video first.
Download PDF file (multi-language)


List of items
|
|
|
| |
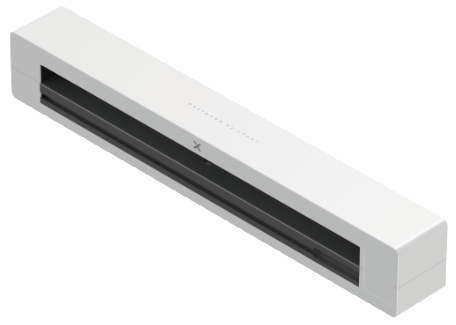
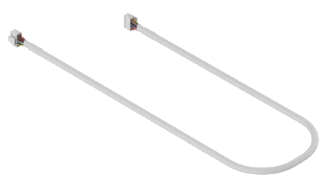
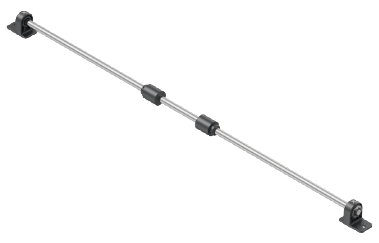
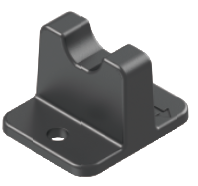
Conveyor feeder | Connection cable | Linear shaft | Fixing block | |
|
|
|
| |
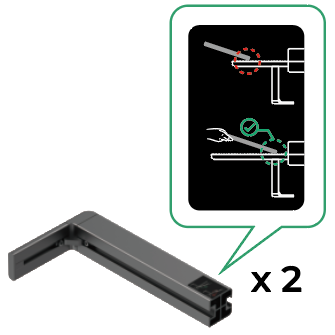
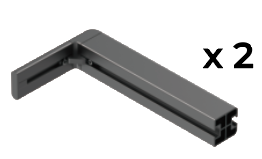
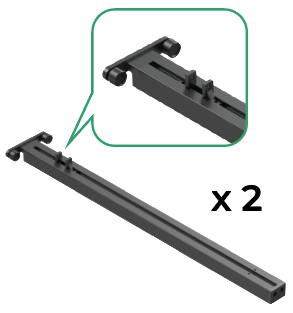
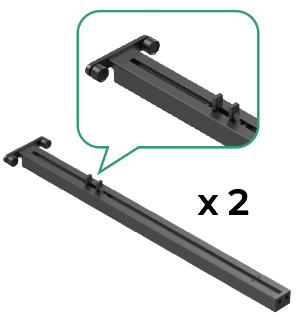
Front support base | Rear support base | Front conveyor rail | Rear conveyor rail | |
|
|
|
| |
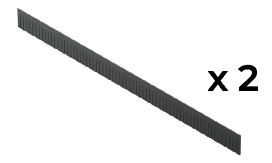
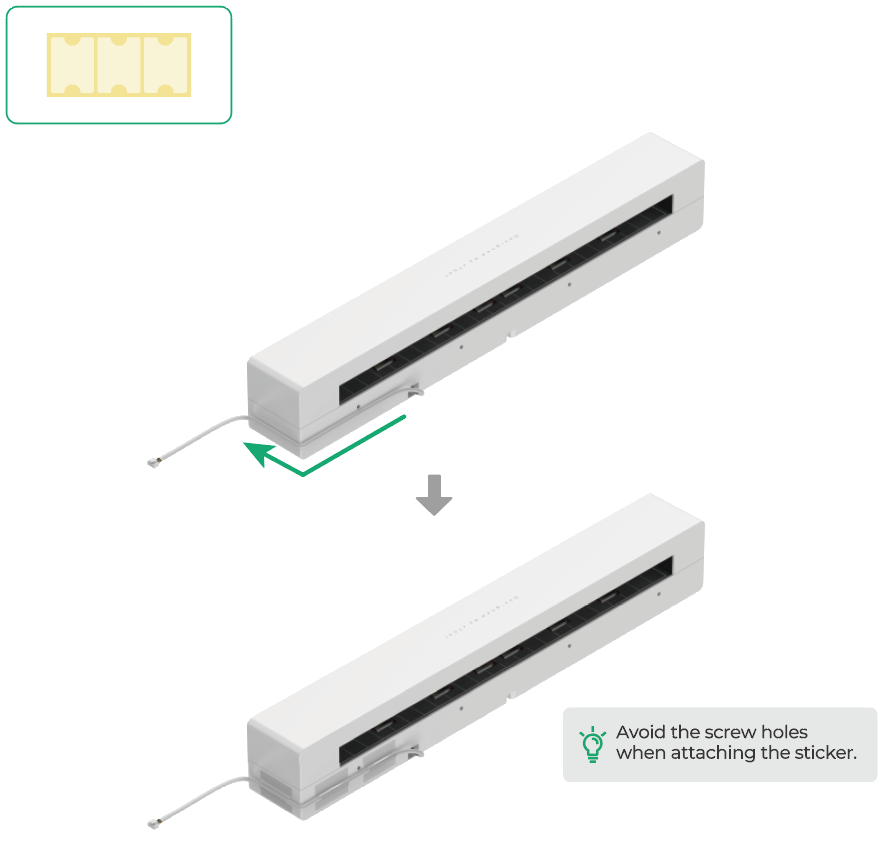
Smoke shield strip | Level | Screw M4*10 | Screw M3*10 | Sticker |
|
|
|
| |
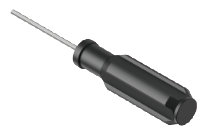
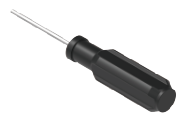
2.5 mm screwdriver | 2.0 mm screwdriver | Quick start guide | Safety instructions | |


Install the conveyor feeder
1. Prepare xTool P3
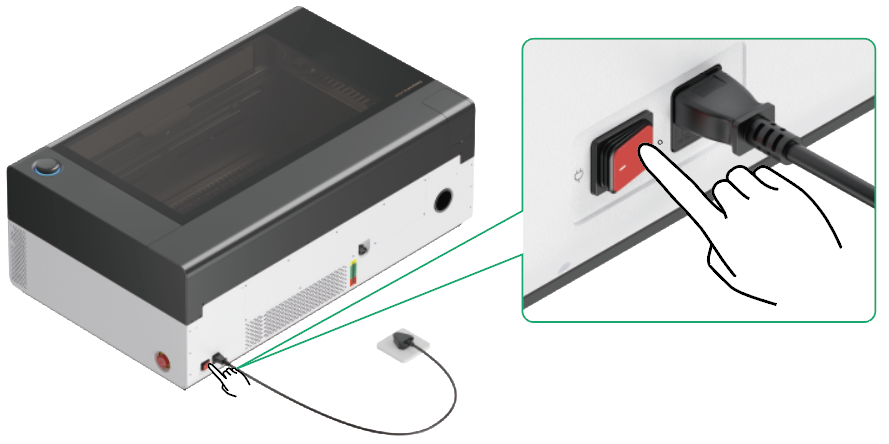
(1) Turn off the power switch.
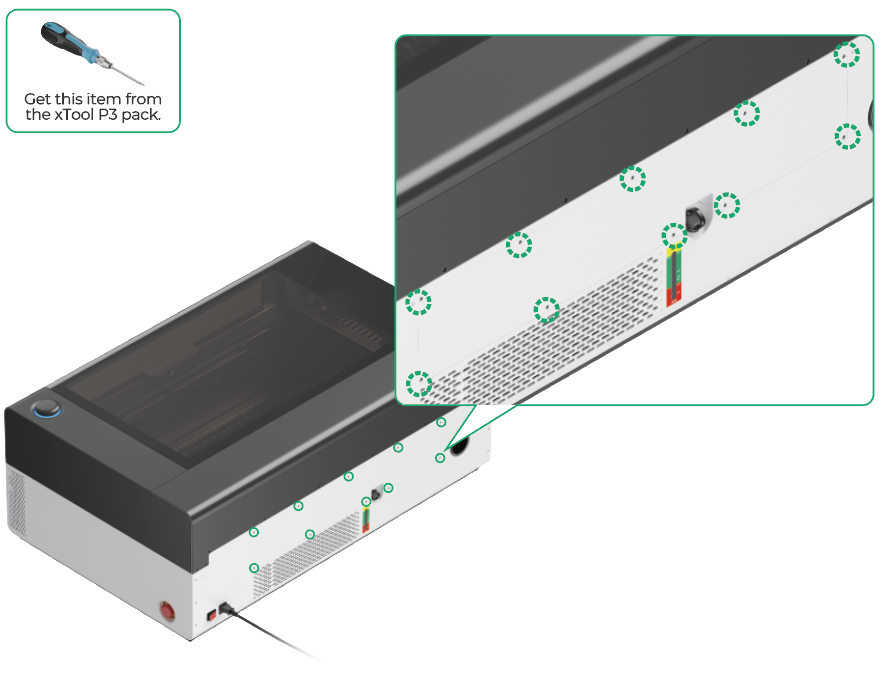
(2) Remove the screws from the back magnetic panel.
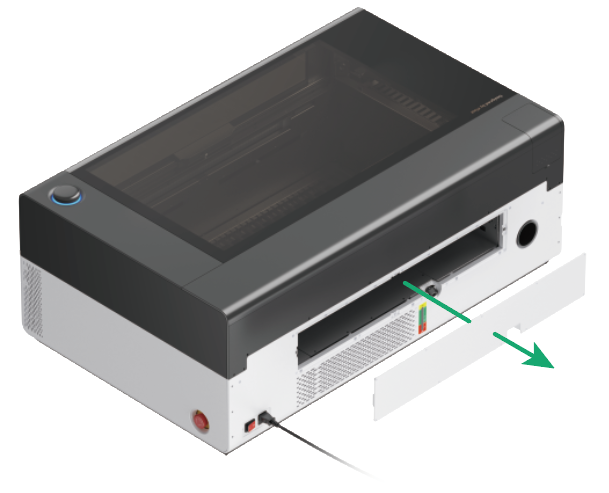
(3) Remove the back magnetic panel.
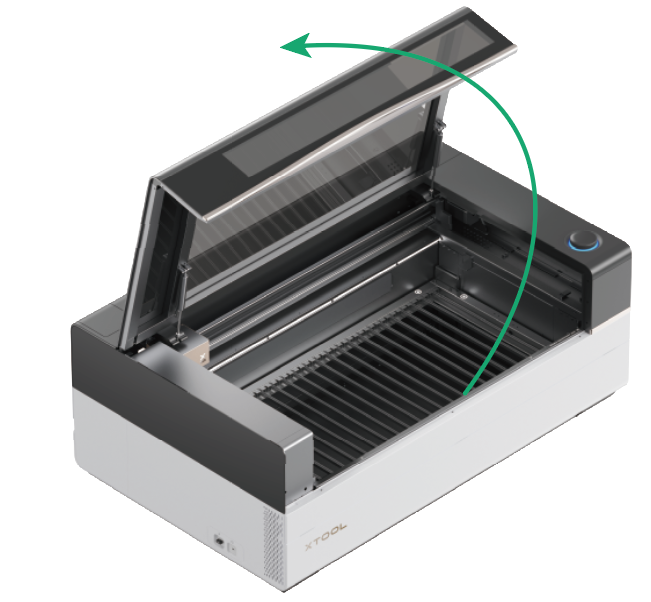
(4) Open the lid.
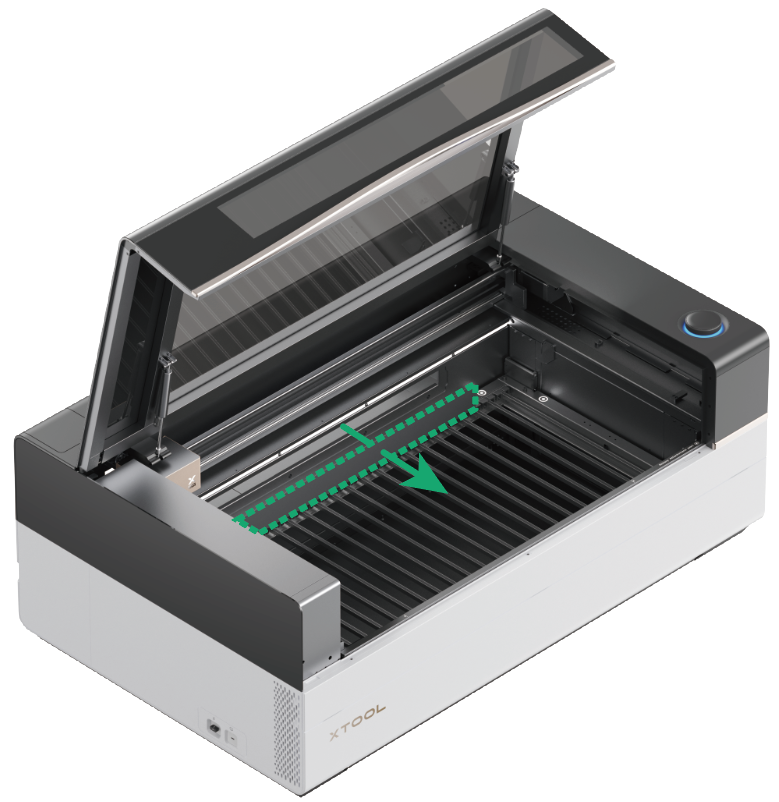
(5) Remove the internal magnetic panel.
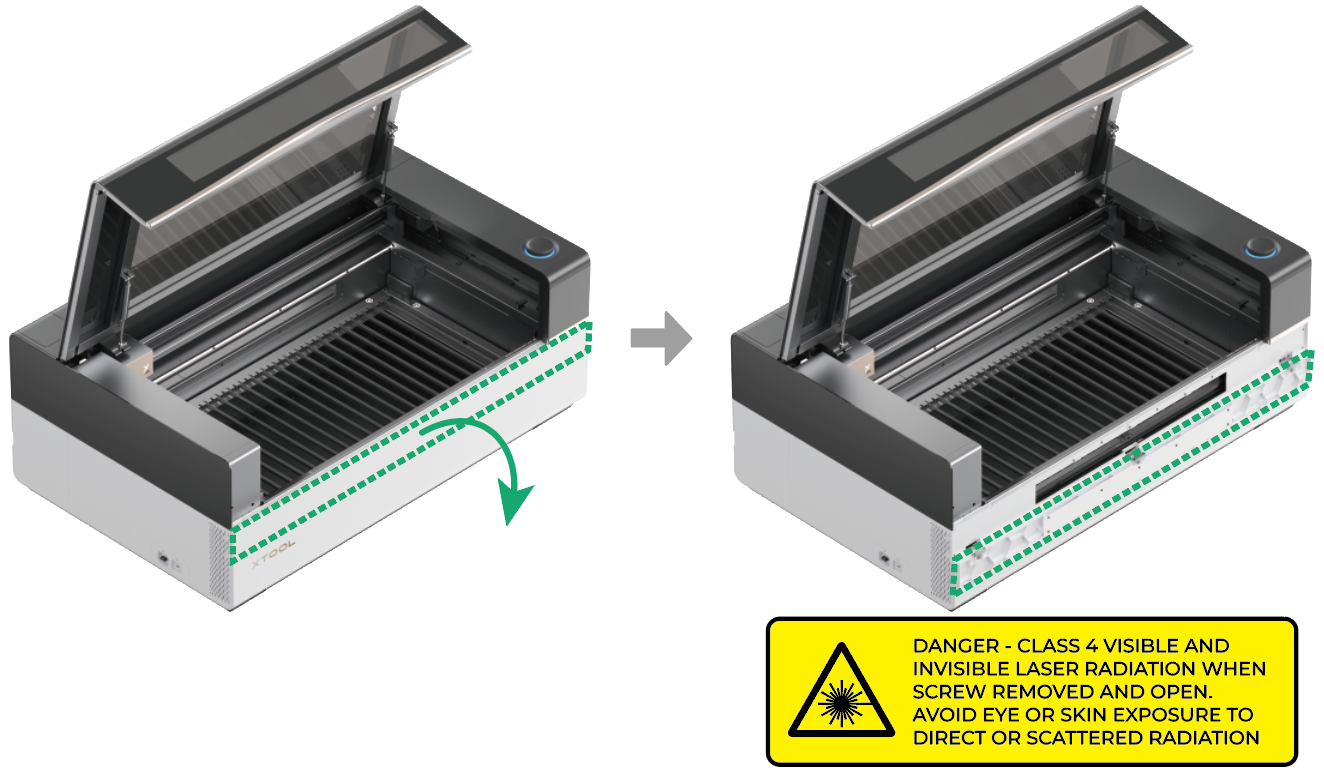
(6) Remove the screws from the front magnetic panel.
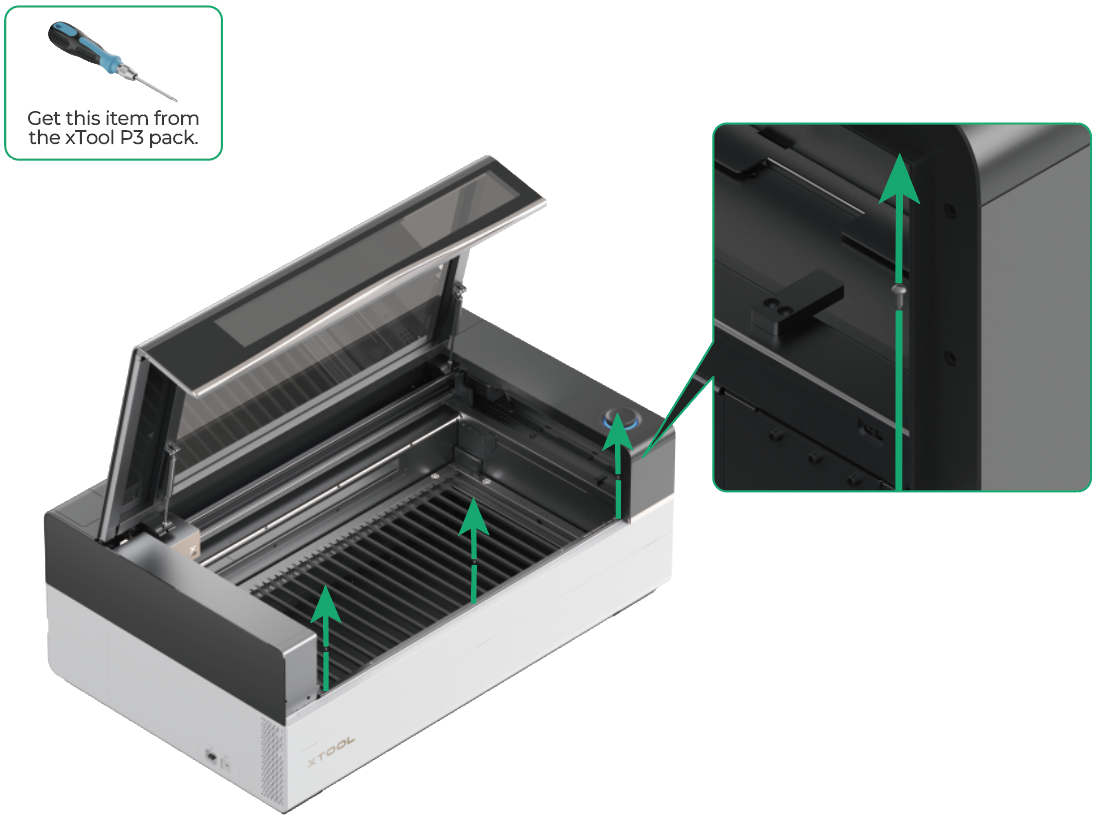
(7) Open the front magnetic panel.
2. Install the conveyor feeder
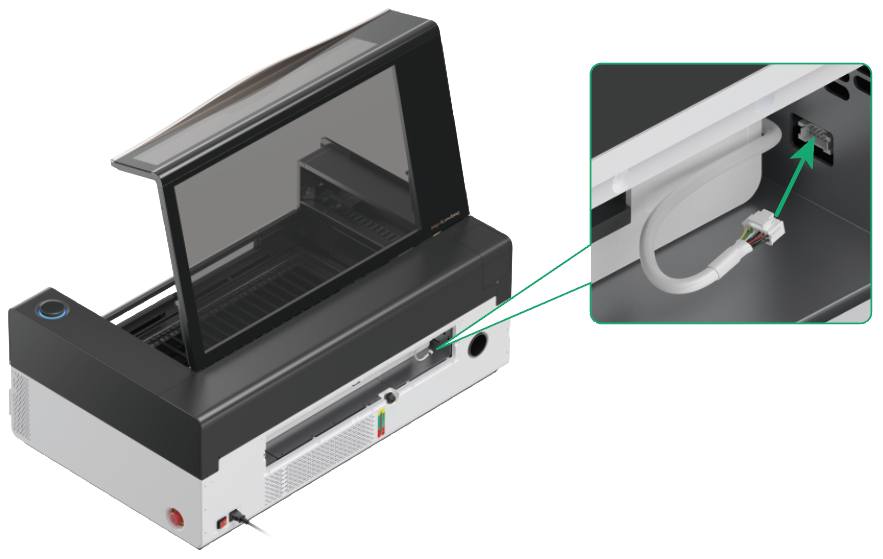
(1) Insert one end of the connection cable to the conveyor feeder.
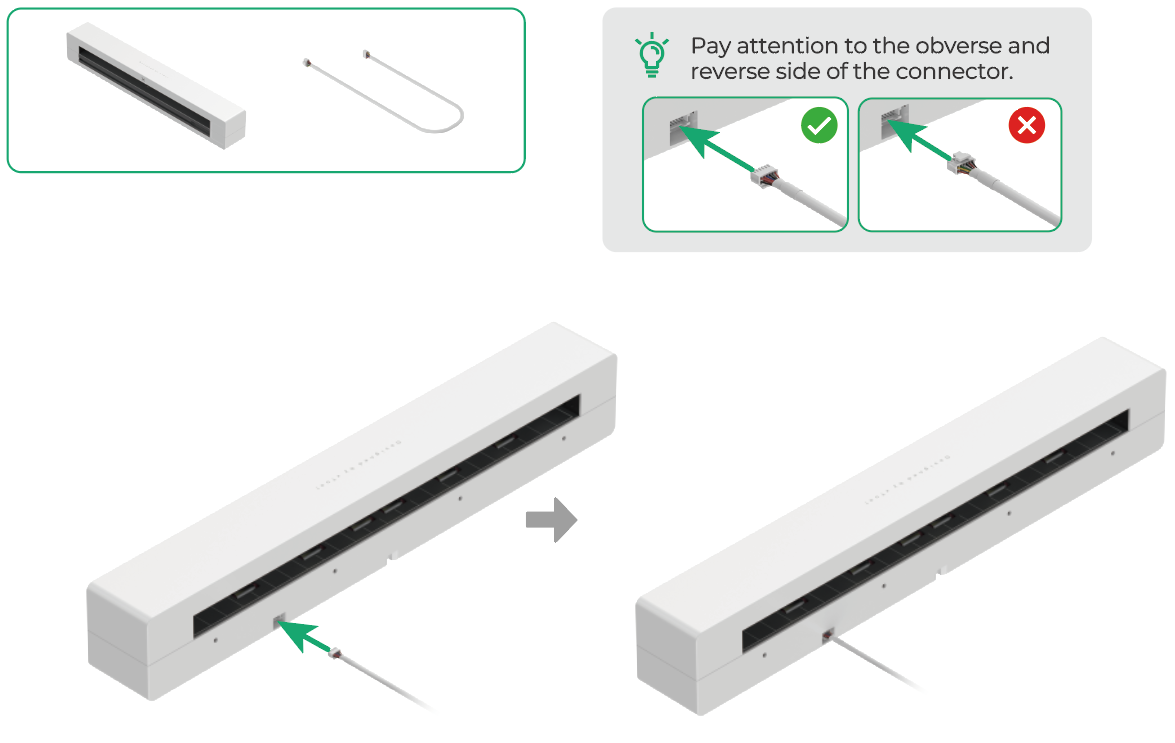
(2) Secure the connection cable.
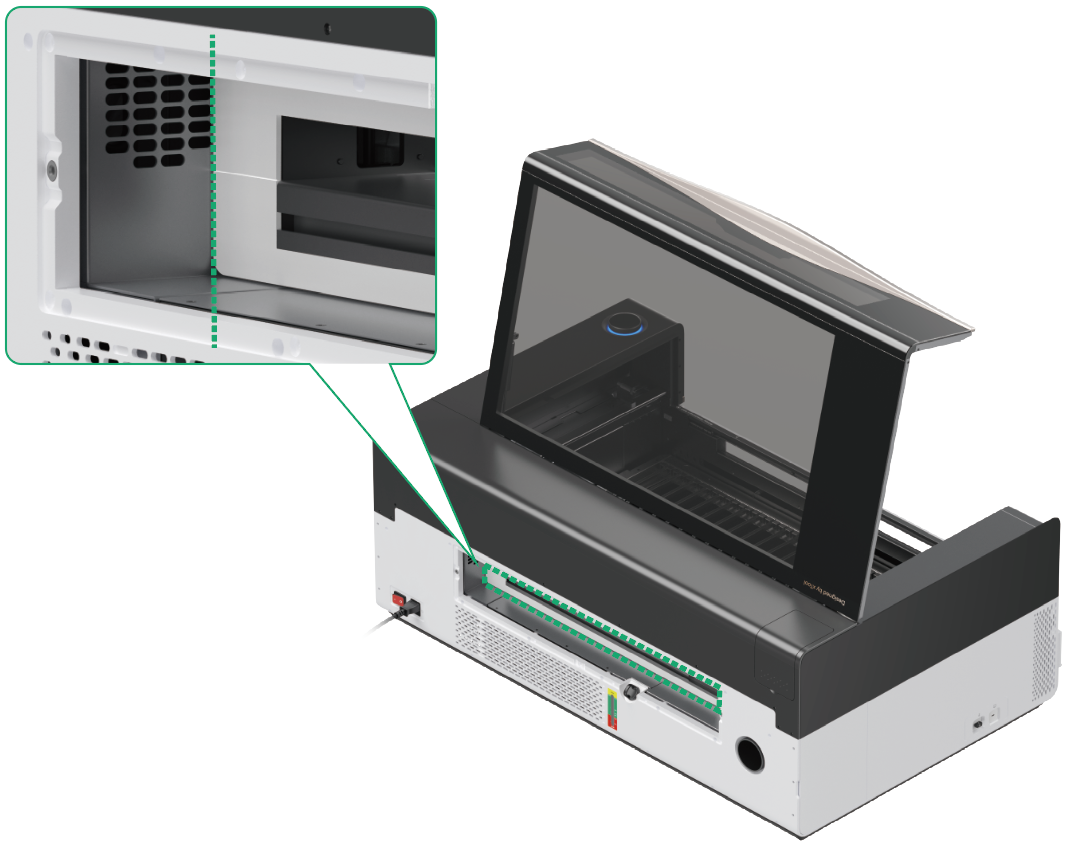
(3) Align the conveyor feeder with the left side of the slot and push it into place.
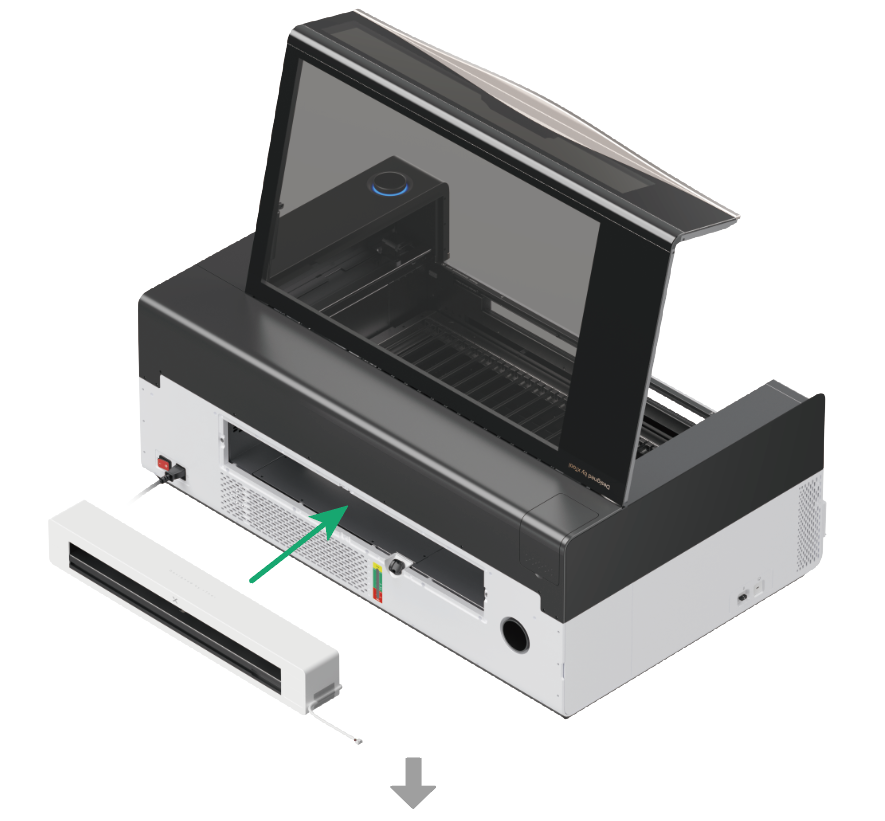
(4) Insert the other end of the connection cable to xTool P3.
(5) Use screws to secure the conveyor feeder.

3. Install other parts
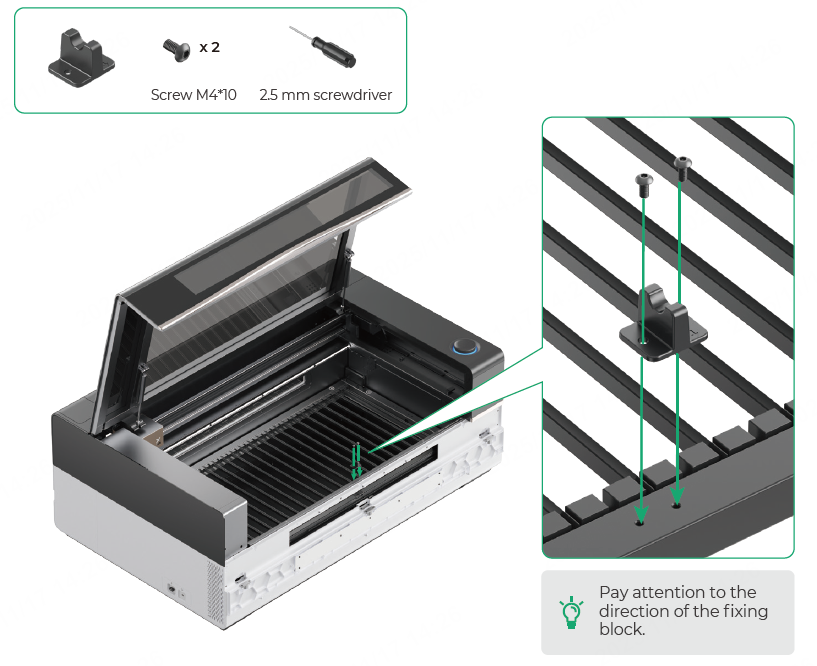
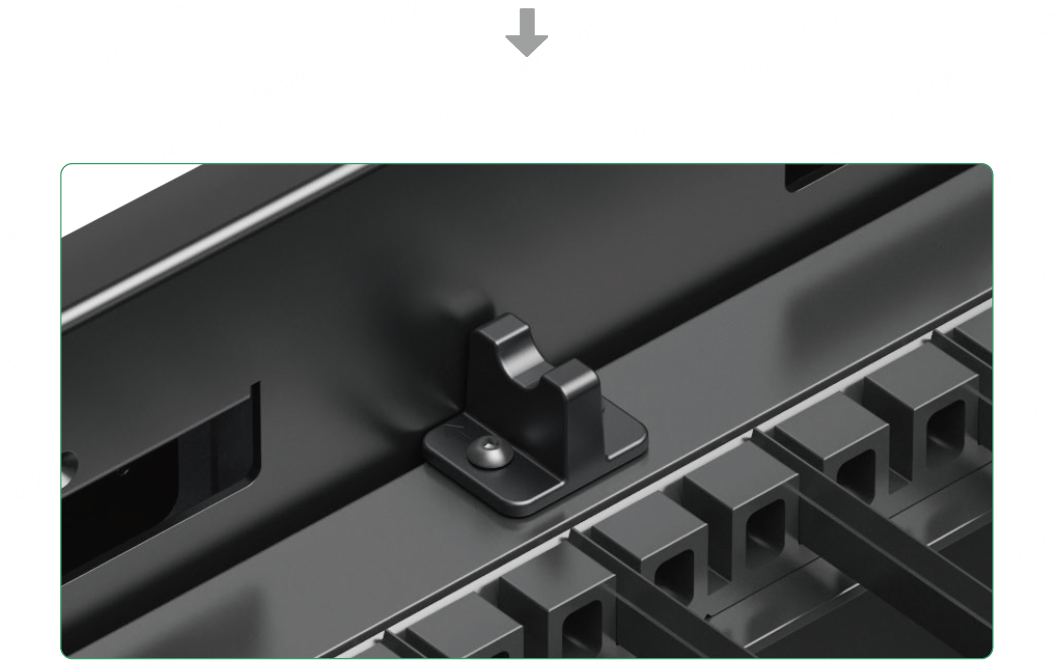
(1) Install the fixing block.
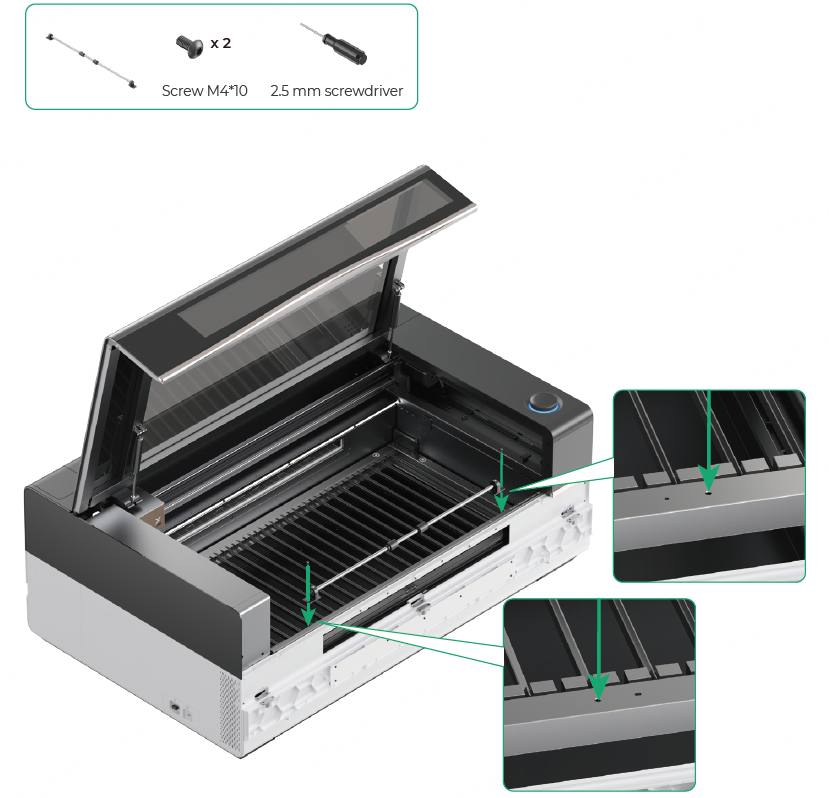
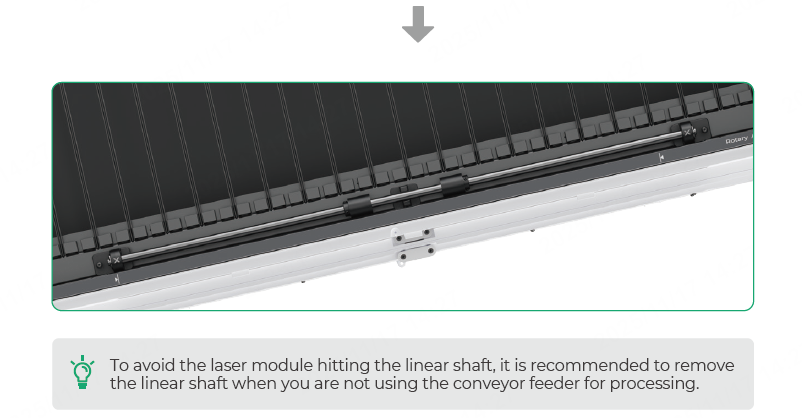
(2) Install the linear shaft.
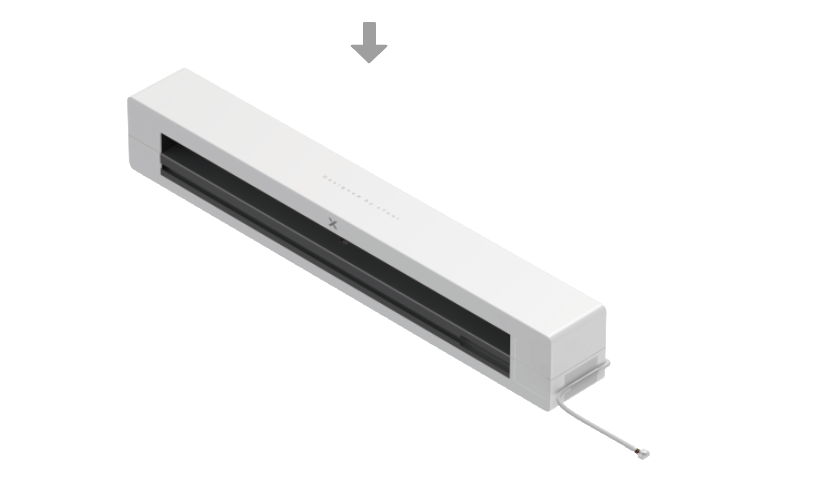
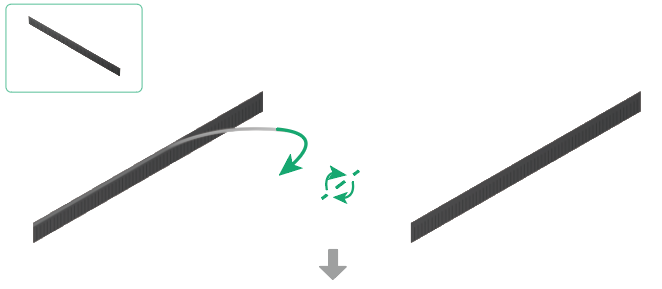
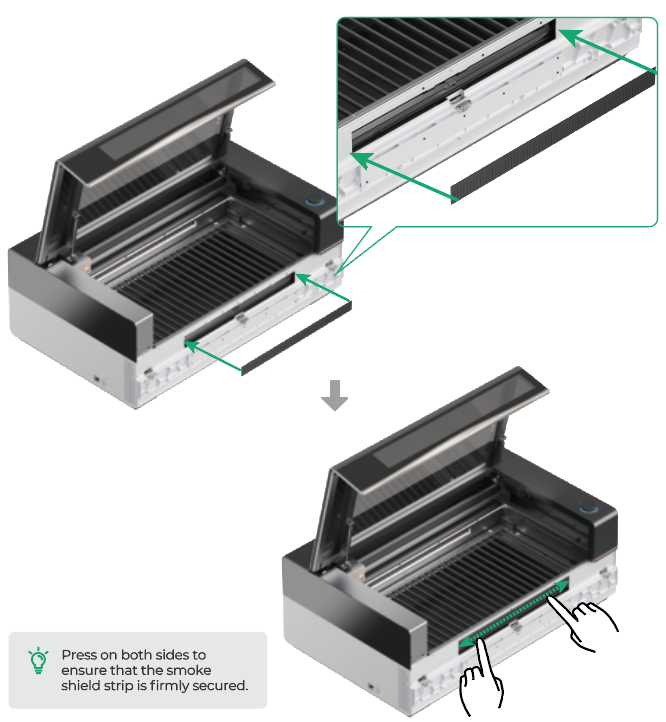
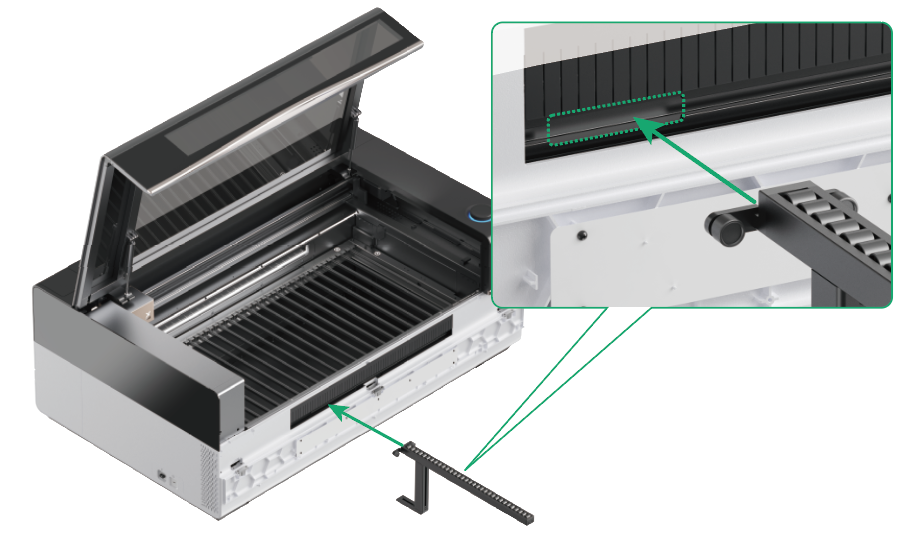
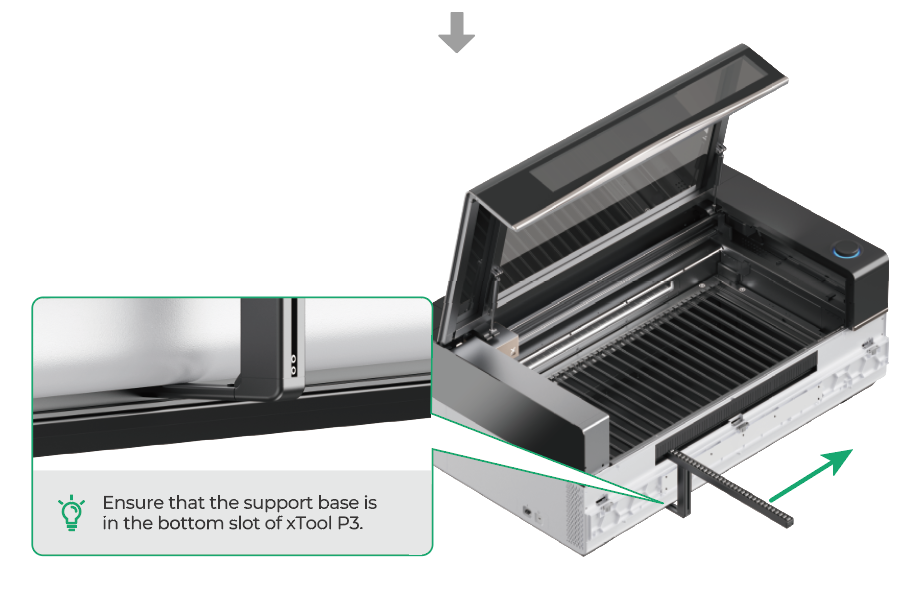
(3) Install the smoke shield strip.
4. Install the conveyor rails
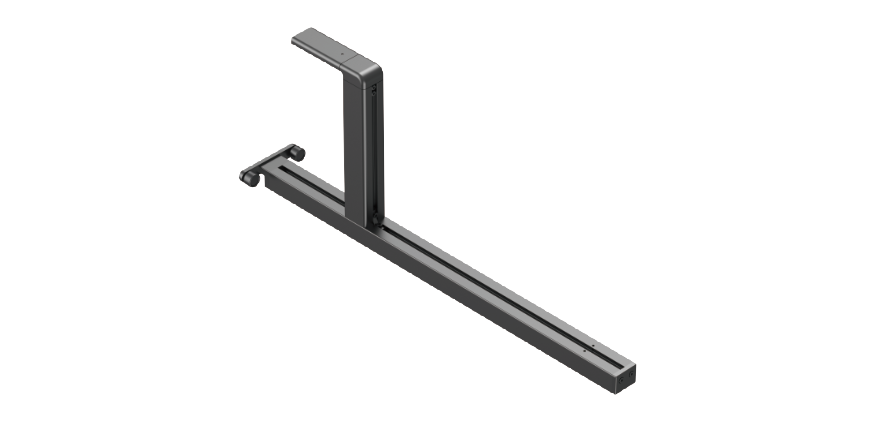
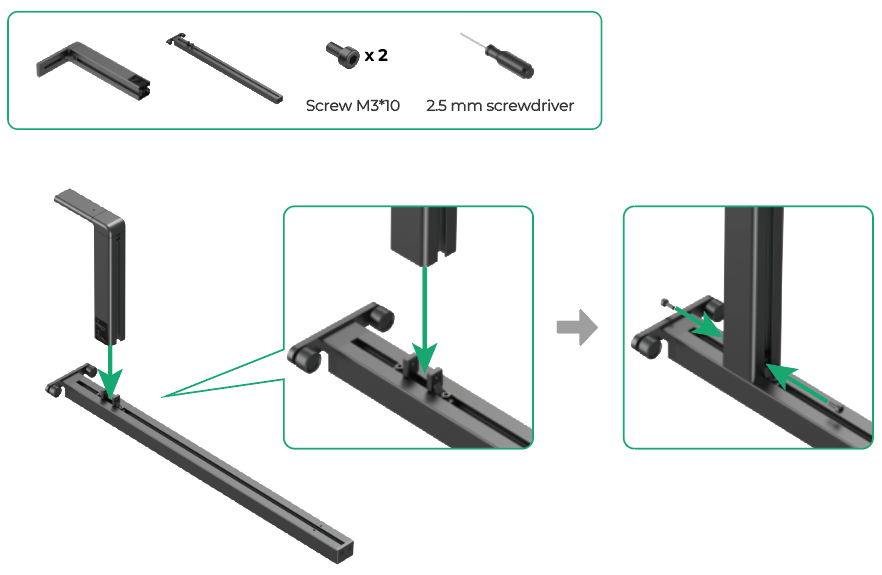
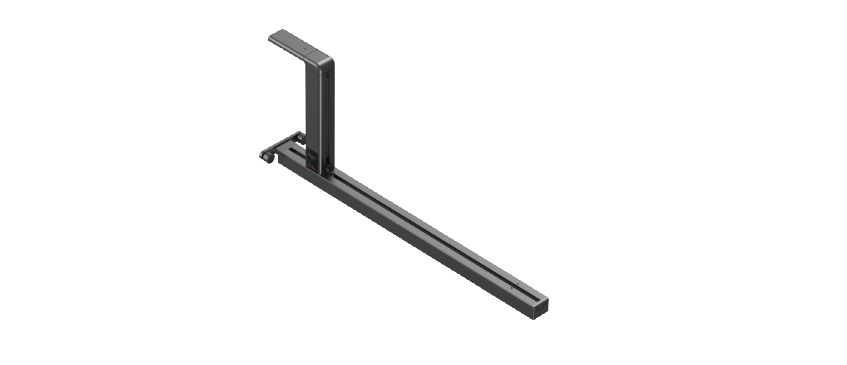
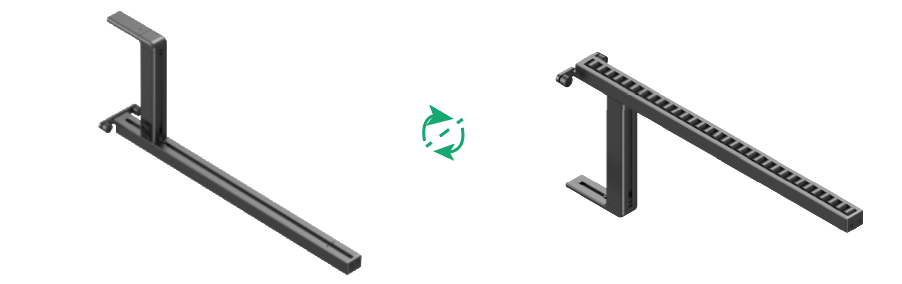
(1) Assemble the rear conveyor rails.
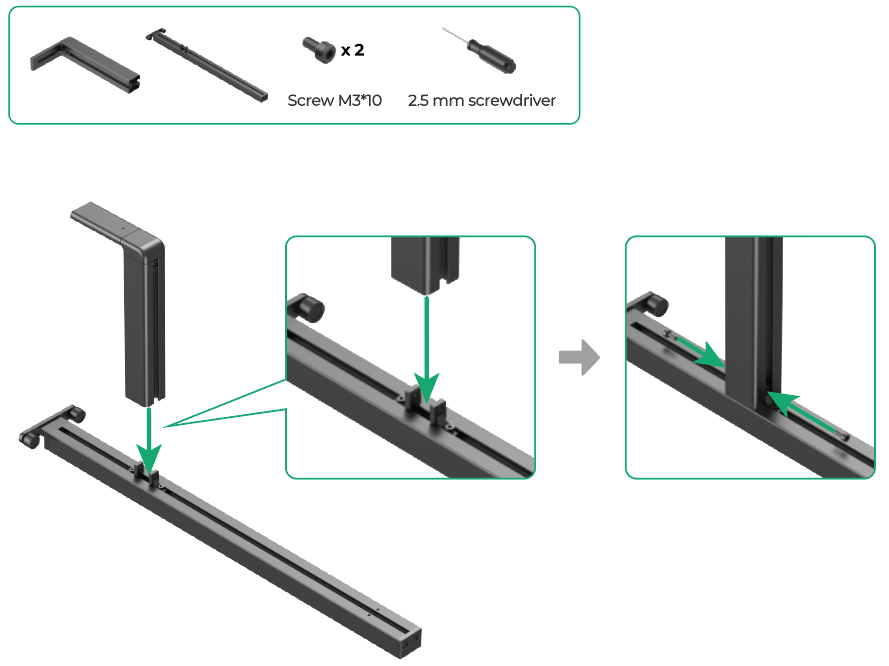
(2) Assemble the other rear conveyor rail in the same way.
(3) Assemble the front conveyor rail.
(4) Assemble the other front conveyor rail in the same way.
(5) Install the front conveyor rail.


(6) Install the other front conveyor rail in the same way.
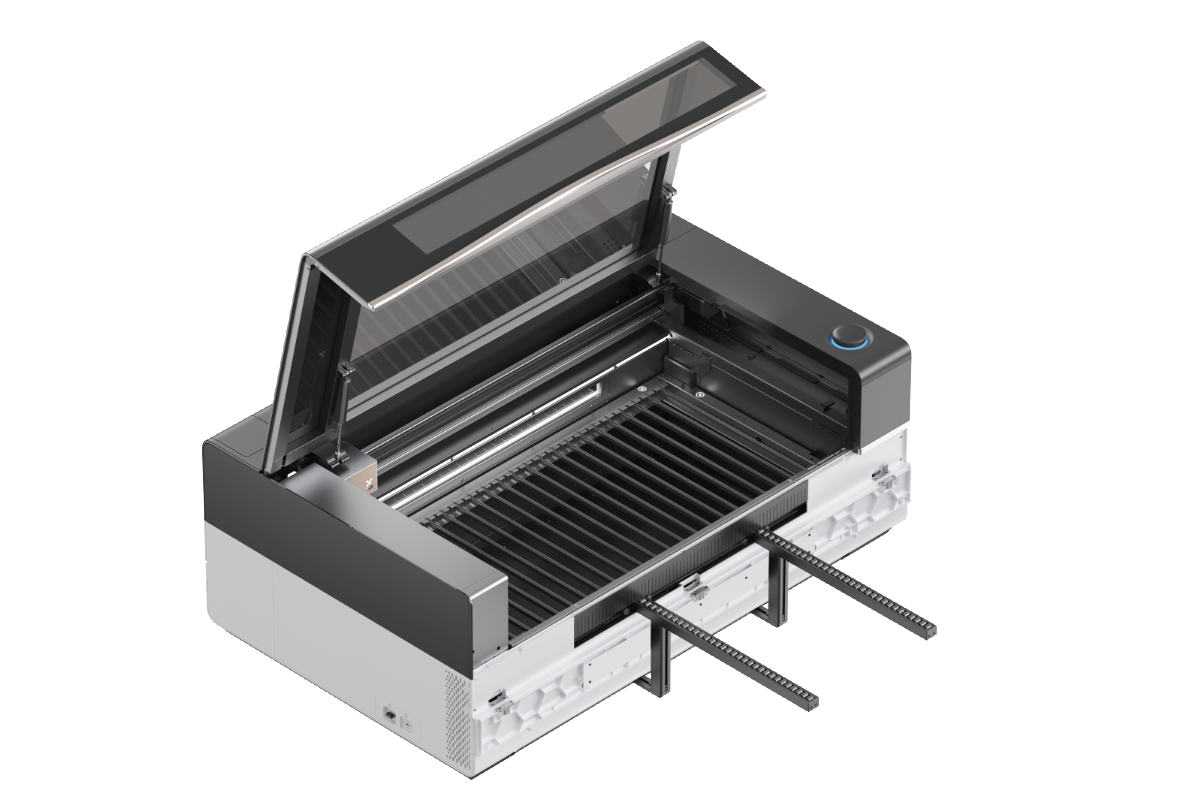
(7) Install the rear conveyor rail.
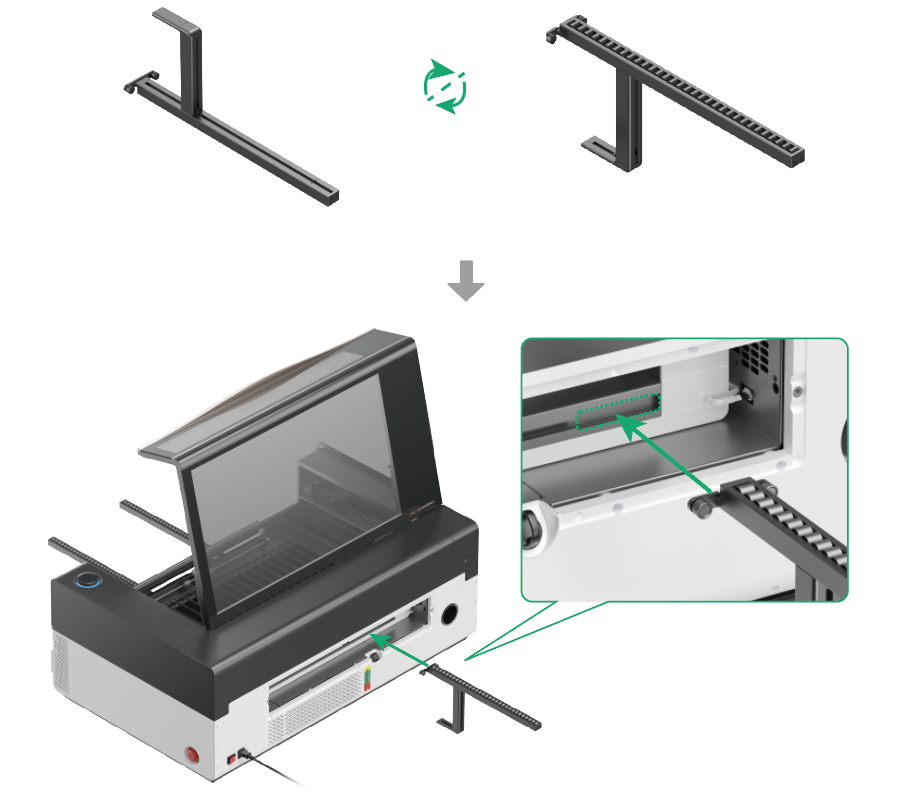

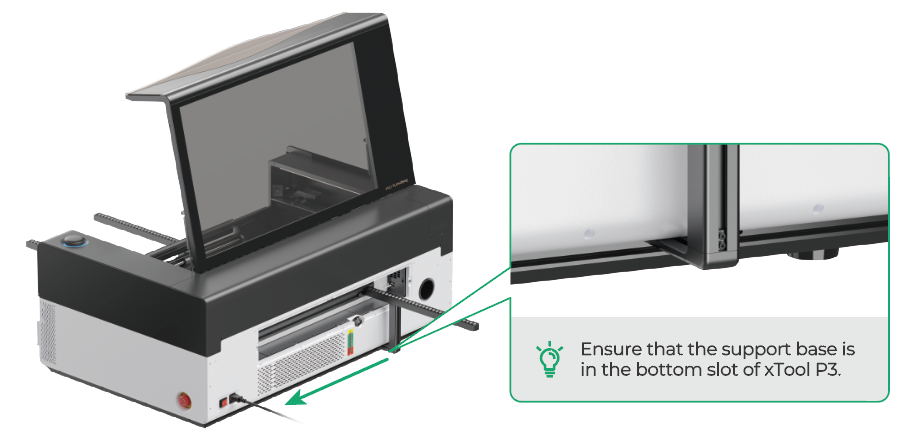
(8) Install the other rear conveyor rail in the same way.

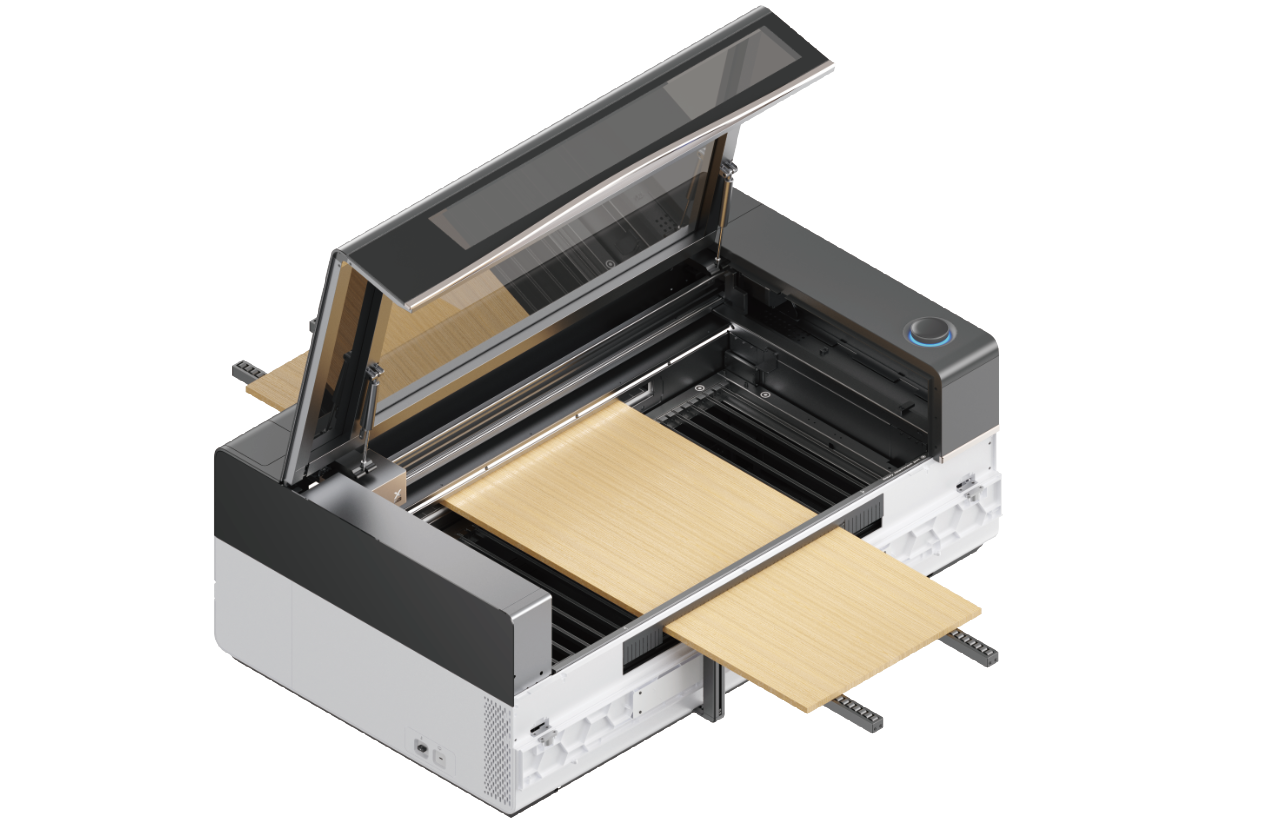
Use the conveyor rail
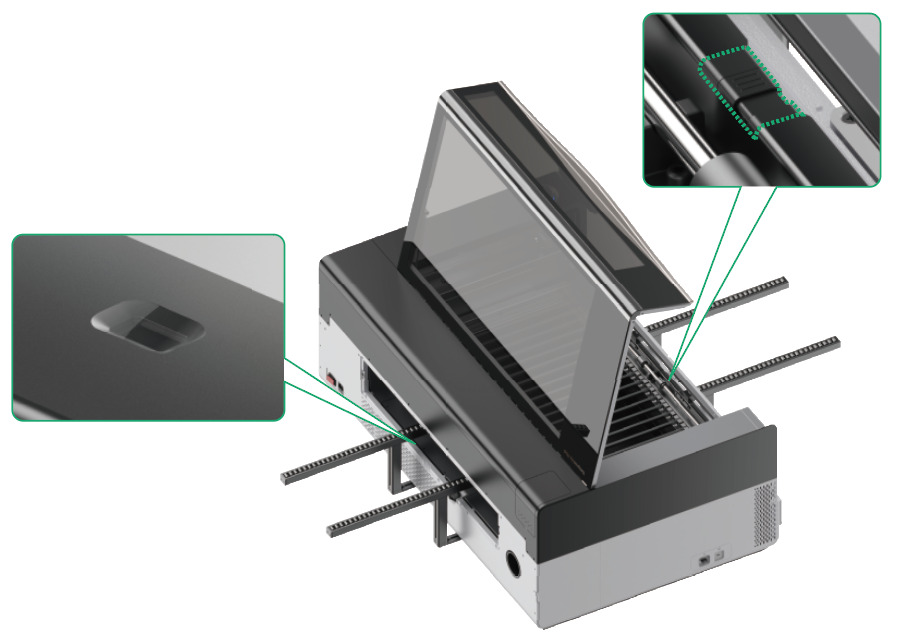
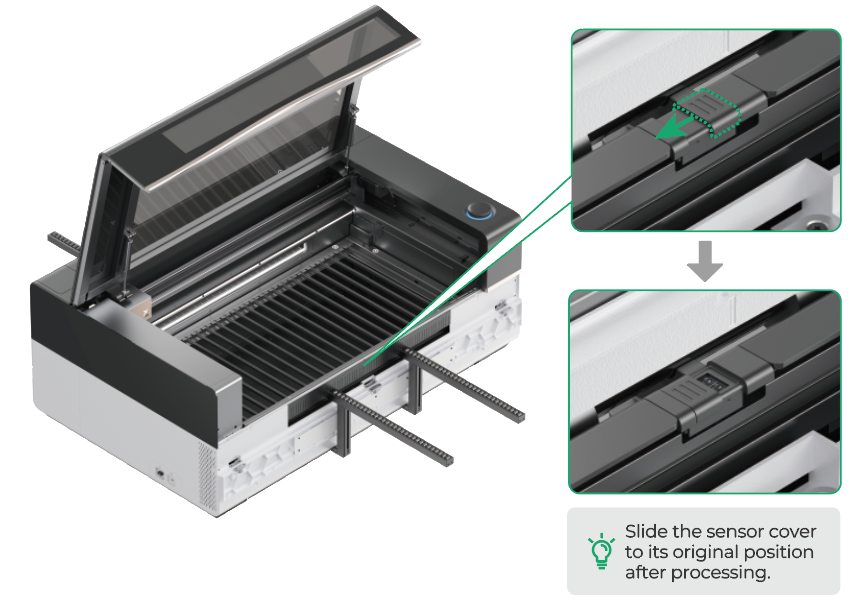
1. Open the sensor cover
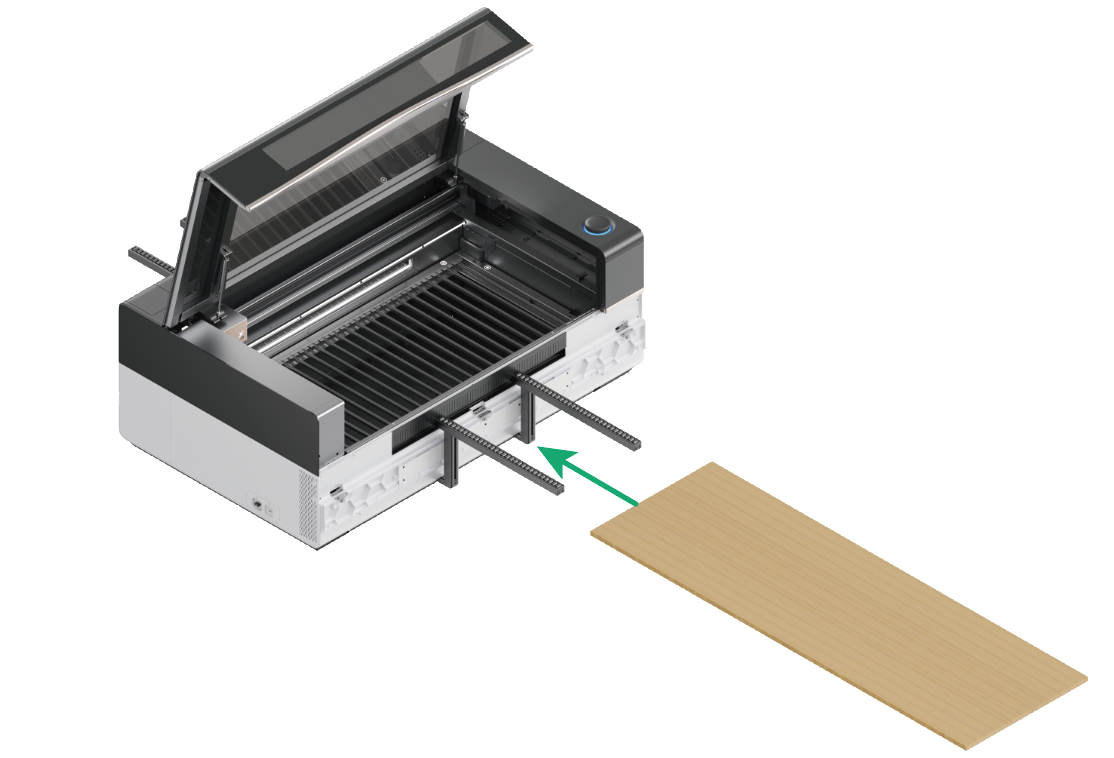
2. Place a material

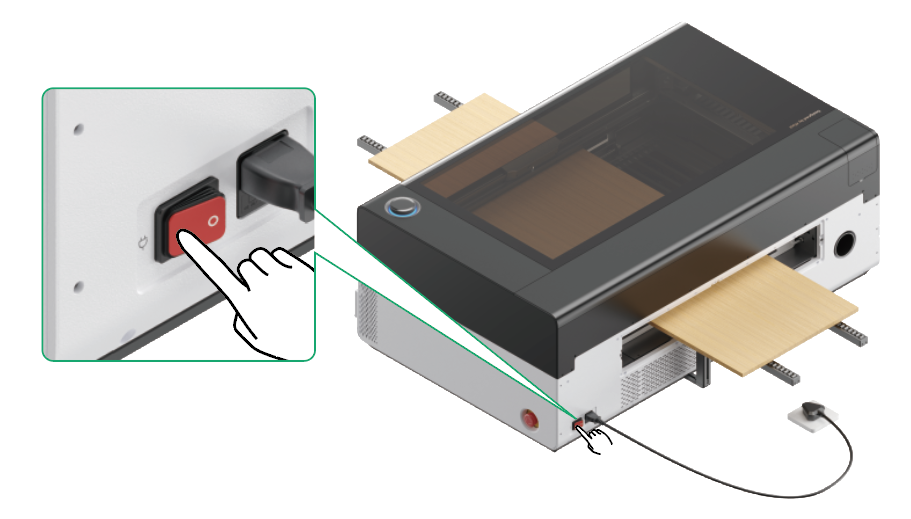
3. Turn on the power switch of xTool P3
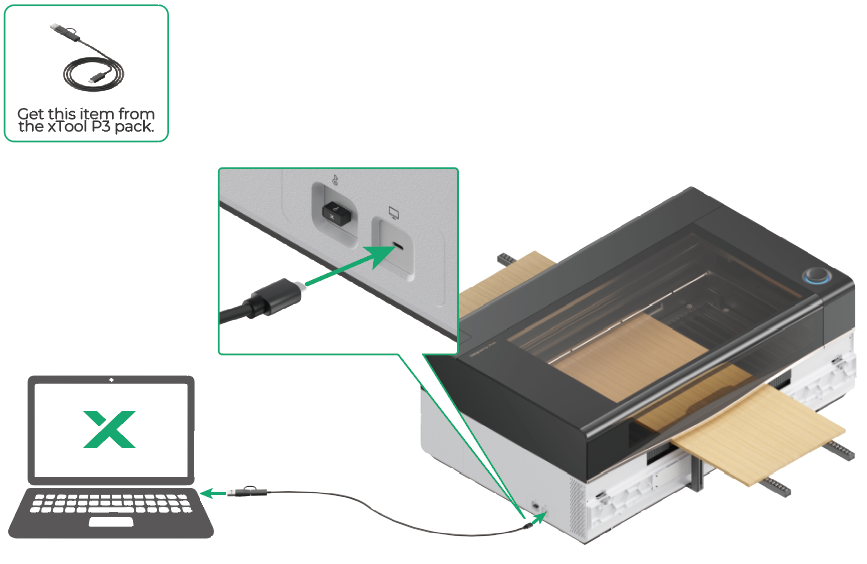
4. Get xTool software

5. Connect xTool P3 to a computer
🔔 For more information about how to use xTool software to process materials, visit Use Automatic Conveyor Feeder with xTool P3.
Product usage tips
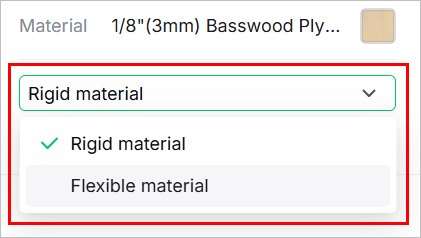
Pressure level
- In xTool software, the conveyor feeder mode provides two pressure levels: rigid level and flexible level, responding to hard materials and software materials respectively.
- Rigid level is the default setting. If you process a soft material, set the pressure level to flexible before capturing images.
Material requirements
- Use materials with straight edges.
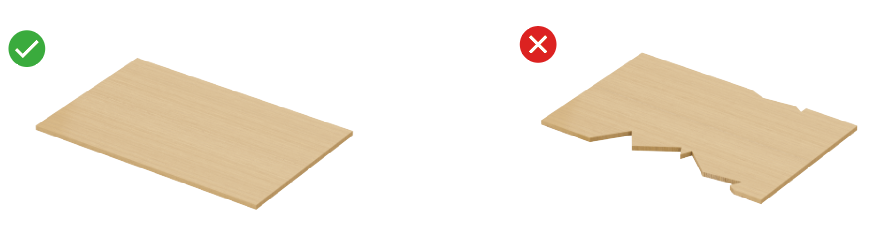
- Use materials with high flatness, or materials with a maximum deformation of 4 mm or less.

- When you process a soft material with a thickness less than 6 mm, adhere it to a 6 mm wooden board of the same size and set the pressure level to rigid in xTool software. During adhesion, ensure the material is aligned with all four edges of the board.
Material placement
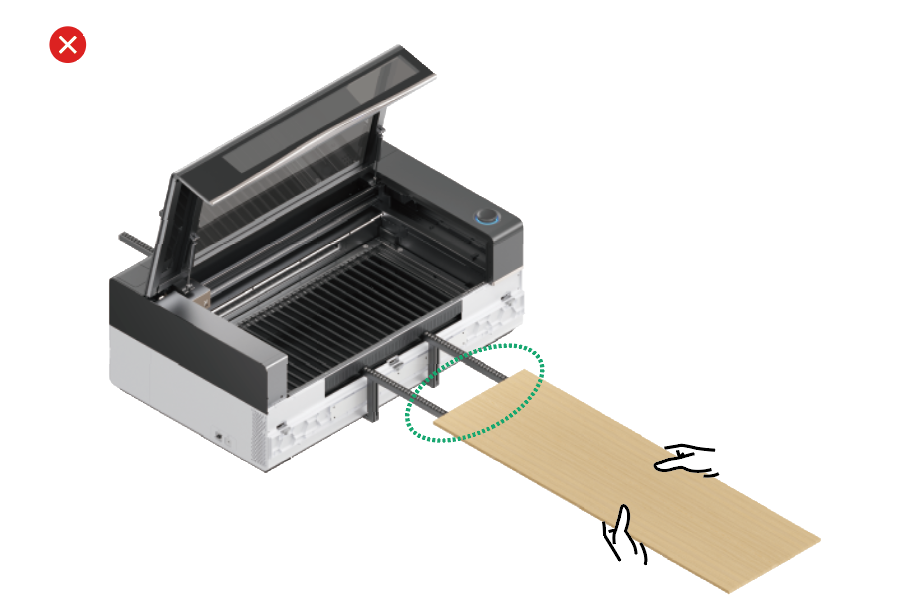
- To avoid damage to the conveyor rails, when placing the material, ensure that the front end of the material is at the support base of the conveyor rails.

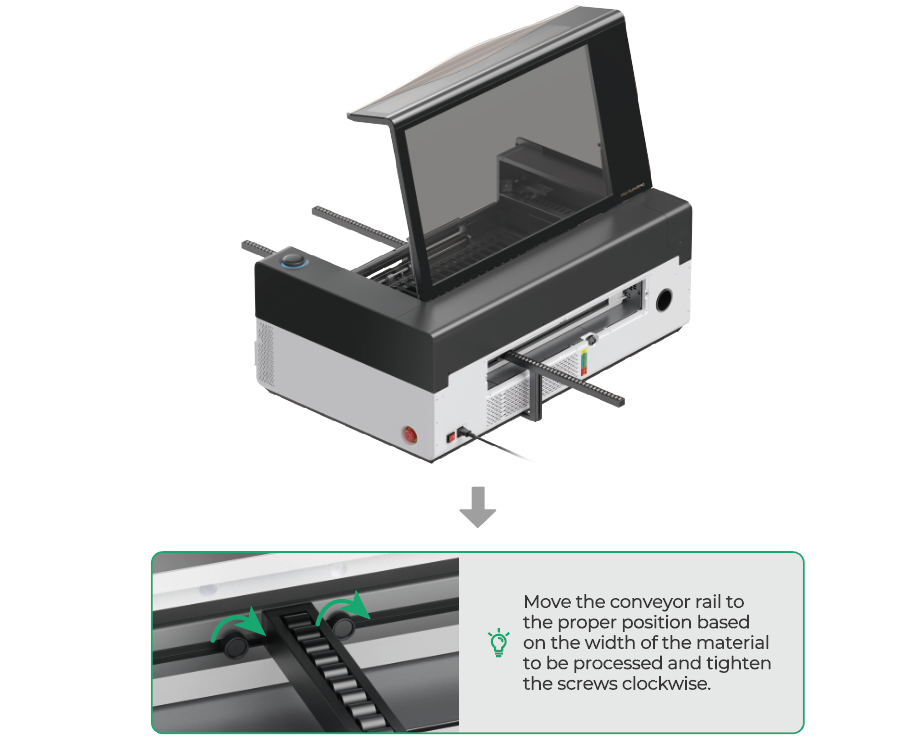
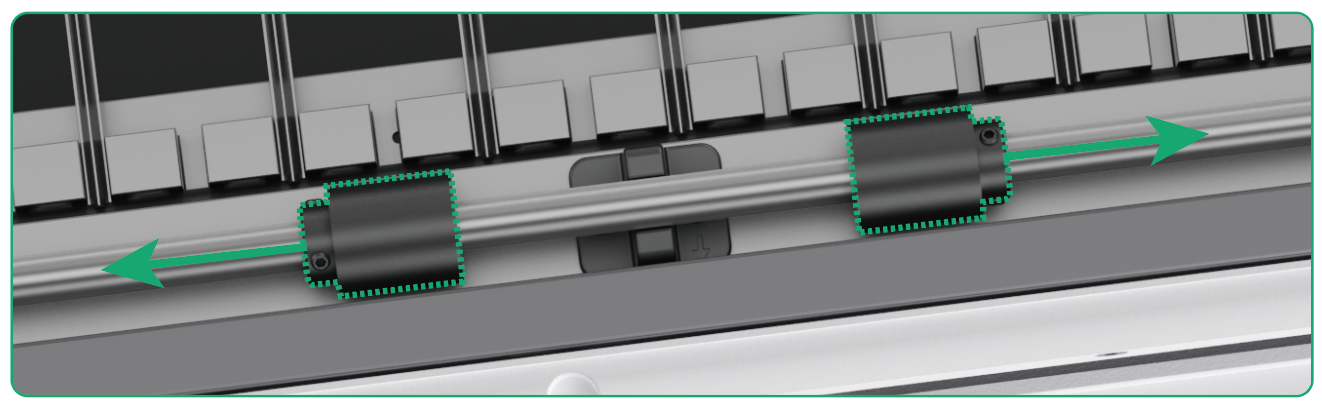
- You can loosen the screws of the conveyor rollers with the 2.0 mm screwdriver and adjust the conveyor roller positions based on the width of the material.
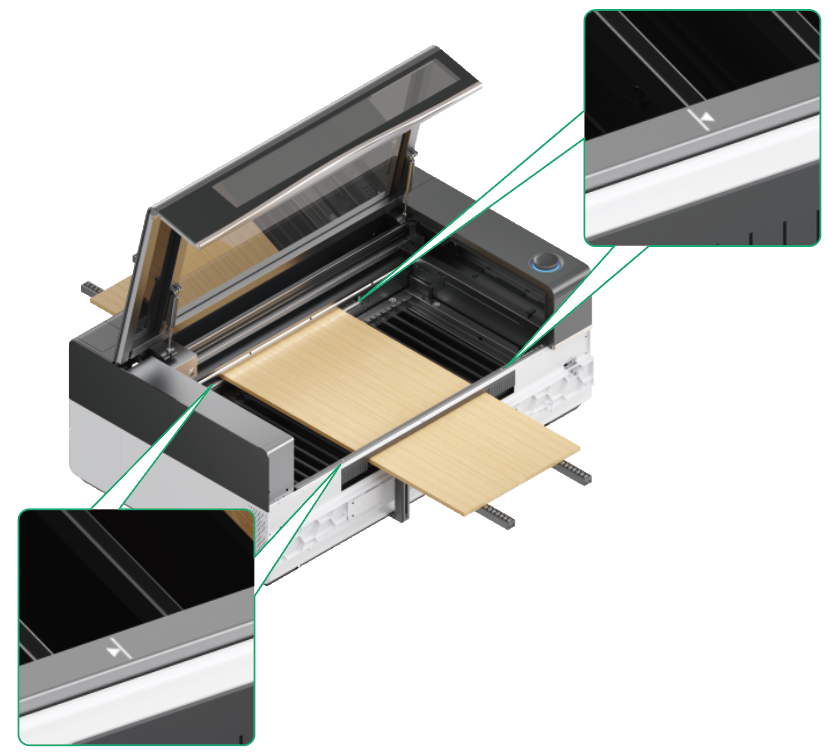
- Ensure that both sides of the material is within the widest limit mark of feeding inlet.
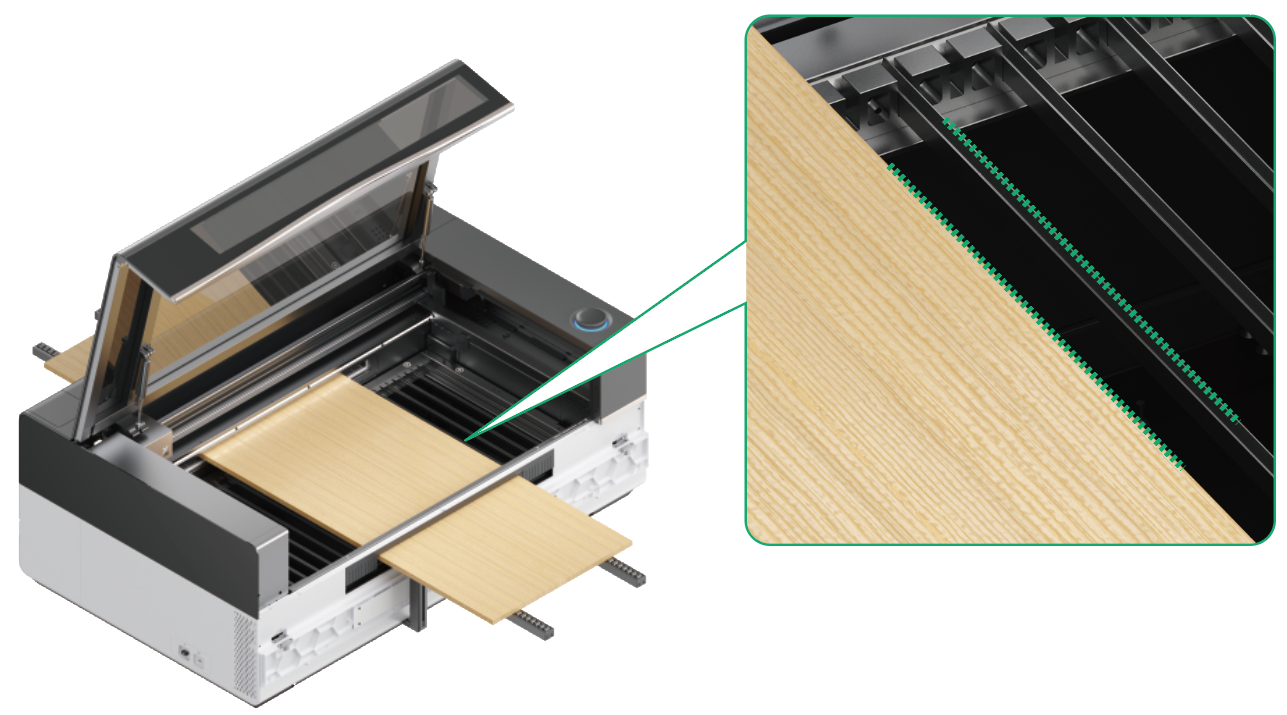
- Ensure that the material is parallel to the slats of xTool P3.
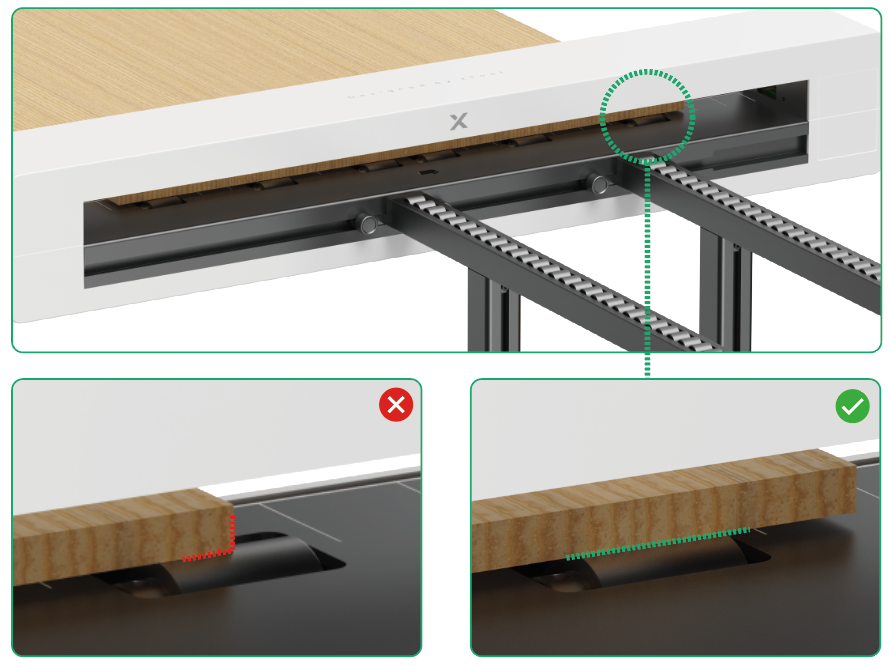
- Ensure both ends of the material fully cover the pinch rollers; otherwise, the material may shift due to uneven force.
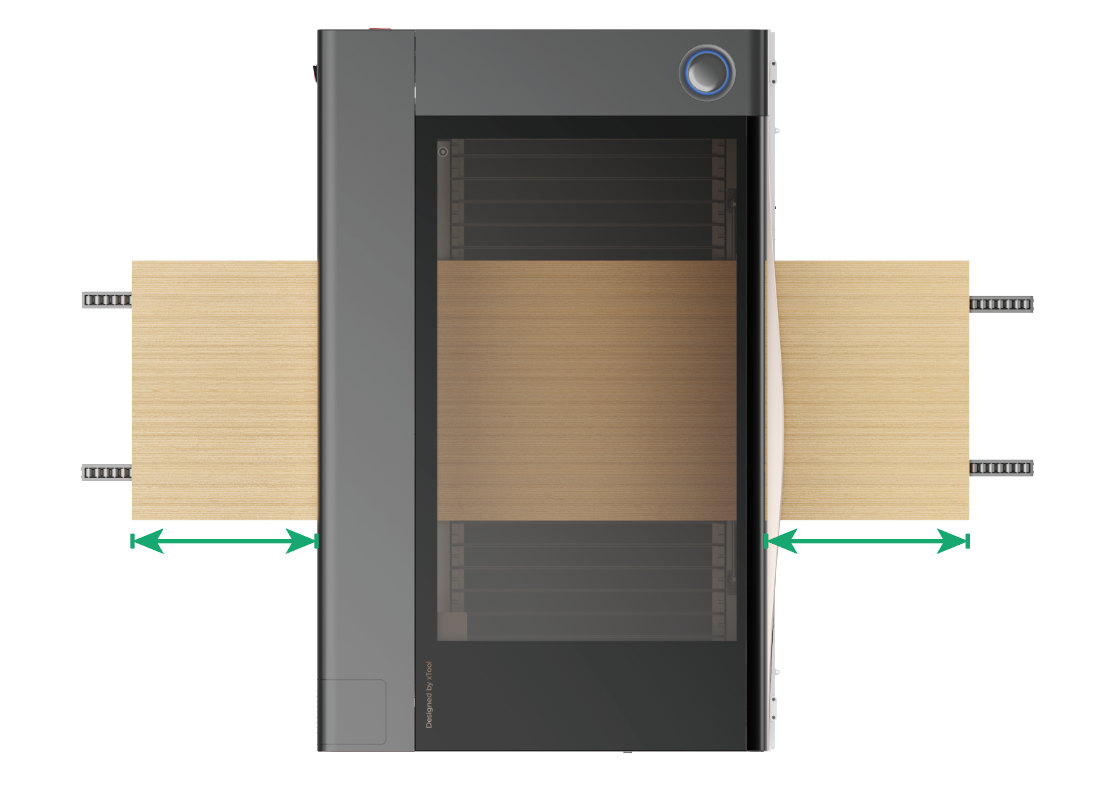
- Adjust the distance between two conveyor rails based on the the width of material to ensure that the material is under even pressure, which can avoid deformation.
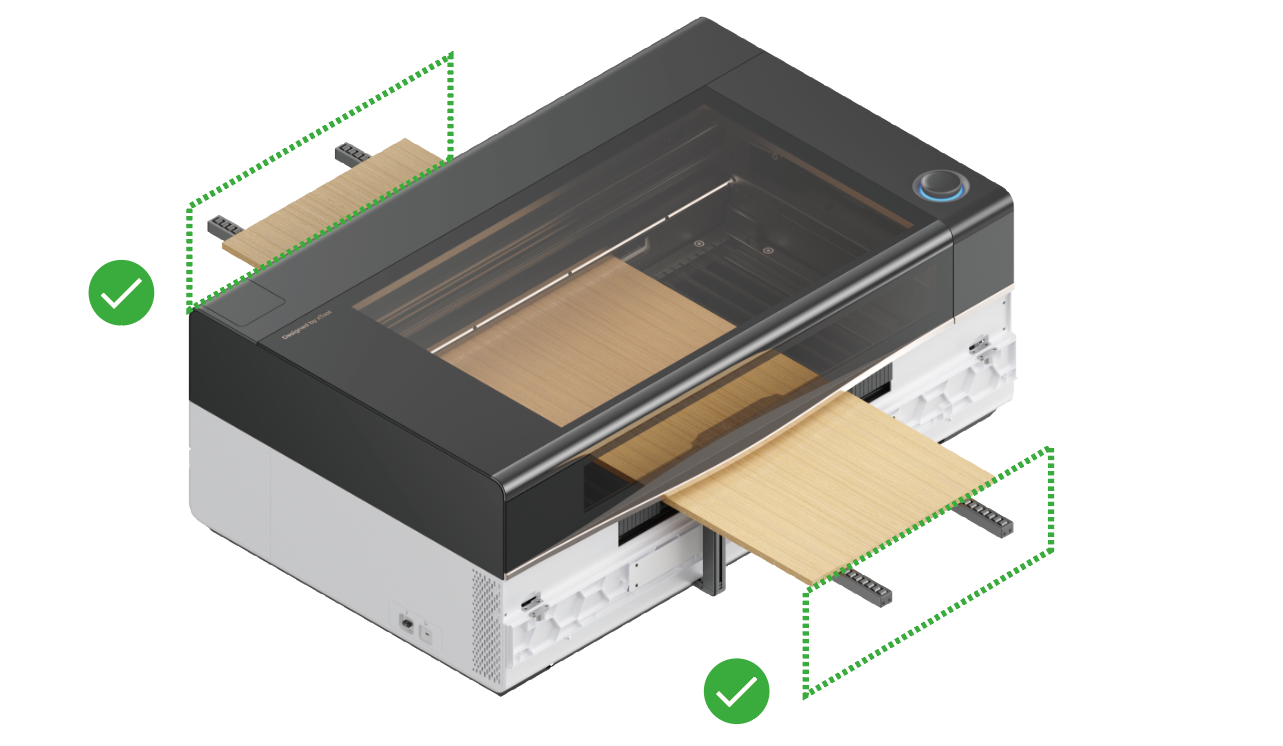
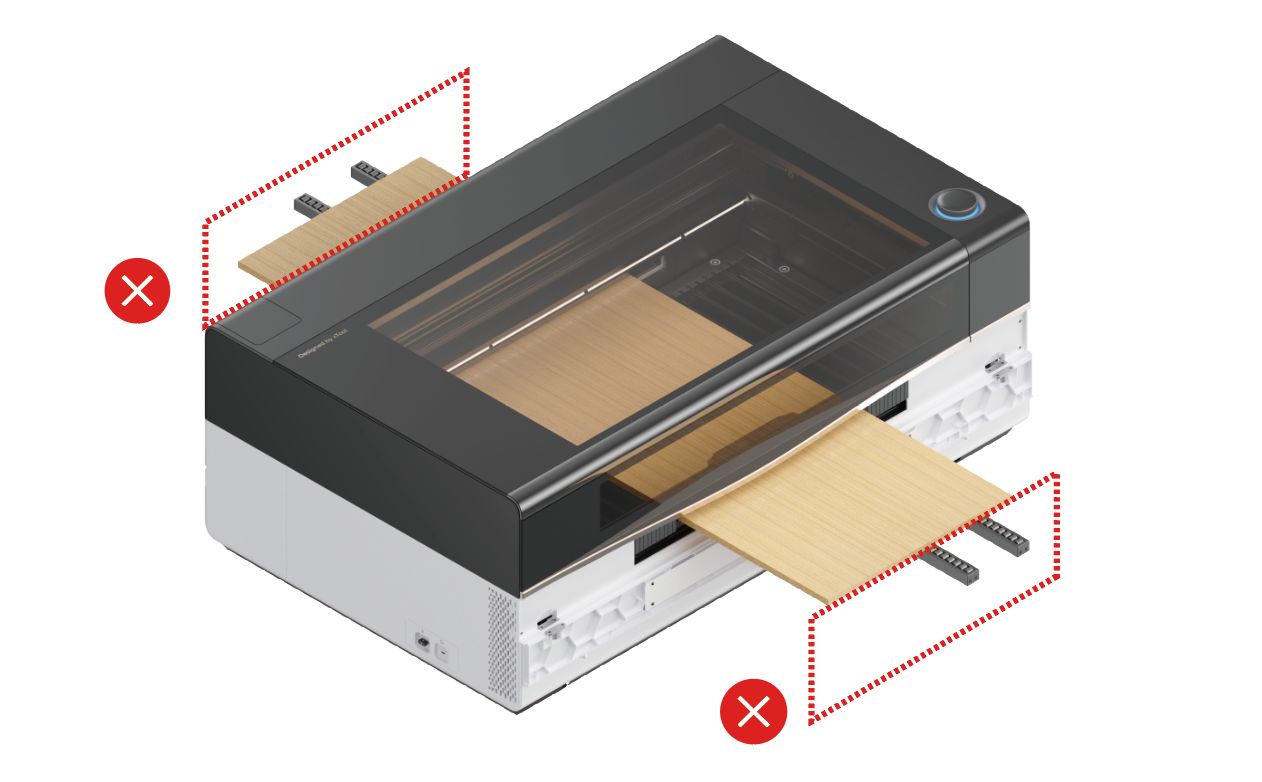
- To ensure that the material is tightly secured and the feed is stable, the protruding length of the material's leading end should be approximately equal to that of the trailing end.
Caution for processing
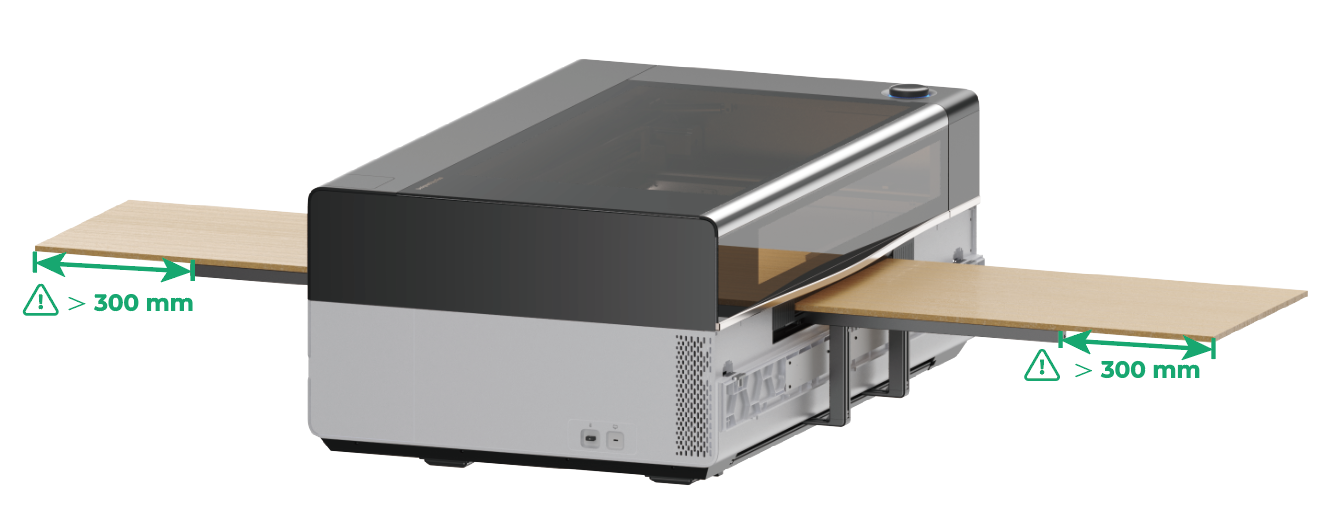
- If the unsupported sections of both sides of the material are more than 300 mm, additional conveyor rails are required.
You can purchase conveyor rails at xTool.com.
Routine cleaning
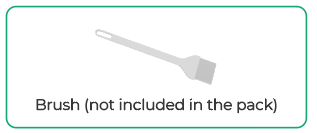
- Use a brush to regularly clean the clamping module on the conveyor feeder to ensure a good processing effect.

- Before using the conveyor feeder, ensure that the sensor cover in the conveyor feeder and that in the front of xTool P3 are clean.