Issue description
When you start a print task on your xTool Apparel Printer, the print carriage moves back and forth normally, but no ink is deposited onto the film. Both the intended design and the image printing test come out completely blank.
Potential causes
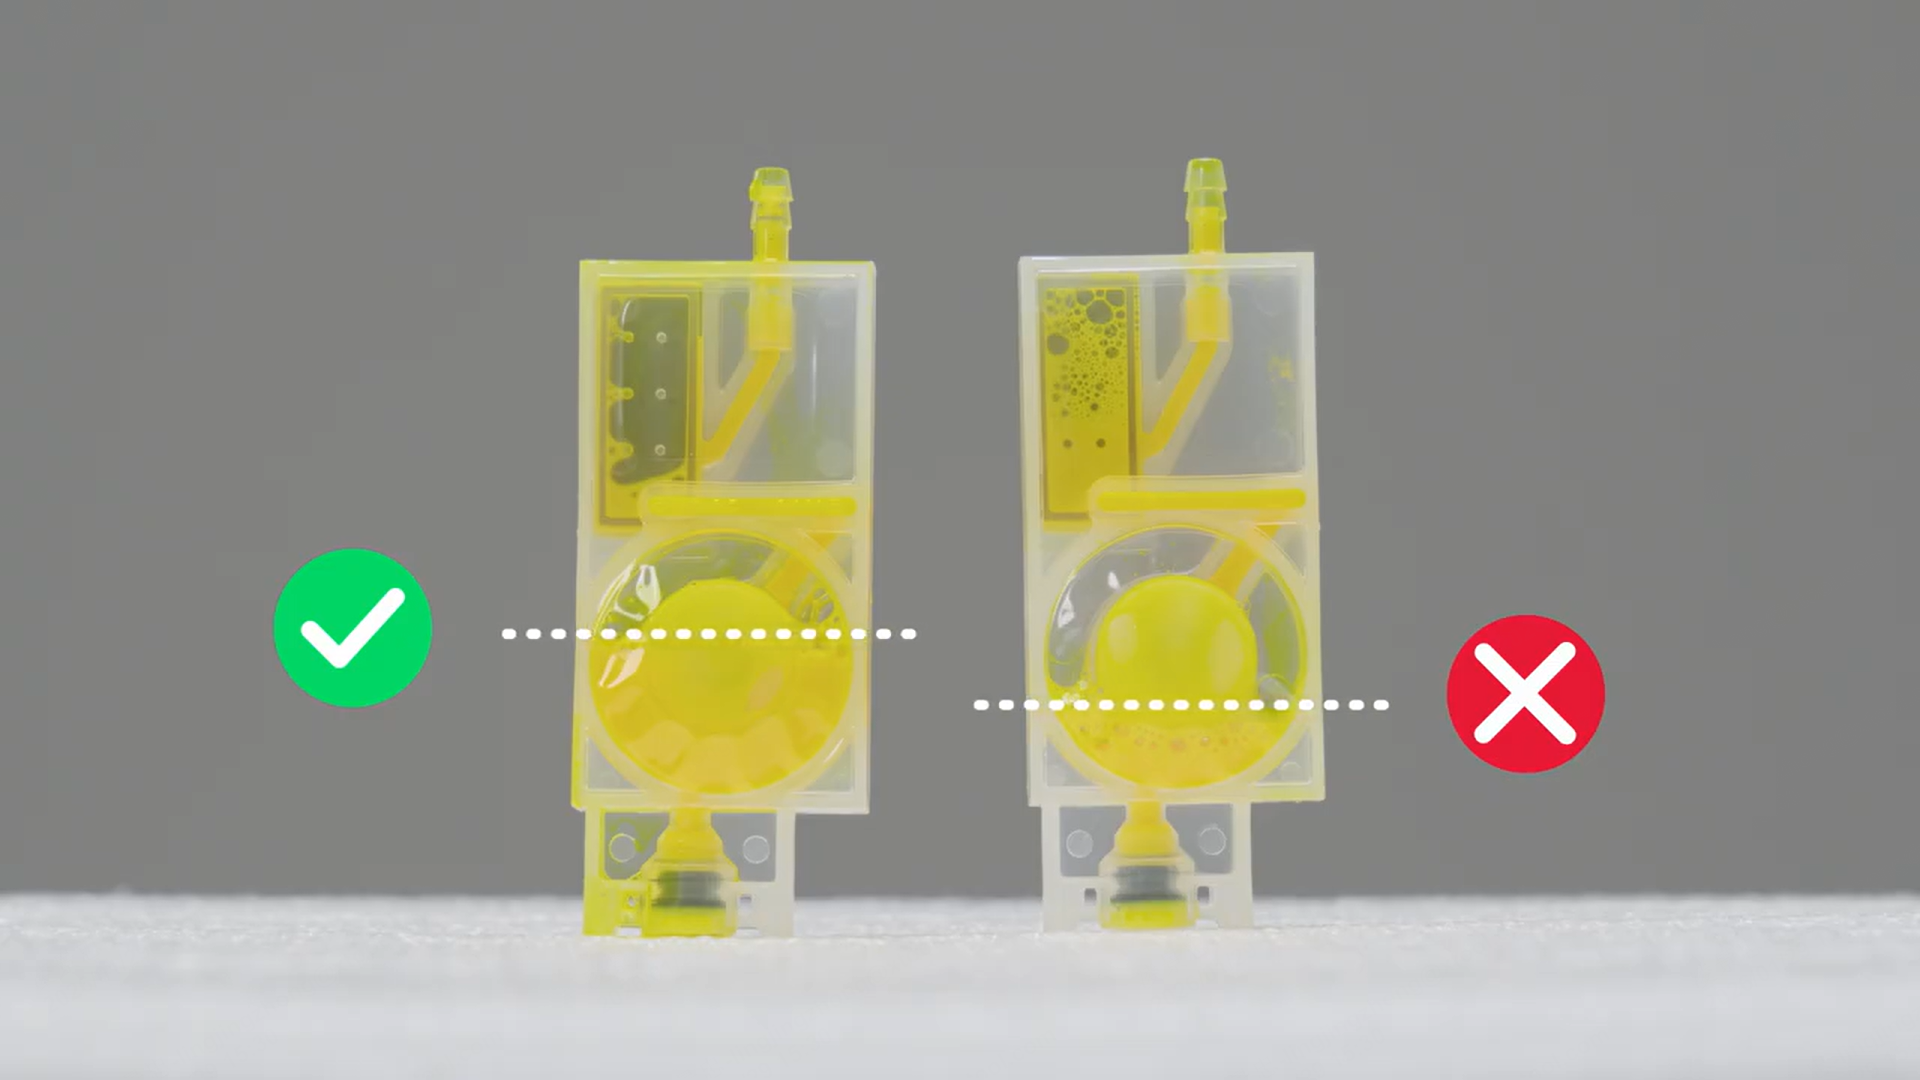
- Empty Ink Dampers (Ink Stack Misalignment): The ink dampers are devoid of ink, often caused by the ink stack failing to seal and pump ink properly.
- Detached Encoder Strip: The transparent strip that tracks the carriage's position has slipped out of its sensor. Without positional data, the print head will not fire ink.
- Carriage Controller Board Error: A hardware or power issue on the board.
- Print Head Short Circuit: Electrical failure within the print head itself.
Troubleshooting steps
Step 1: Inspect the ink dampers
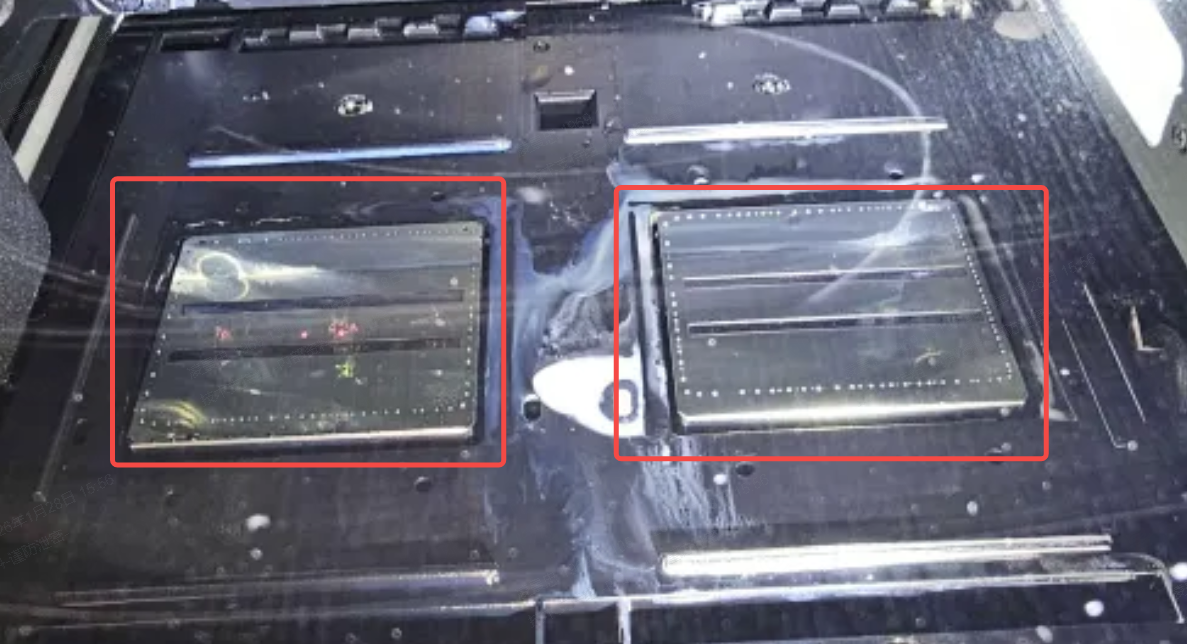
If the ink dampers are empty, the print head has no ink to eject.
- Check the Dampers: Look at the translucent ink dampers inside the print carriage.
- Assess the Status:
- If they have ink: And you have not recently used a syringe to manually draw ink from them, the ink flow is likely fine. Proceed to Step 2.
- If they are completely empty: Or if you recently had to use a syringe to manually pull ink through the system, your ink stack cap is likely misaligned.
- Capture Diagnostic Photo (If empty): Take a clear photo of the bottom of the print head (the nozzle plate).
- Since you cannot see it directly, place a small, clean mirror flat on the printer's baseplate directly underneath the print head.
- Turn on your smartphone's flashlight and take a clear photo of the print head's reflection in the mirror. (Reference: Required Data for Manual Calibration of xTool Apparel Printer Ink Stack).
- Save this photo to send to xTool Customer Service.
Step 2: Inspect the encoder strip position
The encoder strip is a thin, semi-transparent plastic strip running horizontally beneath the X-axis guide rail. It must pass exactly through the center of a small U-shaped optical sensor on the back of the print carriage.
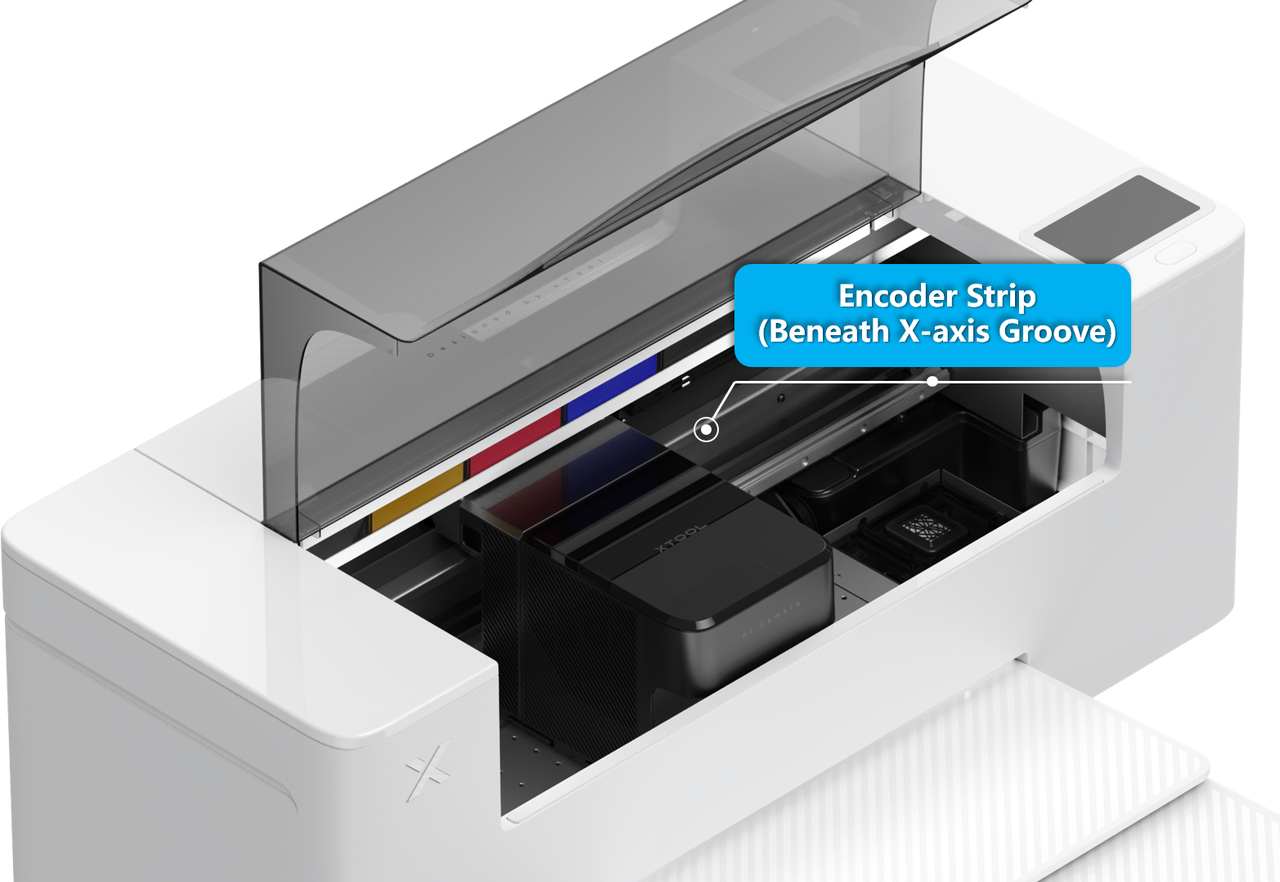
- Locate the Sensor: Look behind the print carriage to find where the encoder strip passes through the sensor groove. (Reference the video guide: Replace the Encoder Strip for xTool Apparel Printer to see its exact location).
- Visual Inspection: Turn on your phone's flashlight. Do not remove the strip. Simply look closely to verify that the strip is seated correctly inside the narrow groove of the sensor. If it is sitting outside or above the groove, the printer cannot track its position.
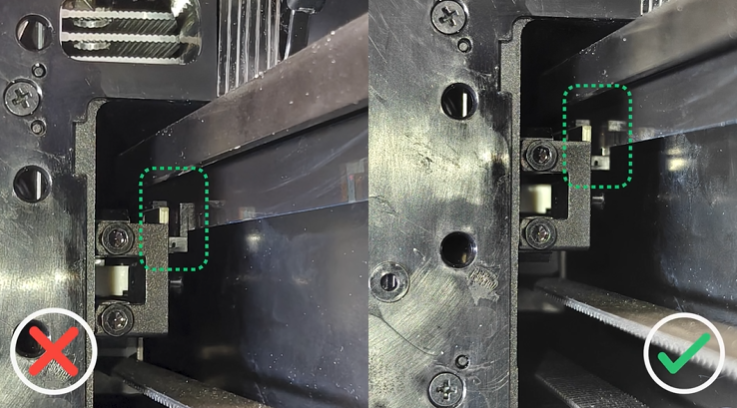
- Test Full Range of Motion: Manually push the print carriage to the far left and then to the far right. Check the sensor groove at both extremes. Sometimes the strip is seated properly in the middle, but slips out at the edges.
- Action:
- If the strip is detached, carefully guide it back into the groove.
- If the strip is perfectly in place across the entire rail, proceed to Step 3.
Step 3: Perform diagnostic cable swap & export logs
Because certain firmware versions hide carriage controller board power errors, you must perform a diagnostic cable swap to force the system to generate an error log.
- Follow the specialized guide: Please refer to the separate troubleshooting article: Troubleshoot "Print Head Carriage Board Power Exceptions" for xTool Apparel Printer
- Execute the Swap: Follow that guide strictly to swap the print head cables, power cycle the machine, and generate new hardware states.
- Export Logs: As instructed in that guide, you must export two sets of log files:
- Log 1: Before swapping the cables.
- Log 2: After swapping the cables.
- Diagnose & Fix "No Color Output" / CMYK Ink Flow Blockage on xTool Apparel Printer
- Diagnose & Fix "No White Output" or White Ink Flow Blockage on xTool Apparel Printer
- Diagnose & Fix Ink Accumulation on the Ink Pad for xTool Apparel Printer
If the problem persists
If you have completed the physical checks and gathered the diagnostic data, please submit a ticket via the "Submit a Ticket" button in the "Help Ticket" section below. The standard response time for xTool Customer Service is one business day.
Please include the following details to facilitate a quick diagnosis:
Required visuals
- A photo of the ink dampers (showing whether they contain ink or not).
- If your dampers were empty: The mirror-reflection photo of the bottom of the print head.
- Confirmation in your message of whether the encoder strip was found securely inside the sensor groove.

Work log files
- Please attach the two separate
.ziplog files generated in Step 3 (Before cable swap and After cable swap).
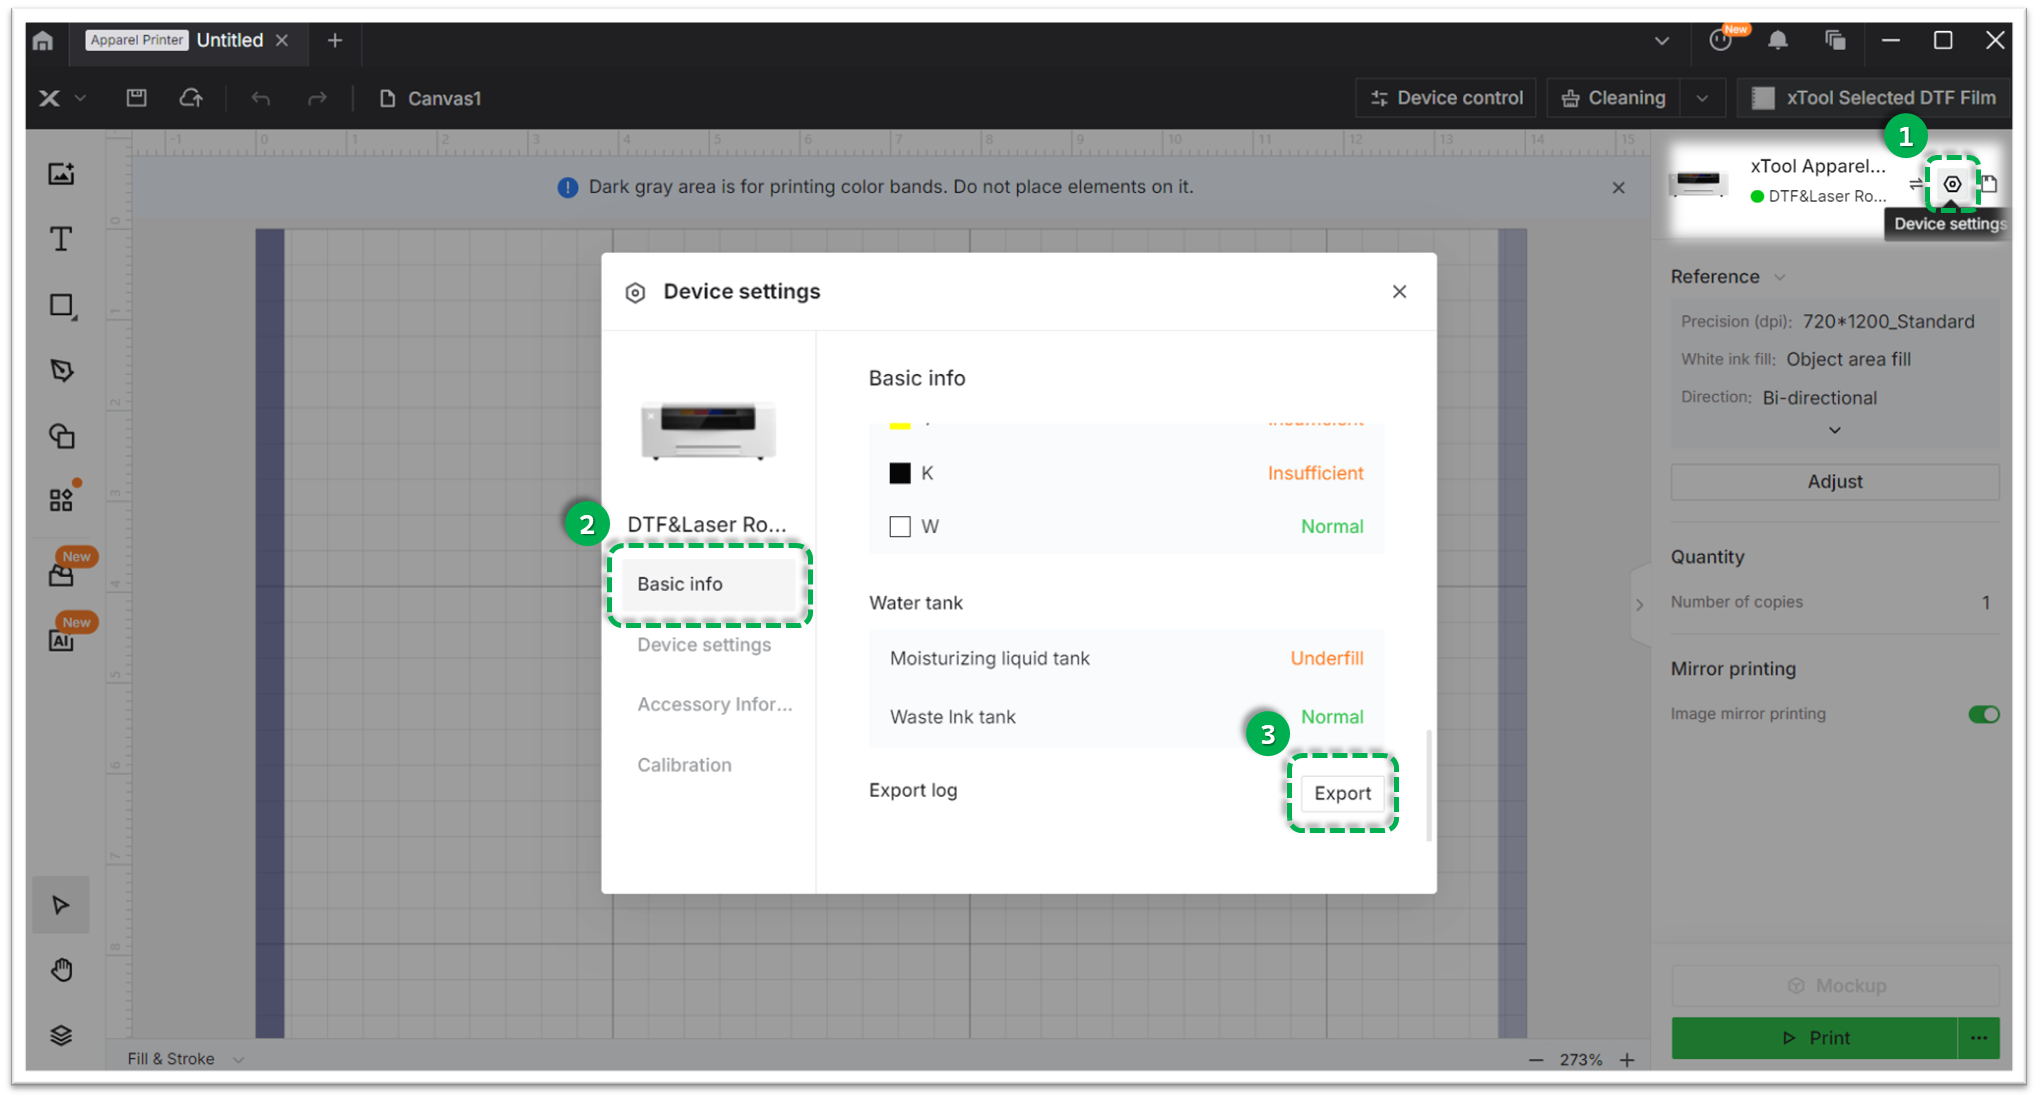
Method A: Via xTool Creative Space (XCS)
Settings (gear icon) > Basic info > Export log.- Compress the folder into a .zip file.
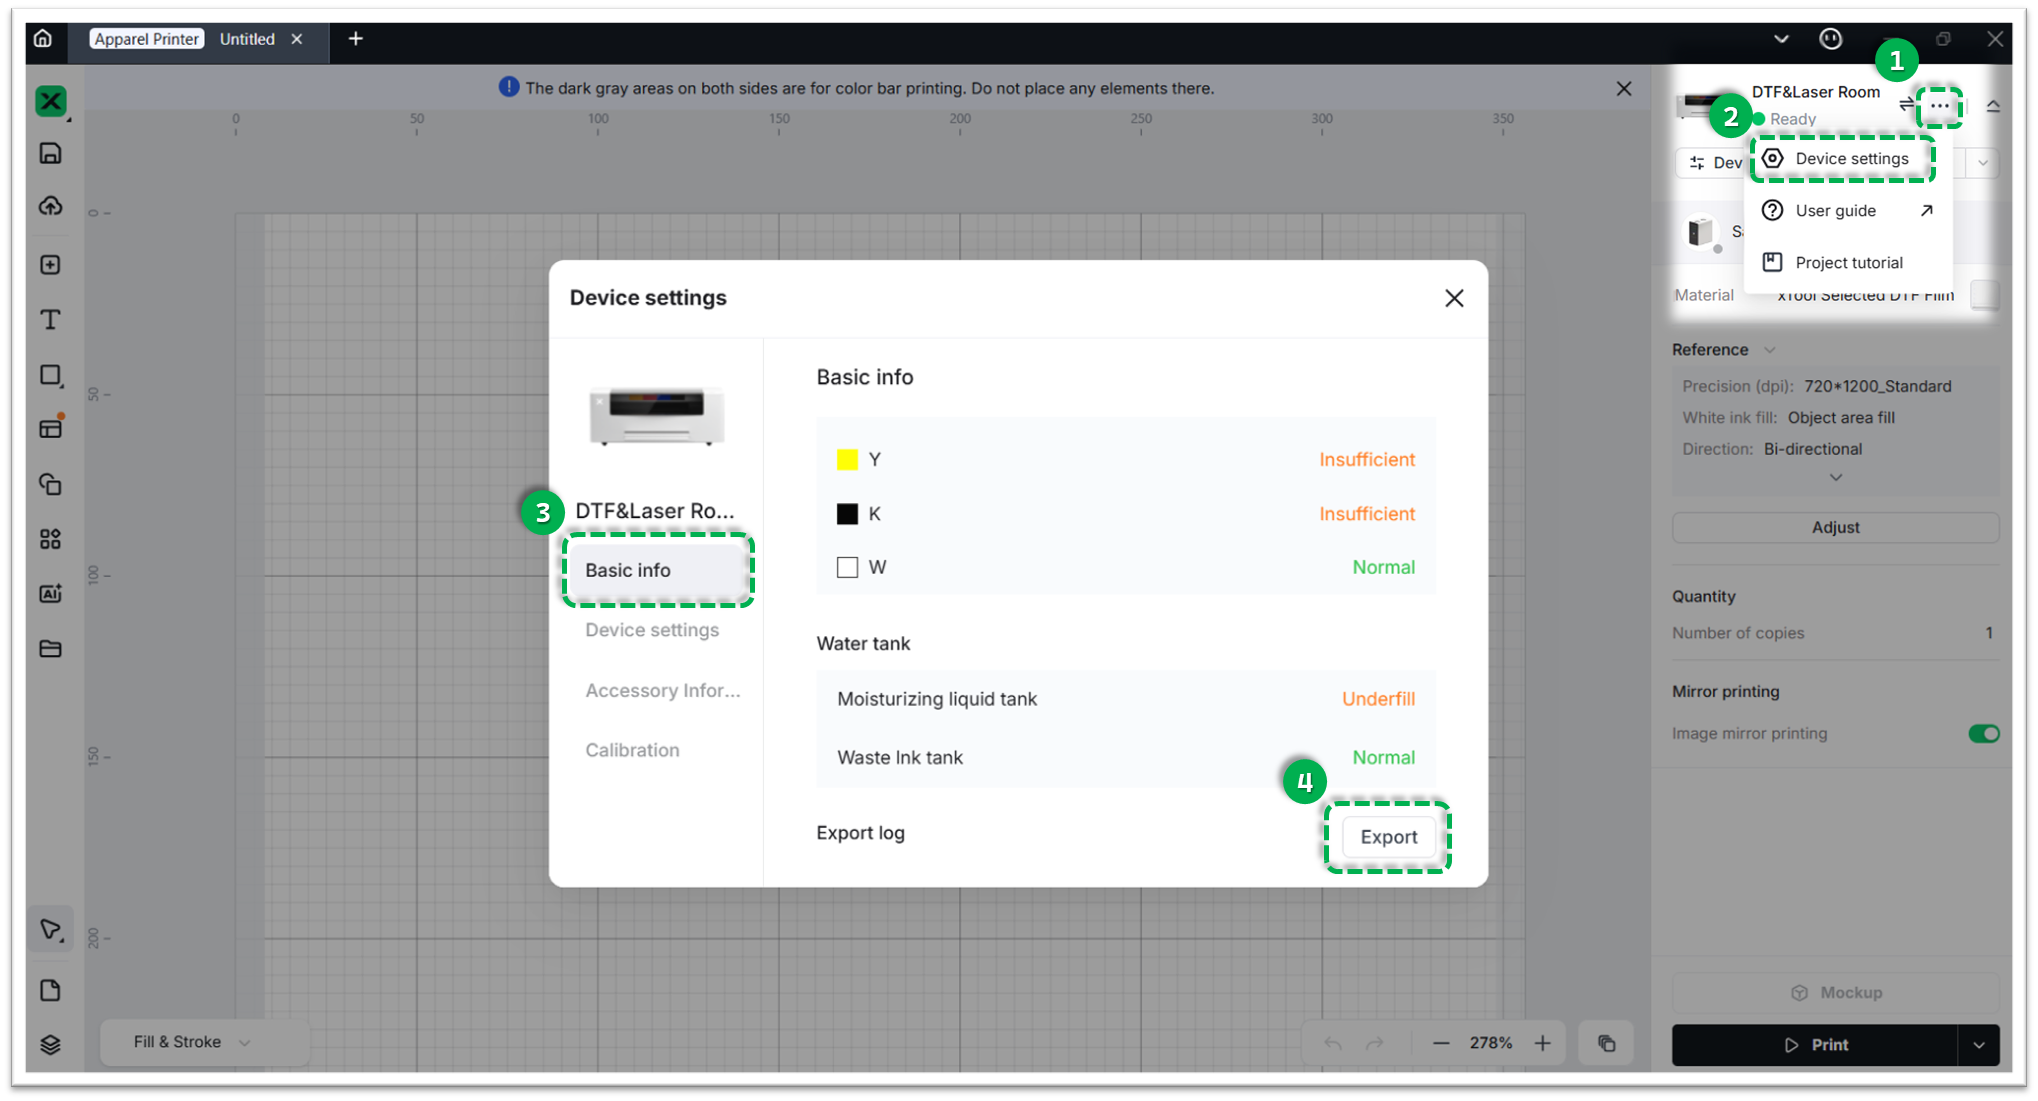
Method B: Via xTool Studio
Three dots icon > Device Settings > Basic info > Export log.- Compress the folder into a .zip file.
Documentation feedback
Help improve this content by providing feedback. If this content did not meet your requirements, select "No" in the "Was this page helpful?" section below. Include specific details about what was unclear or missing in the pop-up suggestion box. Feedback submissions are reviewed by xTool technical writers to enhance future documentation.
Services & Help
Learn & Education

Copyright © 2025 xTool All Rights Reserved.