Overview
When using the Quick Measure feature in slats mode, you may encounter measurement errors greater than 1mm. This guide provides step-by-step instructions to calibrate P2/P2S's Quick Measure, ensuring that measurement error is reduced to within the acceptable limit of 1mm.
Before calibration
Troubleshoot 2 aspects
If these troubleshooting steps resolve the measurement error, calibration of the Quick-measure may not be necessary.
- Ensure the material is flat and the slats are straight. If either is warped, adjust them or replace them.
- Avoid using transparent or high-reflectivity materials for calibration, as these can cause measurement errors. If necessary, cover such materials with white paper.
Prerequisite
Required tools
- A Windows or Mac computer.
- xTool Creative Space (version 2.3 or above).
- An infrared calibration tool.
- You can reach out to Support@xTool.com to obtain the infrared calibration tool required for the calibration process.
- Alternatively, you may 3D print the tool using light-colored materials. For accurate calibration, paint or cover areas with black sponge (see Figure 1) in black. Download the 3D model file here: Calibration Tool 3D Model .
Calibration procedure
#1 Accessing device settings
- Open Device Settings by clicking the gear icon in the upper-right corner after connecting the computer to the machine.
- Based on your computer's operating system, press the corresponding keyboard shortcut to load the "Distance measurement":
- For Windows: Ctrl+Shift+C
- For Mac: Command+ Shift ⇧ +C
- In the Distance Measurement section, click Calibrate.

#2 Calibration method selection and preparation
- Select the corresponding calibration method.
- In the Quick-measure section, click Calibrate.

- Click Start to calibrate quick-measure.

- Click Ready, next to proceed.

- In the Quick-measure section, click Calibrate.
- Prepare the machine for the calibration process.
- Install all slats on the device, skipping two slots between each two slats.
- Place the calibration tool on the slats as shown on the Device preparations page.
- When the preparation is ready, click Next.

#3 Red spot positioning and result comparison
- Red spot positioning
In this step, you need to open the lid and reposition the calibration tool 3 times to let the red spot land on different sides of the tool.
- Reposition the calibration tool to allow the red spot to fall on the 3mm side. Close the lid. Click Done.
- Reposition the calibration tool to allow the red spot to land on the 6mm side. Close the lid. Click Done.

- Reposition the calibration tool to allow the red spot to land on the 24mm side. Close the lid. Click Done.

- After completing these steps, click Next. The calibration process will begin automatically.
- Reposition the calibration tool to allow the red spot to fall on the 3mm side. Close the lid. Click Done.
- Result comparison
- If the graphics match, click Yes. Calibration is successful.


- If the graphics differ, click No and repeat the calibration steps.
- If the graphics match, click Yes. Calibration is successful.
Notes
- If the calibration fails, it is likely to be affected by ambient light. Follow these steps to adjust the ambient light conditions before repeating the calibration process: When calibrating each red dot, close the lid first to prevent direct sunlight exposure and turn off all room lights, which will greatly improve the success rate of the calibration.
- If the above steps still fail, export the following two files and send them to support@xtool.com. In your email, provide a detailed description of the issue and list the troubleshooting methods you have already tried so that we can determine an appropriate solution as quickly as possible.
- File 1:
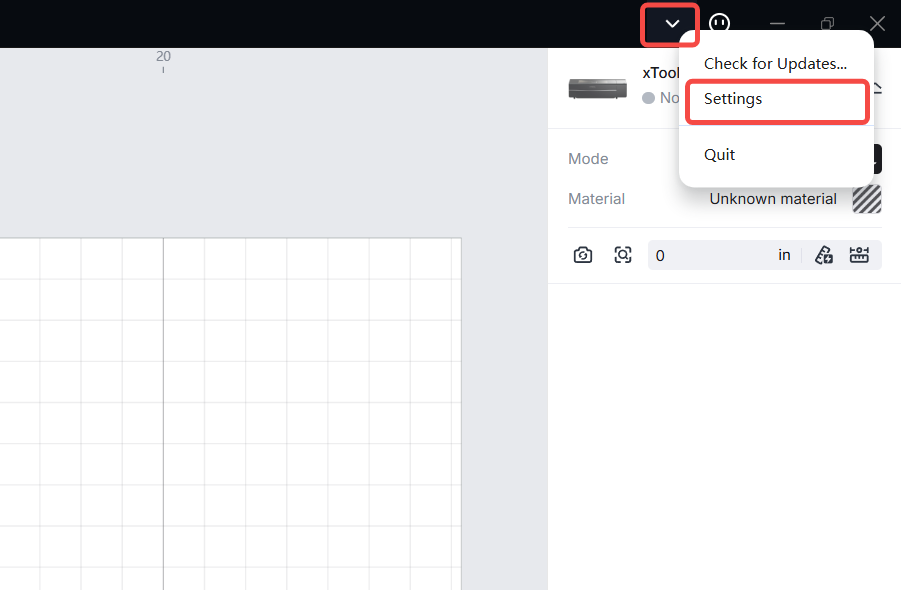
(1) Go to Settings in the upper right corner.
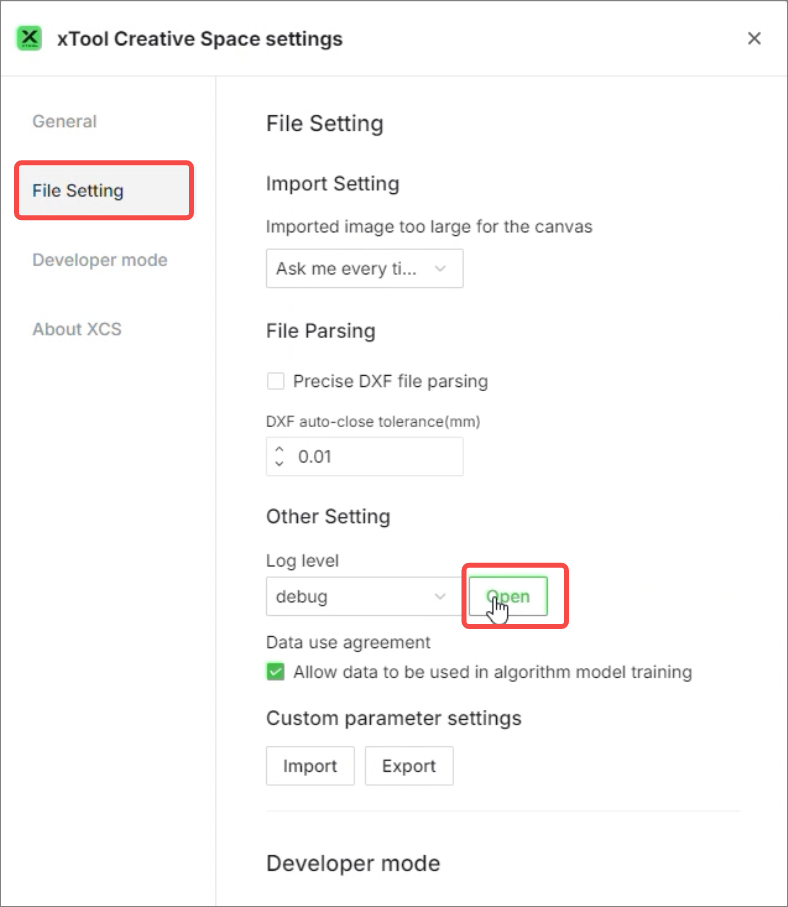
(2) Go to File Setting > Other Setting > Log level. Click Open.
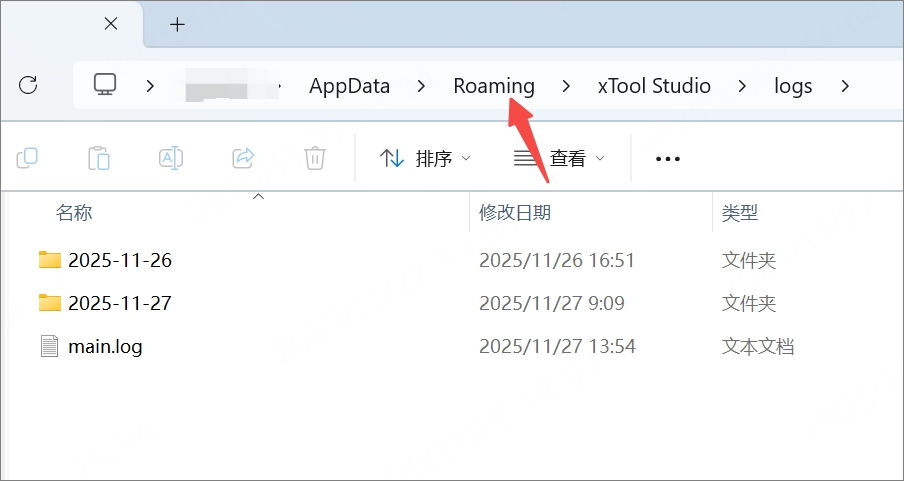
(3) Click Roaming in the path.
(4) Double click to open the file folder "xcs".
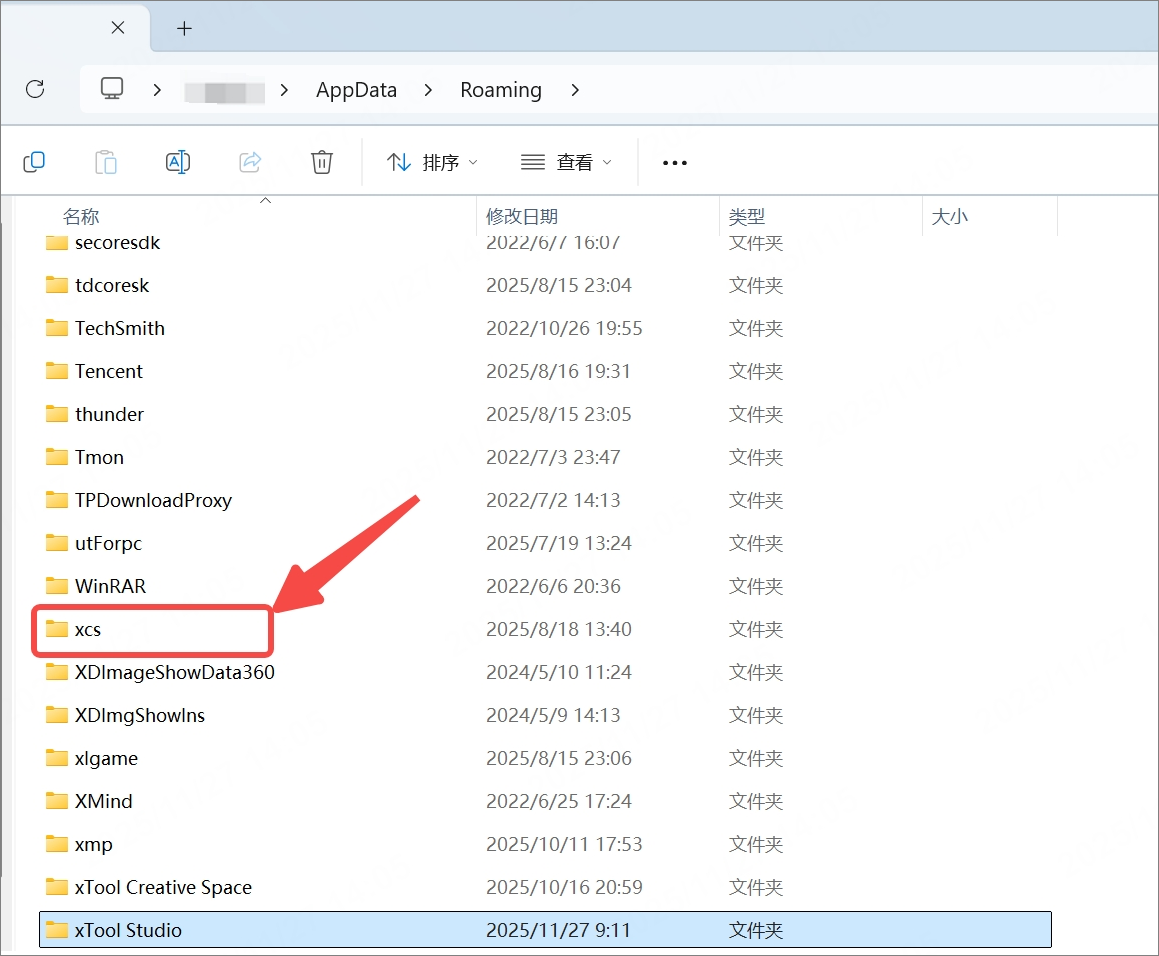
(5) Copy the file folder "tool" and send it to us via email.
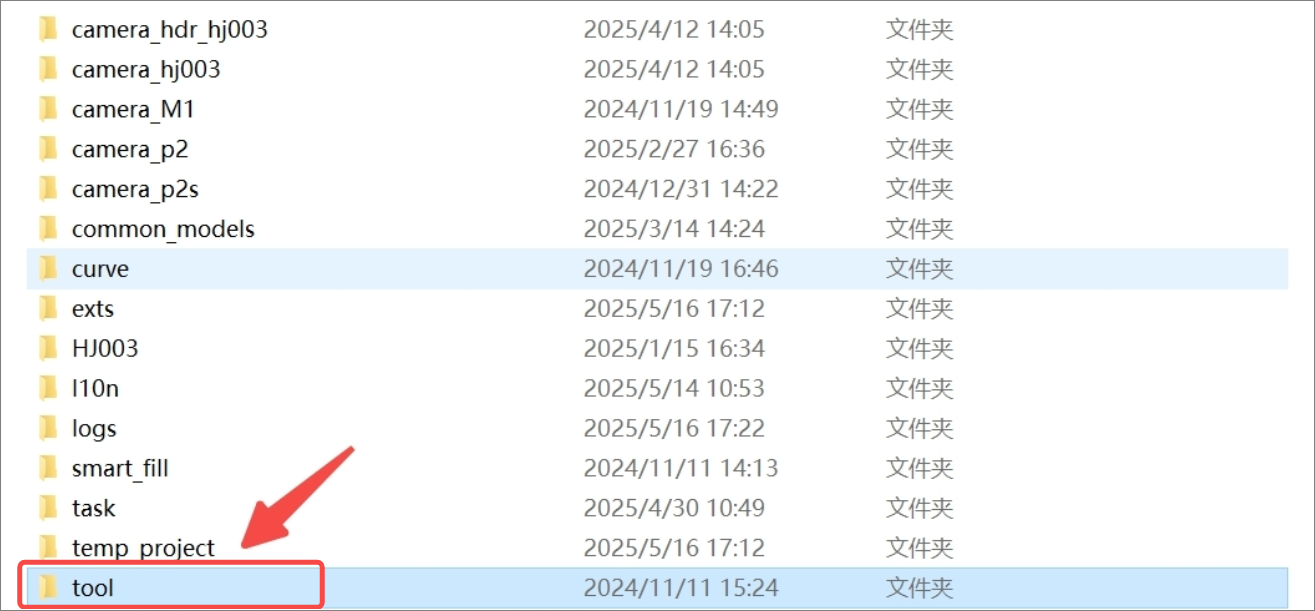
- File 2:
(1) Connect to the device. Go to Device settings.
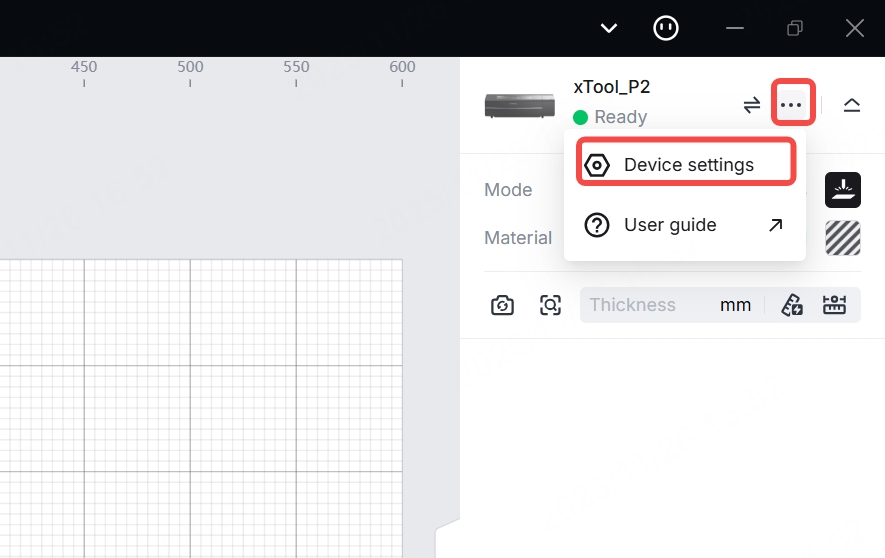
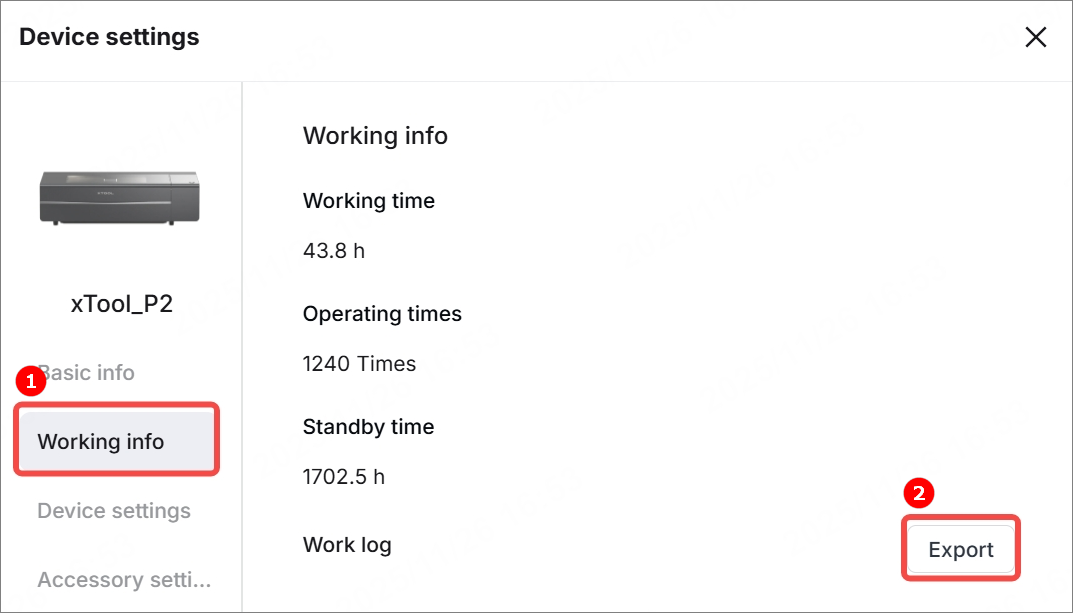
(2) Go to Working info > Work log. Click Export and send us the exported file via email.
Help us improve
If this article or video doesn't effectively assist you in resolving the issue, please let us know by clicking the “No” button in the “Was this page helpful?” section below, and leave your feedback in the pop-up suggestion box. Our knowledge base team will review it and consider it for future updates.
Still need help?
If you need any human assistance, please create a ticket by clicking the “Submit a Ticket” button in the “Help Ticket” section below. Our service team will get back to you in 1 business day via E-mail.

Services & Help
Learn & Education
Copyright © 2025 xTool All Rights Reserved.


