Note:
xTool Creative Space (XCS) is legacy software and is no longer maintained. We recommend using the latest version of xTool Studio. The XCS screenshots and instructions in this article may differ from those in xTool Studio and are provided for reference only.
Connect xTool F1/xTool F1 Lite to XCS
Connect to XCS via USB cable
(1) Use the USB cable to connect xTool F1/xTool F1 Lite to your computer.
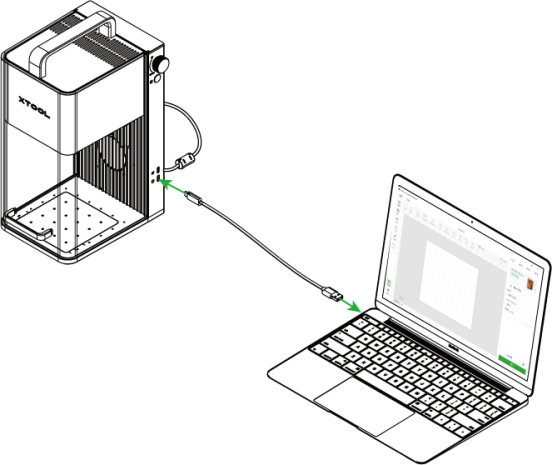
(2) Open XCS on your computer. On the top-right corner of XCS, click the + New project button.

(3) On the right of the project editing page, click Connect device.

 icon > Connect device.

(4) On the pop-up window, click the name of your device to connect to it.

Connect to XCS via Wi-Fi/IP address
1. Connect the machine to a Wi-Fi network
(1) Follow the instructions in Connect to XCS via USB cable to connect xTool F1/xTool F1 Lite to XCS by using the USB cable.
(2) In the top-right corner of XCS, click the Device settings icon  next to the image of xTool F1/xTool F1 Lite.

(3) On the Device settings window, find Wi-Fi setting in Basic info. Click Setting, select a Wi-Fi network and enter its password, and click Next.

(4) Click Complete, and then you can see the IP address of xTool F1/xTool F1 Lite under Wi-Fi setting. If you change the Wi-Fi setting, the IP address changes accordingly.

2. Connect the machine to XCS via Wi-Fi/IP address
(1) Ensure that your computer connects to the same Wi-Fi as xTool F1/xTool F1 Lite. On the right side of the project editing page, click theicon > Connect device.

(2) On the pop-up window, select Wi-Fi and click your device name on the list to connect it.Or select IP, and then enter the IP address of your device to connect it.

Set up xTool F1/xTool F1 Lite in XCS
(1) In the top-right corner of XCS, click the Device settings icon next to the image of xTool F1/xTool F1 Lite.

(2) On the Basic info tab, you can view the basic information of xTool F1/xTool F1 Lite and modify some information.

- Device name: Change the device name in the textbox.
- Laser model: View the laser model of the device.|
Note:
xTool F1 has a 10 W 455 nm blue-light laser and a 2 W 1064 nm infrared laser.
xTool F1 Lite has only a 10 W 455 nm blue-light laser.
- Serial number: View the serial number of the device.
- Plug-in version: Plug-ins are dynamic enhancements for xTool products.
- Firmware version: Check for updates and update the firmware if a new version is available.
- Wi-Fi setting: Connect the device to a Wi-Fi network.
- Safety Terms: View the safety information for the device.
(3) On the Device settings tab, you can set up the device and export files or logs as needed.

- Flame alarm: If a flame is detected, xTool F1/xTool F1 Lite will pause processing and raise the alarm. For safety purposes, you are advised to turn on this feature.
- Stops when moved: If xTool F1/xTool F1 Lite is moved or tilted during processing, it will pause processing. To use xTool F1 to process materials with slopes, you need to turn off this feature.
- Stops when enclosure opened: If the protective enclosure is opened during processing, xTool F1/xTool F1 Lite will pause processing. To use xTool F1 to process materials with the protective enclosure opened, you need to turn off this feature.
- Infrared ray preheat: Using the infrared laser for bitmap engraving at a low temperature may lead to unsatisfying engraving results. To ensure better engraving results, you can turn on this feature, so that the laser module is preheated to enter the optimum state before processing.
Note: This setting is not available for xTool F1 Lite.
- Buzzer reminders: If it is enabled, the buzzer on xTool F1/xTool F1 Lite sounds when the device enters some particular states, such as getting ready for processing or processing completed.
(4) On the Accessory Information tab, set up the accessories for work.

- Pedal/button switch Enclosure-opened processing: By default, a pedal or button switch cannot start processing when the device's enclosure is open. This is to avoid accidental triggering. By turning on this option, you can use a pedal or button switch to start processing with the device's enclosure open.
Processing modes of xTool F1/xTool F1 Lite
XCS supports multiple processing modes for xTool F1/xTool F1 Lite.

- Process on baseplate: to process small and flat materials
In this mode, you need to place the material on the baseplate of xTool F1/xTool F1 Lite.
- Roller – Use rotary attachment: to process irregular cylindrical and extra-long materials
In this mode, you need to use xTool F1/xTool F1 Lite with xTool Rotary Attachment in Roller mode.
- Chuck – Use rotary attachment: to process cylindrical materials with rounded or non-rounded bases
In this mode, you need to use xTool F1/xTool F1 Lite with xTool Rotary Attachment in Chuck mode.
- Baseplate removed: to process large, sloping, or thick materials
In this mode, you need to take out the removable baseplate from xTool F1/xTool F1 Lite and place xTool F1/xTool F1 Lite on top of the material to be processed.
- Use slide extension: to process long materials or multiple small materials at a time
In this mode, you need to use xTool F1/xTool F1 Lite with the slide extension.