With the material pack delivered with xTool S1, you can create your own works.
This document shows you how to make a coaster.
What you need
What you need is the assembled xTool S1, a computer with xTool Creative Space (XCS) or xTool Studio installed, the power adapter and cable, the USB cable, a stone coaster that can be found in the material pack, and the example project files.
Example project files
Project file | Pattern |
|---|---|
| |
Make a stone coaster
Step 1. Open a project file
(1) Download the project file you like.
Download links:
(2) Open XCS on your computer. In the top-right corner of the XCS, click Open from computer > select the file you have downloaded > click Open.

![]()

Step 2. Connect xTool S1 and XCS
(1) Press the power button on the rear side of xTool S1. The annular indicator turns solid purple.
(2) Connect xTool S1 with your computer through a USB cable.
(3) In the top-right corner of the project editing page, click the icon > Connect device.

(4) On the pop-up window, click the name of your device to connect to it.
.png)
Step 3. Select the processing mode and material name
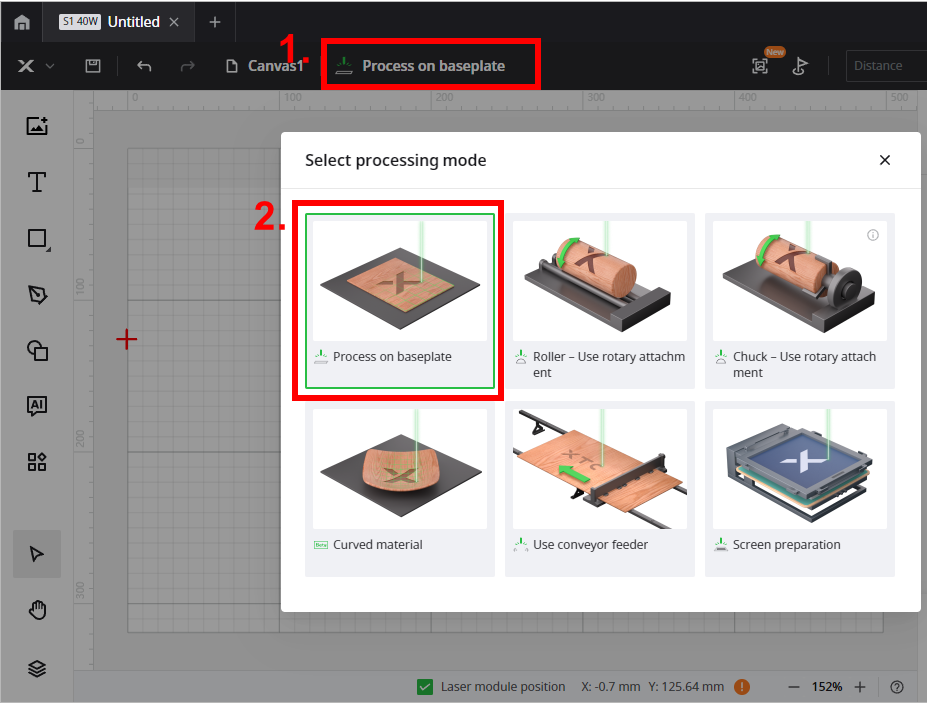
(1) On the top of XCS, click the name of the current processing mode, and then select Process on baseplate as the processing mode.
(2) In the top-right corner, click User-defined material, select Stone Coaster, and click Confirm.
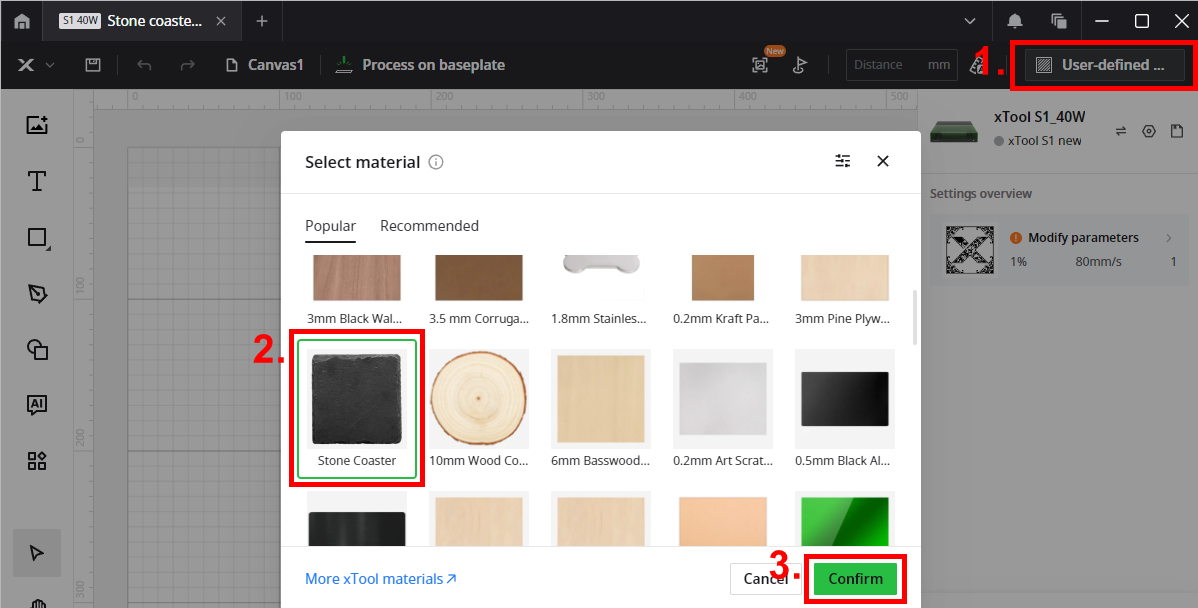
After you select a material name, the software will automatically set parameters for laser processing. You can adjust the settings based on your needs.
Step 4. Place the stone coaster and set the focus
(1) Open the lid of xTool S1. Place the stone coaster on the baseplate of xTool S1.

(2) Move the laser module over the stone coaster. Ensure that the locating spot falls on the surface of the coaster.
(3) In the top-right corner of XCS, click the Auto-measure icon , and xTool S1 will automatically measure the distance from the laser module to the material surface.

Step 5. Mark the processing area
(1) In the top-right corner of XCS, click the Mark processing area icon .
.

(2) In the dialog box that is displayed, select Rectangle and click Start marking.

(3) Manually move the laser module to make the red cross spot fall at a vertex of the target processing area, and press the button on xTool S1 to record the position. XCS shows that Point 1 has been marked successfully. Repeat the steps to record the other vertex. After XCS shows that Point 1 and Point 2 are marked, click End marking and Done to exit.

Note:
- The two vertexes cannot be parallel with each other.
- To re-mark a point, click the Cancel button and repeat the marking process.
On the canvas page, you can see the designated processing area.
Tips:
xTool S1 provides accurate marking, allowing you to mark the processing area accurately on XCS without a camera. For more information on this feature, see Mark Processing Area Using xTool S1 Pin-Point Positioning Function.
Step 6. Edit the design pattern
(1) Drag the design pattern to the target processing area and adjust the size.

(2) Click the text icon and add the text you want to show on the coaster, for example, a name. Drag the text to adjust its position and size.

Step 7. Preview and process
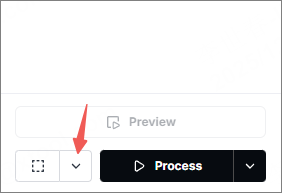
(1) In the bottom-right corner of the software, click the icon next to the framing button to set the speed for framing.
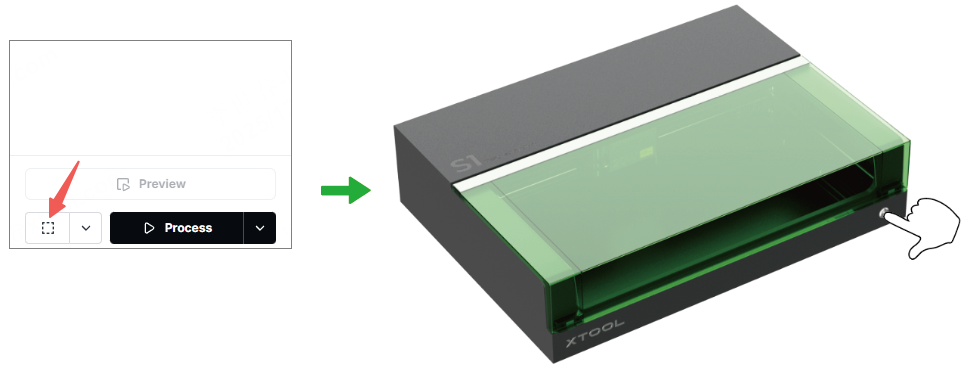
(2) Close the lid of xTool S1, and then click Framing in the software. Press the button on xTool S1 to start framing. The laser spot will move along the boundary of the pattern on the material so that you can preview the processing area.
(3) After confirming the proper processing area, click Framing completed in XCS. If the area is not satisfying, adjust the position of the material or pattern in the software, and then preview the processing area again.

(4) In the bottom-right corner of the software, click Process.
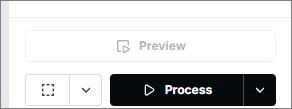
(5) Preview the coaster pattern in the software. Then, in the upper-right corner of the software, click Start.

(6) Press the button on xTool S1 to start processing.

XCS shows the estimated processing time. Wait until the processing is complete and take out the coaster.


Services & Help
Learn & Community
Copyright © 2025 xTool All Rights Reserved.


