Calibrate the Distant-View Camera for xTool P2
Updated Jun 16,2025
Updated Jun 16,2025
About Positioning Accuracy
- There is a difference between the position of the design and that of the actual processing.
- The higher the accuracy, the smaller that difference would be, and vice versa. This is called positioning accuracy.
- When you put the material at the center of the processing area and choose the slats flat mode, if you find the error of the positioning accuracy is larger than 2mm, please follow the steps below to troubleshoot:
Before Troubleshooting
- Make sure that the material is flat and not warped.
- Ensure that the slates are installed in place without any unevenness.
- Check if the distant-view camera module is loose. If so, please tighten the screws.
How to Confirm
The error in the measurement will also result in an error in positioning. Manually input the thickness to rule out the error caused by the measurement before troubleshooting further.
- Change the processing mode to slats flat mode on XCS.
- Input the accurate thickness manually.
- Test processing and check the dimensional accuracy of the camera.

- If the positioning accuracy is good enough after manually inputting the thickness, the calibration of the quick measure is needed. Please refer to the guidance for calibrating the P2 quick measurement to calibrate the distance measurement function again.
- If the issue persists, please refer to the calibration procedure in the following to calibrate the dimensional accuracy of the camera.
Calibration Procedure
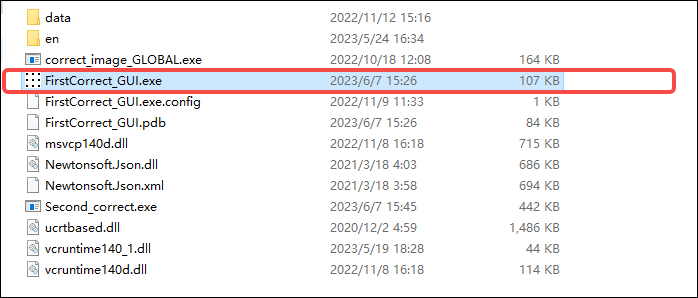
1. Download the calibration software: xTool_P2_Distant-View_Camera_Calibration_Tool_230905_1400.
2. Run the calibration software. If it fails, run it as Administrator.

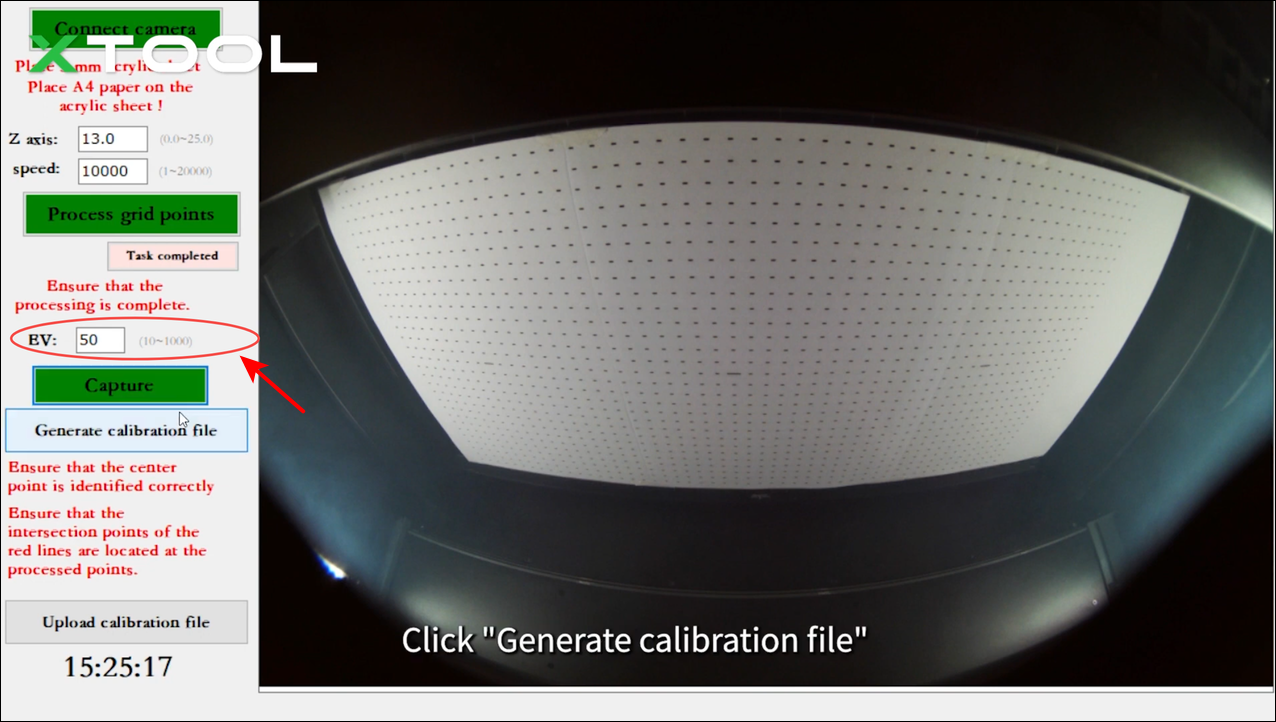
3. Follow the steps in the video.
💡 If the calibration fails, it is likely to be a problem with the Exposure. To solve the issue, adjust the EV value in the software. 
When you set the EV value, click Capture to check whether the calibration grids on the image are clear. If yes, click Generate calibration file to create the calibration file. Then click Upload calibration file to complete the calibration. If not, repeat the step starting from adjusting the EV value. |
Preview
Was this page helpful?
19 out of 82 found this helpful
Help Ticket
Use this help ticket to submit your issue. We will respond within 1 business day
Submit a Ticket Tags
Help Ticket
Use this help ticket to submit your issue. We will respond within 1 business day
Submit a Ticket 
Services & Help
Learn & Community
Copyright © 2025 xTool All Rights Reserved.