
Issue Description
When this issue occurs, the laser head won't go back to the home position properly. You will probably see the laser head jitters or keep going up or down. If the device is connected with xTool Studio in the meantime, you may see a pop-up notification like below.

Causes
- Z-axis motor failure
- An obstruction is preventing the Z-axis motor from returning upward properly during operation
- Z-axis adapter board failure
- Z-axis limit switch failure
- Z-axis cable adapter failure
- Z-axis limit switch cable failure
- Mainboard control interface failure
Troubleshooting
Follow the video below to inspect whether the lead screw of the laser module works properly.
Situation 1:
- The threaded shaft cannot be turned after the device is powered off.
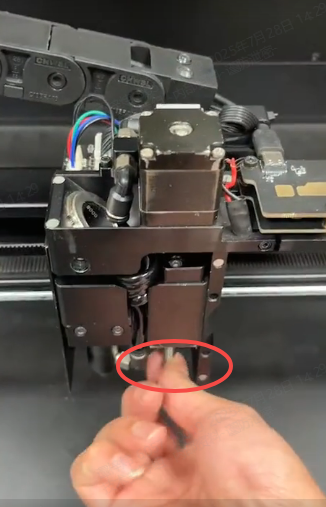
- The z-axis makes a "clack clack" sound and cannot move up.
Both of the situation 1 is caused by foreign objects on the lead screw or the guide rail. At this time, you should clean foreign objects and lubricate the lead screw with lubricating oil (as shown below).
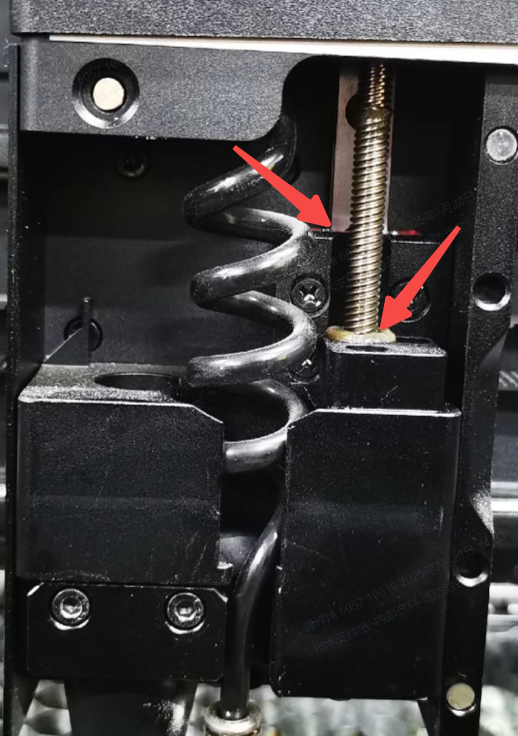
- After cleaning, if the lead screw still cannot be turned manually, you need to replace a new Z-axis motor.
- After cleaning, if the lead screw can be turned manually, but the z-axis still makes a "clack clack" sound and cannot move up when the power supply is connected. It means you need to replace a new Z-axis motor and a Z-axis adapter cable (To determine the specific part SKU based on your device model, please contact xTool Customer Service).
Situation 2:
The z-axis makes a "clack clack" sound when lifted to the top of the z-axis, and the indicator is off.
Observe whether the indicator is on (as shown below).
If so, it means the limit switch works properly. If not, it means the limit switch isn't triggered.
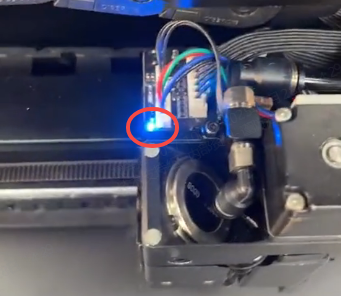
Solution:
- Unplug and re-plug the cables as shown and check whether they are loose or broken. Then connect a power supply to the device.
| |
|---|---|
P2 | P2S |
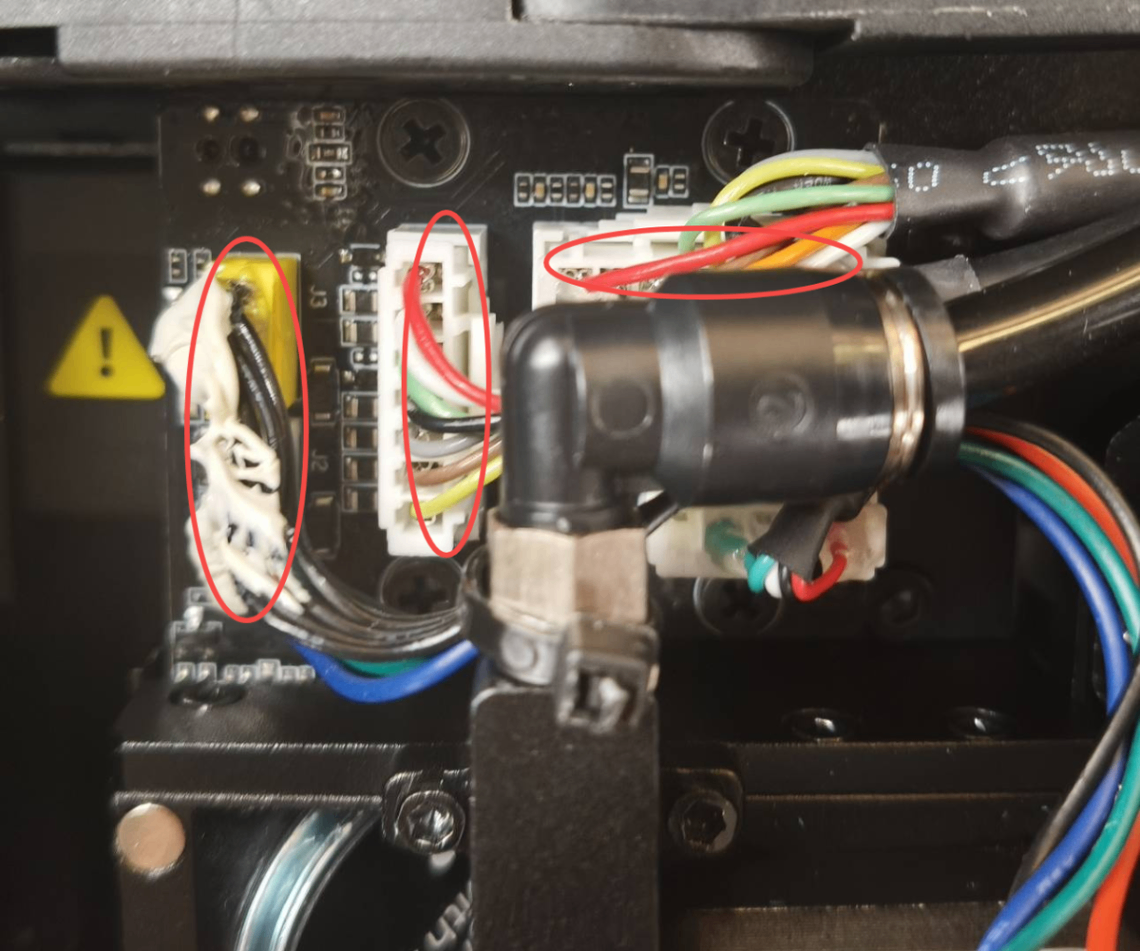
- If re-plugging does not work, check whether the blocking plate bends or is covered by foreign objects (as shown below).
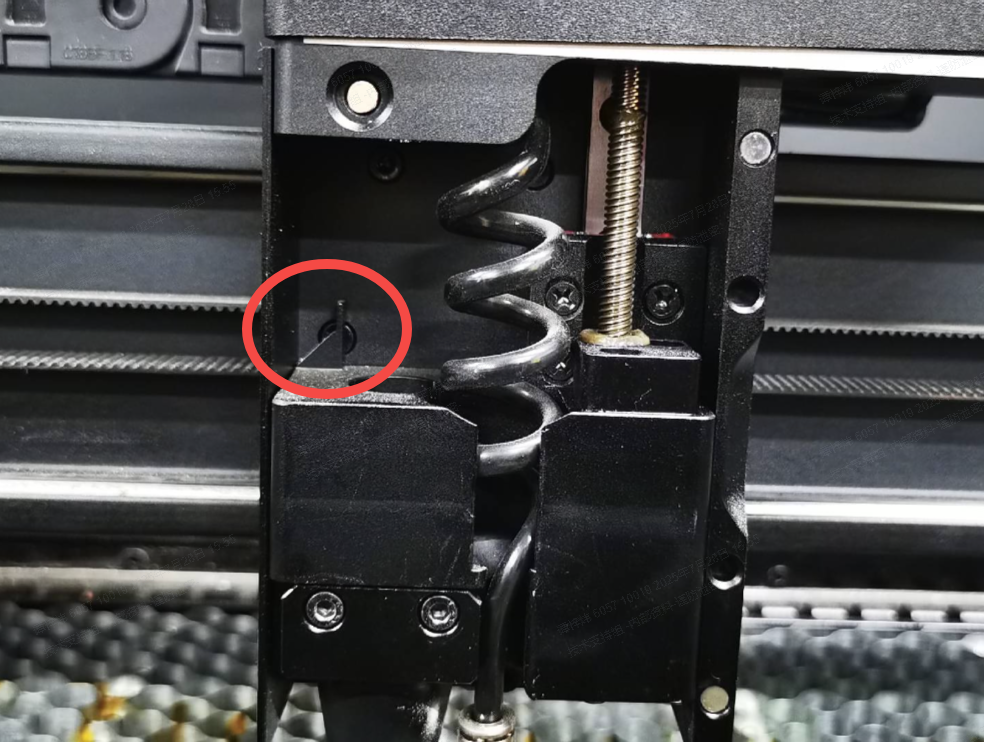
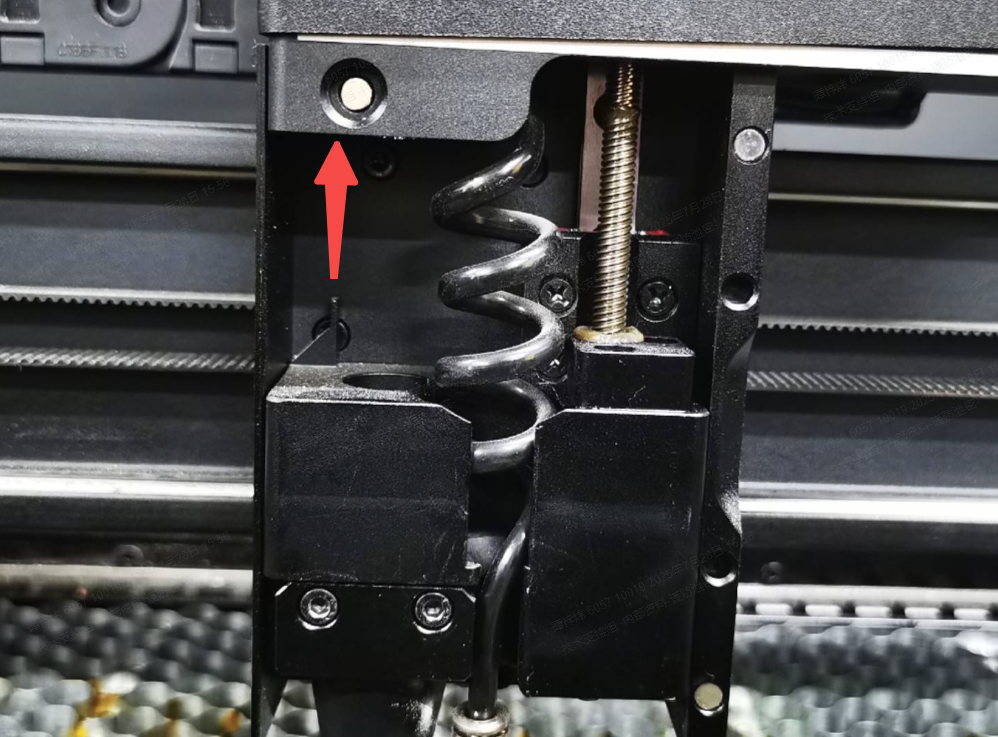
- Check whether the limit switch sensor is stuck by foreign objects (as shown below). Clean the residues in a timely manner.
- If the limit switch sensor is still not working. You need to test it manually. Follow the steps:
(1) Power off the device, and unplug the motor connection cable.
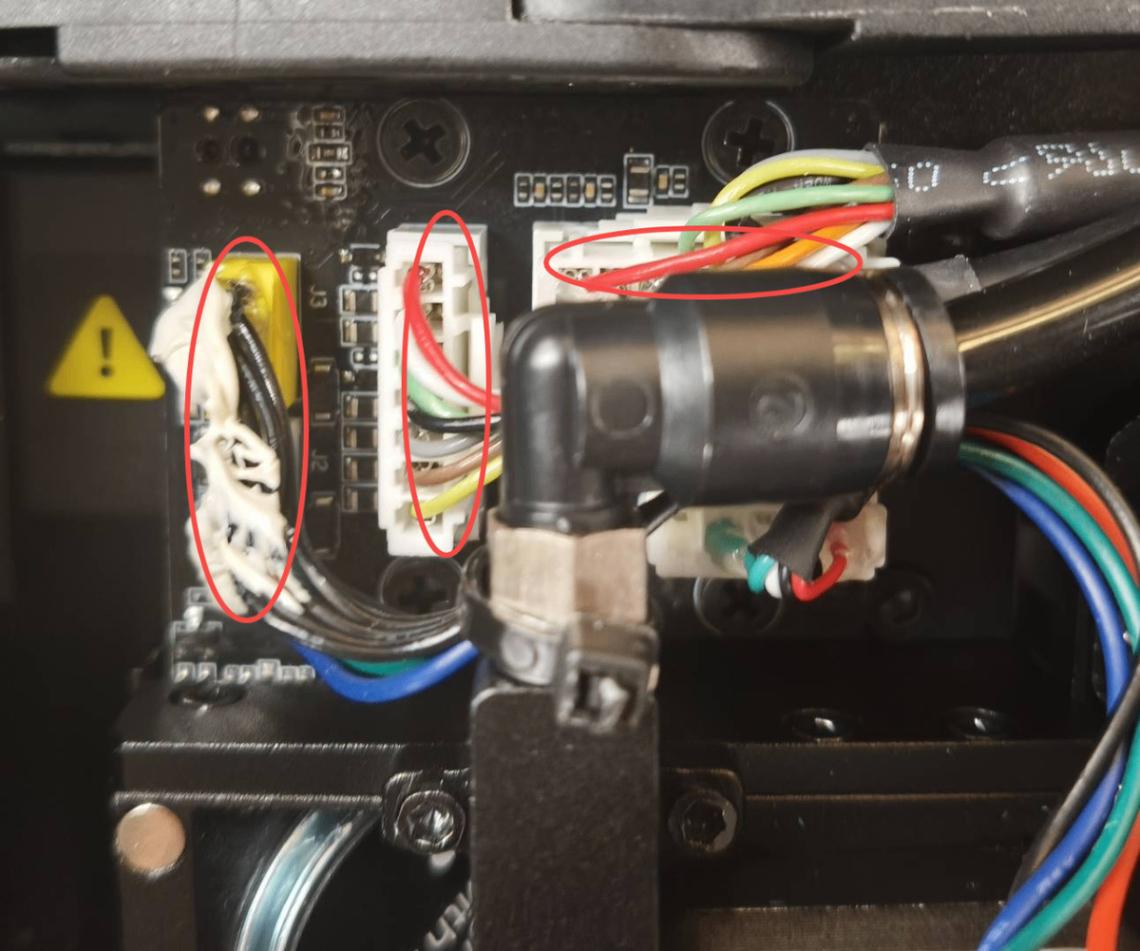
(2) After removing the metal cover on the left side, you can see the Z-axis limit switch.
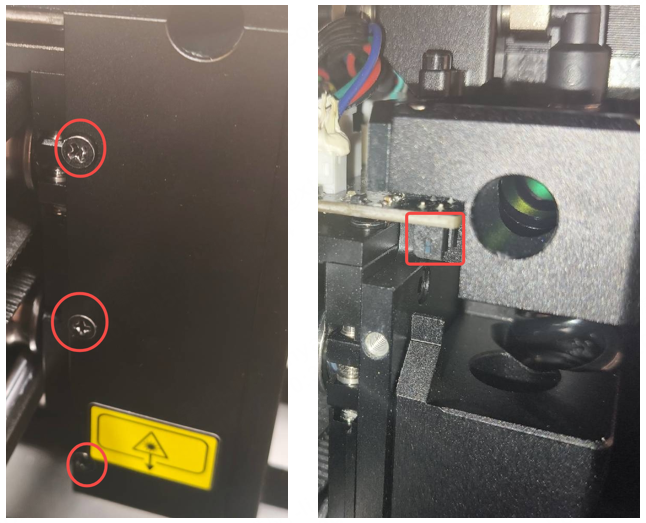
(3) Power on the device again, and manually move the laser head up and down to check whether the Z-axis limit tab can be inserted into the limit switch.
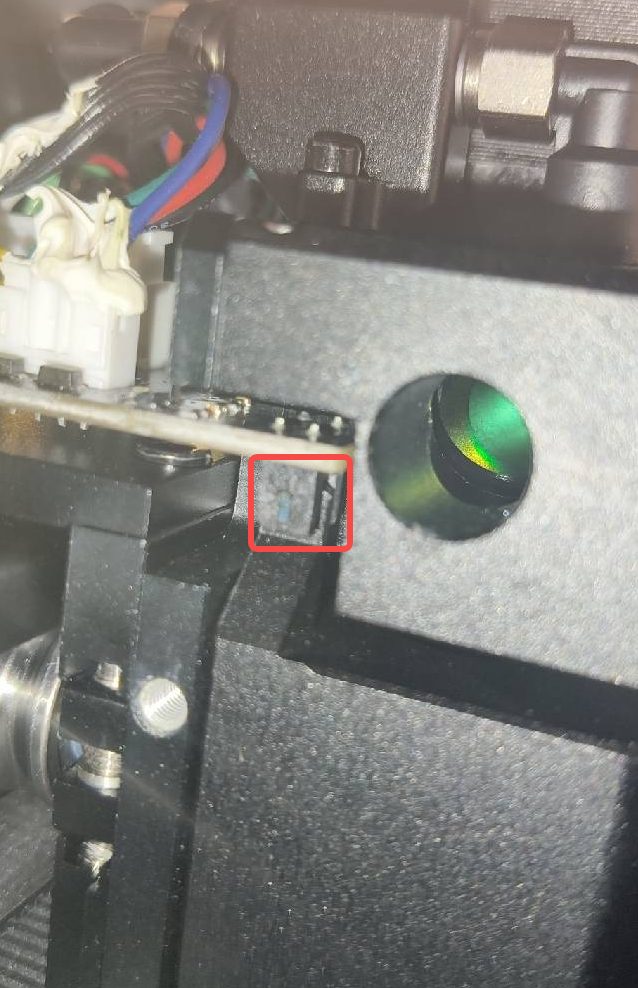
(4) Check whether the indicator light changes. If the indicator light does not change, replace the Z-axis adapter board and X-Z limit position cable. If the indicator light turns on normally, replace the Z-axis transfer board.
Situation 3:
The z-axis makes a "clack clack" sound when lifting to the top of the z-axis, and the indicator is on. However, a "clack clack" sound remains.
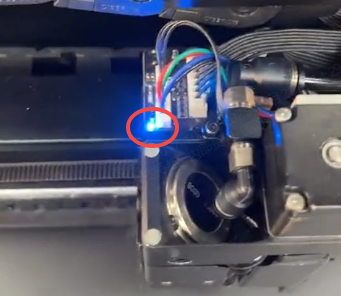
It means both the limit switch and the z-axis motor work properly. The z-axis adapter board is likely faulty. Replace the z-axis adapter board. See the tutorial:
Situation 4:
If the threaded shaft can be turned manually, but it cannot turn and make no sound after the device is powered on, follow the steps:
Solution:
(1) Reboot P2 and connect it to the computer with a USB cable.
(2) Open your browser and input and hit enter on the following links in the address bar in succession:
- Lower the laser head:
- Lift the laser head:
(3) If the laser head fails to lift properly or is stuck, the motor or motor connection cable may be faulty. Please replace it.
(4) Refer to the article to replace the part: https://support.xtool.com/article/951
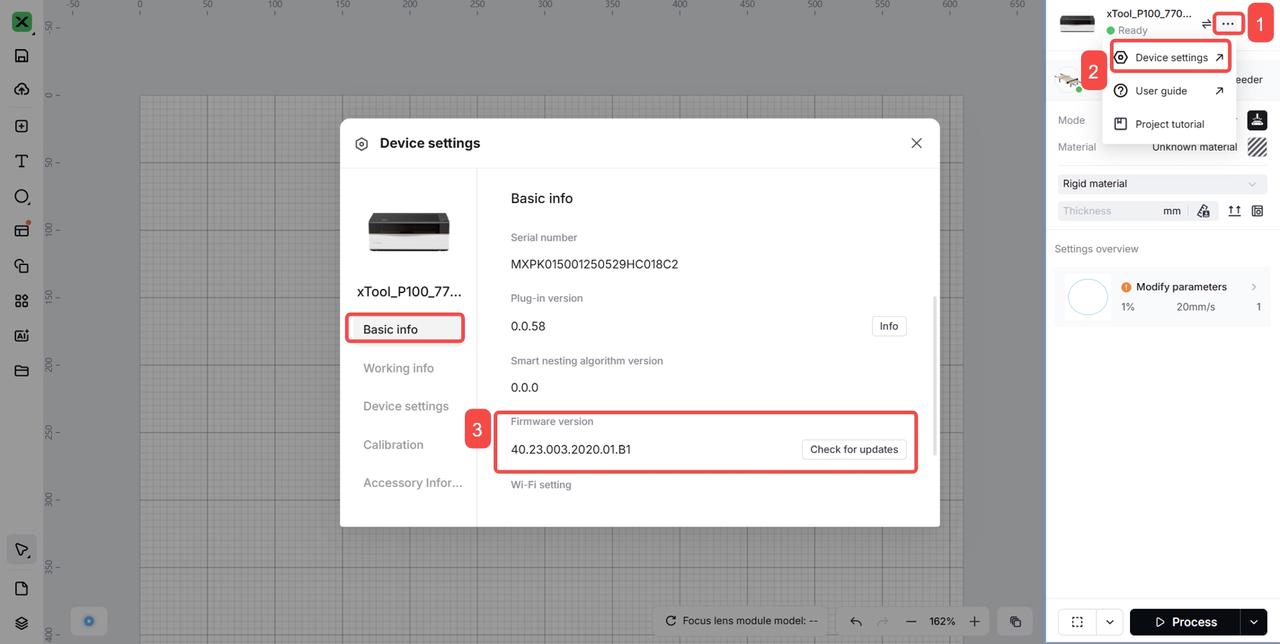
Note: This method applies to the P2 and P2S running firmware version 010 or earlier. If you want to use this method on a P2S with a firmware version later than 010, please refer to this article to downgrade the firmware: Downgrade Firmware for xTool P2S in xTool Studio
If None of the Above Works
Check the cable
(1) Check whether the connection cable between the Z-axis board and the mainboard is damaged(especially inside the drag chain).
(2) If the cable is broken or damaged, please contact the after-sales team for cable parts and follow the link below to have the cable replaced: Replace the Cables of the Z-Axis Adapter Board of xTool P2.
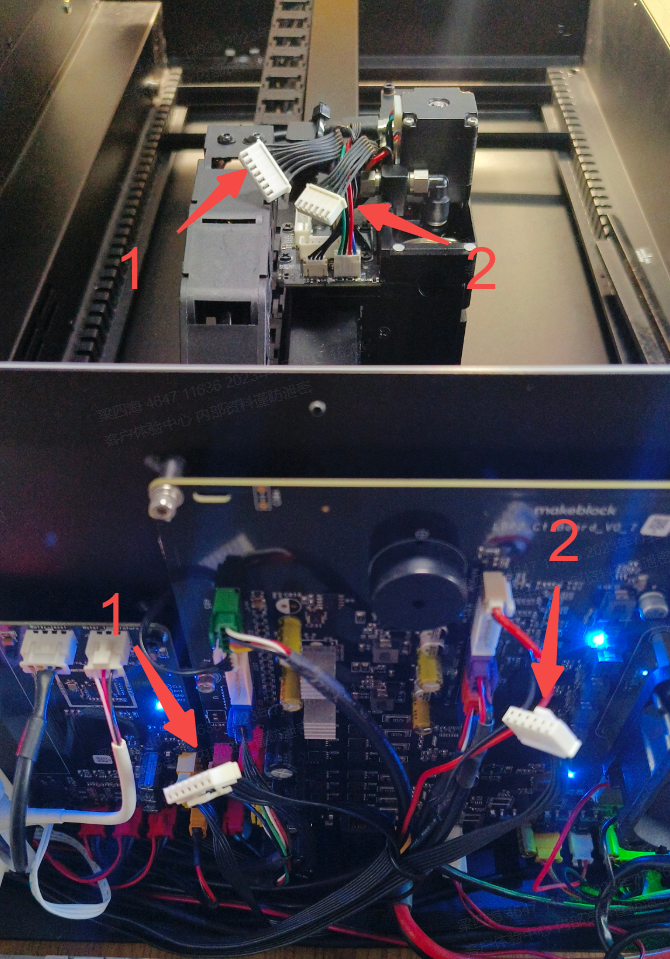
Check the electrical connectivity of the connection cable.
Note: There are two types of cables: round cables and flat cables. However, the measurement method is the same for both.
(1) Please refer to the article to remove the casing:
P2: Remove the Casing of xTool P2 Laser Engraver
P2S: Remove & Install the Left Plate for xTool P2S
(2) If you have a multimeter, please use it to check the electrical connectivity of these cables.
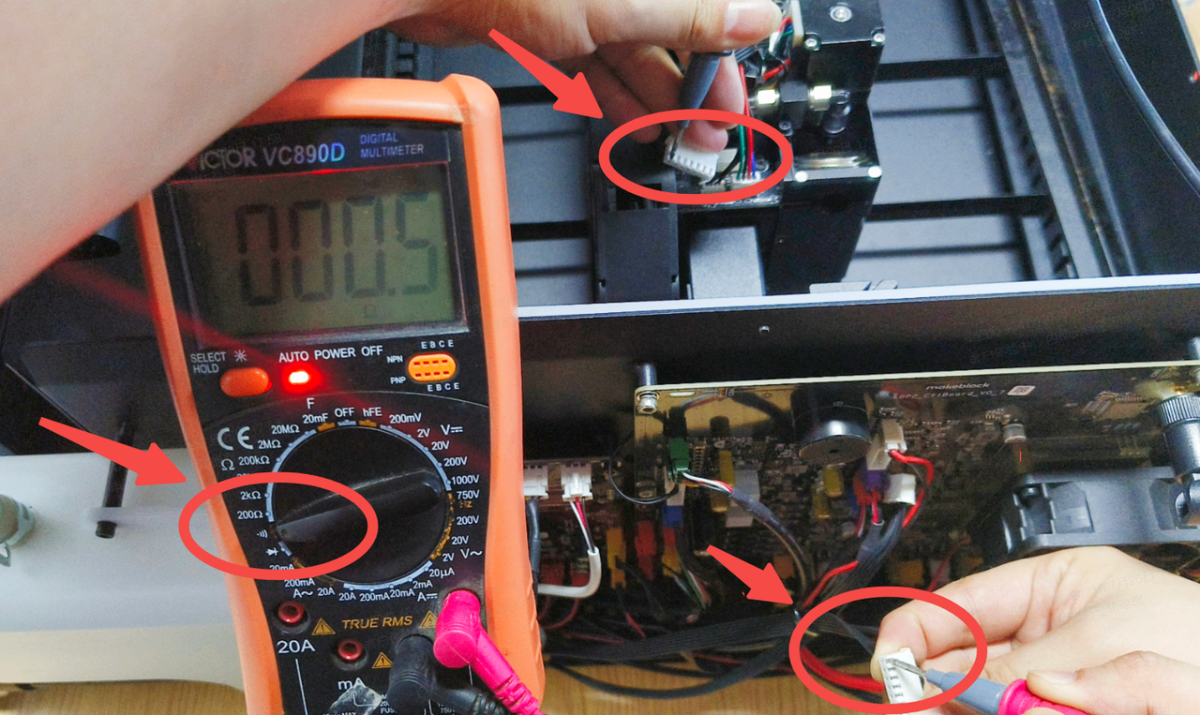
(3) If the cable is broken or damaged, please contact the after-sales team for cable parts and follow the link below to have the cable replaced.
Replace the Cables of the Z-Axis Adapter Board of xTool P2.
(4) If the Z-axis still fails homing and cannot find the reason, you can change the following parts (one piece of each part): Z-axis adapter cable, Z-axis adapter board, X-Z limit position cable, Z-axis motor, and main control board.
Note: If you have followed the instructions above and the issue is still not resolved, please read the article https://support.xtool.com/article/844, collect the troubleshooting steps you have taken, and contact xTool tech support for further advice.

