In this guide, we'll walk you through the basics of the XCS horizontal toolbar to help you edit and arrange your element more smoothly. Let's dive right in!

Note: When you use XCS, some of these functions may be unavailable in some scenarios, displayed in gray. This is what it is supposed to be.
Undo & Redo
Cancels the last action; Performs the last action again
Outline
This function allows you to add inner and outer outlines for images. Learn more


Array
Creates multiple copies of an element and lays them out in grid, circular, or material text mode. You can click an element, select an array mode, and complete the settings.
The material test array enables you to generate an automatic speed & power test array for your design patterns, aiding in quickly determining the most suitable settings for your material. Learn more


Smart Fill
Duplicates a design element, which helps you process multiple materials at a time. Edit your design on one material, and then click Smart Fill. The same design will be copied on other materials.
This function is available only after you have connected your device to XCS, and only applicable with machines that have cameras.
Align
Aligns multiple elements. For example, I want to use the Align function on these graphics.


- For example:
Align left | Align right | Vertical align center | Horizonral align center |
 |  |  |  |
Align bottom | Align top |
 |  |
Distribute horizontally | Distribute vertically |
 |  |
Arrange
Sets the order of elements. You can bring an element to front or send it to back, or bring it forward or send it backward one layer by one layer.
Note: This function has no relation to the processing type or sequence.


Combine
There are 4 options under the Combine function: Unite, Subtract, Unite at Overlap, and Subtract at Overlap. You can merges 2 or more vector elements into a new one, remove the overlapping area, etc. Learn more


Reflect
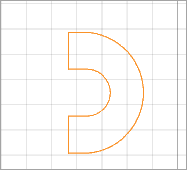
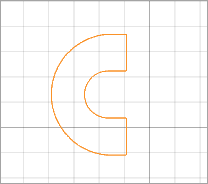
Reflects an element horizontally or vertically.


- For example:
Reflect Horizontally | Reflect Vertically |
 |  |
Position
Sets the position of an element on the canvas on the X and Y coordinates. The origin (0, 0) is in the upper left corner.
By default, when you insert a shape or import an image, its upper left corner is positioned in (0, 0). The unit can be set in Settings.
- Nudge the element 1 pixel at a time: Arrow keys
- Nudge the element 10 pixels at a time: Shift+Arrow keys or Ctrl (Command)+Arrow keys


Size
sets the size of an element. The unit can be set in Settings.
Note: To fix the width-to-height ratio, click the lock icon, and click again to unlock.
 |  |


Rotate
Rotates an element by angle. A positive value indicates rotating clockwise, and a negative one indicates rotating counterclockwise.

Corner Radius
You can adjust the corner curvature of rectangle shapes drawn via the insert function.

Related Content:

Services & Help
Learn & Community
Copyright © 2025 xTool All Rights Reserved.