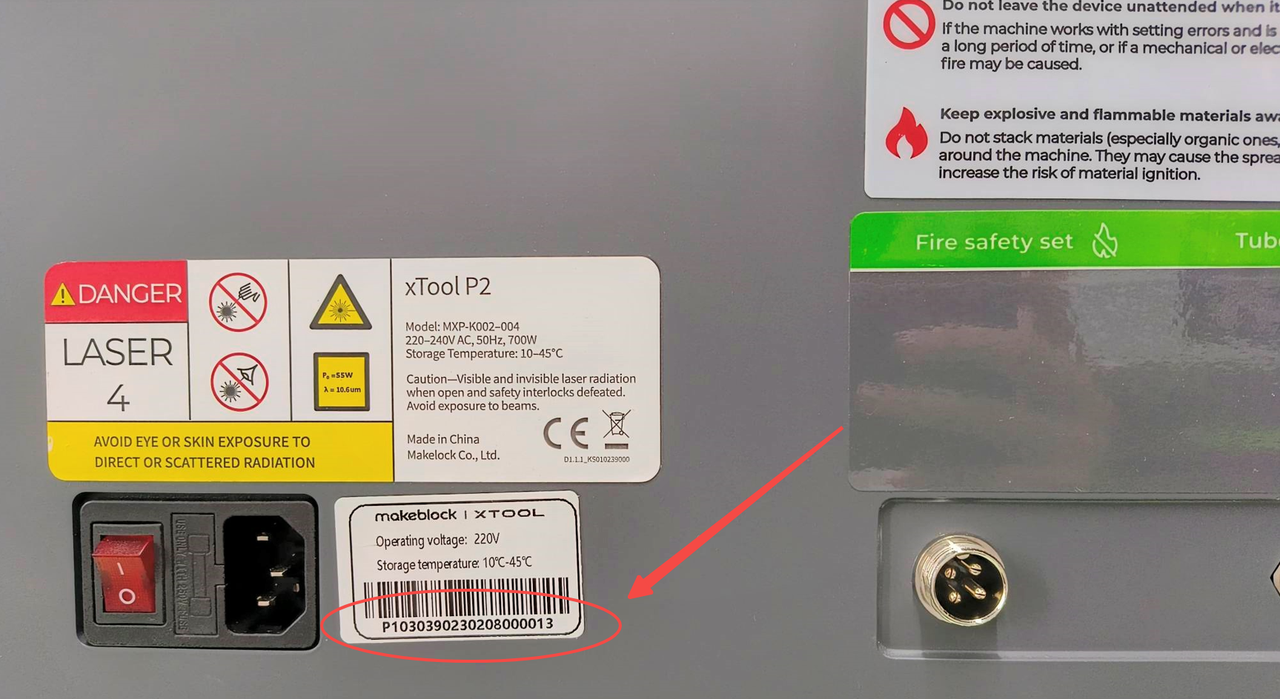
Issue description
After P2 is powered on via the rear switch, it doesn't respond. The following are the main types of issues. Please select the appropriate troubleshooting procedure based on the actual symptoms.
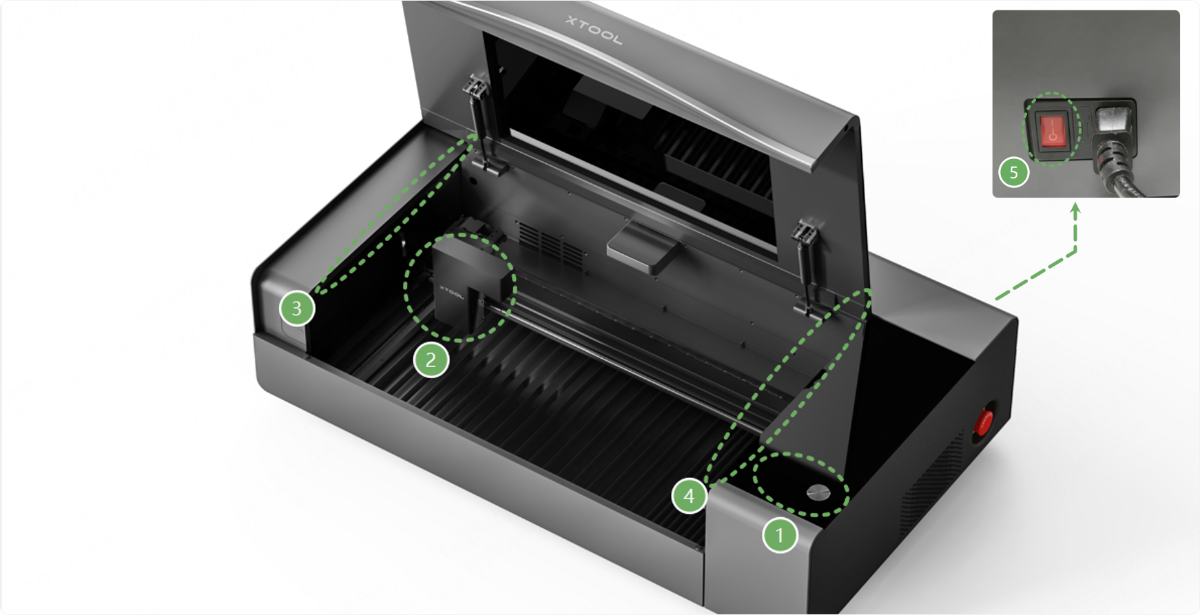
Issue 1: No response to the device
After the device is turned on, it shows no response:
- The progress bar does not work (①)
- The laser module does not reset (②)
- The fill lights do not turn on (③④)
- The power switch light does not illuminate (⑤), etc.
Issue 2: Only the power switch light is on
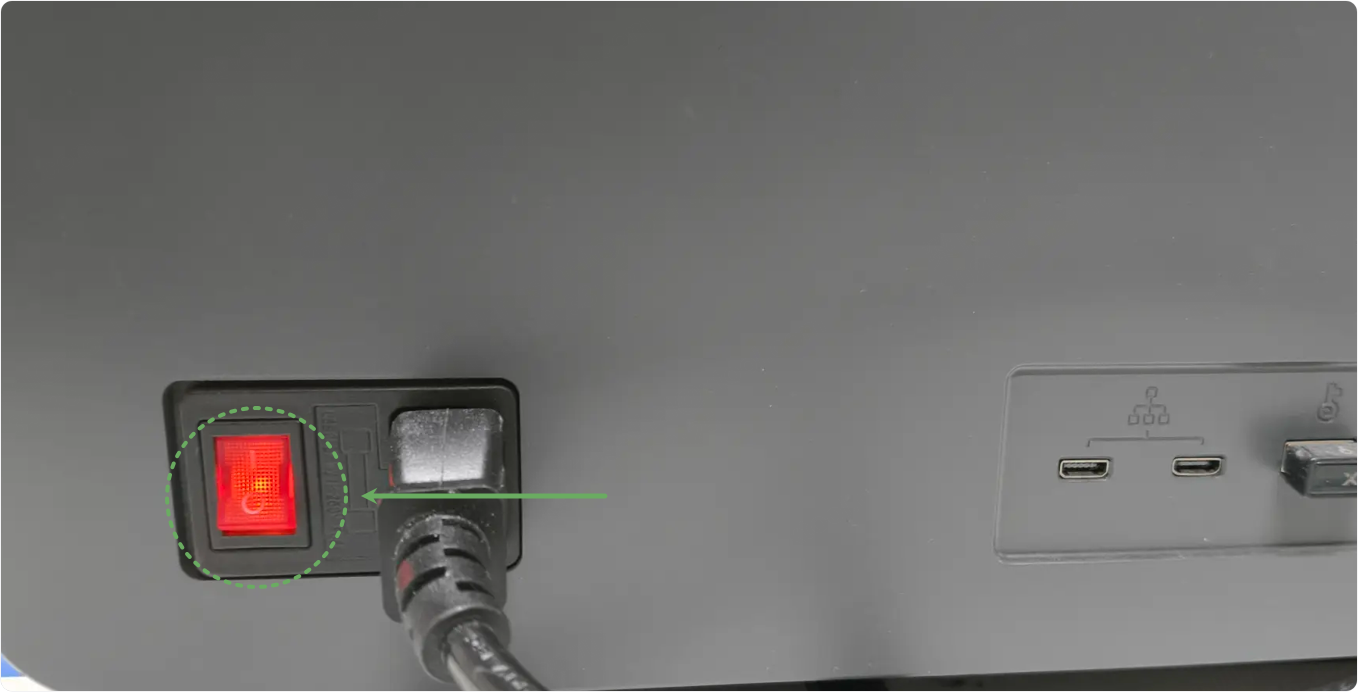
After the device is turned on, only the power switch light is on. Still, none of the other parts are functioning: the fill light is off, the progress bar does not work, and the laser module does not reset.
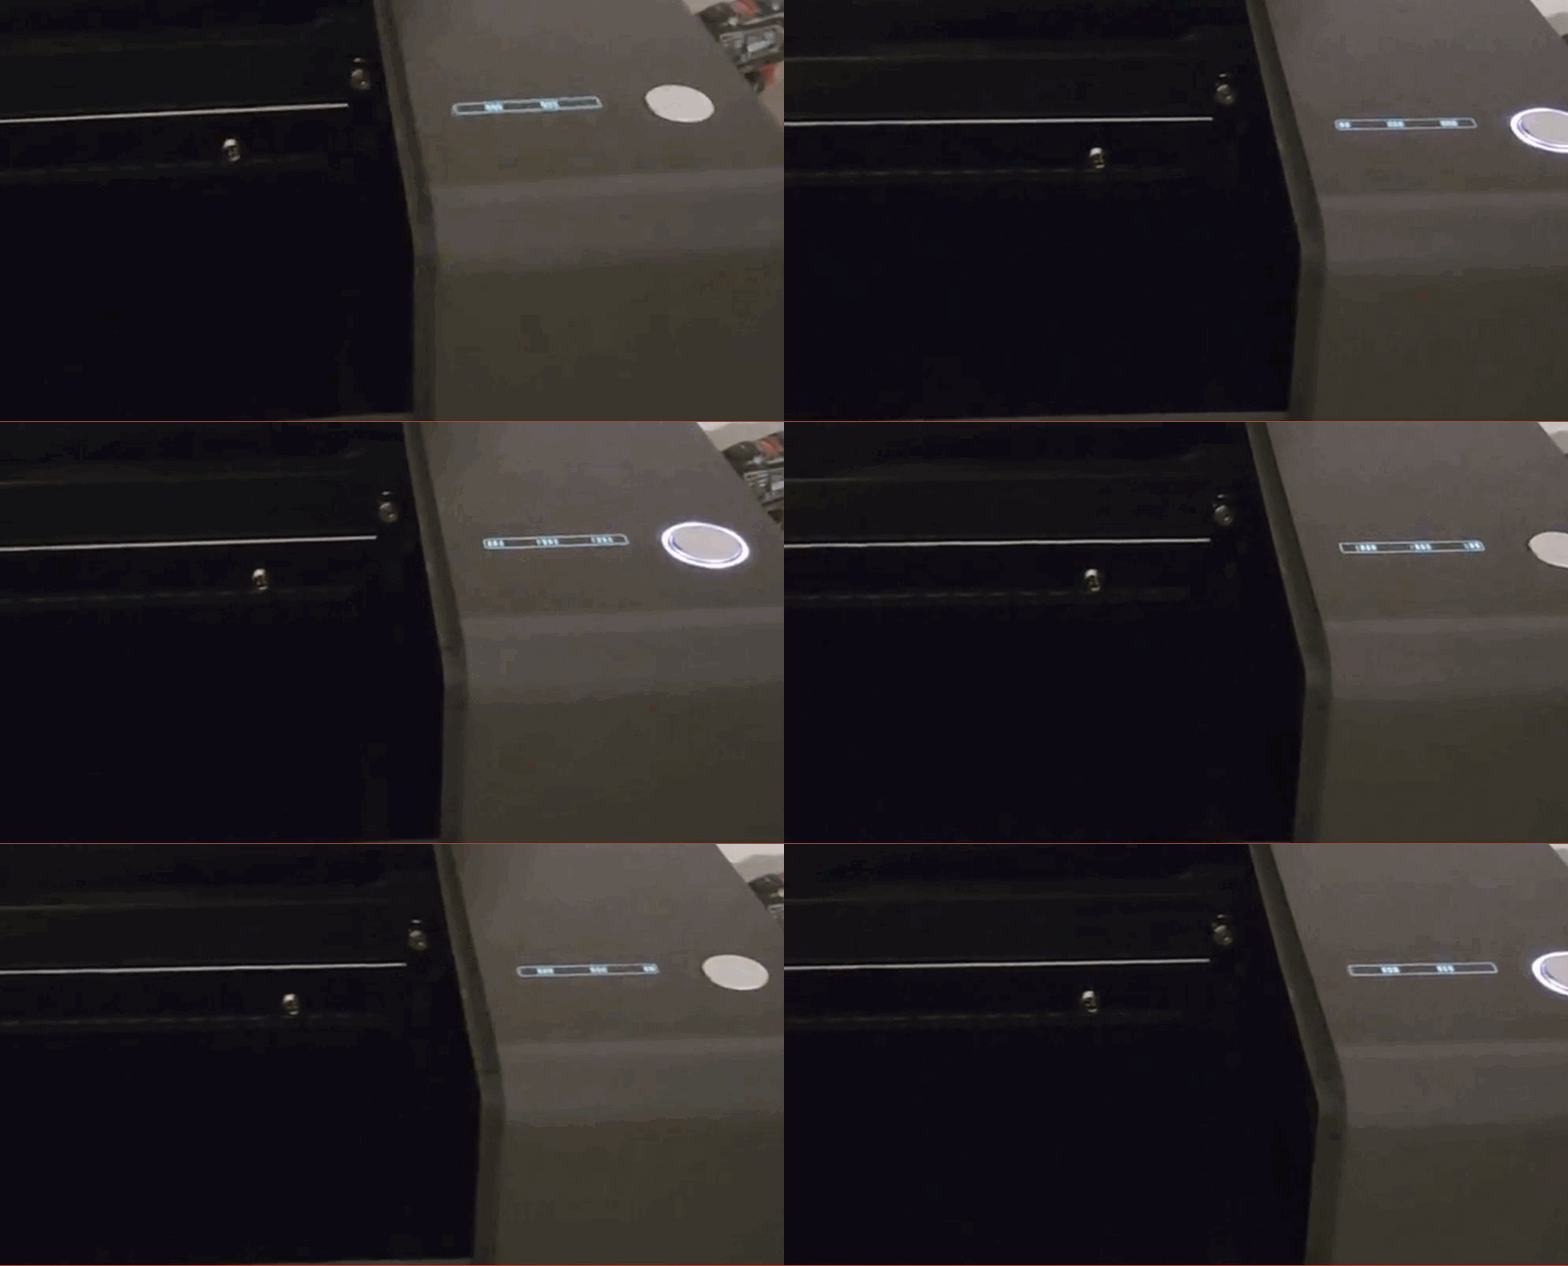
Issue 3: Stuck on the progress bar
After the device is turned on, some parts work normally, but the process gets stuck on the screen, and the device is unable to fully start up.
Important notes
- Do not remove or install parts while the power is on.
- If you need to use a multimeter to test components, ensure that you have the necessary skills and resources to perform the test and operate the device safely before processing.
Possible causes
- The power cable is not plugged in properly.
- Emergency stop switch malfunction
- Fuse blown
- Power switch supply malfunction
- Main control board failure
Troubleshooting procedures for issue 1
1. Check the power cable
Check that both ends of the power cable are properly plugged in. If you have another power supply, replace the power cable for testing:
- If the device returns to normal operation, it means the power cable is damaged.
- If the device won't turn on, proceed to the next step.
2. Replace the fuse
(1) Unplug the power cable.
(2) Use a flathead screwdriver or another tool to pry open the fuse box next to the power switch.
(3) Check the fuse:
- If the fuse has not blown, reinstall it and check for other problems.
- If a fuse blows, replace it with a spare fuse or purchase a new one.
Spare Fuse: Check the fuse box for a spare fuse, as shown below.
- If there is one, use it to replace the blown fuse.
- If there is no spare fuse, please purchase a replacement fuse rated at 250V 10A.
Troubleshooting procedures for issue 2
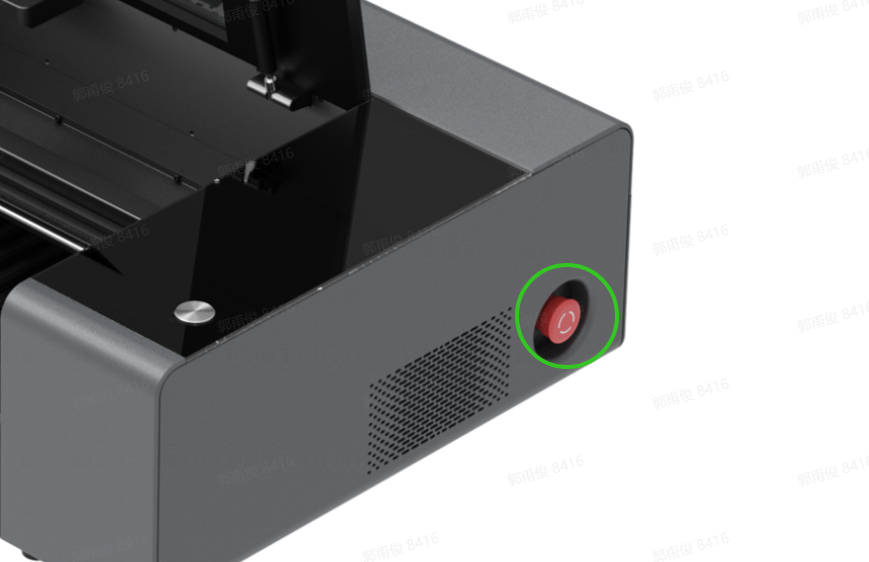
1. Reset the emergency stop switch
(1) Check if the emergency stop switch on the right plate (shown in the image below) is triggered.
(2) Reset the switch by turning it clockwise.
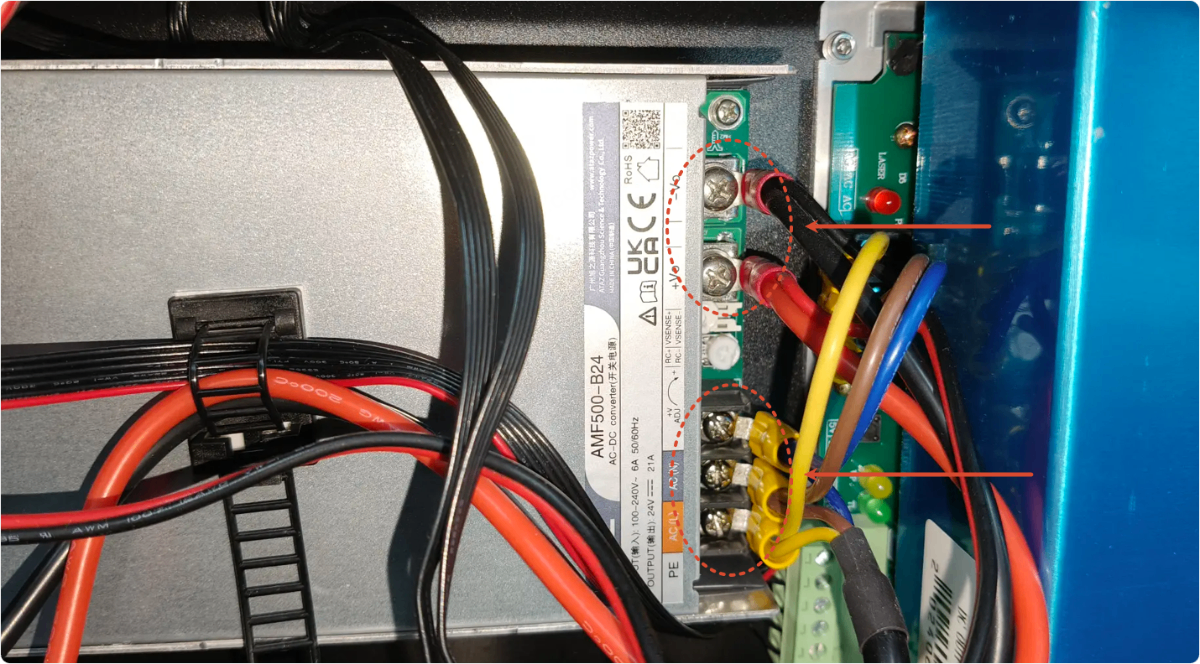
2. Check the connectors of the power switch
(1) Disconnect the power supply from the device.
(2) Follow the video tutorial to remove the right panel.
- P2:Remove the Casing of xTool P2 Laser Engraver - xTool Support Center
- P2S:Assemble & Disassemble the Right Plate for P2S - xTool Support Center
(3) Check whether the connectors of the power switch are loose or dropping.
- If they are loose or dropping, secure them with a flathead screwdriver.
- If not, check for other issues.
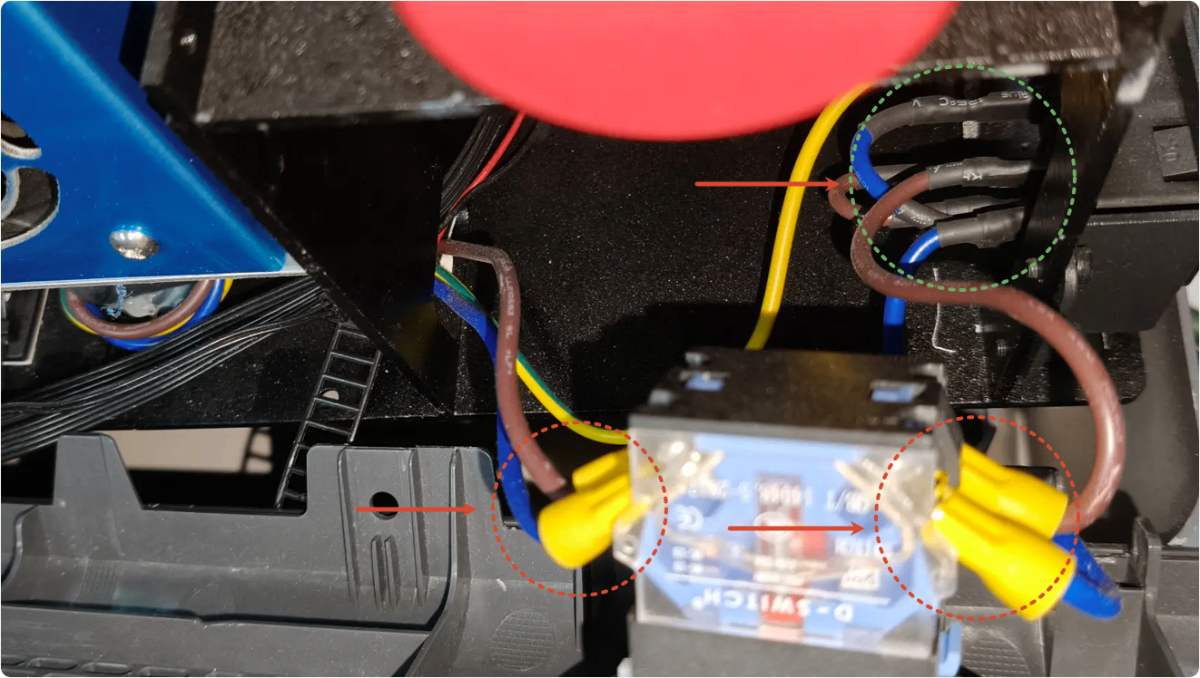
3. Check the connection cable of the switching power supply
(1) Disconnect the power supply from the device.
(2) Check whether the connection cables for the power switch, emergency stop switch, and power supply have come loose:
- If so, please try reconnecting.
- If not, check for other issues.
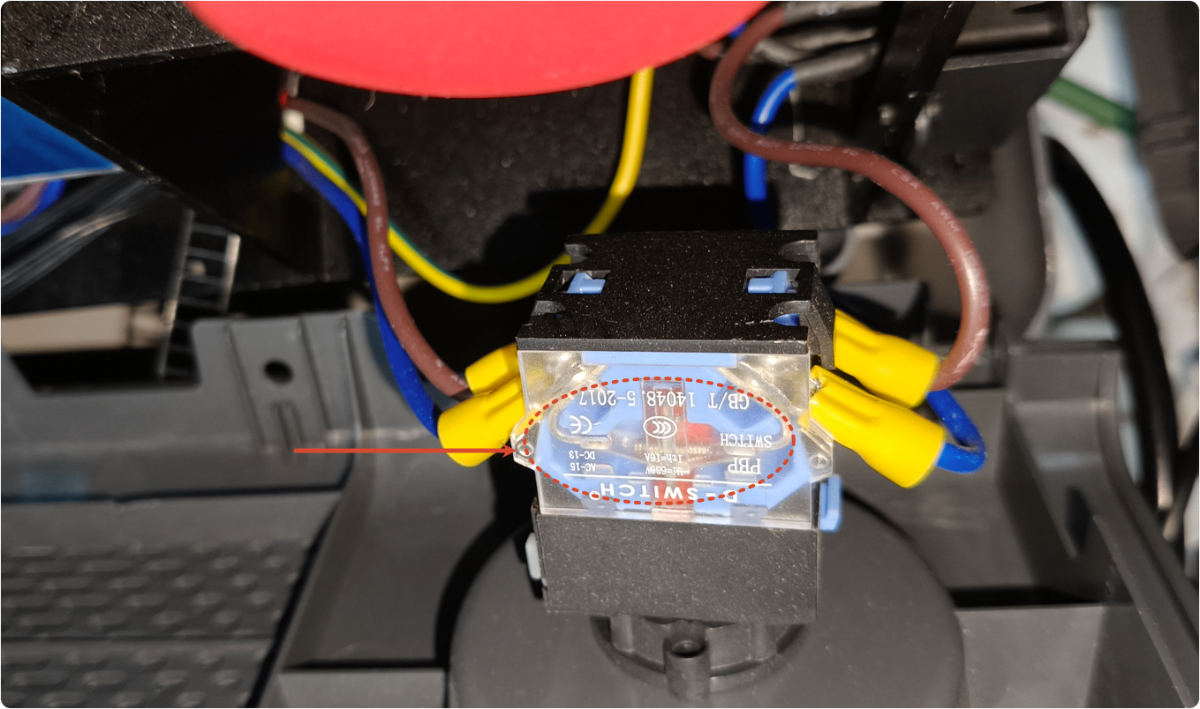
4. Check the emergency stop switch
(1) Disconnect the power supply from the device.
(2) After manually turning off the emergency stop switch, rotate it open again and repeat the operation several times. Observe whether the spring piece inside the switch can be toggled normally.
- If the emergency stop switch malfunctions and cannot be pressed or turned open normally, replace the emergency stop switch.
- If the emergency stop switch functions properly, check for other issues.
5. Check the indicator of the switching power supply
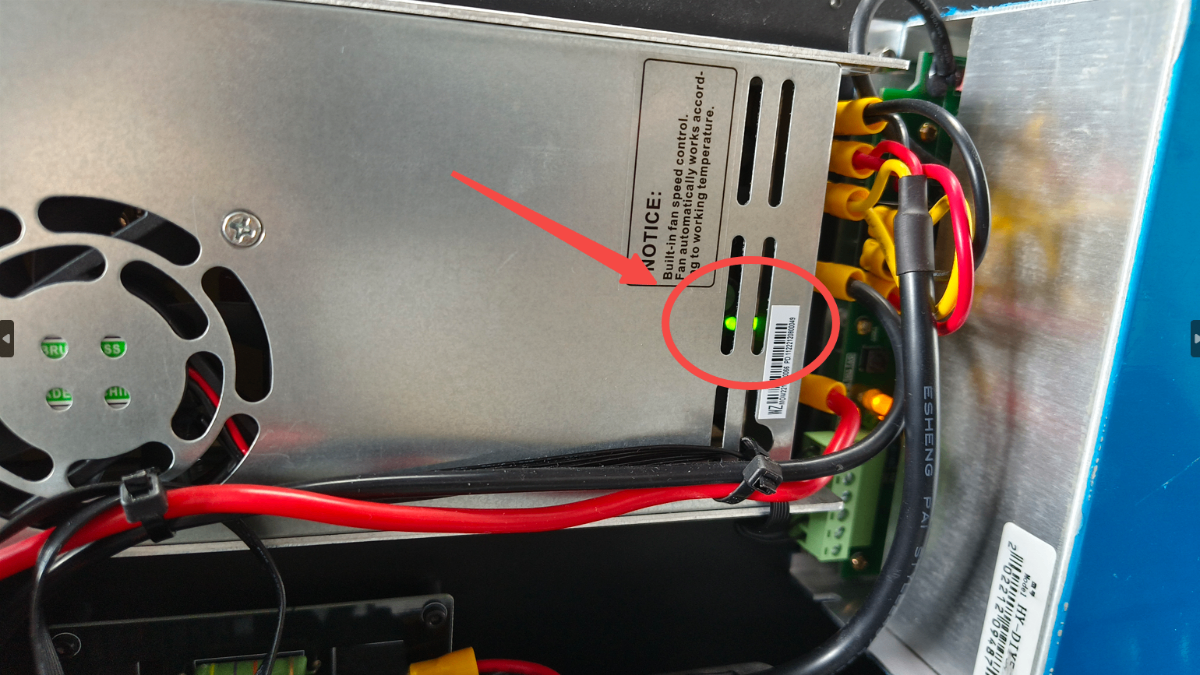
Restart the device. Observe whether the indicator of the switching power supply lights on normally.
- If the light does not come on as expected, the switching power supply is faulty. Please replace the switching power supply.
- If the light comes on normally, please check for other issues.
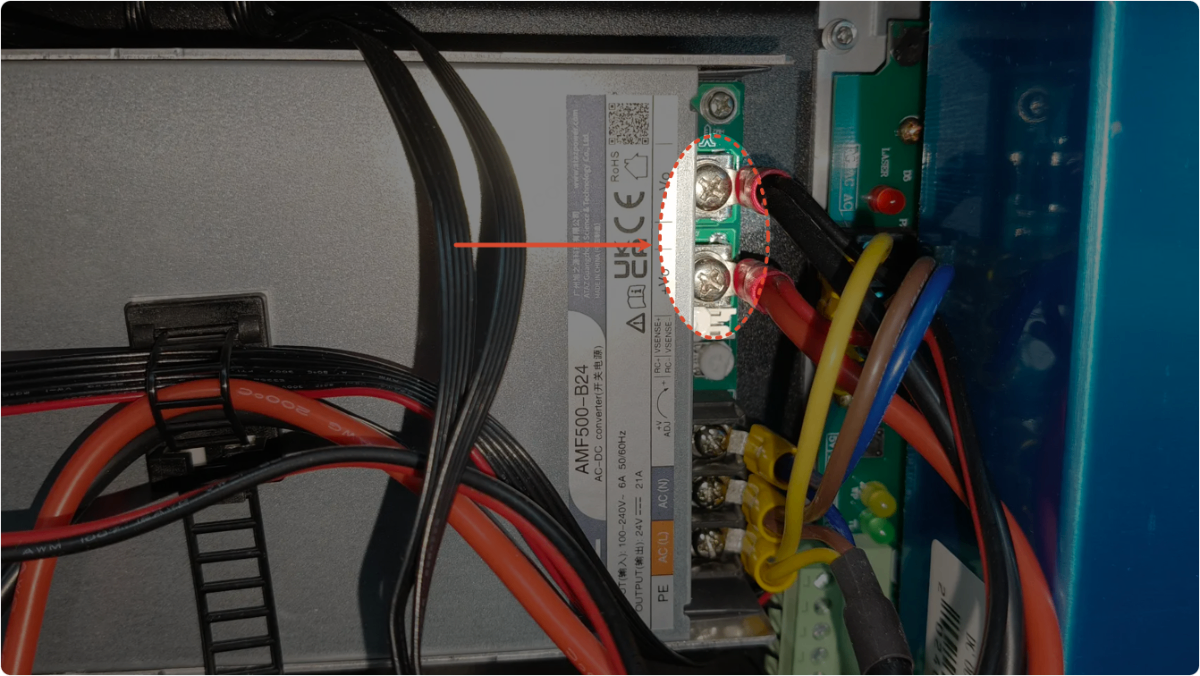
6. Check the power supply output
Make sure you are able to complete this step on your own; if not, skip this step.
(1) Turn on the device.
(2) Use the DC voltage measurement range on a multimeter to check whether the output voltage of the switching power supply is normal:
- If the output voltage is around 24V, the power supply functions normally. Please check for other issues.
- If the output voltage is very low (it is usually close to 0V in the event of a fault), replace the switching power supply.
Troubleshooting procedures for issue 3
Replace the main control board
If the progress bar gets stuck, it indicates that the main control board firmware may be corrupted. Please replace the main control board.
If None of the Above Works
If you have any questions, collect the troubleshooting steps you have taken and the product SN, shoot a video of the issue, and contact us for further assistance at: support@xtool.com.