
Before You Start
You will need:
- O1 Omni Printer
- xTool Studio (V1.9 or later recommended)
- xTool lenticular card
- A sheet of white photo paper or other white material for printing the test image
The whole process takes three steps: measure the card's LPI → place the card → set up the element in Studio and print. Step 1 only needs to be done once per batch of cards.
Step 1: Measure the Real LPI of Your Lenticular Card
This chapter describes how to measure the real LPI of the card in your hand using a test image. You only need to do this once per batch of cards.
LPI (Lines Per Inch) is the number of lenticules per inch on the card. Studio uses this value to slice your images into thin strips and interlace them, so the LPI you enter must match the actual card. An error of 0.1 LPI causes visible banding, and the images will not switch when you tilt the card.
xTool lenticular cards usually measure around 75.1 LPI. It varies slightly between batches, so always use the measured value.
Print the Test Image
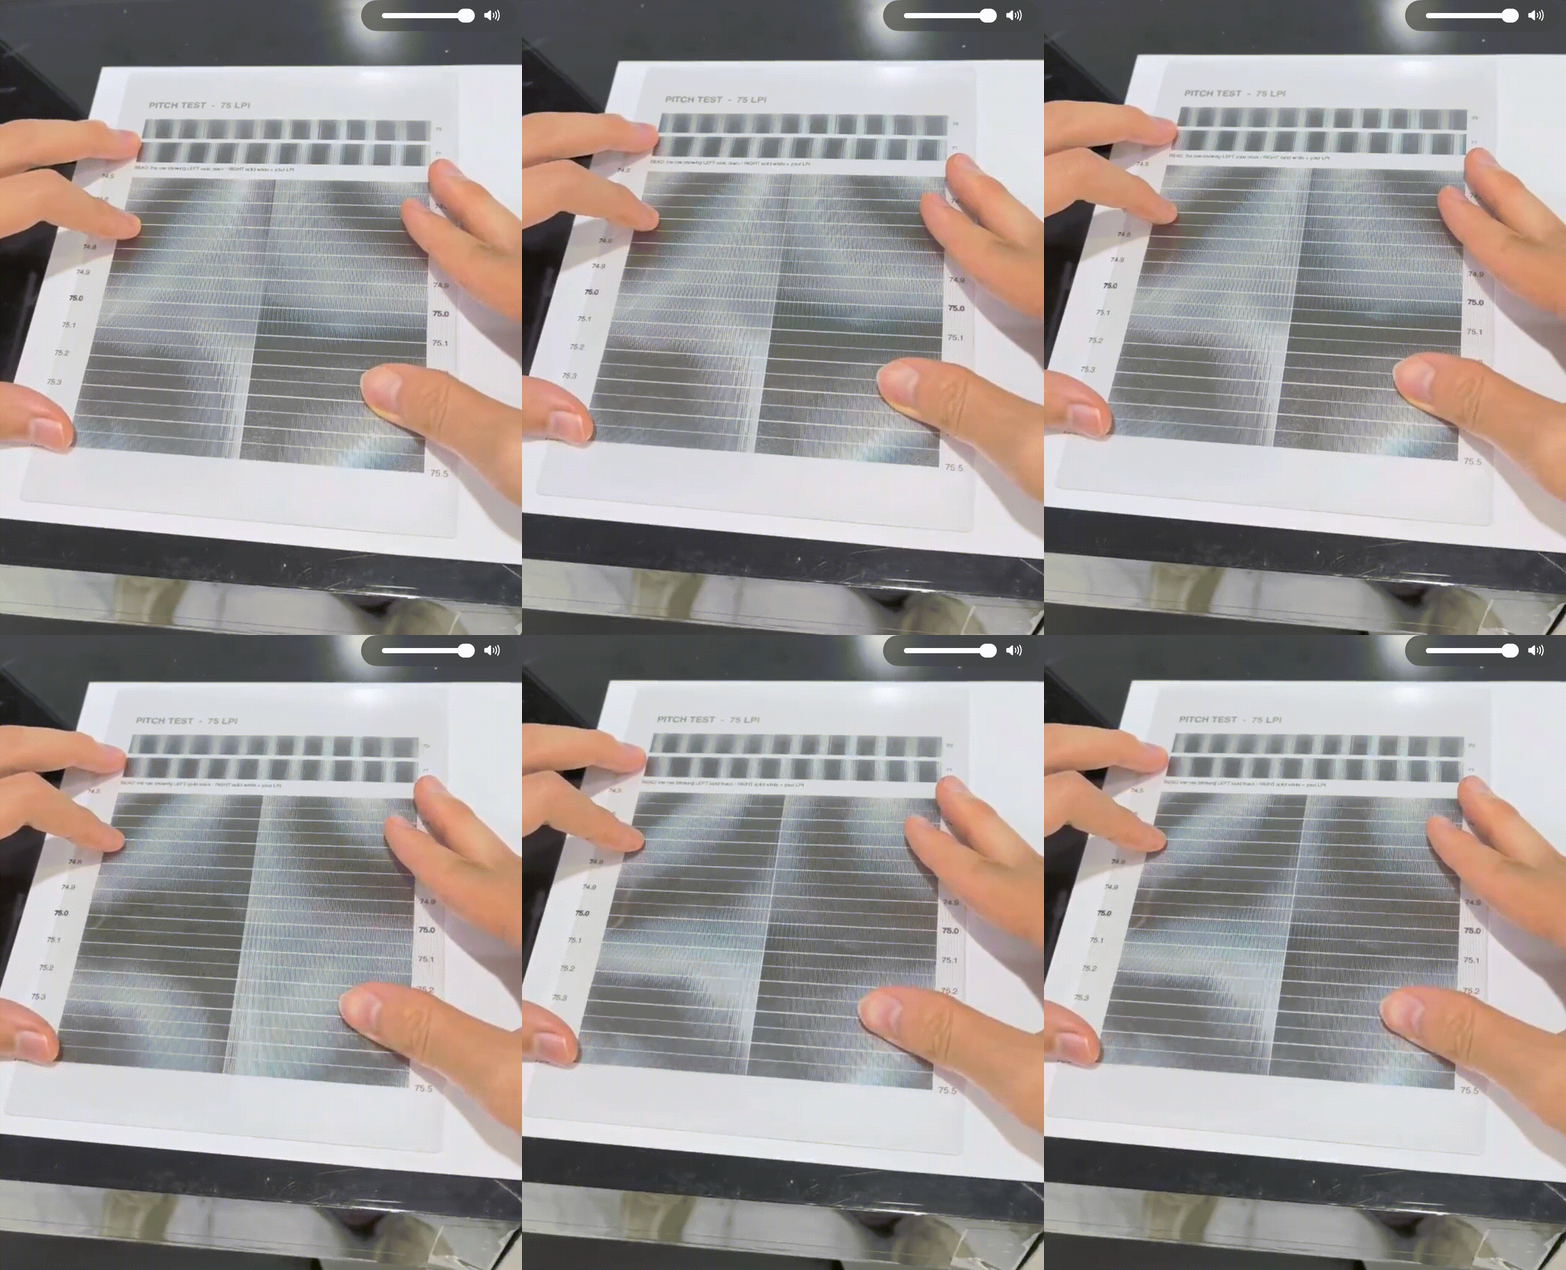
- Download the image below, import it into Studio, set the size to 160 × 178 mm, and print it.

- We recommend rotating the image 90° before printing for a better result.


Read the LPI
Look at the card straight on with your eyes. Do not read it through a phone camera.
- After printing, peel off the protective film. Place the card ridged side down on the test image and press it firmly with both hands so it sits tight against the paper. Then align it with the top two rows.
- When aligned, the stripes in the top two rows look parallel. If they do not, rotate the card until they do.

- Once the top two rows are aligned, look at the rows below and find the row that is solid black on the left and solid white on the right. The number next to that row is your card's LPI.
- If you cannot find such a row, shift the card slightly left or right while keeping the top two rows aligned, as shown below:
- xTool lenticular cards usually measure around 75.18 LPI, so start looking from the 75.1 row.
- Write down this number. You will enter it in Step 3.
Step 2: Place the Lenticular Card
This chapter describes how to place the lenticular card on the platform.
- Clean the platform. Remove any adhesive residue, dust, or other objects.
- Peel off the protective film and lay the card flat on the platform with the ridged side facing down.
- The lenticules must run parallel to the X axis (the left–right direction of the machine). If they are not parallel, the images will not switch cleanly and you will see ghosting.
Not sure whether it is parallel? Print one or two reference lines on the platform first:
- Draw a thin white line on the canvas, at least as long as the card. Set the white ink layer to 1 and print it onto the platform.
- Place the card ridged side down and press it firmly along the white line.
- If the card is parallel to the X axis, the whole white line stays clearly visible. If the card is tilted, the line breaks up into dashes. Rotate the card until the whole line is clear.

Step 3: Set Up the Element and Start Printing
This chapter describes how to generate the lenticular image in Studio and print it onto the card.
- Open Studio and connect your O1 Omni Printer. Click Applications on the left and select Lenticular Image Editor.

- Choose a scenario. Each scenario suits a different number of images:

- Image Swap: 2–5 images. The image switches as you tilt the card.
- Printable Animation: 5–12 sequential frames. Plays like an animation as you tilt the card.
- 3D Effect: 8–20 images of a single object from different angles. Keep the angle change within 45°.
- Free creation: 2–20 images, arranged freely.
- Switch the card size to custom, then enter the actual card size (mm) and the LPI you measured in Step 1 (for example 75.15). Do not simply enter 75.
- Import your images and preview the result.
- Move the generated element to where the card sits on the canvas.
- Start printing. When it finishes, take the card off and flip it over to view the result.
Troubleshooting
Check the symptom first, then go back to the matching step:
- Heavy banding or a moiré pattern: the LPI is wrong. Go back to Step 1 and measure again.
- Images do not switch cleanly and overlap each other: the lenticules are not parallel to the X axis. Go back to Step 2.
- Nothing switches when you tilt the card: the LPI is far off, or the direction in Step 3 is wrong.
- Everything looks blurry: the card was not pressed flat, or the element does not line up with the card.

