
Chapter 1 · Getting Started: Connect Your Device
1.1 Before You Start
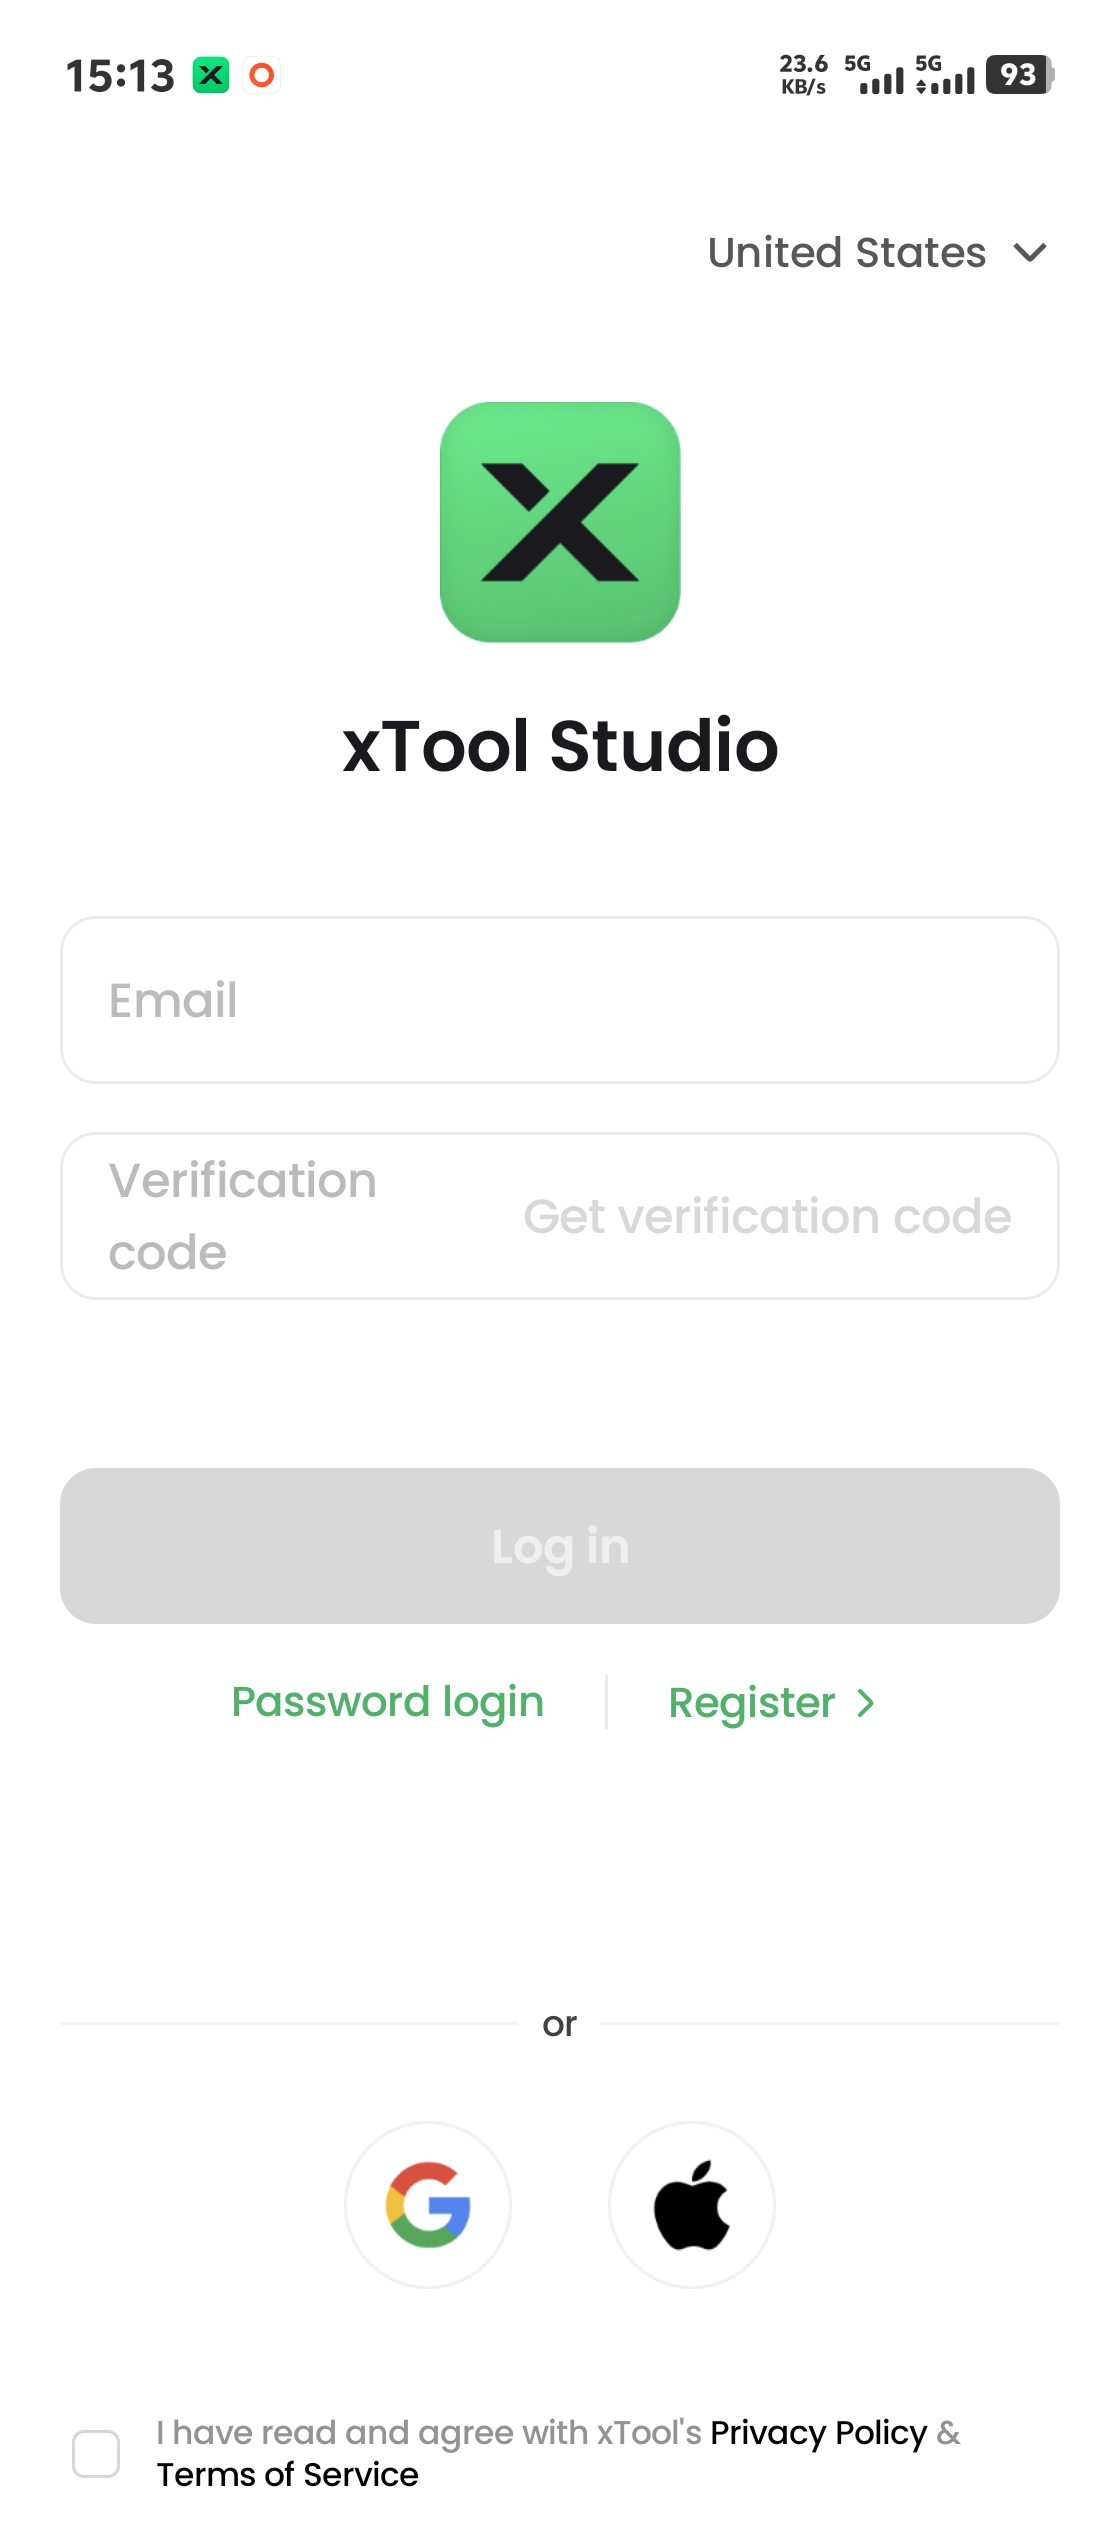
- Install the xTool App on your phone and log in to your xTool account (login is required before connecting a device)
- Download the App: https://support.xtool.com/software-download
- Power on the device
- Turn on Bluetooth on your phone and connect to a Wi-Fi network with internet access.
1.2 Connect and Bind
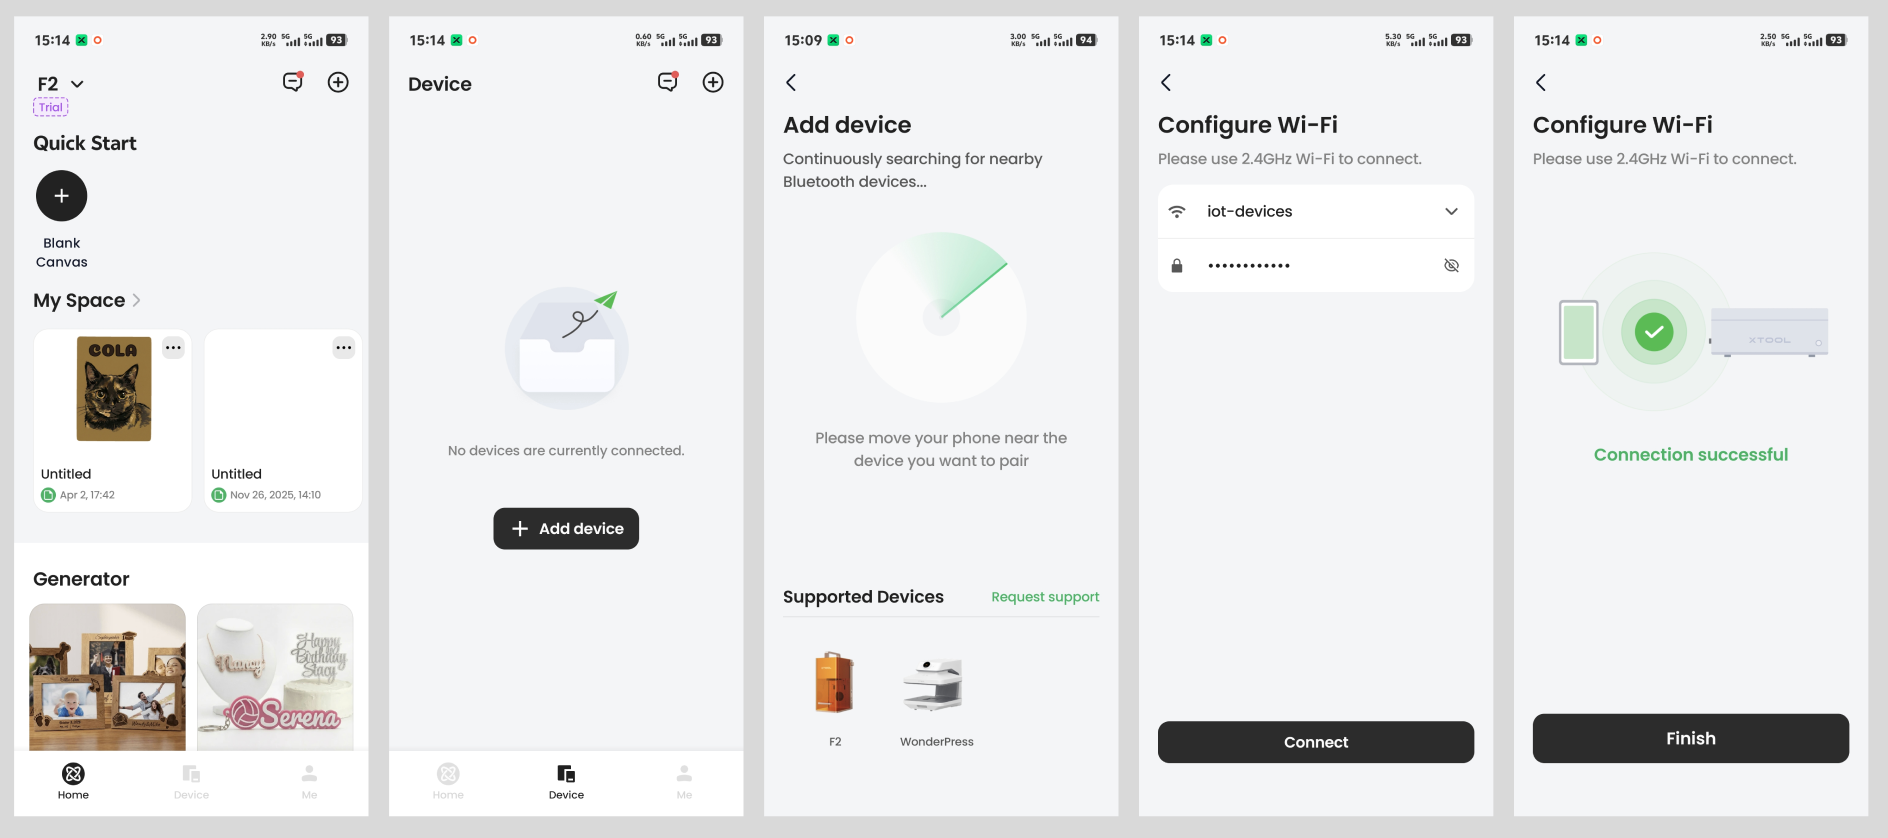
- Open the App and tap + (Add device) in the top-right corner of the home page.
- The App searches for nearby devices via Bluetooth. Select your WonderPress from the list.
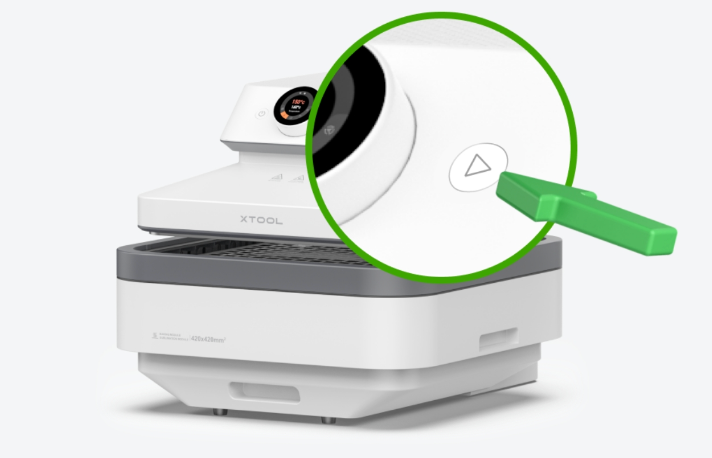
- If the device is not found, press the device's start button for 3 seconds to turn on the device's Bluetooth.
- Follow the prompts to configure Wi-Fi for the device (select a network and enter the password). Once set up, the device stays connected to the App over Wi-Fi, and Bluetooth is no longer needed. Note: only 2.4GHz Wi-Fi is supported.
- The device is automatically bound to your xTool account. After binding, device status and push notifications are linked to this account.
- If the Wi-Fi setup fails, follow the on-screen instructions to troubleshoot.
1.3 Open Your Device
- If there is only one device under your account, the App opens the device home page directly.
- If there are multiple devices, you'll see the device list first. Each card shows the device icon, name, online status, current mode, and temperature (mode and temperature are hidden for offline devices). Tap a card to open that device.
- The list is sorted by binding time — the earlier a device was bound, the higher it appears.
- Tapping an offline device shows the message “Device offline. Please check the device connection.”
Chapter 2 · Interface Overview: Device Home
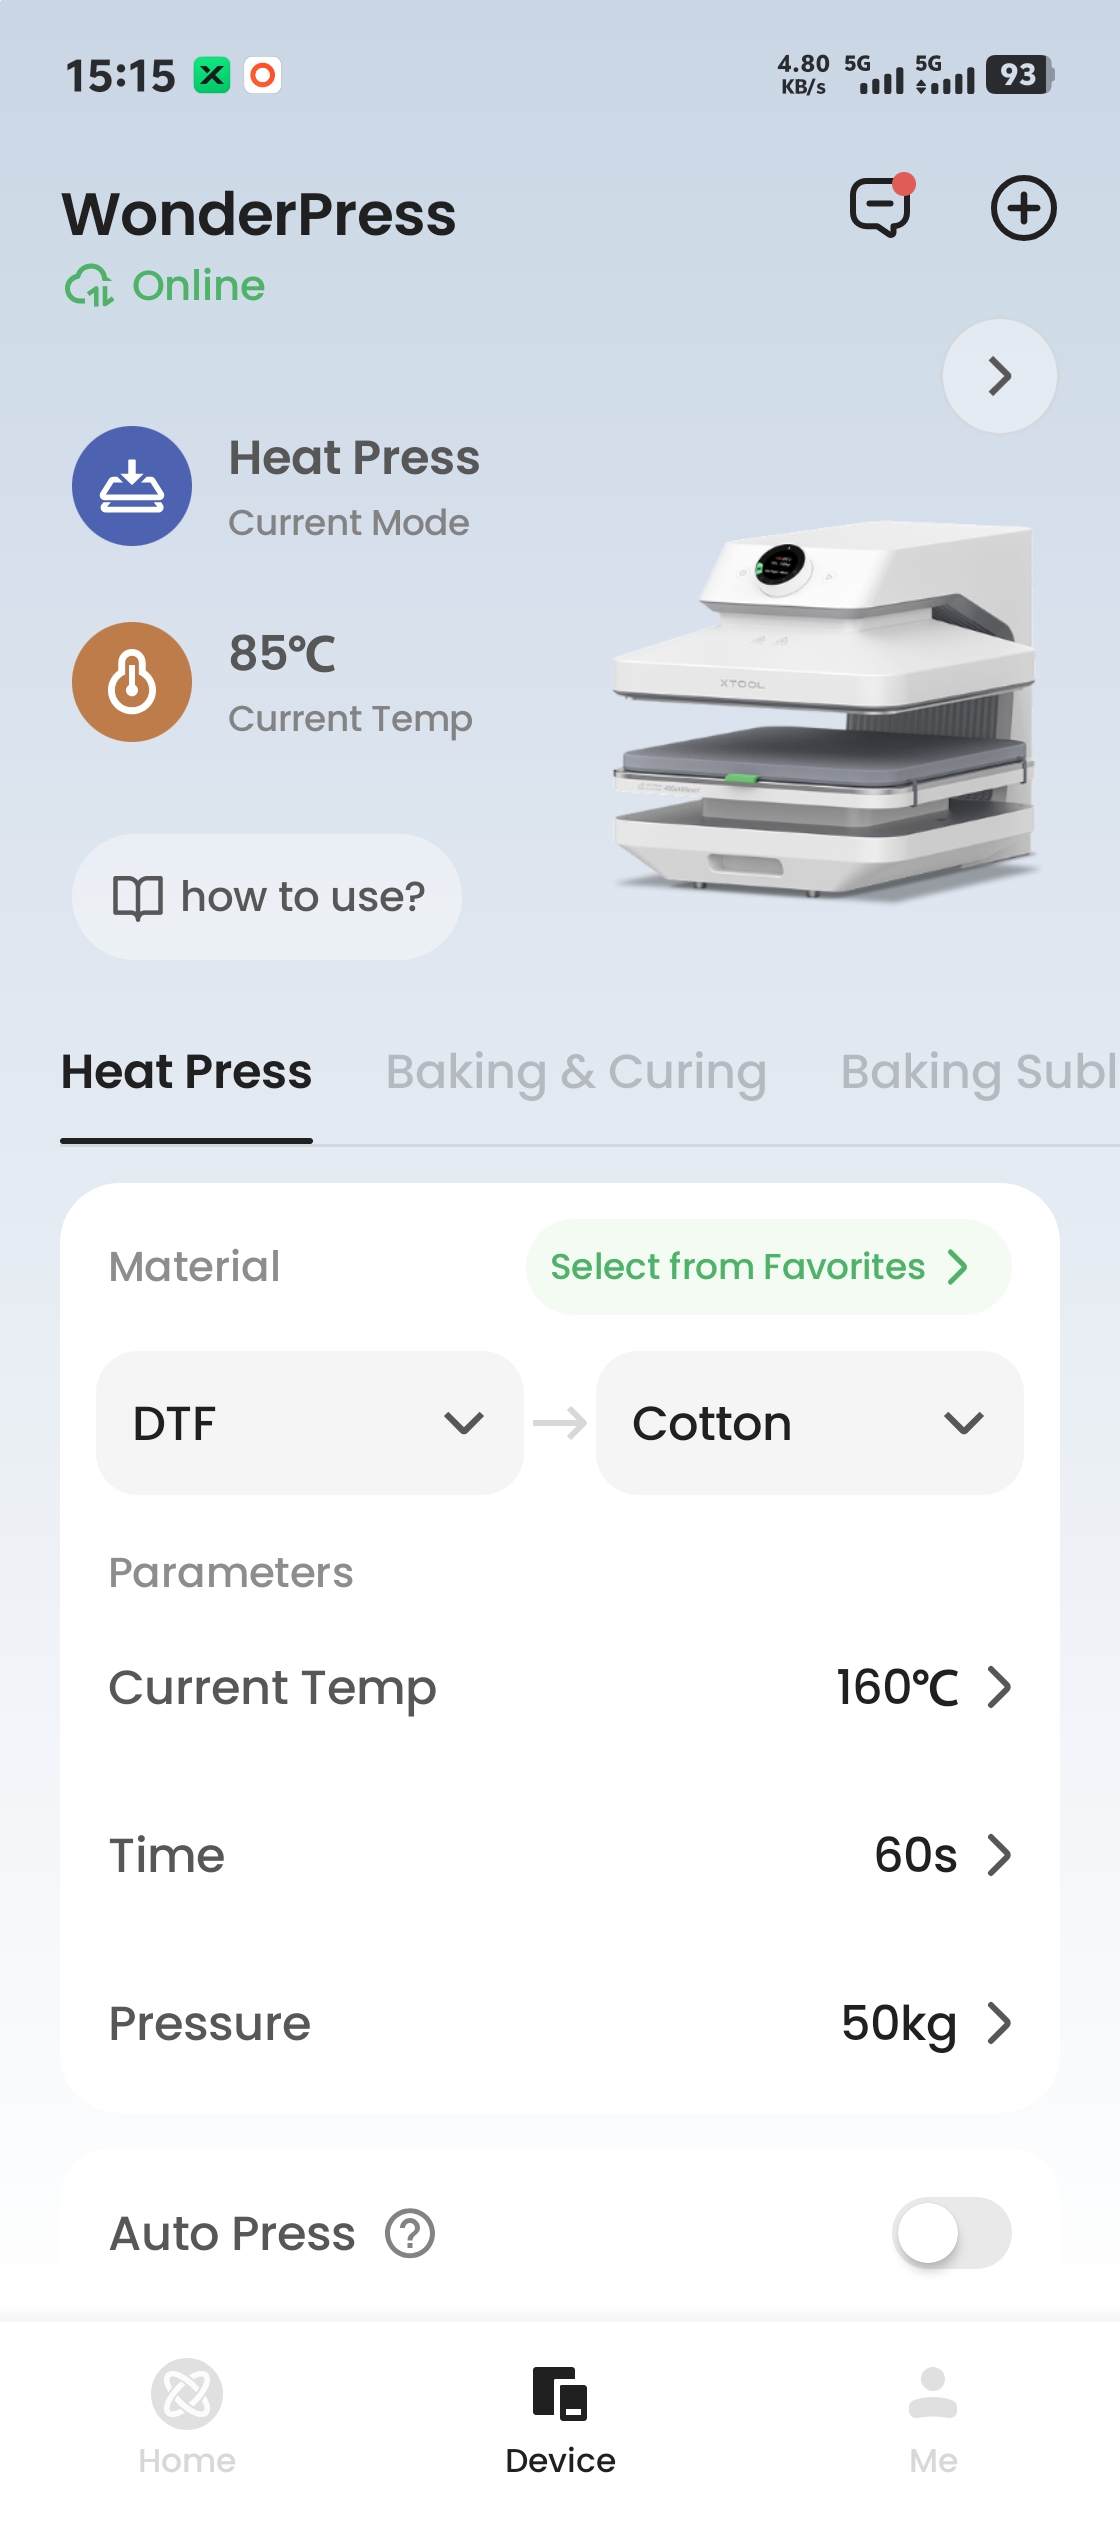
No. | Area | Description |
|---|---|---|
1 | Device name | Shows the current device's name at the top |
2 | Connection status | Shows whether the device is online or offline |
3 | Messages | View device notifications |
4 | Add device + | Bind more devices |
5 | Settings entry | Opens the device settings page |
6 | Current mode + how to use? | Shows the current processing mode; each mode has a how to use? entry with an illustrated guide |
7 | Current temp | The device's real-time heating temperature |
8 | Device image | Shows an illustration of the current device |
9 | Mode tabs | Switch between the 5 processing modes |
10 | Material & parameters | Material selection, parameter settings, favorites, and Auto Press |
When the device is offline:
- Mode, temperature, and parameters are shown as “--”.
- While offline, buttons such as parameter settings, material selection, and Auto Press do not respond, and the message “Device offline. Please check the device connection.” appears. Check the device's power and network, then try reconnecting.
Chapter 3 · Complete Your First Setup
3.1 Select a Processing Mode
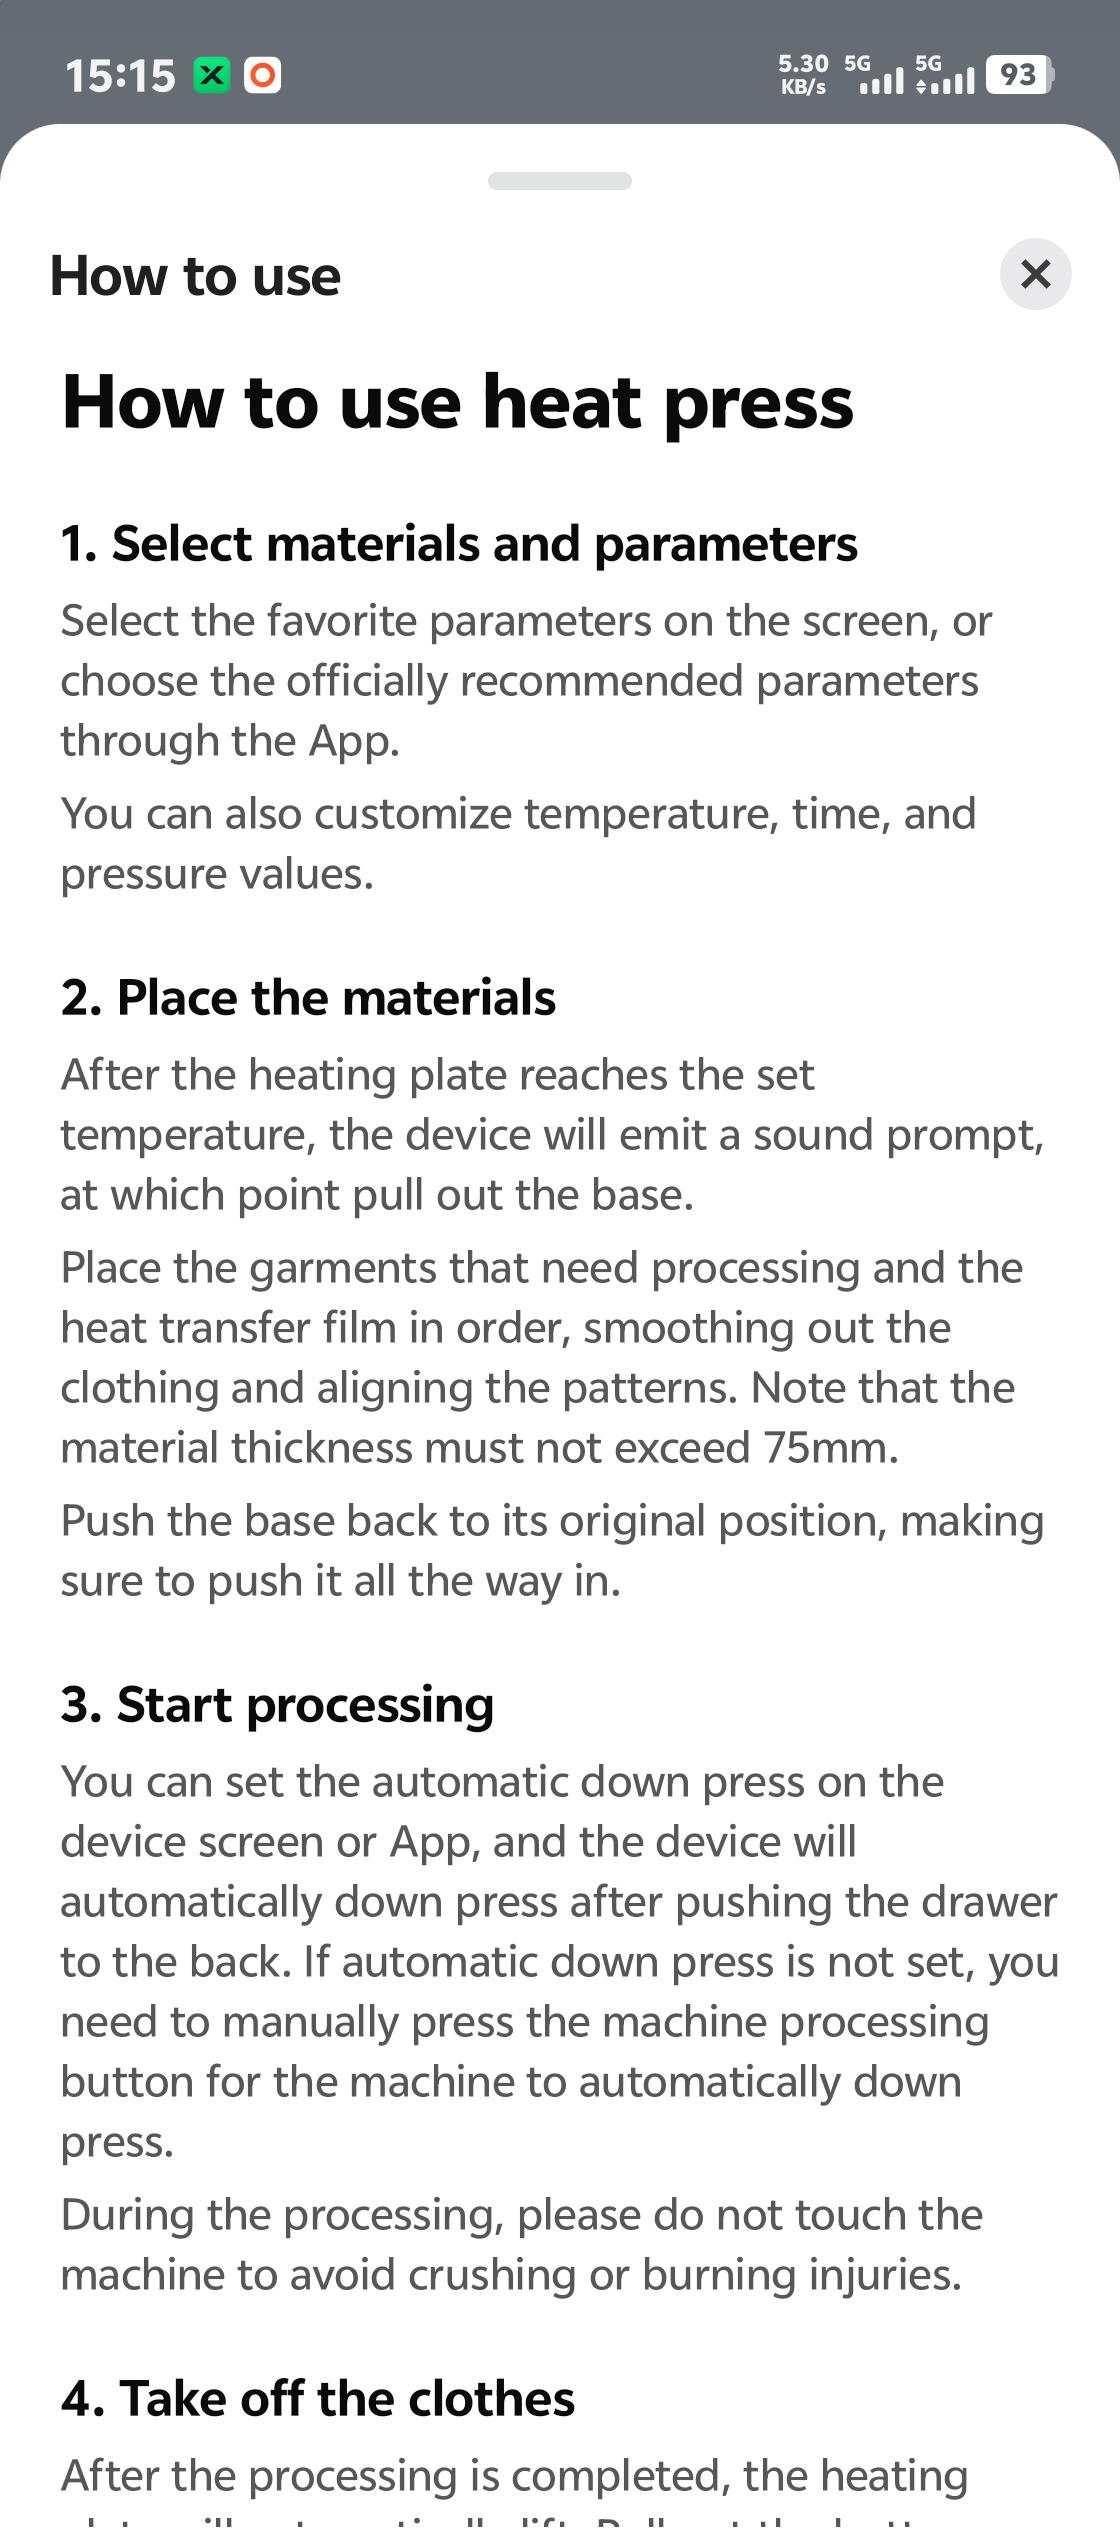
The mode tabs on the home page show 5 modes from left to right, with Heat Press selected by default:
Mode | What it's for |
|---|---|
Heat Press | Press transfer film and similar materials onto T-shirts, boards, and other items |
Baking & Curing | Heat materials for baking or curing |
Baking Sublimation | Sublimation transfer on items that need baking |
Vacuum Forming | Heat and soften a plastic sheet, then vacuum-form it snugly over an object |
Vacuum Sublimation | Sublimation transfer on vacuum-formed items such as mugs |
Next to each mode there is a how to use? entry — tap it to see how that mode works.
3.2 Select Materials
Tap the material area to open the Select Material dialog. Different modes require different materials:
Mode | Materials to select |
Heat Press | Material: goes on top — the transfer material (e.g., DTF film, HTV) Substrate: goes underneath — the item being transferred onto, such as clothing or canvas bags |
Baking & Curing | A single material |
Vacuum Forming | A single material |
Baking Sublimation | Sublimation substrate + transfer paper |
Vacuum Sublimation | Sublimation substrate + transfer film |
- Materials are grouped by type: switch the type at the top, and the list below updates accordingly.
- Each material card shows its name, image, and recommended parameters (Heat Press: temperature/time/pressure; Vacuum Forming: temperature/suction). Only one material can be selected at a time.
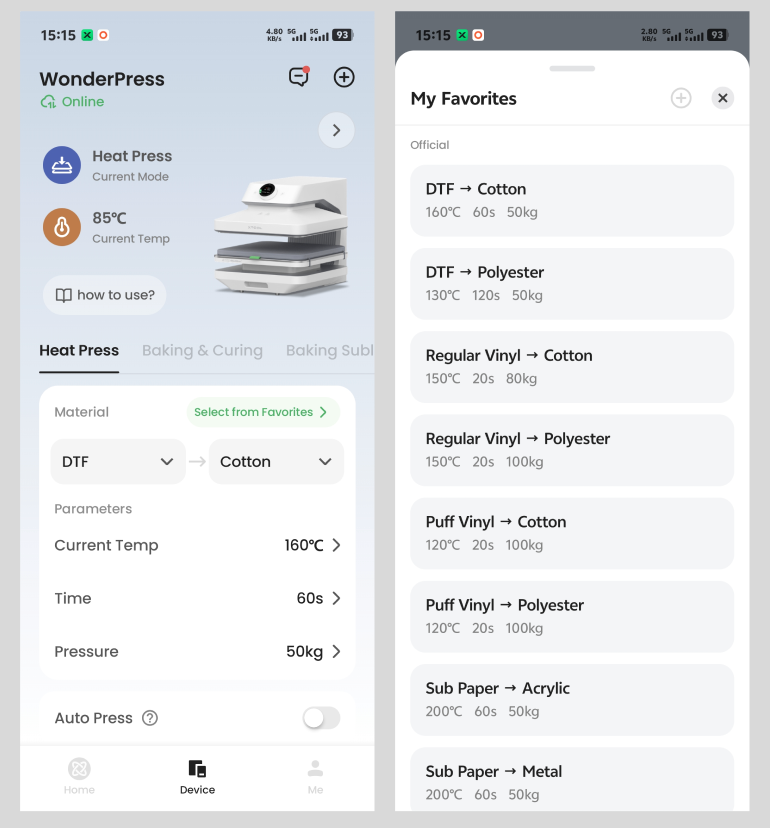
- In Heat Press mode, after selecting both, the material area on the home page shows them combined as “Material → Substrate” (e.g., DTF → Cotton).
Parameters stay in sync between the App and the device screen:
- Change the material or parameters on the device screen and the App updates; change them in the App and the screen follows.
- The device screen keeps a set of “frequently used materials” for quick selection. If you select a material outside this set in the App and confirm, it replaces the current frequently used material on the screen.
3.3 Confirm and Adjust Parameters
- After selecting an official material, the parameters are filled in with the official recommended values (Heat Press: Temp / Time / Pressure; Vacuum Forming: temperature/suction). In most cases the recommended values work fine.
- Tap a parameter to open the settings dialog and fine-tune it manually.
- Messed up the values? In Heat Press and Vacuum Forming modes, a Reset button appears when the current material is an official one. Tap it and confirm to restore the official default parameters.
3.4 Auto Press
Heat Press and some other modes have an Auto Press switch (not available in Vacuum Forming):
- On: after placing the material, push the base in all the way. The machine presses down automatically and starts processing (if the temperature hasn't reached the target yet, it presses down once it does).
- Off: you press the handle down manually and hold the pressure.
- Beginners should keep it on for steadier pressure and more consistent results.
3.5 Start on the Device
Once the parameters are set in the App, go to the device and follow the on-screen instructions to start processing.
Chapter 4 · Work Faster: Favorites and Custom Parameters
This chapter describes how to save your tried-and-tested “recipes” as favorites and reuse them with one tap.
4.1 When to Use Favorites
Official materials come with recommended parameters that work in most cases. If you've dialed in a good set of parameters for your own material (say, the best temperature and time for a third-party HTV), save it as a favorite and reuse it next time.
4.2 Save and Apply Favorites
- Tap Select from Favorites on the home page to open the favorites list.
- Each favorite shows its name and parameters (temperature/time/pressure). Tap one to apply it; the dialog closes automatically.
- To delete a favorite: long-press the item on Android, or swipe left on it on iOS.
- Heat Press and Vacuum Forming each have their own independent favorites list; the order matches the device screen.
- What gets saved: a Heat Press favorite = the material + substrate combination and its parameters; a Vacuum Forming favorite = a single material and its parameters.
4.3 Create a Custom Parameter
- The + Add custom parameter entry is fixed at the bottom of the favorites list.
- Enter a name and the parameter values, then save. Names can be up to 45 characters and support letters, numbers, and some special characters only (a hint appears below the input box).
- After applying a custom parameter, the material area title shows Custom · [name], with a Use Official button on the right to switch back to official materials.
4.4 Favorites Limit
Favorites and custom parameters are capped at 10 in total. When the list is full, saving another one brings up a replacement list — pick an old favorite to replace.
Chapter 5 · Stay Accurate: Vacuum Height Calibration
5.1 When to Calibrate
If the film surface heats up slowly in Vacuum Forming mode and struggles to reach the target temperature, try calibrating to improve it.
5.2 Calibration Steps
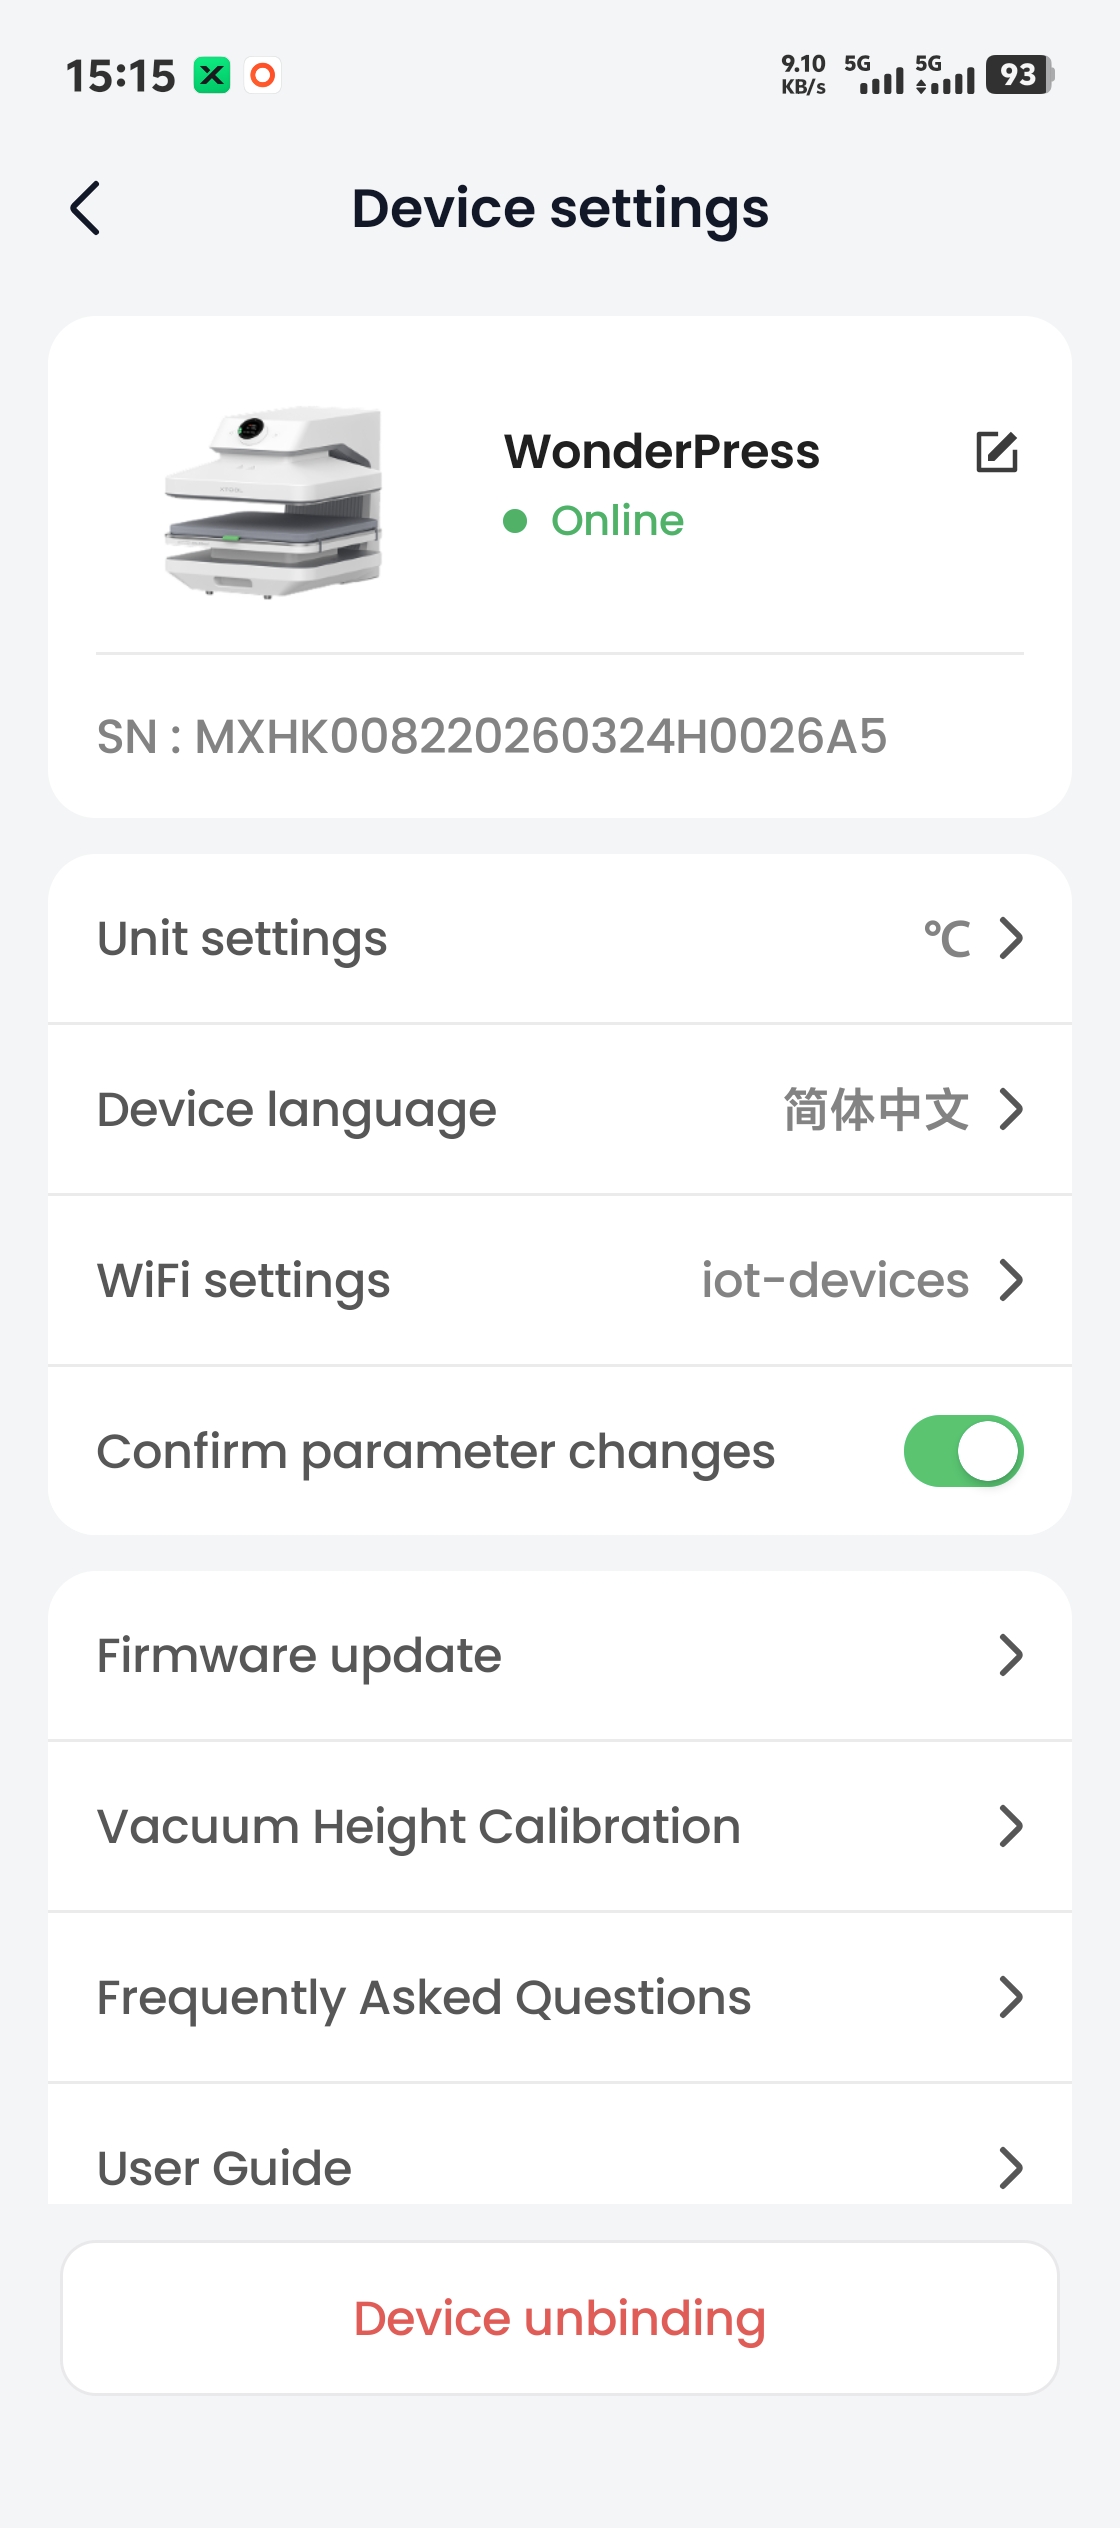
- Entry: go to Device settings → Vacuum Height Calibration.
- Get Ready: install the vacuum module in the device, lift the vacuum frame to its top position, then tap Start Calibration.
- Auto calibration: tap Start Auto Calibration. The device adjusts the heating plate height automatically within a few seconds — no knob operation needed.
- Done: the calibration value is saved to the device and applied automatically next time. Tap Done to return to settings.
5.3 If Calibration Fails
- The most common cause is that the vacuum frame isn't at its top position: lift it all the way up and retry.
- If it keeps failing, check whether the vacuum module is properly installed.
5.4 Manual Calibration
Manual calibration is normally not needed. If auto calibration doesn't work, contact customer support and calibrate manually under their guidance.
Chapter 6 · Device Management
6.1 Device Info
- Rename: tap the ✎ next to the device name. Names can be up to 31 characters.
- Device SN: shown on the settings page; usually only needed when contacting customer support.
6.2 Firmware Update
- Go to Firmware update on the settings page to check for new versions and update.
- You can't leave the page during the update. Keep the device powered and the network stable until it finishes.
6.3 WonderPress Device Settings
- Device language: switch the screen language among 8 options — English, German, Spanish, French, Italian, Dutch, Portuguese, and Polish.
- Unit settings: switch between °C and °F; the change applies to both the screen and the App.
- Device log: export log files to share with customer support when reporting issues.
6.4 Turn Off the “Confirm Parameter Changes” Dialog
When you change parameters on the device screen and press START, a confirmation appears by default: “Confirm changes? The current parameters will be overwritten.” If confirming every time feels tedious, you can turn it off in the App:
- Go to the Confirm parameter changes switch on the settings page.
- Turning it off brings up a confirmation explaining the effect: “Once off, parameter changes made on the device screen will be saved directly, with no on-screen confirmation step.”
- Note: on WonderPress, parameter changes overwrite the original values directly (no separate copy is saved). With confirmation off, an accidental knob turn can change your parameters — keep it on until you're familiar with the device.
6.5 Notifications
After binding a device, the App sends you push notifications about it (see the message center — entry at the top of the home page).
6.6 Unbind the Device
- Go to Device unbinding on the settings page. After confirming “The device will be removed from your account”, the device is removed from the list.
- Unbinding requires an internet connection; without one, you'll be prompted to check your network.

