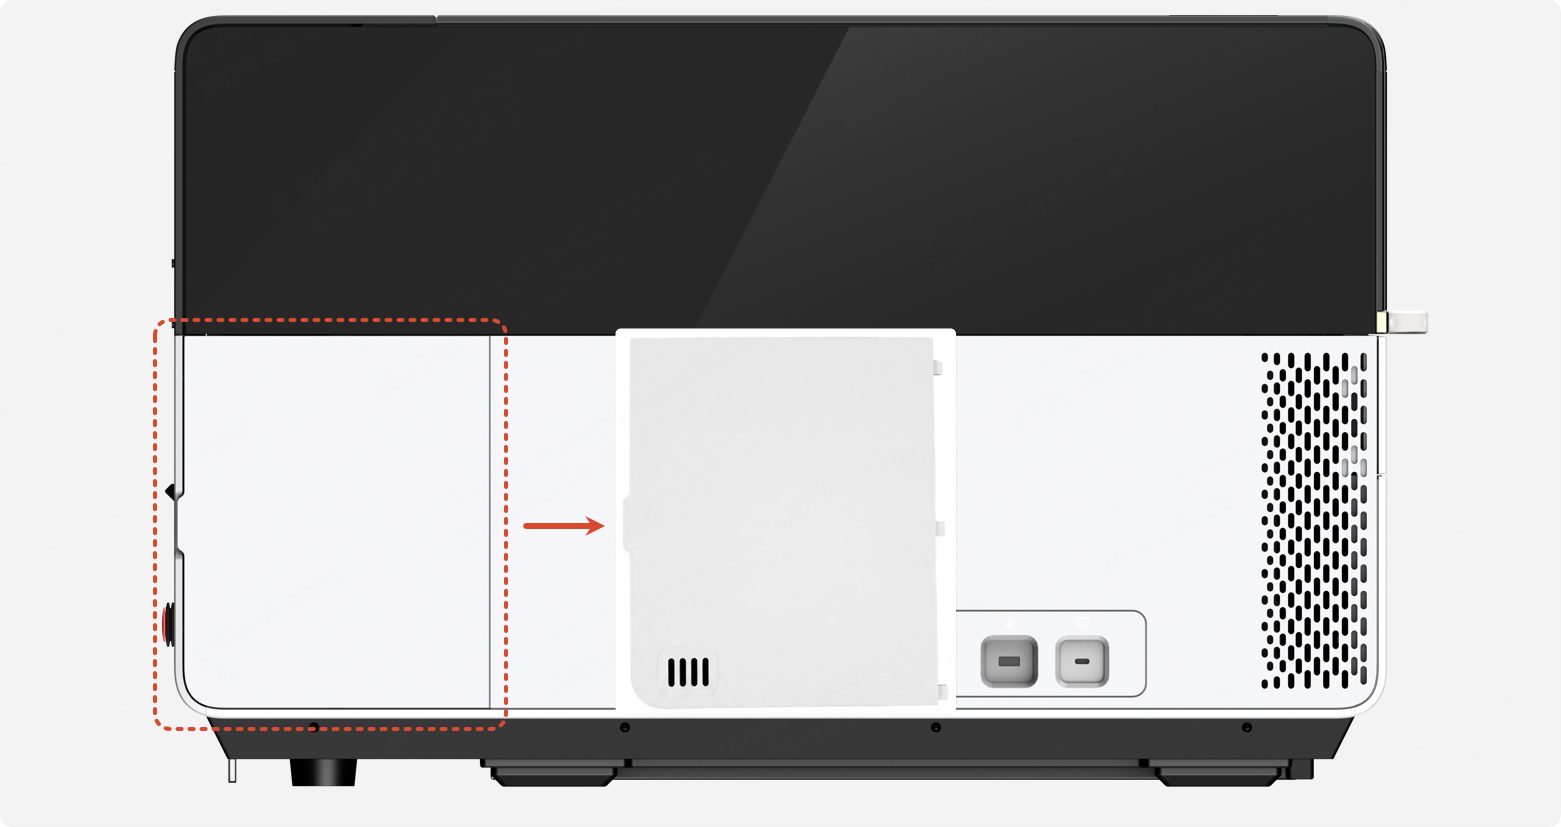
1. Applicable scenarios
- Due to the high-frequency processing by xTool P3, high-frequency maintenance of the air pump silencer is required, so the silencer needs to change from an internal design to an external one for easier maintenance.
- Other situations where the silencer's position needs to be adjusted.
2. Introduction of components
External silencer ① is made of metal and is used on the external suction air pump; internal silencer ② is made of plastic and is used on the internal suction air pump.


The two silencers are functionally identical, but they differ in the following ways:
Rated service life: Calculated based on nozzle airflow less than 30L/min
Product | Material | Position | Maintenance level | Price | Noise reduction performance | Scenarios | Lifespan |
Metal silencer | Metal | Near the gas cylinder | Easy | More expensive | Worse | · High processing frequency · Process in dusty environments · Need to clean the silencer regularly | About 360 hours |
Plastic silencer | Plastic | On the air pump | Difficult | Cheaper | Better | · Sensitive to noise · Low processing frequency · Process in low-dust environments | About 550 hours |
- If you process at a low frequency and the working environment is relatively dust-free, you can use the silencer while ensuring that the exhaust system remains unobstructed and the air pump’s dust filter is clean. It can minimize the frequency of maintenance of the plastic silencer.
- If you want to replace the plastic silencer with an external metal silencer for quick maintenance—whether due to frequent use of the device or other reasons—we can provide you with a complimentary set of parts. Please contact the xTool after-sales team and provide your order information and shipping details.
- The conversion process is roughly as easy as replacing the plastic silencer; you can refer to this tutorial for guidance.
3. Components required
The modification kit requires the following parts, which you can get by contacting the xTool after-sales team.
① New air pump cover
② New lower-left quick-release cover
③ Silicone silencer holder
④ Metal silencer holder
⑤ Short air tube
⑥ Long air tube

4. Tools required
- Philips screwdriver
- Masking tape or foam tape
- M2.5 mm hex key
- M3 mm hex key
- M12 mm hexagon nut spanner or pliers
5. Precautions
- Disconnect the power supply before processing.
- Be careful not to damage the air pump’s connection cables or air hoses during operation.
6. Operation procedures
1. Pre-treat the new air pump cover
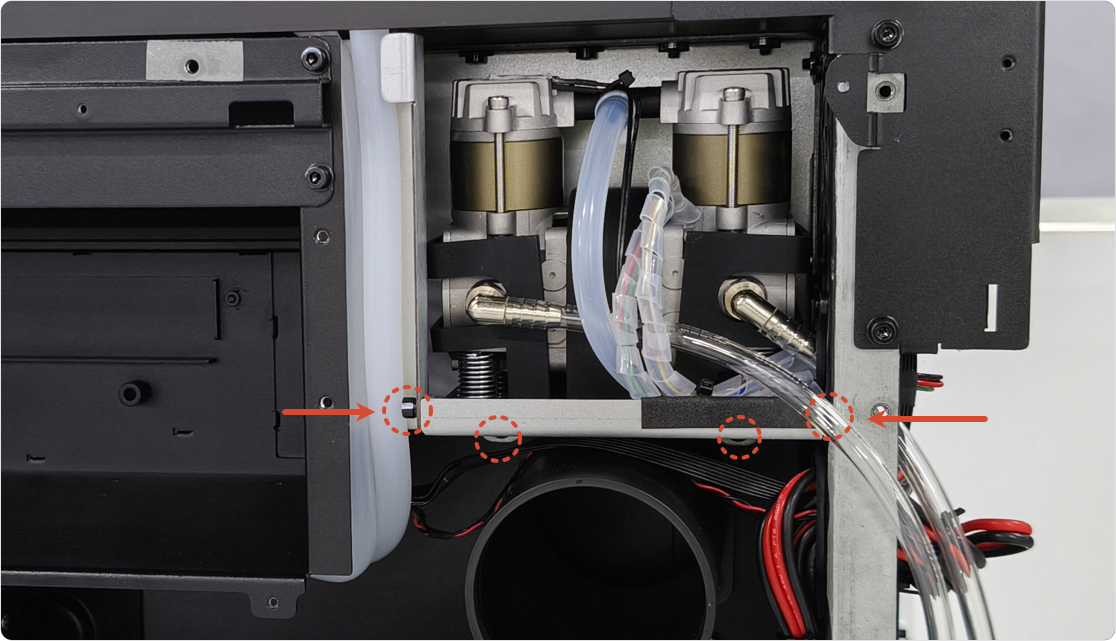
Apply masking tape (or several layers of thin adhesive tape) or foam tape to the gap shown below to reduce wear on the air tube.

2. Remove the panels on the device
Remove the CO₂ cylinder (if present) and, following the steps shown in the video, remove the laser tube plastic upper cover ①, the rear panel ②, and the left panel ③.

3. Install the metal silencer holder
Use a 3mm hex screwdriver to remove the screw shown in the left illustration. Then secure the silencer holder in place and tighten it again.


4. Install the silicone silencer holder
Snap the silicone holder onto the metal holder.

5. Disassemble the fixed screws on the air pump module
Follow the steps shown in the video, remove the four screws securing the air pump module, then gently pull out slightly (without disconnecting the air pump’s connection cable).

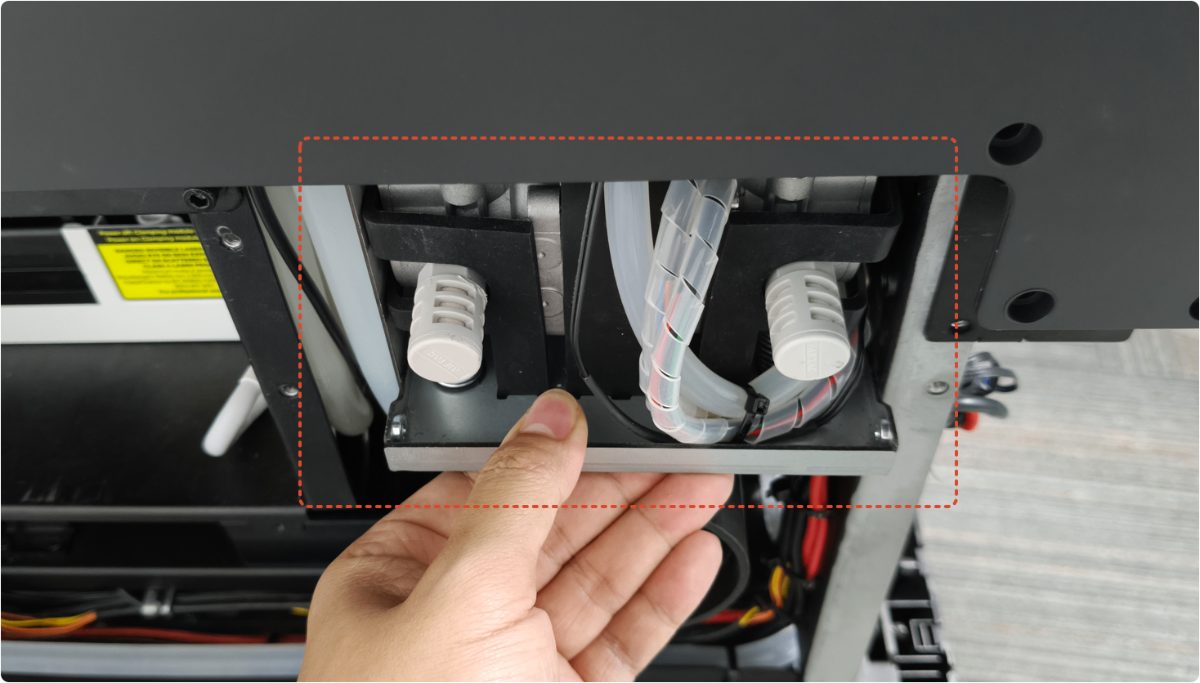
6. Remove the plastic silencer
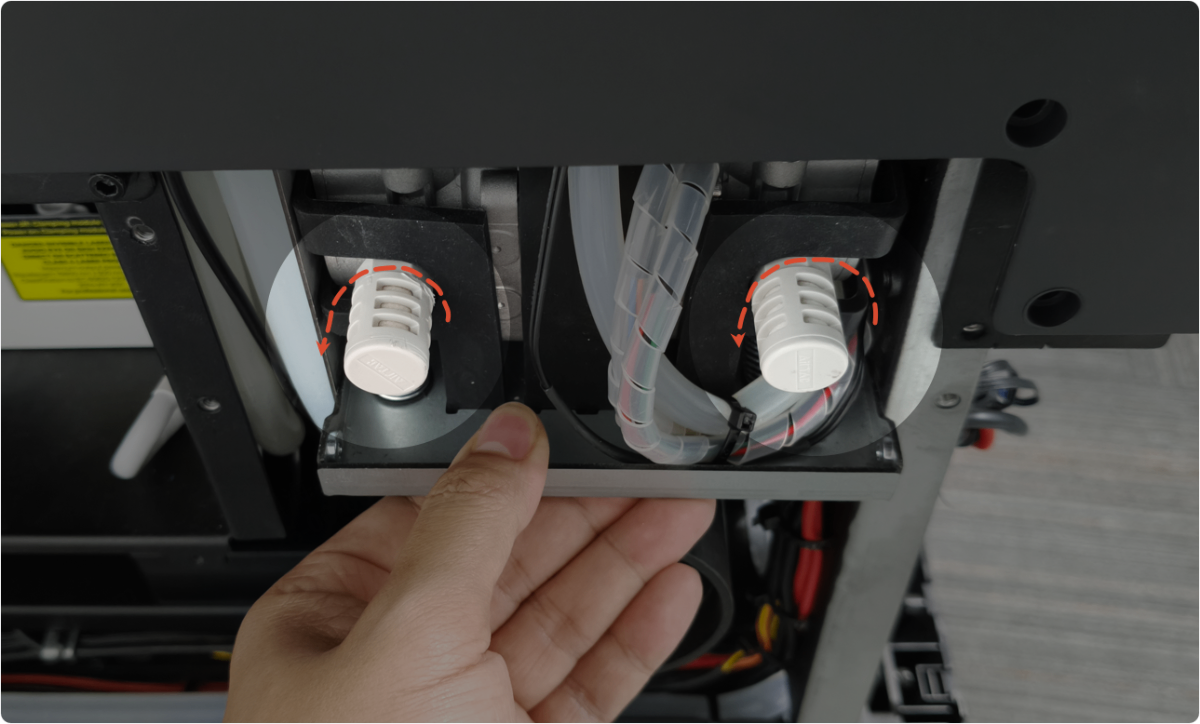
Rotate the plastic silencer anticlockwise to remove it.
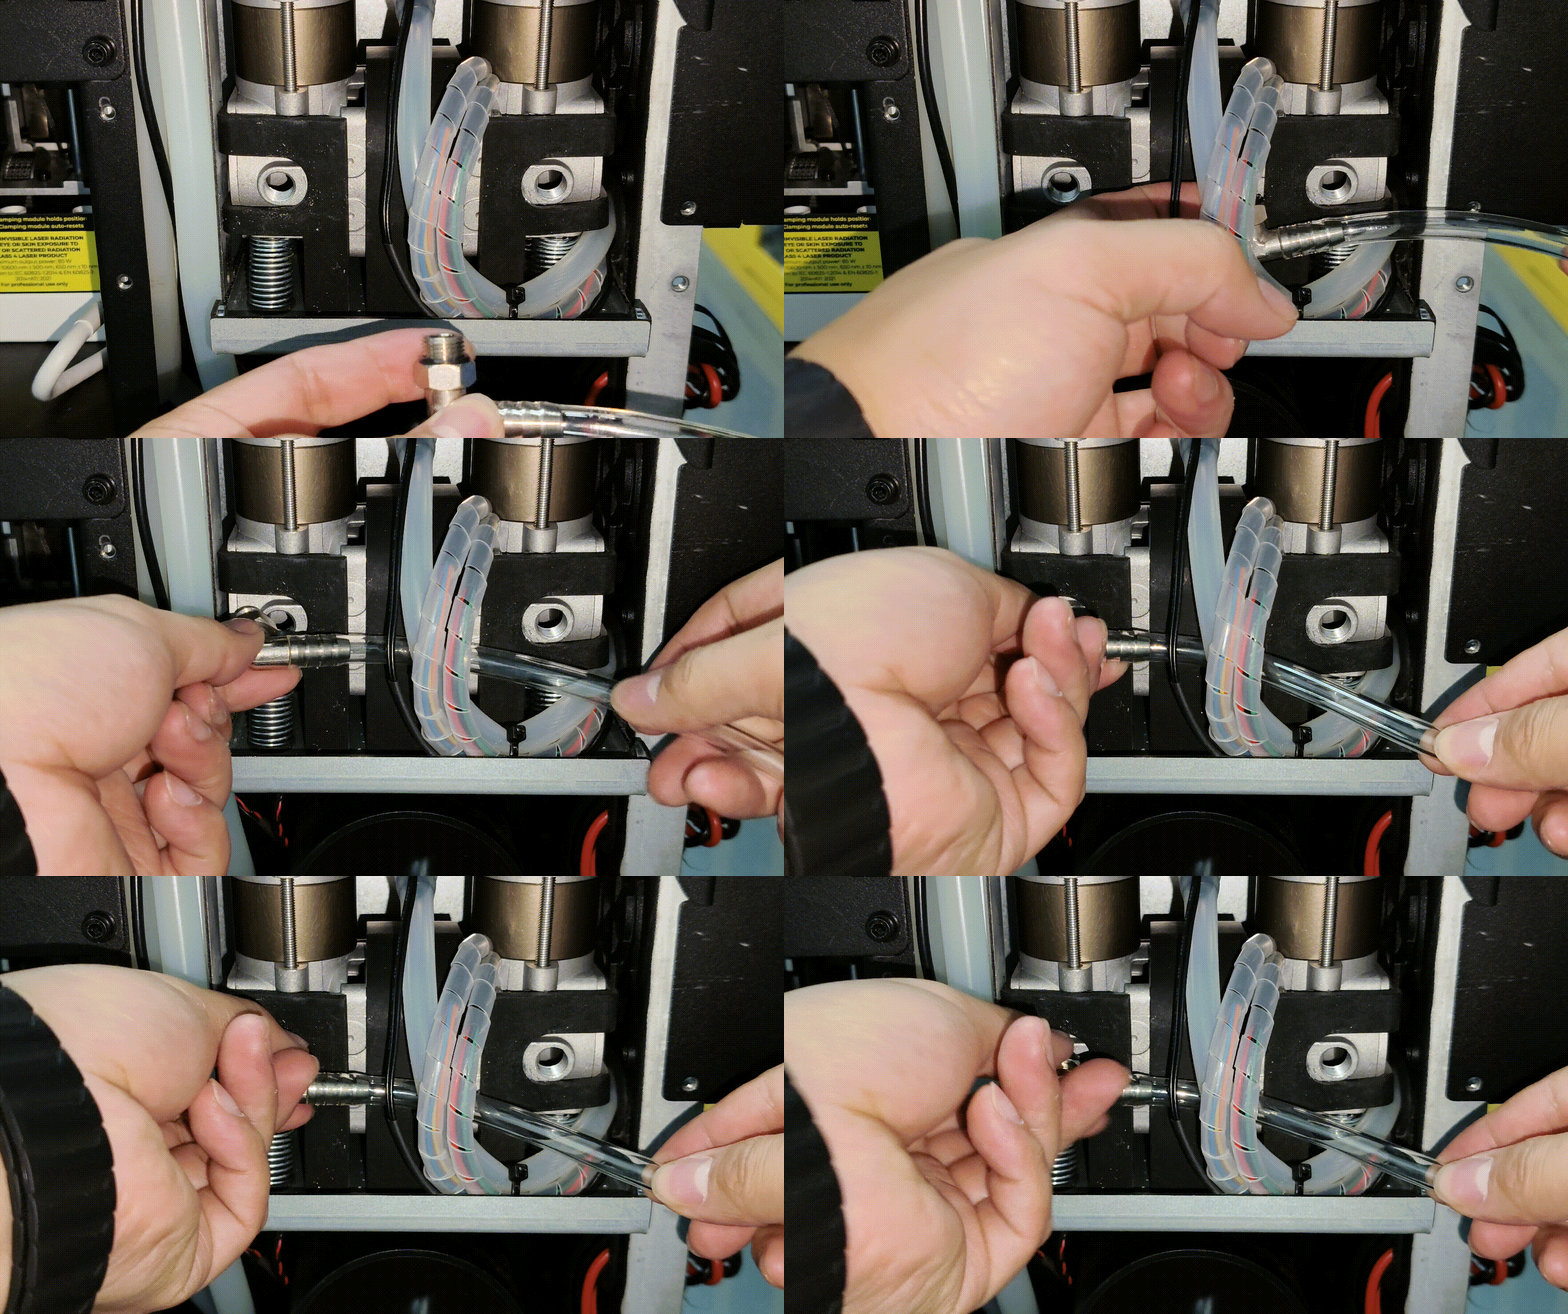
7. Install the long air tube (on the left)
(1) Thread the air tube through the cables.
(2) Align the adapter with the air pump’s intake port, then tighten it (you can use a spanner or pliers to tighten it if necessary).
8. Install the short air tube (on the right)
(1) Thread the air tube through the device gap.
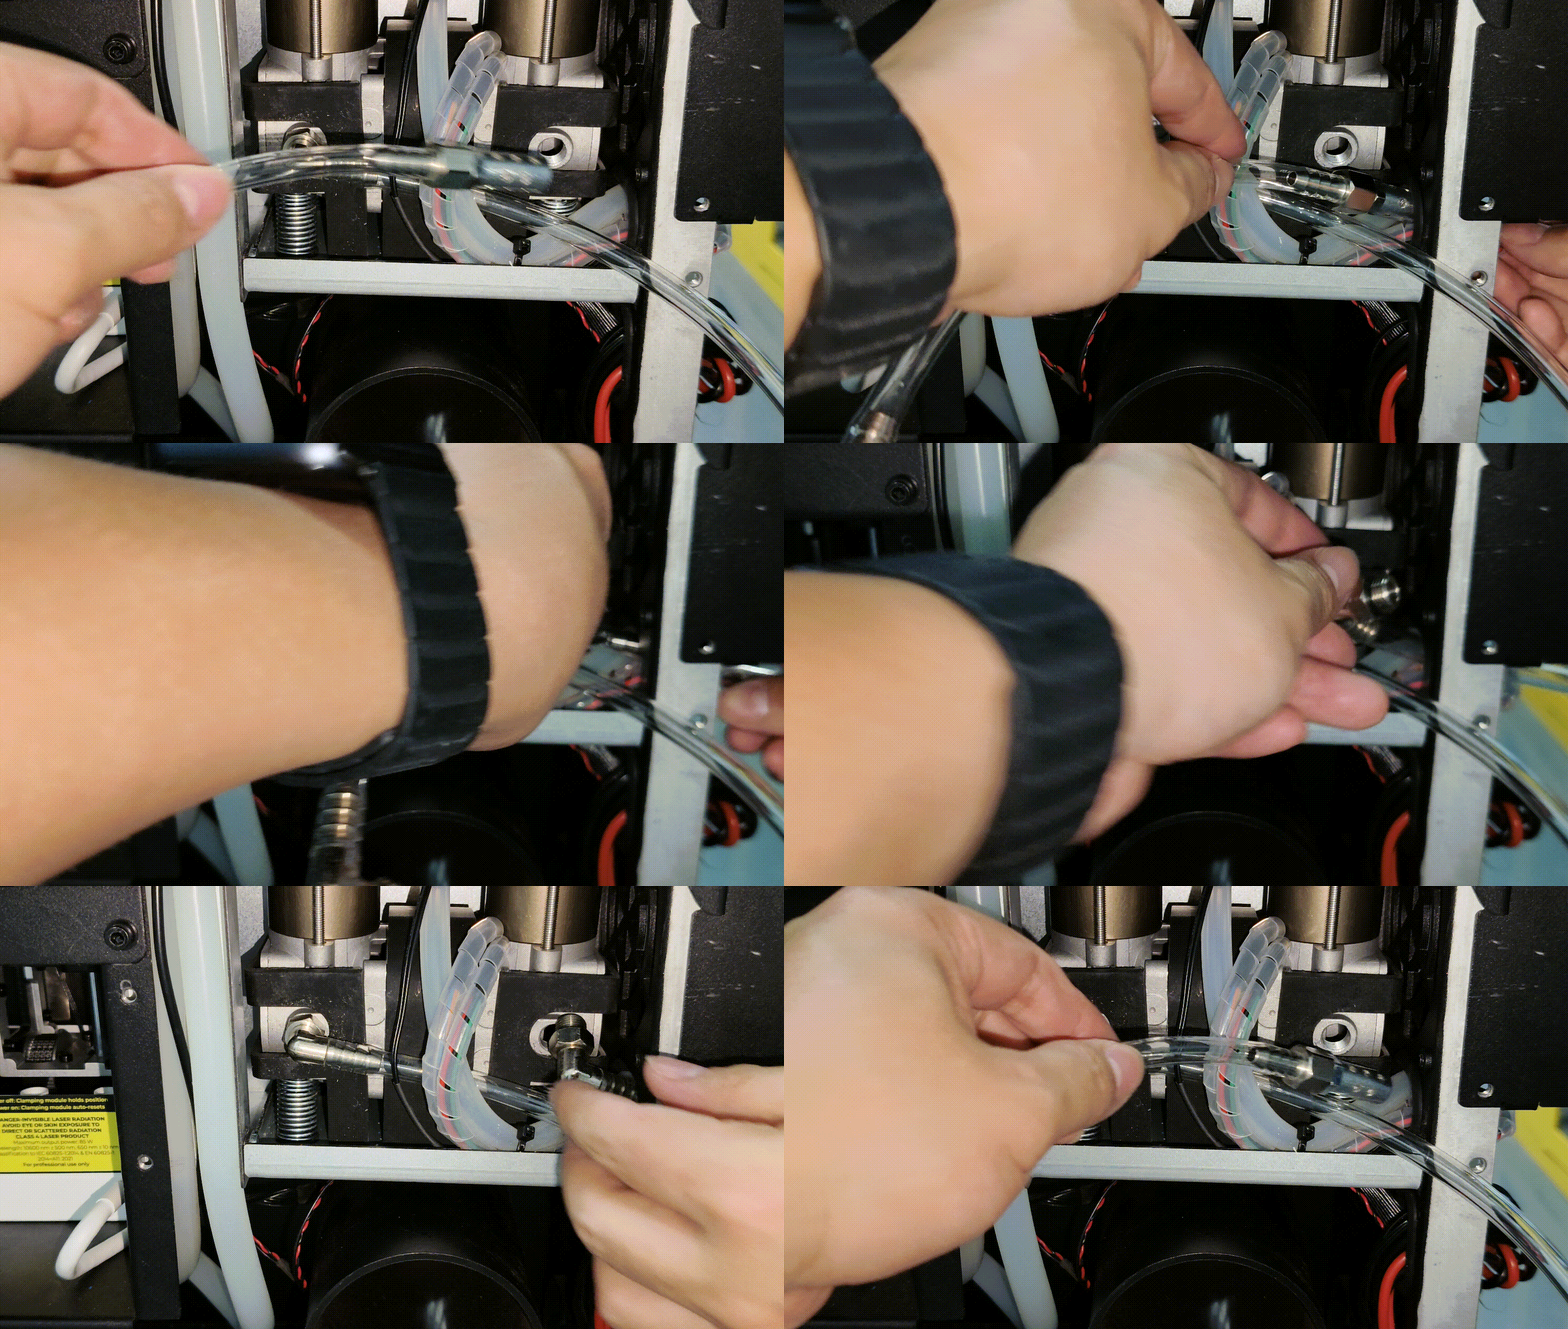
(2) Align the adapter with the air pump’s intake port, then tighten it (you can use a spanner or pliers to tighten it if necessary).
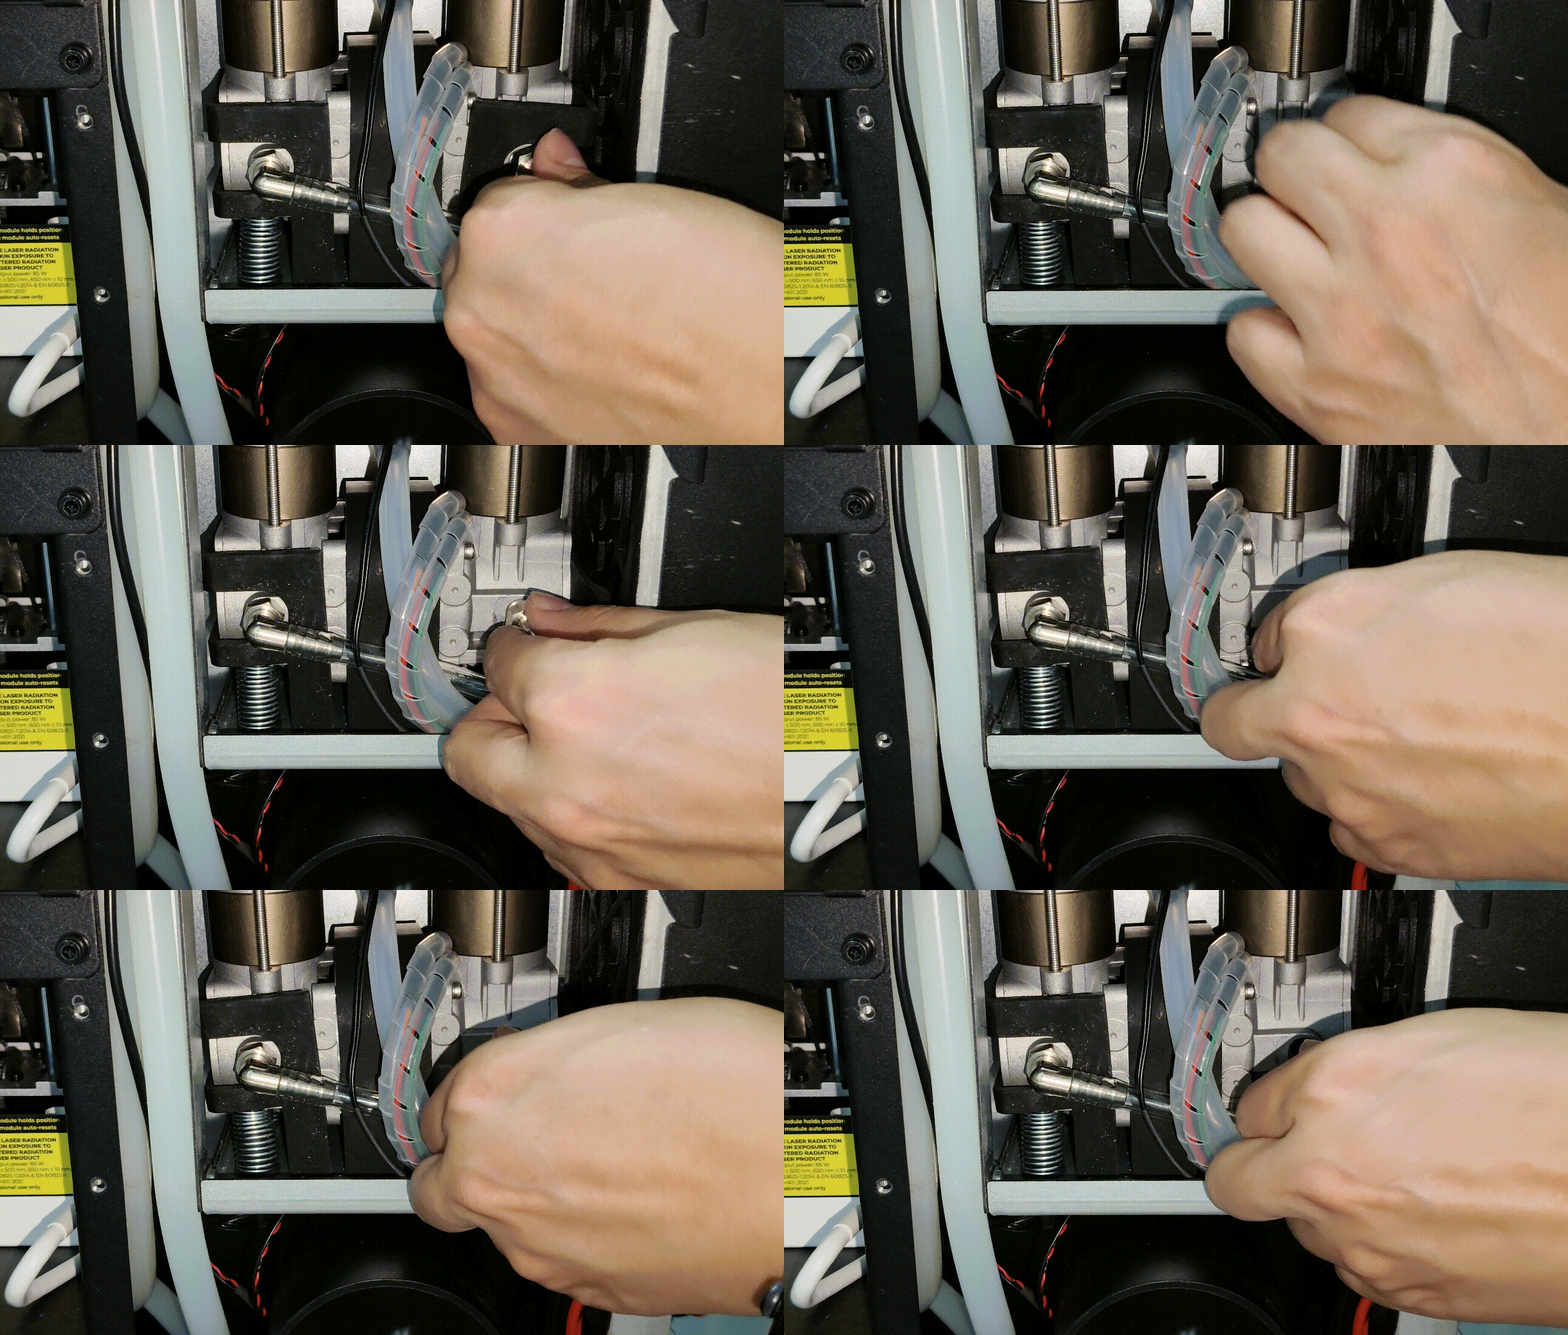
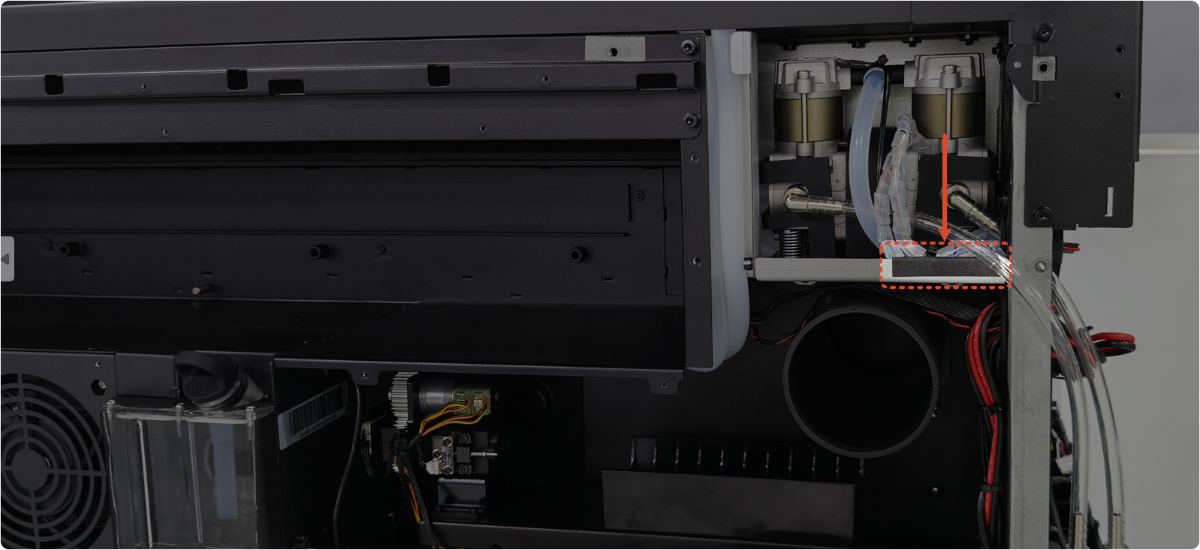
9. Apply the protective tape
Apply a layer of foam tape or masking tape to the right side of the air pump’s metal base to reduce wear on the air tube
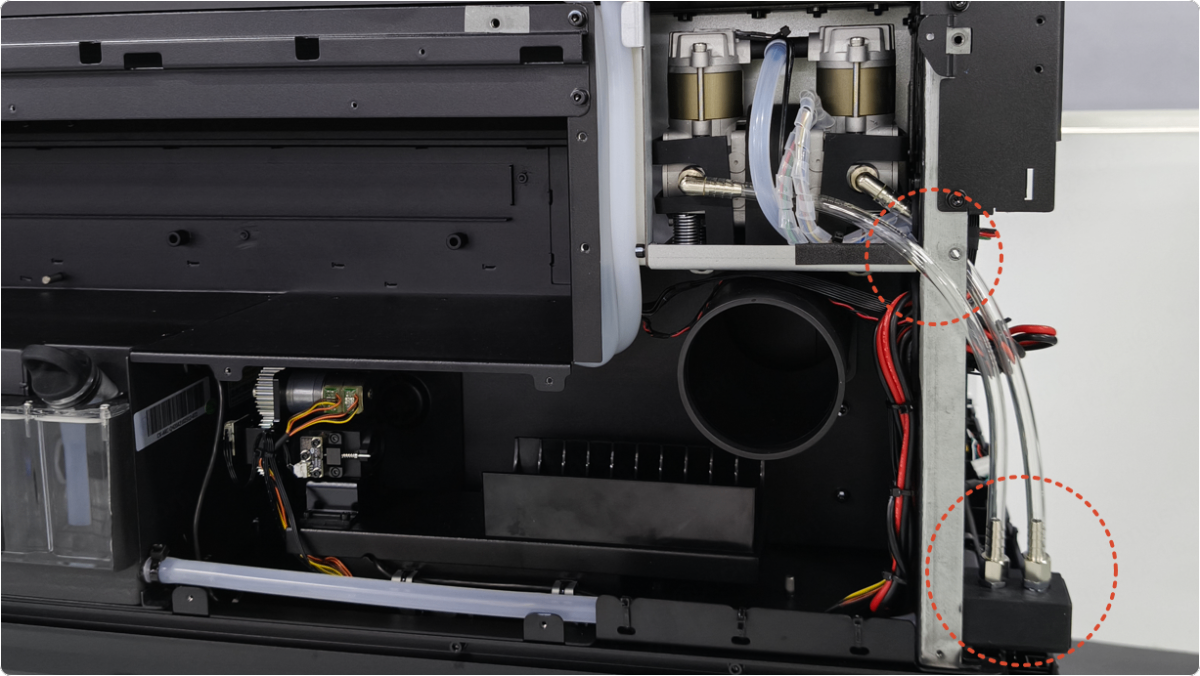
10. Secure the silencer
After adjusting the air tube into position as shown below, insert the silencer into the silicone holder.
Make sure to check whether the tube kinks or bends. If any are found, straighten it out.
11. Secure the screws of the air pump module
Follow the steps shown in the video, and reinstall the four screws securing the air pump module.
12. Check the cable protection sleeve
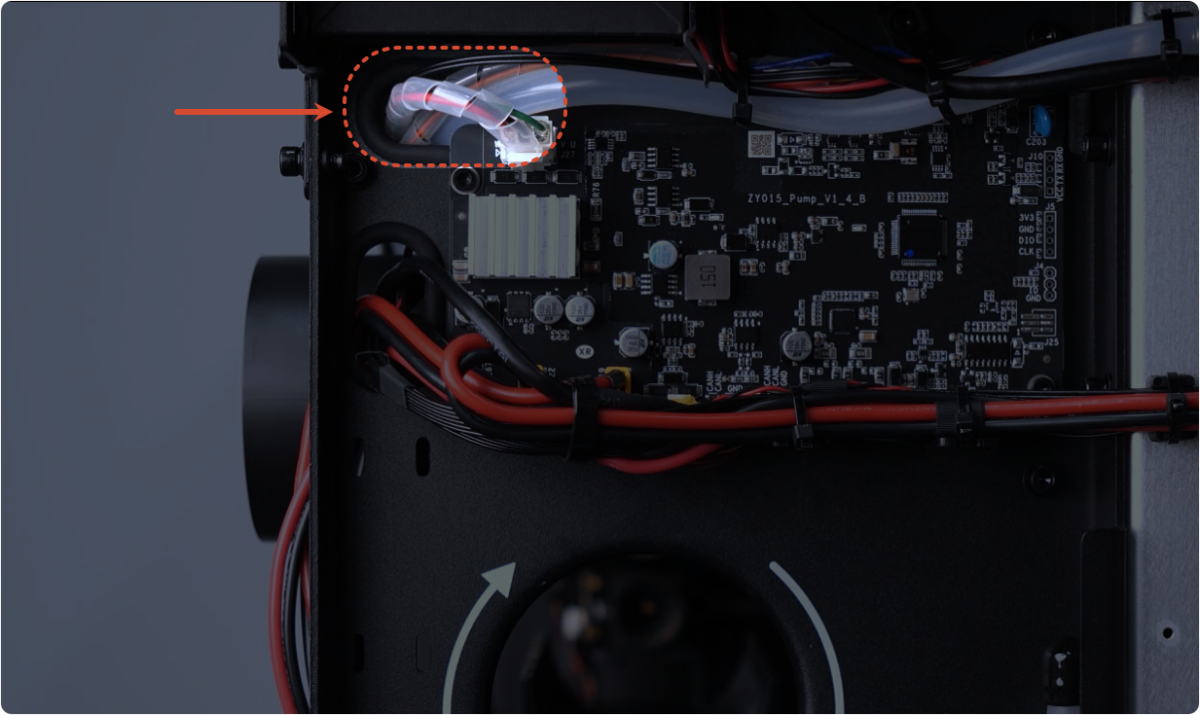
Check whether the cable protection sleeve falls off.
- If yes, secure it.
- If not, proceed to the next step.
13. Secure the new air pump cover
Use an M3 hex screw to secure the new air pump cover.
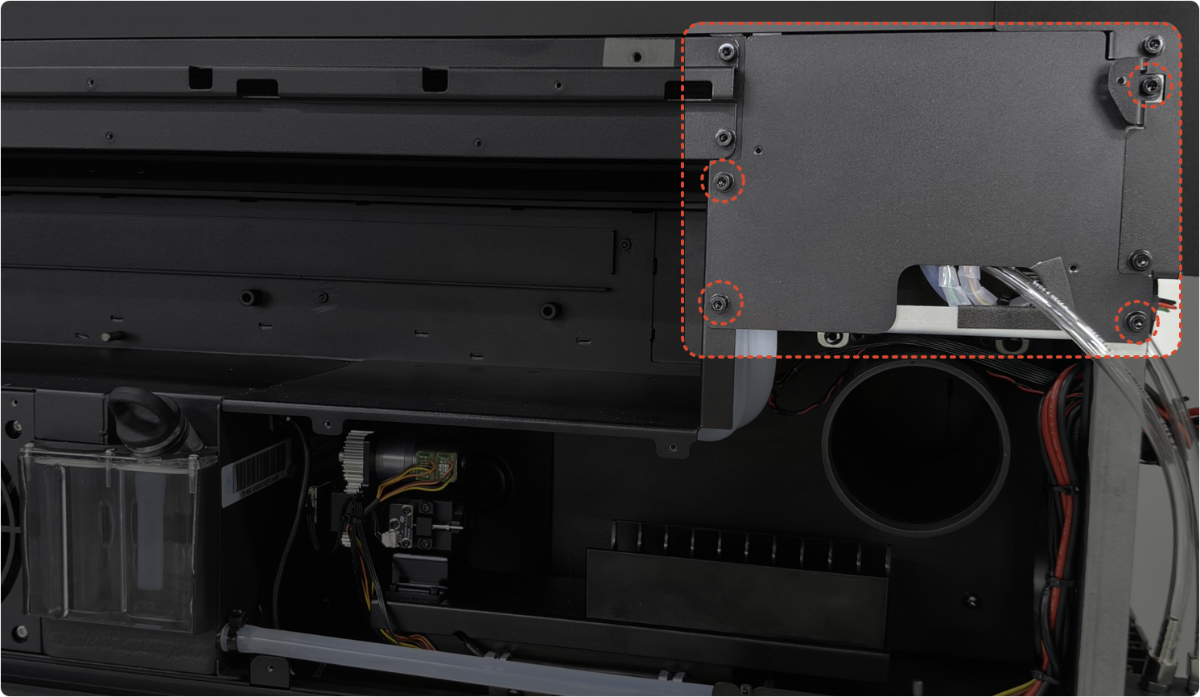
14. Reinstall the panels on the device.
Follow the steps shown in the video and reinstall the panels on the device.
15. Replace the quick-release panel on the left
Remove the old quick-release panel, reinstall the CO2 gas cylinder (if applicable), and install the new quick-release panel.