Issue description
After laser cutting or engraving, yellowing or blackening may appear on the edges of the processed material. Specifically:
- The cut edges show yellow, brown, or black scorch marks.
- There are traces of smoke residue around the engraving area.
- The unprocessed areas of the material's surface are also blackened.
Possible causes
- The material fits closely to the baseplate, preventing heat from escaping from the bottom.
- The air assist is not turned on, or the airflow is insufficient.
- Improper processing parameters (excessive power or speed too low).
- Using non-recommended materials or the optimal processing parameters could not be determined.
Troubleshooting procedures
1. Elevate the material to increase the heat dissipation space
Use magnetic fixtures to elevate the material, creating a gap between the material and the baseplate. It allows heat and fumes to escape from the bottom. (If you have xTool M1 Ultra's triangular prisms, you can also use them to elevate the material.)
Note: After elevating the material, make sure they are securely fastened to avoid displacement during processing.
Laser cutting 0<H ≤ 6 mm materials: secure with magnetic fixtures
Laser cutting 6 mm ≤ H ≤ 16 mm materials: secure with magnetic fixtures
2. Check the air assist working status
The airflow from the air assist can promptly remove smoke and dust generated during processing, reducing smoky residues buildup.
You can operate as follows:
(1) Verify in the software that the air assist is turned on (it usually turns on automatically, but you can check the settings manually).
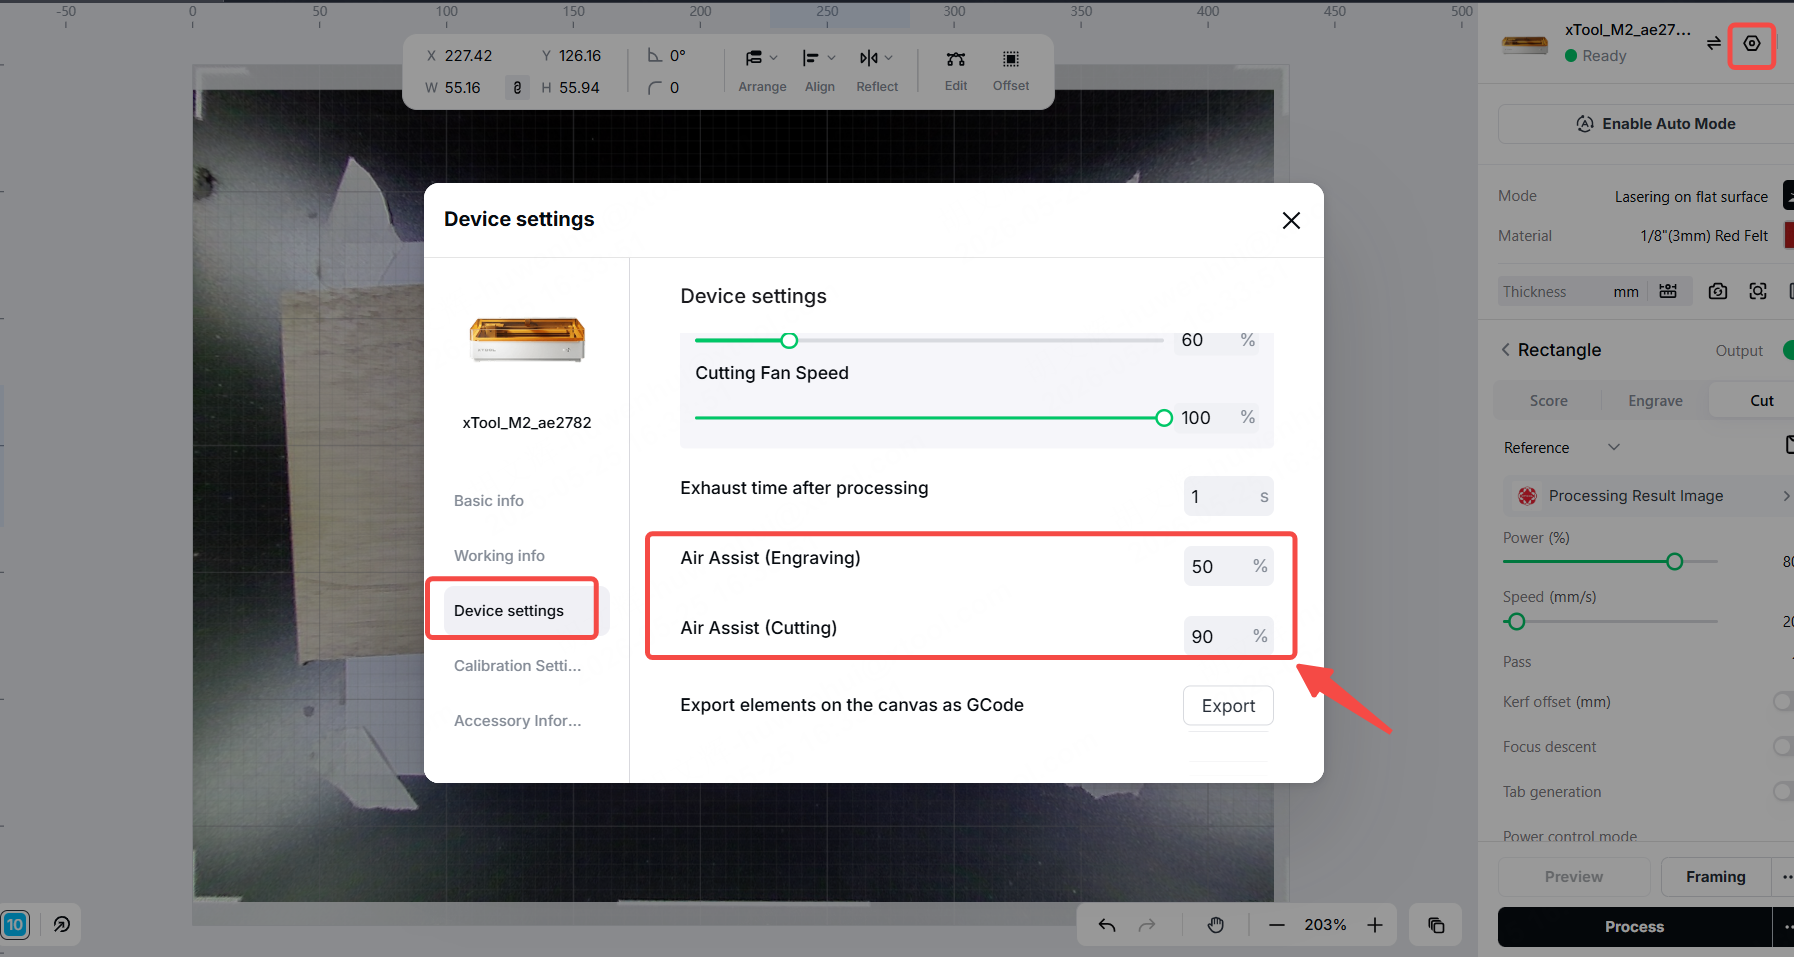
(2) Check that the air assist outlet is unobstructed and that the air tube is securely connected.
(3) Listen to whether the air assist makes a normal airflow sound while it is working.
Note: After turning on the air assist, make sure the material is securely fixed (using magnets, pressure blocks, or double-sided tape) to avoid airflow blowing the thin material and causing displacement.
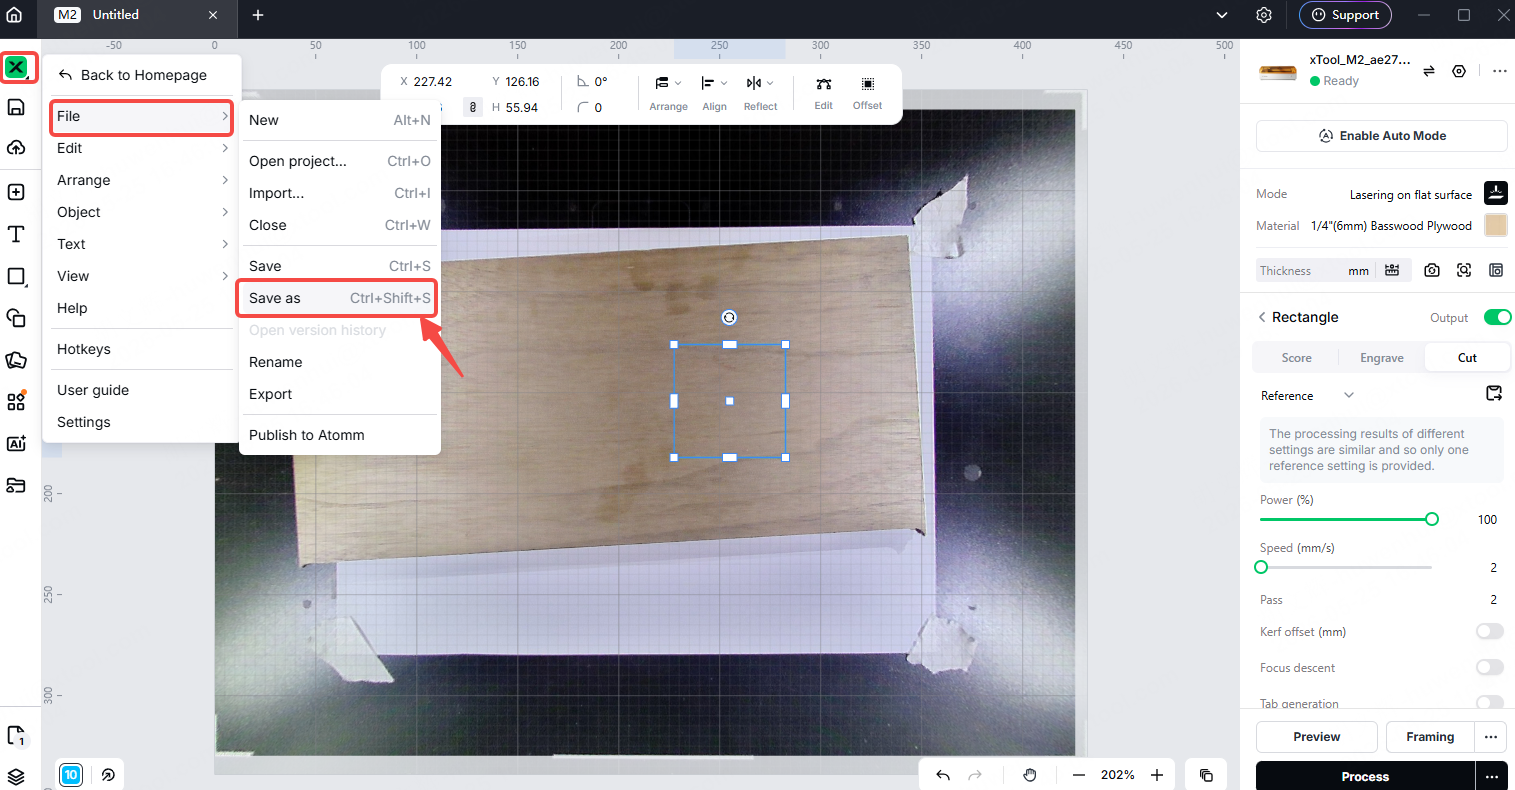
3. Use recommended parameters in the software
The software includes recommended processing parameters for common materials; using these recommended parameters can effectively reduce smoke.
You can operate as follows:
(1) Select the material you are using in the software.
(2) Use the parameters recommended by the software, such as power, speed, and focal length.
(3) If the material thickness differs from the preset value, adjust the parameters accordingly (thick materials typically require a lower speed and higher power).
4. Use the material test array
If the software does not include the material you are using, or if the recommended parameters do not produce satisfactory results, you can use the material test array to find the optimal parameters. For more information, visit How to Perform an Array Test on a Material.
You can operate as follows:
(1) Locate the "Material Test Array" in the software or a similar feature (usually found in the Material Library or Parameter Settings). The feature automatically generates a set of test patterns across different power and speed groups.
(2) After performing the test, observe which group produces the least smoke and has the cleanest edges.
(3) Record the optimal parameters for subsequent use.
5. Apply masking tape along the cutting path
Masking tape can absorb some of the heat and fumes generated during laser cutting, effectively reducing the yellowing edges.
Applicable scenarios: Particularly suitable for materials that require a high level of surface finish (such as acrylic, wood, leather, etc.).
(1) Apply a layer of masking tape to the surface of the cutting path on the material.
(2) Ensure that the masking tape is smooth and free of bubbles, and that it covers all areas along the cutting path.
(3) The laser cuts through the masking tape, while the tape absorbs the smoke and dust. After processing, peel off the masking tape to get a clean cut edge.
6. Contact the xTool after-sales team
(1) If the yellowing or blackening problem persists after completing all of the above steps, it may be due to laser spot issues.
(2) Please provide the required information below, and contact the xTool after-sales team.
Still experiencing issues?
Should the issue persist after completing the preceding steps, submit a ticket via the "Submit a Ticket" button in the "Help Ticket" section below. The standard response time for xTool Customer Service is one business day.
For a prompt resolution, please include the following details:
- Software and firmware version: The software version of xTool Studio and the firmware of xTool M2 that you use.
- Video evidence: Attach a video demonstrating the issue, where applicable.
- Types of materials to be processed
- Image of the processing
- Studio project files
This information is crucial for xTool technical support engineers to provide timely assistance.
Services & Help
Learn & Education

Copyright © 2025 xTool All Rights Reserved.