Issue description
When you perform laser engraving or cutting, the edges of the patterns appear jagged rather than smooth. Specifically:
- Irregular, jagged lines appear along the straight edges.
- The edges of the curves or arcs are not smooth enough and appear noticeably jagged.
- The details of the engraving result are blurred, and the edges are rough.
Possible causes
- Device is placed unevenly
- Processing speed is too fast
Troubleshooting procedures
1. Perform the vibration suppression calibration
If there are minor abnormalities in the device's internal structure, vibration suppression calibration can help optimize the movement path.
You can refer to the video tutorial. Or perform the steps below:
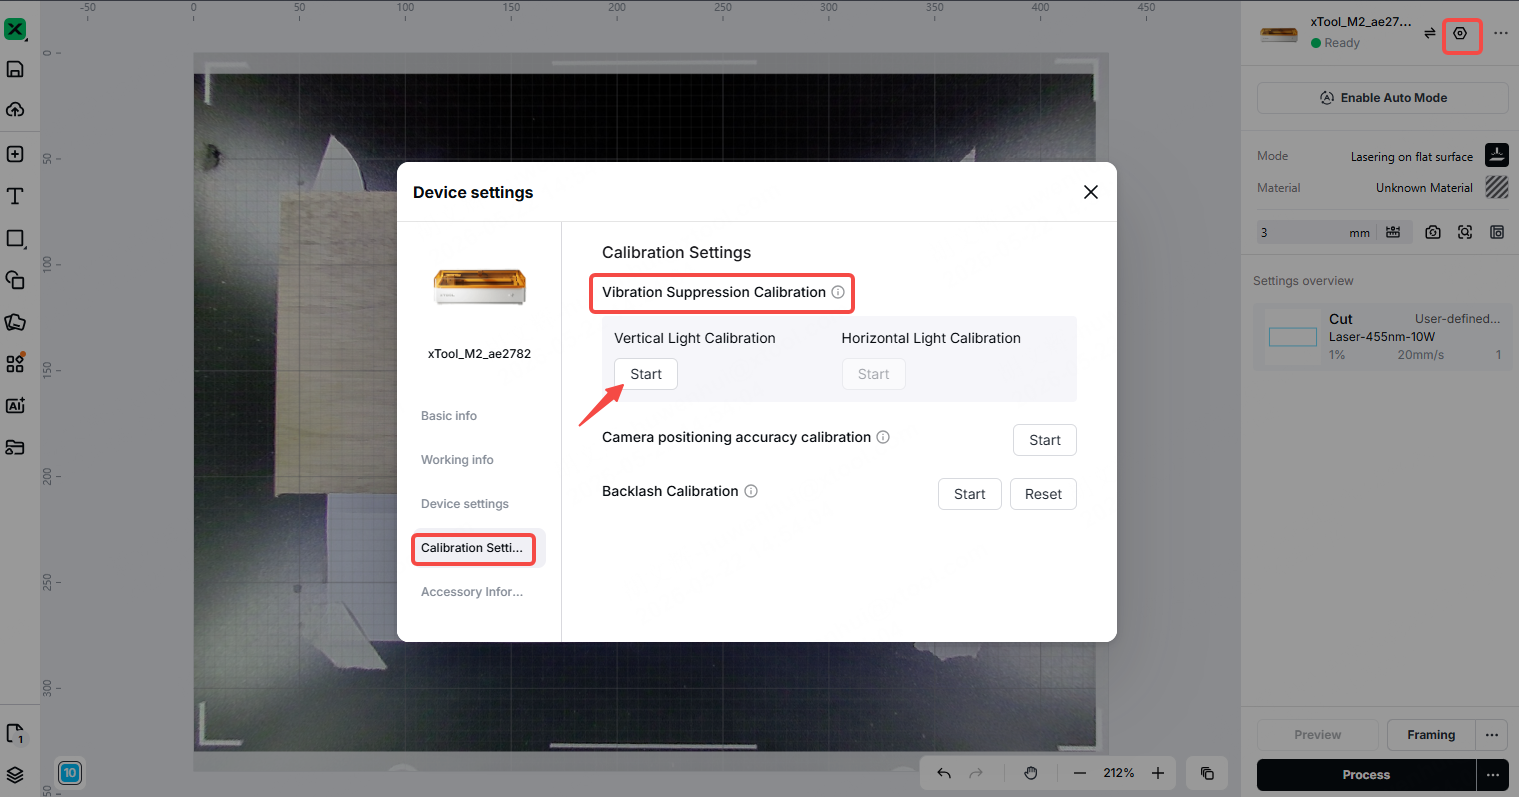
(1) Open xTool Studio and make sure xTool M2 is properly connected.
(2) Click the upper-right "Settings icon" on the software.
(3) Select Calibration Settings.
(4) Click Vibration Suppression Calibration > Start.
Important note: During calibration, please ensure that no objects (including workpieces, tools, scrap material, etc.) are placed inside or outside the device, as this may affect calibration accuracy.
(5) Follow the instructions in the tutorial to complete the calibration process.
(6) Once calibration is complete, run the processing task again to see if the jagged edges have improved.
2. Check the device placement
(1) Check whether the device is placed on a stable and flat work surface.
(2) Testing method:
- Gently push on the four corners of the device to make sure it is stable and does not wobble.
- Use a level to check whether the work surface is level.
(3) If the work surface is uneven or wobbly, move the device to the floor or a stable table.
(4) Check that all four device feet are firmly in contact with the work table, with no feet hanging in the air.
(5) Once the adjustments are complete, perform the processing task again.
3. Decrease the processing speed
- Excessively high cutting speeds are a common cause of jagged edges. It is recommended to reduce the cutting speed to less than 10 mm/s.
Note: When reducing the speed, you must simultaneously reduce the laser power to prevent the material from over-burning or carbonizing due to excessive exposure time.
- After adjusting the parameters, retest the processing task on the used material.
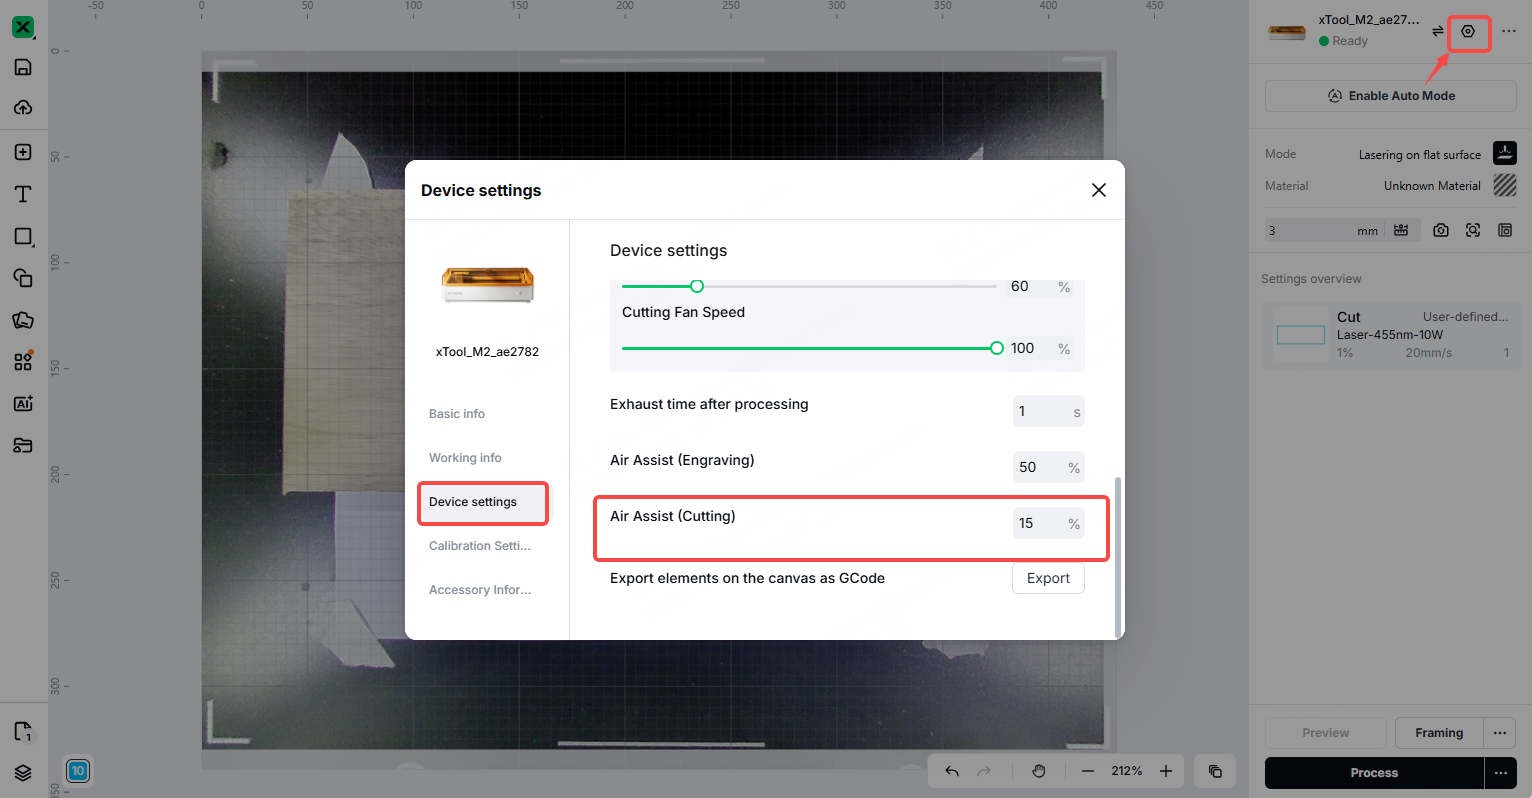
4. Adjust the airflow of the air assist (for light and thin materials)
When cutting very light and thin materials (such as paper, lightweight fabric, or thin paperboard), reducing the speed may make the material more easily blown by the air assist's airflow. Especially when you use slats from the xTool M1 Ultra, the contact area between the material and the baseplate is reduced, making it easier to shift.
Solution:
(1) Reduce the airflow (for example, from 100% to 15%) to reduce the impact of the airflow on the material.
(2) Check the nozzle: Reducing the air assist airflow can make it easier for nozzles to accumulate dust or smoke residues. Use a clean, lint-free cloth or cotton swab dipped in a small amount of anhydrous alcohol to gently wipe the surface of the nozzle. Follow the video tutorial.
(3) For materials that are easily blown away, it is recommended to use magnets, blocks, or double-sided tape to secure the four corners of the material and prevent it from shifting.
Important note: When processing other materials (such as thick wood boards, acrylic, etc.), please set the air assist to its normal power setting to ensure effective smoke extraction and cooling.
5. Motor issue
- If the jagged edges persist after completing all of the above steps, the problem may be a malfunction in the X-axis or Y-axis motor.
- Watch the video tutorial to decide if you want to replace the motor yourself:
- If you want to replace the motor yourself: Please contact us to request a replacement motor, then follow the video tutorial and complete the replacement step by step.
- If you have trouble replacing the part, please contact the xTool after-sales team, and we will provide you with alternative solutions.
Still experiencing issues?
Should the issue persist after completing the preceding steps, submit a ticket via the "Submit a Ticket" button in the "Help Ticket" section below. The standard response time for xTool Customer Service is one business day.
For a prompt resolution, please include the following details:
- Software and firmware version: The software version of xTool Studio and the firmware of xTool M2 that you use.
- Video evidence: Attach a video demonstrating the issue, where applicable.
- Device information: Find the SN number on the back of xTool M2.
- Material that is processed.
This information is crucial for xTool technical support engineers to provide timely assistance.
Services & Help
Learn & Education

Copyright © 2025 xTool All Rights Reserved.