Film overview
Film type | Function |
|---|---|
A film | Printing film used to print designs.
|
B film | Laminated over the printed A film, mainly for making regular UV DTF stickers. |
Waste stripping film | Removes excess adhesive or waste material around the design, mainly for making waste-stripped UV DTF stickers and hot-stamped UV DTF stickers. |
UV DTF adhesive transfer film | Used to transfer the design from A film onto the surface of the target item. |
Make regular UV DTF stickers
What you need
- Sheet A film / A3 sheet A film
- B film
- Paper cutter
- Scraper
- xTool LM1 Laminator for Omni Printer
- xTool O1 Omni Printer
Procedure
1. Print the design
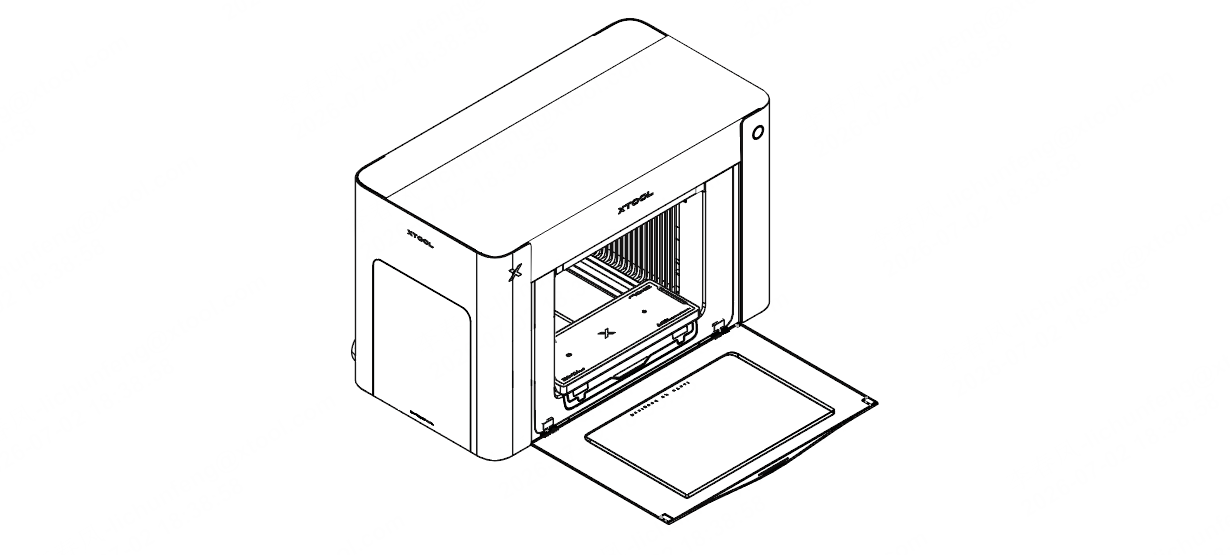
(1) Prepare xTool O1 Omni Printer referring to the instructions in its Quick Start Guide, ensuring it is ready for printing.
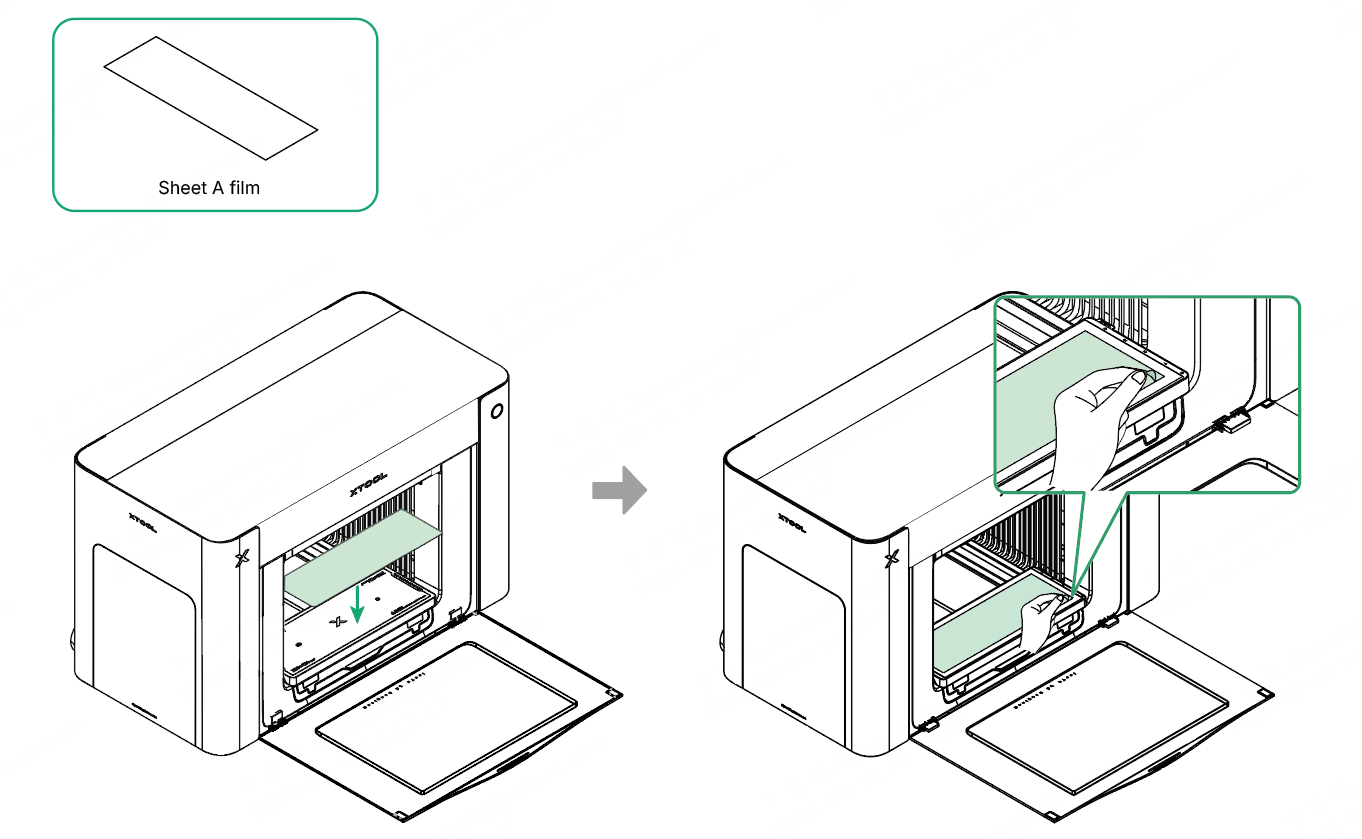
(2) Stick sheet A film to the mini adhesive mat and peel off the release paper.
🔔
- Ensure that the release paper side (the thinner, non-adhesive side) faces upward. - If you use A3 sheet A film, use the standard adhesive mat for printing.
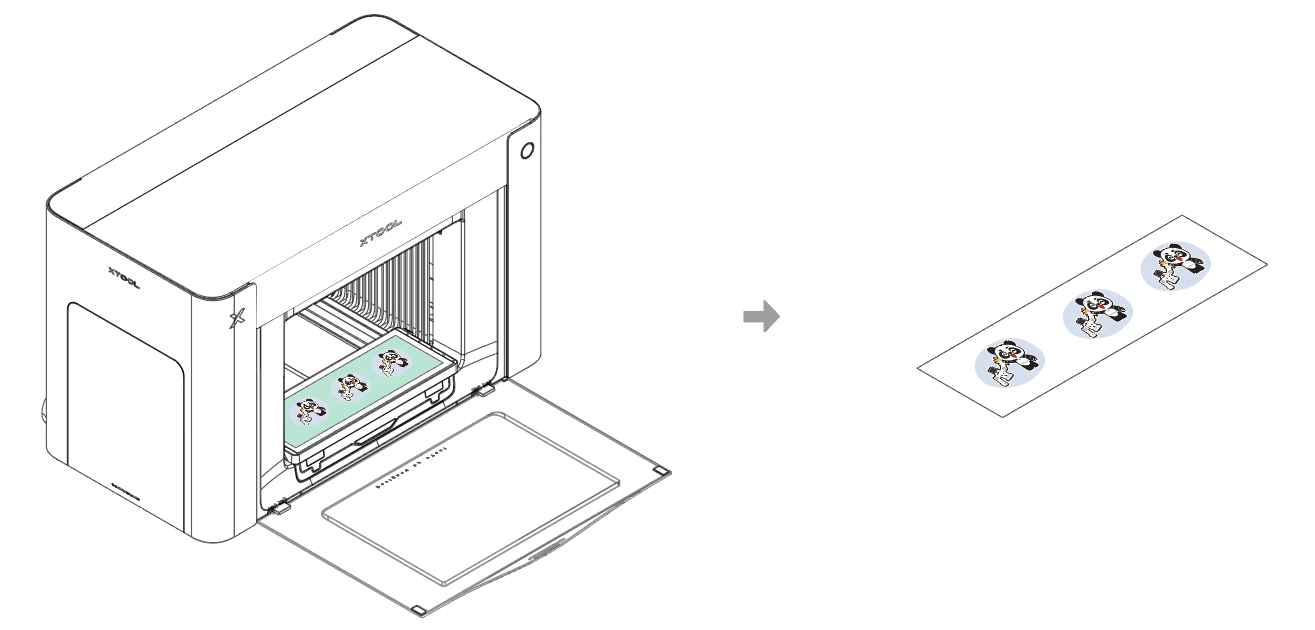
(3) In xTool software, click Material > Regular Transfer Sticker > Apply. Print patterns referring to the operating steps for xTool O1 Omni Printer, then take out the A film.
2. Prepare the laminator
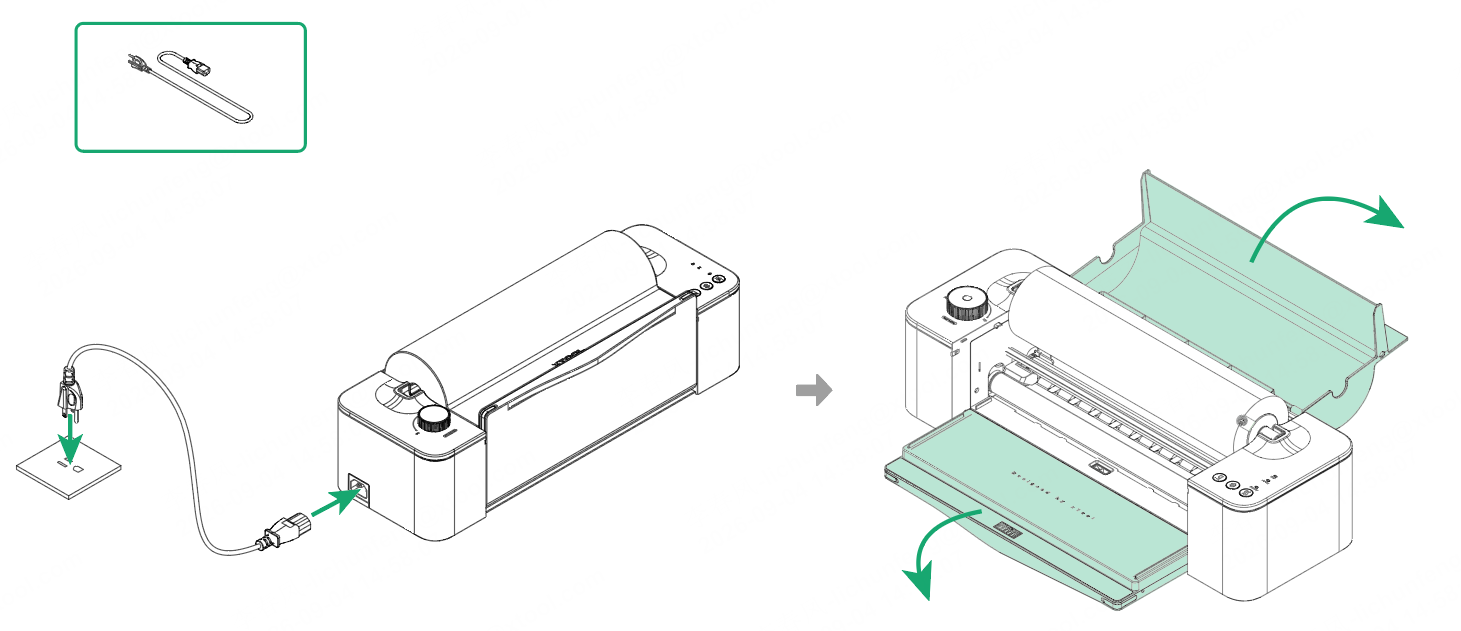
(1) Connect the laminator to the power supply, and open the front and top covers.
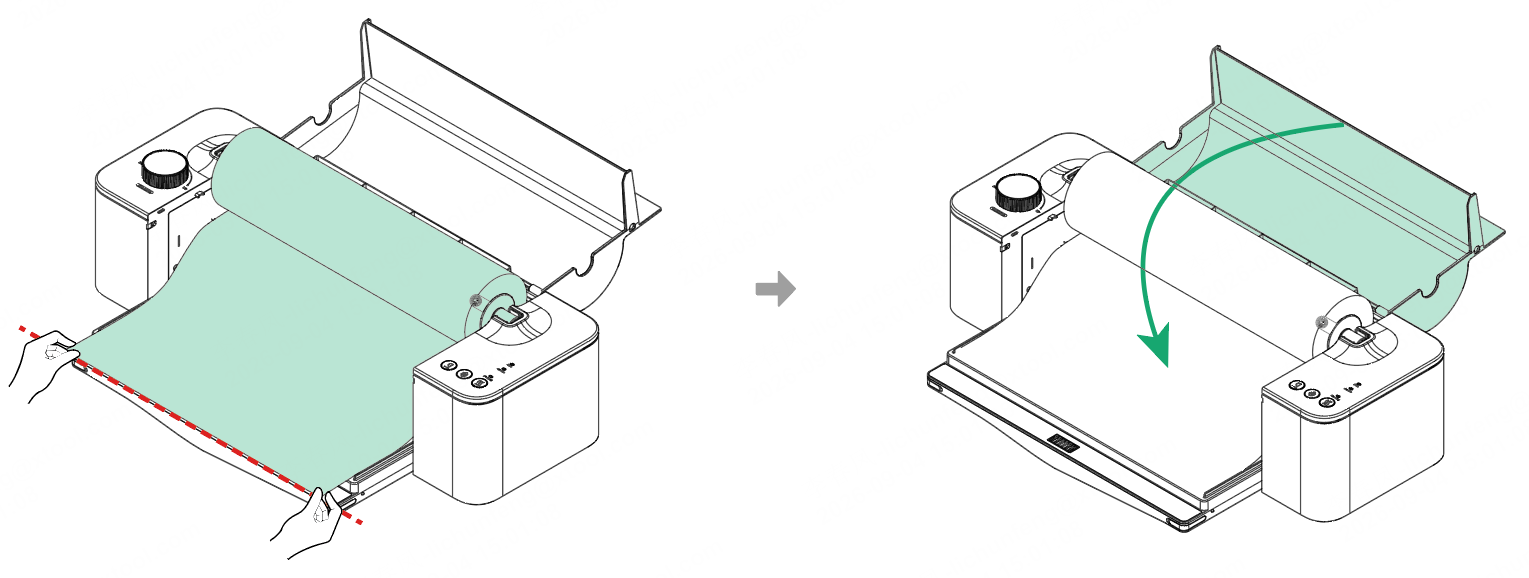
(2) Peel off the sticker from the roll film, pull the film out until it aligns with the top edge of the front cover, and close the top cover.
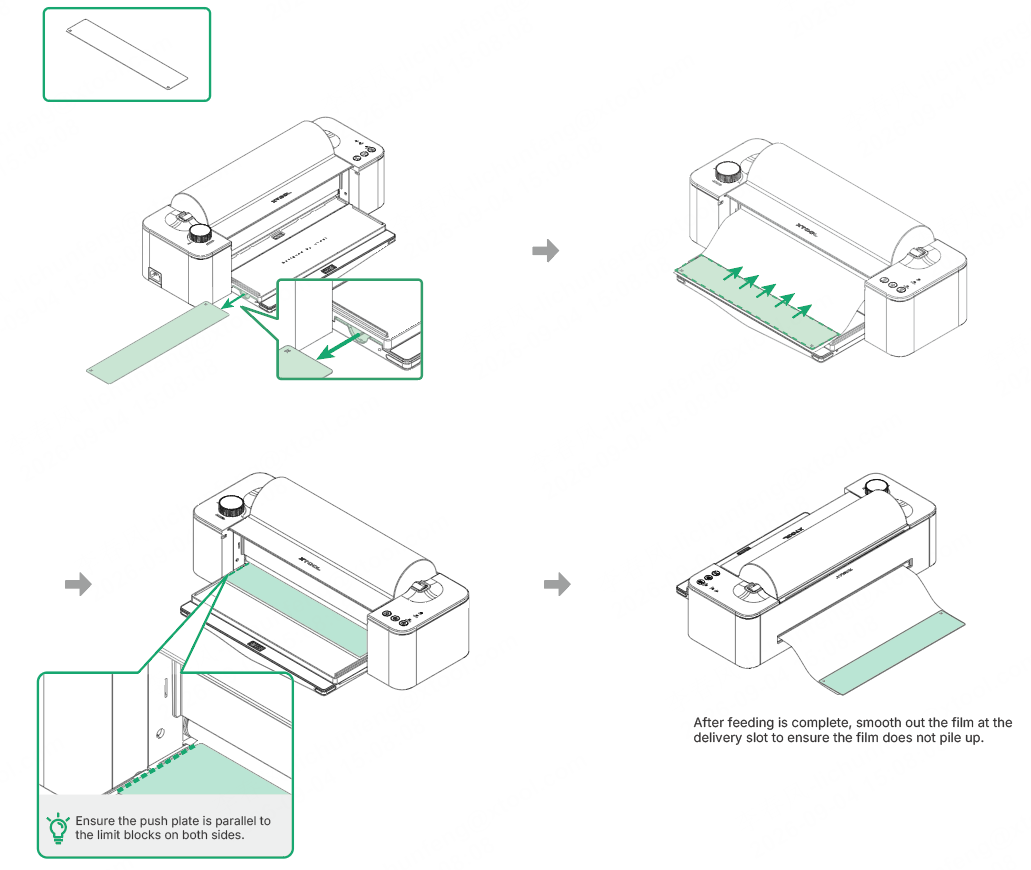
(3) Take out the push plate, place it on the film, and push it towards the roller. When the feed sensor detects the film, the laminator automatically starts feeding.
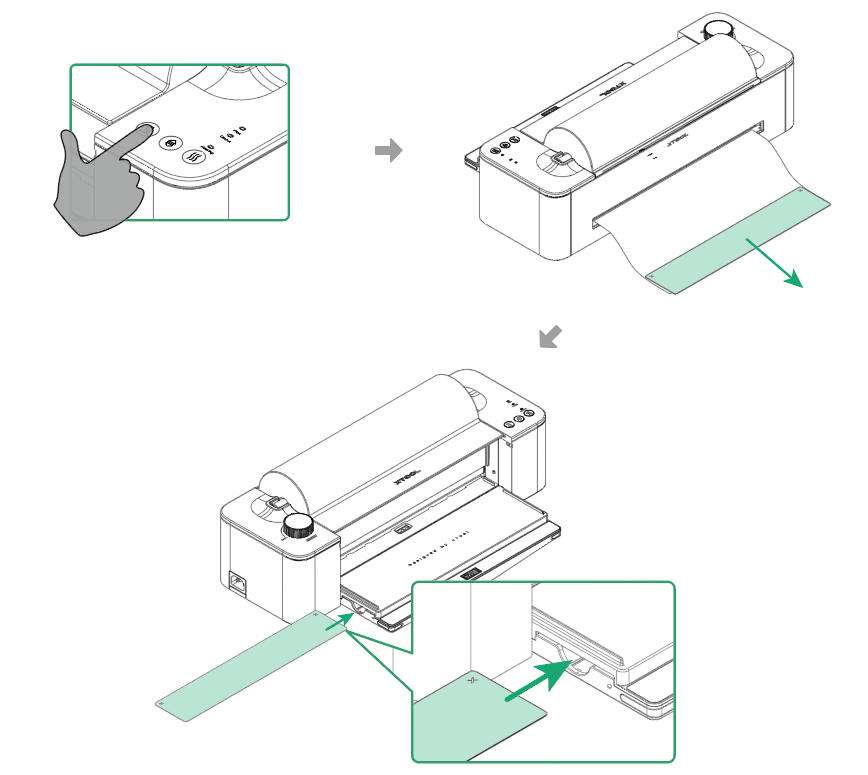
(4) Press the cut button to cut the film. Then, remove the push plate and store it in its storage slot.
3. Laminate
(1) Adjust the roller height. Based on the type of material to be laminated, turn the roller height adjustment knob to set the scale mark to the desired position. (Turn clockwise to raise the roller and counterclockwise to lower it.)
Material type | Scale mark |
|---|---|
Film | 0 |
Thick materials such as boards | 0–1 mm lower than the material thickness. For example, for a 6 mm thick material, the scale mark should be between 5 and 6. |
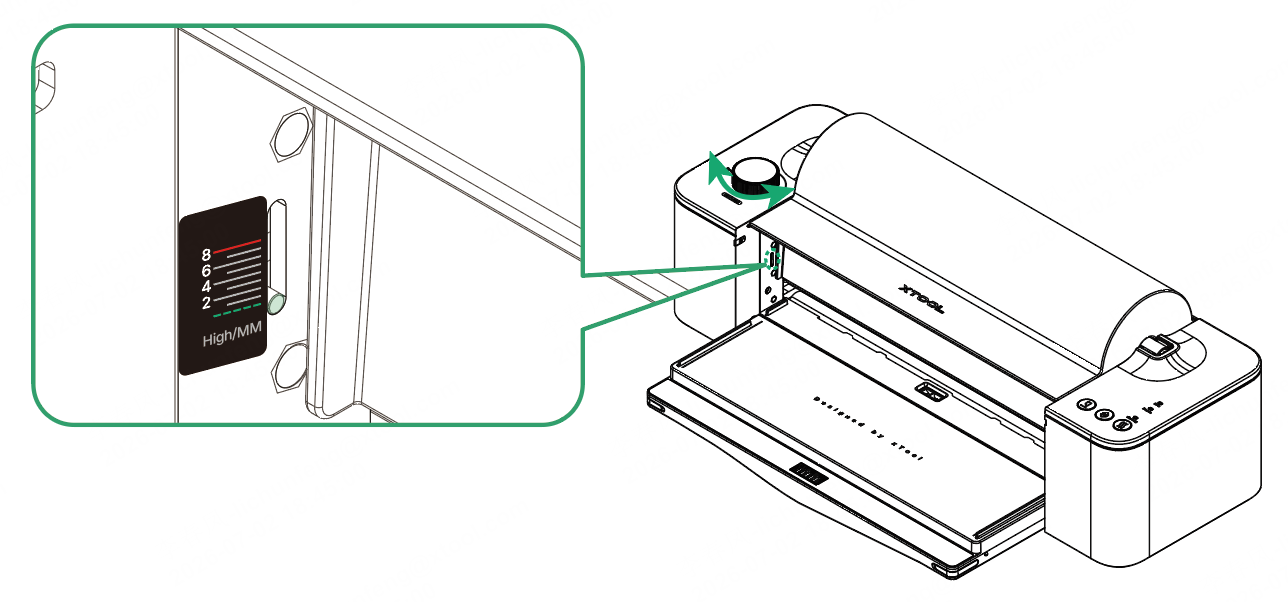
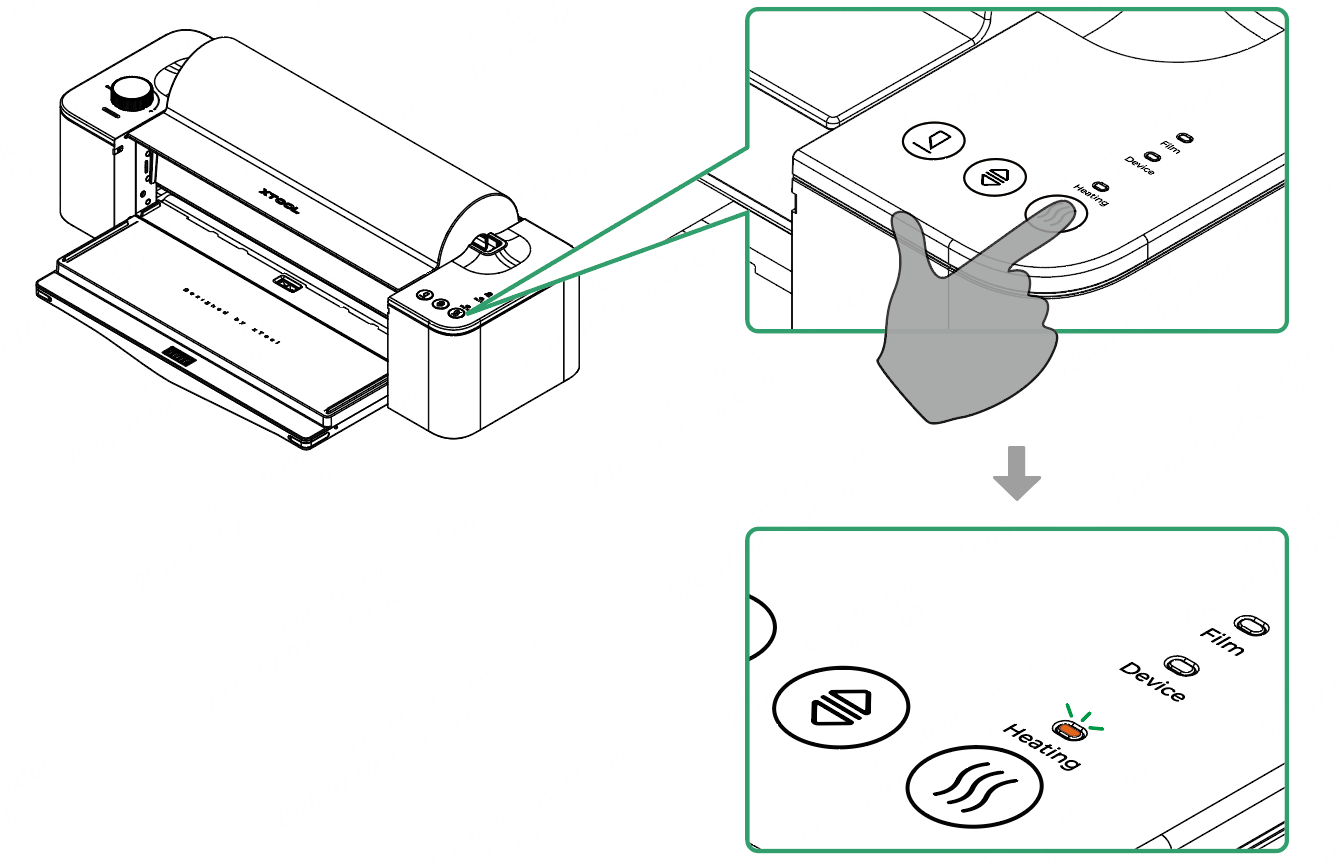
(2) Preheat the laminator. Press the heating button once to start the heating process. Once the heating is complete, you can hear a "beep" and the heating status indicator turns solid orange.
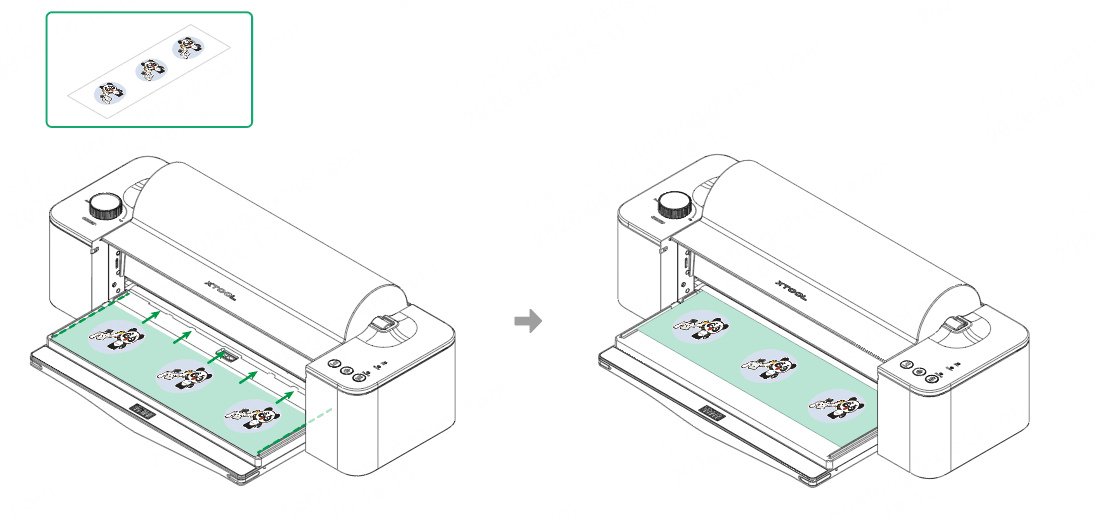
(3) Place the printed A film into the laminator and push it toward the roller. Once the sensor detects the film, the laminator will automatically feed it and begin laminating.
🔔 Ensure that the material is parallel to the limit blocks on both sides.
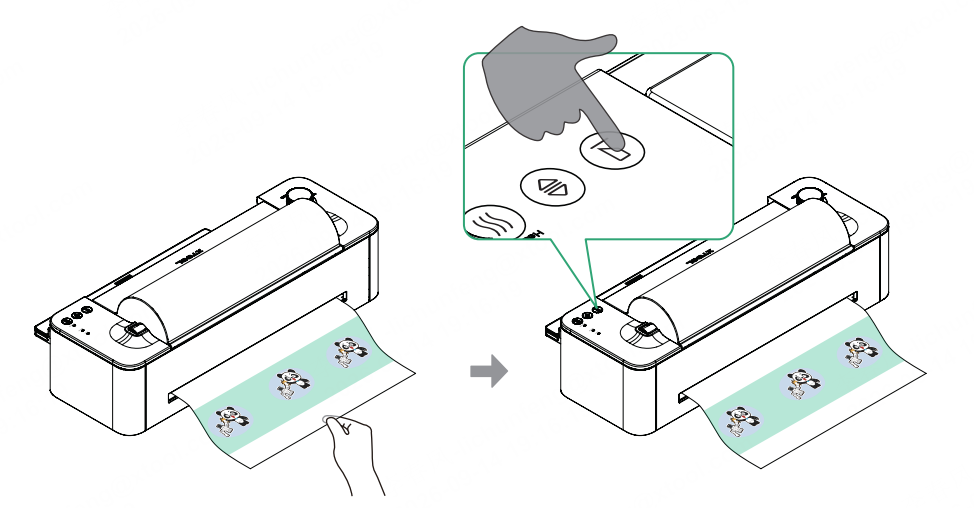
(4) After lamination is complete, pull the material out through the delivery slot, press the cut button to cut the film, then remove the material.
4. Apply the stickers
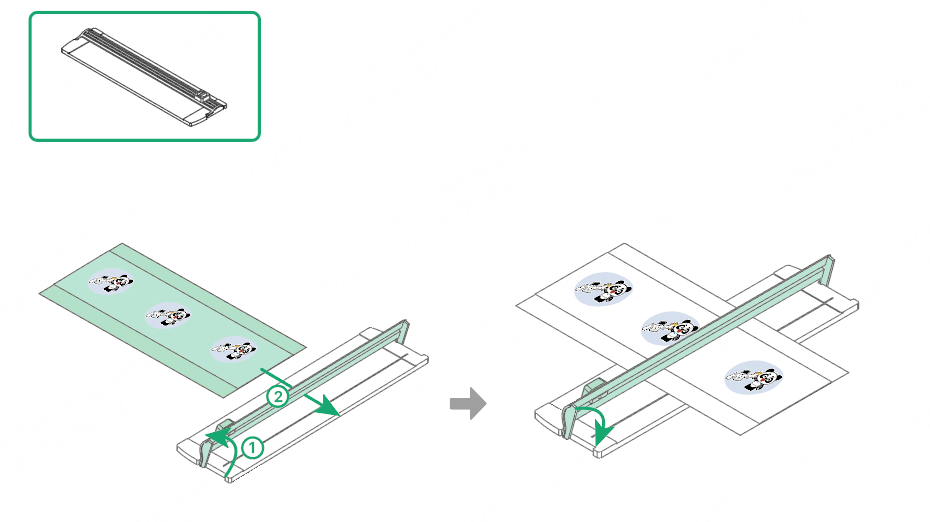
(1) Cut out the stickers with the paper cutter.
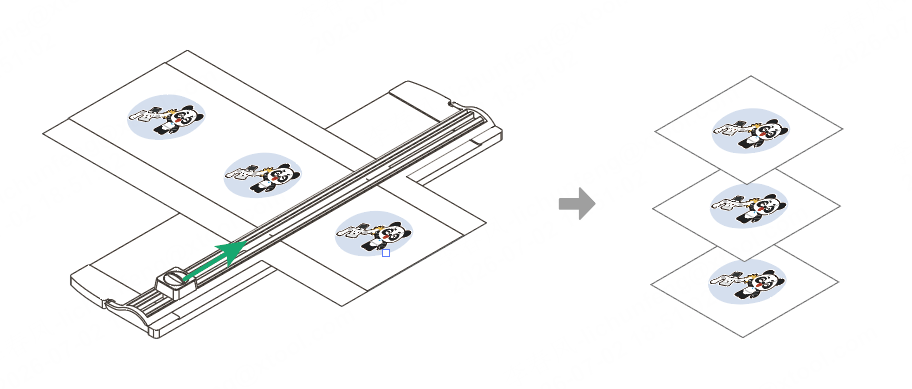
(2) Peel off A film and apply a sticker to the target item, then use the scraper to smooth it back and forth until the pattern adheres completely to the surface.
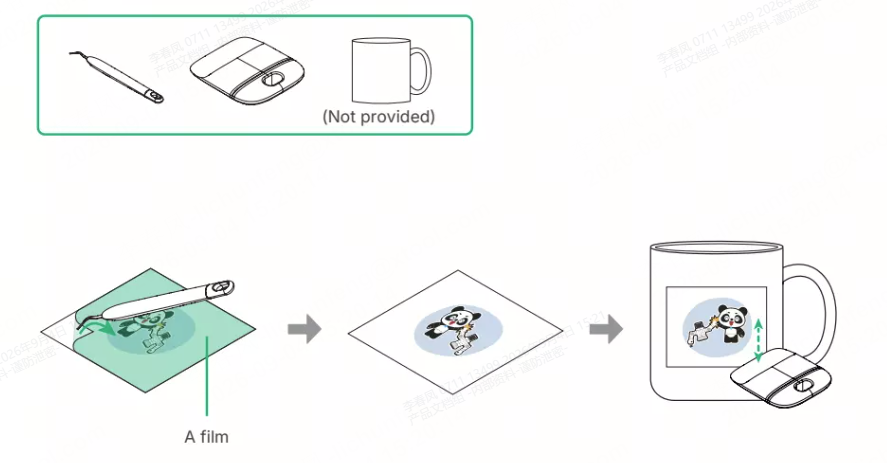
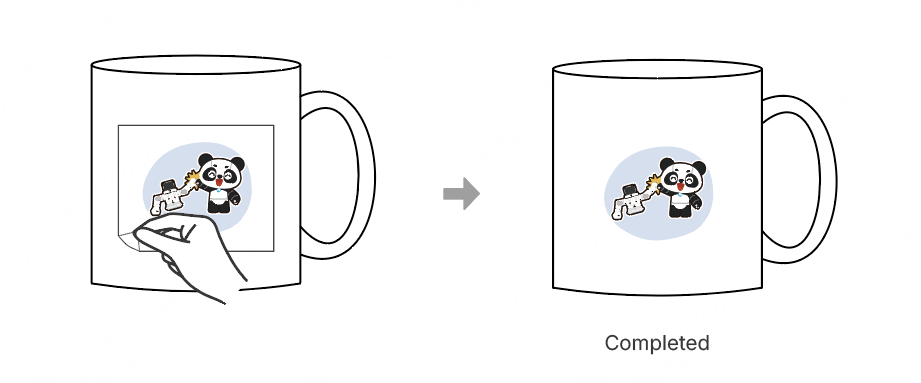
(3) Peel off the B film.
Make regular UV DTF stickers in batches
What you need
- Roll A film
- B film
- Paper cutter
- Scraper
- xTool RF1 Roll Feeder for Omni Printer
- xTool LM1 Laminator for Omni Printer
- xTool O1 Omni Printer
Procedure
Visit the video below to make regular UV DTF stickers in batches.
Make waste-stripped UV DTF stickers
What you need
- Sheet A film / A3 sheet A film
- Waste stripping film
- UV DTF adhesive transfer film
- Paper cutter
- Scraper
- xTool LM1 Laminator for Omni Printer
- xTool O1 Omni Printer
Procedure
1. Print the design
(1) Prepare xTool O1 Omni Printer referring to the instructions in its Quick Start Guide, ensuring it is ready for printing.
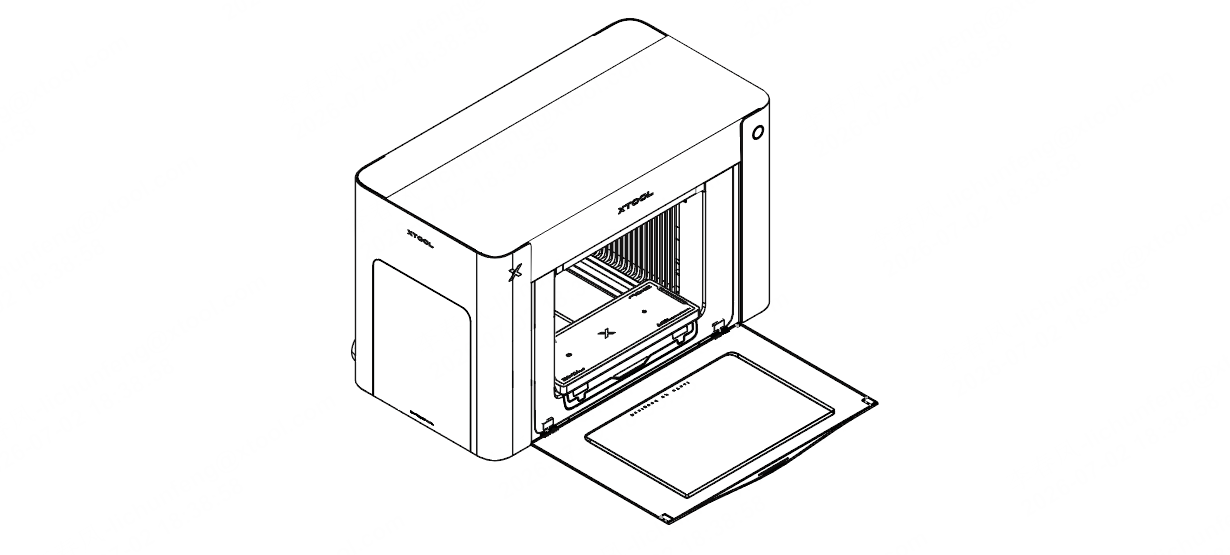
(2) Stick the A film to the mini adhesive mat and peel off the release paper.
🔔
- Ensure that the release paper side (the thinner, non-adhesive side) faces upward. - If you use A3 sheet A film, use the standard adhesive mat for printing.
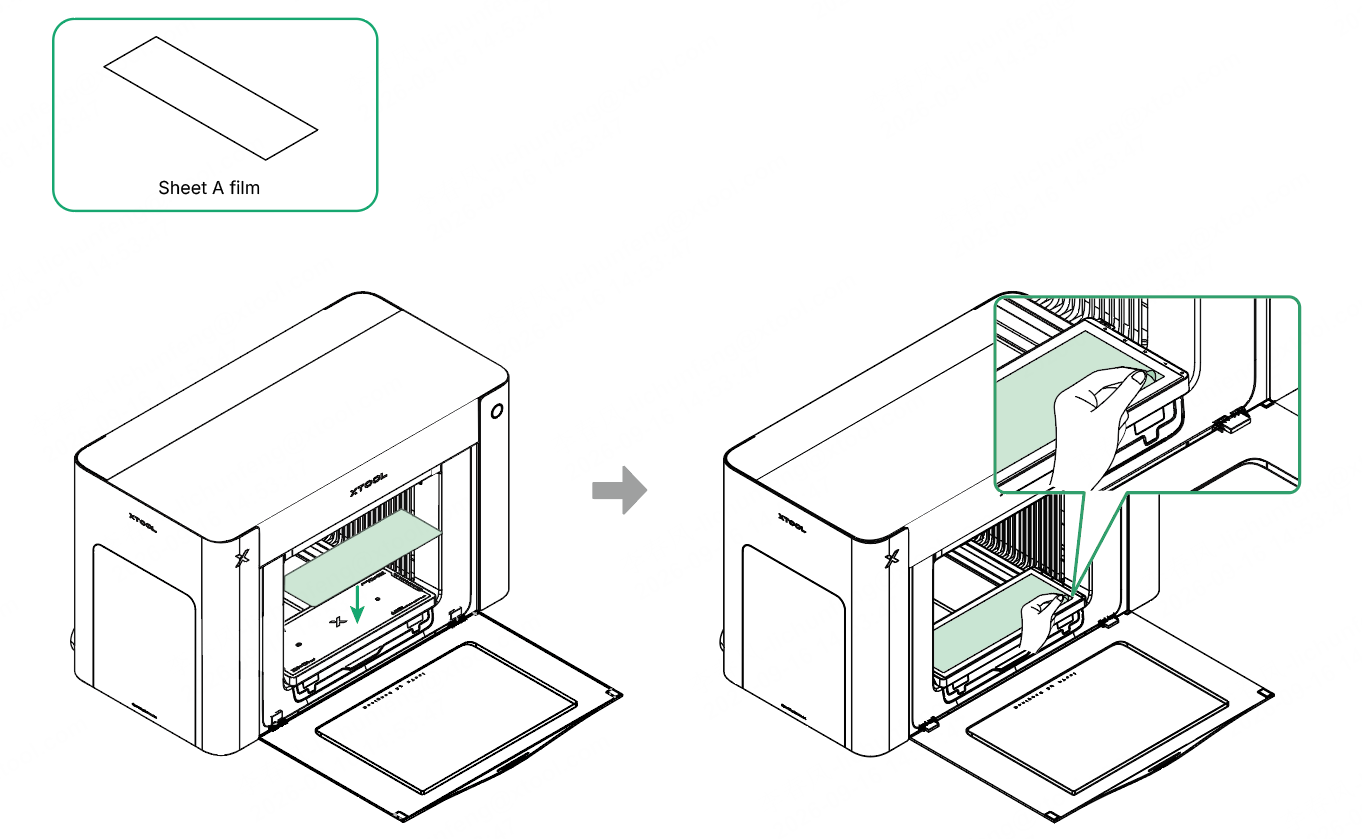
(3) In xTool Studio, click Material > Hot Foil Transfer Sticker > Apply. Print patterns referring to the operating steps for xTool O1 Omni Printer, then take out the A film.
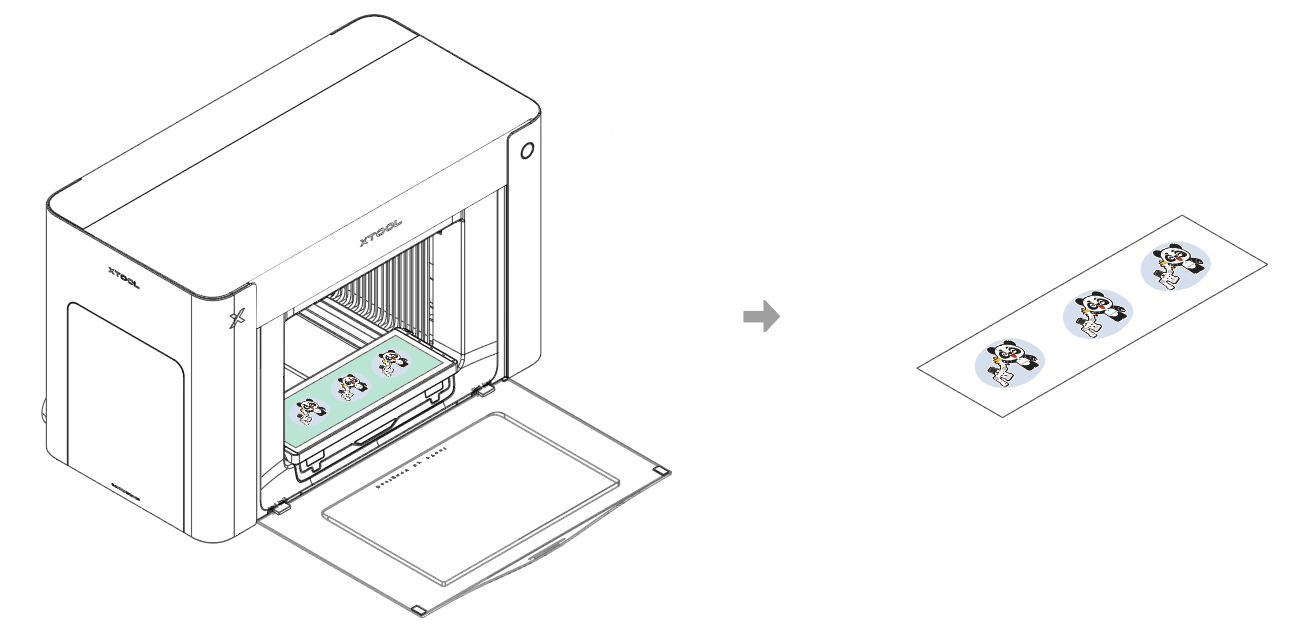
2. Prepare the laminator
(1) Connect the laminator to the power supply.
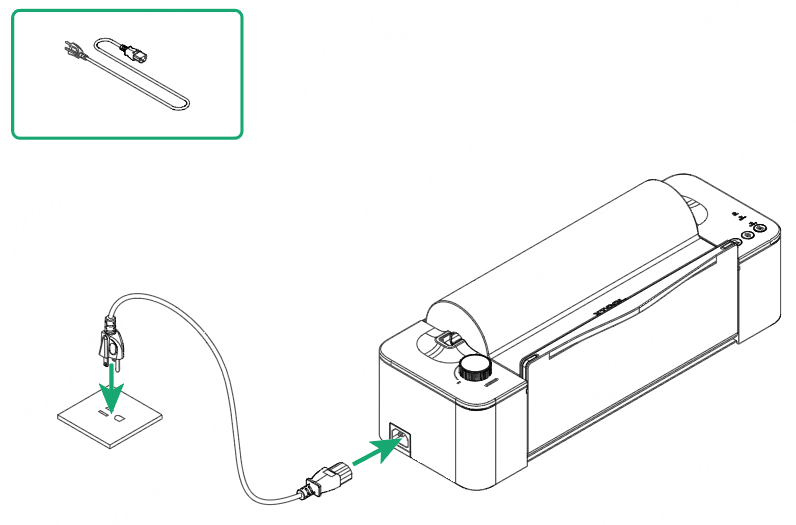
(2) Open the front and top covers and remove B film.
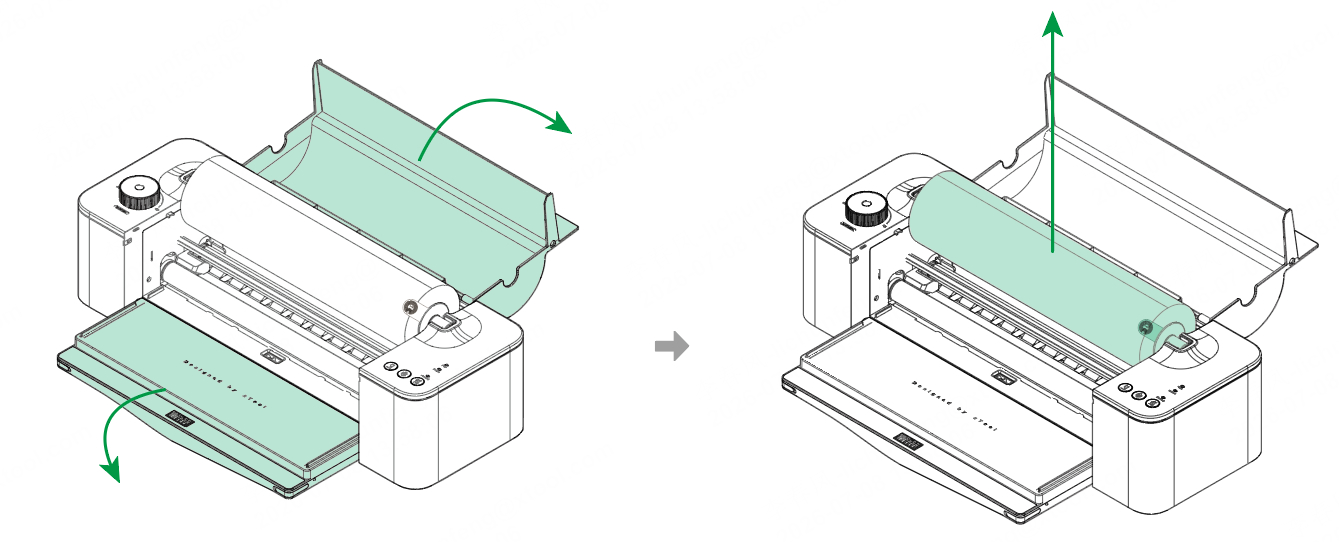
(3) Install the waste stripping film.
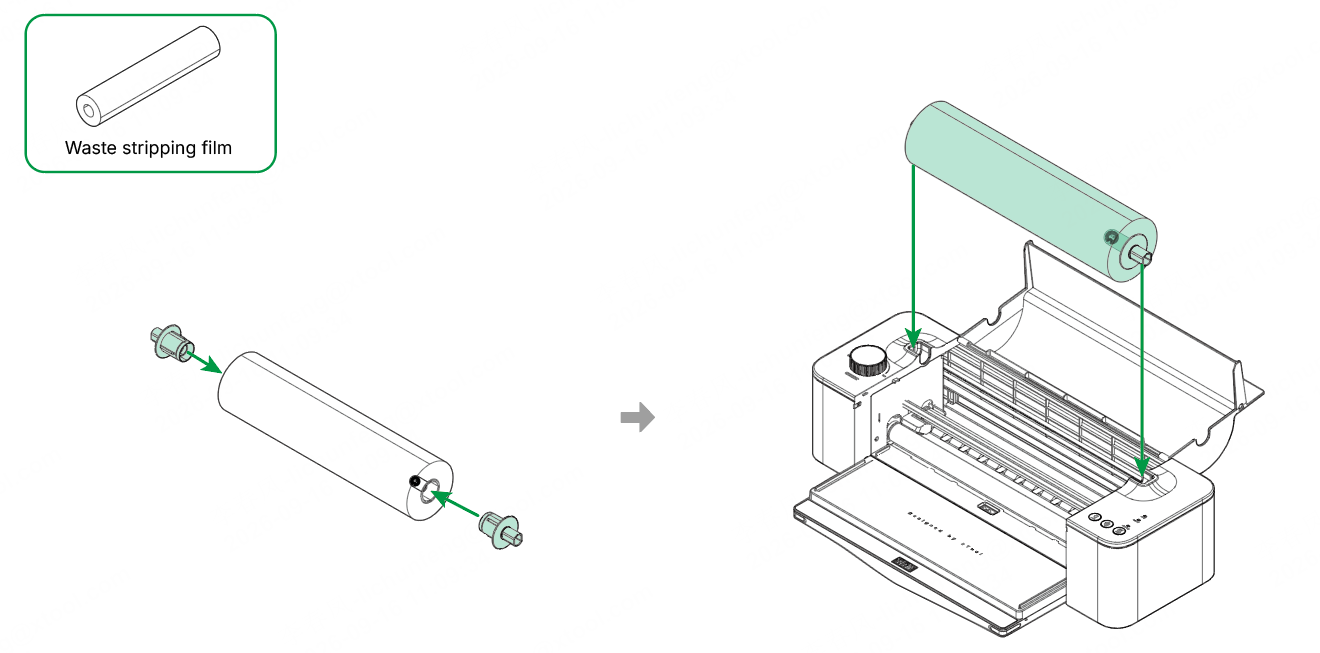
(4) Peel off the sticker from the roll film, pull the film out until it aligns with the top edge of the front cover, and close the top cover.
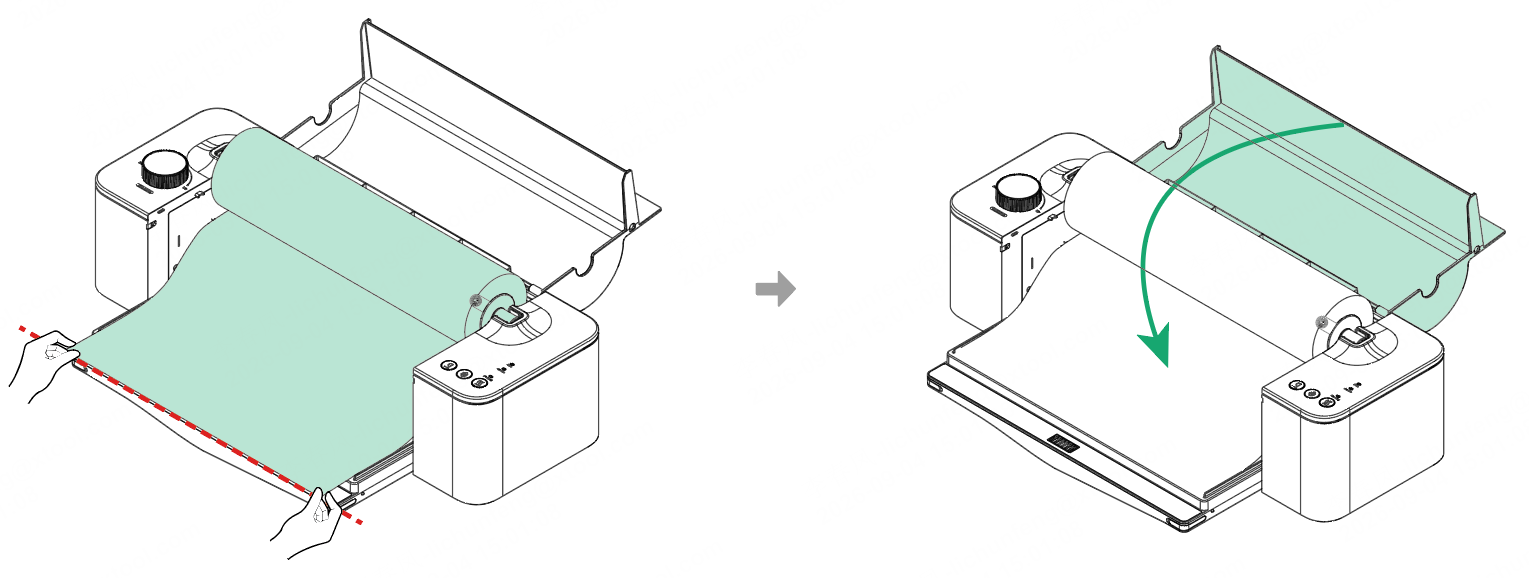
(5) Take out the push plate, place it on the film, and push it towards the roller. When the feed sensor detects the film, the laminator automatically starts feeding.
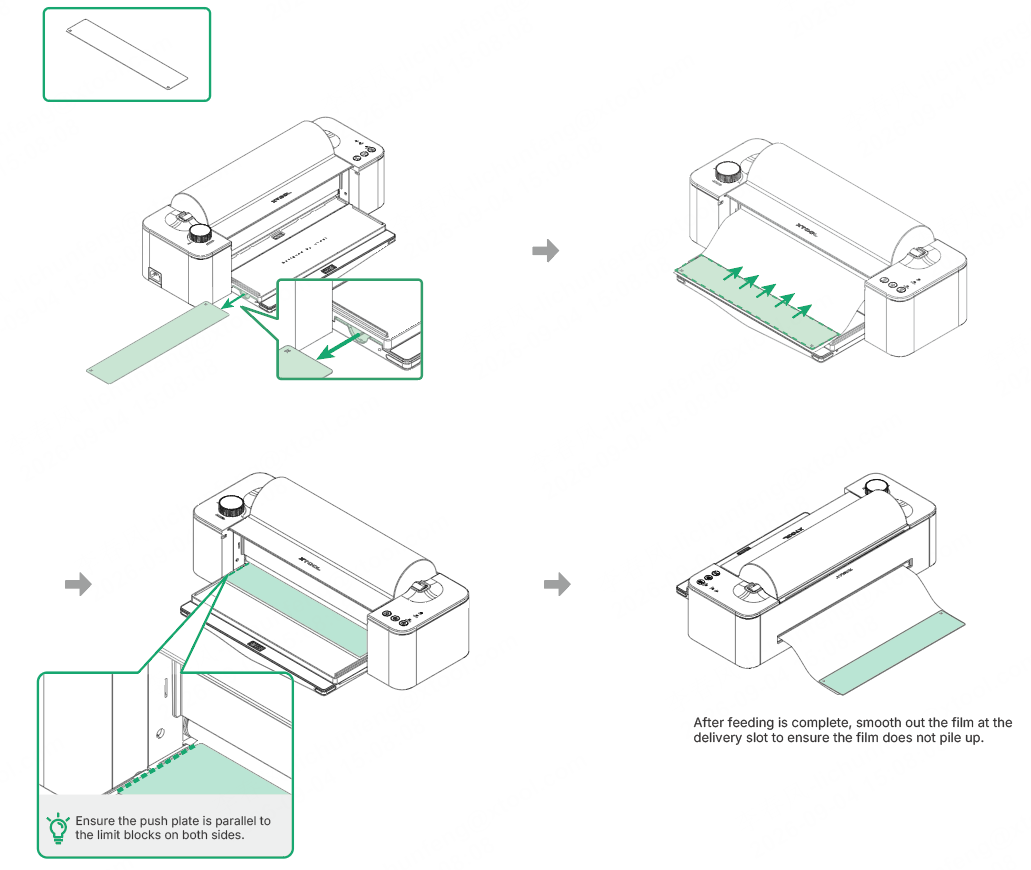
(6) Remove the push plate and store it in its storage slot.
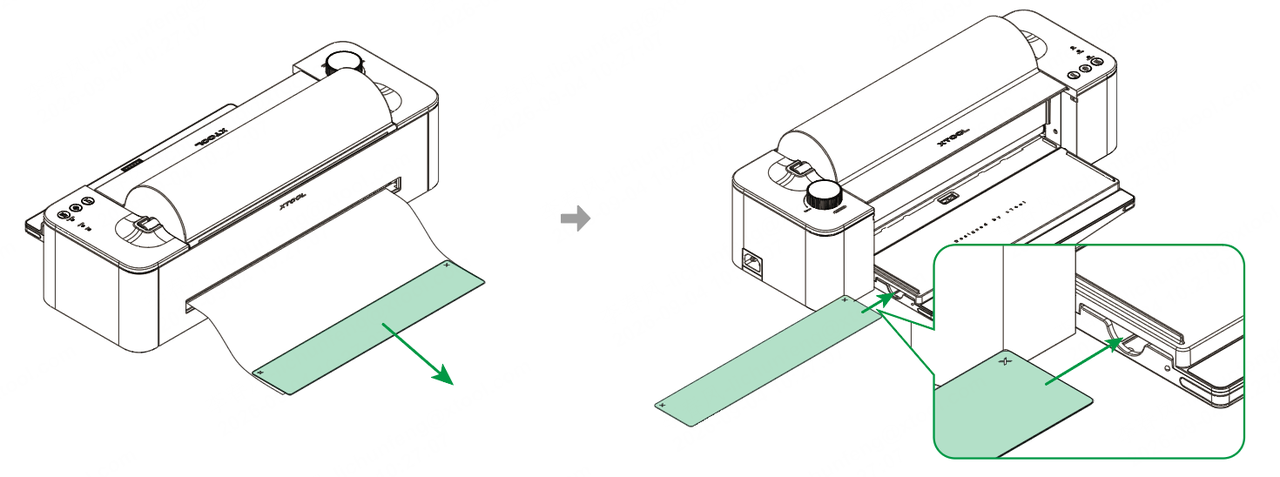
3. Laminate with waste stripping film
(1) Adjust the roller height. Based on the type of material to be laminated, turn the roller height adjustment knob to set the scale mark to the desired position. (Turn clockwise to raise the roller and counterclockwise to lower it.)
Material type | Scale mark |
|---|---|
Film | 0 |
Thick materials such as boards | 0–1 mm lower than the material thickness. For example, for a 6 mm thick material, the scale mark should be between 5 and 6. |
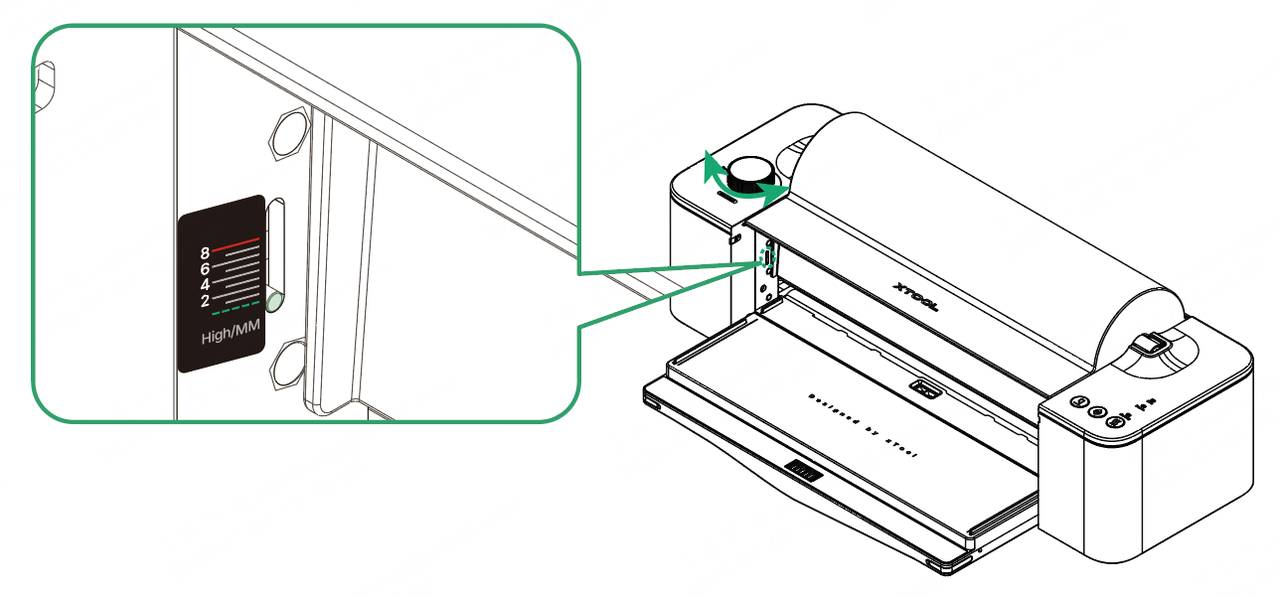
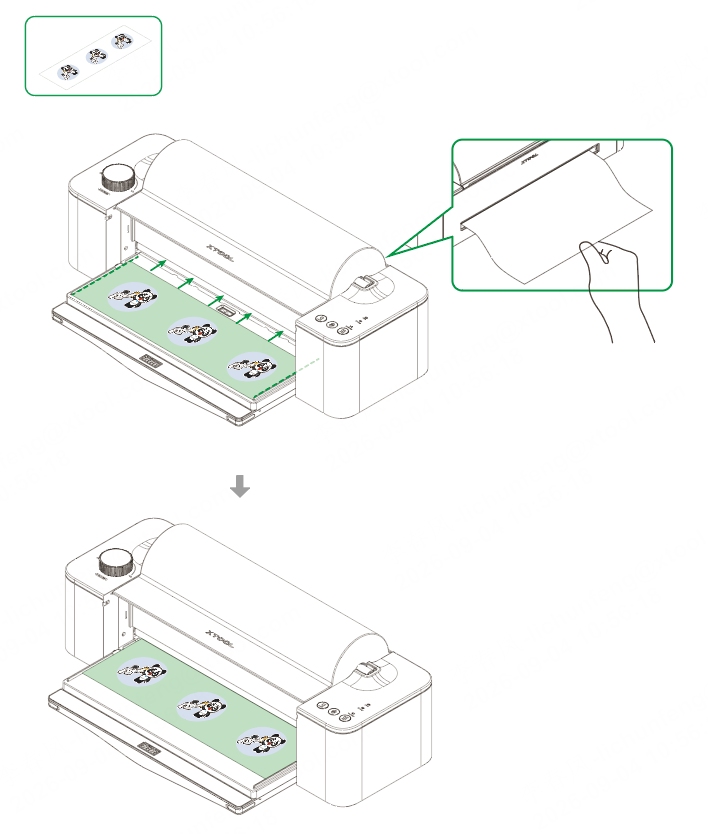
(2) Place the printed A film into the laminator and push it toward the roller while holding the waste stripping film at the delivery slot. When the sensor detects the film, the laminator will automatically feed it and begin laminating.
🔔 During lamination, hold the waste stripping film at the delivery slot to prevent it from being pulled back into the laminator.
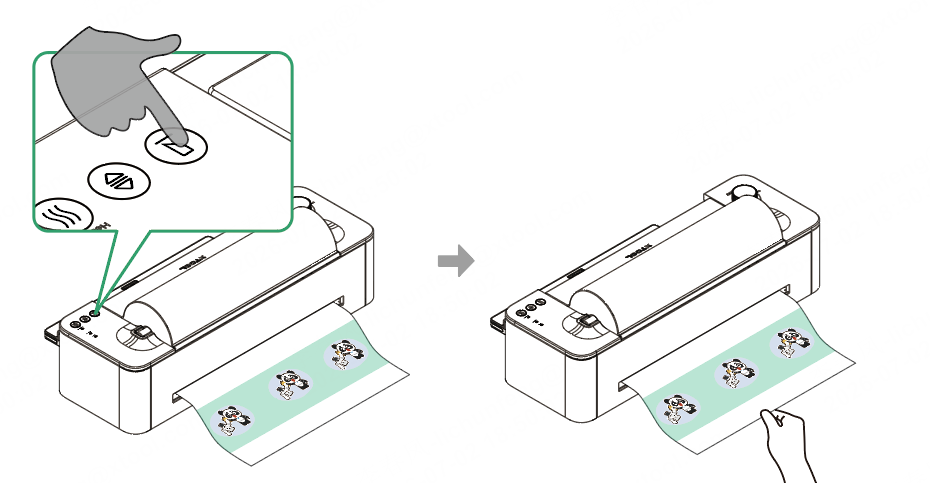
(3) After lamination is complete, press the cut button to cut the film.
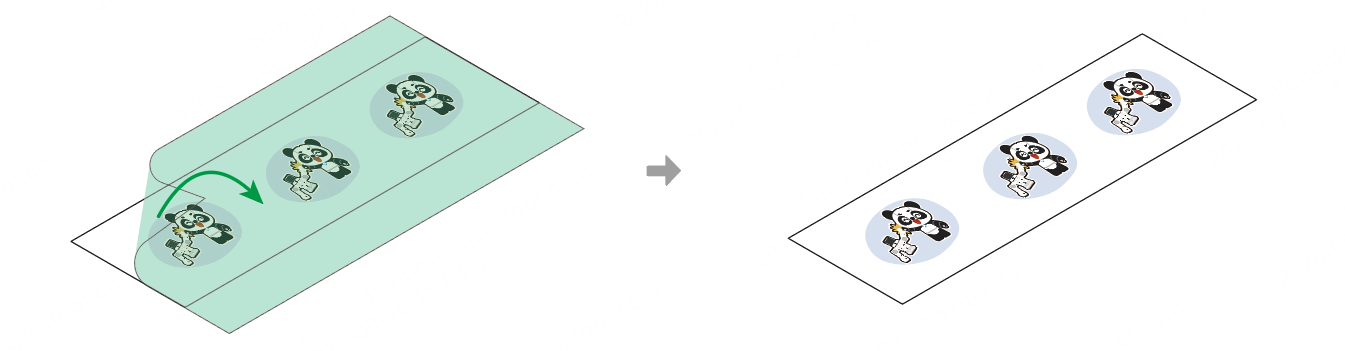
(4) Slowly peel off the waste stripping film close to the surface of A film.
🔔 Peel carefully to avoid lifting the design.
4. Laminate with the transfer film
(1) Cut a piece of transfer film to the same size as the A film, and peel off the release paper from the transfer film.
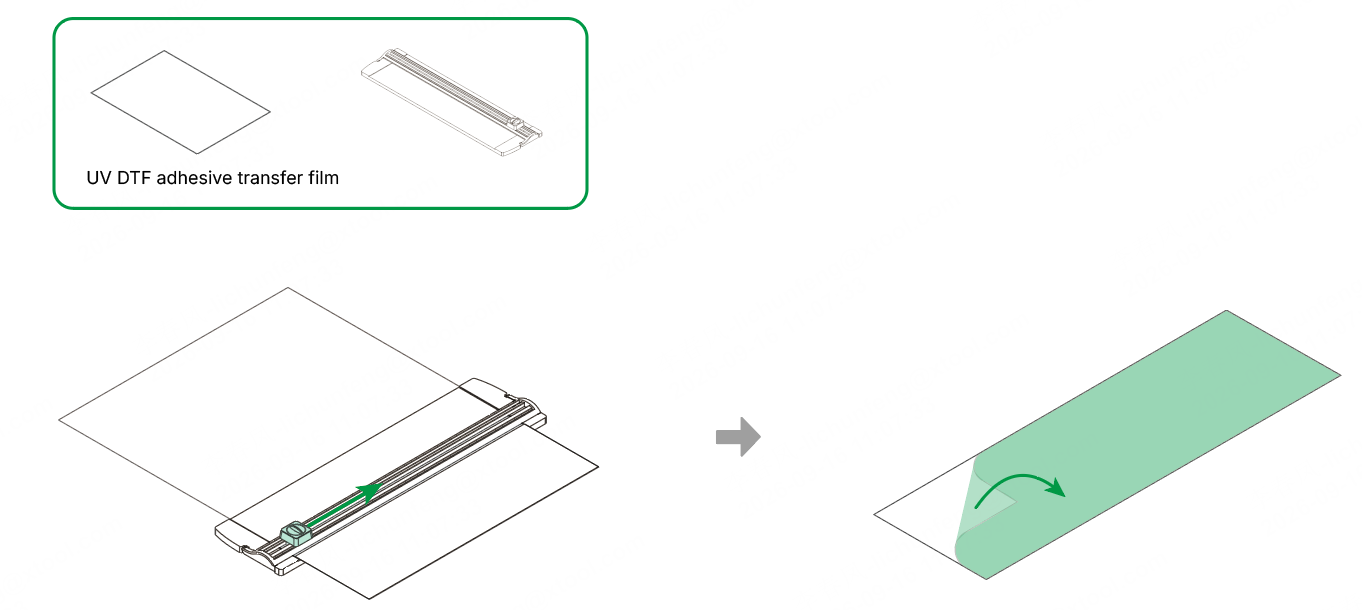
(2) Apply the transfer film to the A film and smooth it out with both hands.
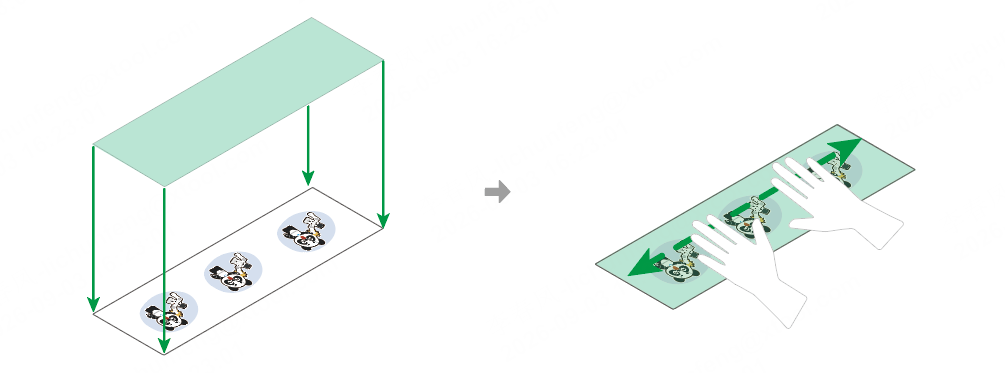
(3) Open the top cover of the laminator and turn the roller height adjustment knob until the waste stripping film becomes loose.
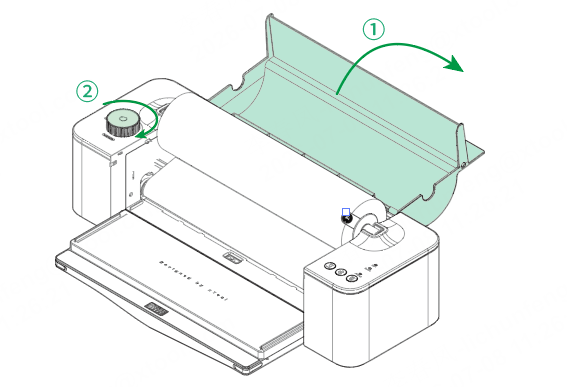
(4) Roll up the waste stripping film, turn the roller height adjustment knob until the roller reaches its lowest position, and close the top cover.
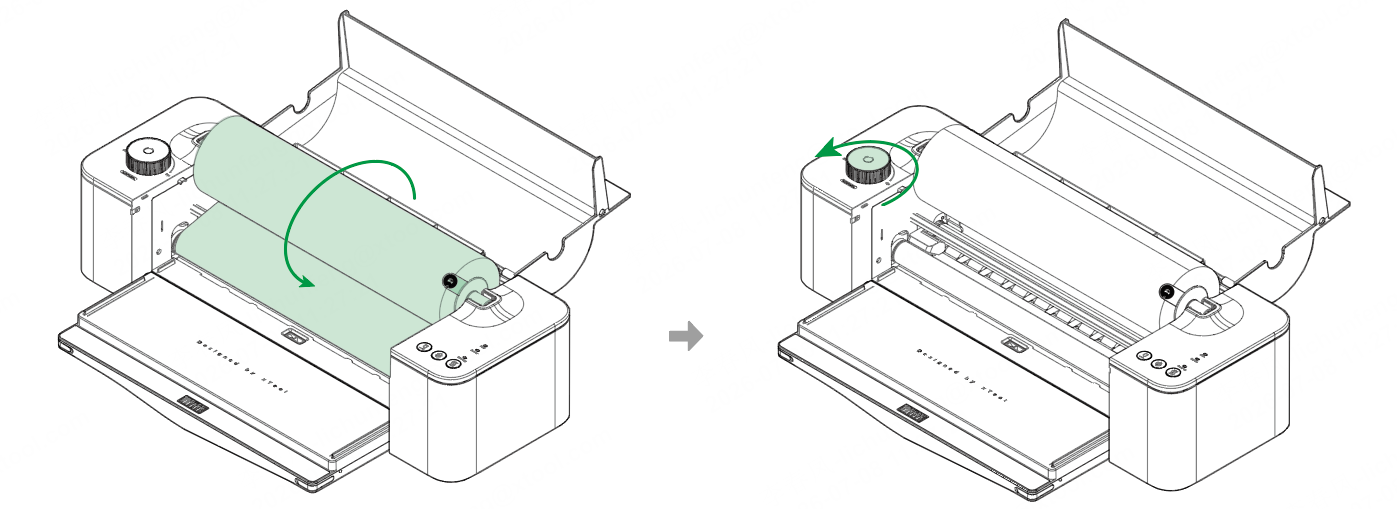
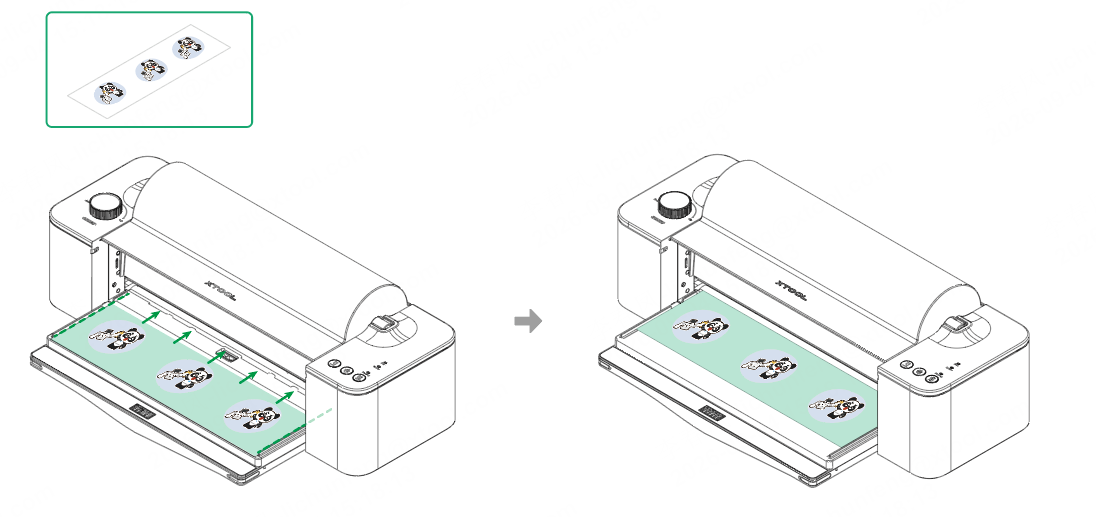
(5) Place the A film with the transfer film applied on the laminator and wait for the material to feed through automatically.
🔔 Ensure that the material is parallel to the limit blocks on both sides.
5. Apply the stickers
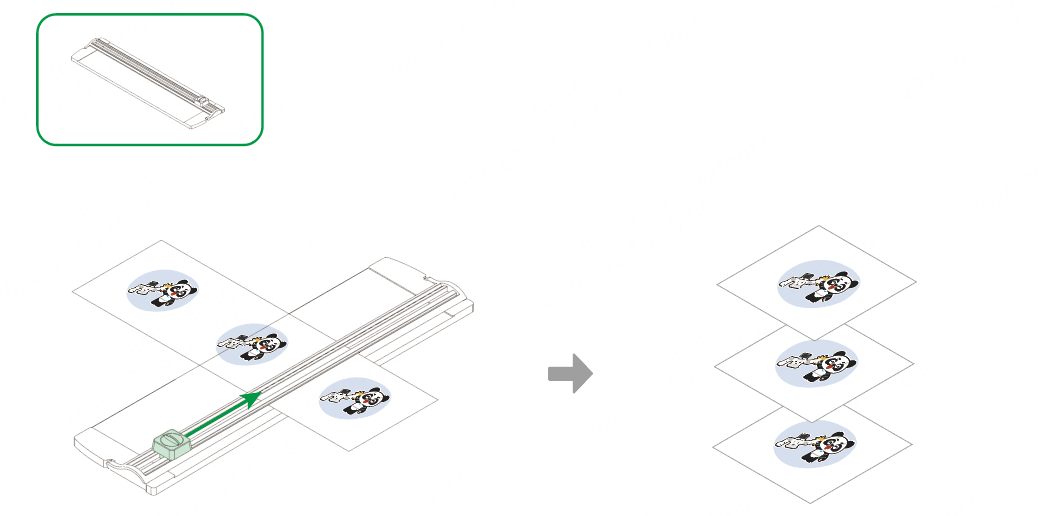
(1) Cut out the stickers with the paper cutter.
(2) Peel off A film and apply the pattern to the target item, then use the scraper to smooth it back and forth until the pattern adheres completely to the surface.
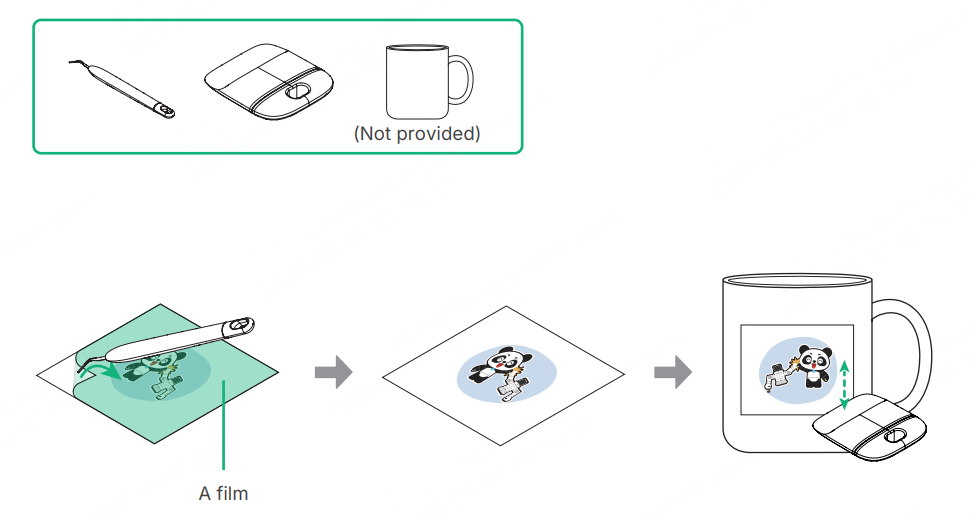
(3) Peel off the transfer film.