
Set up xTool M2 in xTool Software
Updated May 27,2026
Updated May 27,2026
After connecting xTool M2 to the software, you can set up xTool M2 by referring to the following steps.
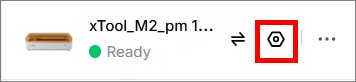
In the top-right corner of the software, click the settings icon.
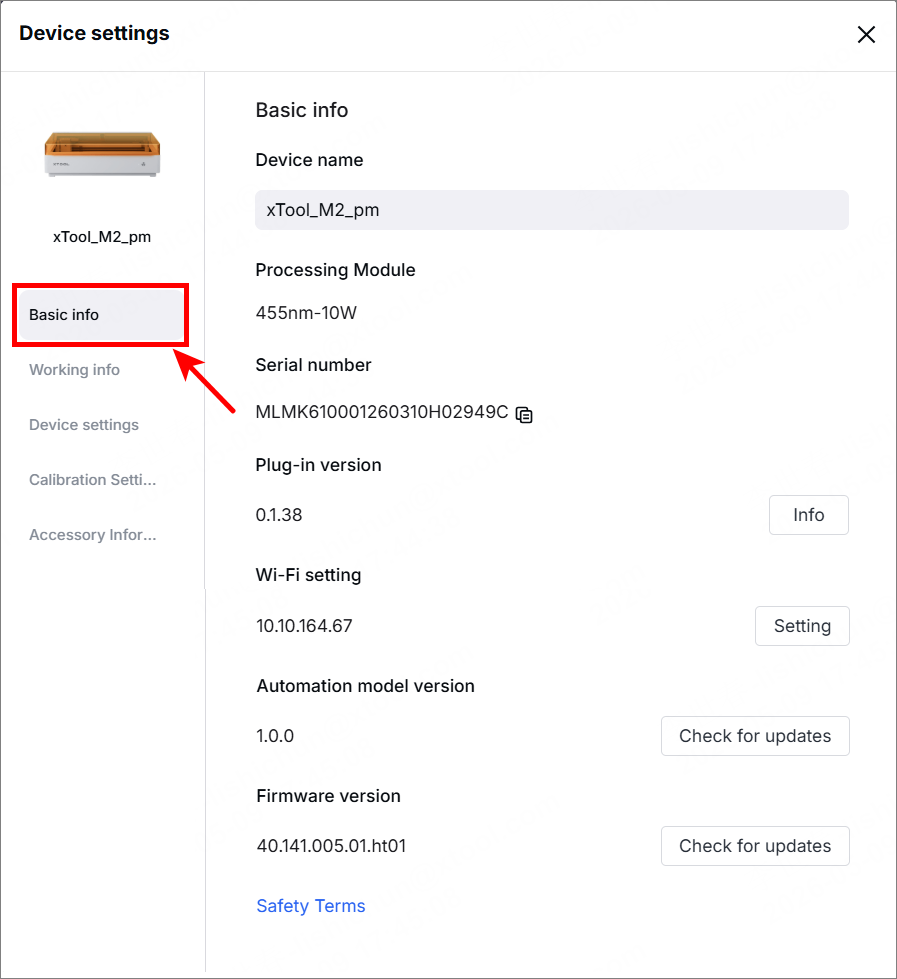
Basic info
In the Basic info tab, you can view:
- Device name: shows the device name. You can enter the text box to change it.
- Processing model: displays the model being processed.
- Serial number: displays the serial number of your device.
- Plug-in version: displays the plug-in version of your device. You can click Info to view details about it.
- Wi-Fi setting: displays the Wi-Fi address.
- Automation model version: displays the automation model version. You can click Check for updates to update to the latest version if available.
- Firmware version: shows the firmware version. You can click Check for updates to update to the latest version if available.
- Safety Terms: click to view the safety terms.
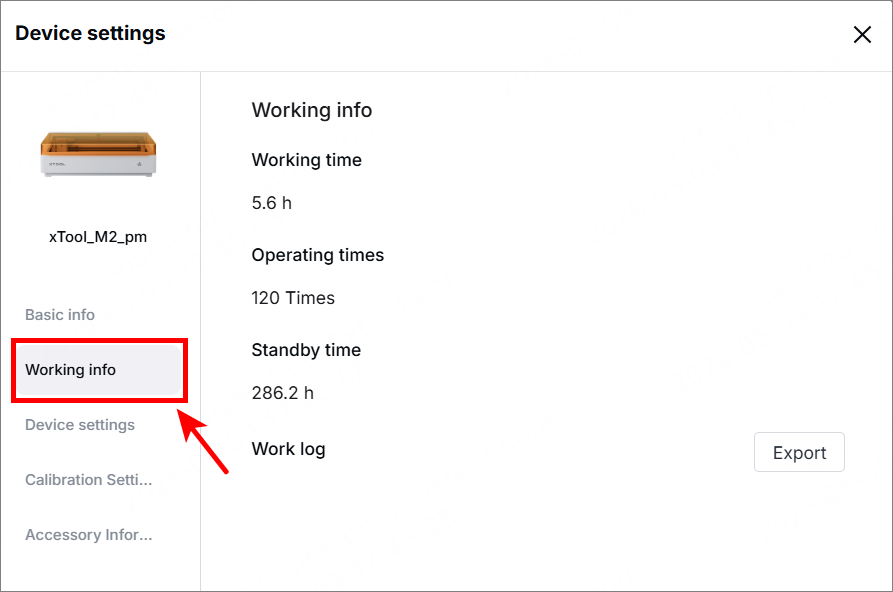
Working info
In the Working info tab, you can view:
- Working time: displays the total time the device processes materials.
- Operating times: displays the total number of times the device has been operated.
- Standby time: displays the total time the device is on standby.
- Work log: You can click Export to export the work log of the device.
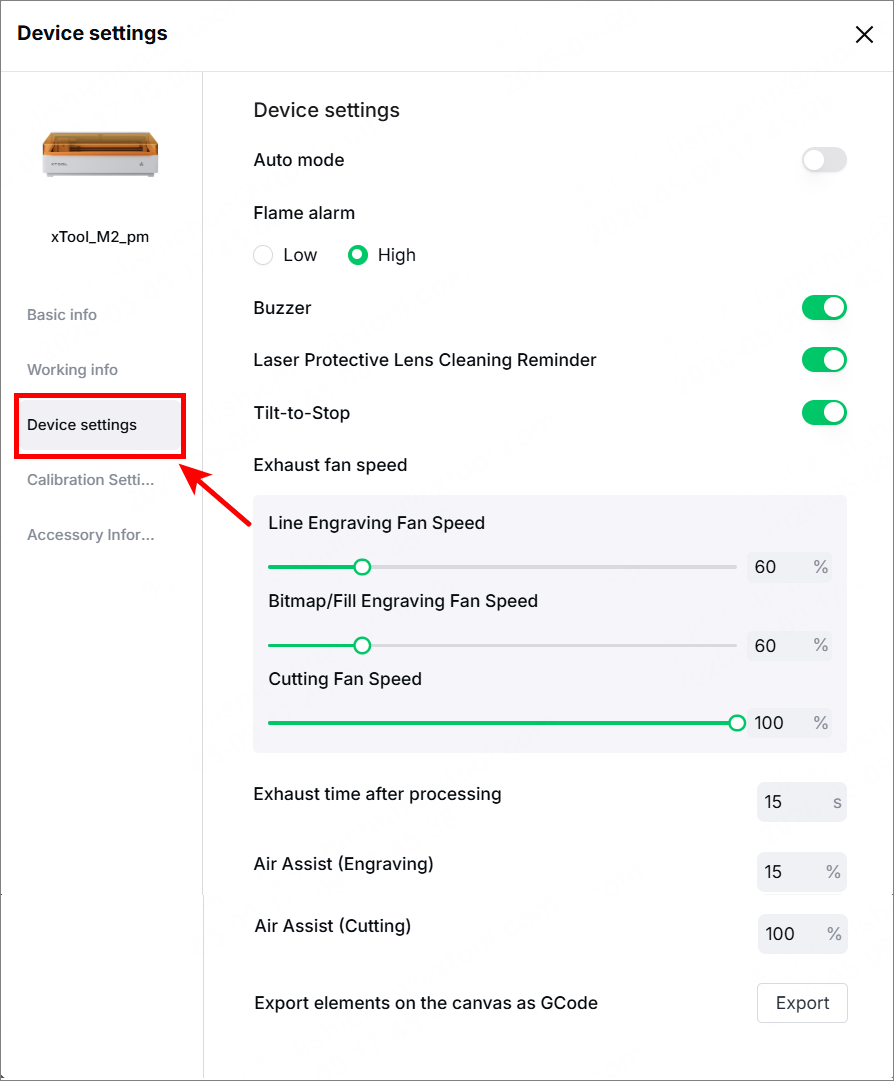
Device settings
In the Device settings tab, you can view:
- Auto mode: enables or disables auto mode during processing.
- Flame alarm: If enabled, the device pauses processing and raises the alarm when flame is detected. You can switch between high detection sensitivity and low detection sensitivity.
- Buzzer: enables or disables the buzzer of the machine. After being disabled, the buzzer no longer works as an indicator.
- Laser protective lens cleaning reminder: Enable or disable the laser protective lens cleaning reminder. It is recommended to enable this reminder. If the protective lens is not cleaned in time, it may reduce the laser output power and even damage the laser module.
- Tilt-to-stop: If enabled, the device will pause processing when it is tilted during processing.
- Exhaust fan speed:
- Line engraving fan speed: Sets the fan speed during line engraving.
- Bitmap/Fill engraving fan speed: Sets the fan speed during bitmap/fill engraving.
- Cutting fan speed: Sets the fan speed during cutting.
- Exhaust time after processing: You can set the time duration the exhaust fan continues to work after a processing task ends. By working for a longer time, the fan can exhaust the remaining smoke after processing.
- Air assist (engraving): Sets the power of the air assist during engraving.
- Air assist (cutting): Sets the power of the air assist during cutting.
- Export elements on the canvas as G-code: exports all the elements on the canvas to a G-code file.
Calibration
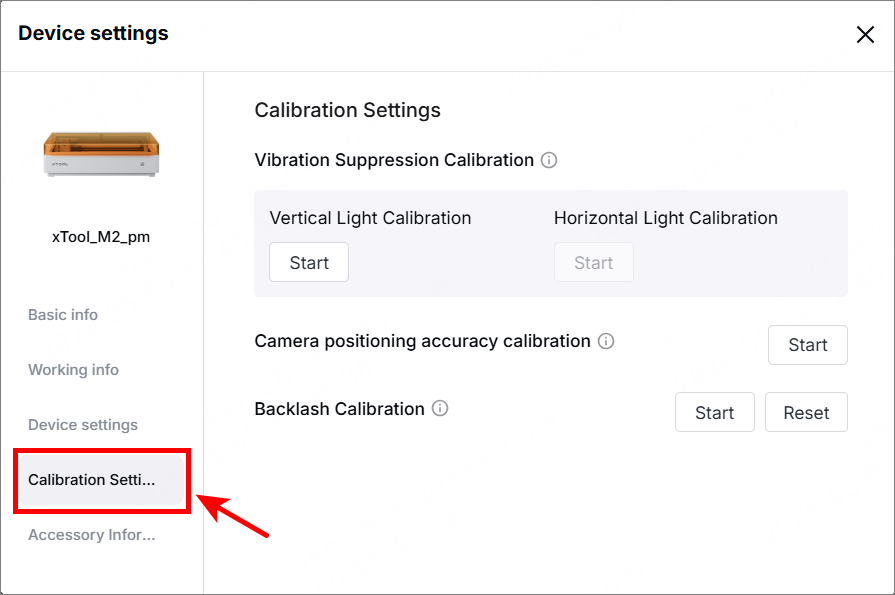
In the Calibration settings tab, you can operate:
- Vibration suppression calibration: Measures the vibration frequency of the laser module and generates compensation data to minimize vibration during processing.
- Vertical light calibration: Clicks Start to perform vertical laser output calibration.
- Horizontal light calibration: Clicks Start to perform horizontal laser output calibration. This feature is available only in Use Rotary Attachment mode.
- Camera positioning accuracy calibration: Calibrates the laser module and the close-view and distant-view cameras to ensure accurate positioning.
- Backlash calibration: Eliminates processing variations and improves the quality of bitmap processing and fill engraving. If you do not observe issues such as streaks, ghosting, or jagged edges, calibration is not necessary.
Accessory information
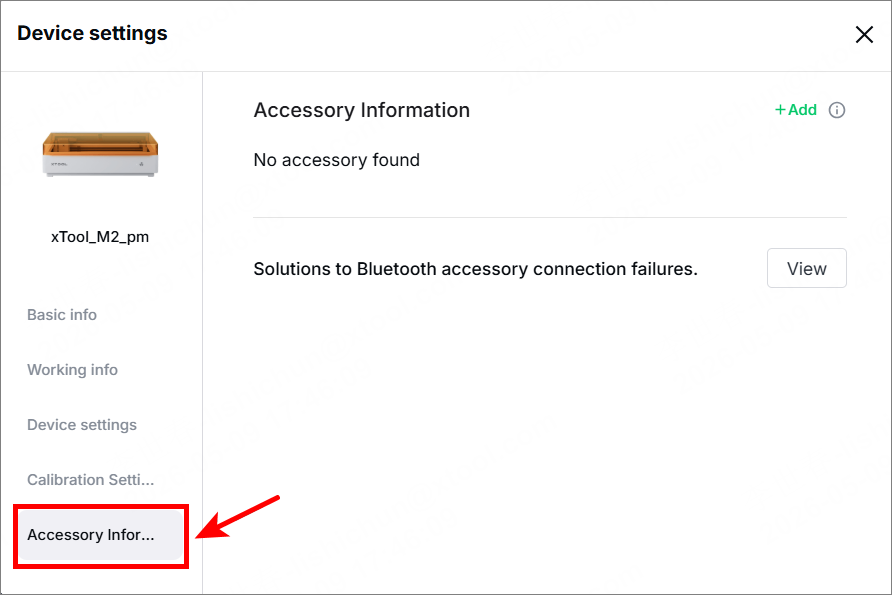
In the Accessory information tab, you can operate:
- Accessory information: displays the accessory that connects to xTool M2.
- Solutions to Bluetooth accessory connection failures: Click View to see the connection solutions.
Preview
Was this page helpful?
169 out of 171 found this helpful
Help Ticket
Use this help ticket to submit your issue. We will respond within 1 business day
Submit a Ticket 
