
Requirements for materials
Under the Curved material mode, different laser modules support different curved surface processing angles (there will be slight measurement errors in the angle).
- 10W laser module: 7.5°
- 20W laser module: 7° ~ 9°
- 40W laser module: 6° ~ 8°
- 3W infrared module: 8°
1. Connect xTool M2 to the software
Go to Operate xTool M2 with xTool Software and follow the steps. Make sure the device is connected successfully.
2. Place the material
Open the lid of xTool M2, and place the material to be processed on the baseplate.
3. Select the processing mode and material
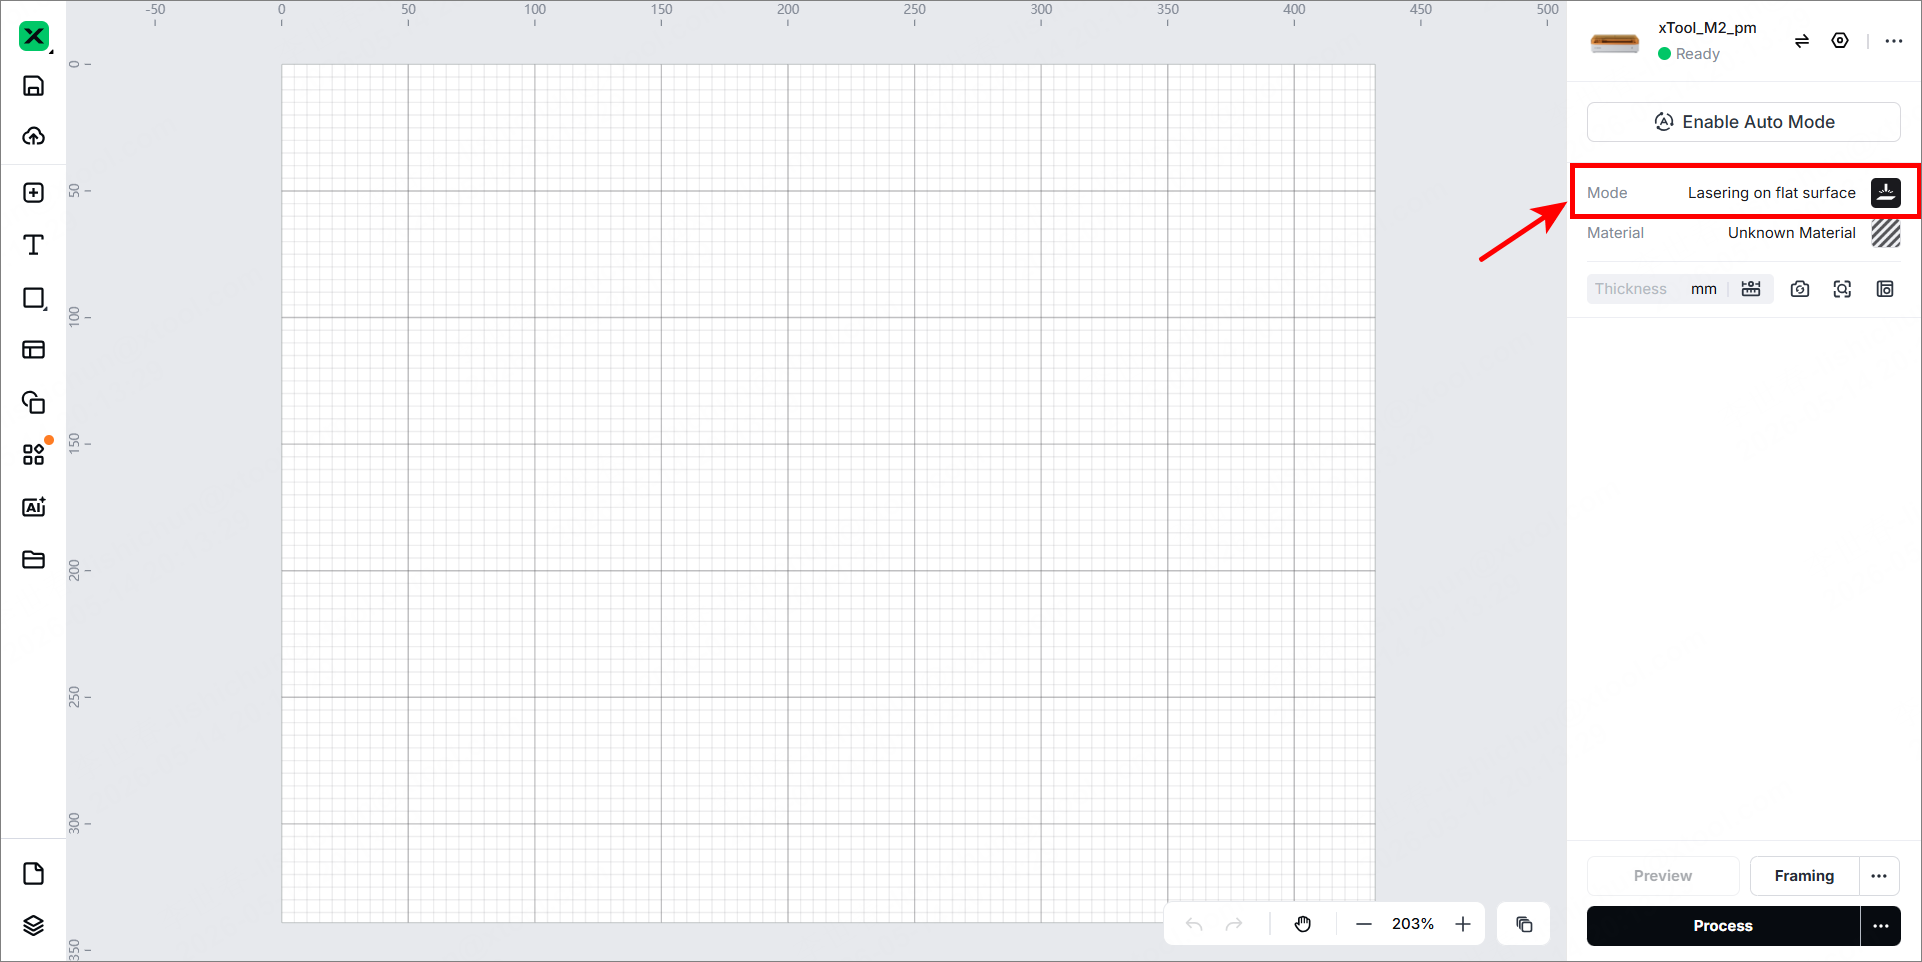
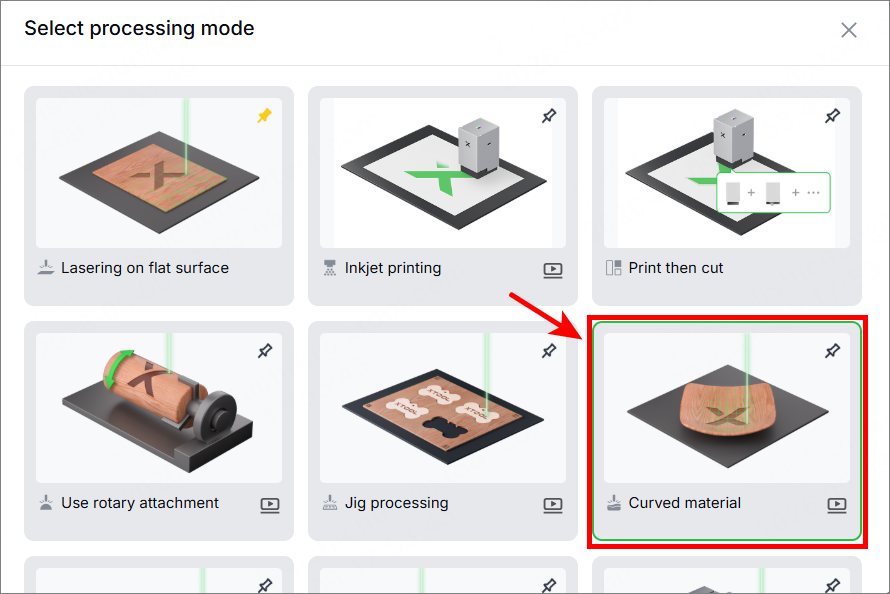
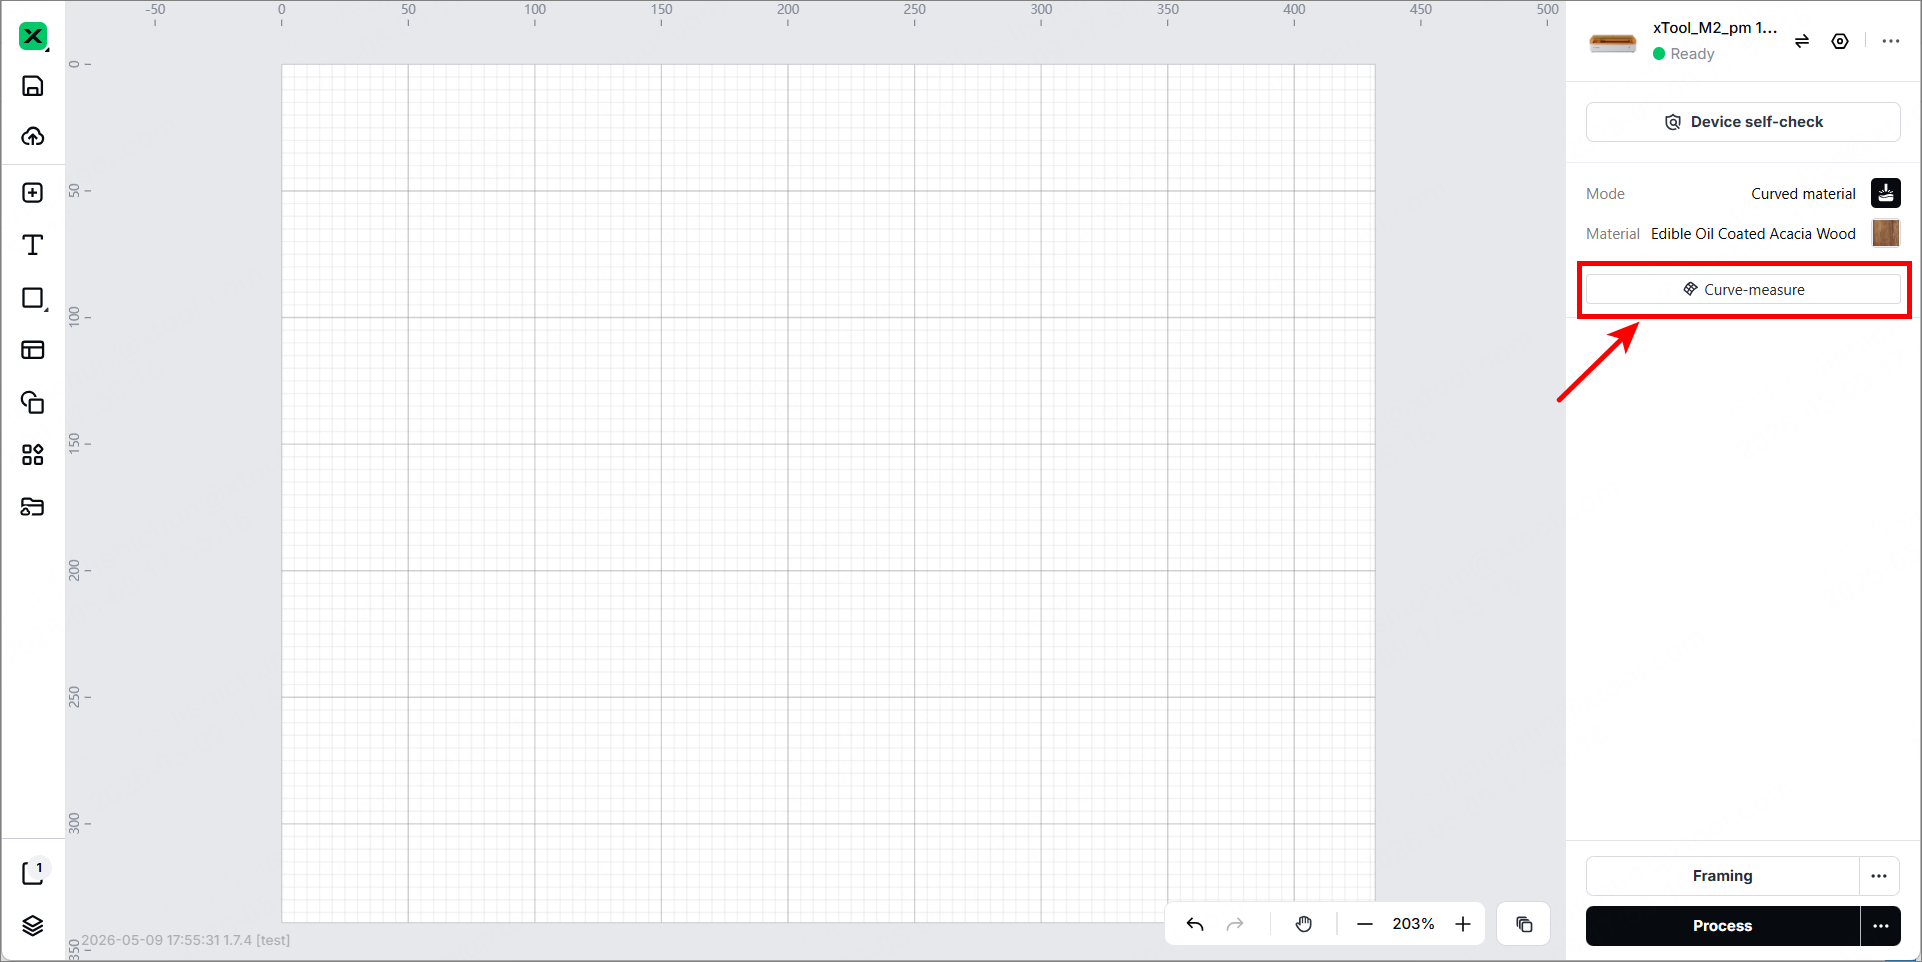
(1) On the right panel, select Curved material as the processing mode.

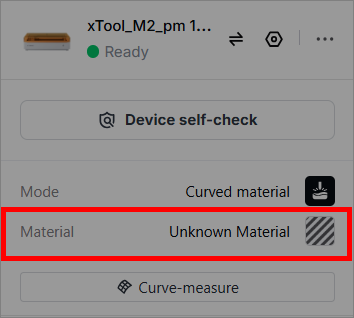
(2) Under Mode, select the material and click Apply.
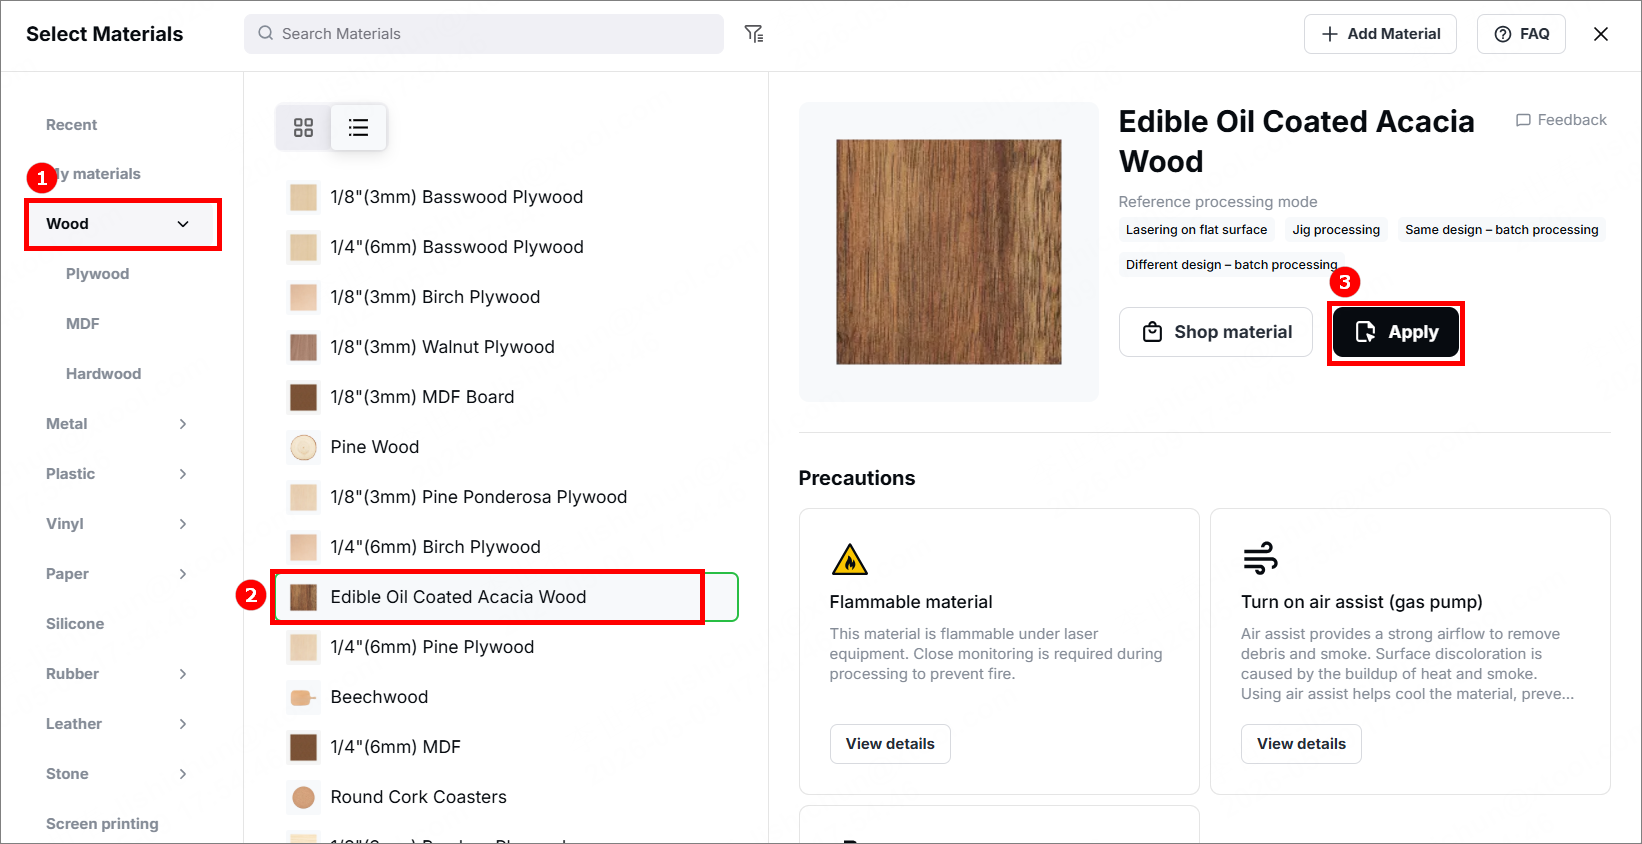
After you select a material from the material list, the software will automatically set the laser processing parameters. The default settings apply to xTool materials. You can adjust the settings based on your needs. If you select user-defined material, you need to set the processing parameters yourself.
4. Measure the curved area
(1) Click Curve-measure to measure the curved area.
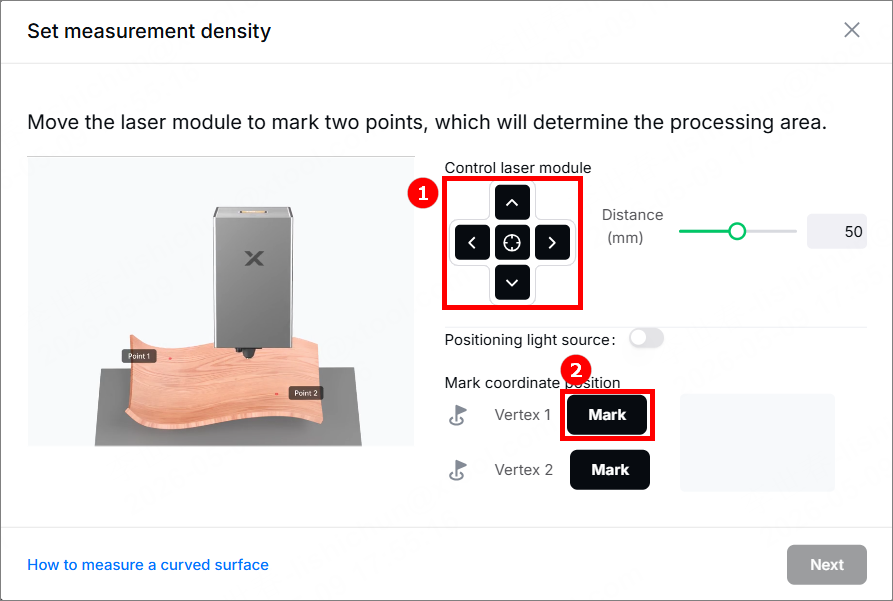
(2) Determine the processing area.
- Move the laser module by clicking the arrow keys to make the red spot fall at the upper left vertex of the area to be measured, and click Mark to mark vertex 1.
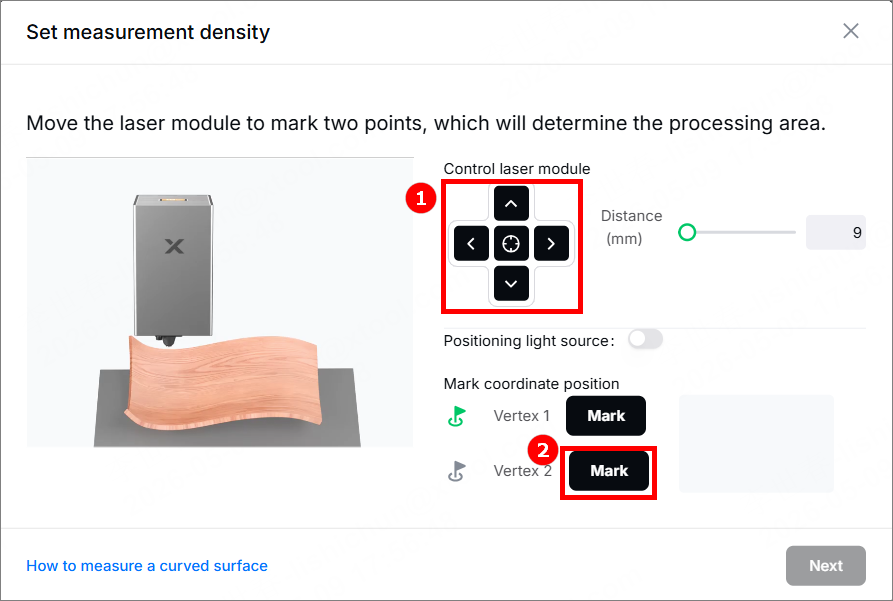
- Move the laser module to make the red spot fall at the lower right vertex, and click Mark to mark the vertex 2. The software will measure the area you selected.
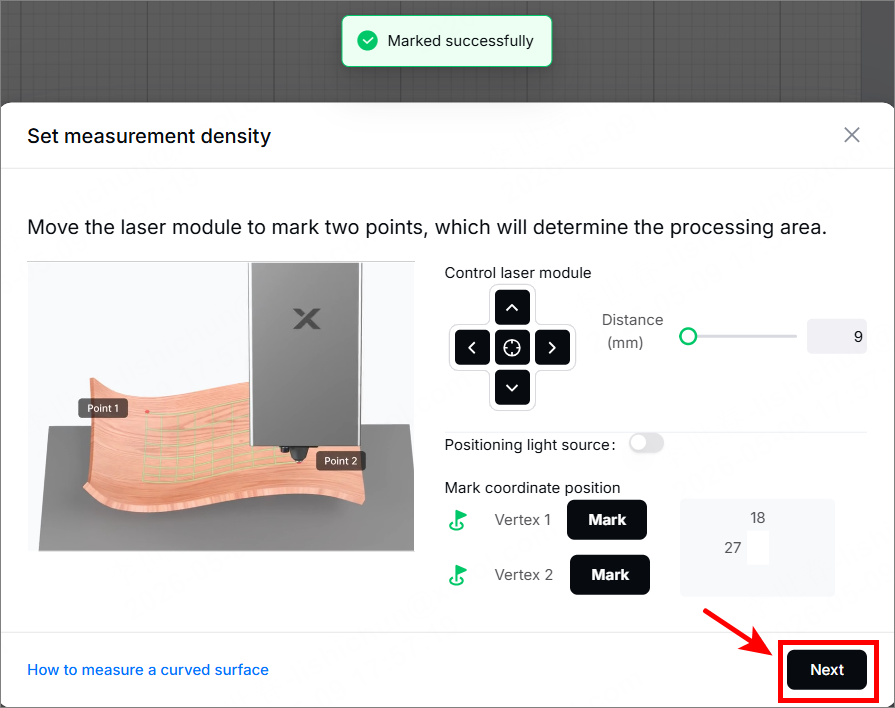
The software displays Marked successfully, click Next.
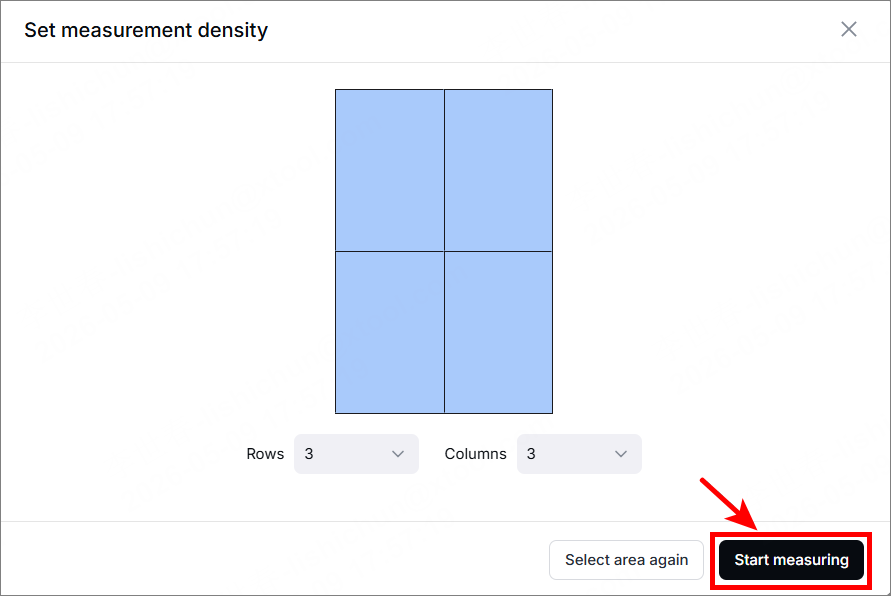
(3) A recommended density is provided based on the area size, which can be adjusted as needed. Increasing the density enhances model precision but also extends the measurement time.
Click Start measuring. The software starts to measure the area, and you can see the progress.
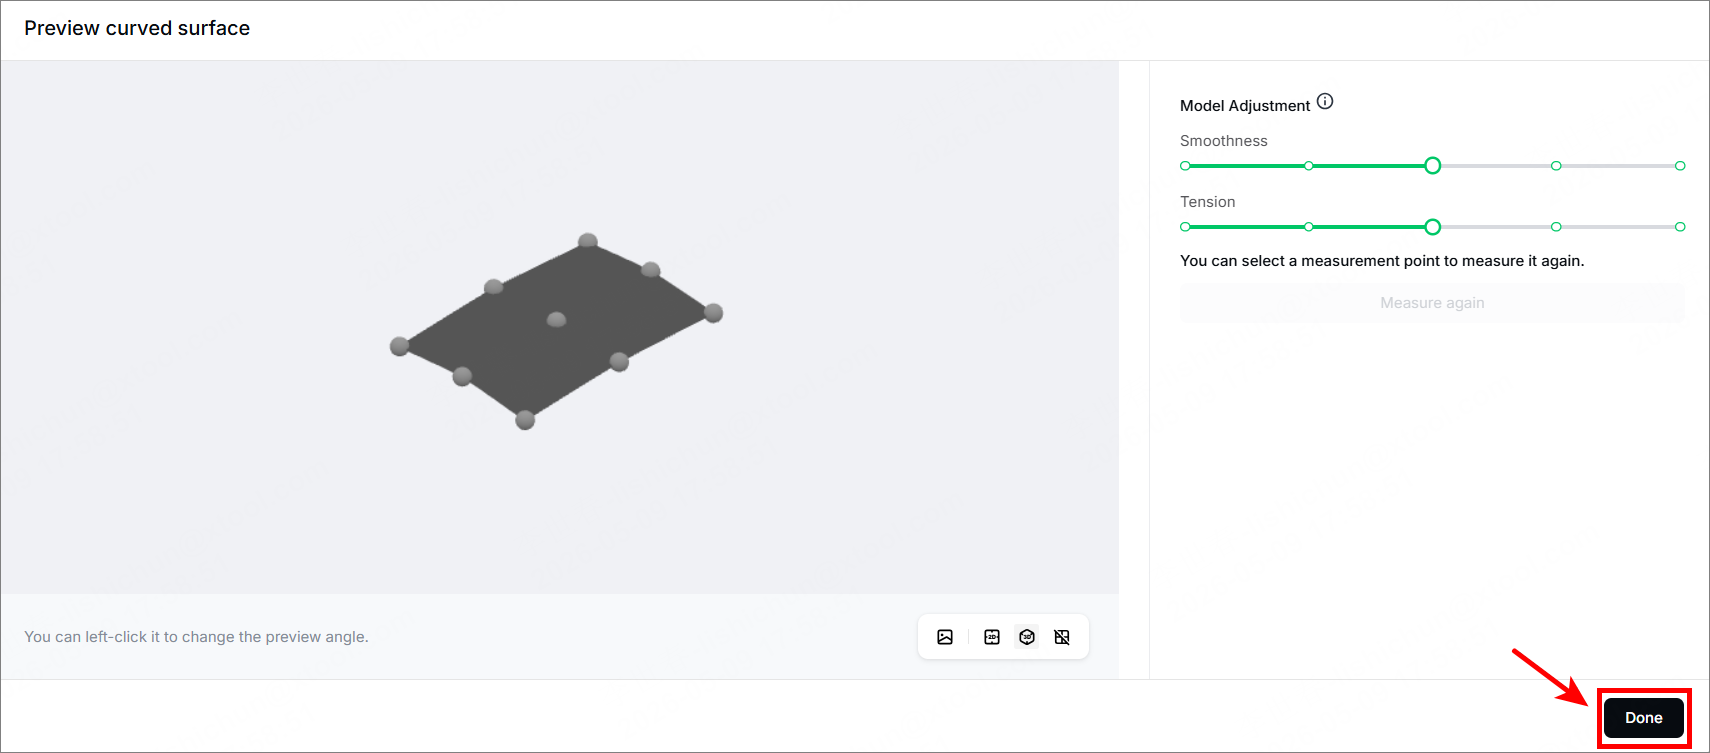
(4) After the measurement is complete, the software generates a model. You can hold down the left mouse key to change the viewing angle and adjust it by setting the smoothness and tension.
Click Done to save the model.
5. Design a processing object
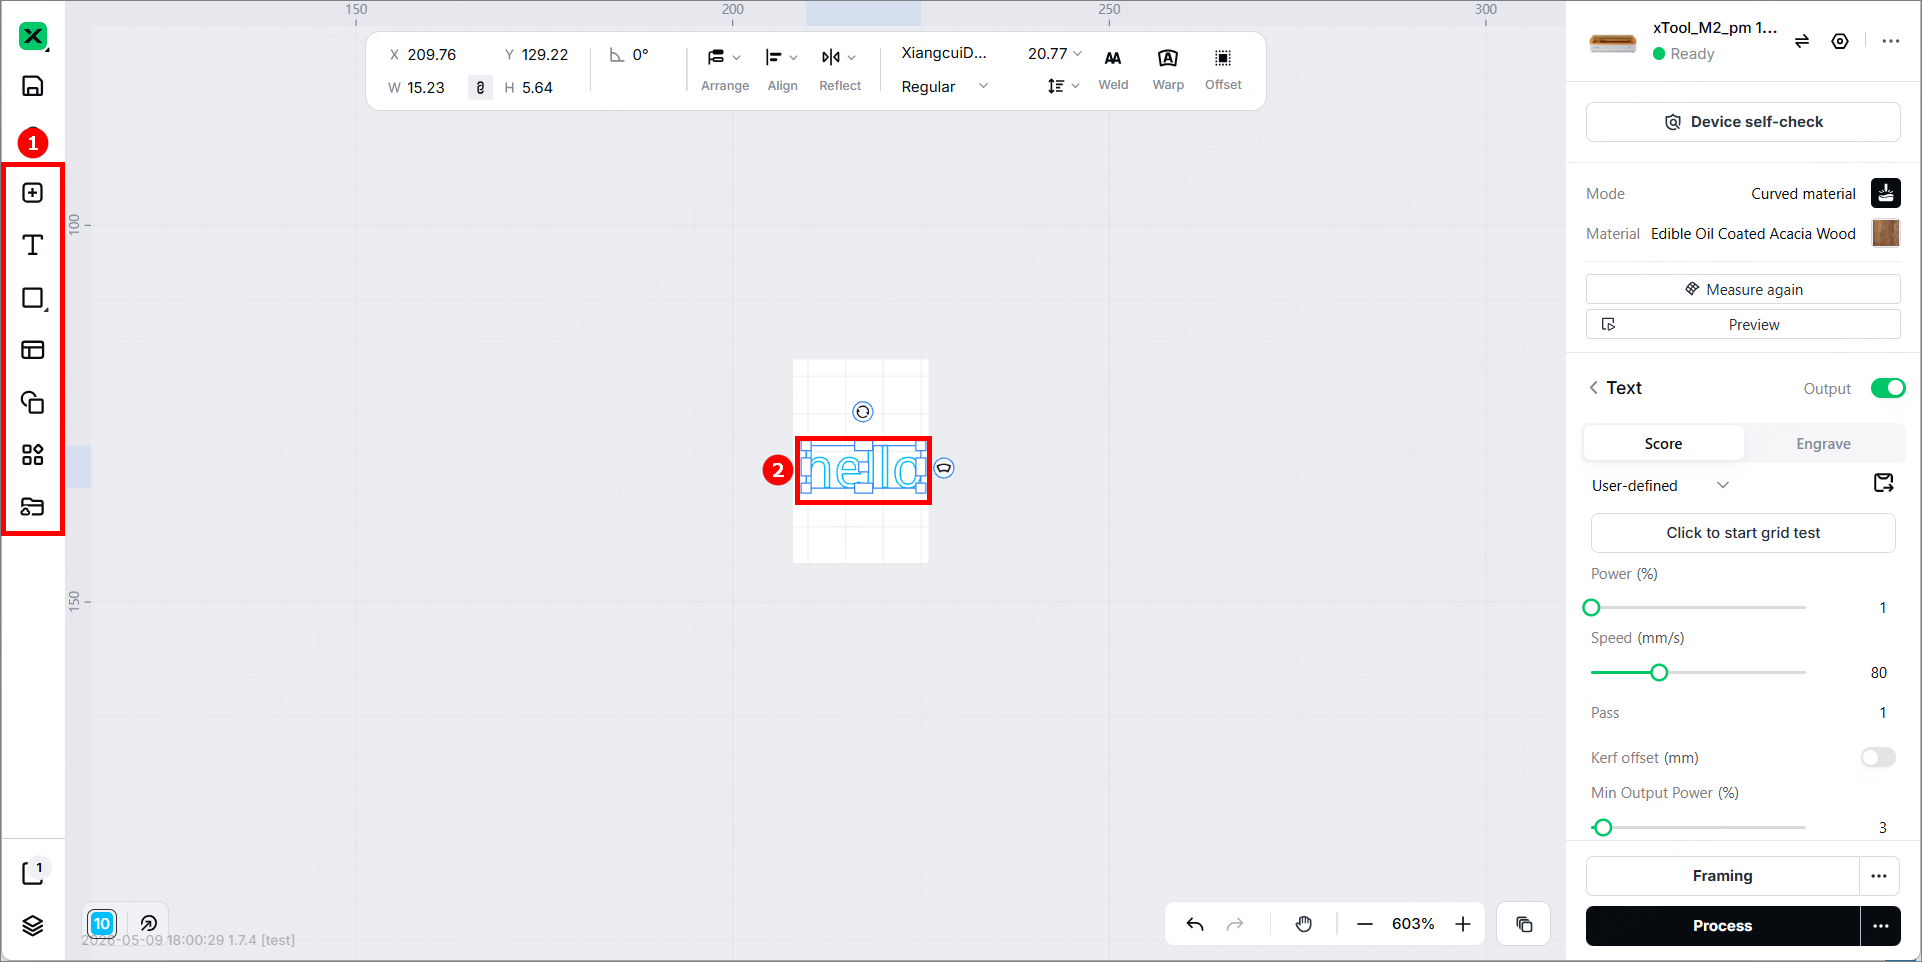
(1) Use the left-side tools to create objects on the canvas.
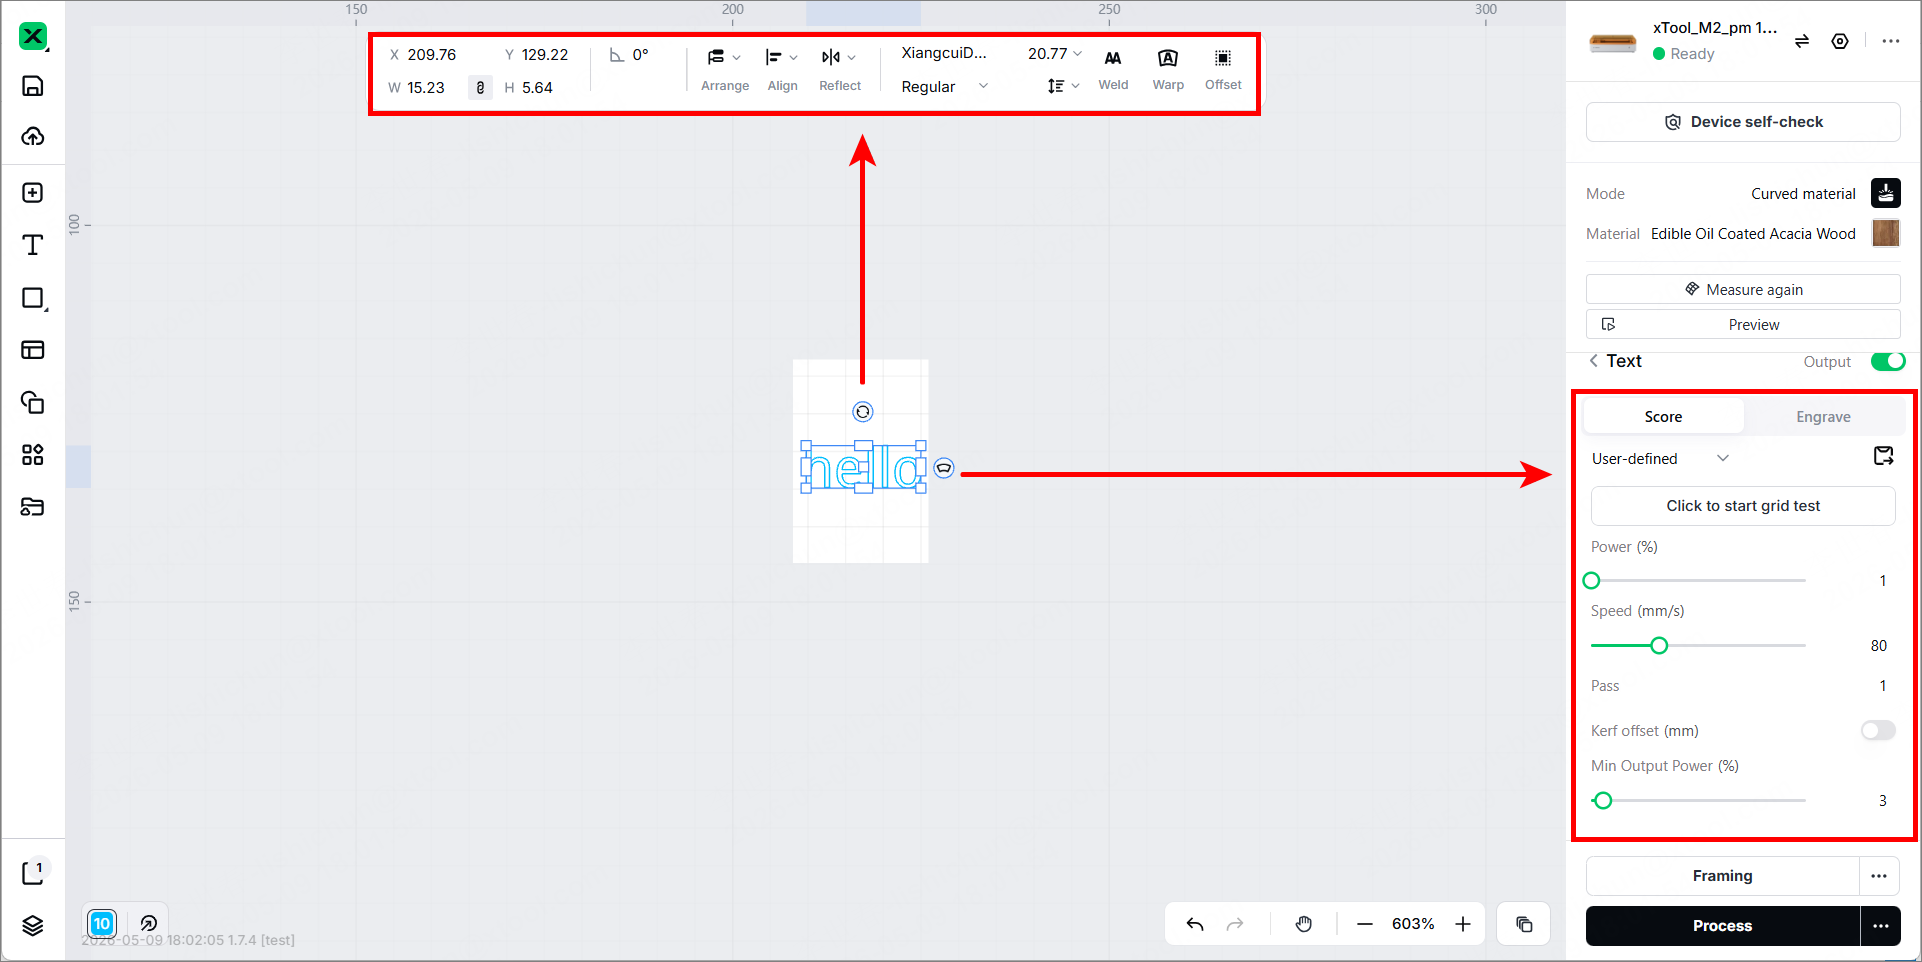
(2) Set parameters for it in the right panel. You can further edit the objects by using the other features in the upper panel.
6. Start processing
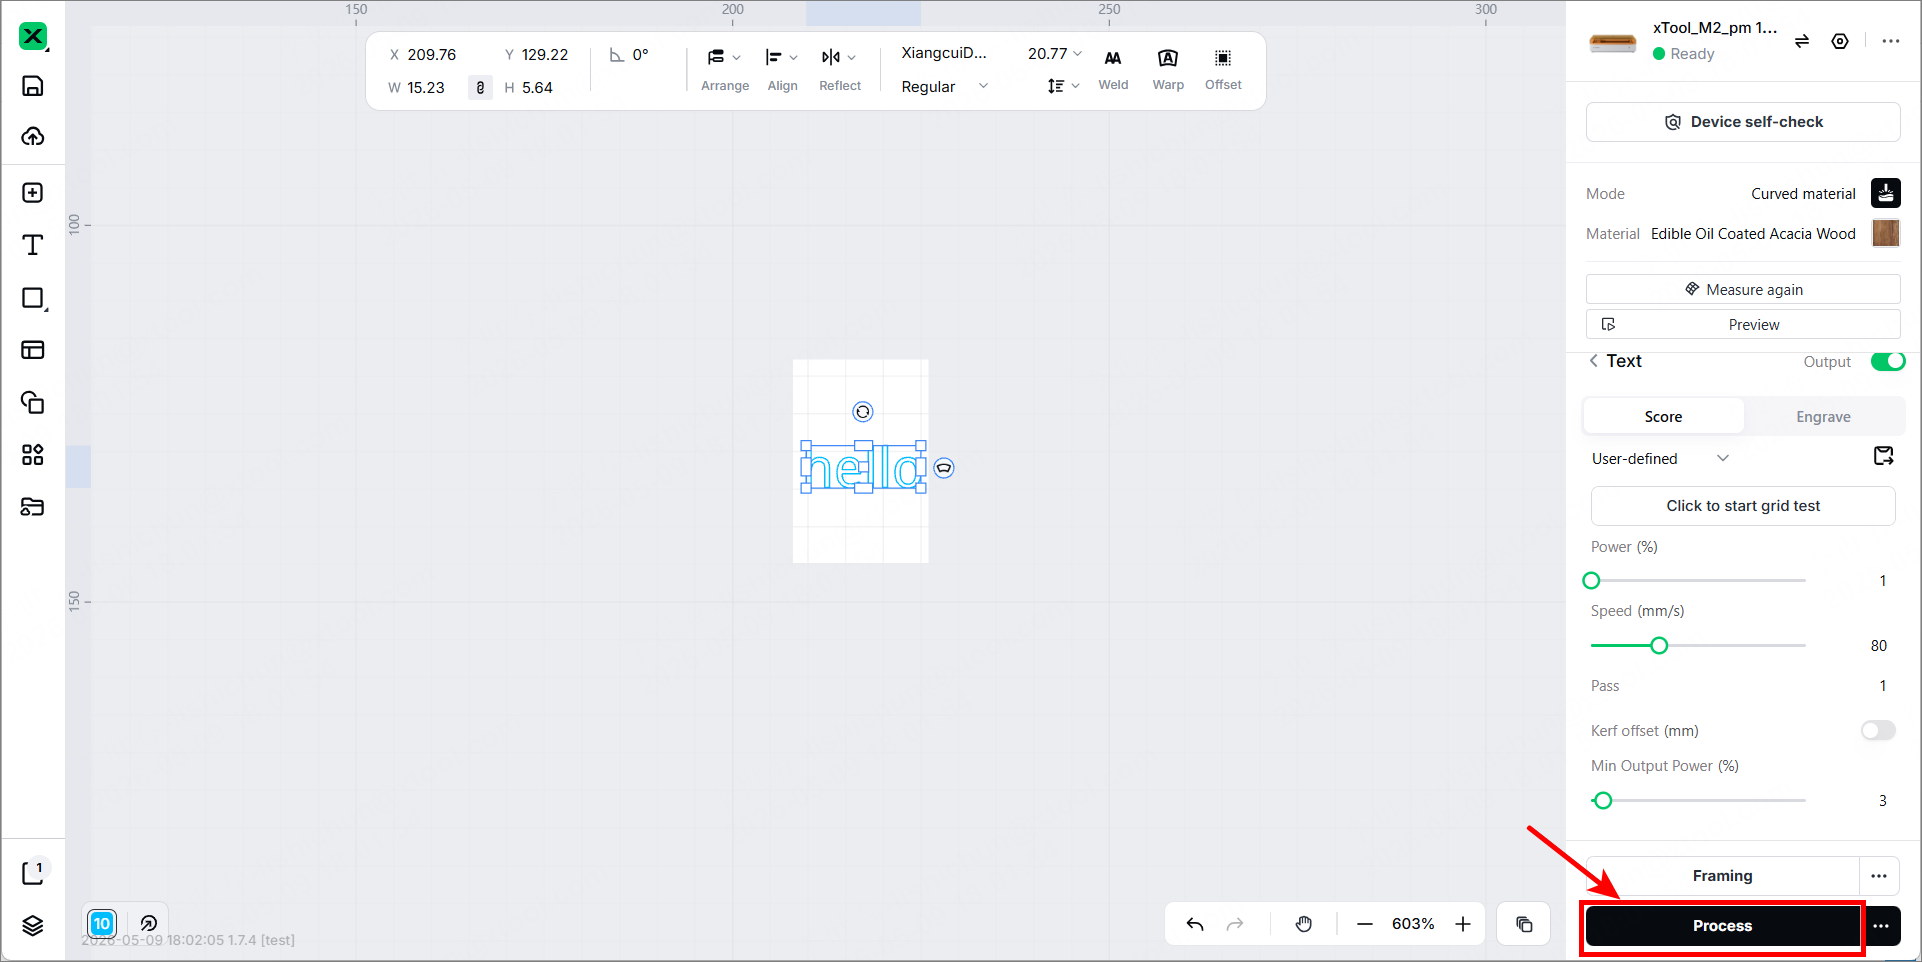
(1) In the bottom right corner of the software, click Process.
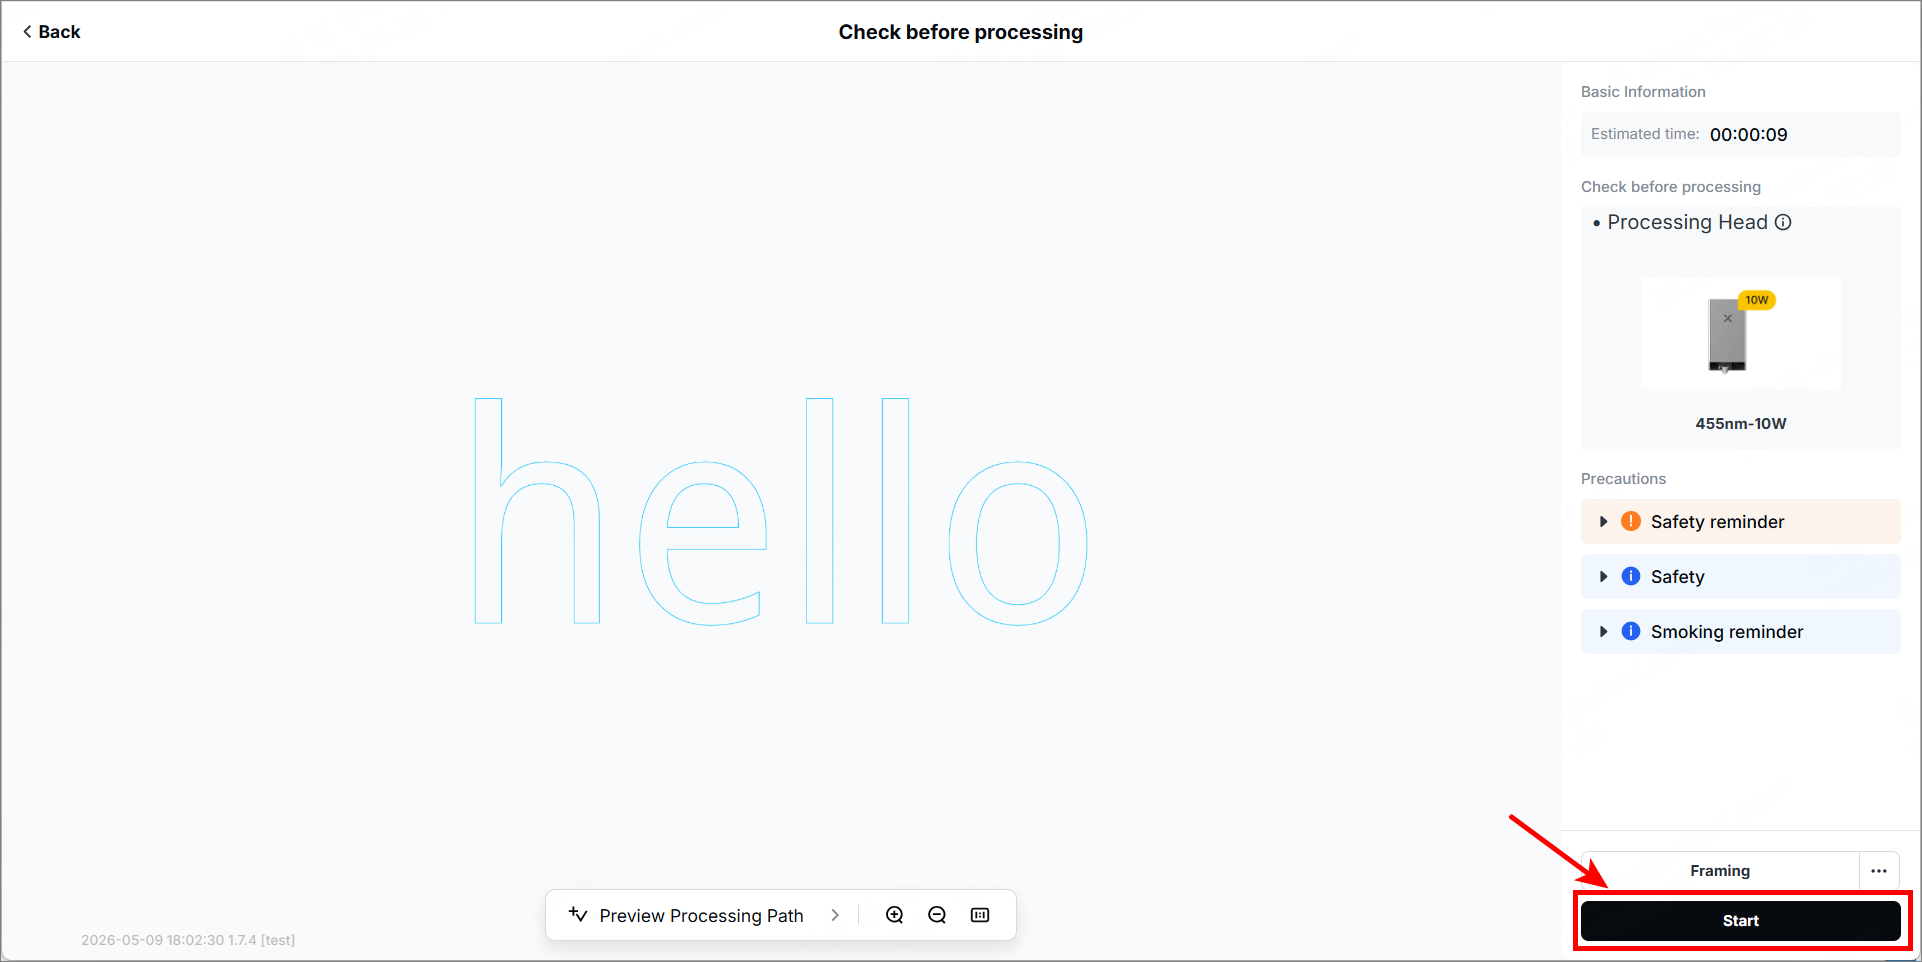
(2) Check whether the accessories are prepared before processing on the right list.
(3) In the bottom right corner, click Start to start processing.
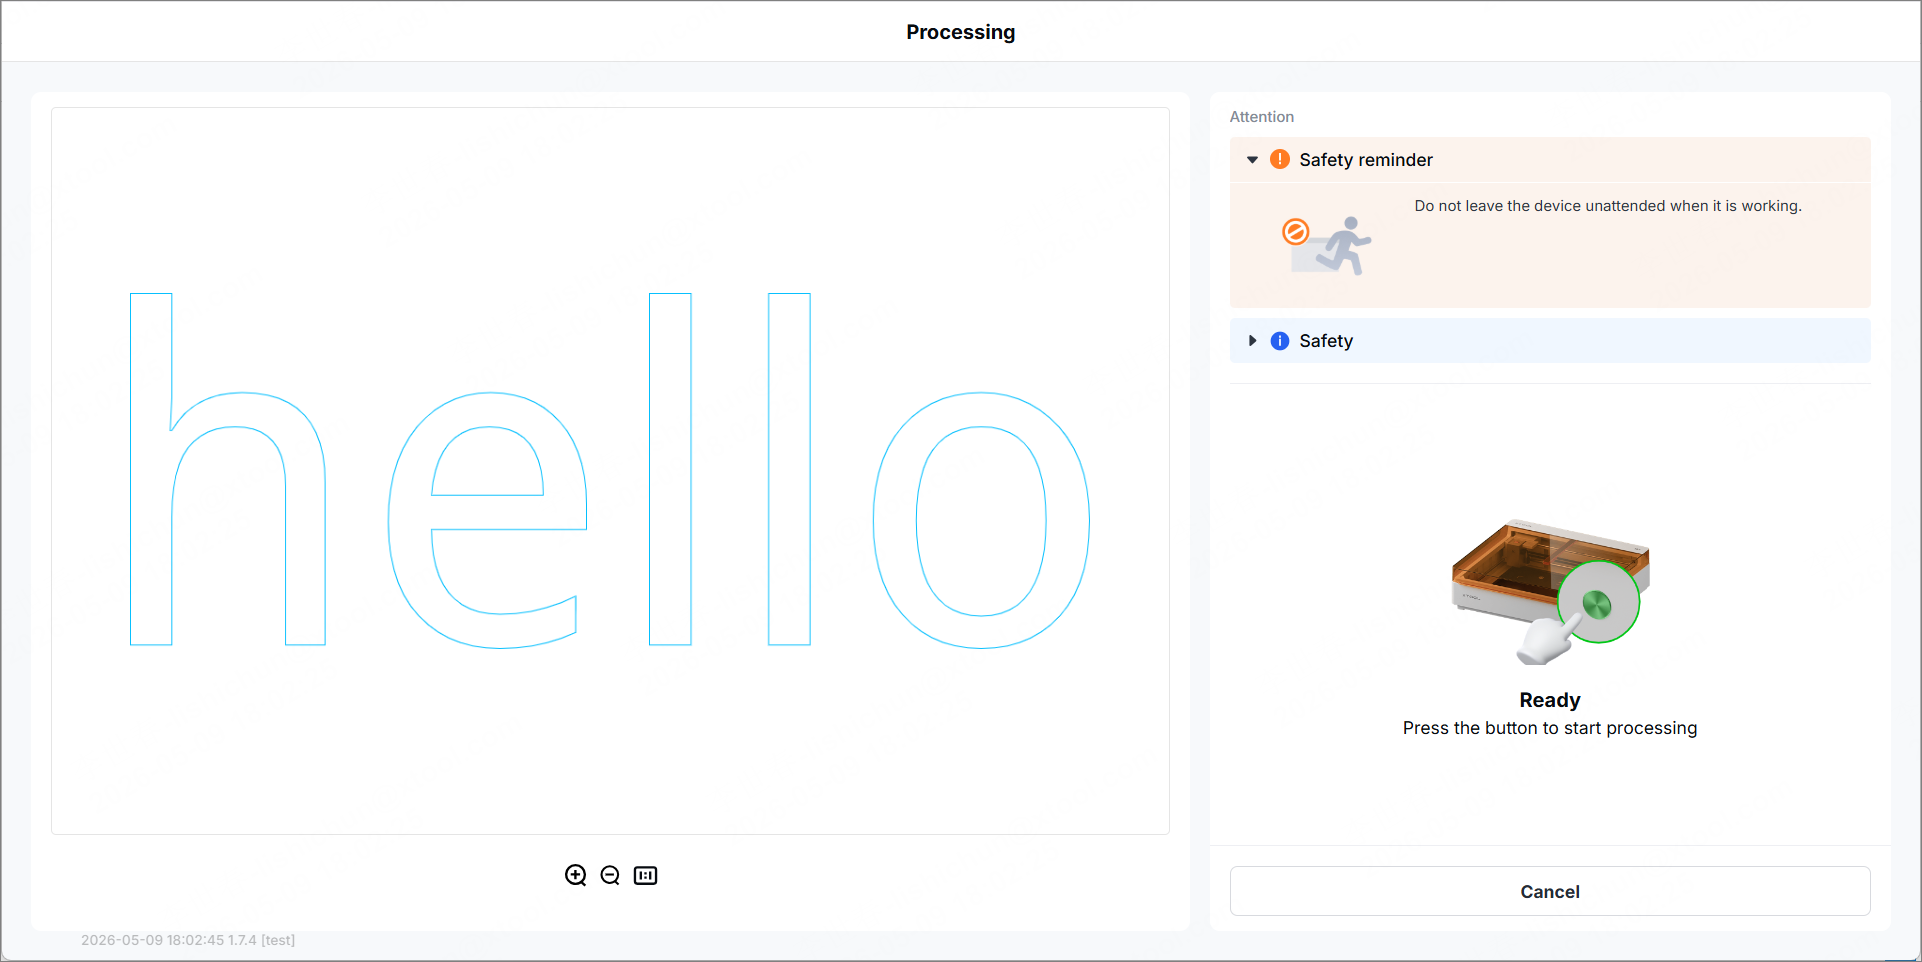
(4) When everything is ready, press the button on xTool M2 to start processing.
(5) Wait until the processing is completed.

