Download PDF file (multi-language)
List of items
Unbox the product and check the items inside the pack. If you find items missing or broken, please get in touch with us for after-sales support.
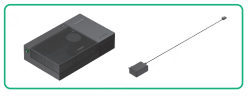
xTool Internal Humidity Module for Apparel Printer |
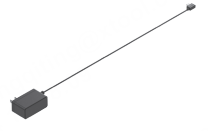
Power adapter |
Quick start guide |
Safety instructions |
Product introduction
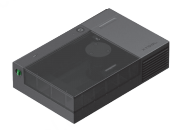
This humidity module is specially designed for xTool Apparel Printer and xTool Apparel Printer Plus. Combining ultrasonic and cold evaporation technology, the humidity module effectively increases the relative humidity in the processing area inside the Direct-to-Film (DTF) printer.
Recommended usage conditions:
· When ambient relative humidity is below 50%, it is recommended to turn on the module to improve print quality significantly.
· When ambient relative humidity is above 70%, it is strongly recommended to turn off the module to prevent excessive humidity from affecting print quality.
Meet your humidity module
Product structure
Indicator description
Status indicator | Device status description |
|---|---|
Solid | Device is operating normally. |
Blinking | Water tank is empty. |
Off | Device is powered off or unplugged. |
Use the humidity module
1. Install the humidity module
(1) Plug the power adapter into the power port of the humidity module.
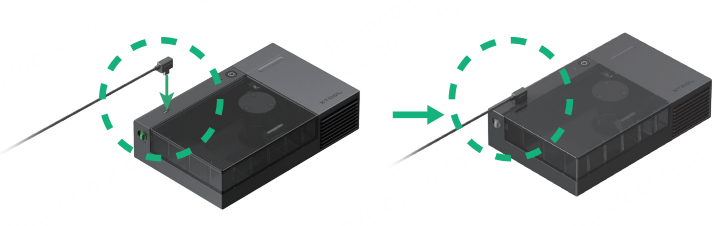
Do not stack the power cable inside the device to prevent it from hitting the print module.
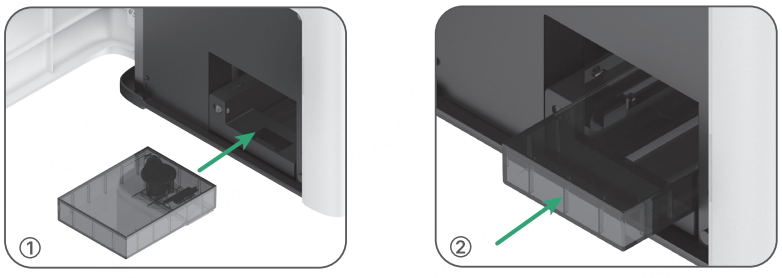
(2) Open the left-side panel of the printer.
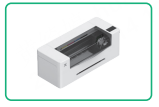
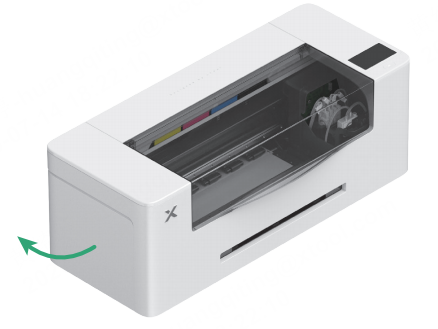
(3) Insert the humidity module horizontally into the printer, ensuring that the air outlet and air inlet of the module face the inside of the printer. Push it inward until the humidity module fits snugly against the inside of the printer and cannot be pushed any further.
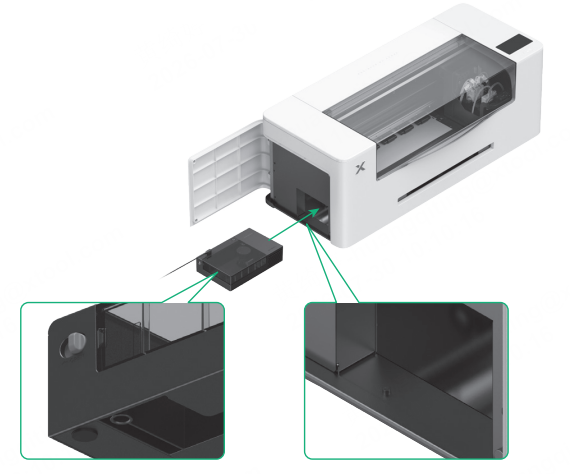
Ensure that the recessed hole at the bottom left corner of the humidity module aligns with the protruding screw on the left side of the printer's installation area, and snaps securely onto the screw.
2. Prepare and fill the water tank
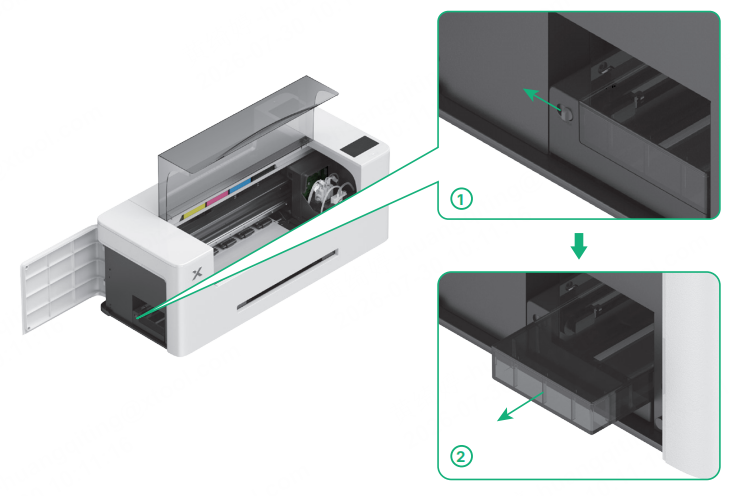
(1) Toggle the water tank release slider to the left, and the water tank will pop out automatically.
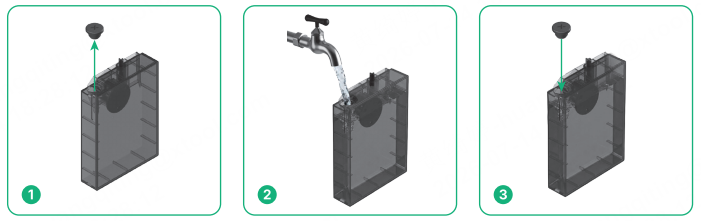
(2) Unplug the silicone plug on the side of the water tank and fill the tank with water. Once filled, insert the silicone plug back tightly.
Always use clean tap water
■ If local tap water tends to produce white scale deposits, it is recommended to use treated or softened water.
■ Do not use purified water or distilled water, as this may affect the humidity module's mist output.
■ Water with high levels of impurities or scale can clog the atomizer components and reduce humidification performance.
(3) Insert the water tank horizontally and push it into the humidity module slowly and steadily to prevent liquid from splashing out. A "click" sound indicates that it is installed in place.
■ Do not tilt the water tank during insertion or when pushing it in to prevent liquid spills that may cause electric shock or device short circuits.
■ If any water droplets are present on the tank surface, wipe them dry before installation.
Daily water refilling:
■ During normal use, it is not necessary to remove the entire module. Simply remove and refill the water tank.
3. Power on and start the device
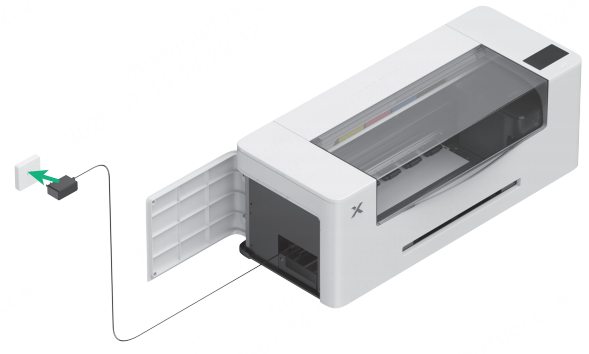
(1) Plug the power adapter into the socket.
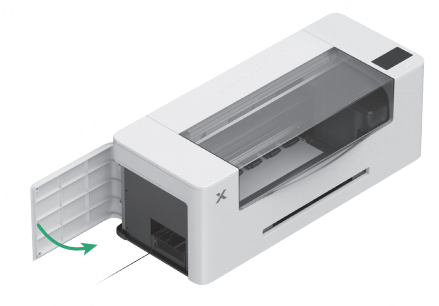
(2) Close the left-side panel of the printer.
(3) Open the printer lid, press the power button of the humidity module to turn it on; finally, close the printer lid.
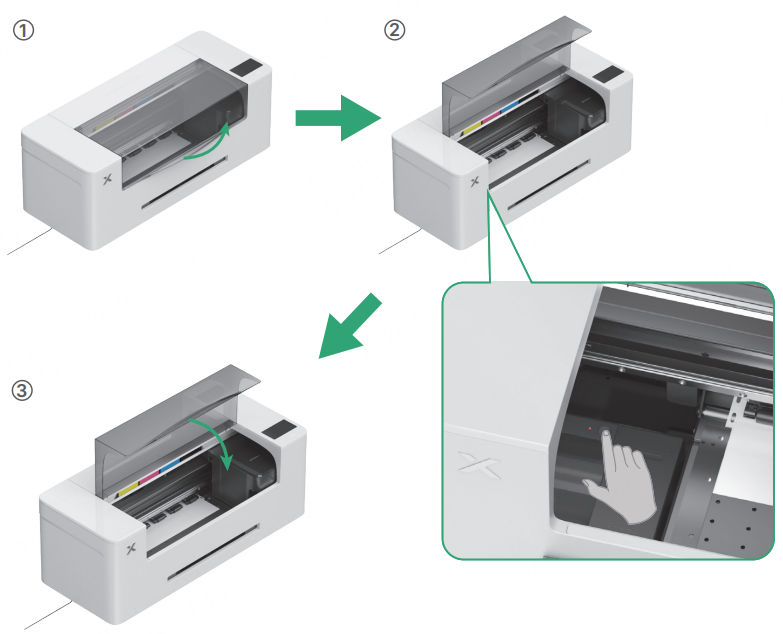
Pressing the power button again during operation will pause the humidification.
4. Remove the humidity module
■ During normal use, do not frequently remove the entire humidity module to avoid spilling liquid from the water tank or base reservoir.
■ Only when performing maintenance on the printer or the humidity module, follow the steps below to remove the entire humidity module.
(1) Open the left-side panel and lid of the printer.
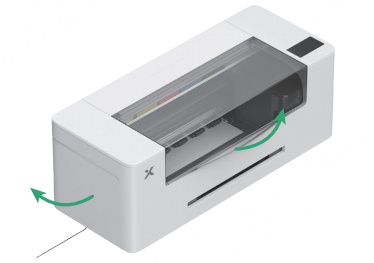
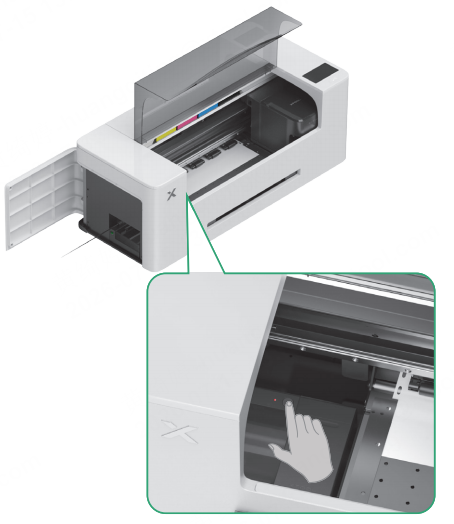
(2) Press the power button to turn off the module.
(3) Unplug the power adapter of the humidity module.
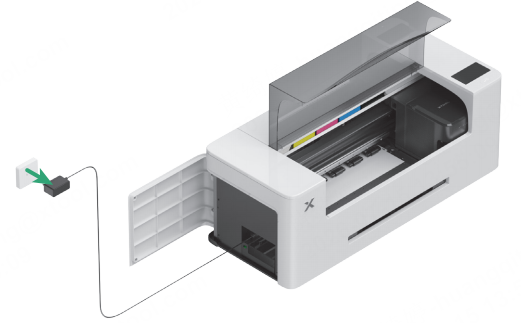
Due to the limited operating space inside the printer, first unplug the power adapter from the power outlet. After the entire machine is powered off and removed, disconnect the cable from the module.
(4) Toggle the water tank release slider to the left to pop out the water tank. Remove the water tank slowly and horizontally to prevent liquid from splashing out.
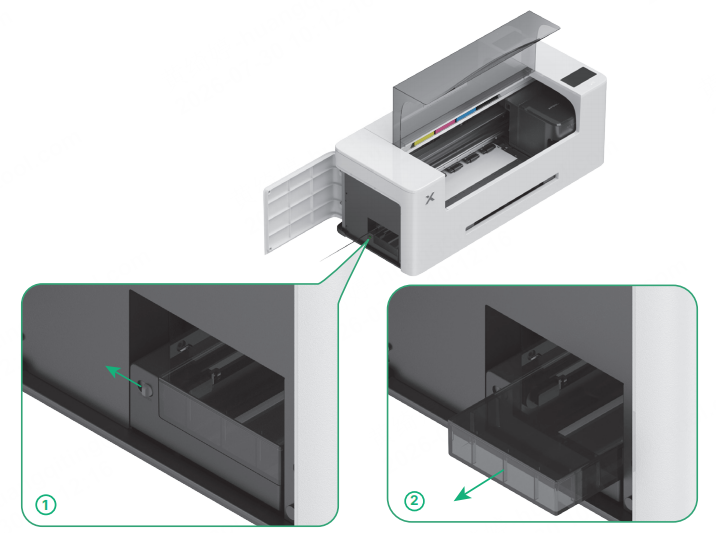
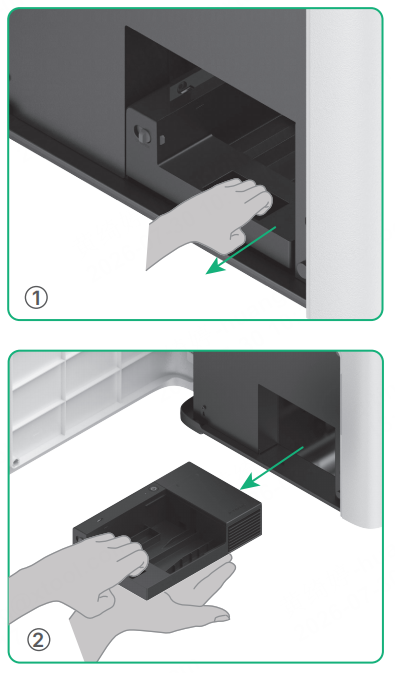
(5) Use the grip slot on the base reservoir to smoothly pull the humidity module out horizontally.
Maintenance and care
Wick filter pad replacement
Replace the wick filter pad regularly. Before performing maintenance, completely remove the humidity module from the printer and disconnect the power according to the instructions in the previous section.
Replacement frequency:
■ Once per month;
■ When the humidity module emits an unpleasant odor;
■ When humidification performance decreases significantly;
1. Slide to remove the mist chamber cover
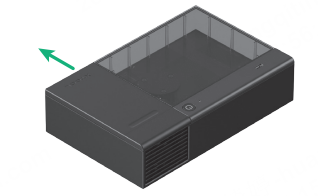
Before maintenance operations, empty the liquid in the water tank and base reservoir of the humidity module completely to prevent liquid from seeping or spilling out.
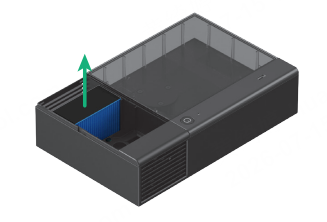
2. Remove the dirty wick filter pad
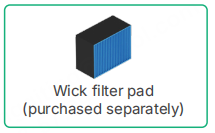
3. Install a new wick filter pad
To purchase replacement wick filter pads, please visit xtool.com.
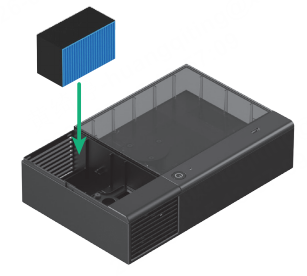
4. Slide to install the mist chamber cover
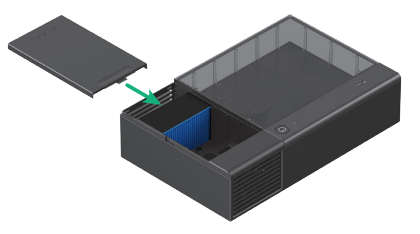
Internal cleaning
Clean the interior of the module regularly. Before cleaning, remove the water tank, mist chamber cover, and wick filter pad as instructed earlier in this guide.
Cleaning frequency:
■ Once per month;
■ When the humidity module emits an unpleasant odor;
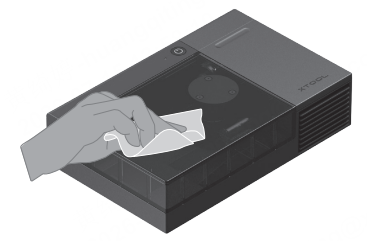
Use a clean lint-free cloth to gently wipe away any scale or mineral deposits in the base reservoir, inside the mist chamber, and around the atomizer.