
Unboxing and First Use
Download PDF file (multi-language)
From the Quick Start Guide, you can view the item list, product structure, specifications, indicators and buzzer explanation, as well as instructions on device installation, basic operations, and fundamental maintenance.
Português_xTool Craft Oven Module_Manual de referência rápida | Język Polski_xTool Craft Oven Module_Skrócona instrukcja obsługi | |
Introduction
xTool Craft Oven Module is designed exclusively for use with xTool WonderPress. It supports direct DTF powder curing on DTF film and sublimation processing for a wide range of mugs and drinkware.
List of Items
|
|
|
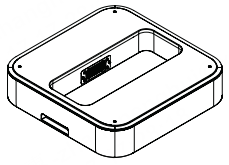
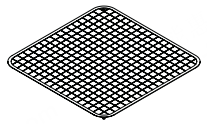
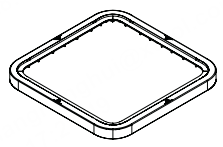
Craft oven base | mesh tray | Sealing frame |
|
|
|
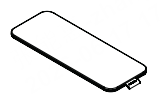
Heat insulation pad | Heat-resistant gloves | Sublimation shrink wrap |
|
| |
Sublimation paper | Quick Start Guide |



Use xTool Craft Oven Module
Installation
1. Remove the currently installed module.
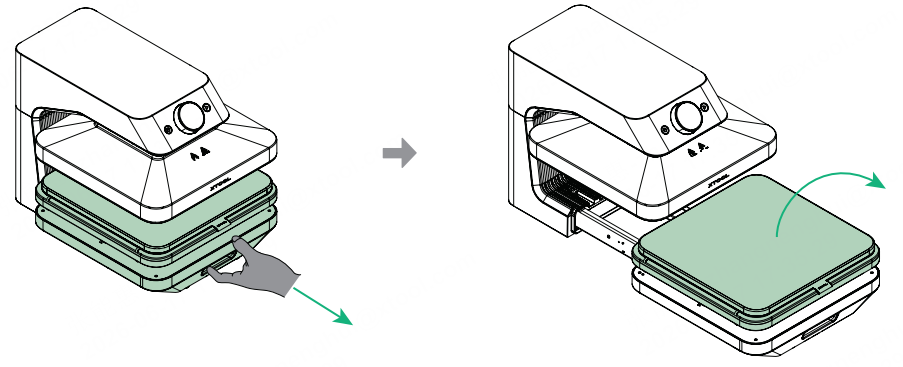
Tips: All xTool WonderPress modules support hot swapping. The device does not need to be powered off when replacing modules.
2. Install the craft oven base.
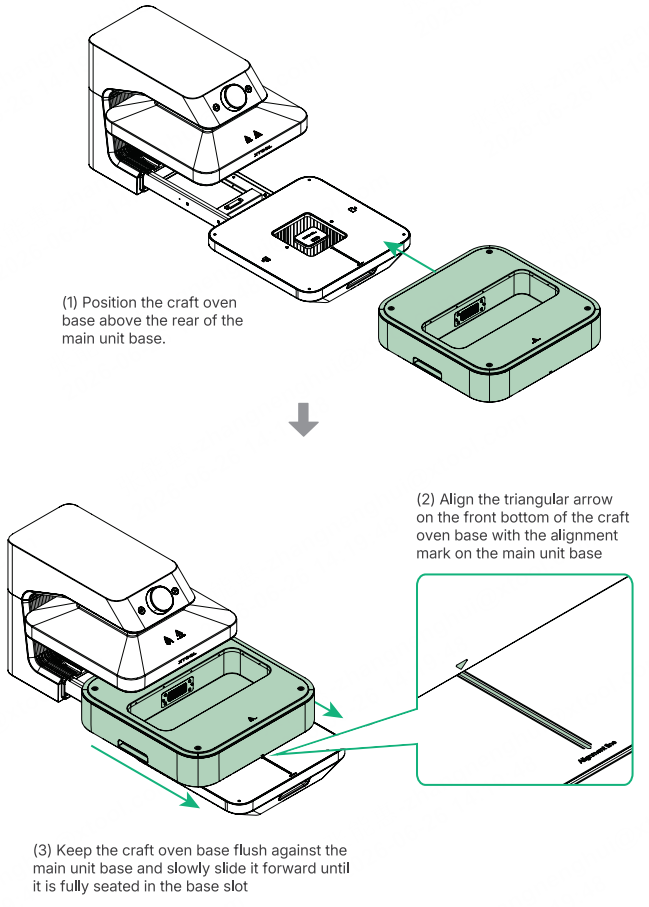
Tips: Once installed, the device automatically switches to the corresponding module mode.
DTF Film Curing
1. Set the Parameters
Rotate the knob to select the Baking & Curing mode and press it to enter the settings page.Then choose a material to use preset parameters or customize the temperature, time, and exhaust time. Finally, set the Auto/Manual mode.
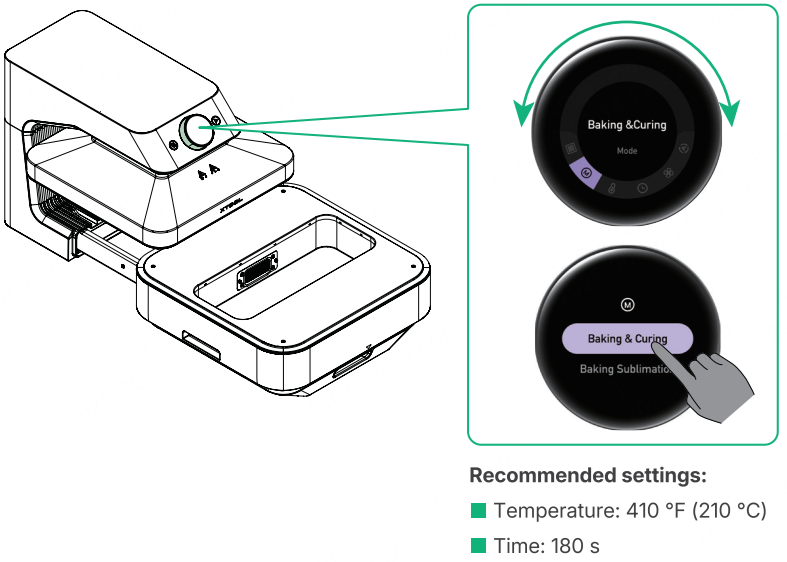
Tips: It is recommended to appropriately extend the exhaust time to maintain a clean and odor‑free working environment.
2. Install the Mesh Tray
Insert the four corner supports of the mesh tray into the corresponding positioning holes.
Before installing the mesh tray, make sure the heat insulation pad has been removed from the slot.
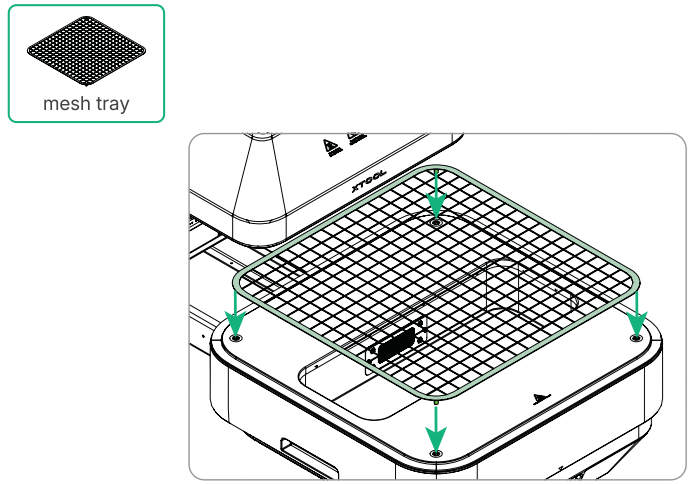
3. Install the Sealing Frame
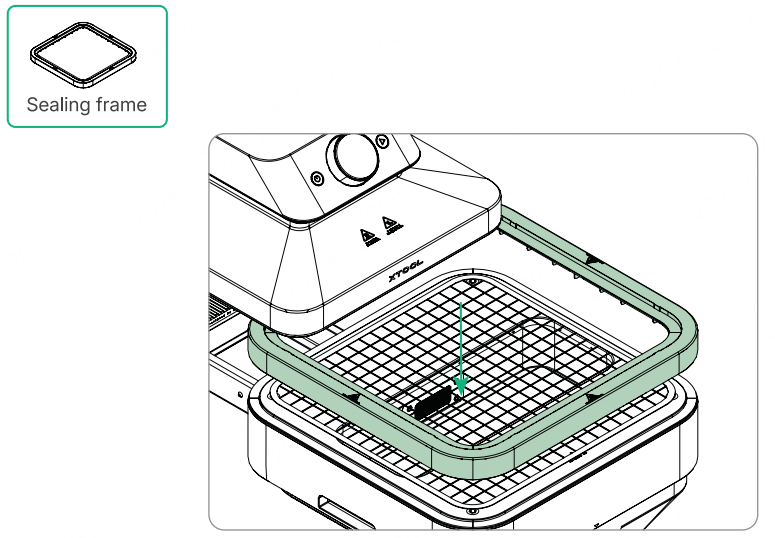
4. Place the DTF Film
Ensure the hot-melt powder side faces up and the printed side faces down, and lay the film flat.
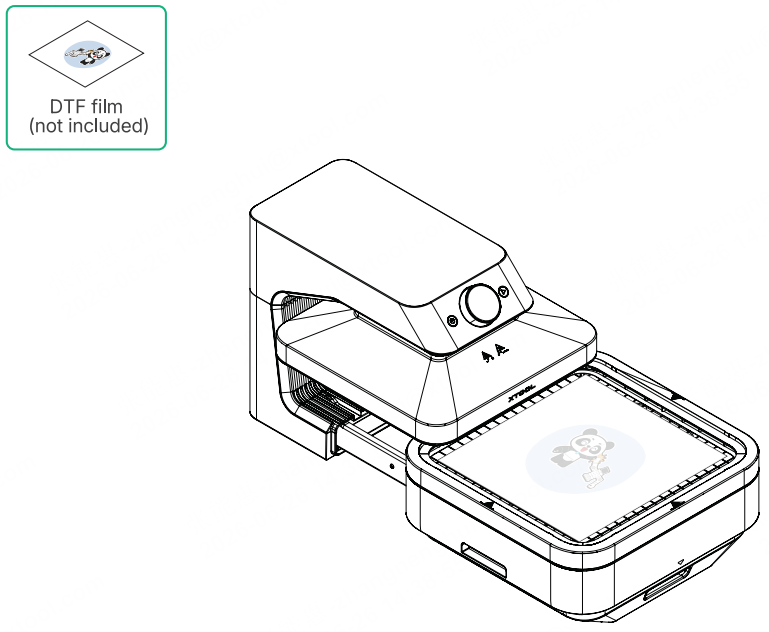
5. Start Processing
Once the set temperature is reached, start processing according to the mode selected in the "Set the parameters" section:
Manual mode
Push in the base, then press the Start/Stop button to begin processing.
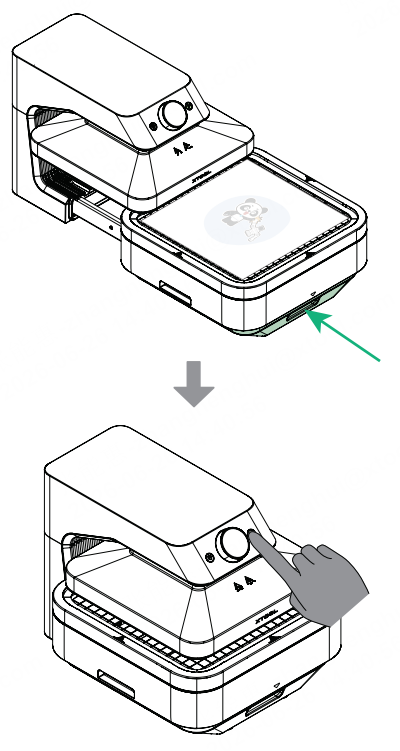
Auto mode
Push in the base, and the device will start processing automatically.
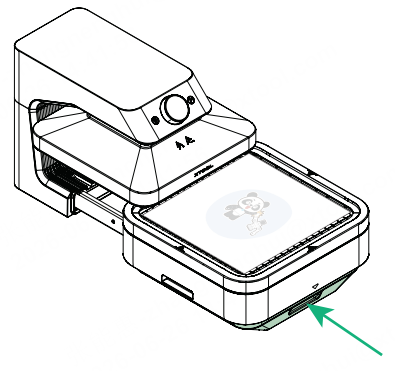
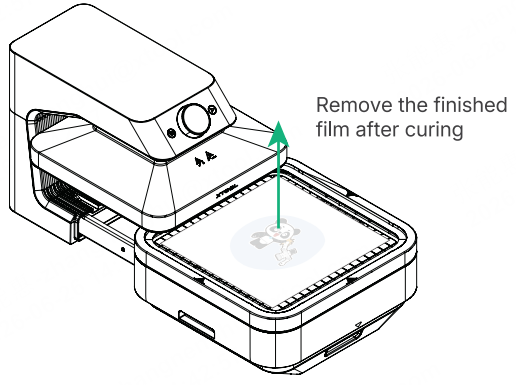
6. Processing Complete
Mug sublimation
1. Prepare the Mug
1. Wrap the sublimation paper around the target area of the mug with the design facing inward. Ensure the paper is in full contact with the mug surface and that its top and bottom edges are aligned with the mug rim and base. Then secure it firmly using heat-resistant tape, applying three horizontal strips followed by two vertical strips.
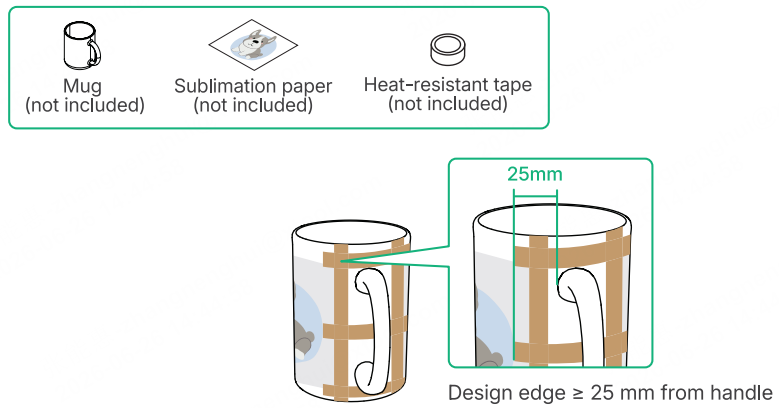
■ Ensure the top and bottom edges of the sublimation paper are aligned with the mug rim and base for better edge transfer results.
■ Keep the design at least 25 mm away from the handle to ensure optimal transfer results.
2. Wrap a layer of sublimation shrink wrap over the sublimation paper, ensuring it fits tightly against the paper. Make sure the wrap is wide enough to fully cover the sublimation paper, with the top and bottom edges extending beyond the mug rim and base. Then secure it as tightly as possible using heat-resistant tape, applying three horizontal strips followed by two vertical strips.
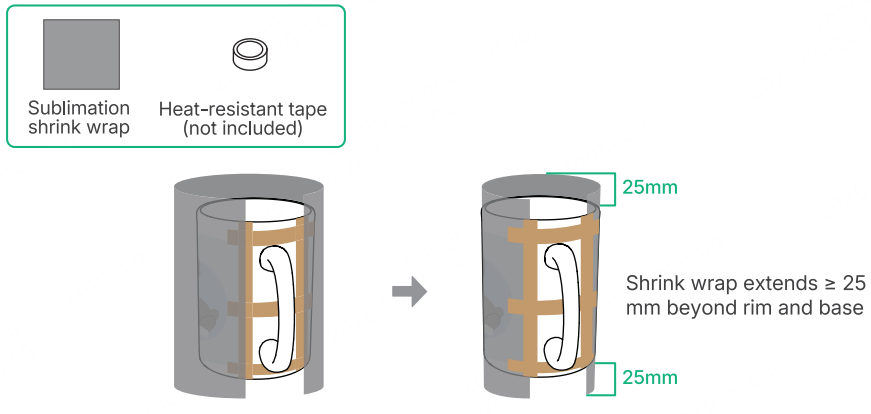
During heating, the sublimation shrink wrap shrinks to provide consistent pressure throughout the sublimation process, helping ensure accurate transfer of the design onto the mug surface while minimizing shifting and distortion.
2. Set the Parameters
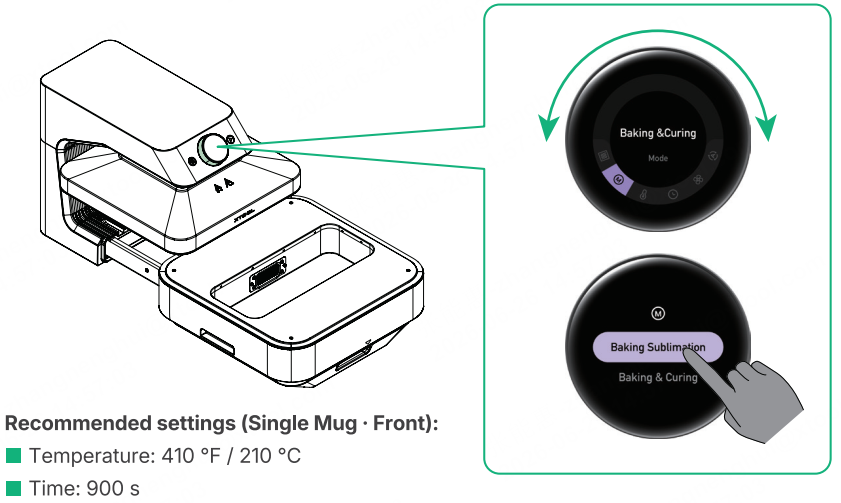
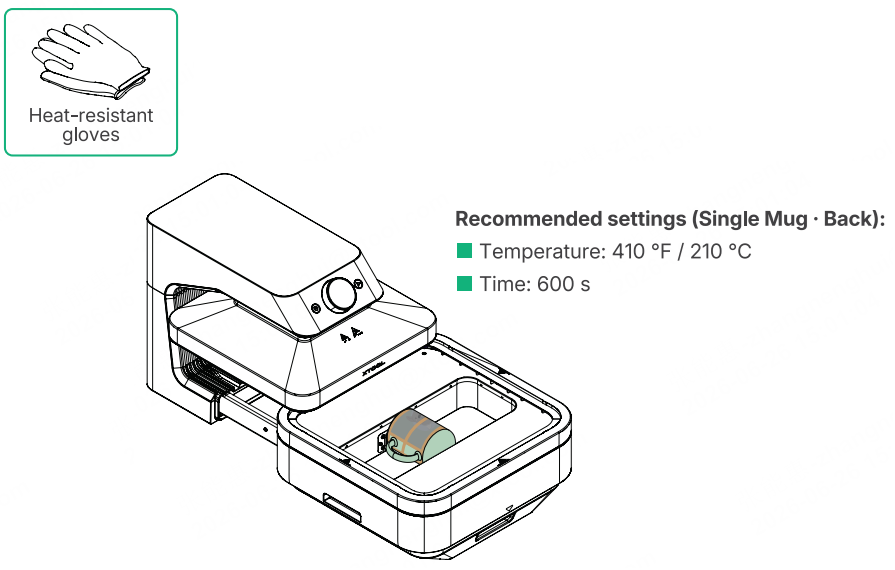
Rotate the knob to select the Baking Sublimation mode, then press it to enter the settings page. Select a material to use the system preset parameters or customize the temperature and time. Finally, set the Auto/Manual mode. Please note that the settings vary depending on whether you are processing a single mug or multiple mugs, as well as the front or back side of the mug. Adjust the settings according to your application.
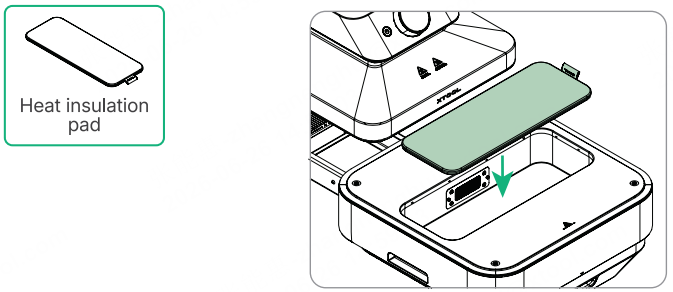
3. Place the Heat Insulation Pad
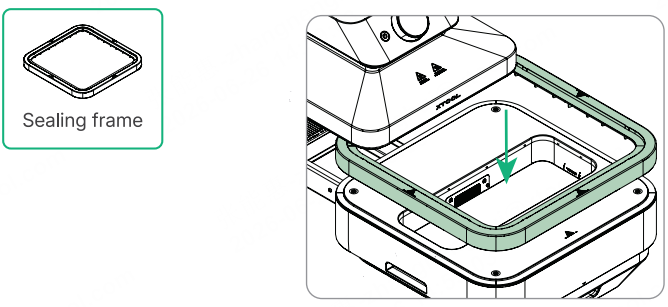
4. Install the Sealing Frame
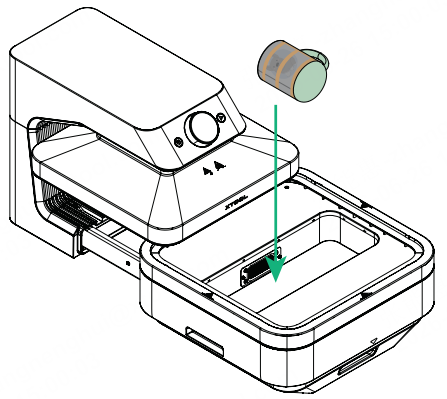
5. Place the Mug
Place the mug into the sublimation slot.
6. Start Processing
Once the set temperature is reached, start processing according to the mode selected in the "Set the parameters" section:
Manual mode
Push in the base, then press the Start/Stop button to begin processing.
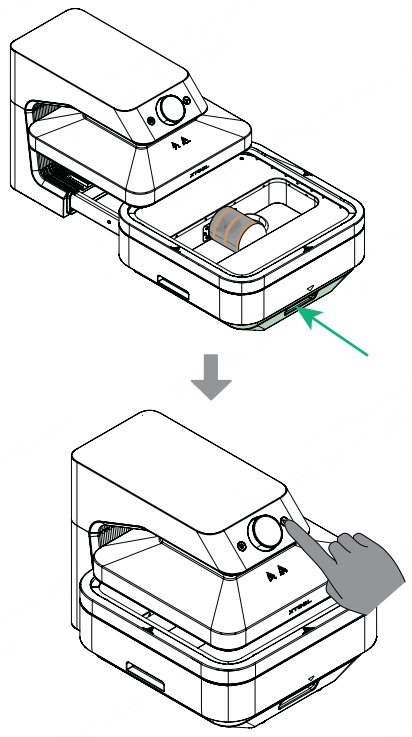
Auto mode
Push in the base, and the device will start processing automatically.
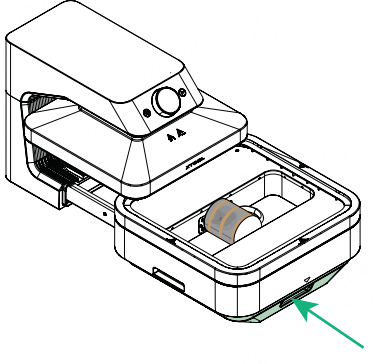
7. Rotate the Mug
Heat-resistant gloves must be worn during rotating to avoid burns.
After completing sublimation on the front side, rotate the mug to ensure even heating and optimal transfer results. Place the mug back into the device, then set the parameters for the back side or use the system preset parameters, and repeat Step 6.
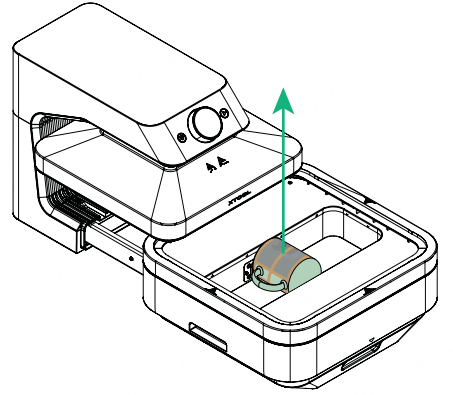
8. Processing Complete
Maintenance
It is recommended to regularly check the condition of the filter and replace it in a timely manner based on usage frequency to maintain optimal air purification performance.
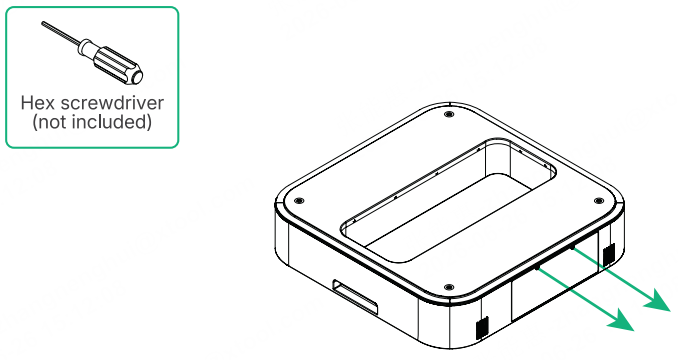
1. Remove the Screws of the Filter Cover
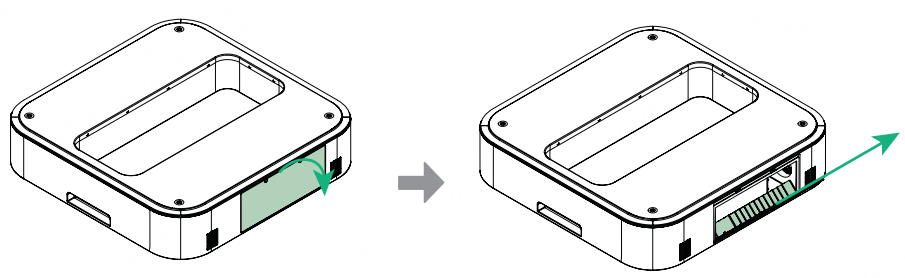
2. Remove the Filter Cover
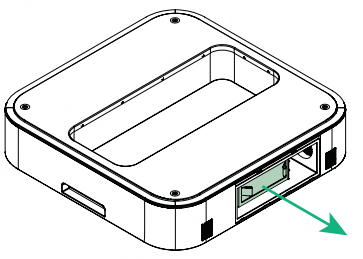
3. Remove the Used Filter
4. Install a New Filter
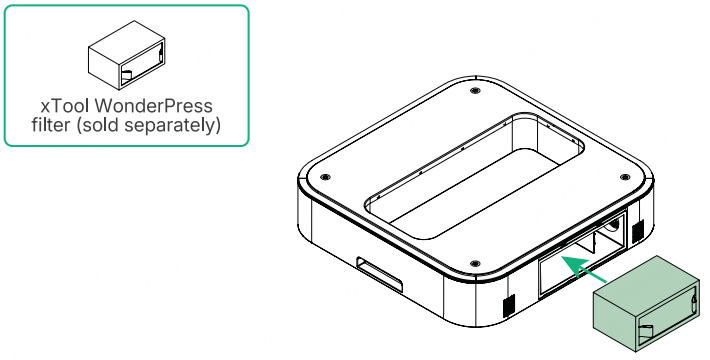
To purchase a new filter, please visit xtool.com.

