Issue description
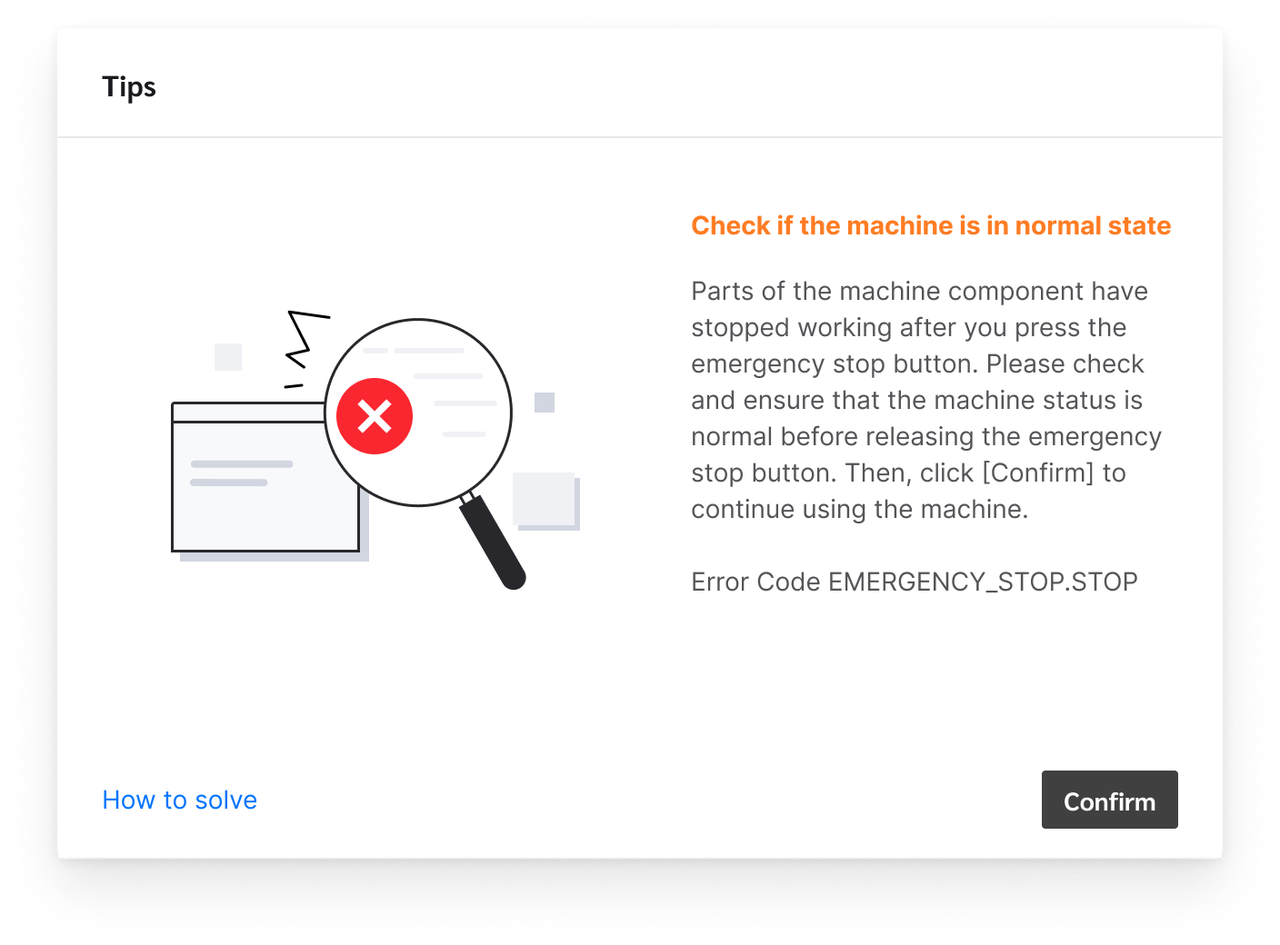
If you encounter a pop-up error message titled "Check if the machine is in normal state" in xTool software, please follow this troubleshooting guide to resolve this issue.
Possible causes
- Emergency stop button pressed: The emergency stop button of xTool MetalFab CNC Cutter or xTool MetalFab Laser Welder is pressed.
- Abnormal emergency stop circuit: A component within the entire emergency stop circuit between CNC Cutter and Laser Welder malfunctions.
Detailed procedure
Step 1: Check whether xTool MetalFab Laser Welder works normally
- Power off xTool MetalFab CNC Cutter and xTool MetalFab Laser Welder.

- Disconnect the communication cable between the two devices.
Disconnect the cable end connecting to CNC Cutter | ||
|---|---|---|
Disconnect the cable end connecting to Laser Welder |
- If the error message still exists during independent operation of Laser Welder, refer to Troubleshoot "Emergency stop button pressed" for xTool MetalFab Laser Welder to address the issue.
- If the laser welder works normally when running independently but exhibits abnormalities when connected to CNC Cutter, proceed with the subsequent steps.
Step 2: Resolve the issue based on different scenarios
The error triggering moment on the xTool software can determine whether the issue originates from the CNC Cutter itself or the emergency stop circuit failure. The following troubleshooting steps differ based on different scenarios.
Scenario 1: No error message when CNC Cutter powered on
Power on CNC Cutter. If the error message doesn't pop up until the button on CNC Cutter is pressed, follow the steps below to resolve the issue.
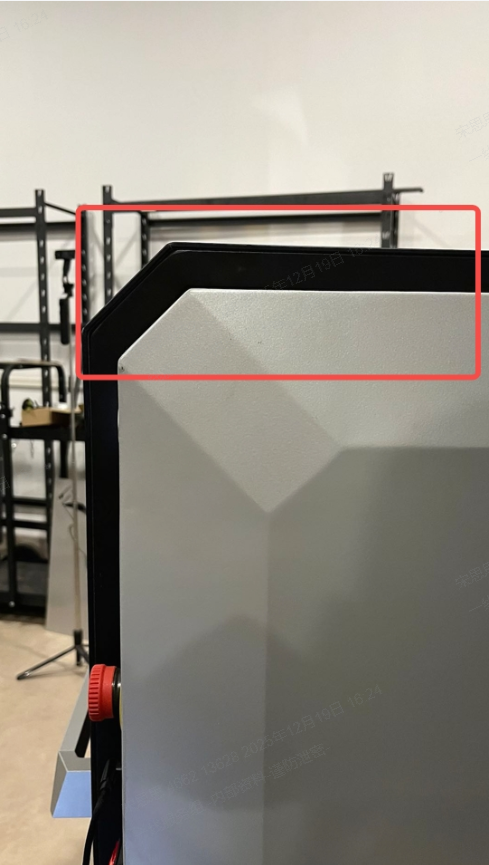
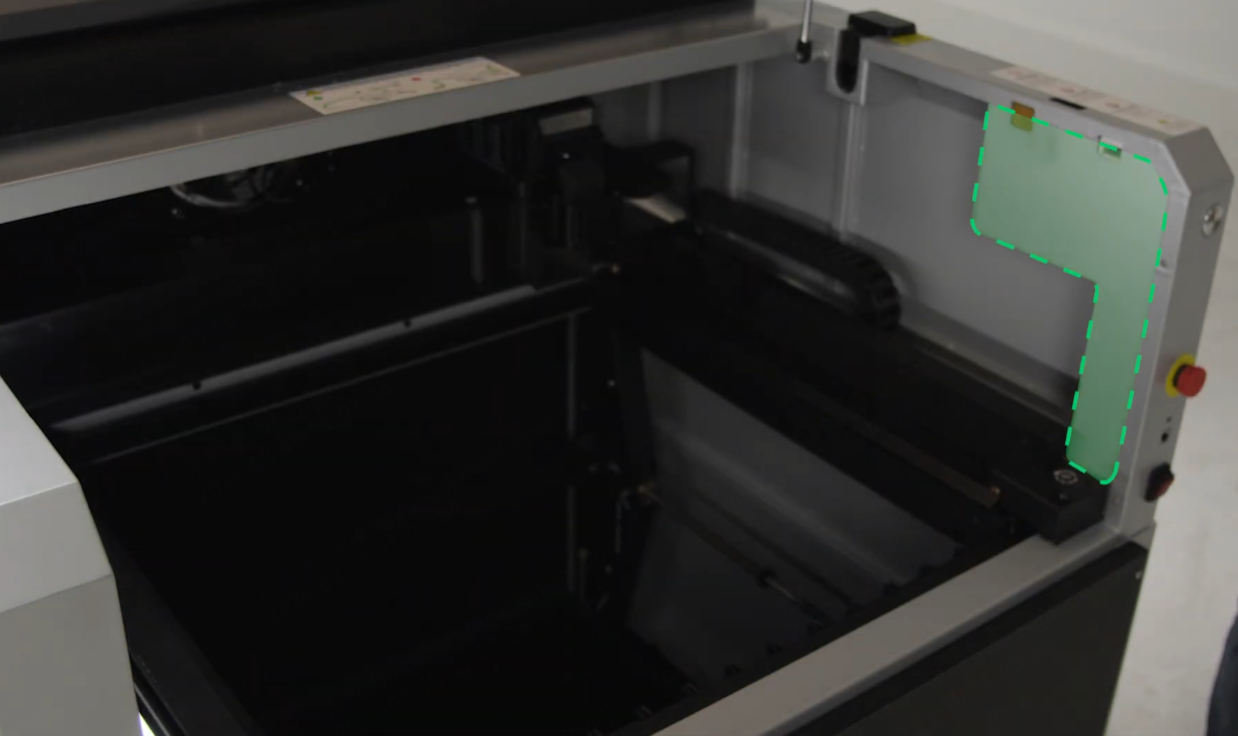
- Check if the metal plate of the lid can be fully inserted into the slot and if the lid can be fully closed.
- If not, check whether there's any irrelevant items preventing the lid from fully closure, or whether the metal plate is deformed. Try to resolve the issue first. If further assistance is needed, please contact the xTool support team.
Inserting the metal plate of the lid into the slot | Lid fully closed |
|---|---|
|
|
- If the issue persists when the metal plate can be fully inserted into the slot (the lid can be fully closed), refer to Replace the Ul Board for xTool MetalFab CNC Cutter to remove the device's right plate and check if the cable connecting the lid and the UI board is loose.
Removing the right plate | Checking the target cable status |
|---|---|
|
|
- If the cable isn't loose or damaged, reinstall the right plate, and then reboot the device to see whether the issue can be resolved.
- If the issue persists, please send a video of the troubleshooting process and results to xTool support team for further analysis.
Scenario 2: Error message poping up when CNC Cutter powered on
If the error message pops up right after xTool MetalFab CNC Cutter is powered on, follow the steps below to resolve the issue.
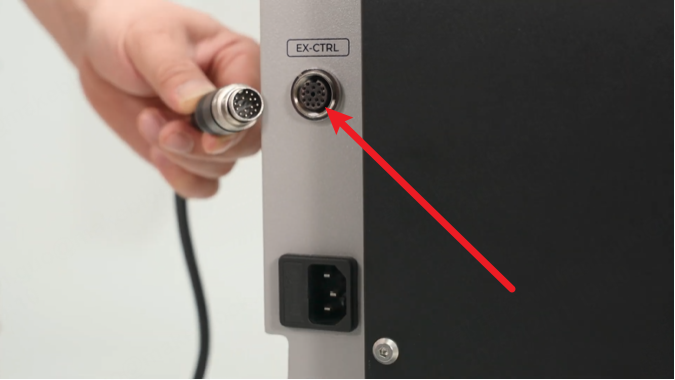
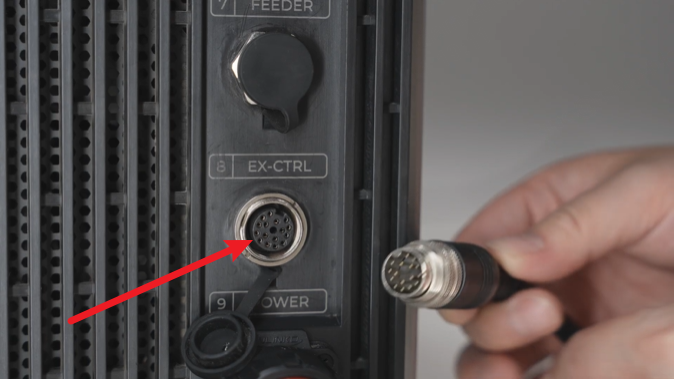
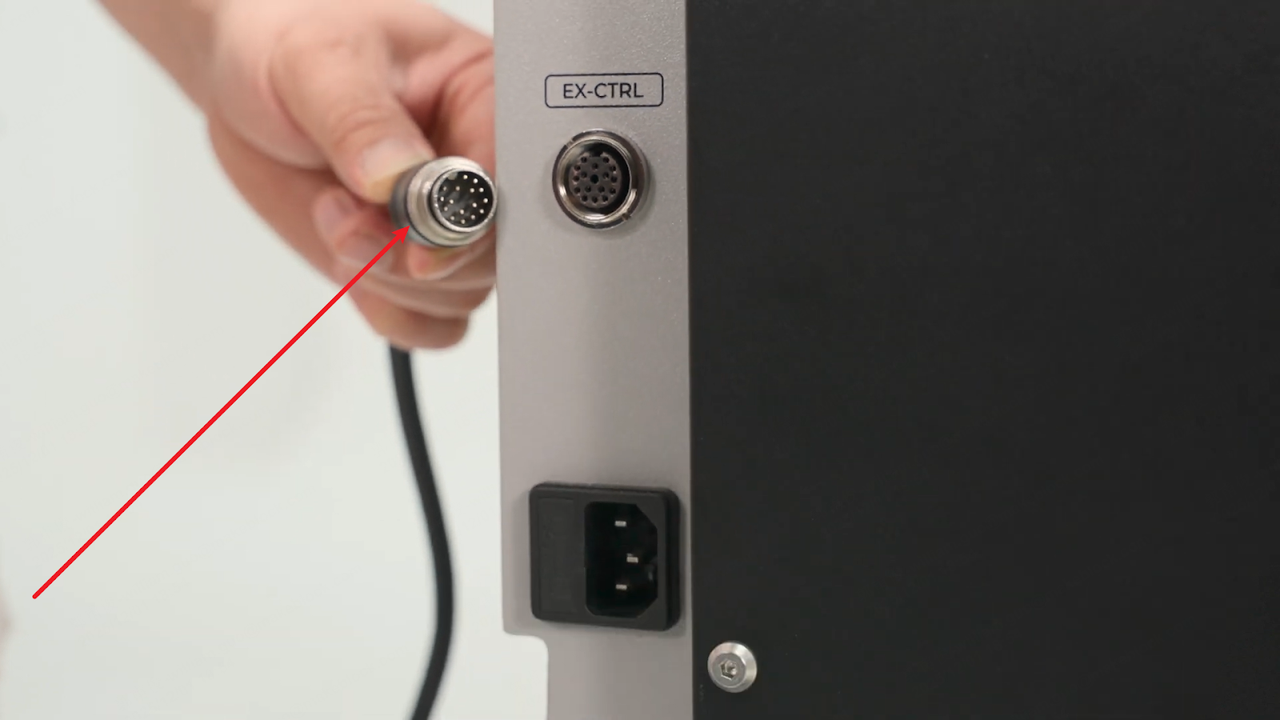
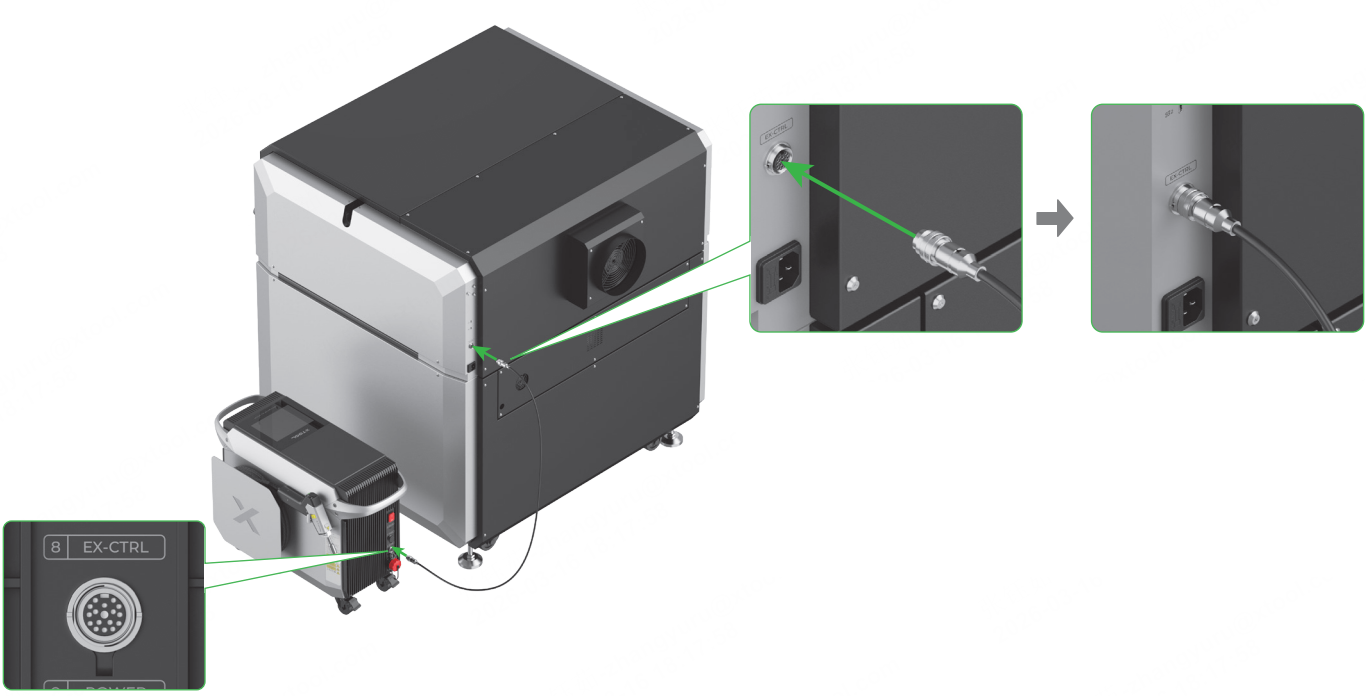
- Check if the communication cable connecting xTool MetalFab CNC Cutter and xTool MetalFab Laser Welder, the corresponding ports, or the pins on both ends are damaged.
Port of xTool MetalFab CNC Cutter | Port of xTool MetalFab Laser Welder |
|---|---|
|
|
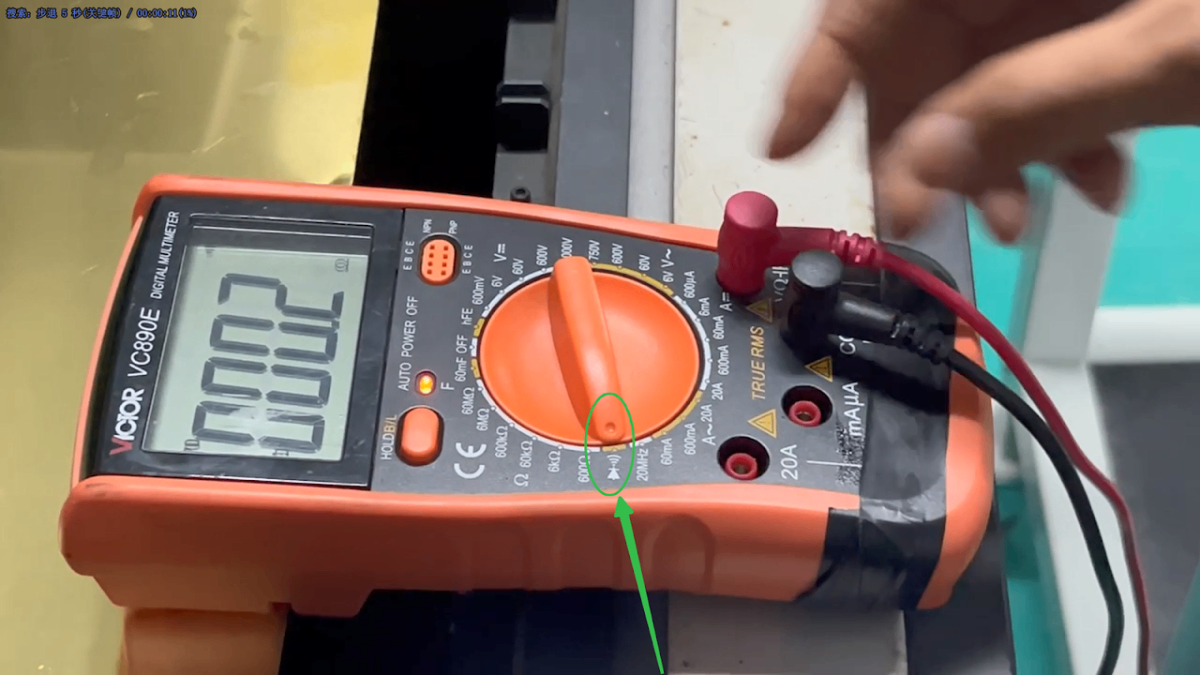
- Set your multimeter to continuity mode and test the conductivity of all 16 pins on both ends of the communication cable.
Note: For details about multimeter usage, please refer to its user manual.
Continuity mode of a multimeter | Communication cable |
|---|---|
|
|
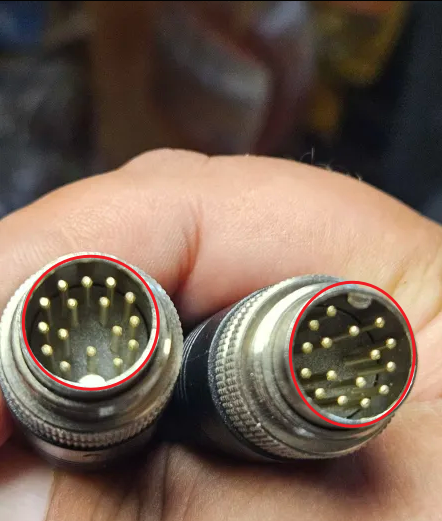
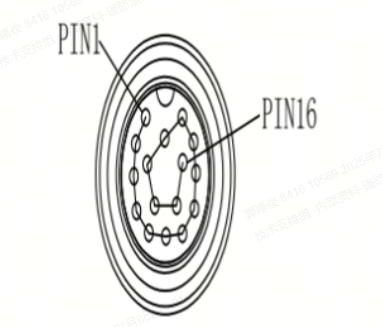
Note: During the test, check if the corresponding pins—such as PIN1 on one end and PIN1 on the other end—are conductive. The following figures introduce the appearance and the sequence of the pins.
Pins on both ends of the communication cable | Pin sequence |
|---|---|
|
|
- Power off your CNC Cutter and Laser Welder.
- Disconnect the communication cable, close the lid, and ensure that the emergency stop button is released.
Disconnect the cable | Close the lid | Release the emergency stop button |
|---|---|---|
|
|
|
- Remove the rear plate of your CNC Cutter and the left cover of your Laser Welder.
Device | Step | Details |
|---|---|---|
xTool MetalFab CNC Cutter | Remove the rear plate |
|
xTool MetalFab Laser Welder | Remove the left cover | Refer to Replace the Motherboard for the xTool MetalFab Laser Welder for detailed steps. The following figure shows the final result.
|
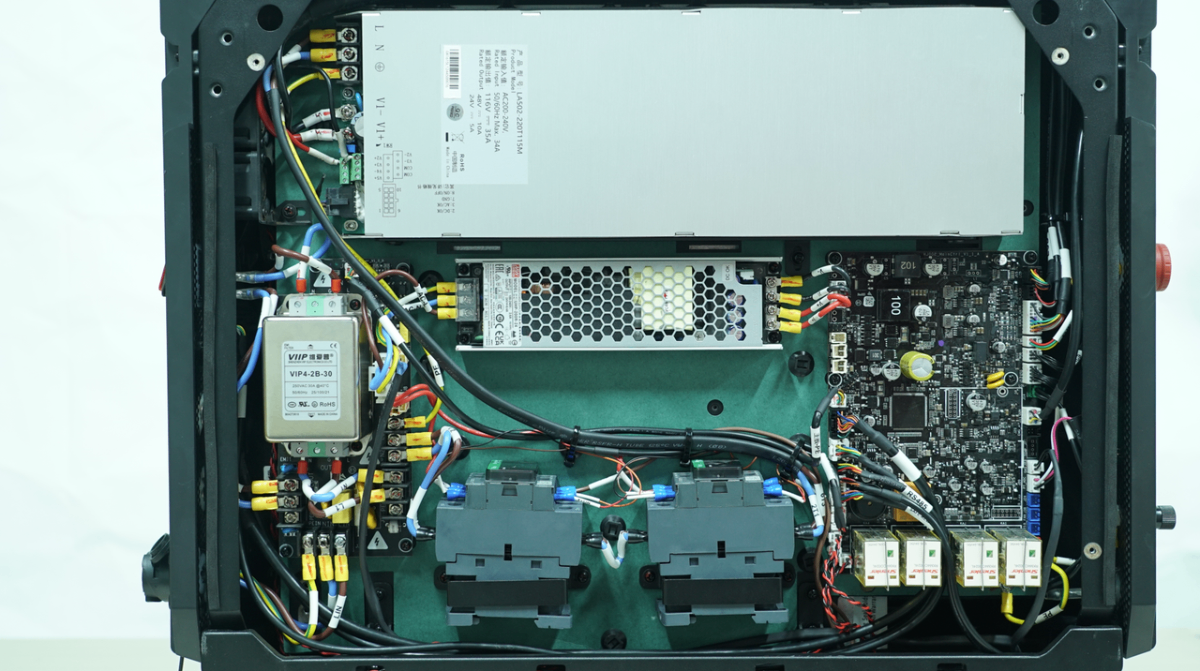
- Set your multimeter to continuity mode and test the conductivity of the two groups of socket contacts of xTool MetalFab CNC Cutter.
a. For details about multimeter usage, please refer to its user manual.
Continuity mode of a multimeter | First group of the socket contacts | Second group of the socket contacts |
|---|---|---|
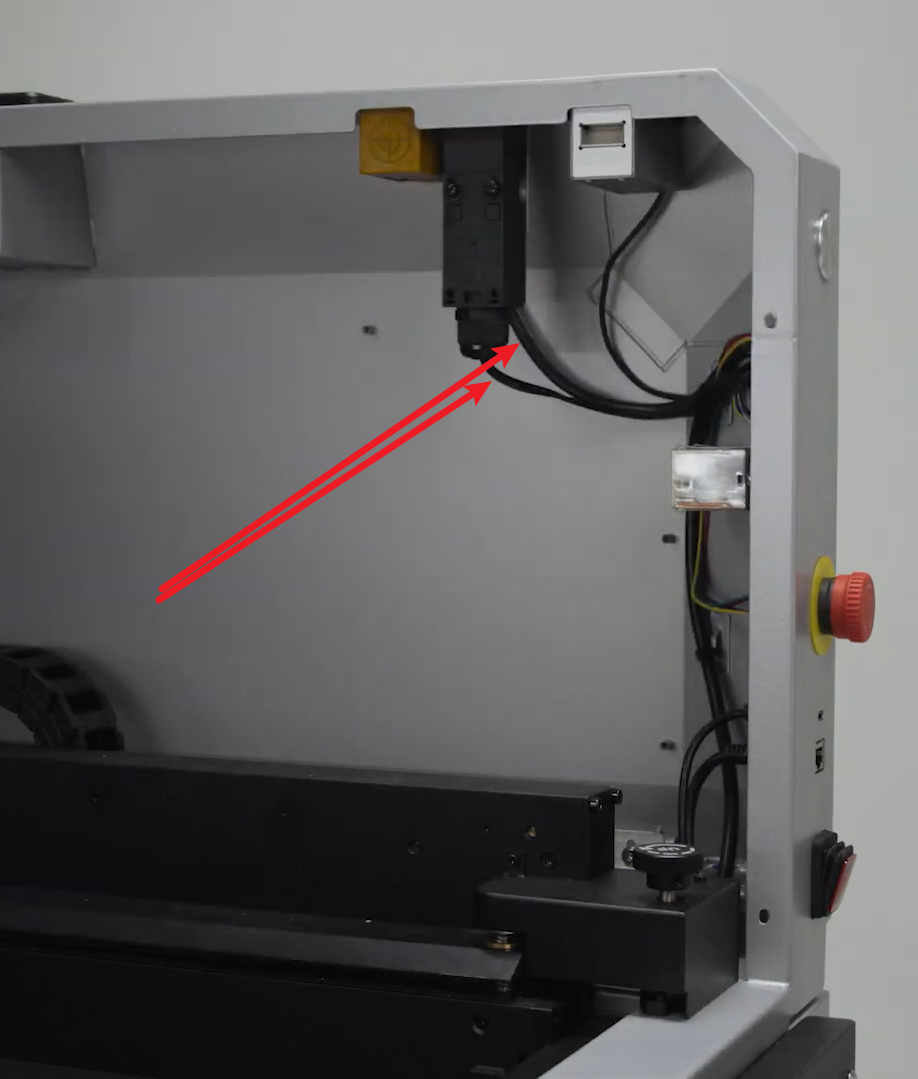
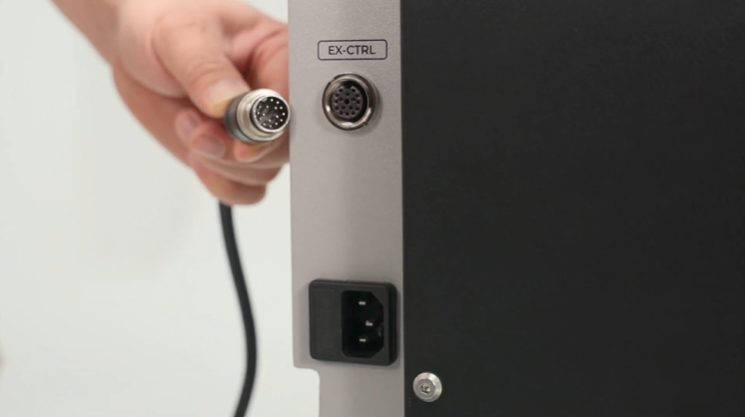
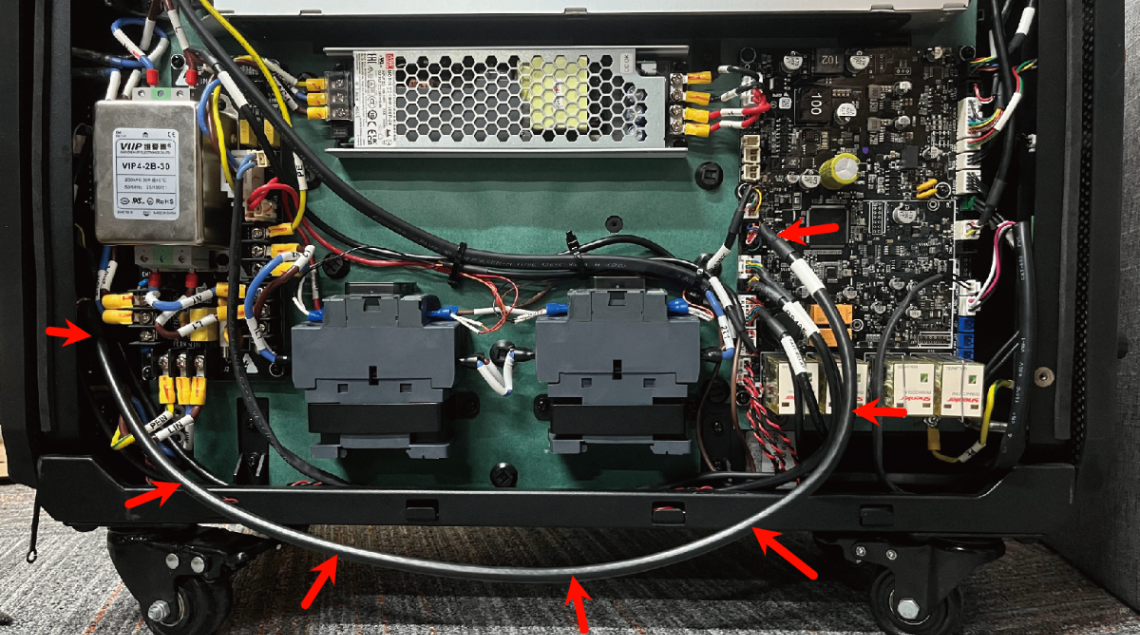
b. If the conductivity of the two groups is normal, please inspect and verify that the external control cable conncted to Laser Welder's main control board is free of loose connections, danmage, or other abnormalities. The external control cable is marked with red arrows in the figure below.
- If the conductivity of the two groups fails and no abnormalities occur in the steps above, proceed to next steps.
- Connect the two devices with the communication cable.
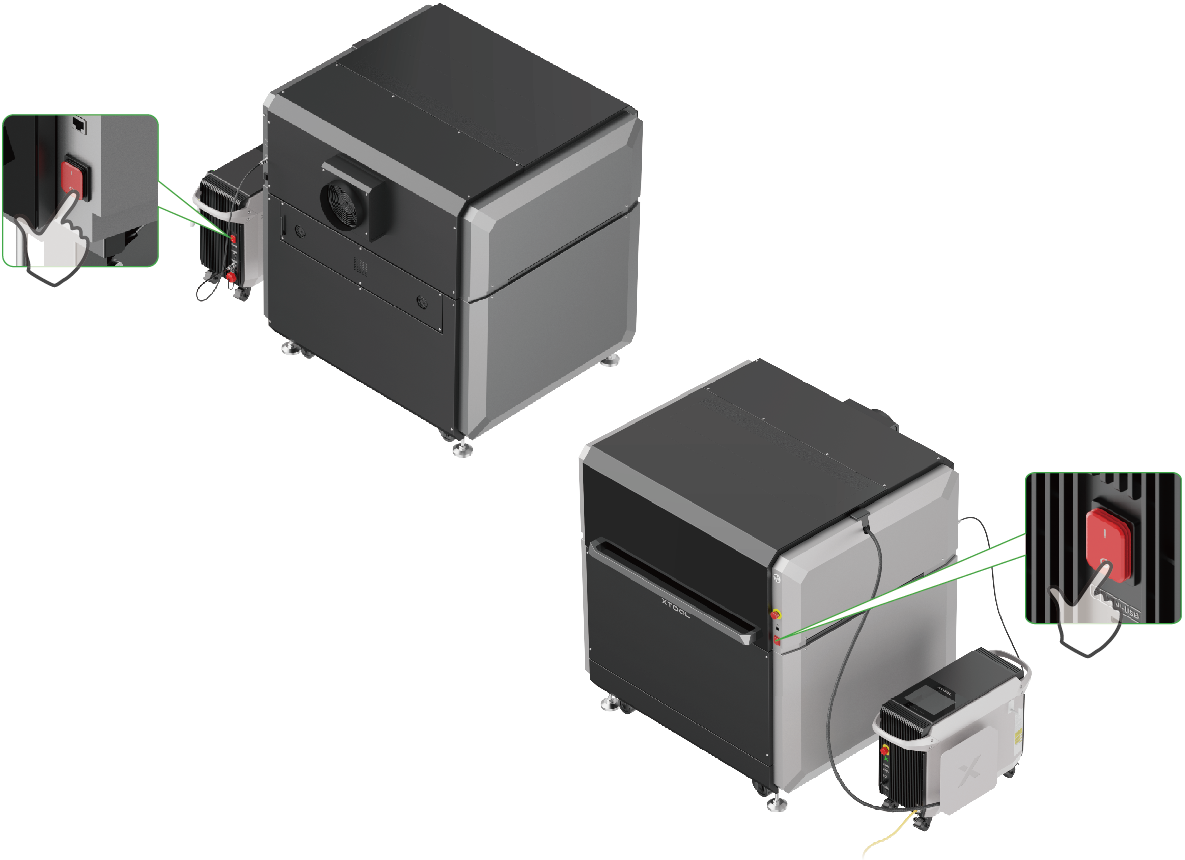
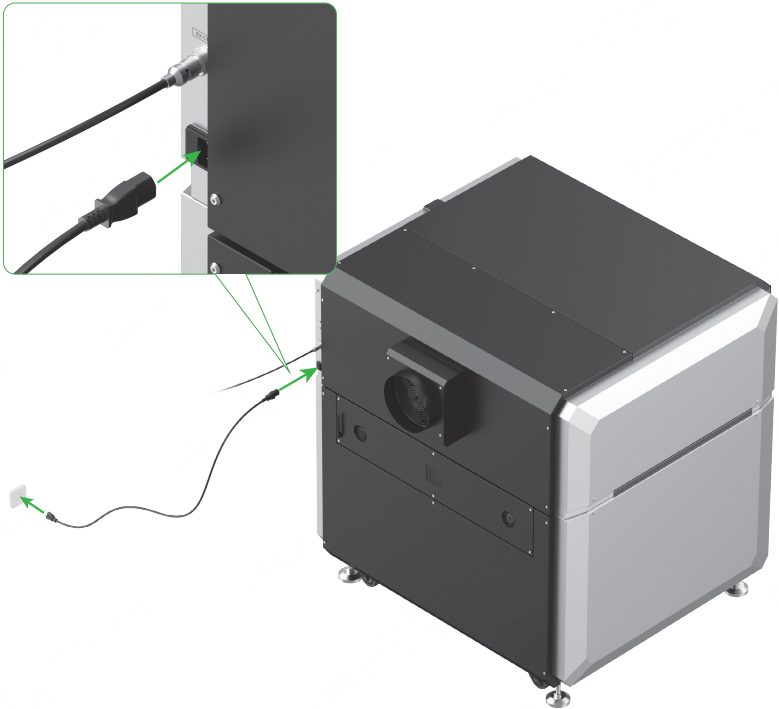
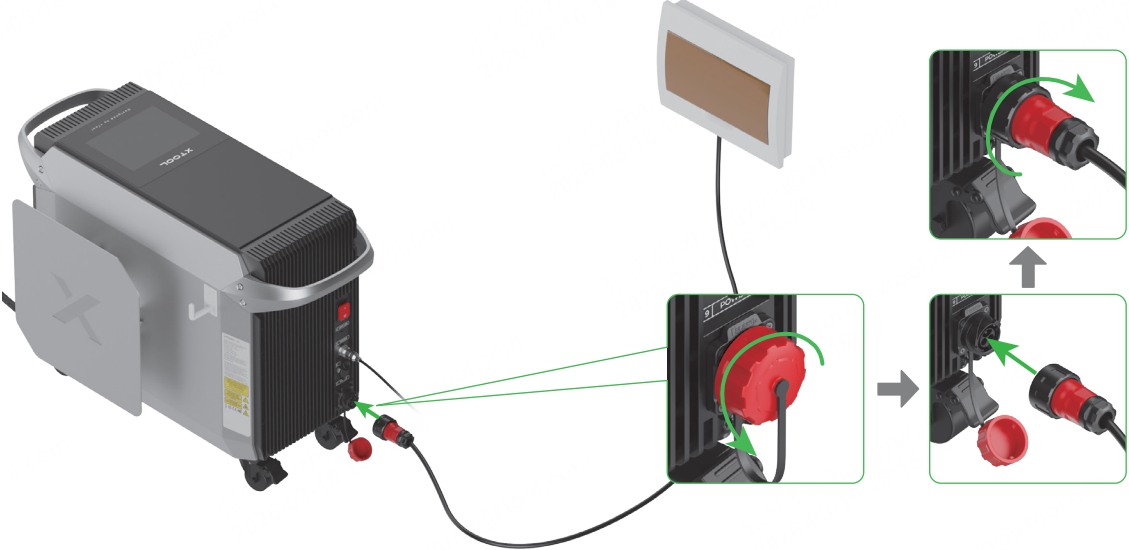
- Reconnect the power cables of both CNC Cutter and Laser Welder.
Reconnecting the power cable of CNC Cutter | Reconnecting the power cable of Laser Welder |
|---|---|
|
|
- Power on the two devices.

- Connect xTool MetalFab CNC Cutter to your computer and connect it in xTool software.
If the same error message pops up in the software, do not power off the device. Please send a video of the following three groups of indicator status to xTool support team for further analysis.
Three relay indicators on the Laser Welder | Four relay indicators on the Laser Welder's main contril board | Two relay indicators on the CNC Cutter's power supply board |
|---|---|---|
Still experiencing issues?
Should the issue persist after completing the preceding steps, submit a ticket via the "Submit a Ticket" button in the "Help Ticket" section below. The standard response time for xTool Customer Service is one business day.
For a prompt resolution, please include the following details:
- Issue description: A detailed explanation of the observed problem.
- Video evidence: Attach a video demonstrating the issue, where applicable.
- Troubleshooting performed: Any troubleshooting steps you have already attempted, along with their results.
This information is crucial for xTool technical support engineers to provide timely assistance.
Documentation feedback
Help improve this content by providing feedback. If this content did not meet your requirements, select "No" in the "Was this page helpful?" section below. Include specific details about what was unclear or missing in the pop-up suggestion box. Feedback submissions are reviewed by xTool technical writers to enhance future documentation.
Services & Help
Learn & Education

Copyright © 2025 xTool All Rights Reserved.